KotS GB 2012 SGTJKJ - Albatros D.III

#041
Kobenhavn, Denmark
Joined: July 20, 2006
KitMaker: 10,069 posts
AeroScale: 3,788 posts
Posted: Sunday, July 08, 2012 - 05:46 AM UTC
A little late into the campaign, but still expect to get some good learnings from this build. Not a builder of WWI aircraft normally I have never made the wood finish before. it is going to be interesting to try new techniques.
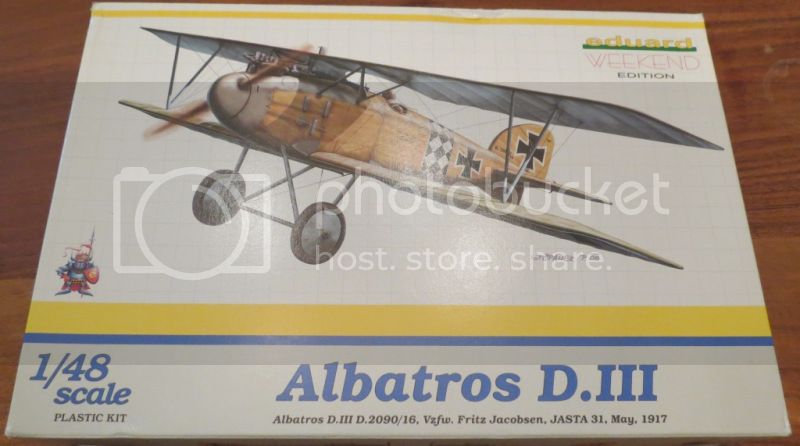
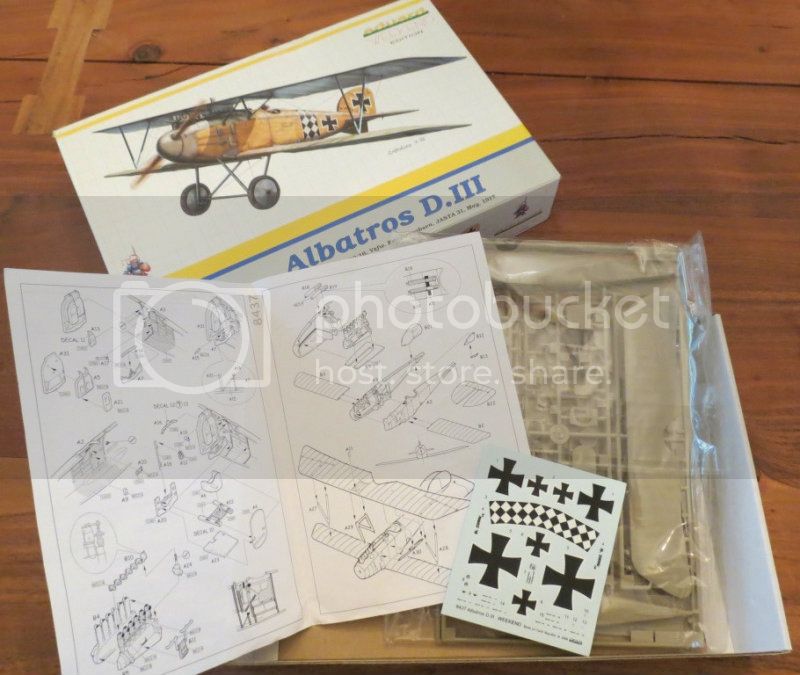
I am building the Eduard 1/48 Albatros D. III weekend edition. I am still trying to convince myself to do the rigging, but the jury is still out on that one.

More to follow.

Campaign'oholic - 252+ campaigns completed
Colorado, United States
Joined: January 25, 2004
KitMaker: 11,669 posts
AeroScale: 11,011 posts
Posted: Sunday, July 08, 2012 - 11:57 AM UTC
Its good to have you with us! Remember the landing gear legs in this kit are about 3mm too short. Also there are a couple of reviews from Jean-Luc and Andy Brazier available. If you do Vzfw. Jacobson's bird, here is a bit of fun on the subject.
Vizefeldwebel (acting sergeant) Fritz John Jacobsen of Jasta 31. He was assigned to Albatros D.III 2090/16 of the first production series. He arrived from Jasta 9 on 15 December 1916 and was transferred on 5 March 1918 to Jasta 73.
His first of 5 confirmed total came on 6 July 1917 when he was a Vizefeldwebel (acting Sergeant) . The second came on 18 August 1917. There were two unconfirmed between 28 Sept. - 26 Oct. 1917. He crashed on 28 Sept. 1917 and WIA 26 Oct. 1917.
During Sept. - Oct.1917, Jasta 31 moved to the Italian front. It is likely that the over all Daffodil scheme came in early summer 1917 Probably between 23 June - 12 July . The best record available is either the Jasta record on my website or a well done article in Over the Front Vol. 11 #1, P. 34 - 39 spring 1988. (Back issue may be available to purchase.) There is stunning image on page 37 detailing the repainted scheme. There is serial number on the pilot's right side of he vertical fin. D. 2090/16.
By the way you may remember this from 2007. This was when Aeroscale member Carl Althaus did the repainted scheme on a Roden 1:32 kit and not only was it featured here but won the MOM for that month.
See here.I have the PE Spandau breech cover & radiator facades (needs to be centered not offset) for this scheme from the Profipack #8035 issue if you want it just send me a PM with your snail mail addy.
". . .The most important thing is to know why you build and then get the most that you can out of building." via D.D.
British Columbia, Canada
Joined: September 03, 2009
KitMaker: 6,965 posts
AeroScale: 6,247 posts
Posted: Sunday, July 08, 2012 - 12:25 PM UTC
Judging by Carl's build, Jacoson's is the early production aircraft with the radiator centered on the upper wing. Eduard's kit gives you the late wing with the offset radiator

Either ignore the error, or find aftermarket markings. Speaking of aftermarket, did D.III types fly in the green and mauve camouflage, or was that strictly a D.V thing?
When once you have tasted flight you will walk the Earth with your eyes turned skyward.
For there you have been, and there you will always long to return.
-Leonardo Da Vinci
Colorado, United States
Joined: January 25, 2004
KitMaker: 11,669 posts
AeroScale: 11,011 posts
Posted: Sunday, July 08, 2012 - 01:51 PM UTC
Only the last production batch of Alb. D.III airframes used just the dark green & light(Brunswick)green upper surfaces. The Venetian red was deleted by German Air Service hdqtrs orders in about May 1917. Ströbel's D.III of Jasta 5 (with the Bavarian Rhomboids on the vertical fin) was one of these from the last production batch.
And Jesper, Jessica is right about this machine of the 1st production batch. Early versions were centrally located (dead in the middle.) In October 1916, the Albatros Werke received an order for 400 Albatros D.III machines, serial numbers, D.1910/16 - 2309/16. In the beginning the radiator was located in the center of the upper wing.
At serial number D.2200/16 and from then on, the radiator was reposition to the right. The purpose of the repositioning of the radiator, was to protect the pilot from being scalded in the event the radiator was ruptured in flight or during combat. And it improved the forward view of the pilot.
The Albatros Werke was given two more orders of 50 each in early 1917, which had offset radiators, s/n D.600-649/17 and D.750 -799/17.
The Tropical Alb. D.III (OAW) had two radiators in the top wing but these were only operational in Palestine and Turkey.
". . .The most important thing is to know why you build and then get the most that you can out of building." via D.D.
#041
Kobenhavn, Denmark
Joined: July 20, 2006
KitMaker: 10,069 posts
AeroScale: 3,788 posts
Posted: Wednesday, July 11, 2012 - 01:56 PM UTC
Thanks for the comments, Jessica and Stephen.
There are actually two wings included in the kit. Can I just use the wing with the center radiator?
Regarding the camouflage. Should I just follow the instructions or use another type of camouflage?
Campaign'oholic - 252+ campaigns completed
British Columbia, Canada
Joined: September 03, 2009
KitMaker: 6,965 posts
AeroScale: 6,247 posts
Posted: Wednesday, July 11, 2012 - 02:03 PM UTC
Oh cool! You have the correct wing after all! Yes, use the one with the centre radiator
You can paint it with the kit scheme and it'll be correct for the time before June 23, 1917.
When once you have tasted flight you will walk the Earth with your eyes turned skyward.
For there you have been, and there you will always long to return.
-Leonardo Da Vinci
#041
Kobenhavn, Denmark
Joined: July 20, 2006
KitMaker: 10,069 posts
AeroScale: 3,788 posts
Posted: Wednesday, July 11, 2012 - 03:33 PM UTC
Super, thanks for the quick reply.
Campaign'oholic - 252+ campaigns completed
#041
Kobenhavn, Denmark
Joined: July 20, 2006
KitMaker: 10,069 posts
AeroScale: 3,788 posts
Posted: Thursday, July 19, 2012 - 05:04 PM UTC
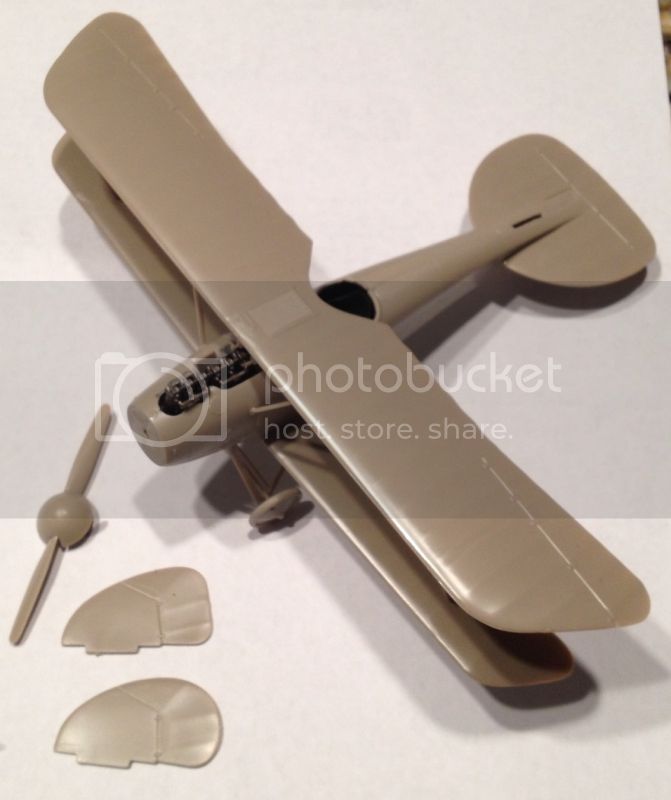
A little more progress on my Albatros. It is a beautiful little kit.
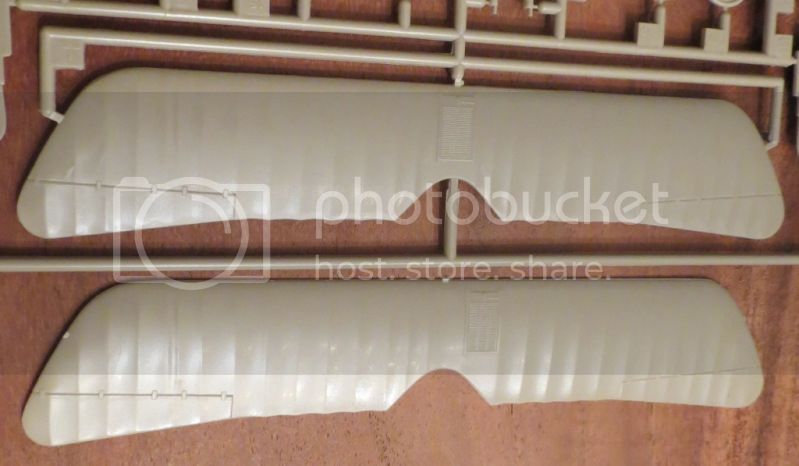
Could somebody advise on the tail rudder? Since I use the center radiator, which tail rudder should I use?

Campaign'oholic - 252+ campaigns completed
British Columbia, Canada
Joined: September 03, 2009
KitMaker: 6,965 posts
AeroScale: 6,247 posts
Posted: Thursday, July 19, 2012 - 07:07 PM UTC
I'm pretty sure that you should use the one with the straight trailing edge. The rounded one was used at Ostdeutsch Albatrose Werke, and I doubt that the early production run that particular aircraft was part of was produced at OAW.
When once you have tasted flight you will walk the Earth with your eyes turned skyward.
For there you have been, and there you will always long to return.
-Leonardo Da Vinci
Västra Götaland, Sweden
Joined: February 19, 2010
KitMaker: 1,473 posts
AeroScale: 1,450 posts
Posted: Thursday, July 19, 2012 - 09:15 PM UTC
Quoted Text
I'm pretty sure that you should use the one with the straight trailing edge. The rounded one was used at Ostdeutsch Albatrose Werke, and I doubt that the early production run that particular aircraft was part of was produced at OAW.
Yup Jessie is spot on about the rudder. Nice build Jesper, have you glued the top wing in place already?
Mikael
_________________________________________________________
Just finished the Wingnut Wings Taube. On to the Junkers D.1
#041
Kobenhavn, Denmark
Joined: July 20, 2006
KitMaker: 10,069 posts
AeroScale: 3,788 posts
Posted: Friday, July 20, 2012 - 06:14 AM UTC
Thanks for the quick replies. Much appreciated.
Michael, I already glued the wing in place. I reviewed the rigging on the Albatros and choose the cowards way out. No rigging.
I think I messed up the engine and mounted it a little to one side or maybe I accidentally hit it before the glue set. In any case it is very difficult to align the MGs properly.
More to follow
Campaign'oholic - 252+ campaigns completed
#041
Kobenhavn, Denmark
Joined: July 20, 2006
KitMaker: 10,069 posts
AeroScale: 3,788 posts
Posted: Wednesday, August 08, 2012 - 03:32 PM UTC
I am getting ready to start painting. However, the eduard kit does not give any painting instructions. I thought that that might be a mistake in my kit, but the PDF instructions from the eduard website also does not include any painting instructions.
From the box I can Judge the colors of the sides, but can anybody show the top and bottom views of this aircraft? My Internet search seem to indicate two different top camouflages, but no underside view and details on the top of the lower wing.
Hope some of the more experienced WWI aircraft builders can help me out.
Campaign'oholic - 252+ campaigns completed
British Columbia, Canada
Joined: September 03, 2009
KitMaker: 6,965 posts
AeroScale: 6,247 posts
Posted: Wednesday, August 08, 2012 - 05:02 PM UTC
Eduard's weekend kits show the top and bottom views on the box sides. They're a trifle small, but should show you what you need. It's a little confusing the first time you encounter it.
When once you have tasted flight you will walk the Earth with your eyes turned skyward.
For there you have been, and there you will always long to return.
-Leonardo Da Vinci
#041
Kobenhavn, Denmark
Joined: July 20, 2006
KitMaker: 10,069 posts
AeroScale: 3,788 posts
Posted: Thursday, August 09, 2012 - 04:28 AM UTC
Hi Jessie
You are right. I missed it on the one end of the box. Should have seen that. The weekend editions are a little on the light side on info - at least for WWI beginners like myself. I guess you still get good value for the low price though.
There is no bottom view on the box. The bottom of the lower and upper wing are just light blue, right? Fuselage is varnished wood all the way around?
Campaign'oholic - 252+ campaigns completed
Colorado, United States
Joined: January 25, 2004
KitMaker: 11,669 posts
AeroScale: 11,011 posts
Posted: Thursday, August 09, 2012 - 04:31 AM UTC
Never throw away kit instructions. Here from the Eduard #8035 Profipack.


". . .The most important thing is to know why you build and then get the most that you can out of building." via D.D.
#041
Kobenhavn, Denmark
Joined: July 20, 2006
KitMaker: 10,069 posts
AeroScale: 3,788 posts
Posted: Thursday, August 09, 2012 - 08:06 AM UTC
You are the champ, Stephen!
Thanks a lot!

Campaign'oholic - 252+ campaigns completed
#041
Kobenhavn, Denmark
Joined: July 20, 2006
KitMaker: 10,069 posts
AeroScale: 3,788 posts
Posted: Saturday, August 11, 2012 - 10:39 AM UTC
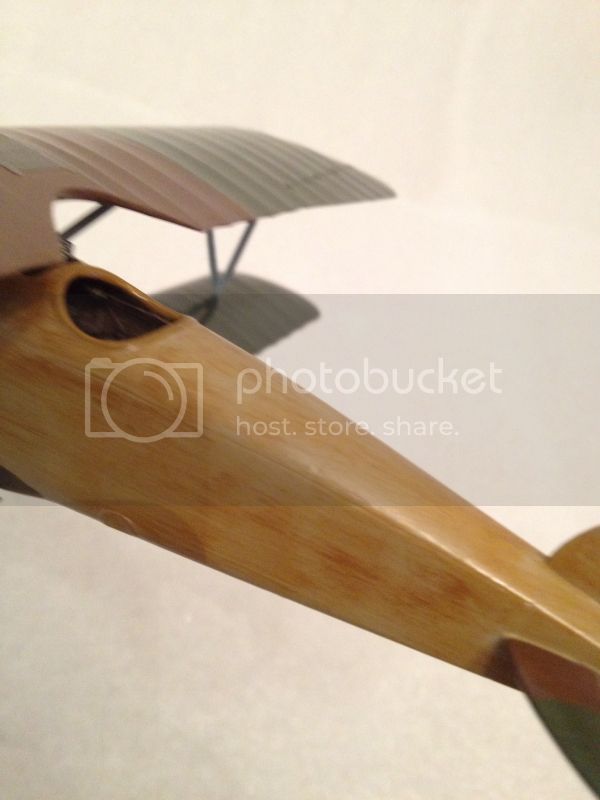
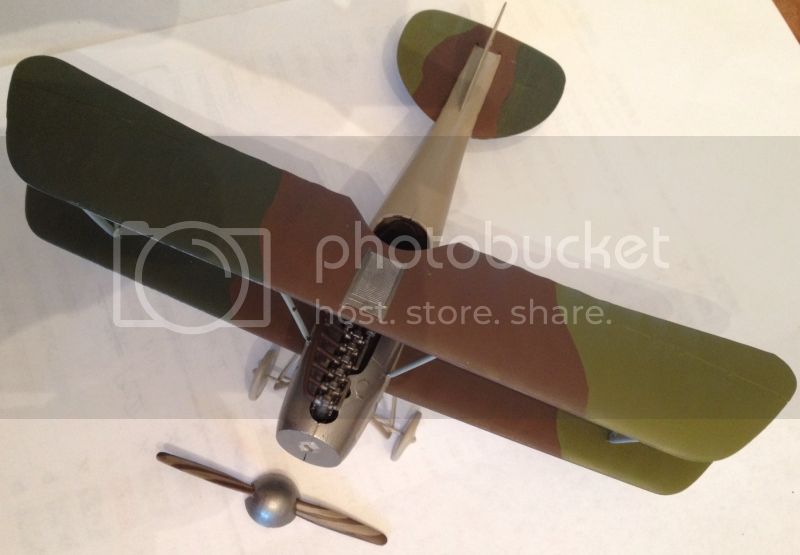
A little more progress on my Albatros. Painting is underway. My first try ever at a natural wood propeller. Not what I want, but after three repaintings this is as good as it will get.
Next I will try to get the wooden look of the fuselage. Suggestions welcome
More to follow.
Campaign'oholic - 252+ campaigns completed
British Columbia, Canada
Joined: September 03, 2009
KitMaker: 6,965 posts
AeroScale: 6,247 posts
Posted: Saturday, August 11, 2012 - 01:09 PM UTC
The usual way is to apply a wood-tone base coat in acryllic, and then once that's dry, use oils to get the streaking of the woodgrain. If you don't have oils, you can drybrush on a darker colour, then seal it with clear yellow or clear amber to simulate the varnish coat.
When once you have tasted flight you will walk the Earth with your eyes turned skyward.
For there you have been, and there you will always long to return.
-Leonardo Da Vinci
Colorado, United States
Joined: January 25, 2004
KitMaker: 11,669 posts
AeroScale: 11,011 posts
Posted: Saturday, August 11, 2012 - 01:42 PM UTC
There are also some very decent wood grain decals available. Reviews to be seen here at Aeroscale!

". . .The most important thing is to know why you build and then get the most that you can out of building." via D.D.
#041
Kobenhavn, Denmark
Joined: July 20, 2006
KitMaker: 10,069 posts
AeroScale: 3,788 posts
Posted: Saturday, August 11, 2012 - 01:56 PM UTC
Thanks for the tips. I will try the oil method.
Campaign'oholic - 252+ campaigns completed
#041
Kobenhavn, Denmark
Joined: July 20, 2006
KitMaker: 10,069 posts
AeroScale: 3,788 posts
Posted: Friday, August 17, 2012 - 05:50 PM UTC
Campaign'oholic - 252+ campaigns completed
British Columbia, Canada
Joined: September 03, 2009
KitMaker: 6,965 posts
AeroScale: 6,247 posts
Posted: Saturday, August 18, 2012 - 02:09 AM UTC
That woodgrain looks really good. Airplane dope dries glossy but then fades to semi-gloss when exposed to the elements. I'd go with an overall satin finsh.
When once you have tasted flight you will walk the Earth with your eyes turned skyward.
For there you have been, and there you will always long to return.
-Leonardo Da Vinci
#041
Kobenhavn, Denmark
Joined: July 20, 2006
KitMaker: 10,069 posts
AeroScale: 3,788 posts
Posted: Saturday, August 18, 2012 - 04:23 AM UTC
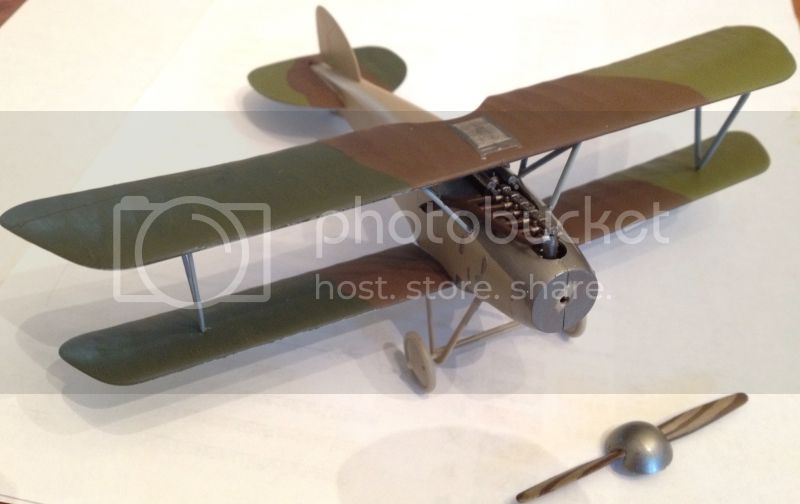
Thanks for the quick reply. Overall satin it is. I appreciate the comment on the wood grain. Not as good as I would like, but for first try I am satisfied.
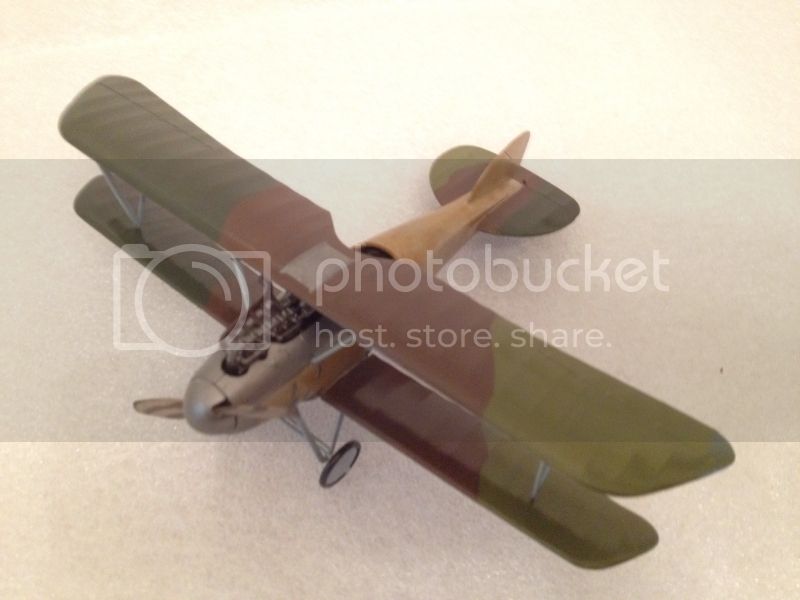
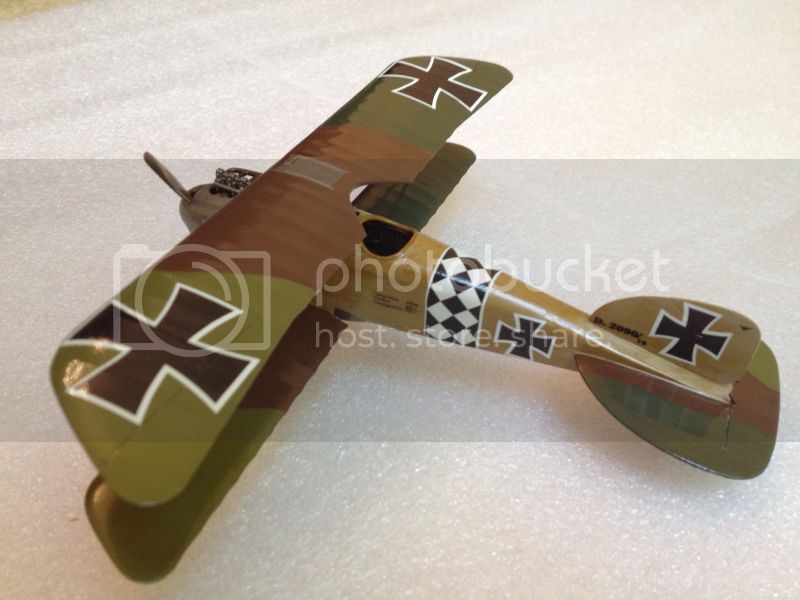
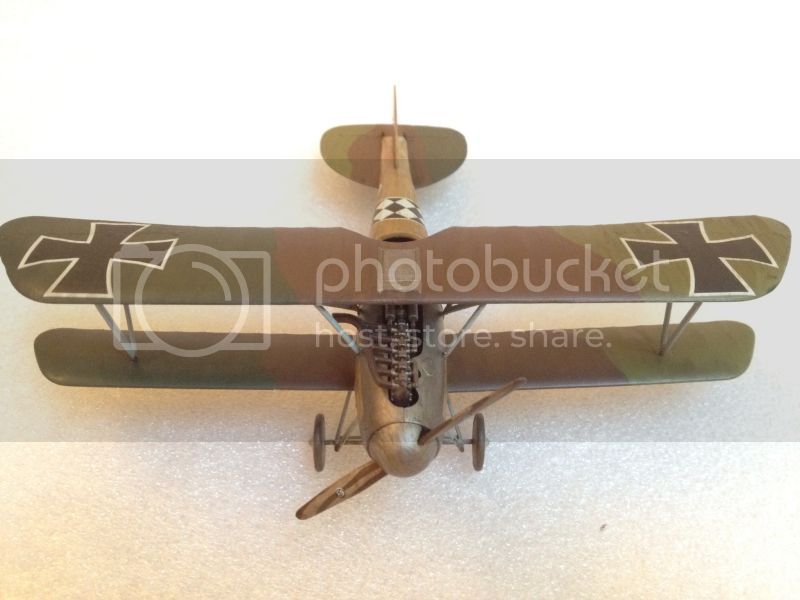
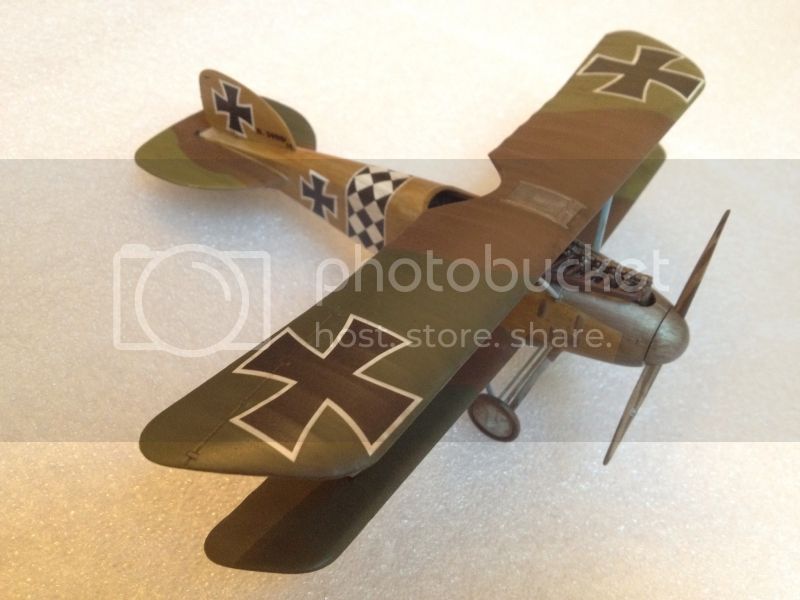
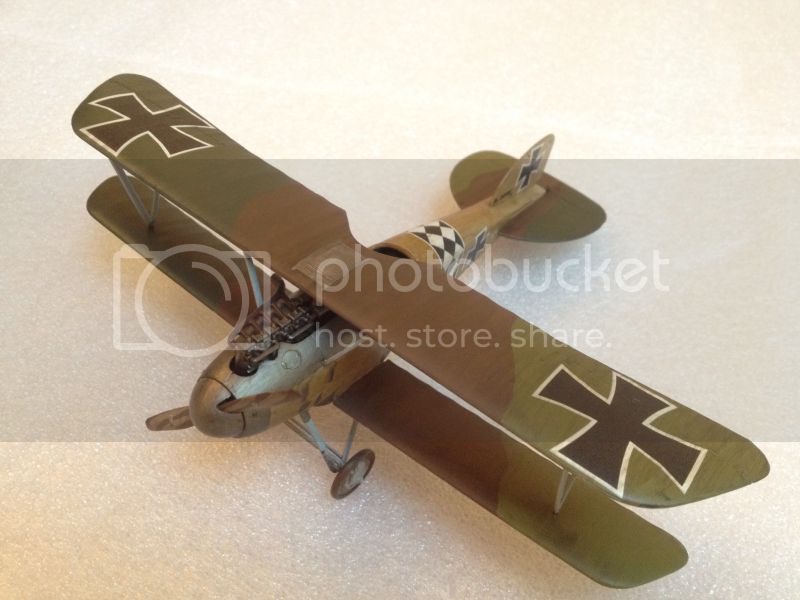
The decals are now on. One has to love the overall colorful appearance of the early fighters with multi color camouflage and large colorful markings.
The eduard decals settled perfectly and after a top coat of varnish it is almost impossible to see it is decals are not painted on - even up close.
Next is some weathering. I think it will keep it light. Maybe with a little mud on the undercarriage.


Campaign'oholic - 252+ campaigns completed
#041
Kobenhavn, Denmark
Joined: July 20, 2006
KitMaker: 10,069 posts
AeroScale: 3,788 posts
Posted: Saturday, August 18, 2012 - 09:43 AM UTC
After some washes and mud on the undercarriage and tail strut I gave the Albatros an overall satin coat of varnish. I am calling this one finished.
Although I know I cheated a bit by not adding the rigging I am very satisfied with the end result. I learned a lot of new techniques - especially on the wooden propeller and the wood varnished fuselage. Thanks for all the help on the painting instructions and tips underway. It is much appreciated.
Next will be a Fokker D.VII in complete Lozenge camouflage. Now that will be the decal challenge to end all decal challenges

Comments welcome

Campaign'oholic - 252+ campaigns completed
Croatia Hrvatska
Joined: November 06, 2009
KitMaker: 624 posts
AeroScale: 609 posts
Posted: Monday, August 20, 2012 - 08:50 PM UTC
Hi Jesper,
I wasn't around the forum frequently in the past, so I missed the opportunity to write few words. It is indeed nice and neat Albie! Sorry you didn't do the rigging, but it's all up to how you feel, isn't it? Very nice job on the wood grain. This was particular challenge for me as well... it is nice to see how people are ready to help around here, wouldn't you say so? The last one goes to Jess - she's always there, lurking behind the scene

All the best,
Entoni
"When everything else fails, read the instructions"