_GOTOBOTTOM
World War II: Japan
Aircraft of Japan in WWII.
Hosted by Rowan Baylis
J7W2 Jet Shinden
Holdfast
Staff MemberPresident
IPMS-UK KITMAKER BRANCH
#056
_VISITCOMMUNITY
England - South West, United Kingdom
Joined: September 30, 2002
KitMaker: 8,581 posts
AeroScale: 4,913 posts
Posted: Wednesday, October 17, 2012 - 04:52 PM UTC
I am trying to get the 1/32 Zoukei-Mura J7W2 Jet Shinden ready for my trade stand at the Scale Modelworld show, in Telford, on the 10th/11th November. The model was sent to Alexander Glass Uschi van der Rosten to have masks prepared for it, so it came to me Included was the resin jet engine Alex and I have been working since around February to get a deal with Zoukei-Mura for masks for both the J7W1 Prop Shinden and the J7W2 jet Shinden but it all seems to have fallen flat! So I decided to build the model as the Jet Shinden for Telford so that Zoukei-Mura could see what they are missing 
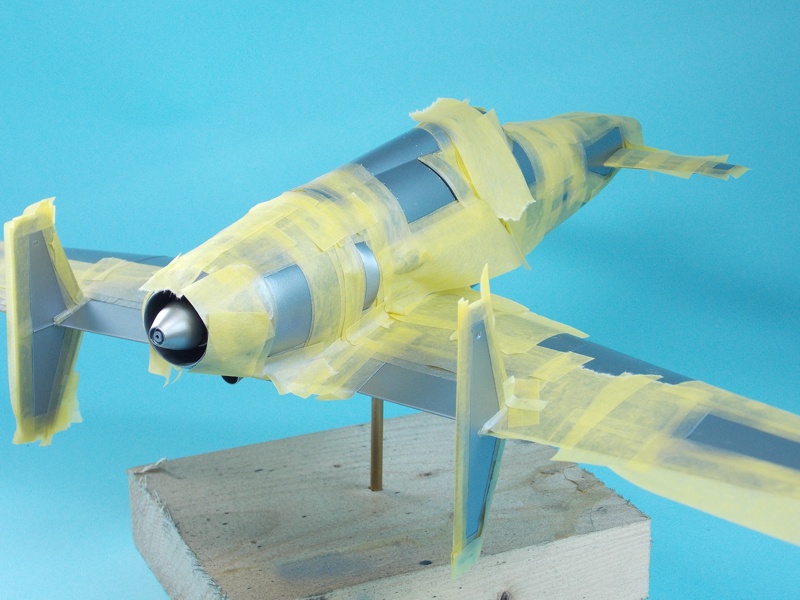
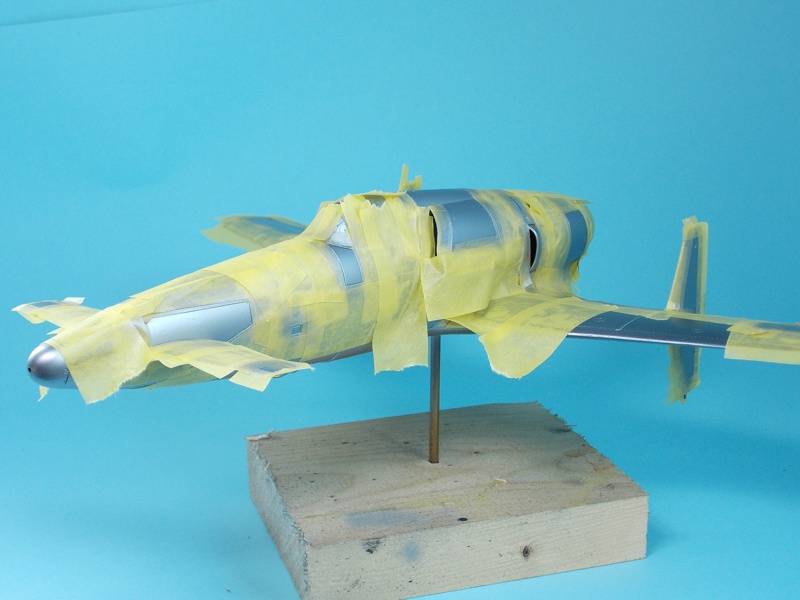
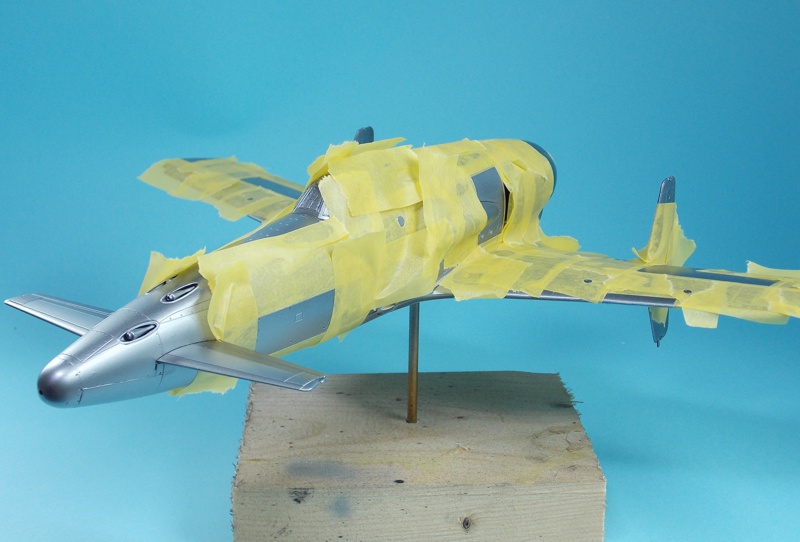
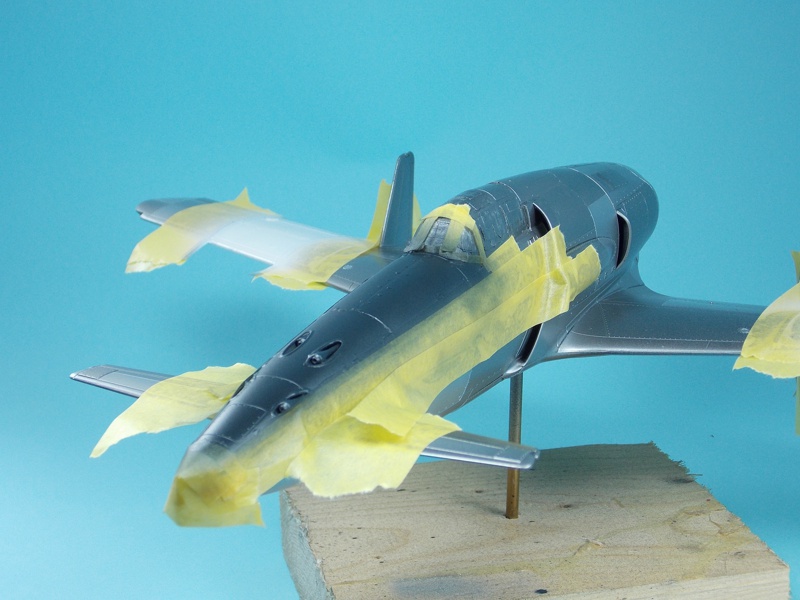
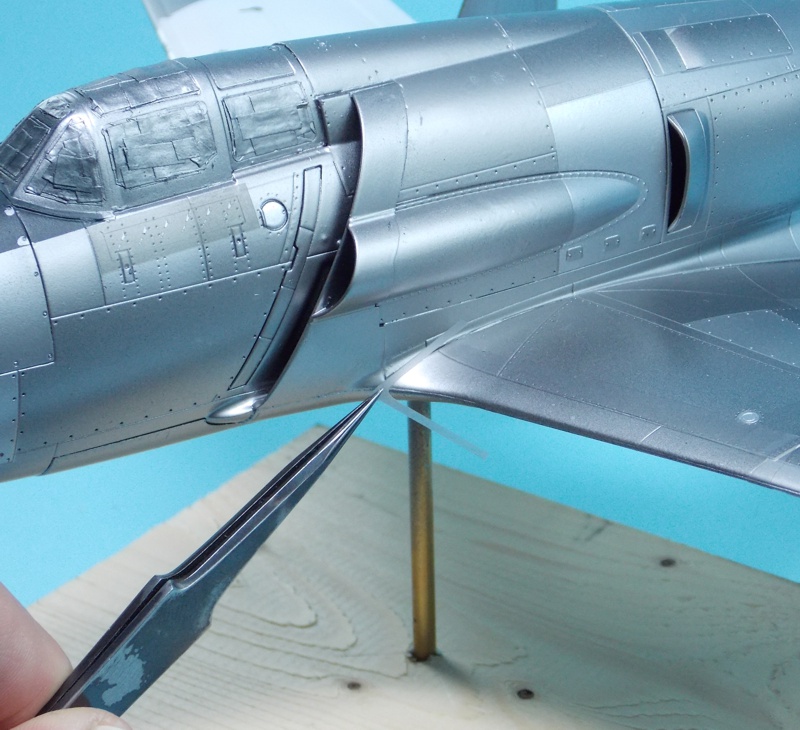
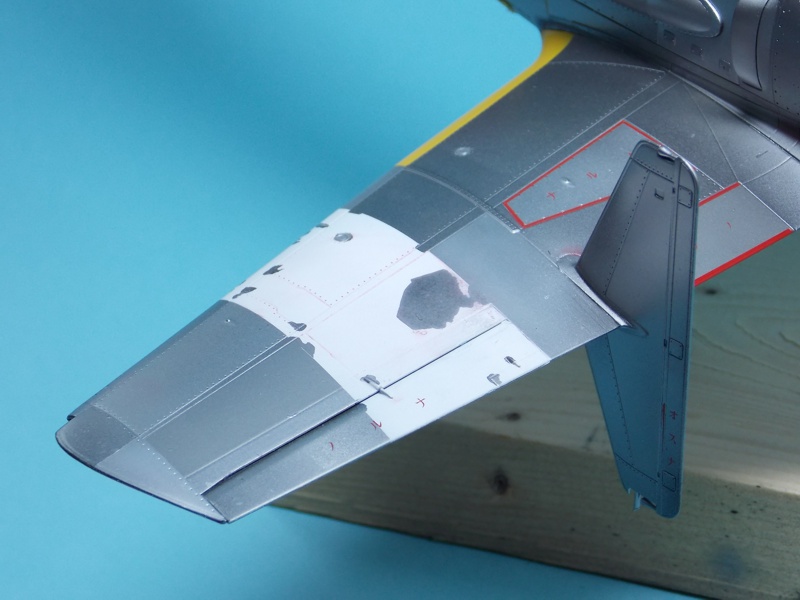
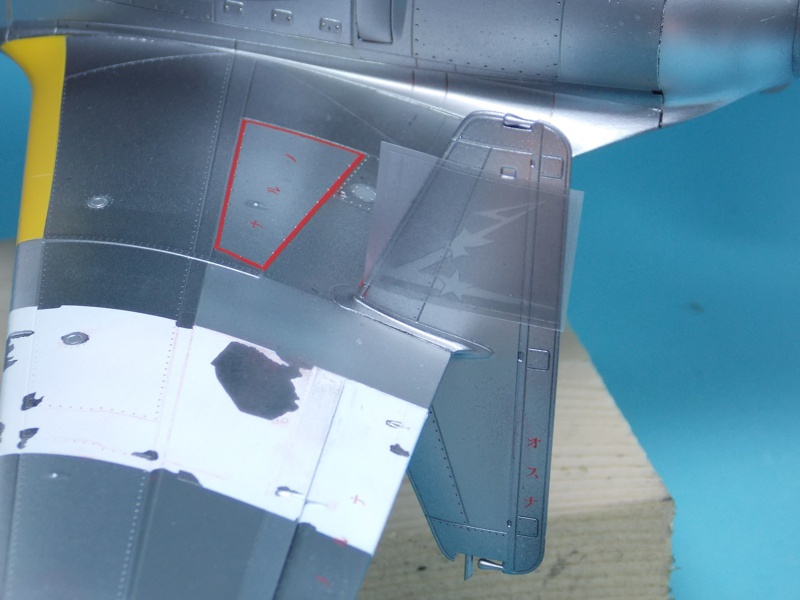
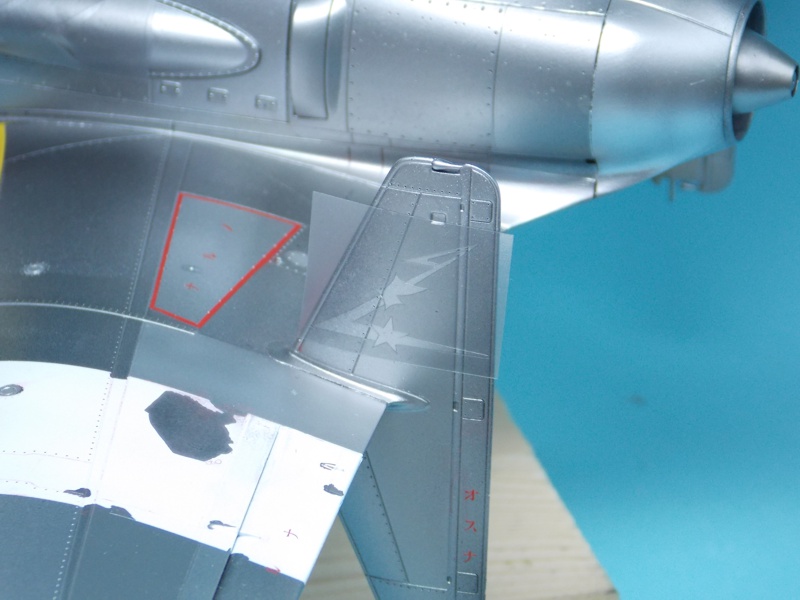
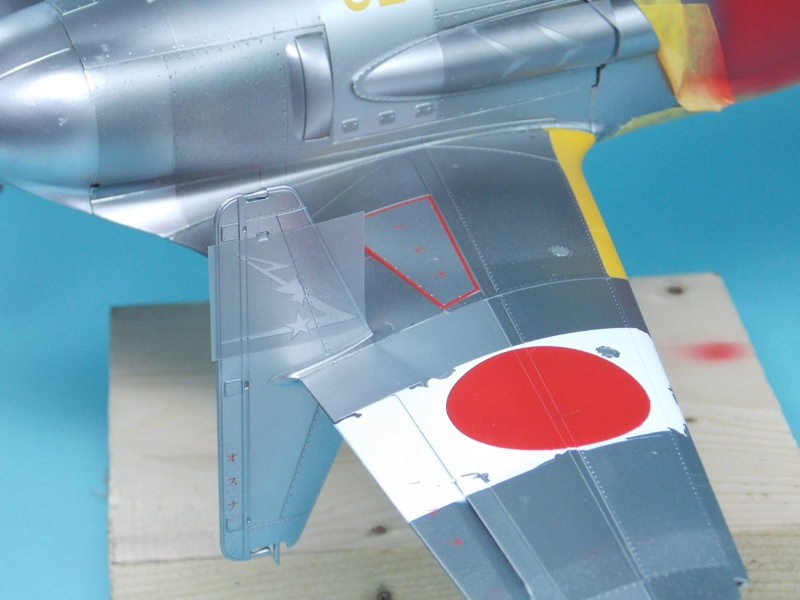
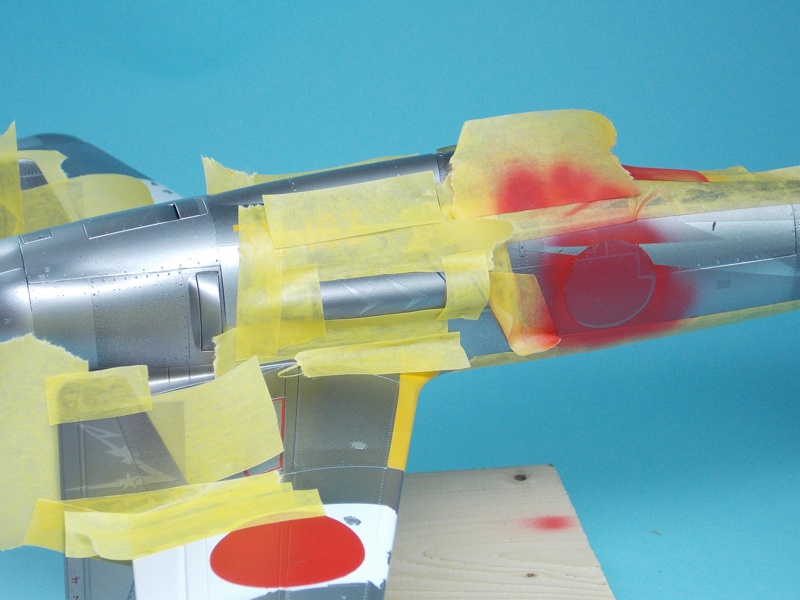
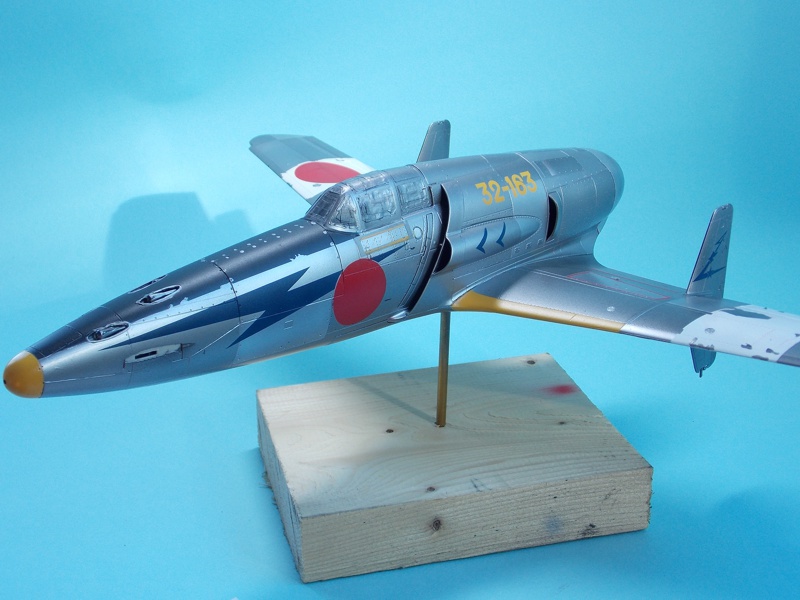
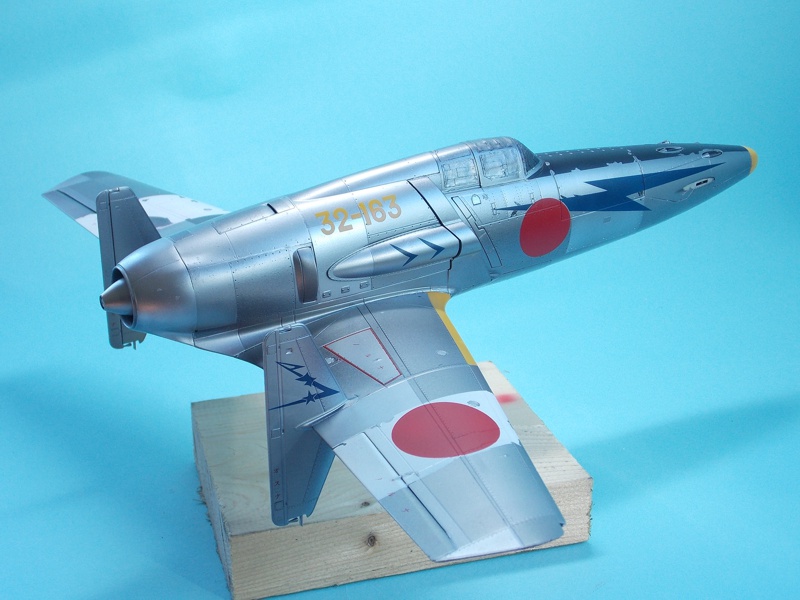
The jet Shinden was a proposal that never flew but the prop Shinden did, for about 45 minutes. This is such a cool looking aircraft, especially as the jet version. Quite obviously there would have been many changes to the airframe for a jet powered version but I don't have the time to do any but the basics. The very long undercarriage legs would not be required but it would be a major task to change the gear, doors and bays, so I elected to show her in flight, closing up the bays and altering the position of the hinge by re-scribing the doors. Unfortunately the kit doors didn't fit very well in the closed position and after a couple of attempts to use plasticard and with time running out, I filled them!not Very satisfactory as the filler as now cracked!


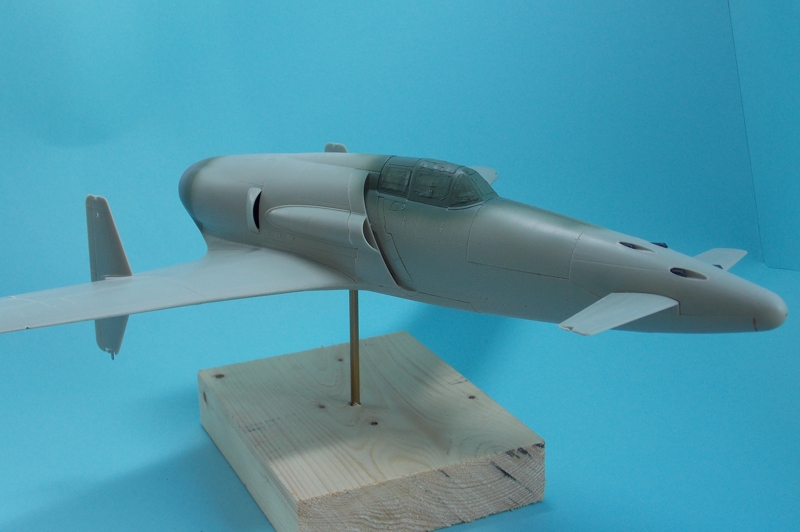
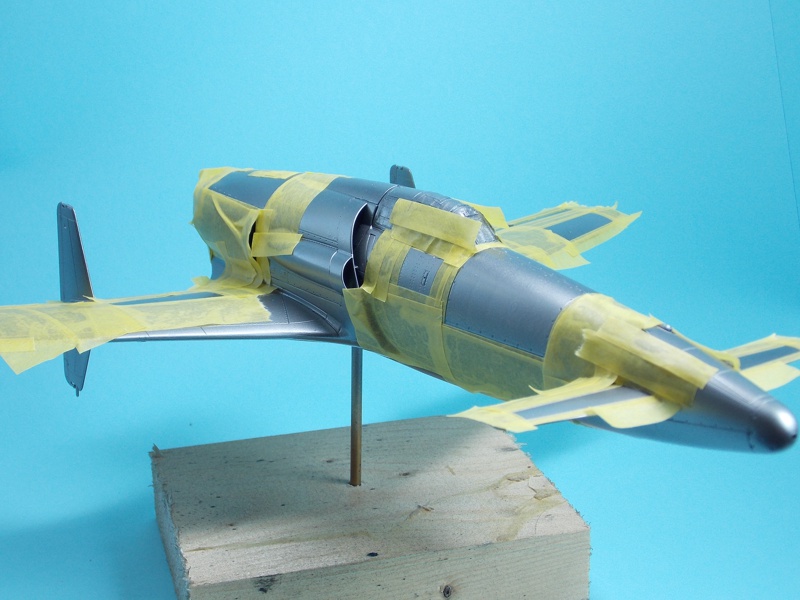
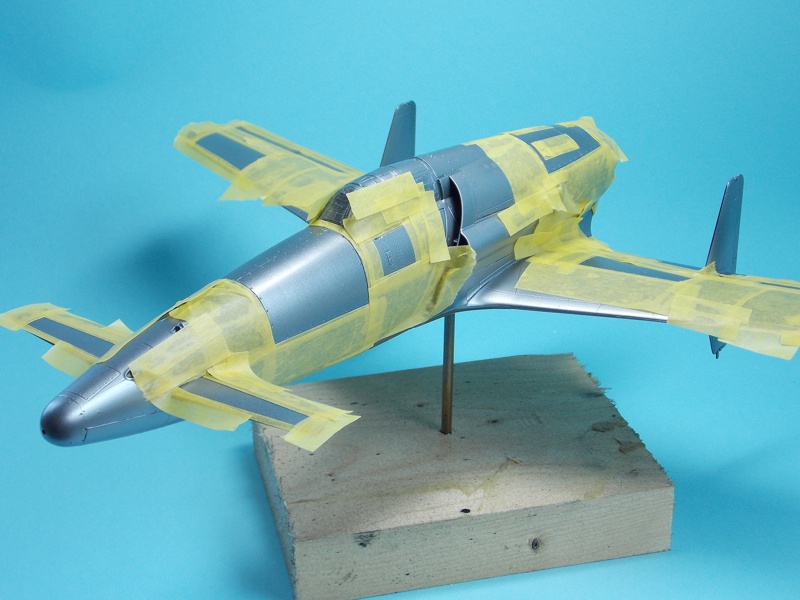
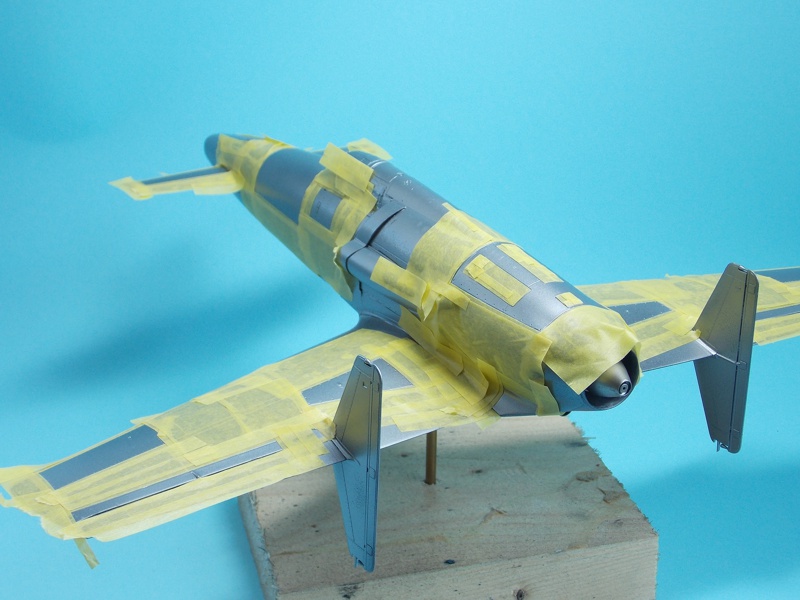
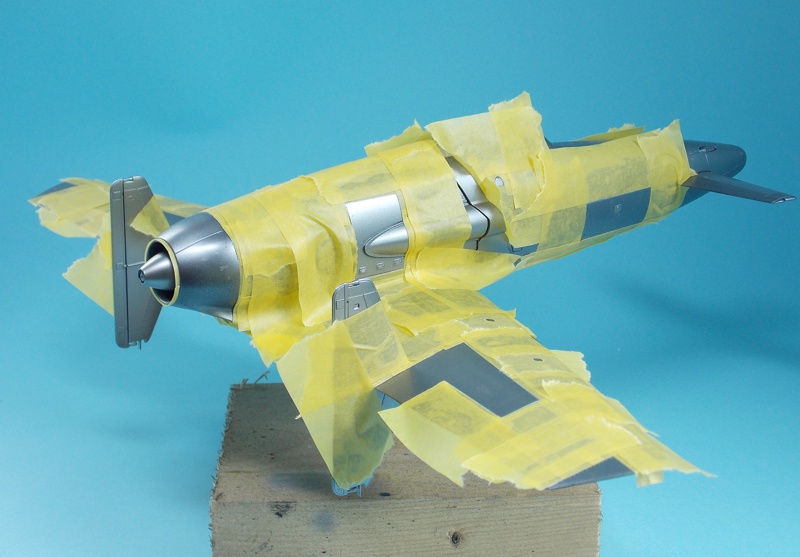
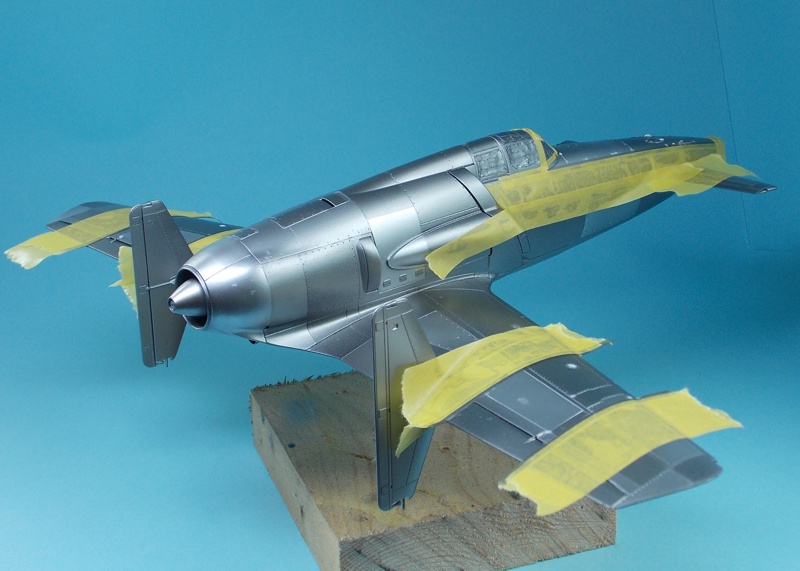
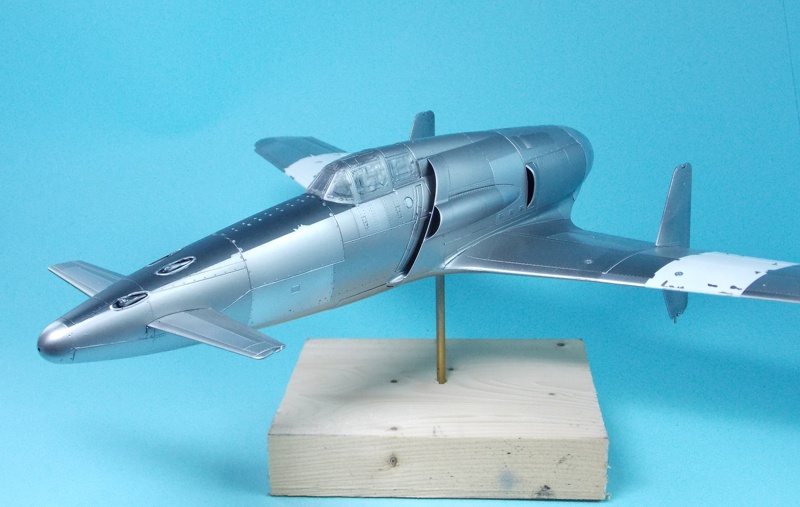
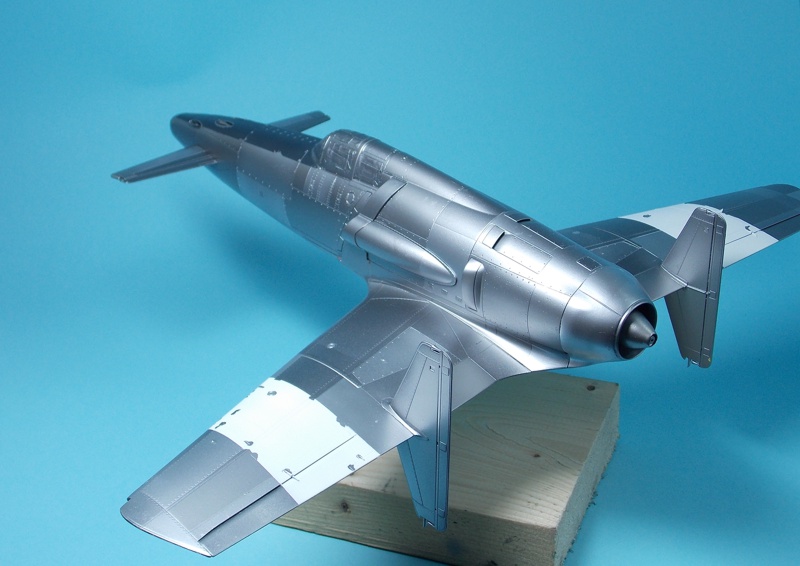
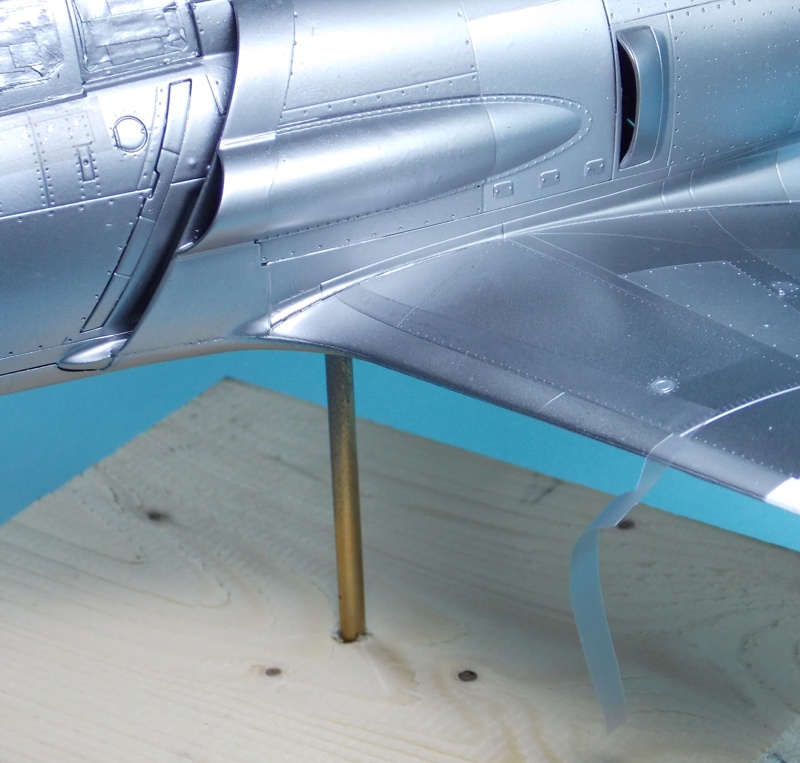
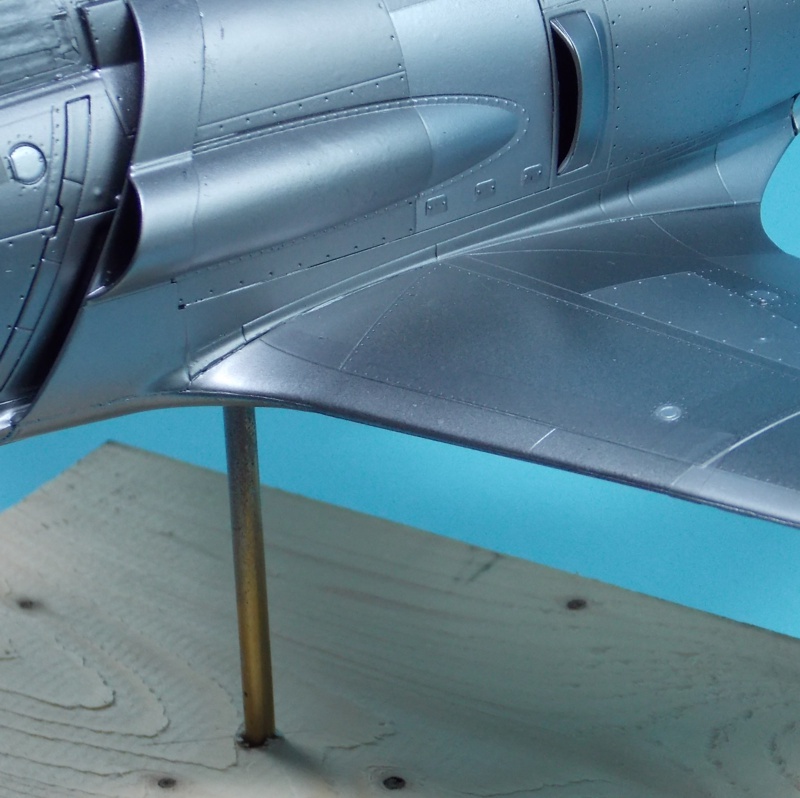
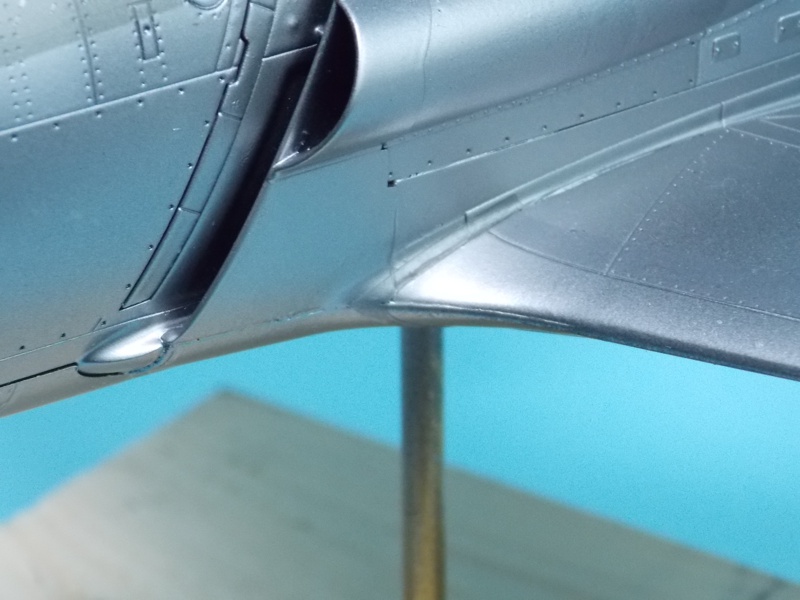
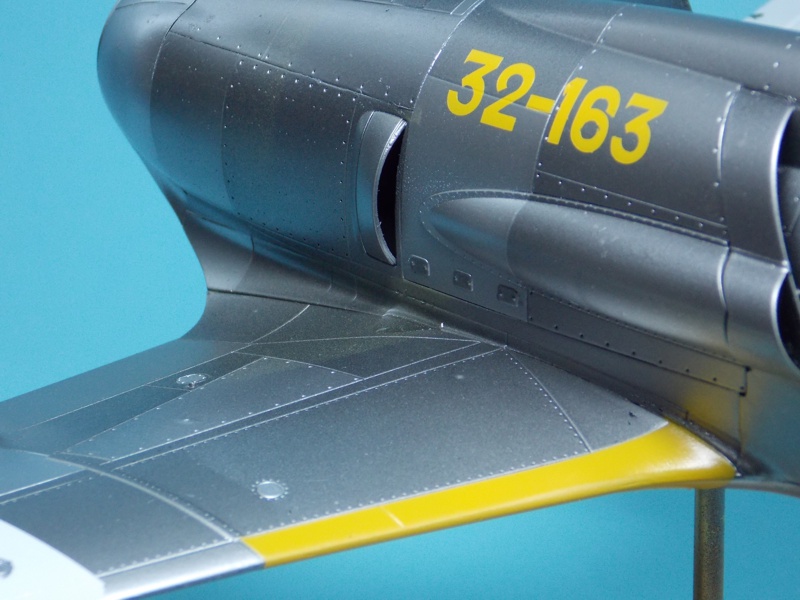
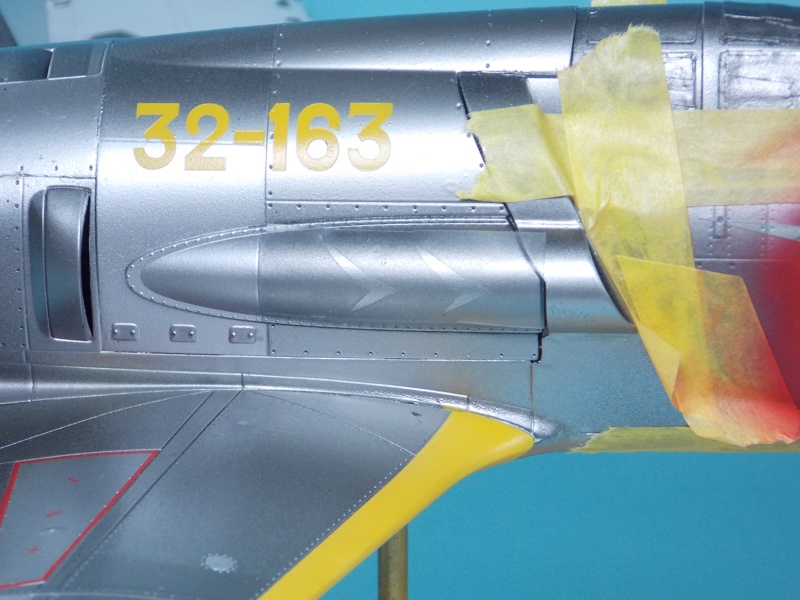
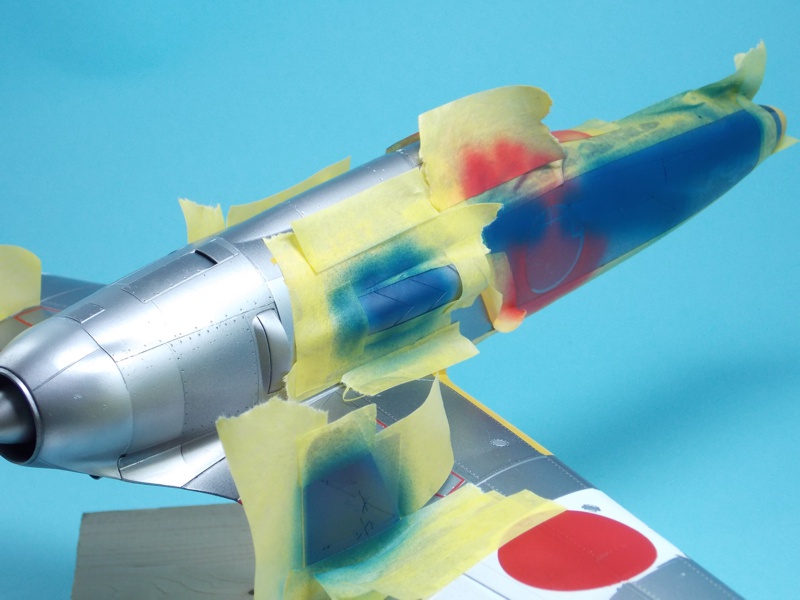
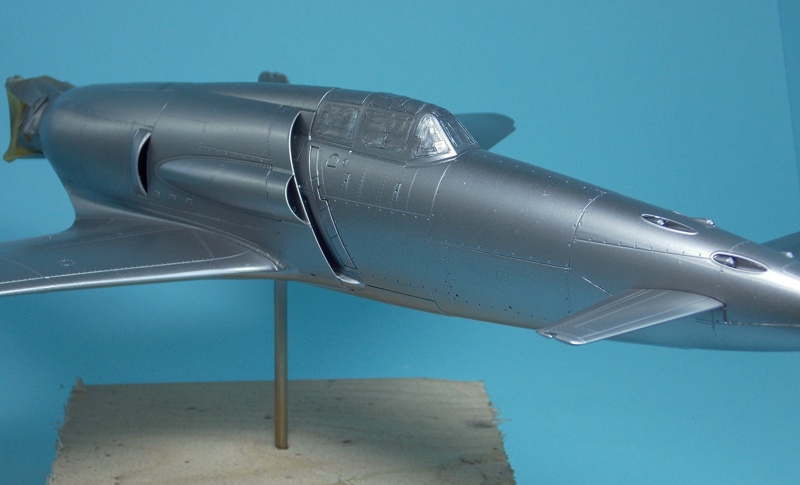
The exhaust system on the prop version is very complicated and there is an exhaust port at the lower rear. The internal trunking is in the way of the jet engine so had to be left out. I blanked off the opening, filed a teardrop hole and covered it with a cut off brass tube fairing.


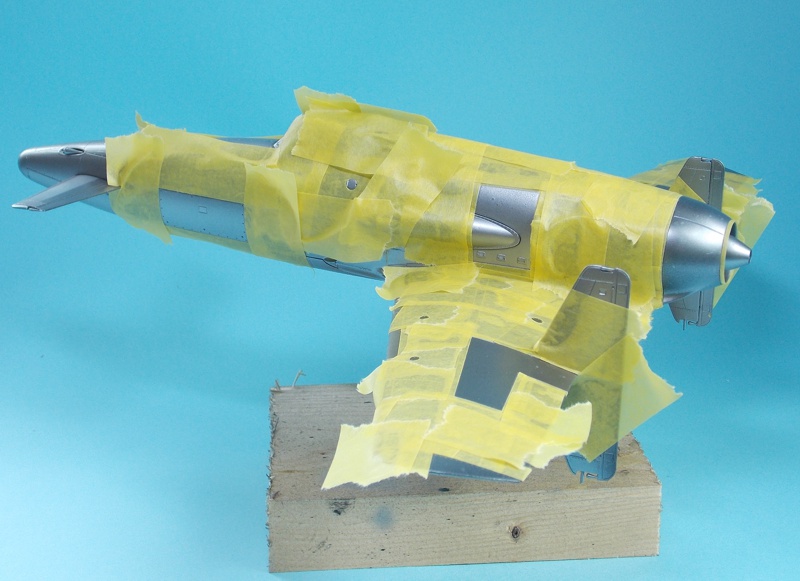
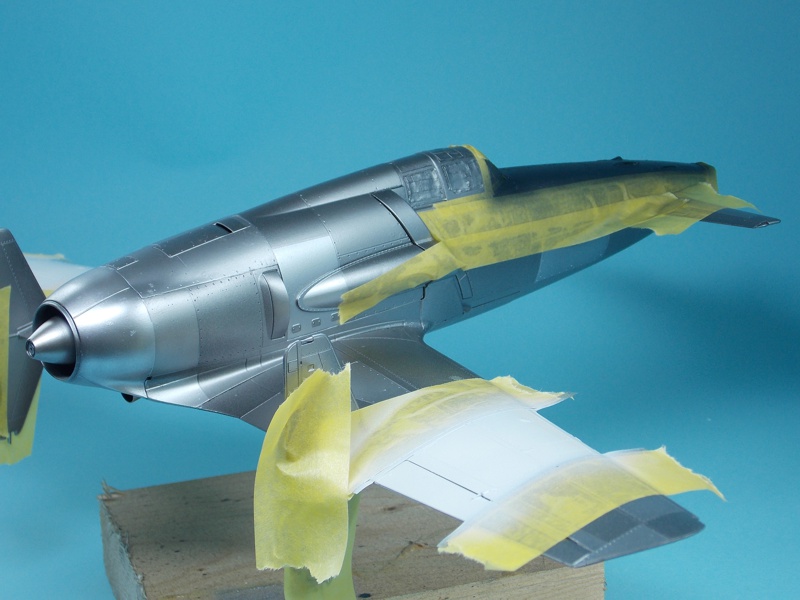
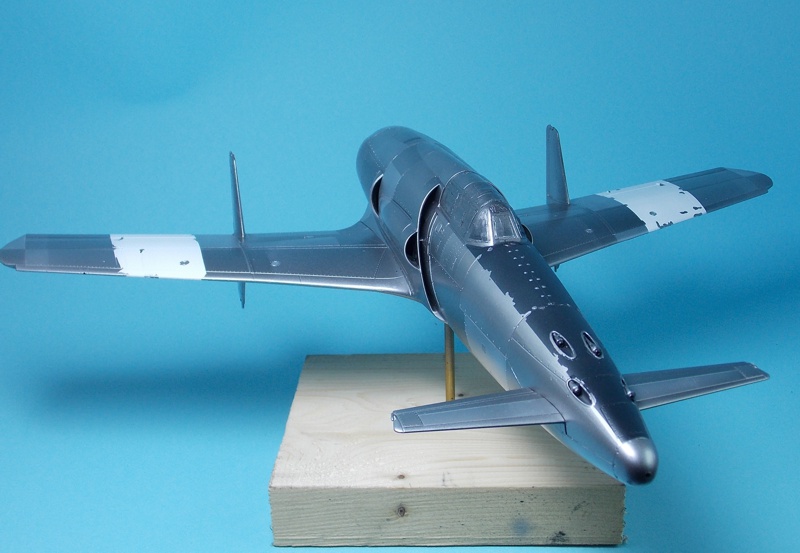
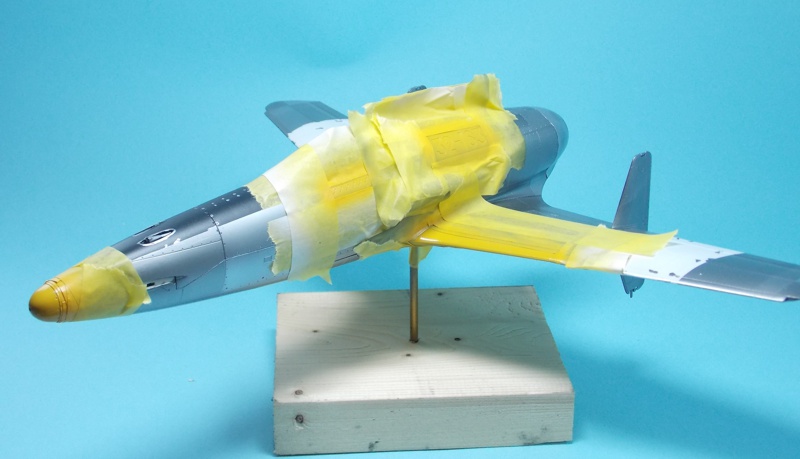
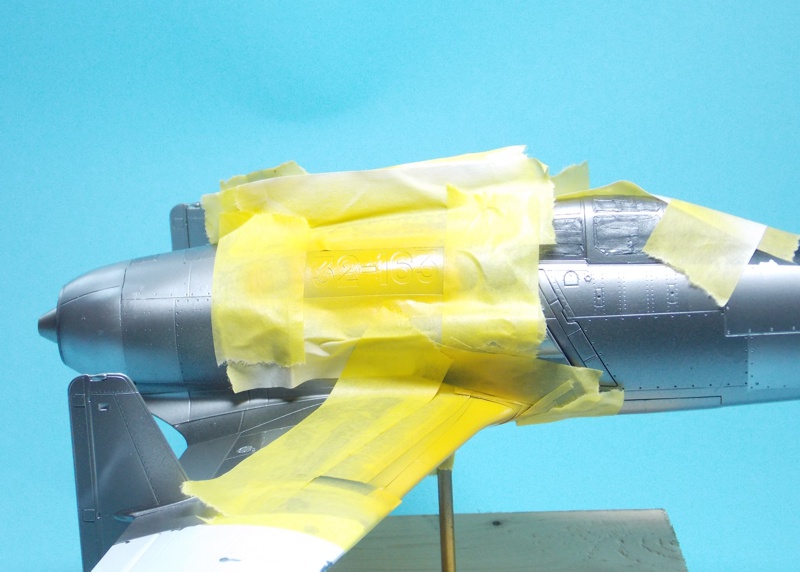
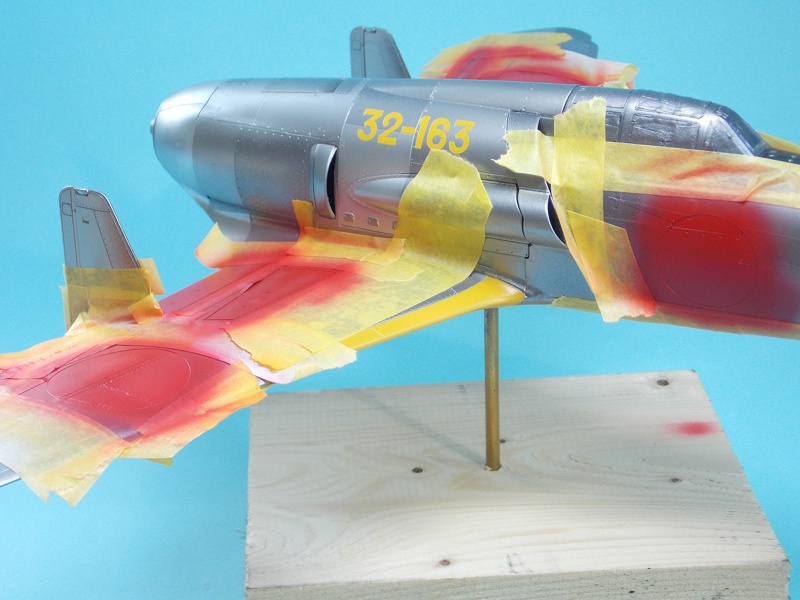
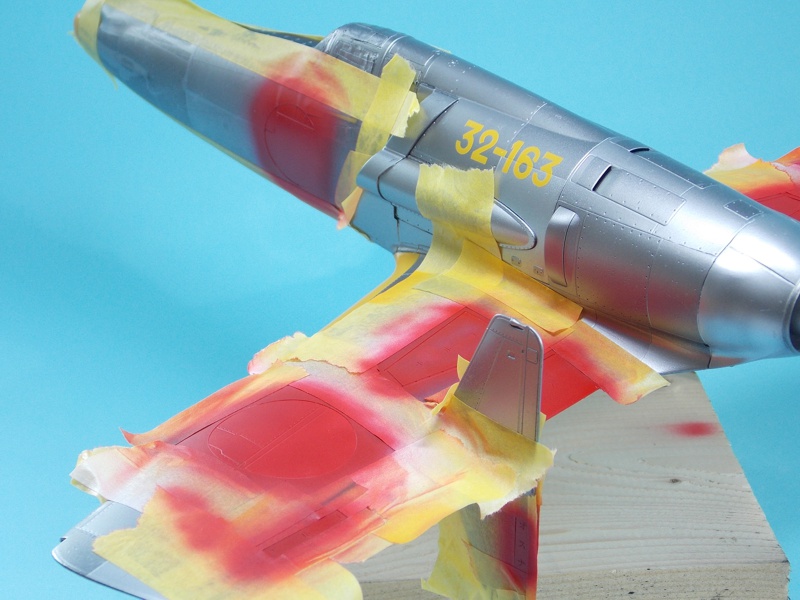
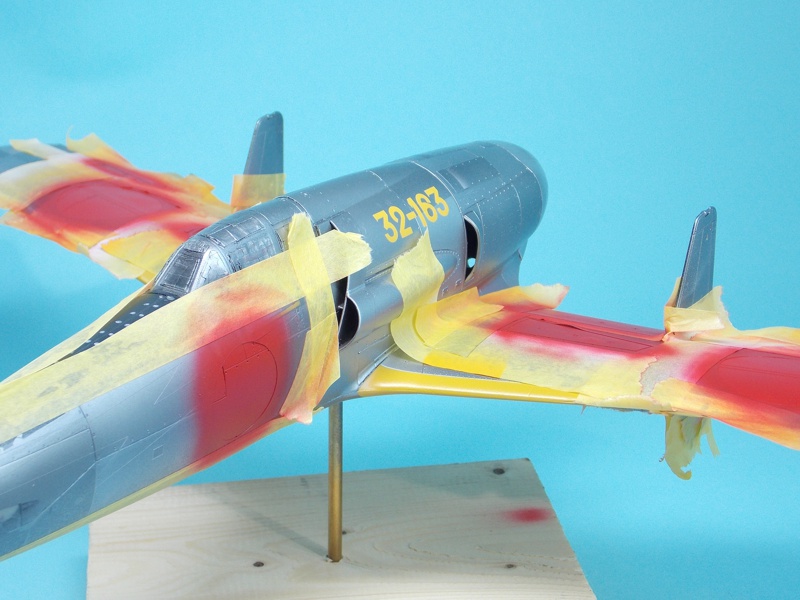
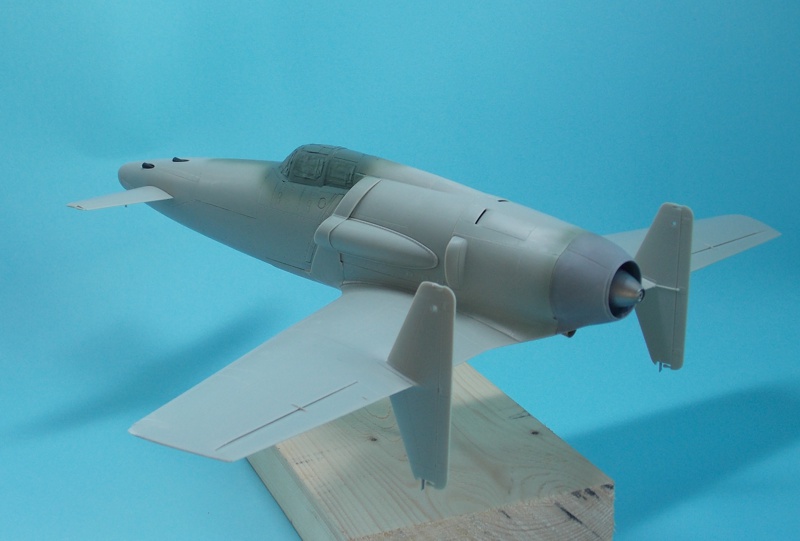
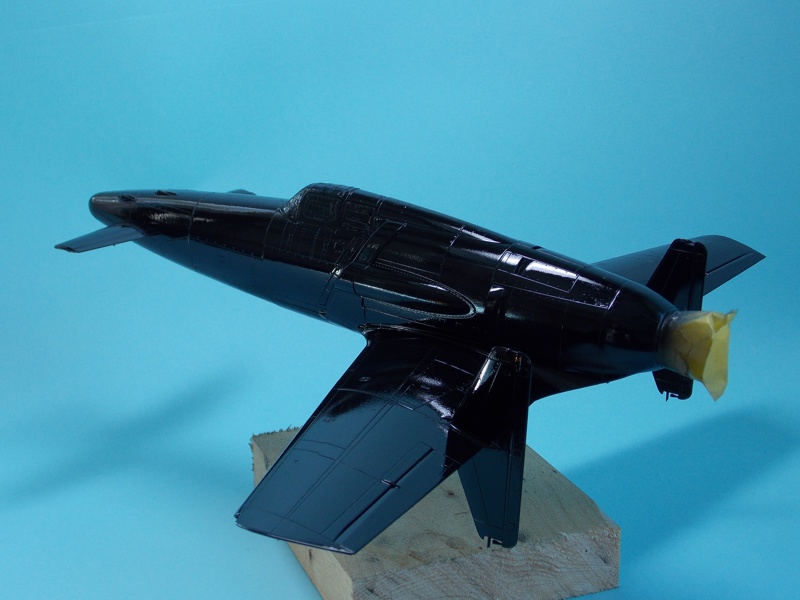
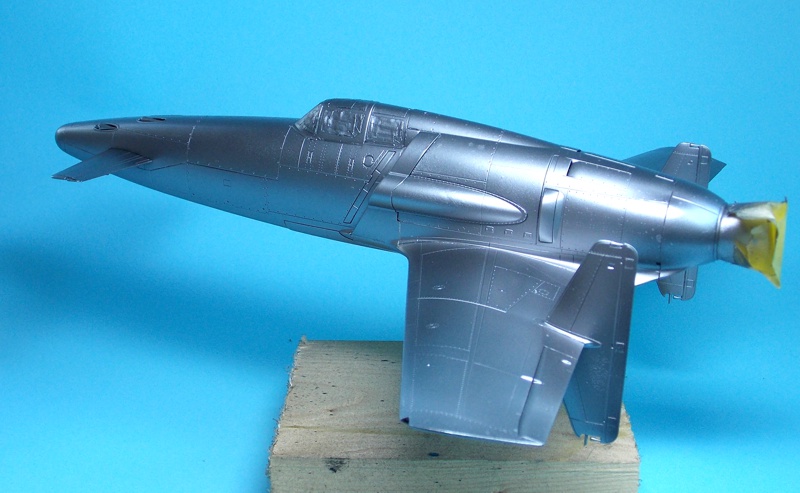
The model painted with Humbrol gloss black in preparation for the AlcladII. I know that gloss black is only necessary for the polished versions of Alclad, but it works and models look cool when painted gloss black.


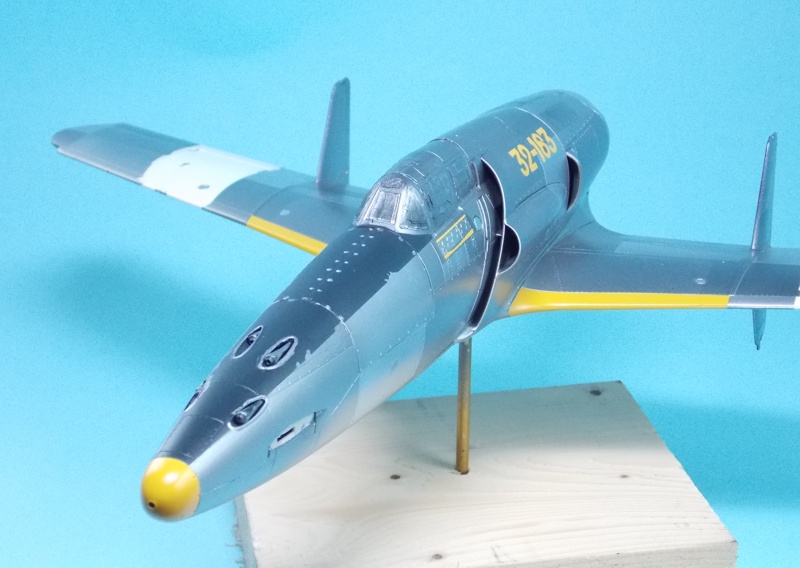
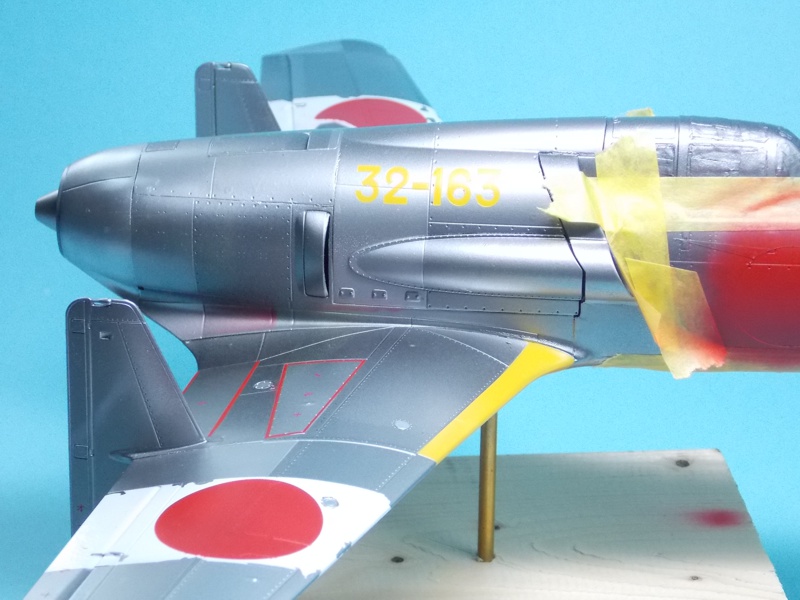
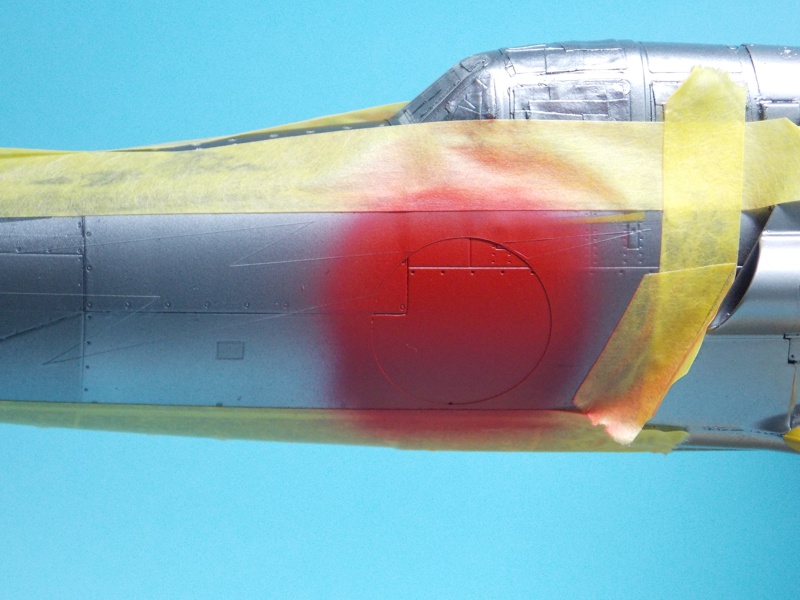
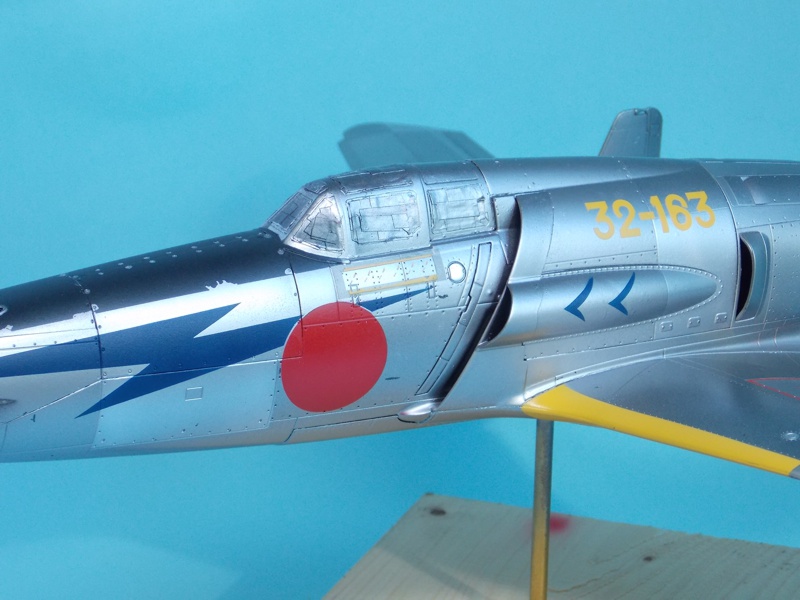
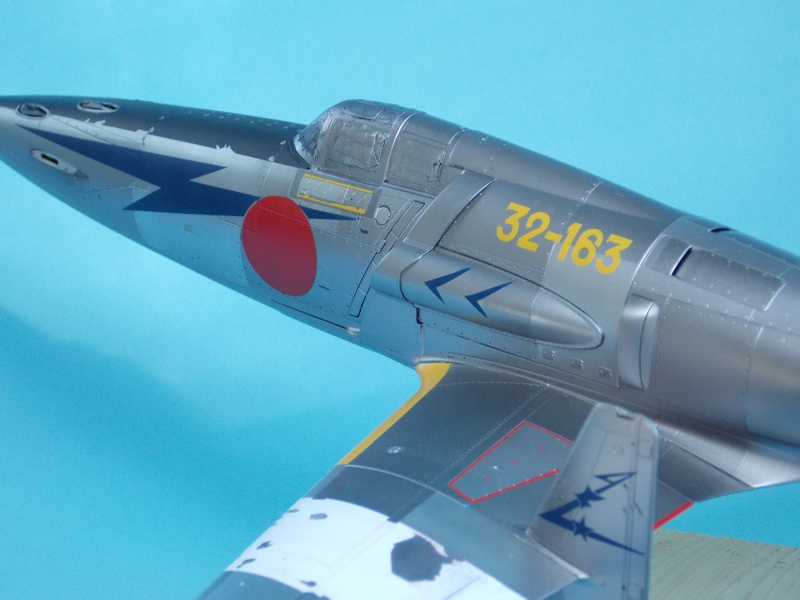
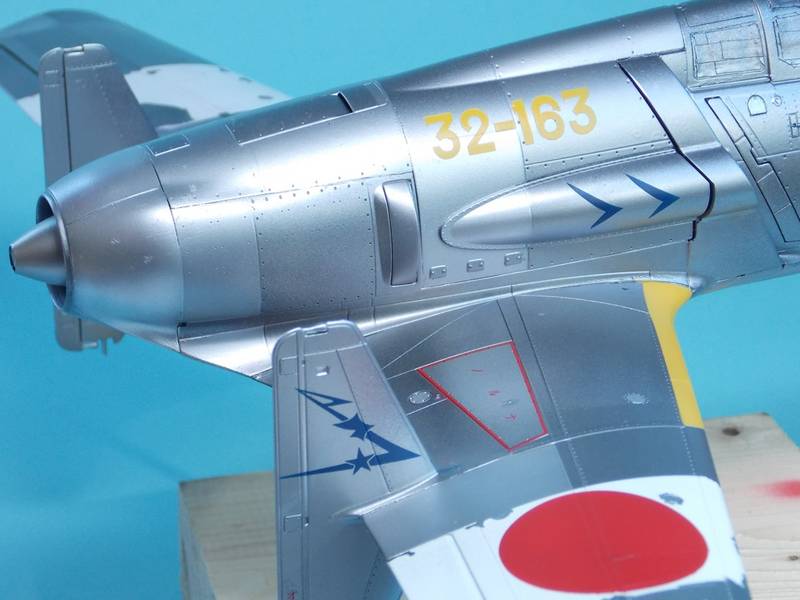
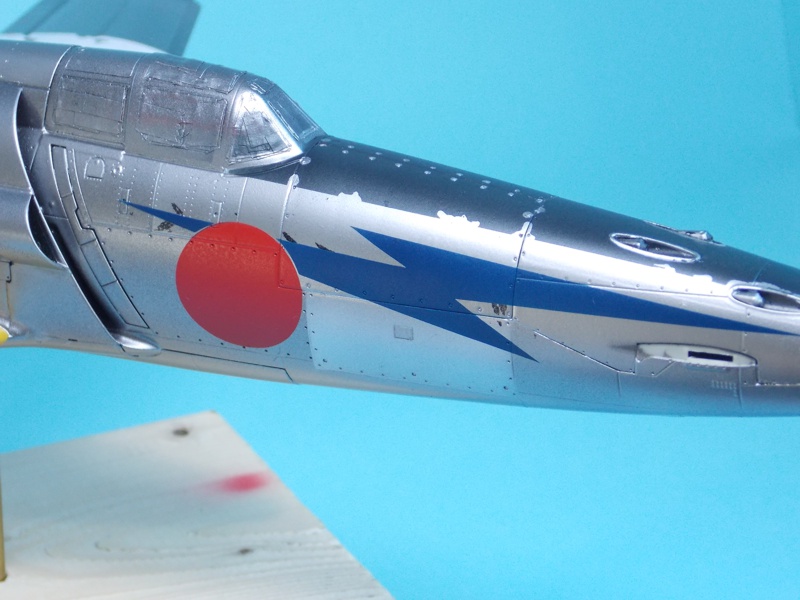
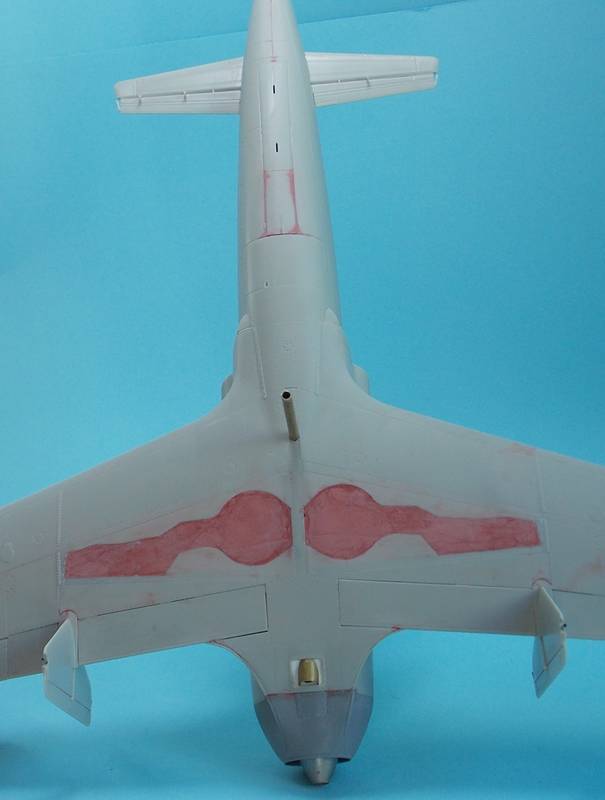
If the Jet Shinden had flown it would have meant that the War wasn't going all the American's way and the Prop Shinden was doing what it had been designed for, bringing down the B-29s (4x30mm cannon would do that!). That would have meant the the Atomic bombs couldn't be dropped and when the Jet Shinden made it's appearance things were looking bleak for the B-29 force. So the Jet Shinden would have been in natural metal Well, if for no other reason, it's going to look so cool


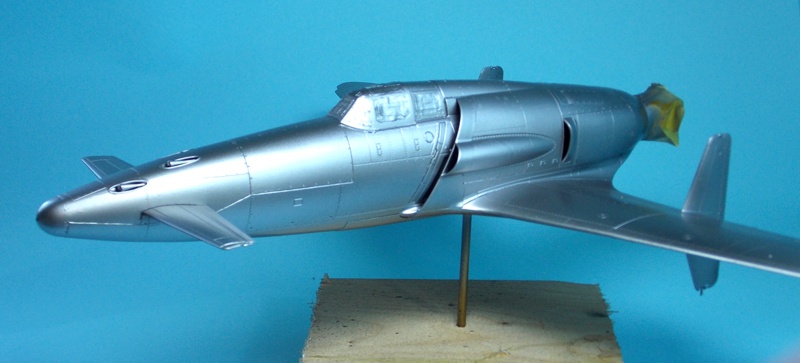
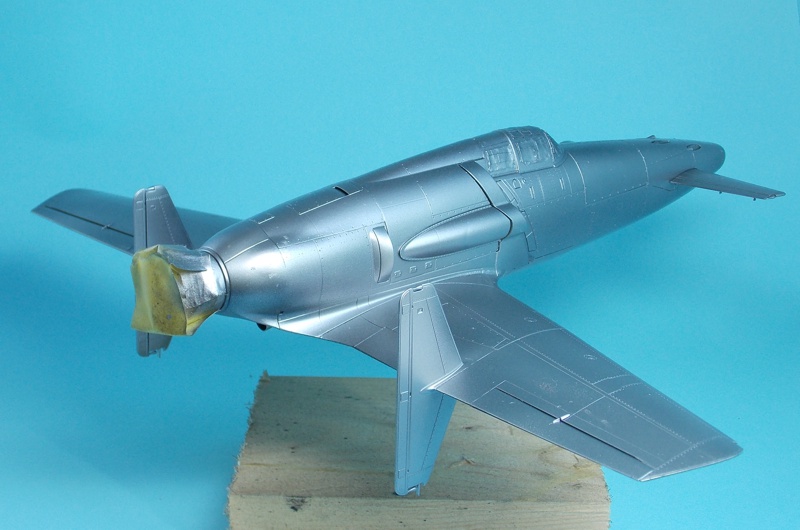
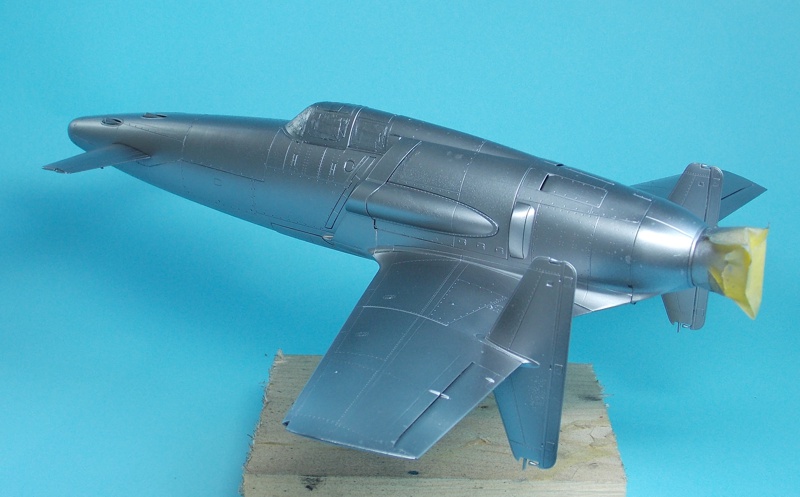
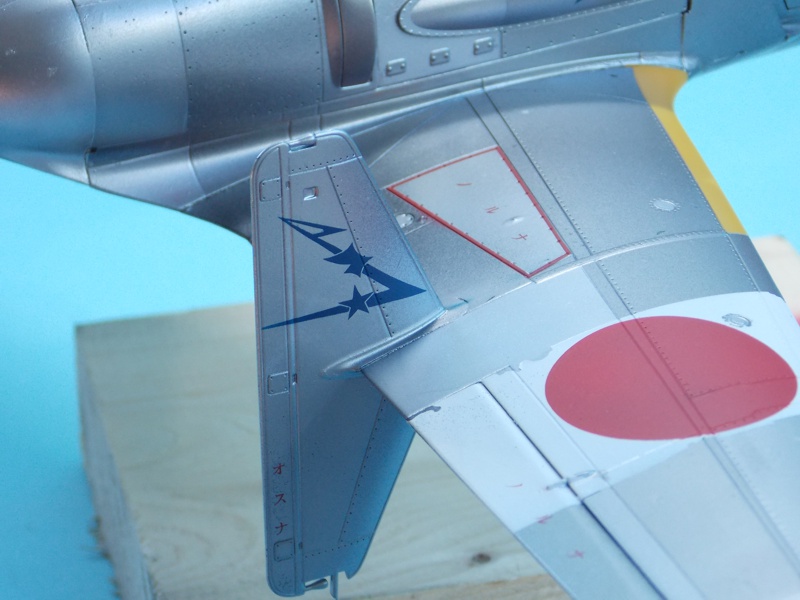
The prop version had small wheels fitted to the lower fins after a prop strike on rotation on it's First (I think) flight. These would clearly not be required on the jet version but, with no time to fair the space in I added fuel dump pipes

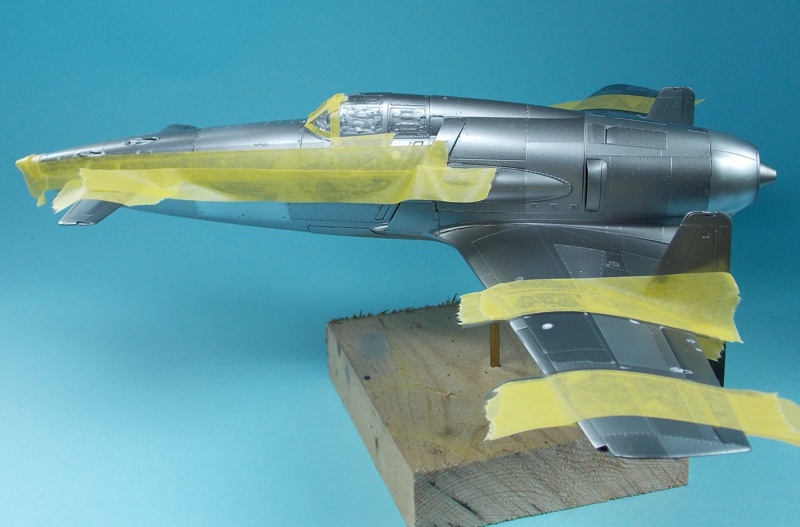
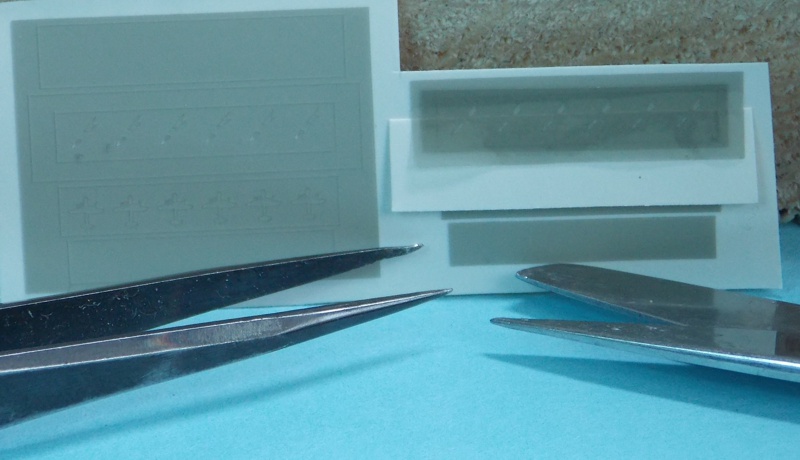
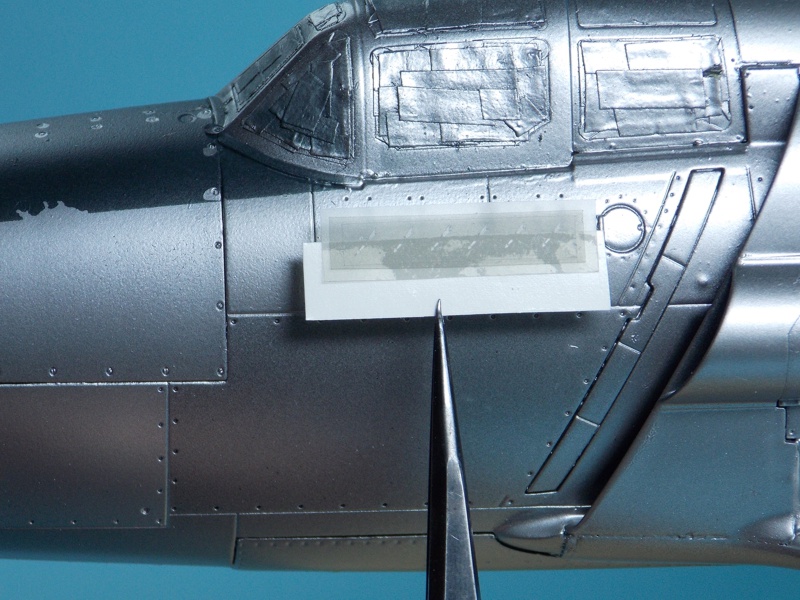
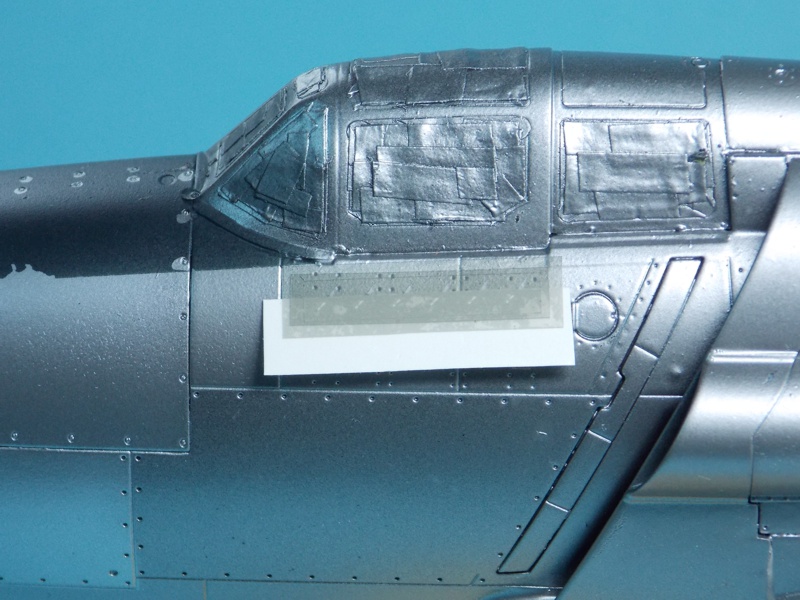
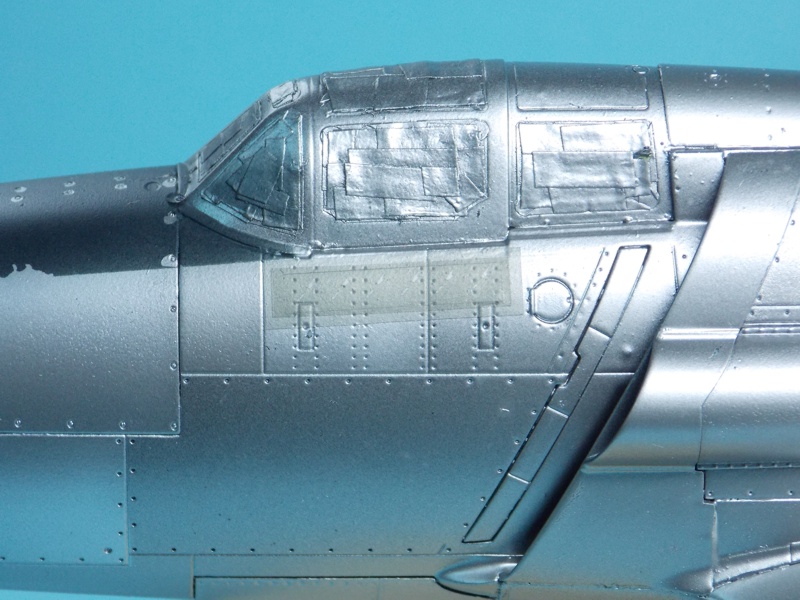
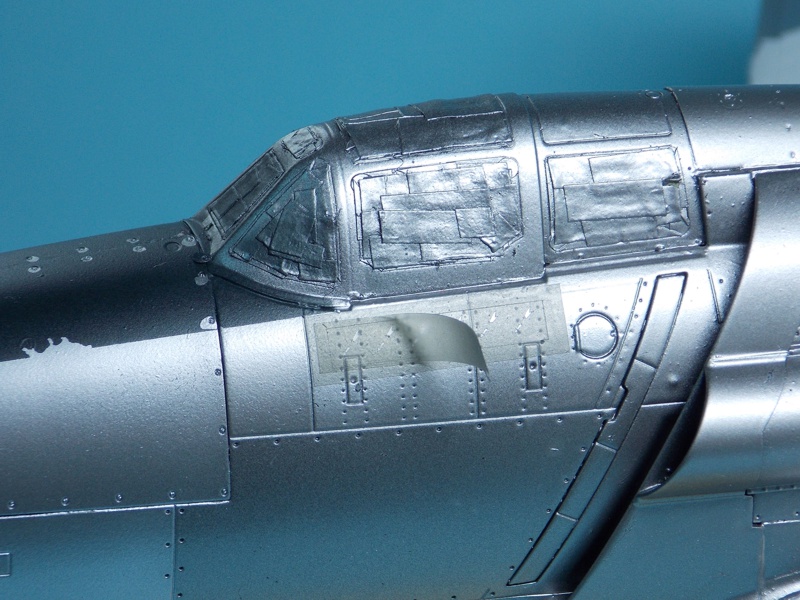
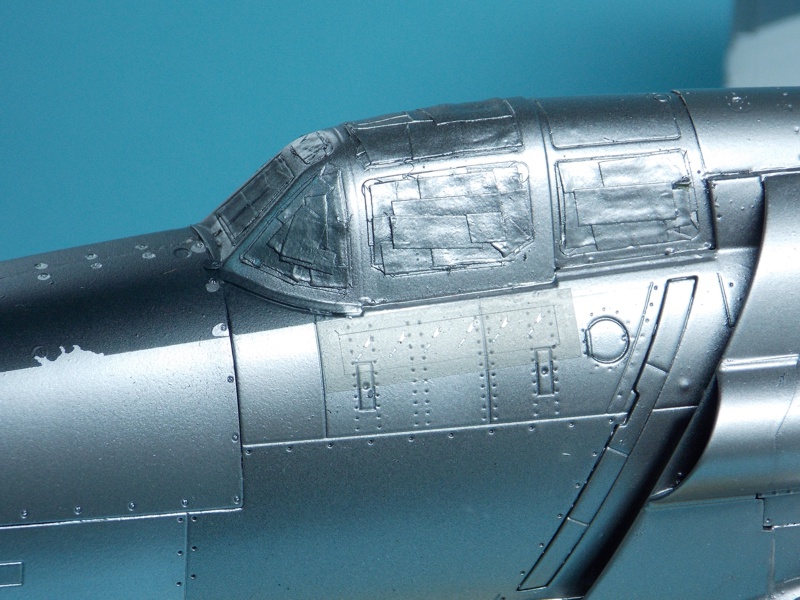
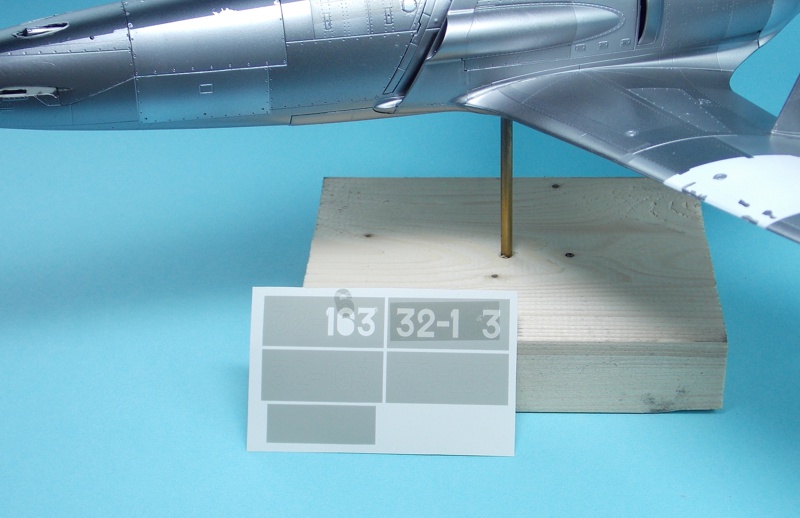
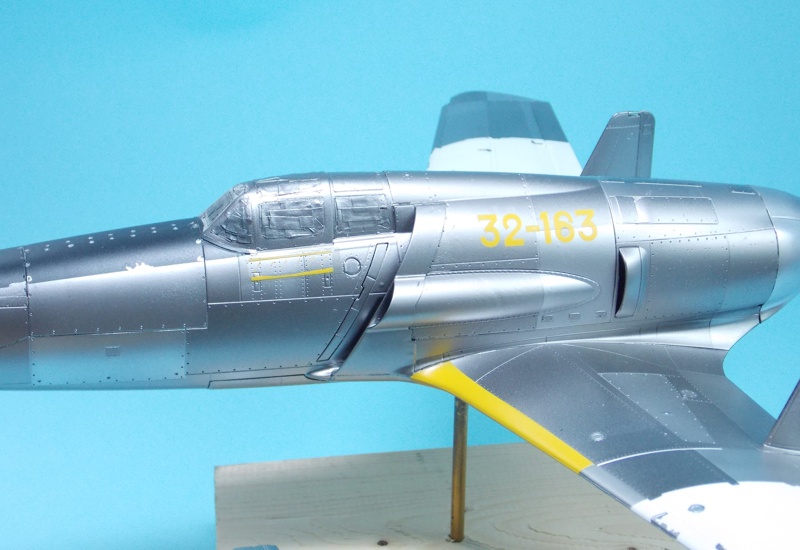
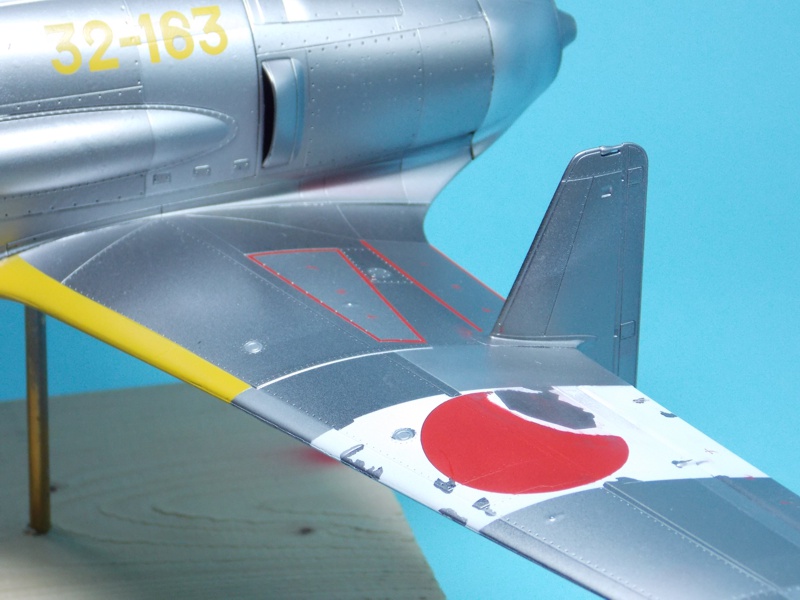
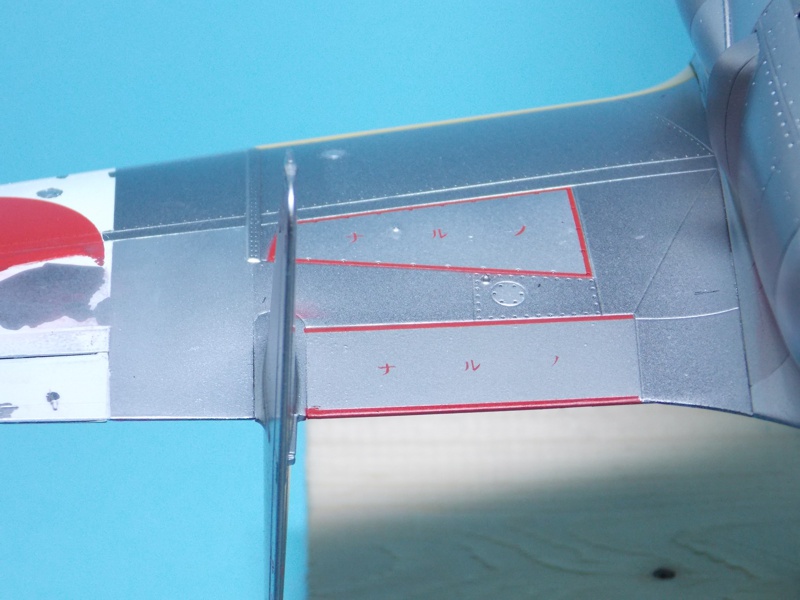
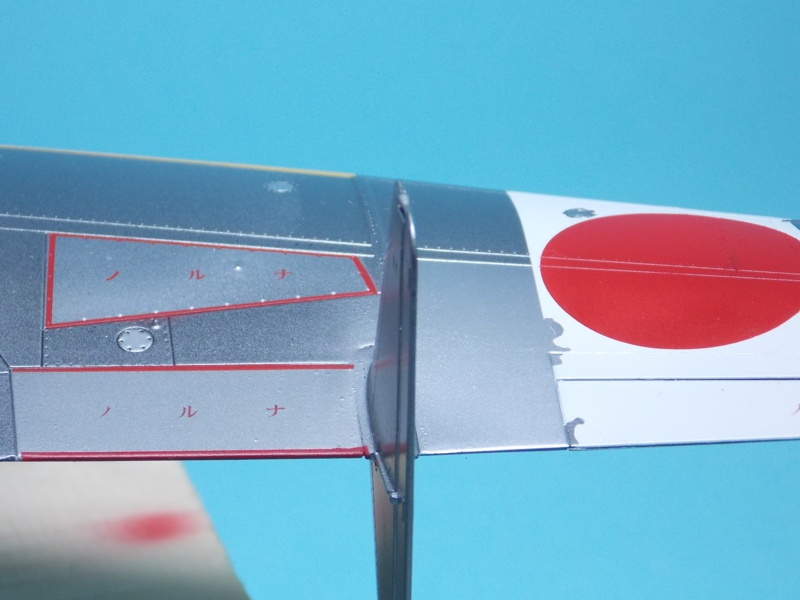
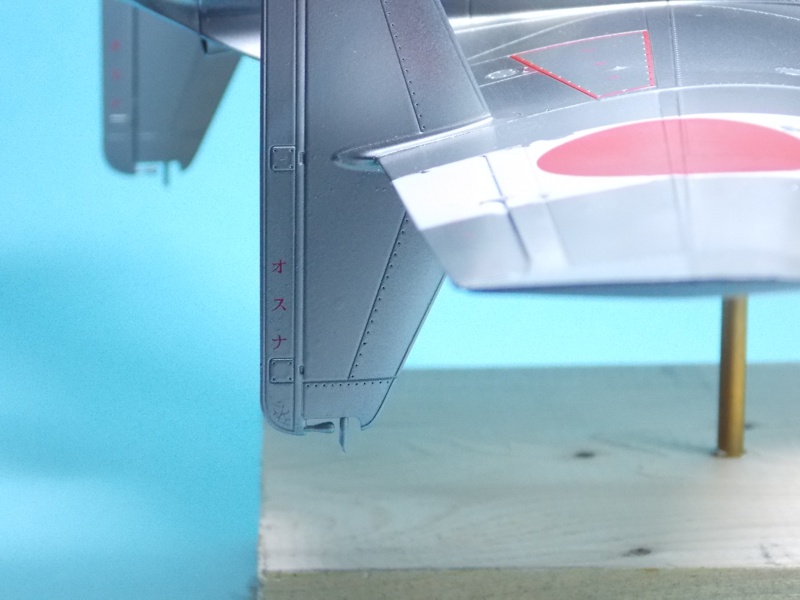
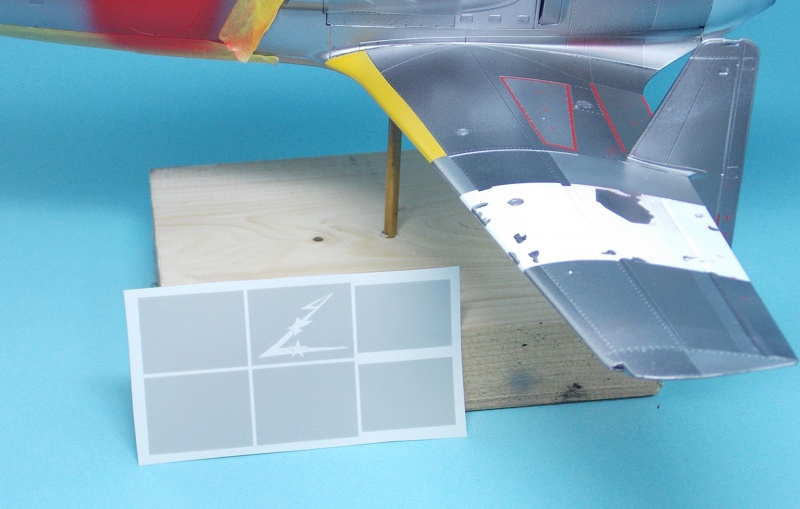
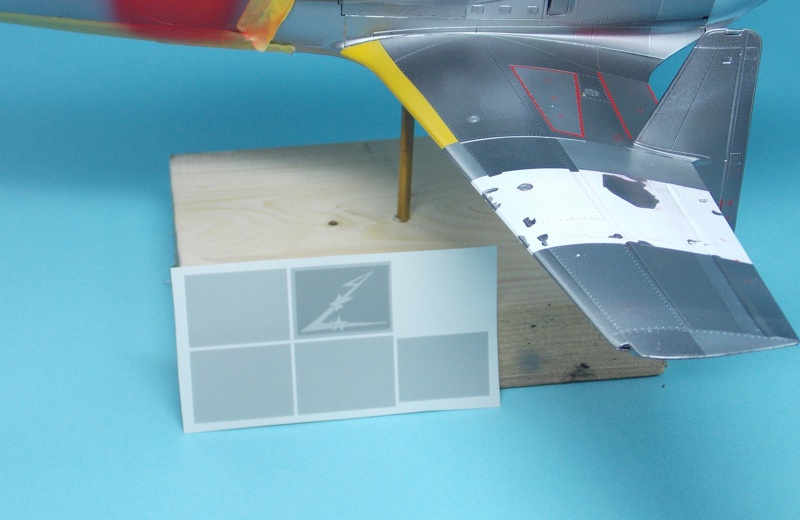
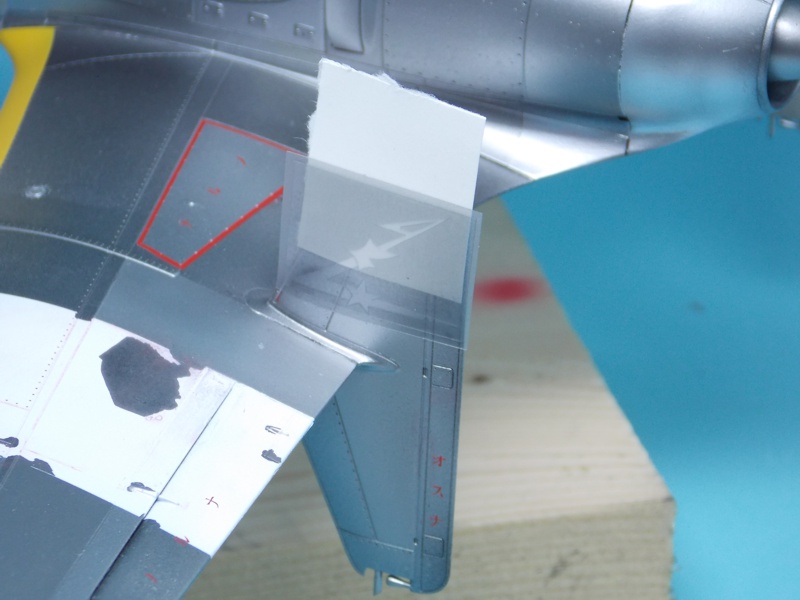
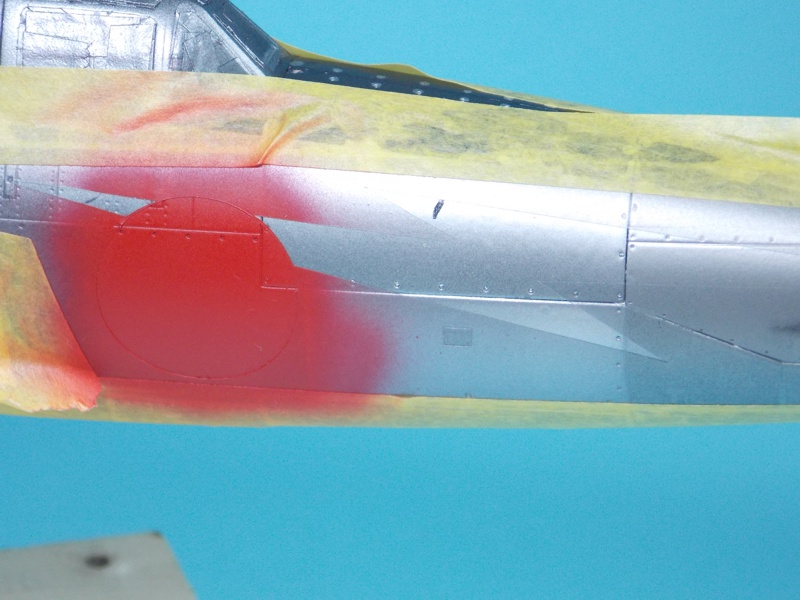
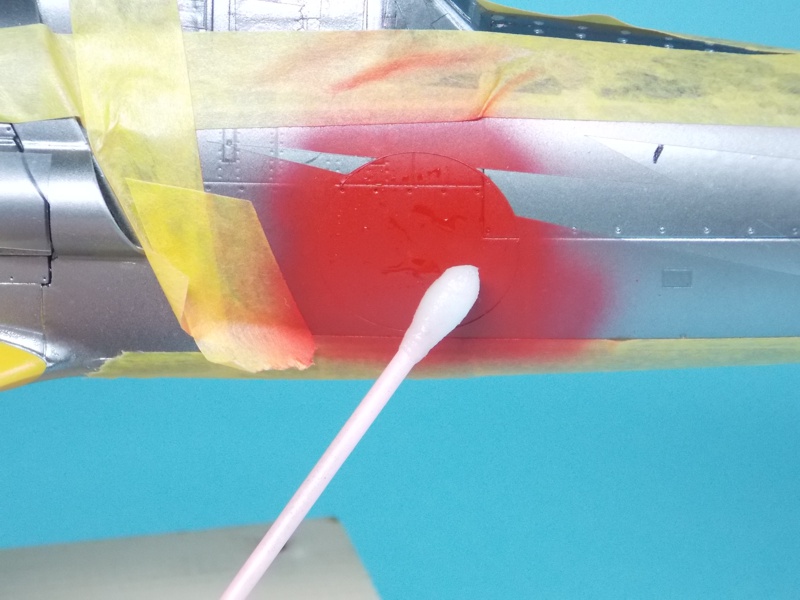
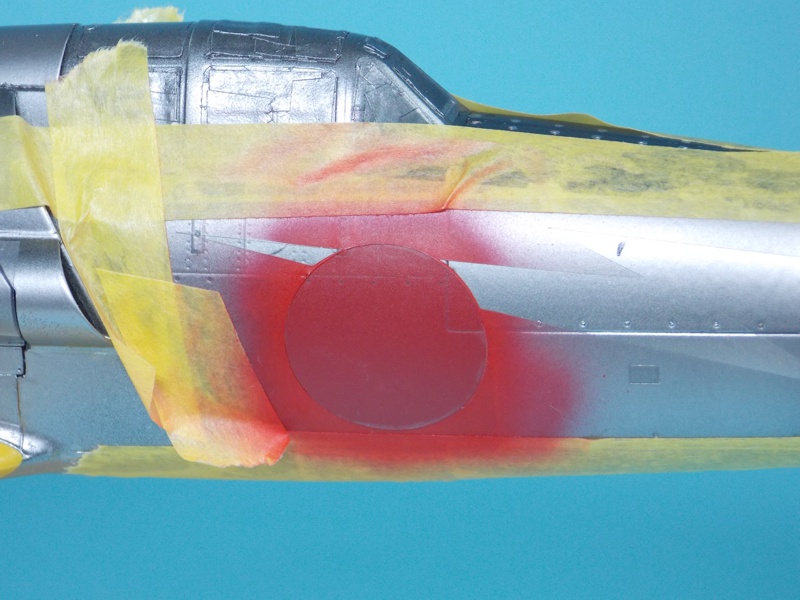
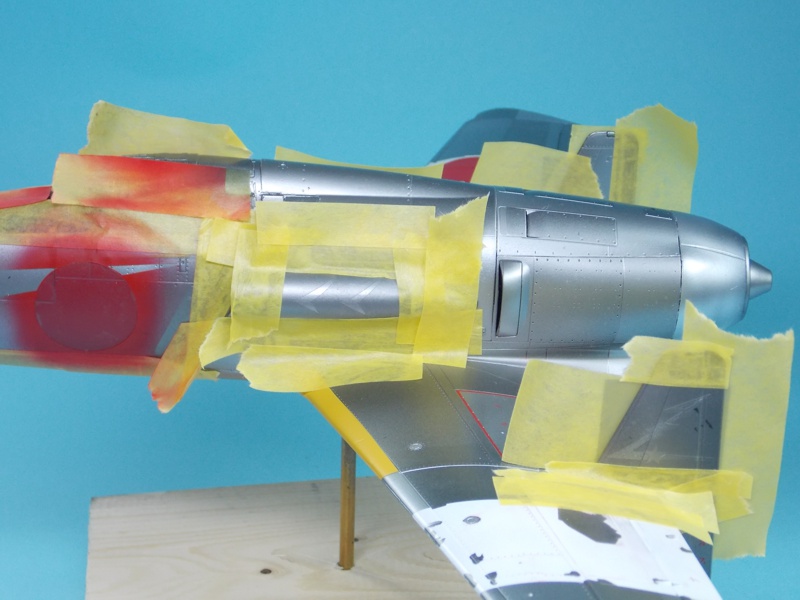
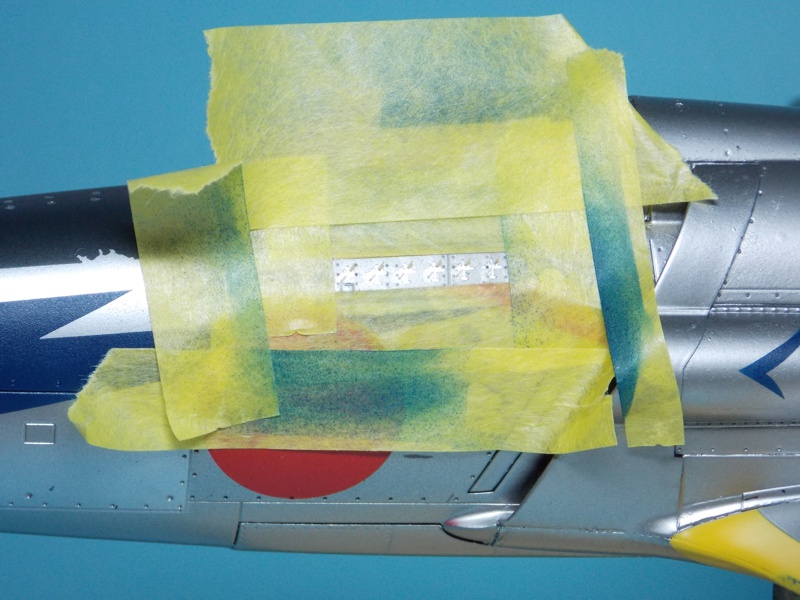
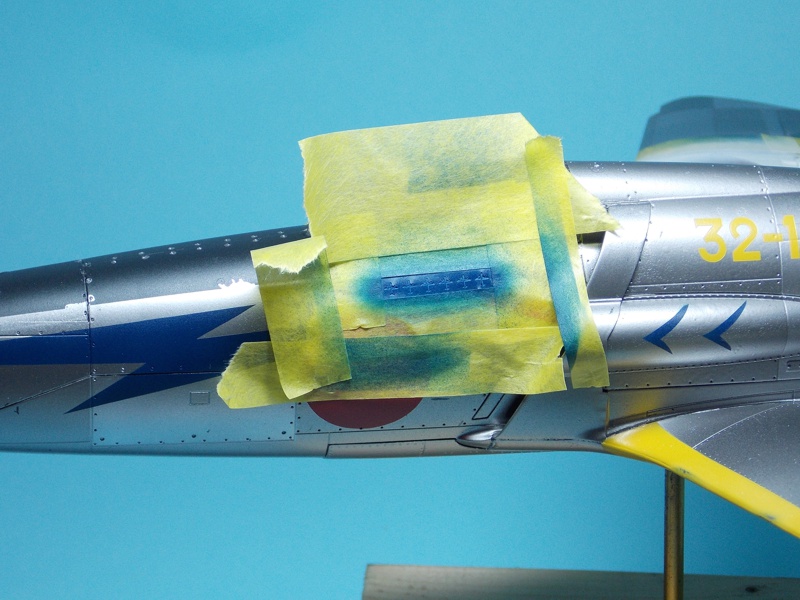
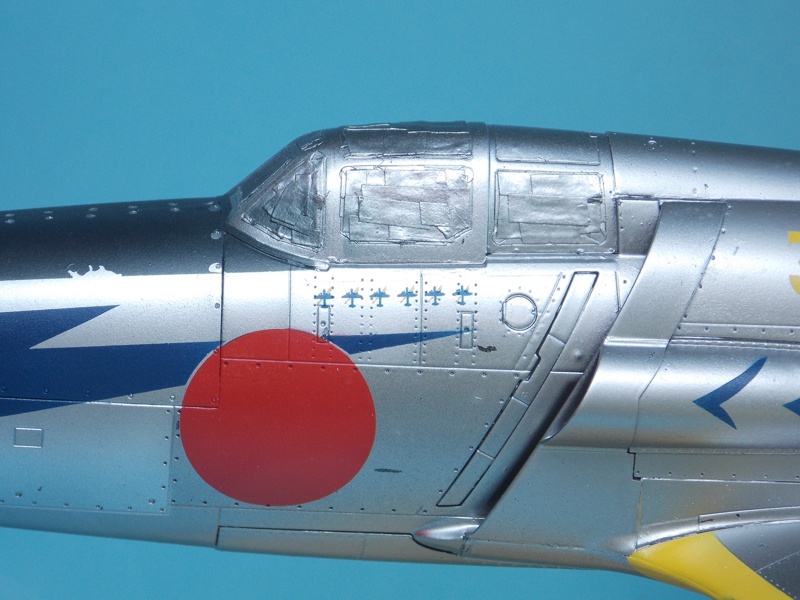
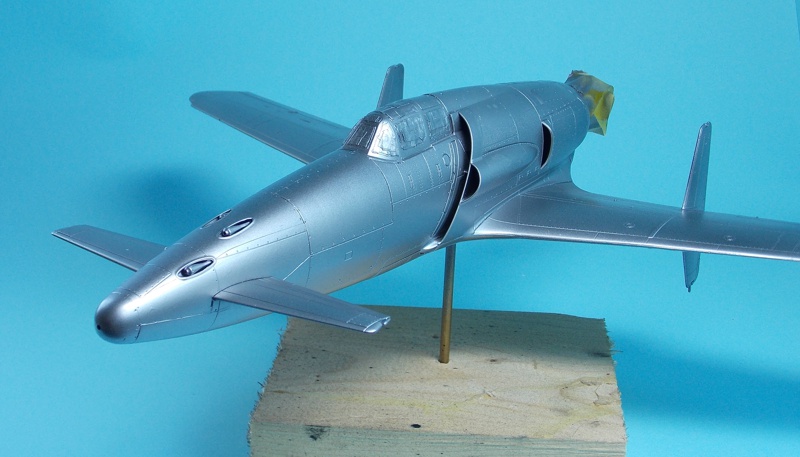
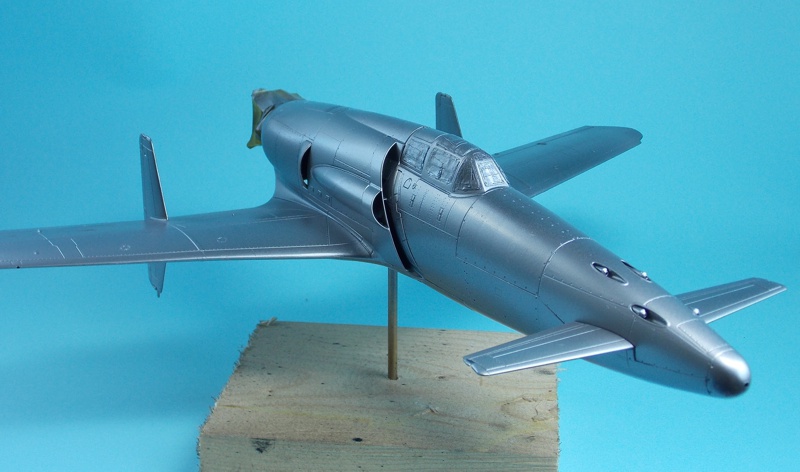
There is a pilot from the Hasegawa Raiden flying this, I spent an age getting a pair of the goggles from one of the heads to fit over his eyes! I developed a set of generic canopy masks to mask the canopy as the kit supplied masks don't quite fit, apart from the upper rear one, which I used. All markings on this bird are going to be painted on, of course
DougN1
_VISITCOMMUNITY
Georgia, United States
Joined: August 08, 2011
KitMaker: 410 posts
AeroScale: 409 posts
Posted: Thursday, October 18, 2012 - 01:37 AM UTC
Looks great! The Shinden is a very cool looking airframe, and looks great in natural metal (there was/is a natural metal build on the ZM site).

Since ZM has sold out of all 1/32 Shinden kits, and is only showing another run of sci-fi marked 1/32 Shinden kits coming, perhaps that is the cause of their lack of response?

Doug
72ndbrigade
_VISITCOMMUNITY
New York, United States
Joined: September 27, 2012
KitMaker: 29 posts
AeroScale: 8 posts
Posted: Thursday, October 18, 2012 - 01:50 AM UTC
That is one cool looking aircraft! Looks almost like something out of Star wars. Will it remain in natural metal?
chukw1
_VISITCOMMUNITY
California, United States
Joined: November 28, 2007
KitMaker: 817 posts
AeroScale: 729 posts
Posted: Thursday, October 18, 2012 - 05:14 AM UTC
Nicely done, Mal! Shame about the deal falling through- a loss for the whole modeling world!
Holdfast
Staff MemberPresident
IPMS-UK KITMAKER BRANCH
#056
_VISITCOMMUNITY
England - South West, United Kingdom
Joined: September 30, 2002
KitMaker: 8,581 posts
AeroScale: 4,913 posts
Posted: Thursday, October 18, 2012 - 05:52 AM UTC
Doug,You could be right about the Shinden kits being sold out and, according to ZM, Japanese model makers aren't used to masks? So I think that getting them to understand what is required proved difficult, I'm hoping that I can change their minds a little when they see this at Telford

Howard, Yes it does look like a Sci-Fi piece of Kit yes it will remain in Natural metal, I have painted the second shade today and I have been masking off for the third, to go on tomorrow. There will be a 4th, maybe, then I'll get the markings on; that is the part that I am looking forward to

Chuck, Yes a real shame, I was also doing masks for the 1/32 Wing XL B-26 Marauder and I had been offered a kit by Martin on which to scale the masks, so I was more than disappointed when that didn't happen as well! I have had a few, none mainstream, model producers ask about masks, apparently decals are getting expensive
spiralcity
_VISITCOMMUNITY
Illinois, United States
Joined: October 14, 2012
KitMaker: 150 posts
AeroScale: 107 posts
Posted: Saturday, October 20, 2012 - 08:53 AM UTC
Great subject and a nice build.

She's comming along great. I cant wait to see the finished product.
Holdfast
Staff MemberPresident
IPMS-UK KITMAKER BRANCH
#056
_VISITCOMMUNITY
England - South West, United Kingdom
Joined: September 30, 2002
KitMaker: 8,581 posts
AeroScale: 4,913 posts
Posted: Saturday, October 20, 2012 - 07:26 PM UTC
Hi Kevin,
I hope to put more pictures up today or tomorrow of the completed NMF, then it's on to the markings
Holdfast
Staff MemberPresident
IPMS-UK KITMAKER BRANCH
#056
_VISITCOMMUNITY
England - South West, United Kingdom
Joined: September 30, 2002
KitMaker: 8,581 posts
AeroScale: 4,913 posts
Posted: Monday, October 22, 2012 - 04:28 AM UTC
I have finished the marathon of masking and painting the different shades of AlcladII, unfortunately I kept forgetting to take photos between masking so you can't actually see the effect. I also forgot to take a photo when all the masking came off for the last time before masking again for the white defense bands on the wings and the blue black anti-glare panel on the nose. These are both painted now and then it's on with the markings

If you check out the pics below you should be able to make out the different panels that were masked each time.


Holdfast
Staff MemberPresident
IPMS-UK KITMAKER BRANCH
#056
_VISITCOMMUNITY
England - South West, United Kingdom
Joined: September 30, 2002
KitMaker: 8,581 posts
AeroScale: 4,913 posts
Posted: Wednesday, October 24, 2012 - 06:37 PM UTC
Next I masked and painted the white wing defense bands and the blue/black nose anti-glare panel. I used white glue to produce a chipping effect, which looks fine on the anti-glare panel but I'm not to thrilled about the way it turned out on the white bands With Telford rushing up on me there was no time to worry about it so it stays, I might try and deal with it later, if I find that I have the time. The initial edge masking was achieved using the 3mm wide straight edge masks from my "D-Day helpers" set the "anti-overspray" masking is achieved using "Frog" tape.


Next up will be the yellow areas
chukw1
_VISITCOMMUNITY
California, United States
Joined: November 28, 2007
KitMaker: 817 posts
AeroScale: 729 posts
Posted: Thursday, October 25, 2012 - 02:26 AM UTC
That look HAWT, Mal! Nice job on the NMF- theis baby is reaching critical mass!
Holdfast
Staff MemberPresident
IPMS-UK KITMAKER BRANCH
#056
_VISITCOMMUNITY
England - South West, United Kingdom
Joined: September 30, 2002
KitMaker: 8,581 posts
AeroScale: 4,913 posts
Posted: Thursday, October 25, 2012 - 05:03 AM UTC
Hi Chuck,
Although I am under pressure to get this done in time for the big show and it is a mammoth masking task I'm enjoying it greatly It is a pity though that the P-47 and Spitfire that I was also hoping to get done have fallen by the wayside, there just isn't the time to do all 3

The yellow areas masked and painted:
The first part of the kill markings, these are tiny arrows with lightning flash type rear ends. Because the mask is in 2 parts the first part is transferred to the model contained in a "positioning box", this box will be used to accurately locate the second part of the mask.


The wing leading edge masks are very simple, they just require to be positioned correctly and the wing root mask added for a fool proof masking solution. The set contains masks to paint the yellow first, if you prefer but that isn't a realistic option on a NM surface.

The code is easy to transport and position using the transfer tape (included in my sets) and the backing paper "handle", all explained in the instructions, which makes the masking process a doddle


I also masked and painted the nose cone yellow. I'll post the pictures of these areas painted next time
Holdfast
Staff MemberPresident
IPMS-UK KITMAKER BRANCH
#056
_VISITCOMMUNITY
England - South West, United Kingdom
Joined: September 30, 2002
KitMaker: 8,581 posts
AeroScale: 4,913 posts
Posted: Sunday, October 28, 2012 - 12:21 AM UTC
The yellow areas painted and the red areas masked and painted.


spiralcity
_VISITCOMMUNITY
Illinois, United States
Joined: October 14, 2012
KitMaker: 150 posts
AeroScale: 107 posts
Posted: Sunday, October 28, 2012 - 07:21 AM UTC
She's comming along nicley.

Nice work.
Siderius
_VISITCOMMUNITY
Tennessee, United States
Joined: September 20, 2005
KitMaker: 1,747 posts
AeroScale: 1,673 posts
Posted: Sunday, October 28, 2012 - 07:48 AM UTC
Really nice work there Mal. You have a knack for masking markings it looks like! Russell
Holdfast
Staff MemberPresident
IPMS-UK KITMAKER BRANCH
#056
_VISITCOMMUNITY
England - South West, United Kingdom
Joined: September 30, 2002
KitMaker: 8,581 posts
AeroScale: 4,913 posts
Posted: Sunday, October 28, 2012 - 09:47 PM UTC
Thanks Kevin


Quoted Text

Really nice work there Mal. You have a knack for masking markings it looks like! Russell


I would hope so Russell, it's what I do, Miracle paint Masks
Littorio
_VISITCOMMUNITY
England - South East, United Kingdom
Joined: September 15, 2004
KitMaker: 4,728 posts
AeroScale: 1,351 posts
Posted: Monday, October 29, 2012 - 07:04 AM UTC
I really like this Mal, makes me want to build my 1/48 Hasegawa offering. I'll be looking for this in two weeks tme
SGTJKJ
#041
_VISITCOMMUNITY
Kobenhavn, Denmark
Joined: July 20, 2006
KitMaker: 10,069 posts
AeroScale: 3,788 posts
Posted: Monday, October 29, 2012 - 07:38 AM UTC
Great looking work.

Cannot wait to see more.
Holdfast
Staff MemberPresident
IPMS-UK KITMAKER BRANCH
#056
_VISITCOMMUNITY
England - South West, United Kingdom
Joined: September 30, 2002
KitMaker: 8,581 posts
AeroScale: 4,913 posts
Posted: Monday, October 29, 2012 - 08:11 PM UTC
Hi Luciano,
Are you building the Jet or prop version? Does Hasegawa do a Jet version? I know that Zoukei-Maru are planning a 1/48 version, there may be a Jet engine available for it?

Thanks Jesper, I will try and get more photos up today
Littorio
_VISITCOMMUNITY
England - South East, United Kingdom
Joined: September 15, 2004
KitMaker: 4,728 posts
AeroScale: 1,351 posts
Posted: Tuesday, October 30, 2012 - 08:23 AM UTC

Quoted Text

Hi Luciano,
Are you building the Jet or prop version? Does Hasegawa do a Jet version? I know that Zoukei-Maru are planning a 1/48 version, there may be a Jet engine available for it?

Mal, Hasegawa do or did the jet version which is their prop kit with a resin conversion included. I think I may try and pick up the prop version as well.
Merlin
Staff MemberSenior Editor
AEROSCALE
#017
_VISITCOMMUNITY
United Kingdom
Joined: June 11, 2003
KitMaker: 17,582 posts
AeroScale: 12,795 posts
Posted: Tuesday, October 30, 2012 - 10:24 AM UTC
Hi Mal

Lovely job, as usual!


Quoted Text

Does Hasegawa do a Jet version?


Shame on you though for not ready our own review of that kit... https://aeroscale.kitmaker.net/review/3938

Incidentally, did you take photos of the early construction too? - this would make a great full-build article...

All the best

Rowan
Holdfast
Staff MemberPresident
IPMS-UK KITMAKER BRANCH
#056
_VISITCOMMUNITY
England - South West, United Kingdom
Joined: September 30, 2002
KitMaker: 8,581 posts
AeroScale: 4,913 posts
Posted: Tuesday, October 30, 2012 - 06:51 PM UTC
Ooops, my bad Rowan A lovely review as usual.


Quoted Text

Incidentally, did you take photos of the early construction too? - this would make a great full-build article...


Unfortunately not! To be honest I didn't think because I had to just get my head down and get it finished. Because I rushed it I caused myself some fit problems (I think that's why I had some fit problems), so a build article which highlighted those may not be fair on ZM. I'll send in some pics of the finished item though and, if I can find the time, write an article about the painting of the markings?
Holdfast
Staff MemberPresident
IPMS-UK KITMAKER BRANCH
#056
_VISITCOMMUNITY
England - South West, United Kingdom
Joined: September 30, 2002
KitMaker: 8,581 posts
AeroScale: 4,913 posts
Posted: Tuesday, October 30, 2012 - 07:19 PM UTC
The red unmasked:


When I removed the masking for the port wing Hinomaru a portion of the white paint lifted, which also meant that the Hinomaru was damaged as well! In the next 2 pics I have sanded back the edge and cleaned up the area with white spirit, which cut the red of the Hinomaru but left the white intact.


I'm quite chuffed at how the Japanese script came out for the "No Walk" "No push" areas


As the white spirit seemed not to affect the white (Humbrol thinned with cellulose thinner) I bit the bullet and removed the whole of the port Hinomaru.

Holdfast
Staff MemberPresident
IPMS-UK KITMAKER BRANCH
#056
_VISITCOMMUNITY
England - South West, United Kingdom
Joined: September 30, 2002
KitMaker: 8,581 posts
AeroScale: 4,913 posts
Posted: Thursday, November 01, 2012 - 07:21 PM UTC
The blue areas masked, first off the unit emblem.


Chevrons on the intake bulges.


The lightning flash on the nose is weeded, but the Hinomaru needs re-instating.


The Hinomaru mask need to be re-placed accurately so wet the surface and it will slide into position; much easier than trying to position it dry


Perfectly positioned.


Masking tape is used around the miracle masks to prevent overspray and the blue is painted.


Holdfast
Staff MemberPresident
IPMS-UK KITMAKER BRANCH
#056
_VISITCOMMUNITY
England - South West, United Kingdom
Joined: September 30, 2002
KitMaker: 8,581 posts
AeroScale: 4,913 posts
Posted: Saturday, November 03, 2012 - 08:58 PM UTC
The blue areas revealed:


The second part of the kill markings had to be painted separately, the second part of the mask is accurately positioned within the positioning box (left after the first part was painted.


This came out really well, for such a small, 2 part, mask
chukw1
_VISITCOMMUNITY
California, United States
Joined: November 28, 2007
KitMaker: 817 posts
AeroScale: 729 posts
Posted: Sunday, November 04, 2012 - 06:21 AM UTC
Fantastic! My mind is boggled with the possibilities.
 _GOTOTOP