_GOTOBOTTOM
Early Aviation
Discuss World War I and the early years of aviation thru 1934.
WNW E.III (The Duelists) Kornbeef's attempt
Kornbeef
_VISITCOMMUNITY
England - South East, United Kingdom
Joined: November 06, 2005
KitMaker: 1,667 posts
AeroScale: 1,551 posts
Posted: Friday, November 16, 2012 - 11:53 PM UTC
Well, I meant to post progress pics but never took any. Camera and time constraints.

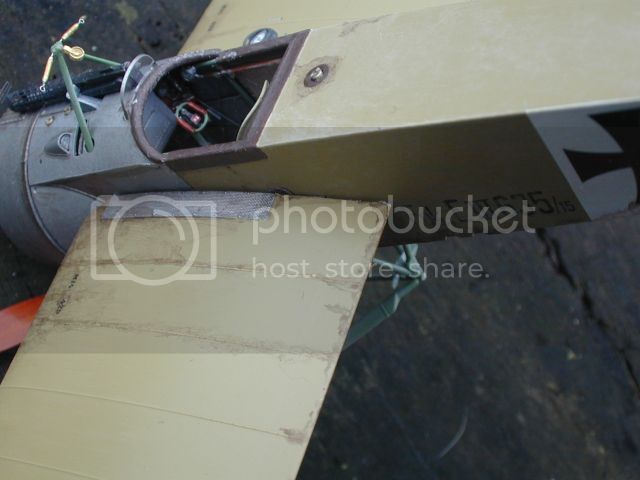
So now she isnt as built as the pics indicate. Wings, rudder and cowl at dry fitted.

My findings... There are a few points I thought WNW could have handled better but overall it's an impressive feat of egineering, tightly fitted engineering in places so be warned. WNW tolerances apply.

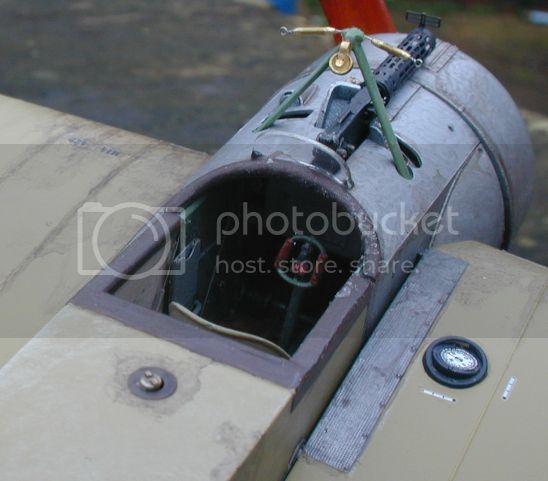
Downs are few: detail on the fuel control panel seems soft. I would have prefered the lower mount for the rudder bar assembly to be seperate from the front panel. The compass could have been moulded as a seperate item, I know it doesnt affect this build but the earlier E.III's need it removed from the wing risking damage to the detail nearby.
Basically thats the downers done.

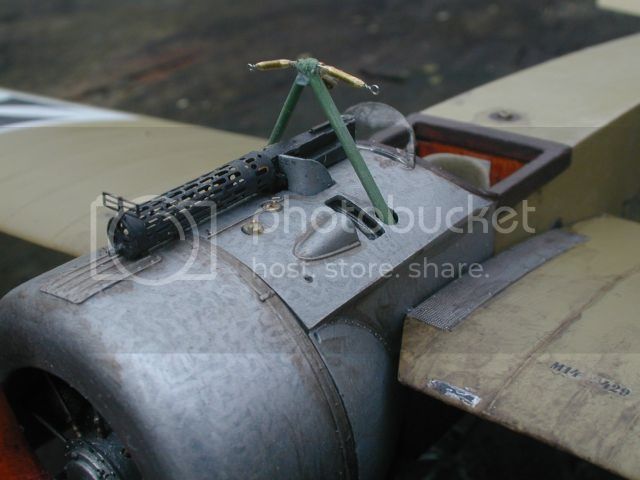
Uppers: Some wonderfully thought out solutions to this planes eccentricities.

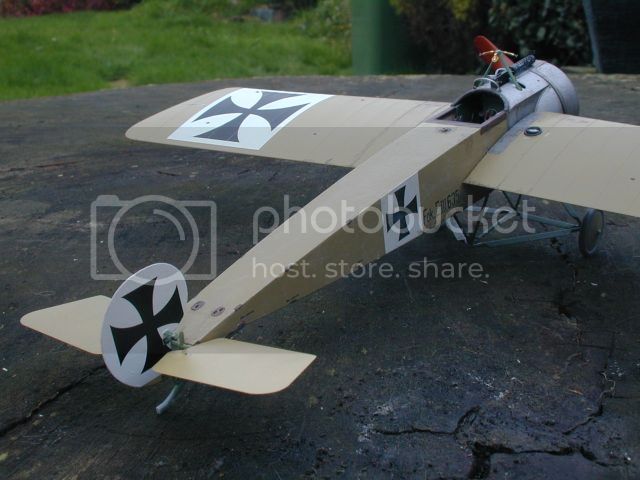
So a brief buld blog. All pretty much OOB so far apart from cutting the lower rudderbar mountings away from the floor and thinning them, adding a couple of pipes that are hardly visible. building up the guage on the fuelcontrol panel and replacing the hand fuel pressure pump pipe with copper wire. I added a map folder from a spare from some PE and have a few other small mods planned, Seatbelts and such have yet to be done.

The tail assembly is really femer, I've bent it twice while handling, I thing brass rod strengthenig is going to be a must here... For me at least.

Anyway, pics.


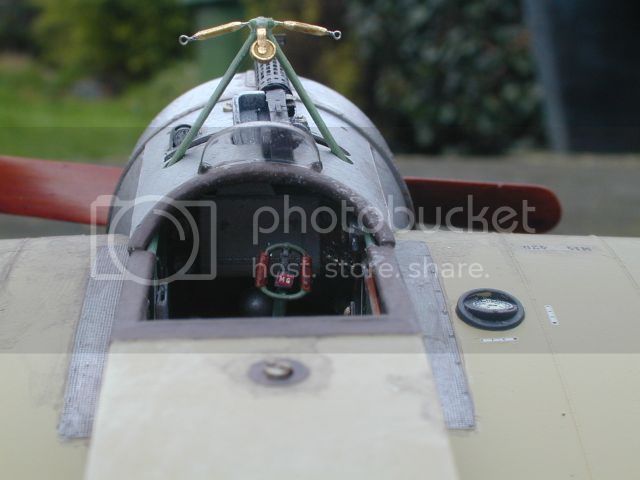
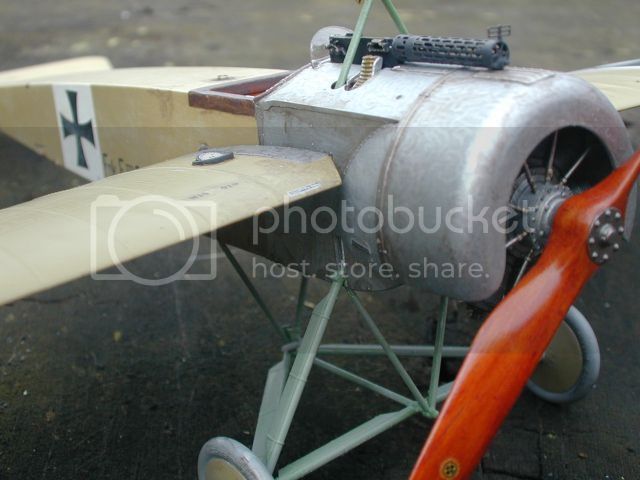
Yes theres a pushrod and rocker asembly adrift, I put it somewhere*coughs* safe... along with the small rod under the cockpit side that snapped off ..


As always comments, advice etc are always welcome

Keith
thegirl
_VISITCOMMUNITY
Alberta, Canada
Joined: January 19, 2008
KitMaker: 6,743 posts
AeroScale: 6,151 posts
Posted: Saturday, November 17, 2012 - 08:44 AM UTC
I do like your CDL effect , looks like you have some silvering with some of the decals


How does the wing mount to the fuselage and is there enough strenght in this area with out having to add pins ? Must say though , this is one of your quicker builds !


Terri
stugiiif
_VISITCOMMUNITY
Virginia, United States
Joined: December 13, 2002
KitMaker: 1,434 posts
AeroScale: 403 posts
Posted: Saturday, November 17, 2012 - 11:26 AM UTC
The wing root is firm and slides into the cockpit assemble behind the seat and has smaller pins to help with alignment. All in all it's very well engineered.
Kornbeef
_VISITCOMMUNITY
England - South East, United Kingdom
Joined: November 06, 2005
KitMaker: 1,667 posts
AeroScale: 1,551 posts
Posted: Saturday, November 17, 2012 - 01:00 PM UTC

Quoted Text

I do like your CDL effect , looks like you have some silvering with some of the decals


How does the wing mount to the fuselage and is there enough strenght in this area with out having to add pins ? Must say though , this is one of your quicker builds !


Terri

CDL... No its Focker beige, apparently all but a few Eindeckers were finished in opaque dopes Terri. Yes theres a few silvering issues that strangely didnt show their ugly little heads till the mattcoat went on..

Zey Vill Be dealt vith very harshly!

Keith
OEFFAG_153
_VISITCOMMUNITY
Västra Götaland, Sweden
Joined: February 19, 2010
KitMaker: 1,473 posts
AeroScale: 1,450 posts
Posted: Sunday, November 18, 2012 - 03:33 AM UTC
My oh my you have been busy at your hobby desk lately Keith Its looking very nice indeed!

What was your take on the fokker squiggles? I really like it!

Mikael
Kornbeef
_VISITCOMMUNITY
England - South East, United Kingdom
Joined: November 06, 2005
KitMaker: 1,667 posts
AeroScale: 1,551 posts
Posted: Sunday, November 18, 2012 - 04:10 AM UTC
Mikael, after picking others idea's and tossing them around I settled on a dark/meduim grey base coat, the sworls were painted with a fine bush in Citadel Mythril Silver which is very bright. After a coat of Klear I overbrushed with a drybrush of Citadel Runefang Steel which tones down the Mythril and metalises the grey. Its not difficult with practice.... thankfully its not like machined finish as on Camels etc.

Keith
Merlin
Staff MemberSenior Editor
AEROSCALE
#017
_VISITCOMMUNITY
United Kingdom
Joined: June 11, 2003
KitMaker: 17,582 posts
AeroScale: 12,795 posts
Posted: Sunday, November 18, 2012 - 10:08 PM UTC
Hi Keith

Great build! I love the stained fabric and sworled effect on the metal panels.

Despite WNW's clever engineering, it does look like the wings have a tendency to sag (but the rigging might sort that out) - I'll maybe add an extra tensioner to the spars when I tackle my kit.

All the best

Rowan
stugiiif
_VISITCOMMUNITY
Virginia, United States
Joined: December 13, 2002
KitMaker: 1,434 posts
AeroScale: 403 posts
Posted: Monday, November 19, 2012 - 02:21 AM UTC
Rowan, that does appear to be the right angle of the wings. There is a box behind the cockpit and it is what the spars firmly slide into. There is also a smaller tab on the forward wing that passes throught the fuselage and into a small slot on the cockpit sidewalls. This joint seems to be very well engineered. The only thing I can see is is slight gap in the in the forward wing root on Keiths build, but I doubt that would have caused any significant drooping to occur. My suggestion would be to leave off part H3, the upper fuselge, until the wings are attached to ensure the forward tab and wing root sit snuggly against the Metal Fuselage area and then to clamp or tape the area to ensure all the tabs are seated and the joint is tight while the glue dries.

I really didn't want to say anything negative. Keith is better at the Stringy things than I'll every be. Beautiful Eindeker sir!!
Kornbeef
_VISITCOMMUNITY
England - South East, United Kingdom
Joined: November 06, 2005
KitMaker: 1,667 posts
AeroScale: 1,551 posts
Posted: Monday, November 19, 2012 - 03:33 AM UTC
Steve/Rowan

Thanks for the feedback.
Don't worry about saying anything, if somethings wrong or such I like to know....

Yes the wings do tend to sag a little but, theyre only dry fitted at the mo, I'm going to rig the undercarriage etc before fixing them properly. I'll do as Ray Rimmel advises and keep them under a little force by letting the whole thing set off over the corner of a box, or maybe paint jars.

Yes the rigging will pull them into shape too but the less it needs to the better.

One tiny thing I'd recommend though, paint the rear main stub dark as it shows even when snugly fitted to the fuselage, the dark paint camoes it in the shadow.

Keith

 _GOTOTOP