1:32 WNW Fokker E.II (Early)
Östergötland, Sweden
Joined: April 04, 2006
KitMaker: 1,058 posts
AeroScale: 1,004 posts
Posted: Sunday, December 02, 2012 - 12:43 AM UTC
Long time since I posted anything here, I never stopped the hobby but I discovered that the computer modeling toke me more time than the accrual build models. So nowadays there´s more modeling and less surfing for me. But for a moment I was in for a change in my way to build and just took the camera with me upstairs, so here´s what I´m doing now.
Just started up the very nicely Fokker EII kit last week and the interior is almost finished, used Tamyia´s and humbrols with some oils for the finish, also I replaced the kits etched belt´s for a set from Radub Production´s. He’s belt I far away better than what’s supplied in the kit.


I used Gold-zack thread and hot streched Q-tips for turnbuckles and added some safty belts for the rudderstick from plasticards. Still there´s the decals to put into the interior so next thing is to build up that awesome engine and getting on with the outside.


LarsaQ
Arizona, United States
Joined: December 12, 2008
KitMaker: 1,423 posts
AeroScale: 1,319 posts
Posted: Monday, December 03, 2012 - 03:53 AM UTC
Hello Larsa Q:
Good to see you back in the modeling "Saddle": Looks like you are making good progress. I always liked you work, it looks clean and orderly and this is no exception. I will be getting this kit at some time and will be referring to your build for pointers.
Best
Mark
We few, we happy few........
Västra Götaland, Sweden
Joined: February 19, 2010
KitMaker: 1,473 posts
AeroScale: 1,450 posts
Posted: Monday, December 03, 2012 - 09:50 PM UTC
Nice one Larsa!
I'm waiting for the post to deliver me mine.
Look forward to following your build!
Mikael
_________________________________________________________
Just finished the Wingnut Wings Taube. On to the Junkers D.1
Östergötland, Sweden
Joined: April 04, 2006
KitMaker: 1,058 posts
AeroScale: 1,004 posts
Posted: Tuesday, December 04, 2012 - 07:20 PM UTC
Thanks Guys,
Updates coming this way as the work progress.
LarsaQ
Östergötland, Sweden
Joined: April 04, 2006
KitMaker: 1,058 posts
AeroScale: 1,004 posts
Posted: Tuesday, December 04, 2012 - 11:47 PM UTC
Hi
Next update is here,the interior is done to the last decal and just need a little dash of satin varnish to be totally finished.

Also had my first atempt to get the aluplates painted, so I started with Tamyia´s silver with a drop off black(Just to get some shades in the silver)Then the doodles was painted in fresh silver.

So the engine just need some wiring to get done.

LarsaQ
Östergötland, Sweden
Joined: April 04, 2006
KitMaker: 1,058 posts
AeroScale: 1,004 posts
Posted: Sunday, December 23, 2012 - 11:20 PM UTC
Merry Chgristmas folks, here´s an update on the Fokkerbuild.It´s time for some paint to do on. The basecolour is Tamyias flat grey.All ribs are masked and ready for shadings.

The shadings are done with flat black and brown from the Tamyias range.

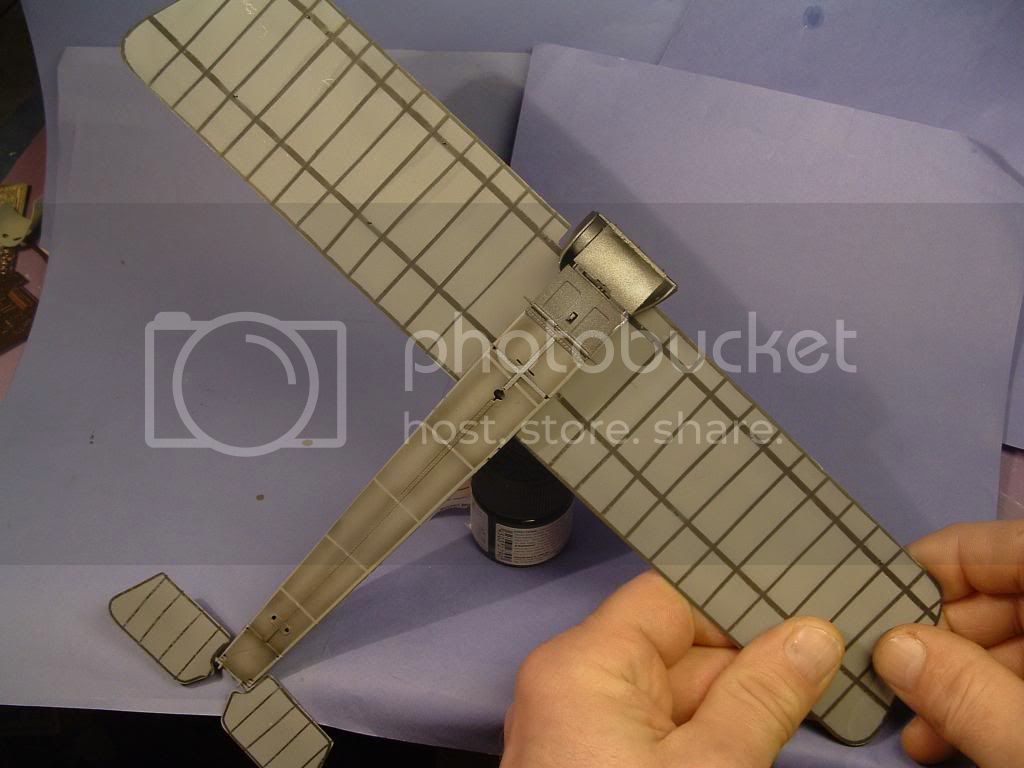
The dooped linnen are mixed from xf60, flat black and brown. Finally I added some touches with some white mixed in to the colour and shaded the wingtips.
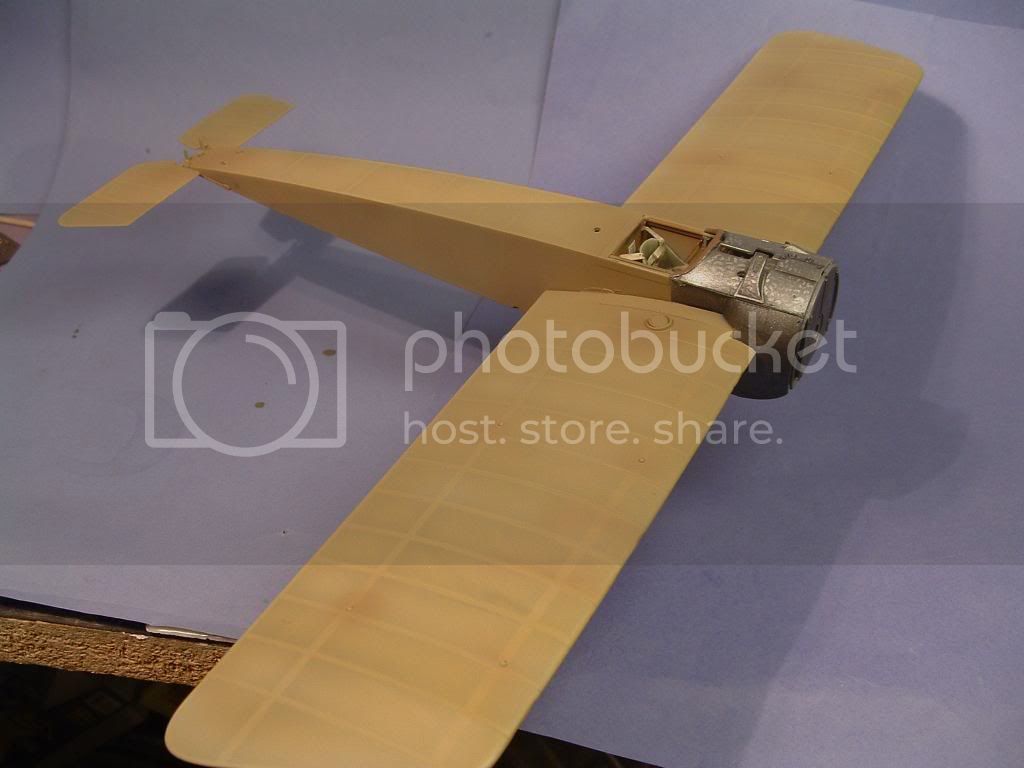

Now I´m of for the holiday with my family, so I wich u a merry Christmas
LarsaQ
Arizona, United States
Joined: December 12, 2008
KitMaker: 1,423 posts
AeroScale: 1,319 posts
Posted: Monday, December 24, 2012 - 03:20 AM UTC
Hello and Merry Christmas Lars:
This is coming along quite nicely. Your interior work is nicely done especially the belts. I will have to give those fabric belts another go.
Looking forward to more as you progress.
Best
Mark
We few, we happy few........
Alberta, Canada
Joined: July 26, 2010
KitMaker: 1,032 posts
AeroScale: 1,025 posts
Posted: Monday, December 24, 2012 - 08:46 AM UTC
Lars,
Coming along very nicely. The interior is top notch, I really like the way the belts compliment the work and the metal panels are brilliant. Very effective shading as well, looking forward to your next progress report. Glad to see you active again!
Cheers,
Lance
Officially Retired as of 20 August 2013 and looking forward to some un-interrupted bench time. Currently starting Roden's Nieuport 28 and hoping to follow that with another WNW Fokker DVII.
Östergötland, Sweden
Joined: April 04, 2006
KitMaker: 1,058 posts
AeroScale: 1,004 posts
Posted: Thursday, December 27, 2012 - 08:11 AM UTC
Quoted Text
Lars,
Coming along very nicely. The interior is top notch, I really like the way the belts compliment the work and the metal panels are brilliant. Very effective shading as well, looking forward to your next progress report. Glad to see you active again!
Cheers,
Lance
Thanks Lance
soon time for a new update and hoping to get this done before the Hannover hitting my mailbox

LarsaQ
England - South East, United Kingdom
Joined: November 06, 2005
KitMaker: 1,667 posts
AeroScale: 1,551 posts
Posted: Friday, December 28, 2012 - 10:58 AM UTC
Quoted Text
Quoted Text
Lars,
Coming along very nicely. The interior is top notch, I really like the way the belts compliment the work and the metal panels are brilliant. Very effective shading as well, looking forward to your next progress report. Glad to see you active again!
Cheers,
Lance
Thanks Lance
soon time for a new update and hoping to get this done before the Hannover hitting my mailbox 
LarsaQ
Lars.... The Hannover is wonderful.

Still can't cure the AMS even with sausage finger implants & olde eyes.
Östergötland, Sweden
Joined: April 04, 2006
KitMaker: 1,058 posts
AeroScale: 1,004 posts
Posted: Monday, January 07, 2013 - 04:52 AM UTC
Hi almost time for rigging this lovley bird.Just some small stuff to finish off before I´ll start up the spider.
Final cote of postshadings done and the final bits will be in place. Yep the compass in still there and I did not have the heart to grind it away so I let it stay,just love that position.
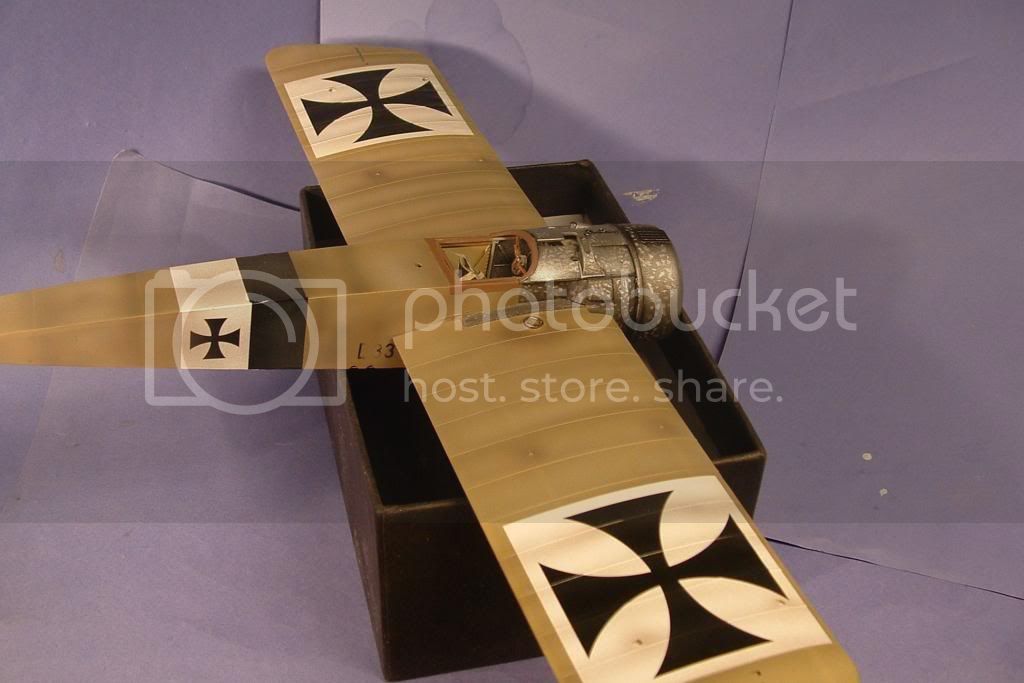
I used Tamiys black and flat earth for the shadings off the dooped, just to give a little bit more personality.
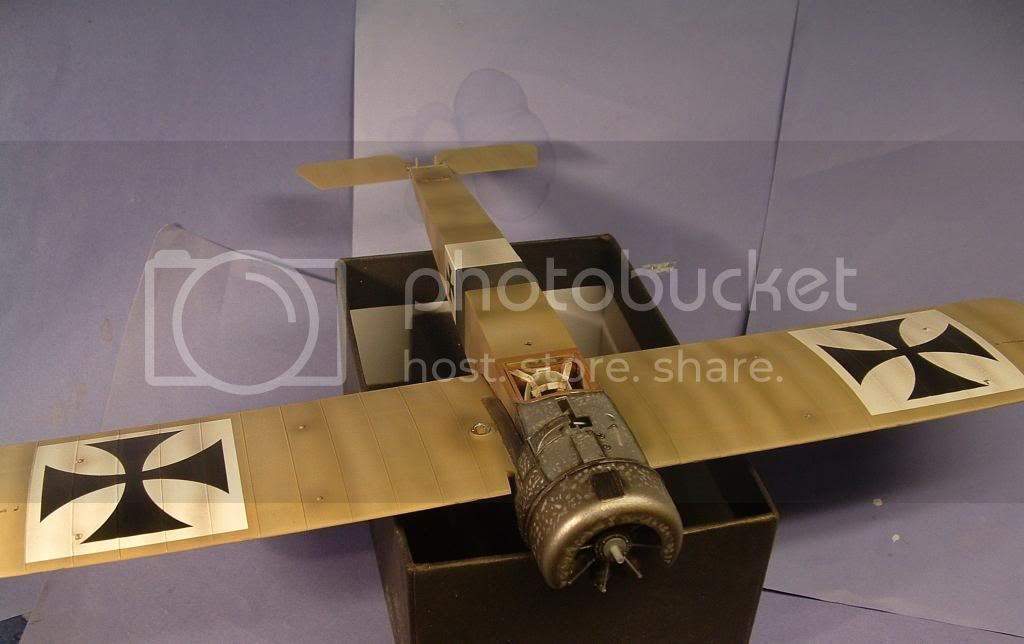
The landinggear went on without any troubble or break.And tha last bits are in place.
So before rigging it´s looking like this.
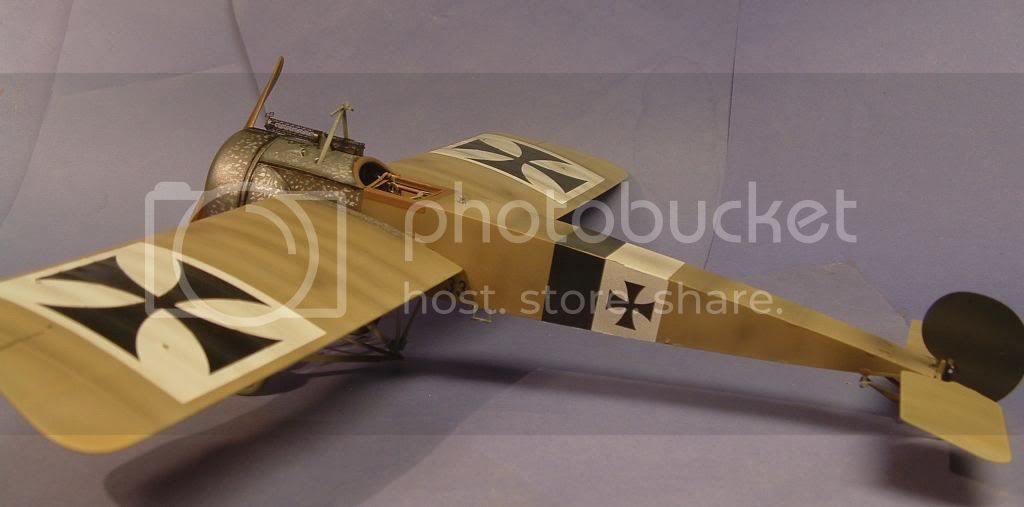
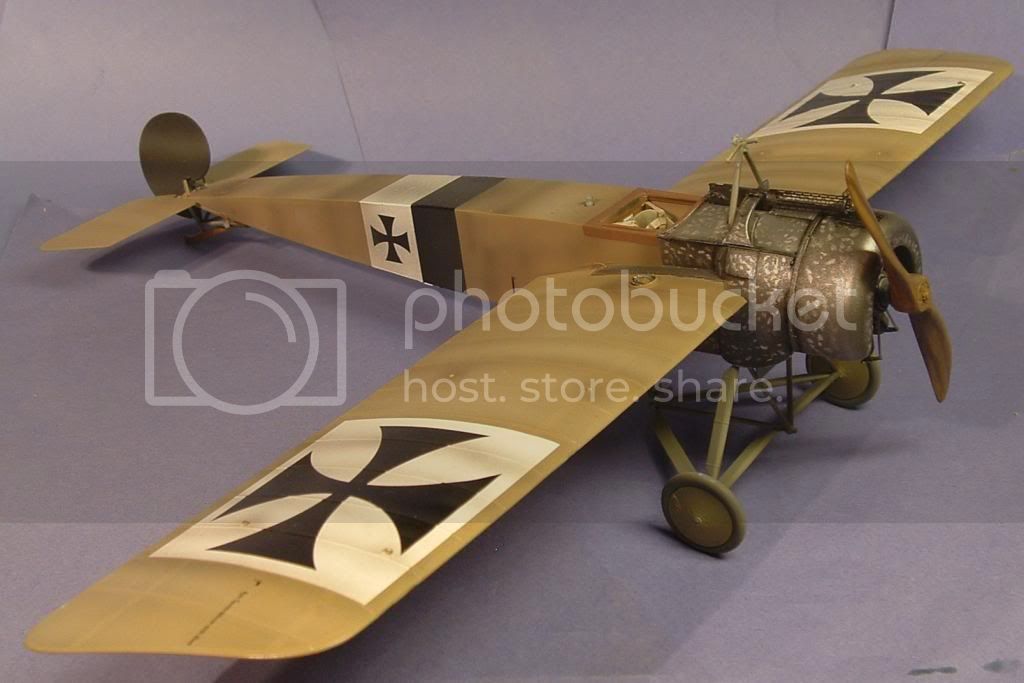
And still no Hannover in the mailbox.
LarsaQ
Arizona, United States
Joined: December 12, 2008
KitMaker: 1,423 posts
AeroScale: 1,319 posts
Posted: Monday, January 07, 2013 - 07:47 AM UTC
Hello Lars:
You have really made some progress here. The preshading is definately first rate, has a nice weathered look to it. The "sworls" are nice as well. I am looking forward to the rigging portion of this.
Best wishes for the new year.
Best
Mark
We few, we happy few........
South Australia, Australia
Joined: August 14, 2007
KitMaker: 5,926 posts
AeroScale: 2,201 posts
Posted: Monday, January 07, 2013 - 08:05 AM UTC
Looking great Lars.
I am afraid that when I was in the RAAF and I had walked out and seen any of MY aircraft looking like a dirty car I would have had troops out there cleaning very soon. But I suppose we didn't operate from grass/mud strips very much.

I have an idea how I am going to replicate the machine finish on my E.II if and when I take a break from ships.
Keep up the great work mate. Looking fantastic so far.
Cheers
Warren
You may be right, I may be crazy.
Västra Götaland, Sweden
Joined: February 19, 2010
KitMaker: 1,473 posts
AeroScale: 1,450 posts
Posted: Monday, January 07, 2013 - 08:10 PM UTC
Beautiful Larsa my freind!
She is coming together in a great way – looking forward to more!
Hälsningar
Mikael
_________________________________________________________
Just finished the Wingnut Wings Taube. On to the Junkers D.1
Östergötland, Sweden
Joined: April 04, 2006
KitMaker: 1,058 posts
AeroScale: 1,004 posts
Posted: Tuesday, January 15, 2013 - 11:09 PM UTC
Hi
Started up the rigging, this time I´ll goes for the Albion micro tubes for the first time, have used hot stretched Q-tips before but not that satisfied be the result with the uneven tubes that comes from Q-tips.So 0,5 mm brass microtubes are used here for the first time. The tubes been cut to 3mm length and 0,15 wire are used for the tiny loops. Yep this going to take more time than I thought, but the result is far better than the Q-tips.

I had to fix a jig for cutting the thin tubes straight.
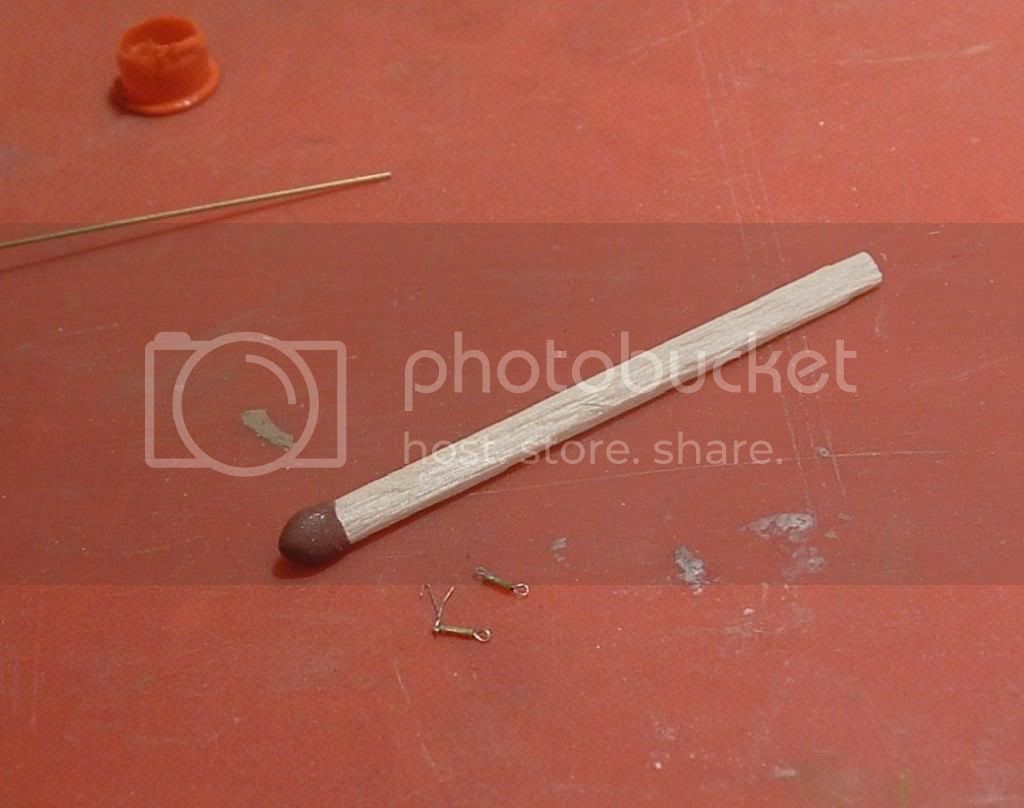
Here´s the tiny turnbuckles and there´s plenty to go from here.
Meantime I started up a wooden displaybase for the Fokker, planning a order for a figure from modelcellar to finish it all off.
LarsaQ
Östergötland, Sweden
Joined: April 04, 2006
KitMaker: 1,058 posts
AeroScale: 1,004 posts
Posted: Saturday, January 26, 2013 - 12:19 AM UTC
Hi folks
This is the first for this year, No pilot yet but things are going well with the sculpting and this is no forum for figures, so I give you pics off my Fokker EII from Wingnuts. All OOB except the seatbelts from Radubs(Fine stuff well recommended).
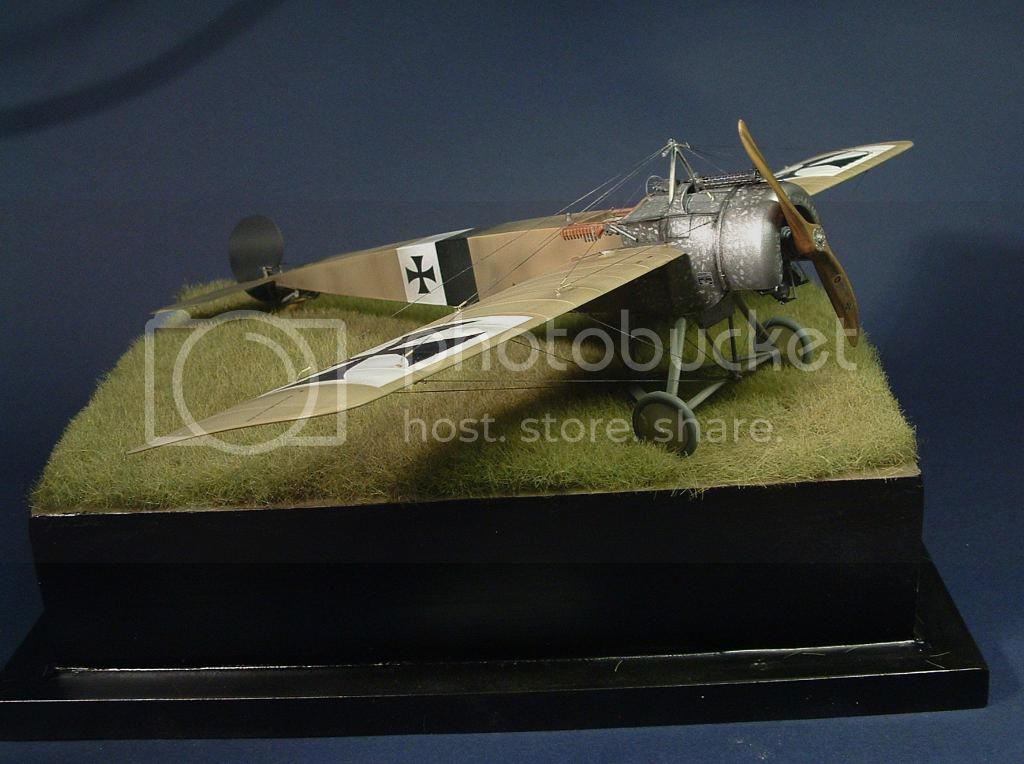
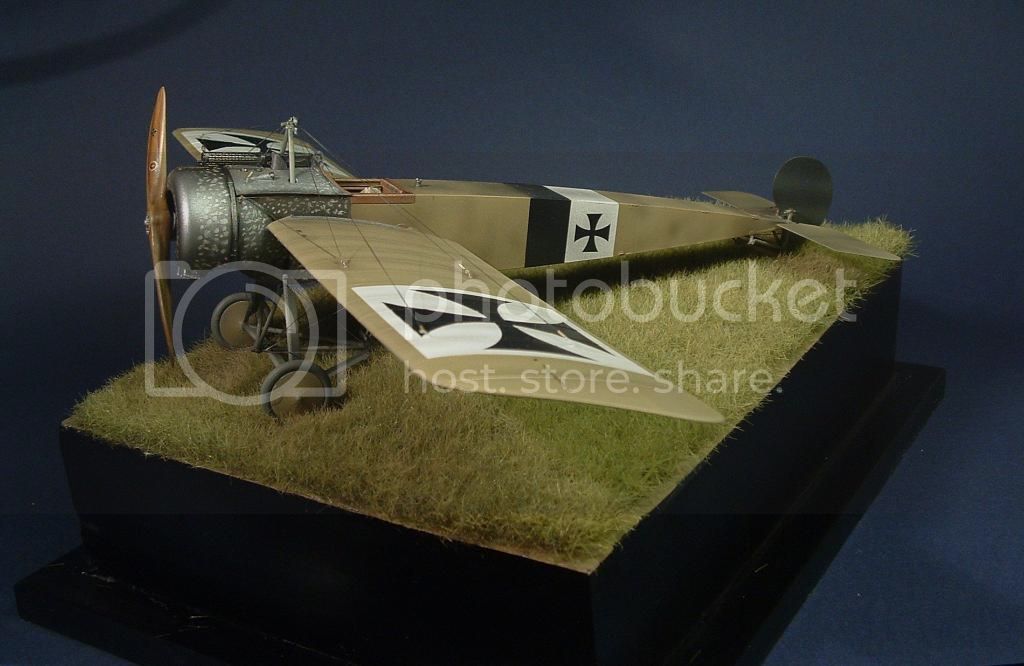
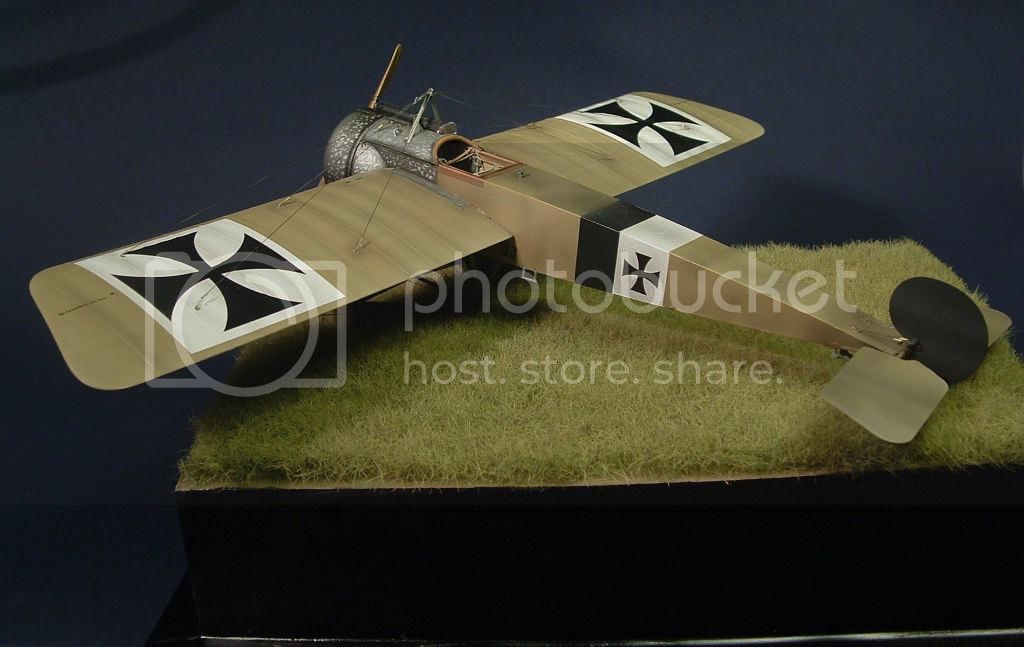

LarsaQ
Alberta, Canada
Joined: January 19, 2008
KitMaker: 6,743 posts
AeroScale: 6,151 posts
Posted: Saturday, January 26, 2013 - 03:38 PM UTC
I see you didn't lose your magical touch Lars

Terri
West Virginia, United States
Joined: December 18, 2006
KitMaker: 1,121 posts
AeroScale: 1,063 posts
Posted: Saturday, January 26, 2013 - 03:44 PM UTC
Östergötland, Sweden
Joined: April 04, 2006
KitMaker: 1,058 posts
AeroScale: 1,004 posts
Posted: Saturday, January 26, 2013 - 07:31 PM UTC
Thanks guys.This one almost glue itself together and it's the first build with almost only Tamyia paint.Now when I'm having the paints stirred up will start up the Hannover tonight.
Regards
LarsaQ
Västra Götaland, Sweden
Joined: February 19, 2010
KitMaker: 1,473 posts
AeroScale: 1,450 posts
Posted: Saturday, January 26, 2013 - 09:44 PM UTC
Lovely bird Larsa, good to see you back in form! Looking forward to your take of the Hannover!
Simma lungt
Mikael

_________________________________________________________
Just finished the Wingnut Wings Taube. On to the Junkers D.1
Östergötland, Sweden
Joined: April 04, 2006
KitMaker: 1,058 posts
AeroScale: 1,004 posts
Posted: Saturday, January 26, 2013 - 10:15 PM UTC
Tackar Micke/Thanks Micke
The Hannover will be something to take on, yep and this Hannover is one off my favorites so I´m guessing that I´m already in the box tonight...so pics will come this way....
LarsaQ
Alberta, Canada
Joined: July 26, 2010
KitMaker: 1,032 posts
AeroScale: 1,025 posts
Posted: Sunday, January 27, 2013 - 04:19 AM UTC
Lars,
You certainly have not lost your ability to turn out great results; beautiful Model! Look forward to seeing your next, and congratulations again on a great Build.
Cheers,
Lance

Officially Retired as of 20 August 2013 and looking forward to some un-interrupted bench time. Currently starting Roden's Nieuport 28 and hoping to follow that with another WNW Fokker DVII.
Östergötland, Sweden
Joined: April 04, 2006
KitMaker: 1,058 posts
AeroScale: 1,004 posts
Posted: Sunday, January 27, 2013 - 04:54 AM UTC
Quoted Text
Lars,
You certainly have not lost your ability to turn out great results; beautiful Model! Look forward to seeing your next, and congratulations again on a great Build.
Cheers,
Lance 
Thanks for your kind words Lance.Just got the Hannover tonight and will open it with a good cup of coffey, just to check it out. Have allready got in to next kit and this time it´s an allied machine, FE.2b late.A real gem and as inspiration for the build I´m checking in Mikael´s build time to time, this time I´ve have him infront off me

Mikael is a source off inspiration for everybody...
LarsaQ
Arizona, United States
Joined: December 12, 2008
KitMaker: 1,423 posts
AeroScale: 1,319 posts
Posted: Sunday, January 27, 2013 - 07:08 AM UTC
This really turned out nice Larsa: As has been mentioned, good to see you back at it, and a great result to boot.
I finished my Hannover, be sure to install the upper wing radiator pipe after the engine is installed in the former before buttoning up the fuselage.
Until that time
Best
Mark
We few, we happy few........
Östergötland, Sweden
Joined: April 04, 2006
KitMaker: 1,058 posts
AeroScale: 1,004 posts
Posted: Sunday, January 27, 2013 - 07:15 AM UTC
Quoted Text
This really turned out nice Larsa: As has been mentioned, good to see you back at it, and a great result to boot.
I finished my Hannover, be sure to install the upper wing radiator pipe after the engine is installed in the former before buttoning up the fuselage.
Until that time
Best
Mark
Hi Mark and thanks both for your kind words and the headsup on the Hannover
LarsaQ


