Early Aviation
Discuss World War I and the early years of aviation thru 1934.
Hosted by Jim Starkweather
REVIEW
Hannover CL.IIJackFlash
Colorado, United States
Joined: January 25, 2004
KitMaker: 11,669 posts
AeroScale: 11,011 posts
Joined: January 25, 2004
KitMaker: 11,669 posts
AeroScale: 11,011 posts
Posted: Sunday, December 23, 2012 - 04:47 AM UTC
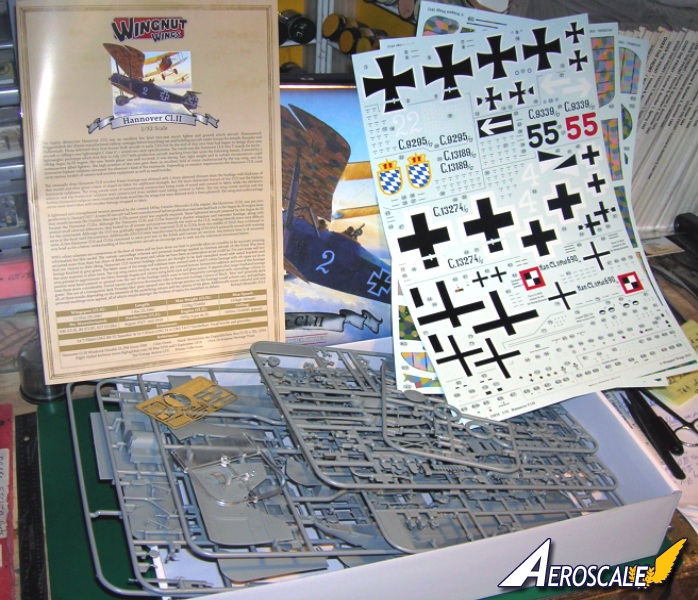
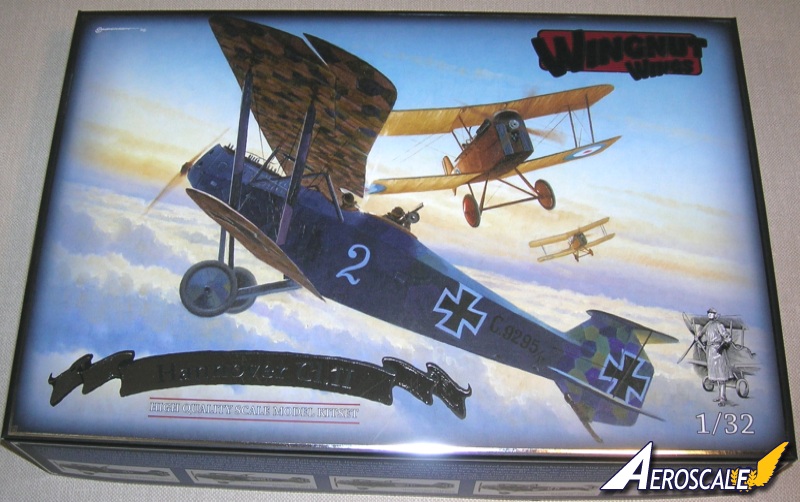
The Hannover CL type aircraft was the mainstay of Schustas and Schlachtstaffels for escort protection flights or ground attack - infantry support operations in 1917 18. Now Wingnut Wings gives us their 1:32 version of the CL.II. Lets have a look.
Link to Item
If you have comments or questions please post them here.
Thanks!
Posted: Monday, December 24, 2012 - 09:58 AM UTC
Hi Stephen
Wow! That does look SERIOUSLY tasty!
All the best
Rowan
Wow! That does look SERIOUSLY tasty!
All the best
Rowan
OEFFAG_153
Västra Götaland, Sweden
Joined: February 19, 2010
KitMaker: 1,473 posts
AeroScale: 1,450 posts
Joined: February 19, 2010
KitMaker: 1,473 posts
AeroScale: 1,450 posts
Posted: Tuesday, December 25, 2012 - 12:33 AM UTC
Quoted Text
Hi Stephen
Wow! That does look SERIOUSLY tasty!
All the best
Rowan
Im in total agreement – Veeerry tasty indeed!
Mikael
JackFlash
Colorado, United States
Joined: January 25, 2004
KitMaker: 11,669 posts
AeroScale: 11,011 posts
Joined: January 25, 2004
KitMaker: 11,669 posts
AeroScale: 11,011 posts
Posted: Wednesday, January 23, 2013 - 05:20 PM UTC
Our men "Kornbeef" & "McGunns" both comment.
". . .WNW seem to have got the aileron decals swapped over, the top has the gaps for the arm and cable point, the underside doesnt. Not a difficult fix given the spare lozenge ribtape included."
JackFlash
Colorado, United States
Joined: January 25, 2004
KitMaker: 11,669 posts
AeroScale: 11,011 posts
Joined: January 25, 2004
KitMaker: 11,669 posts
AeroScale: 11,011 posts
Posted: Wednesday, January 08, 2014 - 07:42 PM UTC
Another modeler has weighed in on his build.
"When I glued the fuse halves together, the tail area join was skewed by a fraction of a millimeter. However, with WNW's legendary tolerances, this totally threw off the angle of the stab slot. I had to gouge the slot out on one side and eyeball it into the correct angle.
Another was the radiator pipe that comes from the upper wing and goes all the way to the bottom of the engine sump. I snapped it off when trying to align it into its slot (of course, the fuse was already joined by this point). So I had to ream out two of the fuse bottom access ports, shine a bright light into one, and use the other to tweezer and glue the pipe end back into place. I really could have used a nurse mopping my brow during that "operation".
Third major muff-up was snapping off one of the wing strut connector points (KNEW that was gonna happen). I reattached it with a tiny length of .3mm piano wire. Greatly strengthened it, and it gave me some flexibility to work with while I tried to get the da*@n thing into the slot."
Posted: Wednesday, January 08, 2014 - 07:55 PM UTC
Hi Stephen
I hope you've chased them up to do a Feature for us - that does look superb!
All the best
Rowan
I hope you've chased them up to do a Feature for us - that does look superb!
All the best
Rowan
JackFlash
Colorado, United States
Joined: January 25, 2004
KitMaker: 11,669 posts
AeroScale: 11,011 posts
Joined: January 25, 2004
KitMaker: 11,669 posts
AeroScale: 11,011 posts
Posted: Thursday, January 09, 2014 - 02:44 PM UTC
As a matter of fact, he has expressed an interest in doing such a feature. He is traveling on a business trip at the moment but will get back to me in 24 hours. I also e-mailed him the link to our Features page and he seems properly chuffed.
StukaJr
California, United States
Joined: April 26, 2010
KitMaker: 346 posts
AeroScale: 292 posts
Joined: April 26, 2010
KitMaker: 346 posts
AeroScale: 292 posts
Posted: Friday, January 10, 2014 - 09:28 AM UTC
I have this kit in my build queue under "next" - it's certainly a big bang for your buck... There are not many kits that offer a "simple" scheme (Roland built) to hand painting lozenge + lozenge wings.
I'll be building option "A" - look towards mixing 4 and 5 color lozenge on lower and upper wing planes