Paints: Golden Fluid Acrylics; Vallejo Model Color; Coat d'arms
Weathering: Iwata/Medea Com.Art Real Deal Weathering Kit

I've never posted on this board before, but the build just completed took me to some places I've never been before and perhaps some others might be interested.
After spending nearly nine months doing ships and armor, I decided to do a serious aircraft. In the stash was an Accurate Miniatures 1/48 Avenger. A check of the boards showed some very good modelers consider the AM kits from the late 90's to be challenging but very good kits. Worth a try methinks, but there was one immediate problem: AM did several editions of the TBM and mine represented aircraft lost shortly after the war in the Bermuda Triangle. So here is what I was looking at:

The Avenger was one of the premier attack aircraft of WWII and I had no interest in doing a postwar build. I've also got a boat load of USN and USMC aircraft (and ships) that will all be wearing some kind of blue and gray uniform, so after some reading I decided to model a plane flying off the USS Bogue. Good history, no error. In mid-1943 the RN decisively turned the tide in the Battle of the Atlantic. The allies were putting together the pieces required to turn the U-boat arm into a suicide service with something like 75% of German crewmen perishing by war's end, making it the war's most dangerous duty. (A higher percentage of Kamikaze pilots survived simply because large numbers were saved for the American invasion of Kyushu that never came.) One of the last of the pieces was the creation of Hunter-Killer groups of escort aircraft carriers each accompanied by from 3 to 6 destroyers or corvettes. Armed with the best technology and guided by British code breakers these groups were viciously effective. Interestingly they were effective in different ways. The British were more interested in protecting convoys and were always wary that targeted attacks would alert Doenitz to the fact that Bletchley Park was reading his mail. The RN went to great lengths to make sure that any sub ambushed by aircraft knew it had been sighted (so it could report the fact) or was near a convoy and thus vulnerable to attack. In addition Fleet Air Arm got the lion's share of the UK's 900 Lend Lease Avengers to reequip their fleet carriers. A few went to Coastal Command where were used in the nasty war against German shipping in the North Sea. Thus RN kill groups relied on the redoubtable Swordfish which became a most effective weapon when fully fitted with radar and rockets in 1944. In general RN groups could be considered convoy escorts with extended teeth. The Americans wanted to kill German subs and its groups often operated far from convoys and would pursue any submarine sighted until sunk or lost a process often taking several days and involving several ships. The most successful US group was formed around the USS Bogue, a converted fast liberty ship. Killing their first boat in July 1943, Bogue and her escorts were credited with 12 submarine kills (two Japanese) with planes or escorts involved in the killing of five more. As Bogue usually carried about 12 Avengers and four FM-2 fighters, these are impressive totals. And the planes were given the gray and white Atlantic colors. Nobody could argue that the Avenger was a beautiful plane, but when hunting U-boats they were well dressed.
In the end the AM Avenger proved to be a splendid kit. However, anyone possessing an original AM had to build with very poor instructions a bad situation when dealing with a complex kit. Originally the AM web site had a photo build of their models that could act as an aid, but this went blank in about 2010. Fortunately for me, an Aeroscale modeler with the ID of hellvetier did a very good photo build that relied on the AM web page which proved invaluable. (Academy presently sells a rebox of the AM Avenger emulating a plane off the Bunker Hill. I learned yesterday that a Japanese site called Hobby Search has instructions for the new boxing on their site: http://www.1999.co.jp/eng/10035902. The instructions and decals are greatly improved, but the Academy kit lacks the very good canopy masks that came with the AM kit. Wish I would have had the new directions complete with photos of correctly assembled modules when I started.)
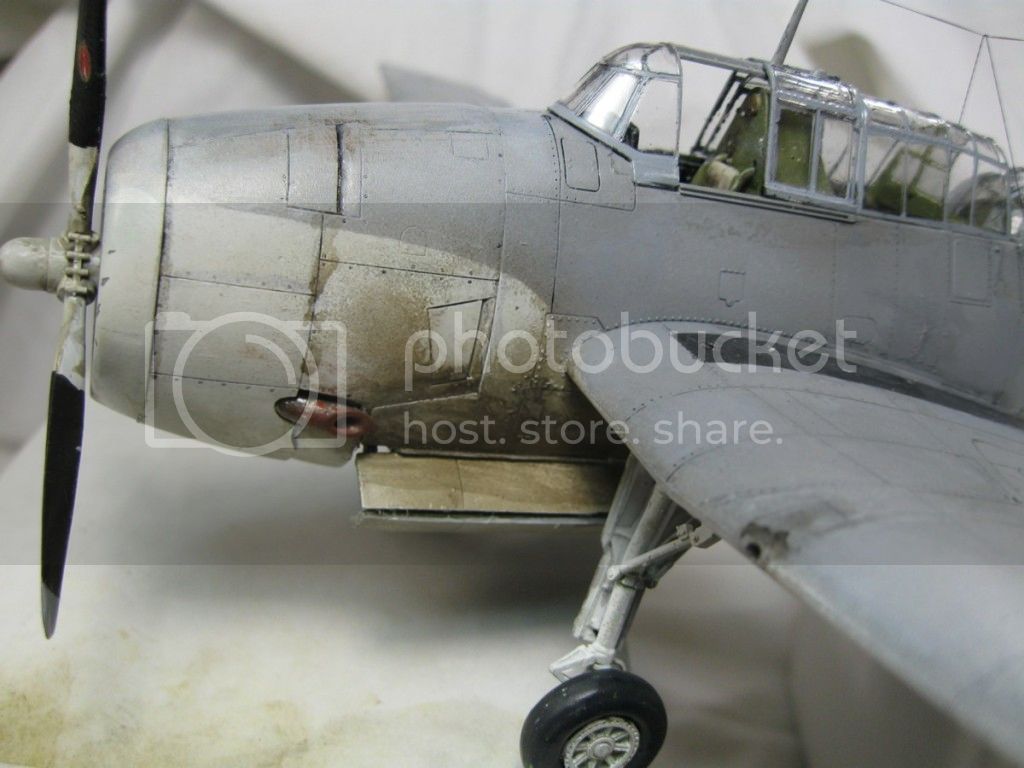
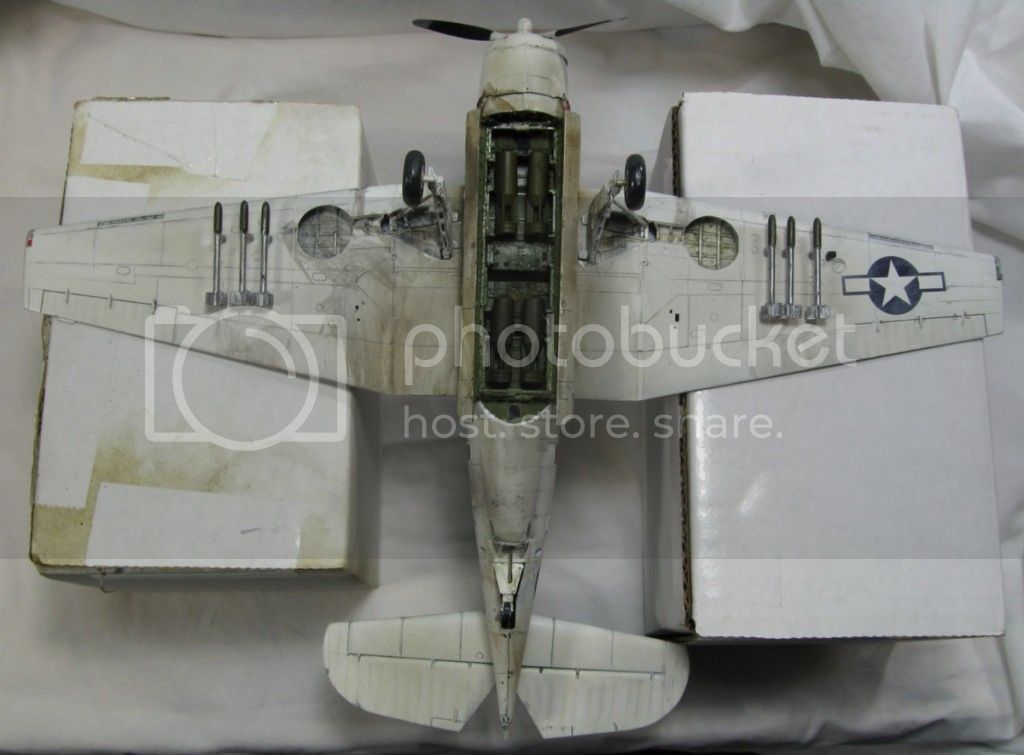
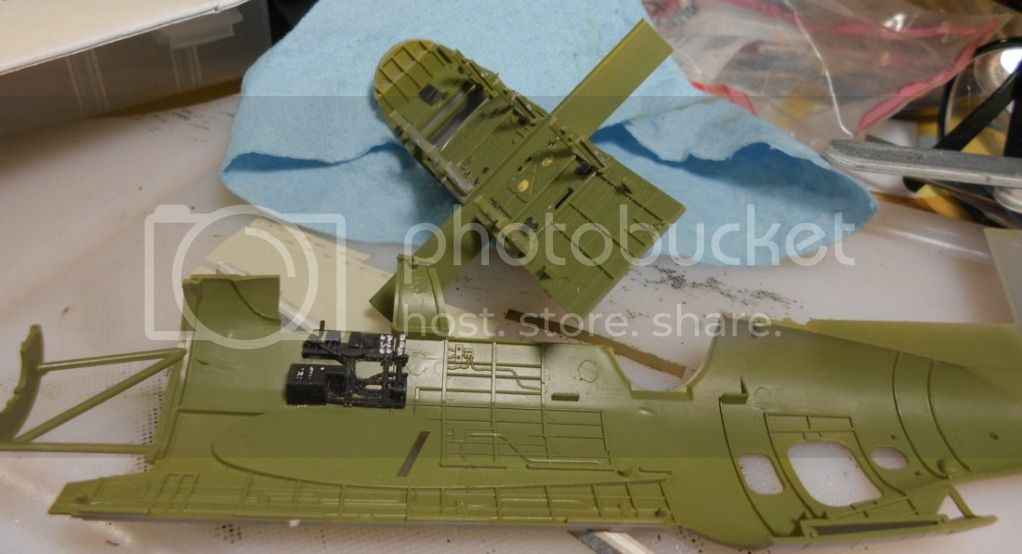
The AM kit looks good to my eyes regardless of era. It lacks PE but has a hefty part count, extremely well detailed molds and very crisp panel lines. For such a well engineered kit, the decent clear parts were hampered by overly thick sprue attachments. The build requires a modular approach indeed the instructions will often make a call on a task several steps before or behind in the build. There is a very elaborate interior of which only a little can be seen. The modeler is required to fit and align well as a mistake made in step one can come back to haunt you on step eight. Anyone who has built one of Eduard's kits will feel right at home, although for my money AM has better fit. I'm not an interior guy because my models don't go to contests and nobody sees the interior. But in the spirit of the build I spent some time there even made some seat belts. I created my own color and matched it to the excellent samples found in Robert Archer's opus on USAAF camouflage and colors which includes all naval aviation colors. As you can see it's closer to a green than a yellow. (Nerd alert: please skip if color squabbling bores you. Paint procurement was one issue that the US services collaborated on so ANA samples cover both. Each ANA wartime bulletin is reproduced via color sample by Archer. The book cost $50 and is 350 pages of military color squabbling but at least I've got a good idea of how every US aircraft was colored if not painted. Throw in the elusive US Army Olive Drab because the Army insisted that the AF adapt the GF version of OD which was done in April 43 (OD 613). Because the AF thought the color too light they used it on only a handful of planes before shifting to NMS a couple of months later. Figure that out: at least I have a sample of OD 613 the paint the GF used but the AF did not. As Archer notes, this means that most US aircraft modelers actually use the hue intended for AFVs and not the darker shade used in practice. As US armor guru points out Tamiya XF-62 Olive Drab fits OD 613 quite closely and is thus a good paint for armor. It is noticeably lighter than OD 41 which was actually used by the USAAF in WWII.) I applied a black/brown Vallejo acrylic wash and the first Medea Com.Art wash to give the interior the lived in look. The pics below show some of the complexity involved. Frankly I was surprised that in the end the sides fit together extremely well. The wings and tail went together flawlessly, the landing gear was tricky but worked and the clear parts aligned splendidly. Something went wrong somewhere, however, and surgery was required to seat the turret correctly and it is now static. I might add that the build was highlighted by a monumental blunder on my part that destroyed my first coat of paint and required some rough treatment to repair. That so little damage was ultimately done is testimony to the soundness of the kit. (I lost two clear parts which were replaced via scratch and a rocket which I left off. To atone for that sin I scratch built a small camera under one wing often shown in photos to record results from rocket attacks.)


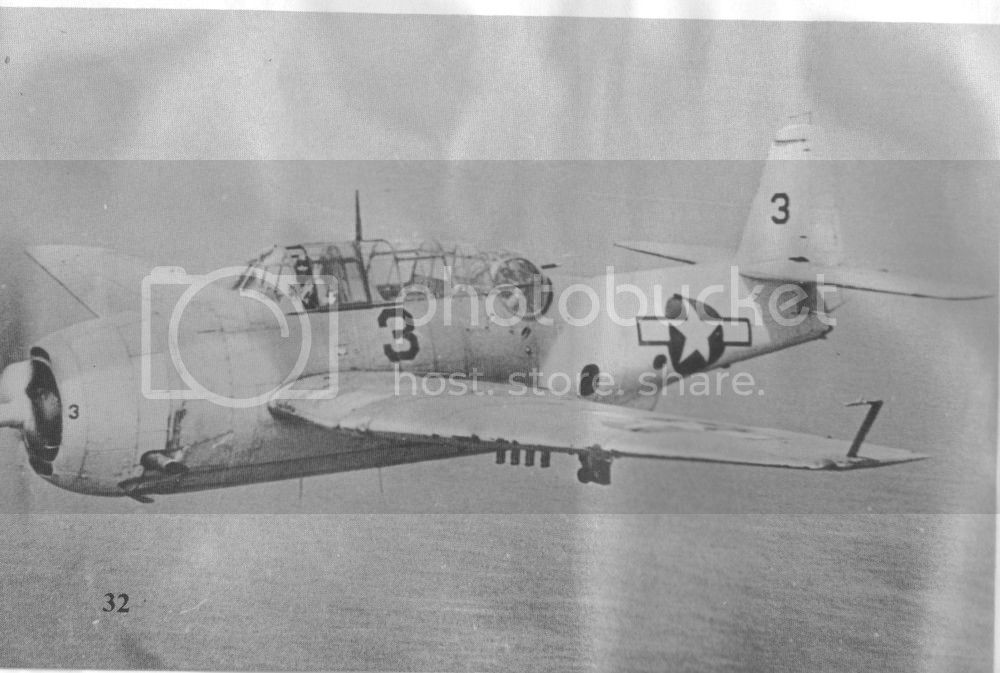
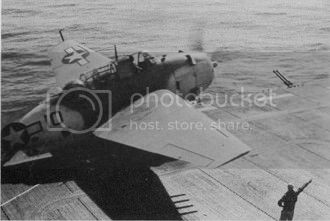
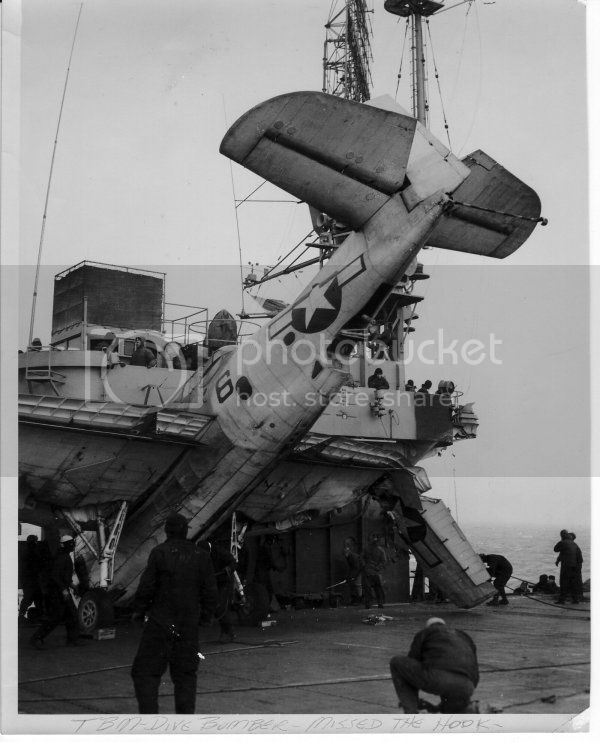
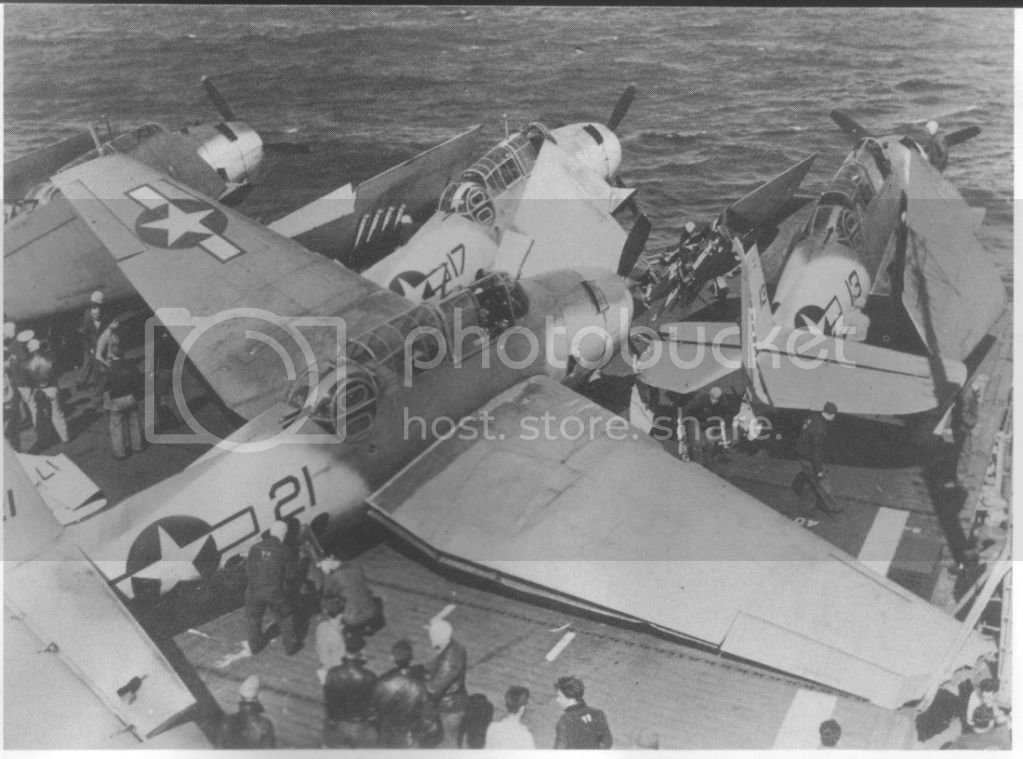
While building I was checking the net for Avenger photos preferably those flying with the killer groups. I also had a very good version in the Squadron series dealing with the Avenger. It took a lot of digging. Because the TBF/TBM was such a versatile and solid design it was in military and civilian use throughout the world long after WWII. (The Canadian government's agricultural department retired a TBM about three years ago: apparently the last working for its supper.) The result is that there are an unusual number of flying Avengers around the world all photographed in living color exactly the type of evidence that will tell little about what an Avenger looked like in the middle of history's greatest war. (There's a wonderful YouTube video showing a mint Avenger in Atlantic colors taking a lap. Big plane, big engine.) Looking closely at wartime photos, however, has convinced me that carrier based planes were heavily worn and faded. This was especially true with the Atlantic Avengers. First, the TBM carried a very large Wright R-2600 radial that kicked out 1900 horsepower. Radials burn oil. One of the virtues of the Avenger was its elaborate wing folding system: the plane was loaded with hydraulics which means fluids. The pace of operations for the sub hunters was very intense. When at sea, there were standing patrols in the air whenever weather permitted it. If on the trail of a sub, it was all hands on deck. The tactics of sub-hunting required huge numbers of sorties. Although normally carrying a very simple ASB radar system, the RCA SCR-521, most subs were spotted visually: the brains of the operation was on the ships. (More complex radar deployed late in the war allowed very aggressive tactics including night attacks.) Turn-over of aircraft of aircraft was low (Bogue lost four planes in the war, none to enemy fire.) As we'll see damage on landings took place, but it's safe to say that the percentage of fresh planes on a ship like Bogue would have been very small during the war when compared to a fleet carrier in the Pacific. Bogue was adequate to the job but lacked the elaborate hangar deck facilities found in fleet carriers. Indeed the servicing of a plane like the TBM would have required up to the elbow fluid work daily. Lastly, these planes were open to the elements: sun, wind and salt. Might add that sub-hunting was done at quite low altitude perhaps 5,000 feet or lower normally, so the aircraft were flying in thick air rich in particulates. Think of driving across Texas at 225 mph and checking your car for dust. (The point of attack, of course, was right on the deck. I've interviewed pilots who attacked subs from aircraft and was told they could see the boat clearly until it's maybe 50 feet down. Strange sight.) Below are some photos of aircraft from the Bogue. Please note the two photos of crack-ups. One gives a good view of the heavily weathered area around the cockpit, the other a very clear view of the underside of a hard-used aircraft. Also note that Squadron's artist, presumably after looking at more photos than I have, likewise depicts a heavily weathered aircraft.

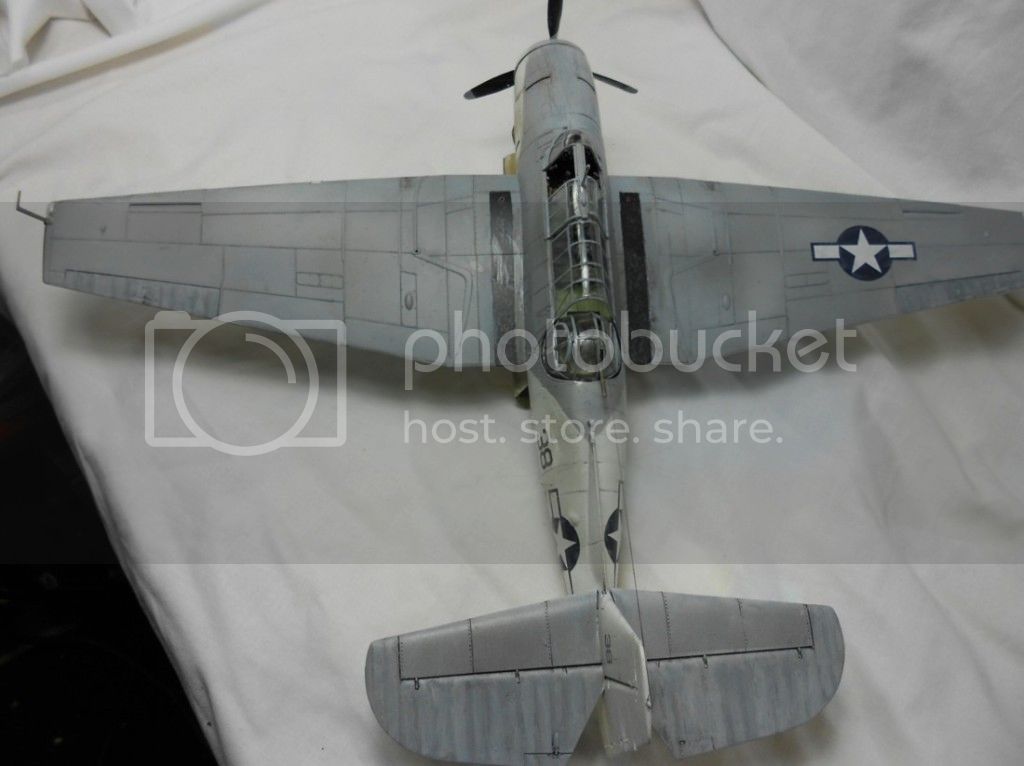
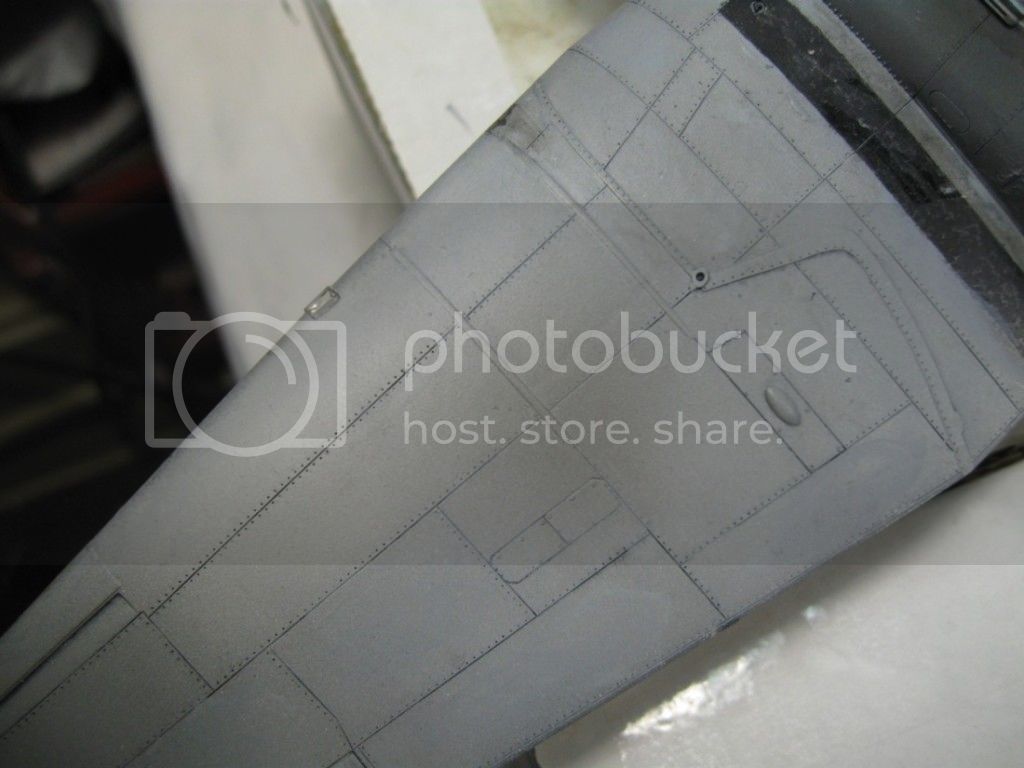
So I decided to give the model a well weathered look. I did not want chipping or obviously rust. I did want fading across the board which meant above all avoiding uniformity in the model's surface colors make the eye work for a living. I also wanted show smudging, grime, exhaust stains and overall dirt. Except for exhaust and obvious points of fluid discharge, I did not want paint to show airflow: when I look at aircraft I do not see any kind of front to back movement of coloration of the kind you might want on armor. I also wanted to get the panel lines right. I think that panel lines are often over emphasized, so I was looking for thin but visible. However, the Avenger had very prominent bulkhead lines along the fuselage and those we did want to see. And I wanted to do this all on a plane that was 75% white, a color I've never employed at anything like this quantity.
We'll disregard a woefully botched attempt at salt fading a technique I normally like a lot. I started with gray Vallejo acrylic-polyurethane primer. I don't like solvents and am very pleased with this product. The base coat was 95% Golden Fluids Titanium White. For Insignia White I tinted the base with a bit of Golden Buff. (It was obvious in Archer that Insignia White had an unbleached look to it.) I used Vallejo Dark Blue Gray to create the USN Dark Gull Gray. Both base colors had progressively lighter shades used for panel fading this is evident only on the gray in the photos. Golden Titanium White is extremely opaque and I was concerned about covering all of the preshade, so I preshaded the base with after the first thin coat of white was down. I employed Golden Carbon Black which is the most opaque black I've ever seen and put it on with a brush. The paint self-levels and thin strokes are invisible after an airbrush coat is applied over it. Panel lines were very thin, bulkhead lines more prominent. I paid a lot of attention to the fabric surfaces. I wasn't sure whether I wanted them darker, lighter or a different color. The only thing I could tell from the photos was that they looked different. In practice they're a bit lighter and busier because of very thin preshade. Below is the model after the base coat was complete but nothing else done. (The slightly off nature of the white does not appear clearly in this photo.) I was quite pleased at this stage.

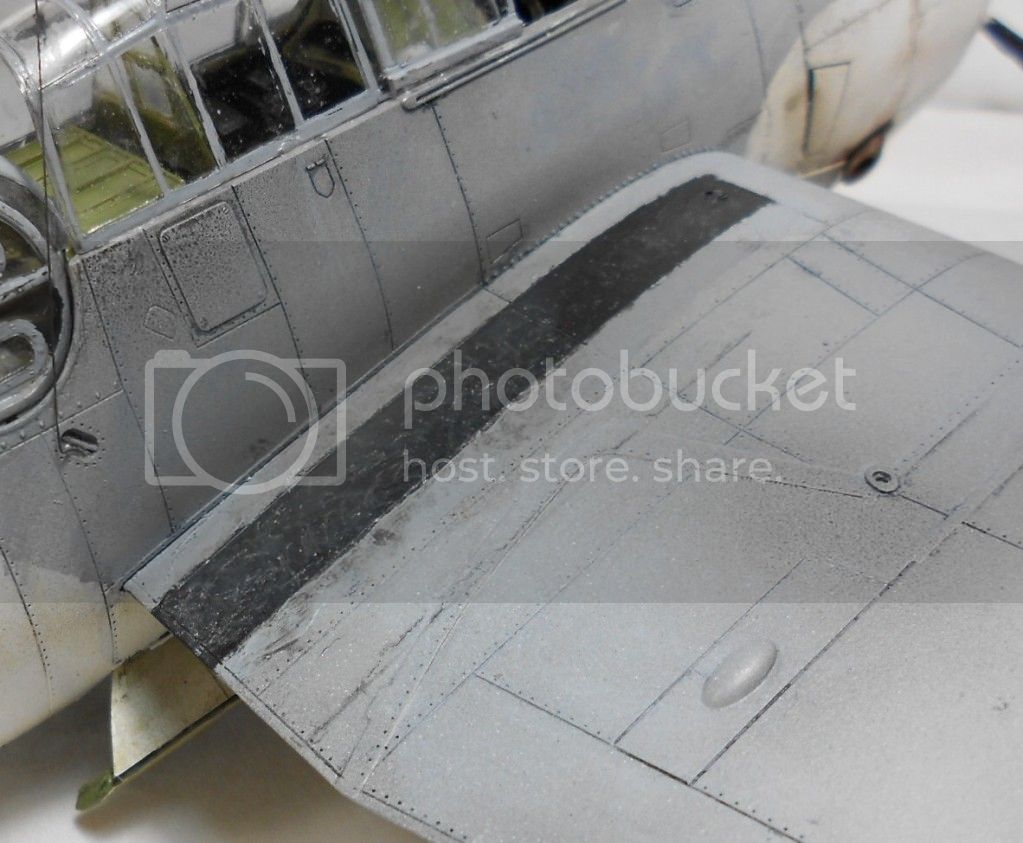
After a coat of Future the decals went on and I painted on the black walkways next to the cockpit. (The kit's decals were late war and useless. Instead I used some Aero Master which I found very nice. Fortunately the Bogue's aircraft have very little embellishment so some numbers and the national insignia were enough.) I turned to fading, the stage I thought would make or break the model. First I used a filter of Windsor Payne's Gray oil over the gray. The subtle blue in Payne's Gray gave the color much more depth. I made a filter of Humbrol Middlestone enamel for rest of the plane with good effect. I dot faded the entire plane, decals included, with oils white, Paynes gray, and ocher and let it dry for a day.
To darken the panel lines I broke out Iwata Medea Com.Art paints. These are unfamiliar to many plastic modelers but are used by railroaders. It's certainly used by rest of the craft world. Log on to a big airbrush emporium like Chicago Airbrush or TCP Global and check out the paints they sell. Basically nothing in the plastic modeling field but dozens of colors made by Golden, Createx and Iwata/Medea (among others) that are designed to be paint fabrics with an airbrush. They're acrylic paints, but completely unlike anything for normal styrene use. Because they're designed to be used on fabric or other porous surfaces the solvent reminds me a little of Future but thinner. The pigments range greatly in opacity just as artist paints do. If you could imagine a cross between a heavily thinned MIG pigment and a Vallejo Model Air you'd be close. (Any art supply store will have this stuff. The Blick chain doesn't sell the specific weathering colors but you can pick up a bottle of Transparent Smoke for $3.00 and check it out.) The reason styrene modelers don't use Com.Art or something like it is that it doesn't hold to a solid surface well. That is also it's greatest advantage for weathering. For panel lines I put a few drops of transparent smoke into a cup and hand brushed it a few inches at a time with a very thin brush. Over Future, the stuff runs right into the panel lines. Here's where it gets interesting. After waiting a minute or so you wipe the stuff perpendicular to the line's direction with a paper towel rather like a Swanny sludge wash, except you want to keep the paint in the paint to avoid the directional effect that comes when wiping away the excess. Give it a quick swipe and hopefully it will remain inside the line but not smudge the surface. The most likely difficulty is to swipe too hard and remove too much. Removing excess is a cinch because Com.Art type paints are active almost like a lacquer. In other words, if you've got too much on, put water on and wipe it off. Do it progression if you want to be efficient but you could wait for a couple of weeks as near as I can see. Moisten Com.Art and it reactivates and can be removed. In theory you can do this with pigments in practice I've often found that very difficult. Clay based washes like Flory Pro Modeler Wash are also a real problem to get off completely. This stuff will wipe clean because it doesn't stick. After doing the panel lines I used some blue-gray smoke on top and base white on the bottom to create a series of very nice smudges that you can stretch out with the brush complements the oils very nicely. Lastly, I put on a brew Com.Art calls old oil tinted with an earth color and began creating the darkened zone coming from the exhaust and going underneath the wing. OK: the stuff doesn't stick so it's now time another coat of Future to seal the fading and panel lines. The Future includes 30% Tamiya Flat Base which gave a very matte finish. Usually I look for satin, but the sun and salt argued for flat. Here's where we are:
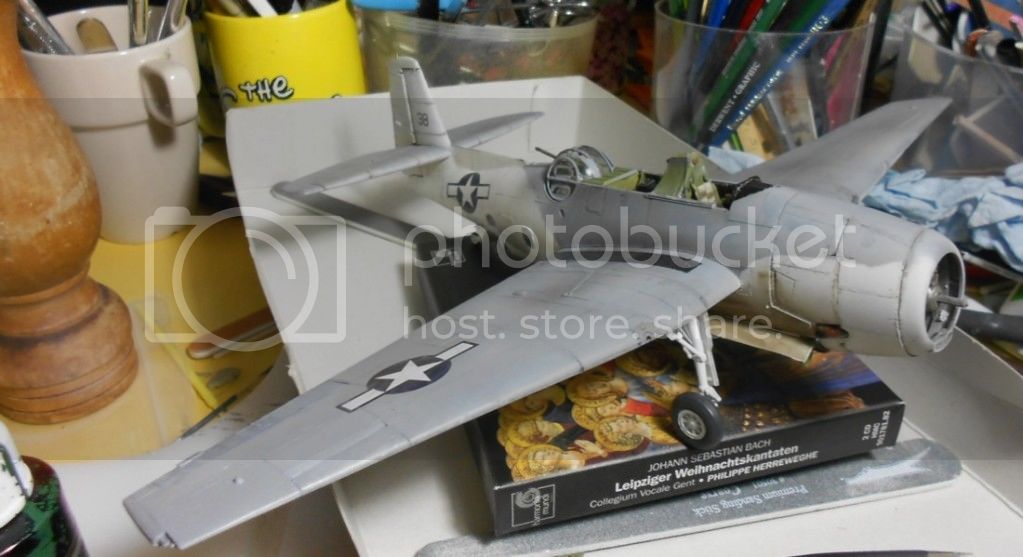
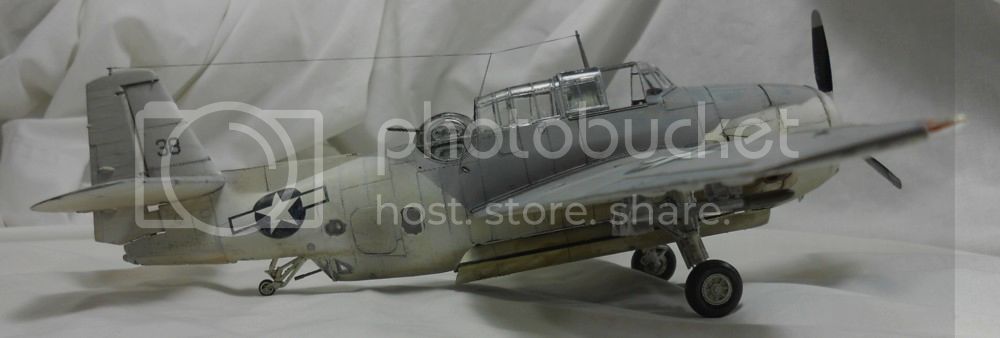
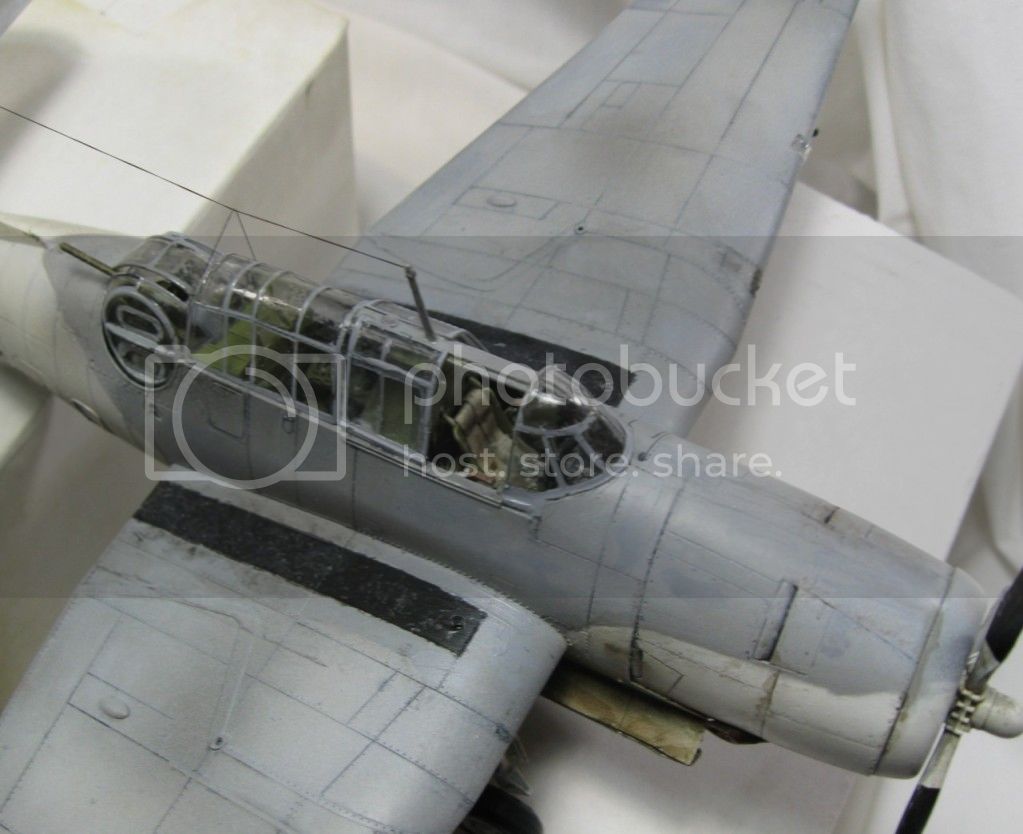
At this stage we're basically done: just have dirty things up. The Com.Art colors are redeployed with the airbrush. I sprayed more exhaust color along the bottom this time with the bomb bay doors open and depth bombs installed. The color I used mostly here was transparent smoke applied from varying distances to give some more smudging and just to make the thing dirty. I also did some chipping with a silver, black and gray artist pencils. I kept the tips very sharp and tapped more than scratched. This is pretty evident on a detail shot below of the cockpit area. The cockpit was already painted it went on with a nearly perfect fit. Put on a radio antenna with some stuff called EZ Line that stretches and allowed the odd angle seen. I did not seal the final stage. The final exhaust highlight had Future in it for a kind of wet effect. In general, Com.Art leaves the kind of moist texture you see on heavy machinery: a good contrast with the flat finish. And if I don't like it next month, I can clean it all off with Windex.
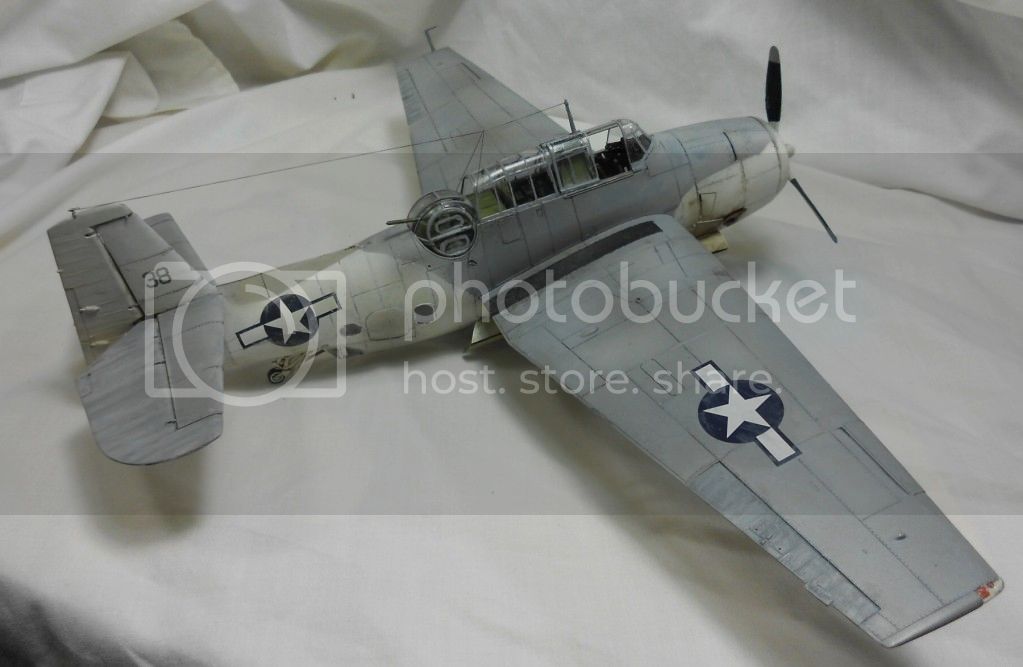
Whole thing took me about three weeks. I almost destroyed the kit once. The final weathering stage was delayed by an abscessed tooth (never model when you have an abscessed tooth: if I would have had a gun, I would tried to shoot my tooth out). I lost parts and committed other follies. That said, the kit itself was splendid. And in the end the model turned out the way I wanted it. I'm sure many, probably most modelers would approach this project differently and perhaps they should. But the model looks the way it does because I wanted it to. If the model is a failure it was not in technique but in mind's eye. Personally, I think it looks like a very well worn combat aircraft which is what I wanted. Always interested the the thoughts of others. Pics of a Bogue Avenger below: