_GOTOBOTTOM
Cold War (1950-1974)
Discuss the aircraft modeling subjects during the Cold War period.
Hosted by Tim Hatton
Airfix English Electric Canberra PR9
spaarndammer
_VISITCOMMUNITY
Noord-Holland, Netherlands
Joined: January 28, 2007
KitMaker: 1,945 posts
AeroScale: 388 posts
Posted: Wednesday, January 23, 2013 - 12:25 AM UTC
Hi all,

I started this topic to show progress of a build on which I am working on and off for about one and a half a year.

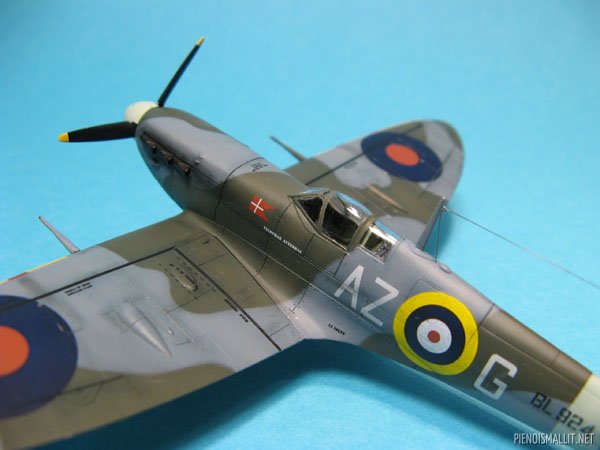
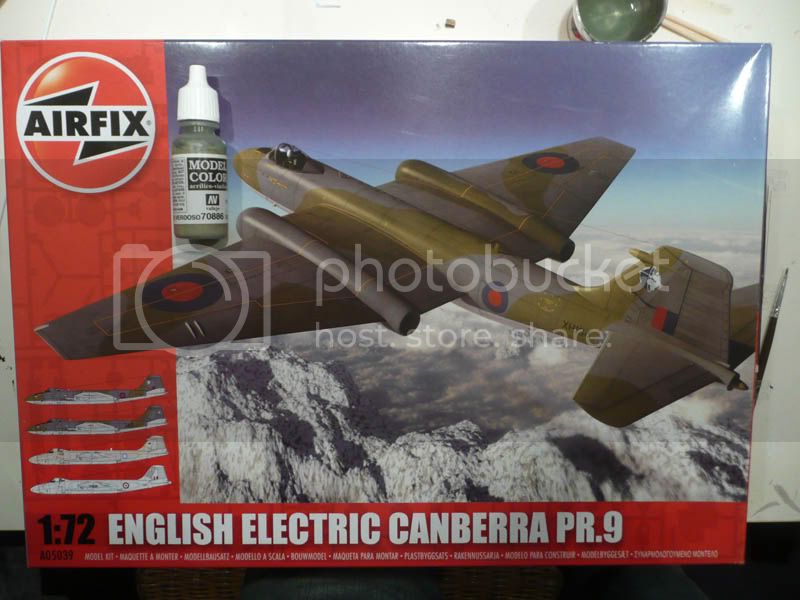
The kit is supplied in an impressive big box with a flying RAF PR9 as the box art.


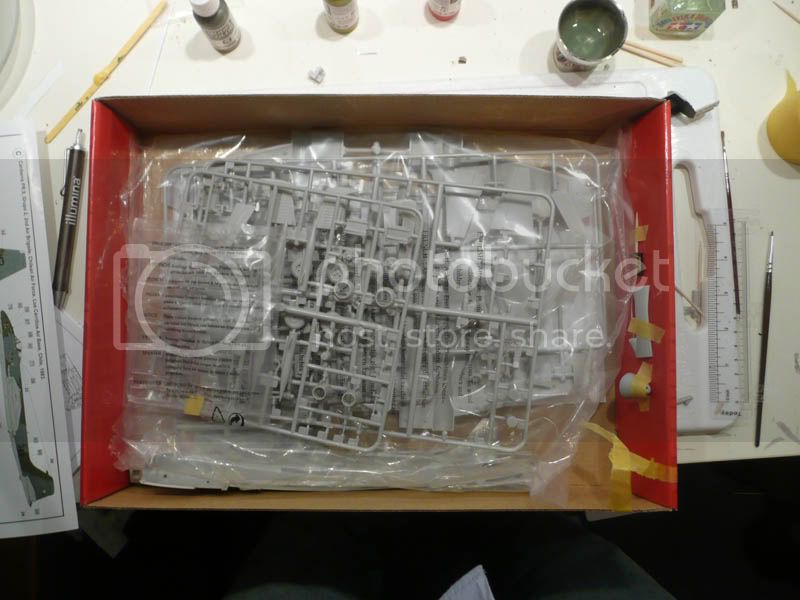
The box contains several sprues with rather big attachment points for the parts, which makes removing parts sometimes a bit difficult.


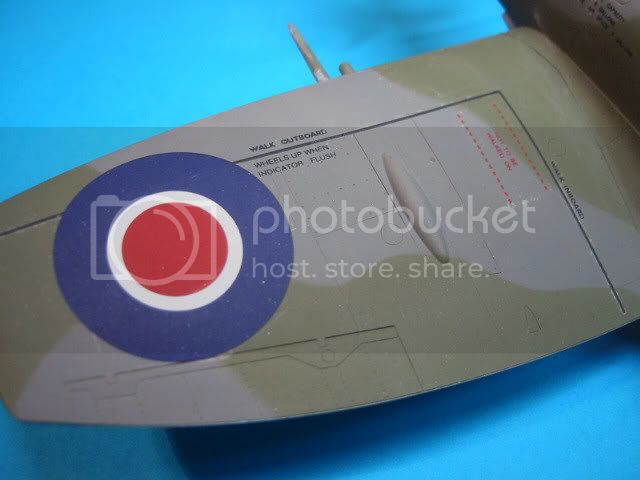
A big decal sheet for 4 variants is supplied as well:


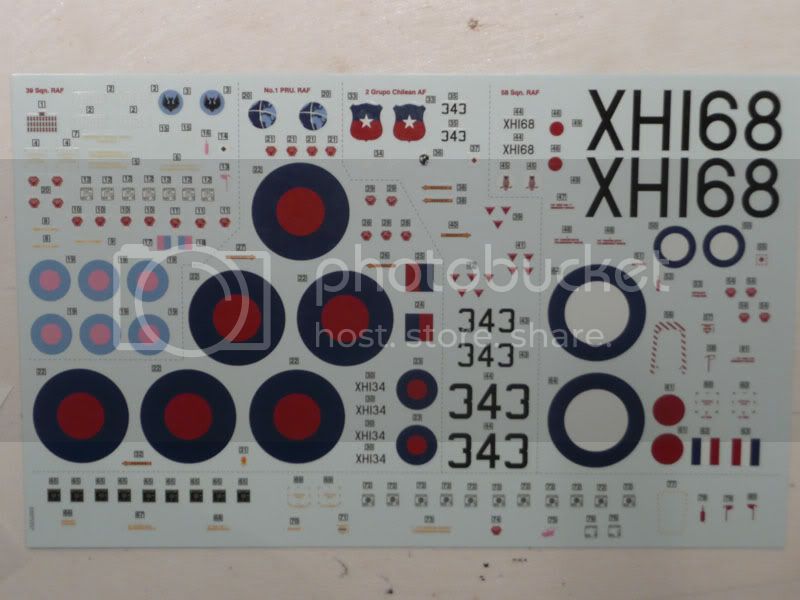
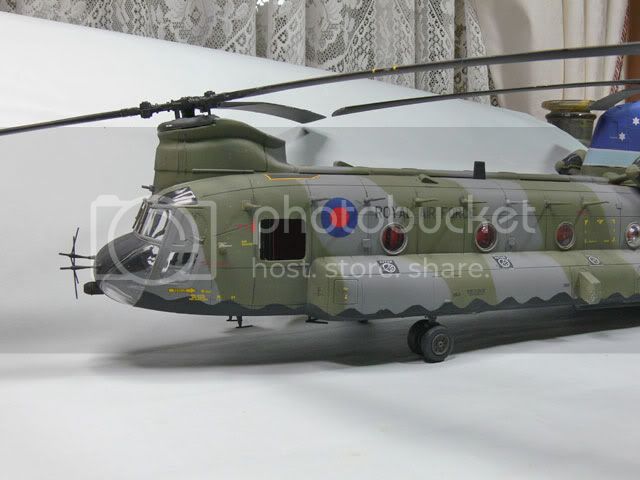
I like the big RAF roundels very much and they will decorate my build.

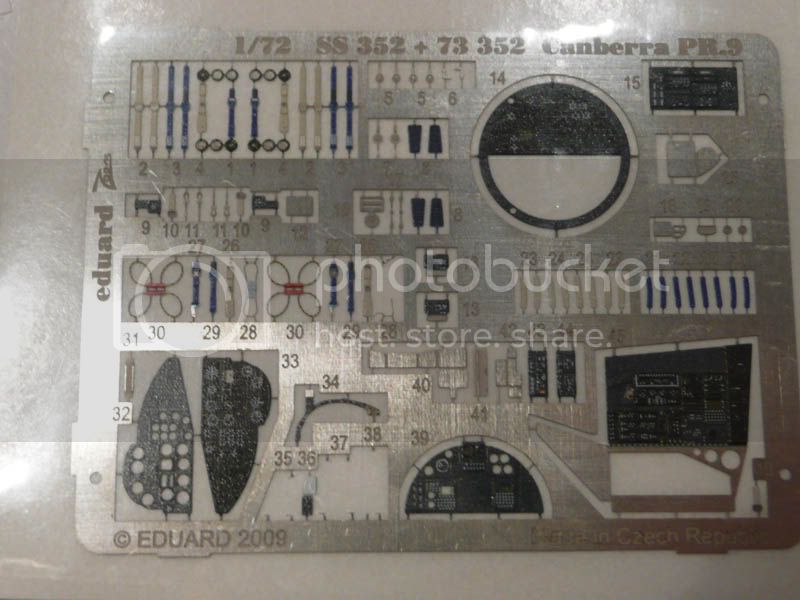
Given that the navigator position in the nose can be openend, I bought Eduards PE set for extra detailing.


Unfortunately, Airfix supplies a cockpit part that belongs to the B(I) 8 bomber version (which is also produced by Airfix). With the B(I)8 the navigator is positioned right and below the pilot, but with the PR9, the navigator is located in front of the pilot. Therefore, some changes had to be made:


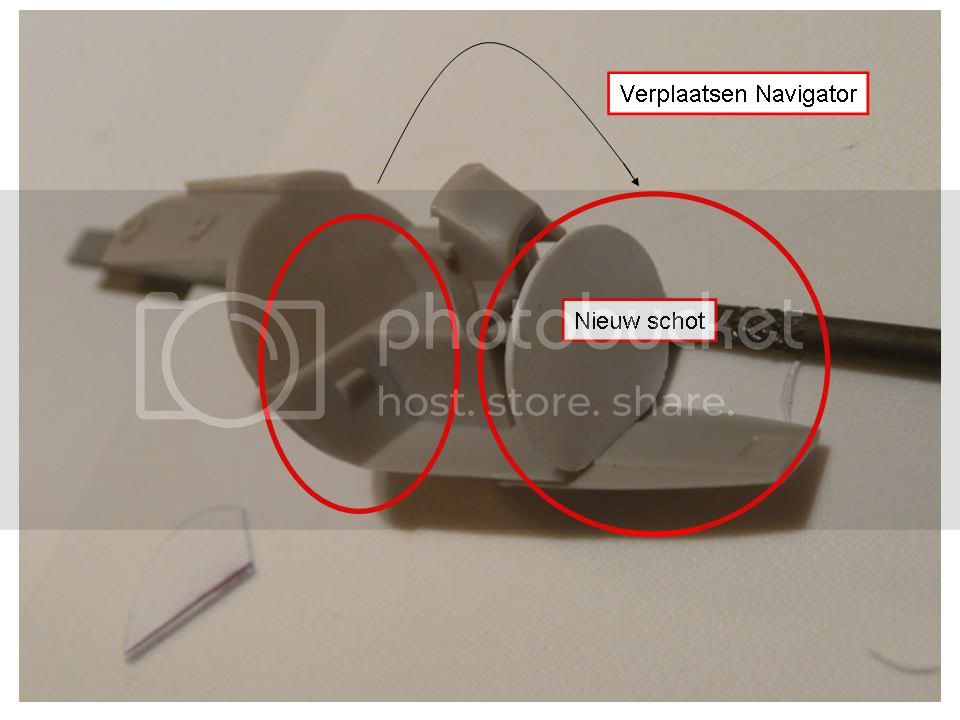
Verplaatsen: to move
Nieuw Schot: new Bulkhead

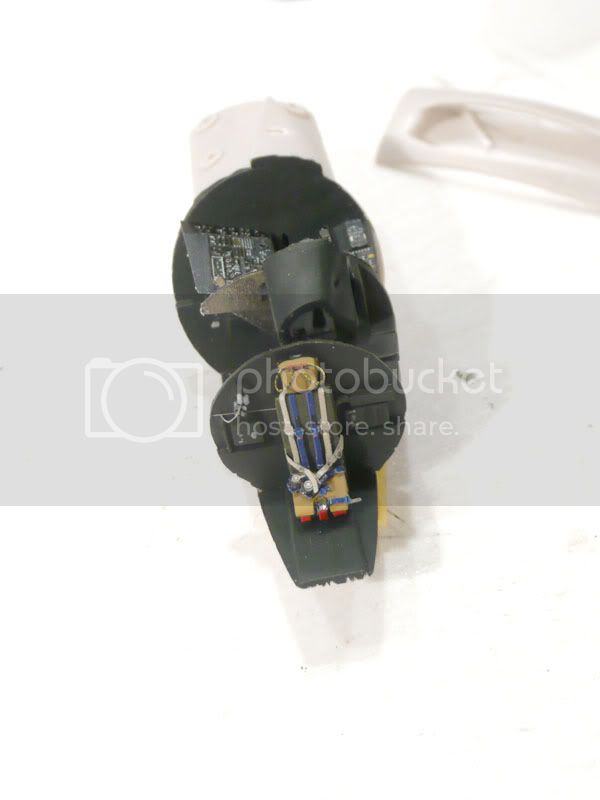
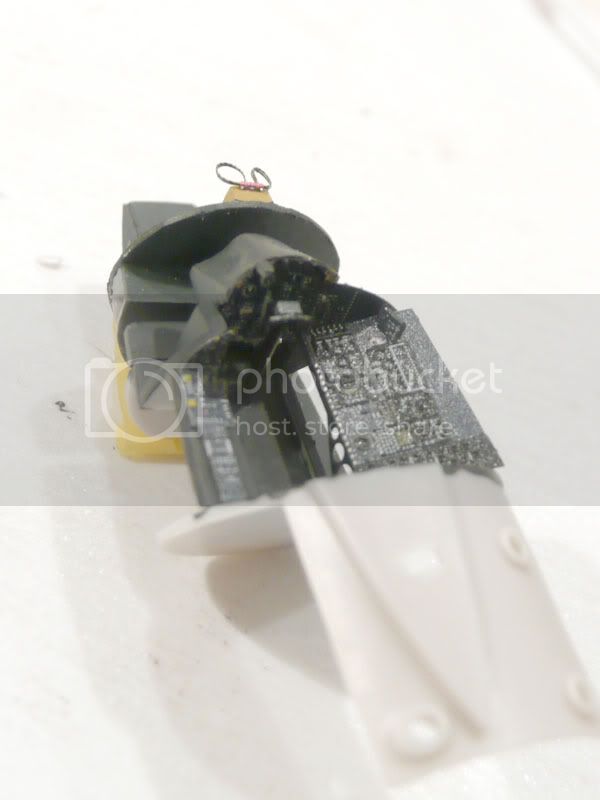
When this was done, it was time to add details to the cockpit and navigator position using Eduards set, styrene and some wire. Not everything is correct, but it gives the idea.


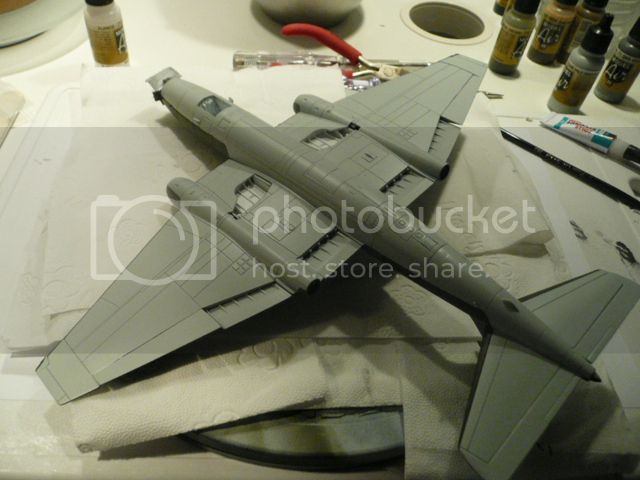
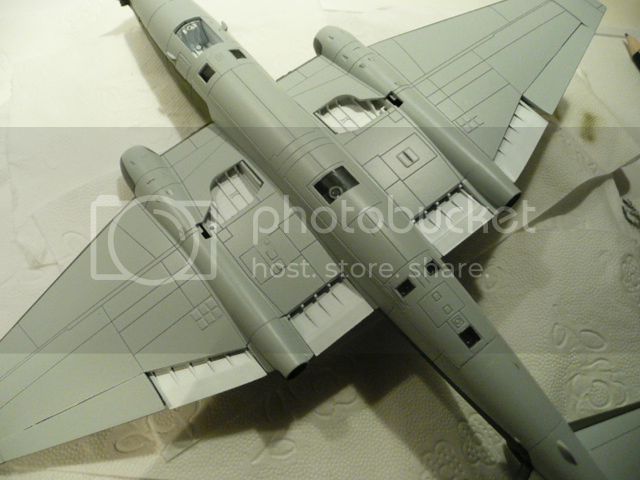
After this, it was time to add the hull together. Everything fitted quite well.


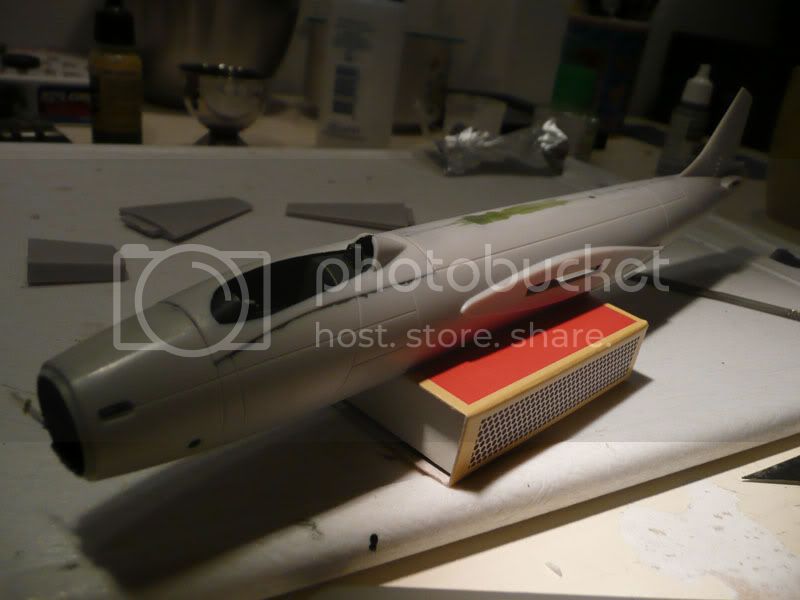
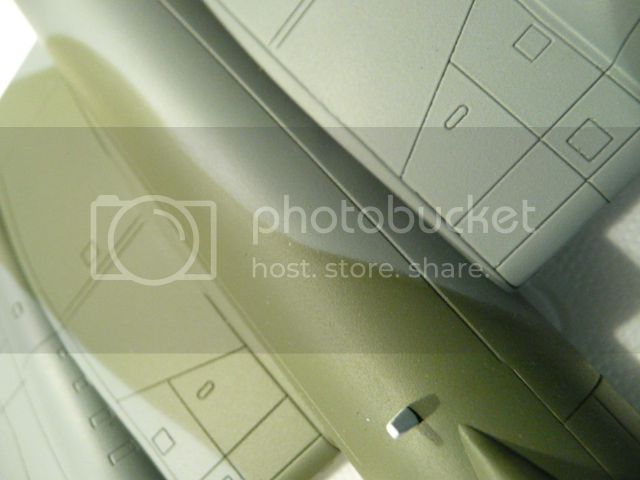
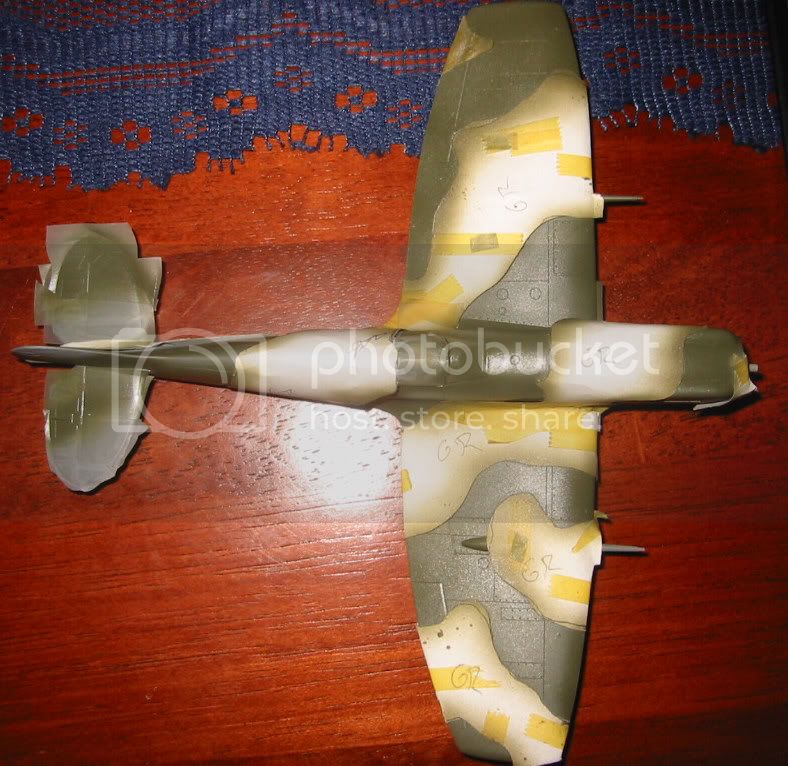
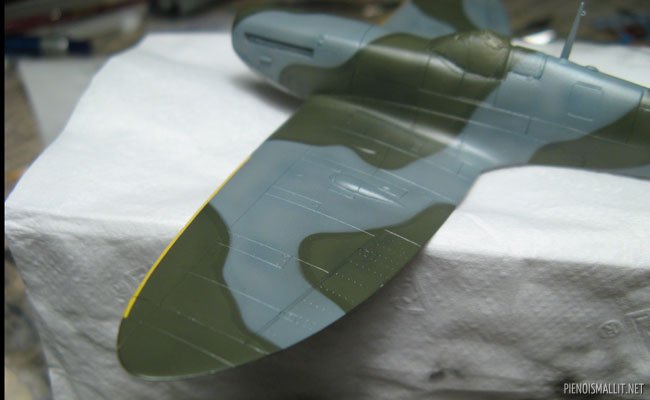
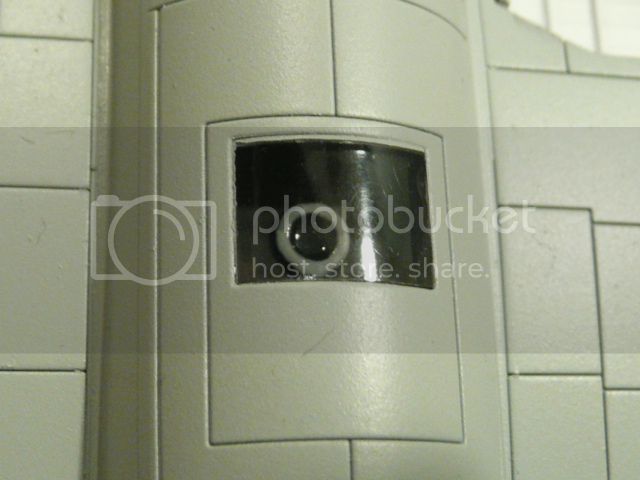
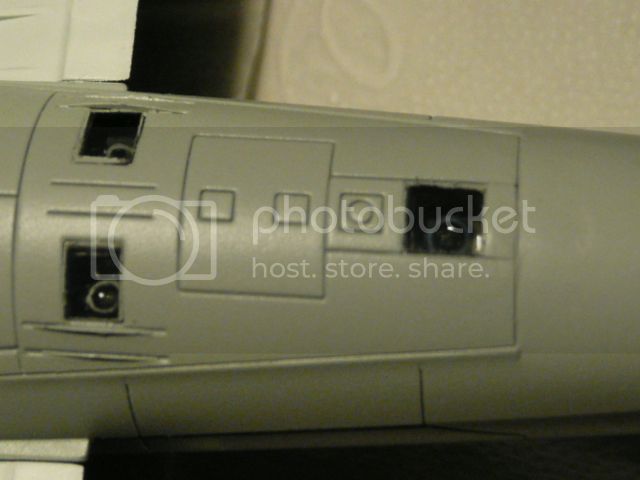
A drawback of this kit are the deep panel lines which easily can do for a typical Dutch canal. Some modellers fill these trenches, but I decided to leave it as it is.

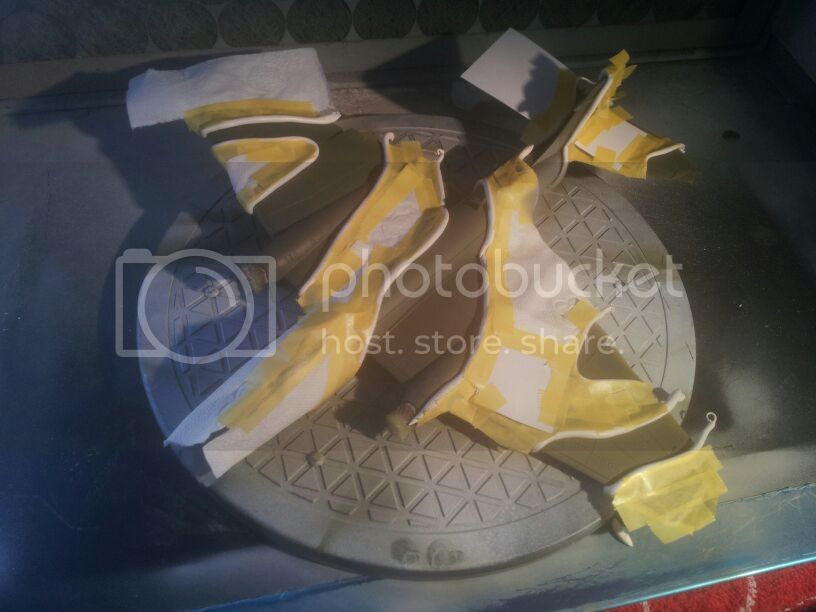
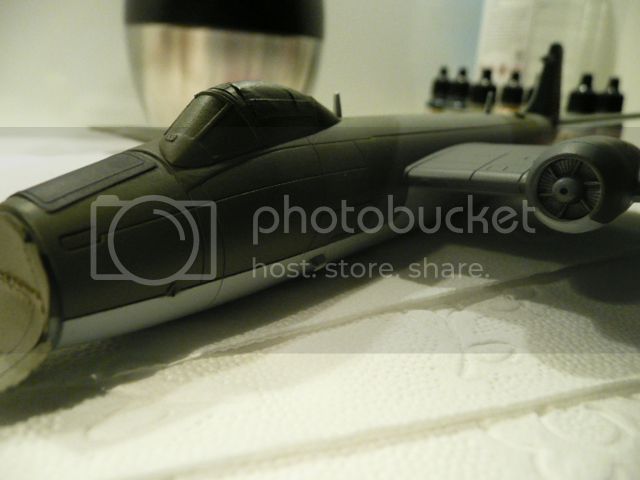
Some Alclad on the intake and exhaust:


And tail:


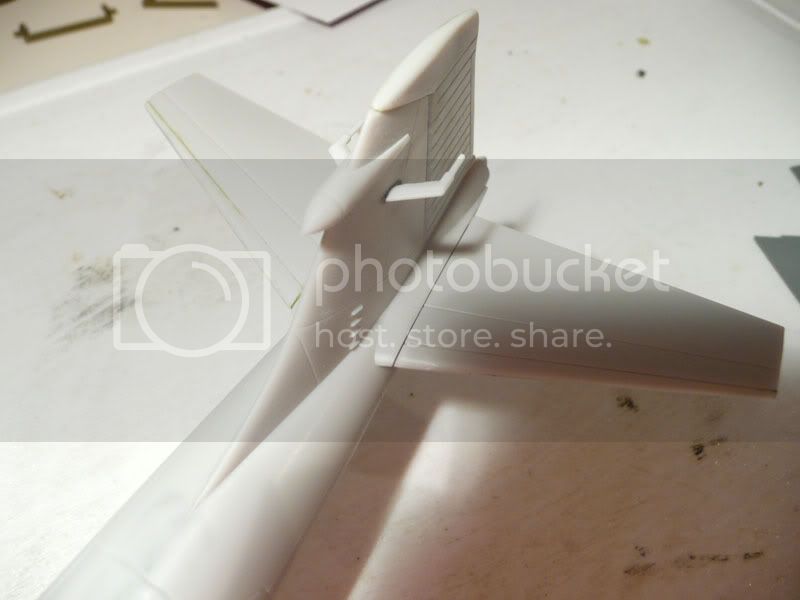
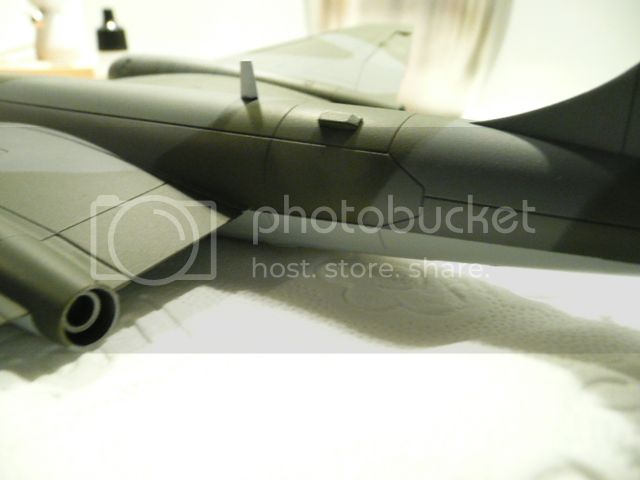
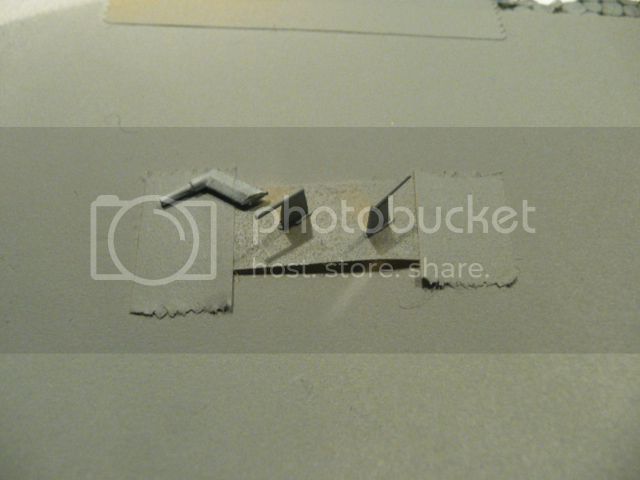
The two parts adjecent on the antenna are with hindsight too big and I will replace these with smaller scratchbuild ones.

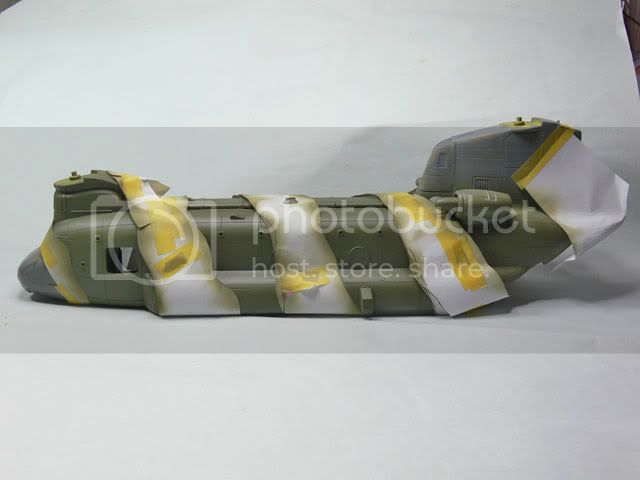
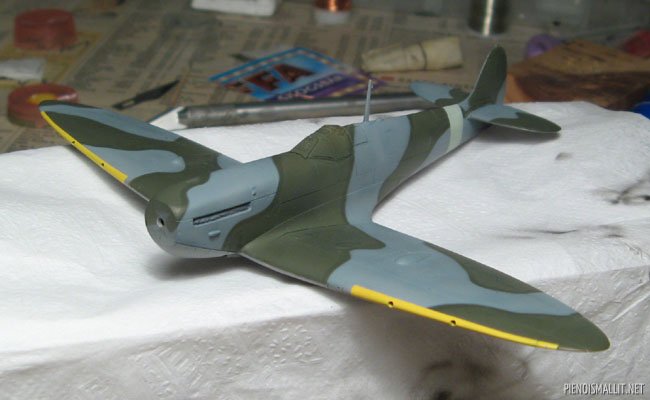
This was my progress until about a year ago. Meanwhile I have made quite some progress as the kit received late december its camoflage and I am currently doing the small bits and pieces. More pictures soon to follow.


Jelger
phantom_phanatic309
#372
_VISITCOMMUNITY
United Kingdom
Joined: March 10, 2010
KitMaker: 2,568 posts
AeroScale: 1,619 posts
Posted: Wednesday, January 23, 2013 - 03:02 AM UTC
Watching with interest. It looks almost identical to its bigger brothers in 1/48 and has the same drawbacks. Matchbox-era trenches, chunky small parts and a poor fit of the large piece around the cockpit. I have Xtrakits PR9 and its molded with a little more finesse.
Does this still have a lot of the weapons and bits spare in the box?
spaarndammer
_VISITCOMMUNITY
Noord-Holland, Netherlands
Joined: January 28, 2007
KitMaker: 1,945 posts
AeroScale: 388 posts
Posted: Wednesday, January 23, 2013 - 04:34 AM UTC
Hi Stephen,

The extras included are an extra camera bay as one option is a early version with a different camera bay as the other versions. Furthermore, wing fuel tanks are supplied as well as two target-pods for target towing.

The large piece around the cockpit is indeed a bit of a lousy fit, but in general no real problems are present.

The trenches can be filled easily I suppose, I only reduced the trenches on the rudder.


Jelger
phantom_phanatic309
#372
_VISITCOMMUNITY
United Kingdom
Joined: March 10, 2010
KitMaker: 2,568 posts
AeroScale: 1,619 posts
Posted: Wednesday, January 23, 2013 - 08:58 AM UTC
I'd just wondered if the sprues for the B.8's weapons were still here. But towed targets, now they could be interesting. I always thought it was BOZ flare/chaff pods that Airfix threw in with this kit.
Its a shame Airfix don't scale back the B-57 and B.2 series. I'd love to do the late RAF B.6 with the AS30 missiles. My display space does not have much room for a lot of big stuff.
spaarndammer
_VISITCOMMUNITY
Noord-Holland, Netherlands
Joined: January 28, 2007
KitMaker: 1,945 posts
AeroScale: 388 posts
Posted: Wednesday, January 23, 2013 - 09:25 AM UTC
Hi Stephen,

I made a mistake, indeed chaff/flare dispensers are included in the kit, not target towing pods.

My apologies for the confusion.


Jelger
phantom_phanatic309
#372
_VISITCOMMUNITY
United Kingdom
Joined: March 10, 2010
KitMaker: 2,568 posts
AeroScale: 1,619 posts
Posted: Wednesday, January 23, 2013 - 10:18 AM UTC
Hi Jelger,
no worries its an easy one to make. They're almost exactly the same size and shape as towed target pods that they used to carry. Founds some pics of them here. http://forums.airshows.co.uk/viewtopic.php?f=2&t=13754
They would make a great model!
spaarndammer
_VISITCOMMUNITY
Noord-Holland, Netherlands
Joined: January 28, 2007
KitMaker: 1,945 posts
AeroScale: 388 posts
Posted: Thursday, January 24, 2013 - 09:53 AM UTC
Great colors indeed, especially the red-white-yellow-black bird.

If you would like to have the chaff pods, just send me a PM and they will come your way.


Jelger
RedwingNev
_VISITCOMMUNITY
England - East Midlands, United Kingdom
Joined: February 07, 2004
KitMaker: 911 posts
AeroScale: 415 posts
Posted: Friday, January 25, 2013 - 01:47 AM UTC
Re: panel lines, I think it depends on if you are doing a camoflaged or silver example. Mine was silver and I simply had to fill the panel lines, on a camo example you can get away with it. They're also not so bad on the wings, and they are quite useful for lining up the walkway decals
phantom_phanatic309
#372
_VISITCOMMUNITY
United Kingdom
Joined: March 10, 2010
KitMaker: 2,568 posts
AeroScale: 1,619 posts
Posted: Friday, January 25, 2013 - 04:11 AM UTC

Quoted Text

Great colors indeed, especially the red-white-yellow-black bird.

If you would like to have the chaff pods, just send me a PM and they will come your way.


Jelger


Hi Jelger,
thanks thats a great offer. If your absolutely sure you don't want them?
Ste
spaarndammer
_VISITCOMMUNITY
Noord-Holland, Netherlands
Joined: January 28, 2007
KitMaker: 1,945 posts
AeroScale: 388 posts
Posted: Sunday, January 27, 2013 - 08:18 AM UTC

Quoted Text


Quoted Text

Great colors indeed, especially the red-white-yellow-black bird.

If you would like to have the chaff pods, just send me a PM and they will come your way.


Jelger


Hi Jelger,
thanks thats a great offer. If your absolutely sure you don't want them?
Ste


Hi Ste,

No problem at all to get them. I have replied your PM.


Jelger
spaarndammer
_VISITCOMMUNITY
Noord-Holland, Netherlands
Joined: January 28, 2007
KitMaker: 1,945 posts
AeroScale: 388 posts
Posted: Sunday, January 27, 2013 - 09:05 AM UTC
Hi all,

A new update from this build.

As written, all progress shown was until late 2012. With the Christmas holidays to come, I prepared the Canberra for painting.

First the Canberra received a layer of Tamiya grey Fine surface primer. A bit of extra sanding was needed, especially at the wingroots, which had a bit of glue spills.

After priming, I first sprayed the lower hull with 1:5 Vallejo Air (VA) Pale Grey Blue : White. When dry, I masked the lower part with Tamiya tape and tissue paper to spray the top of the model with VA Dark Green.

Then it was time for something new, at least for me. To spray the camo with a bit of soft edge, I found several options on the internet, but for me it seemed that using sausages from Pritt Poster Buddies (a variant of Blu-tac) was the easiest option. The sausages were easily applied to the model and the areas not to be painted were covered with paper and masking tape:


When masking was done, I sprayed the gray color using VA Medium Sea Grey.

After spraying, I let everything dry for 3-4 hrs and removed the masks:


I am very pleased with the result, especially as it was the first time I did this.

Nevertheless, not everything is perfect. Some edges are a bit too diffuse and not sprayed perfectly. But this is just more practice I guess (I was too impatient to practice first).


Unfortunately, at some spots the sausages left an imprint in the paint. I have read on the internet that such things can happen. Maybe, I should remove the sausages more quickly.

I sprayed the emergency hatch on the front black and brush painted some antennas white. With the next build, all big antennas with a different color will be painted separately and added later to the model as this probably is easier than painting them when already attached.

Something which caught my attention every time I worked on the model were the two antenna on the sides of the tail. Initially, I added the kit supplied parts, but these are way too big and shape-wise not correct. Furthermore, they don't seem to be present on the 80s style Canberra I am building (as several other antennas I added as well....). As the model was already sprayed, I could not remove them from the tail to leave them off as this would show a ugly spot on the tail. So, I decided to break them off, but replace them with scratch build more accurate ones (left: kit part). With a bit of care adding them to the model won't show ugly spots.


I addition, things like flaps and landing gear are sprayed as well. Such small things will keep me busy for a while.

A new update will follow soon.


Jelger
phantom_phanatic309
#372
_VISITCOMMUNITY
United Kingdom
Joined: March 10, 2010
KitMaker: 2,568 posts
AeroScale: 1,619 posts
Posted: Sunday, January 27, 2013 - 09:28 AM UTC
Looking good. I've always like the old green/grey cammo schemes. I always use the same method myself when airbrushing. Its just a lot easier and more precise than trying to hand spray the pattern. I've had a mark left by the blu-tack once or twice but that's because I used old stuff rather than new. Rarely had it happen when I've used new stuff straight out the packet. I have heard it said that its often caused by grease or oils that get mixed up in the tack and other brands can have the same effect even if new. Only thing I can suggest is trying a few different brands to see what gives the best results. It usually disappears under a coat of varnish anyway.
PM incoming about the pods.
Ste
Harvs73
_VISITCOMMUNITY
Queensland, Australia
Joined: January 23, 2012
KitMaker: 66 posts
AeroScale: 47 posts
Posted: Sunday, January 27, 2013 - 11:41 PM UTC
I generally use a paper mask rather than blu tack or any of those types of masks. I cut the shape out in paper then cut shapes in the paper to enable some tamiya tape to hold the mask down. This gives you enough feathering to look good and it isn't a straight line. Some areas can't be masked in this way so I use tape. Some examples:

Masking (1/48 Chinook)


Result


Masking (1/48 Spit 14)


Result


Emeritus
_VISITCOMMUNITY
Uusimaa, Finland
Joined: March 30, 2004
KitMaker: 2,845 posts
AeroScale: 1,564 posts
Posted: Monday, January 28, 2013 - 06:15 AM UTC
Great progress! Looking forward to seeing it finished.

I've had the same thing happen with white-tac sausages leaving marks on the paint. Here's an example of a Spitfire I built back in 2008, painted with Xtracrylix RAF paints:


Here's how it looked after giving it a coat of Future, thinking it might solve the issue:


I don't know why, and I can't remember anymore at which point the marks went away, but they sure did. Here's how it looked after finishing the kit:


So I wouldn't panic about the marks. Those in your model don't look even half as pronounced as in mine.
After that happened, I've taken the habit of usually giving each color a quick, thin coat of future to protect it, just in case. However, that phenomenon doesn't even seem to happen every time. Might be the paint brand, how long it has been allowed to dry?

spaarndammer
_VISITCOMMUNITY
Noord-Holland, Netherlands
Joined: January 28, 2007
KitMaker: 1,945 posts
AeroScale: 388 posts
Posted: Monday, January 28, 2013 - 08:16 AM UTC
Thanks for your replies. You show both very nice RAF camos. This camo is just a very nice combination of colors.

@Eetu: I have only a few marks present, not on all spots where sausages were applied. I had the paint to dry for 4-5 hrs. Hopefully the few spots will eventually be no more visible. I am at least planning to do a coat of future for the decals.

Most pictures I saw of the Canberra showed very clean machines with little wear so it can be very well that only future will be applied together with some mild washes.

@David: Your technique looks very promising. It doesn't look to much work at all applying the masks. I will try this for sure with a future build.


Jelger
raypalmer
_VISITCOMMUNITY
Ontario, Canada
Joined: March 29, 2010
KitMaker: 1,151 posts
AeroScale: 985 posts
Posted: Monday, January 28, 2013 - 11:08 AM UTC
I am loving this build. Also like seeing the results of different techniques. Steven, what did you use to stand off the paper on the spitfire wings?
spaarndammer
_VISITCOMMUNITY
Noord-Holland, Netherlands
Joined: January 28, 2007
KitMaker: 1,945 posts
AeroScale: 388 posts
Posted: Thursday, February 07, 2013 - 05:56 AM UTC
It is time for another update!

As written in my previous post, I decided to replace the antennas on the tail by scratch build ones. I spray painted them white and added both to the tail. In my opinion the new antennas are much better than the original ones:


I have spray painted the wheels as well and for this I used Eduard Masks which are pretty nice to work with.


Furthermore, I spray painted the front wheel bay, as well as the parts of the wings that contain the flaps.


As you can see, I removed all the masks as I intended to spray the hull with Future as preparation for decalling. However, I probably put the masks back and instead will use Humbrol Gloss Arcylic varnish as I think that using a spray can is more easy.

Nevertheless, removing the masks reveals some of the details inside the camera bay:


The lenses of the cameras were filled with Future to give them a glass-like appearance.

The next step is Humbrol gloss coat (or still Future....) and start decalling. Furthermore, I am still busy with the small bits and pieces like landing gear struts...


Jelger
magnusf
_VISITCOMMUNITY
Stockholm, Sweden
Joined: May 02, 2006
KitMaker: 1,953 posts
AeroScale: 1,902 posts
Posted: Thursday, February 07, 2013 - 06:13 AM UTC
Nice build! This really is a cool aircraft, I did one a few years ago that I blogged here.

I follow your build with interest!


Magnus
spaarndammer
_VISITCOMMUNITY
Noord-Holland, Netherlands
Joined: January 28, 2007
KitMaker: 1,945 posts
AeroScale: 388 posts
Posted: Thursday, February 07, 2013 - 07:49 AM UTC
Magnus, Thank you for your compliments. I read your build log with great interest. Very nice scratch building on the outer parts of the wings and the flaps.

I like the Khaki scheme very much, but I agreed with another Dutch modeller (Jurrie) to do a RAF 3 tone camo.


Jelger
phantom_phanatic309
#372
_VISITCOMMUNITY
United Kingdom
Joined: March 10, 2010
KitMaker: 2,568 posts
AeroScale: 1,619 posts
Posted: Thursday, February 07, 2013 - 09:41 AM UTC
I have to admit the old cammo does look much more eye catching than the later hemp. I was lucky enough to get the 1/48 version of this kit over the weekend. Modelzone stores in the UK are throwing them out at £9.99 each! Thats a third off the original asking price (unfortunately none of the other canberras for sale at that price). I'll be doing that in the green/grey as I think the hemp looks a bit bland on such a large model. Whats a pity is the poor research into the cockpits as Airfix also place the navigators position to the right and below of the pilot instead of the nose, just like in its little brother.

Magnus, fantastic build of the xtrakit PR9. I plan on making a start on mine soon so I'll be taking on a lot of your improvements and fixes on board.
spaarndammer
_VISITCOMMUNITY
Noord-Holland, Netherlands
Joined: January 28, 2007
KitMaker: 1,945 posts
AeroScale: 388 posts
Posted: Thursday, February 07, 2013 - 06:50 PM UTC
I fully agree,

Cchanging a Canberra bomber to a PR is not just replacing the bomb-bay with a camera-bay.


Jelger

By the way, I just posted the chaff-pods to you Stephen.
magnusf
_VISITCOMMUNITY
Stockholm, Sweden
Joined: May 02, 2006
KitMaker: 1,953 posts
AeroScale: 1,902 posts
Posted: Thursday, February 07, 2013 - 07:04 PM UTC
Stephen! That's a lot of plastic for ten pounds! Blog it here and I'll promise to follow the build

Jelger! I had plans for doing a camouflaged one as well but I doubt it will ever be done, at least not in 1/72... I have a 1/144 B(I).8 that I look forward to do one day or another though. And that one will be a camo bird with a sharkmouth...


Magnus
phantom_phanatic309
#372
_VISITCOMMUNITY
United Kingdom
Joined: March 10, 2010
KitMaker: 2,568 posts
AeroScale: 1,619 posts
Posted: Friday, February 08, 2013 - 05:02 AM UTC

Quoted Text

I fully agree,

Cchanging a Canberra bomber to a PR is not just replacing the bomb-bay with a camera-bay.


Jelger

By the way, I just posted the chaff-pods to you Stephen.


Cool, look forward to receiving them.
Having now got all of the big airfix Canberra's (where I'm going to display them is a good question), I get the distinct feeling that they were rushed into production. Don't get me wrong they are brilliant kits, just that the little cock ups are annoying. Its an easy fix to re-position the cockpit as you have shown, but they should have got it right. Its not like the Canberra is some obscure pre-war dive bomber or some luft-46 aircraft that only existed on a drawing board. Most kit manufacturers put many years of research into those and still manage to get close to 100% accuracy.
spaarndammer
_VISITCOMMUNITY
Noord-Holland, Netherlands
Joined: January 28, 2007
KitMaker: 1,945 posts
AeroScale: 388 posts
Posted: Tuesday, February 12, 2013 - 09:12 AM UTC
hmmm, a set back seem to have occurred when spraying Future (or in my case Parket Plus, the equivalent). The whole surface got a rough texture, or orange peel. Decals won't set properly on such surface, so I have to find a solution to get back a nice even surface.


Jelger
Jessie_C
_VISITCOMMUNITY
British Columbia, Canada
Joined: September 03, 2009
KitMaker: 6,965 posts
AeroScale: 6,247 posts
Posted: Tuesday, February 12, 2013 - 10:18 AM UTC
Carefully wipe the surface down with Ammonia? Or maybe buff it with a fingernail buffing stick?
 _GOTOTOP