

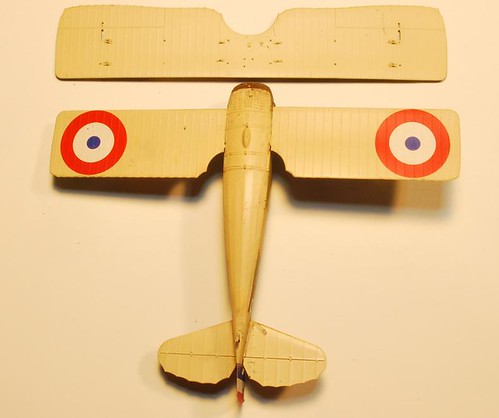
This is the kit I'll be working with.
http://www.flickr.com/photos/26677464@N07/8462205155/
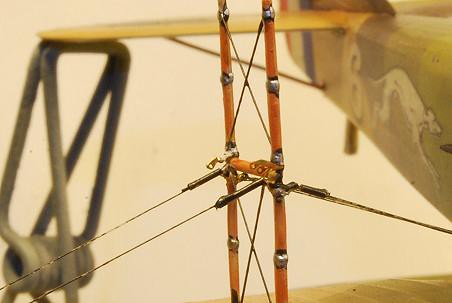
As can be seen in the photo, I've just started the cockpit and painted a few items. I'm trying to work out some details with the rigging. That darn inboard strut anchors no less than 8 cables, both on the fore and aft side. This might be a deal breaker! Considering using left over PE from an armor build to make the twin flight wire anchors. Maybe stretched sprue for the strut cross braces, and somehow tie in the landing wires. Don't know if it'll work, just have to give it a try. Guess I'll have to cross that bridge when I get there. Post more pics as they become available.
Early Aviation
Discuss World War I and the early years of aviation thru 1934.
Discuss World War I and the early years of aviation thru 1934.
Hosted by Jim Starkweather
KotS III GB SPAD XIII

Mobious

Joined: May 18, 2008
KitMaker: 210 posts
AeroScale: 80 posts
Posted: Sunday, February 10, 2013 - 12:19 PM UTC

Jessie_C


Joined: September 03, 2009
KitMaker: 6,965 posts
AeroScale: 6,247 posts

Posted: Sunday, February 10, 2013 - 12:33 PM UTC
"Oops! You don't have permission to view this photo."
:(
It looks like you've got your gallery set to private. If you want us to see your pictures you'll need to adjust your settings.
You can embed photos in your posts by using the IMG button. Here's a tutorial.
:(
It looks like you've got your gallery set to private. If you want us to see your pictures you'll need to adjust your settings.
You can embed photos in your posts by using the IMG button. Here's a tutorial.

JackFlash
Joined: January 25, 2004
KitMaker: 11,669 posts
AeroScale: 11,011 posts
Posted: Sunday, February 10, 2013 - 01:56 PM UTC
Here is a bit of fun on the subject.
Mobious
Joined: May 18, 2008
KitMaker: 210 posts
AeroScale: 80 posts
Posted: Saturday, February 16, 2013 - 04:12 PM UTC
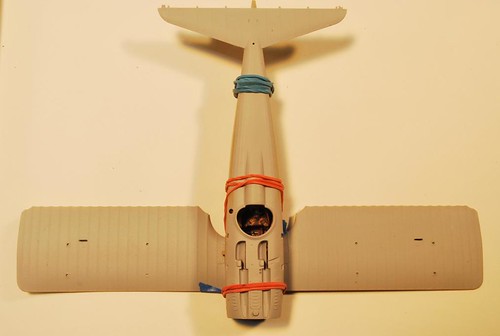
Well, spent a few hours building the cockpit. Lost one of the seat belts. Resorted to using masking tape. Got everything else installed. Here is a shot of where the SPAD is tonight.

 " BORDER="0">
The lower wing is just fitted as is the upper fuselage. Still working out some final details on the rigging. If all goes according to Hoyle, should begin drilling tomorrow.
Thanks for checking in.
" BORDER="0">The lower wing is just fitted as is the upper fuselage. Still working out some final details on the rigging. If all goes according to Hoyle, should begin drilling tomorrow.
Thanks for checking in.

warreni

Joined: August 14, 2007
KitMaker: 5,926 posts
AeroScale: 2,201 posts
Posted: Saturday, February 16, 2013 - 06:24 PM UTC
For a bit of inspiration here is not how to do it..

The interplane struts where all broken and the fuselage short-shot when I opened the kit but I repaired them. Roden did come through with a new set of sprues though.
Roden 1/32 kit.
Keep up the good work mate.
Cheers
Warren
The interplane struts where all broken and the fuselage short-shot when I opened the kit but I repaired them. Roden did come through with a new set of sprues though.
Roden 1/32 kit.
Keep up the good work mate.
Cheers
Warren
Mobious
Joined: May 18, 2008
KitMaker: 210 posts
AeroScale: 80 posts
Posted: Monday, February 18, 2013 - 11:32 AM UTC
Warreni, Nice work. I was thinking about building one of the Roden SPAD VII's. The Lafeyette boxed offering has the local pilot's mount.
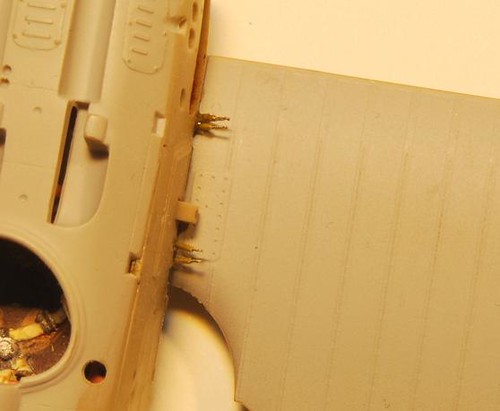
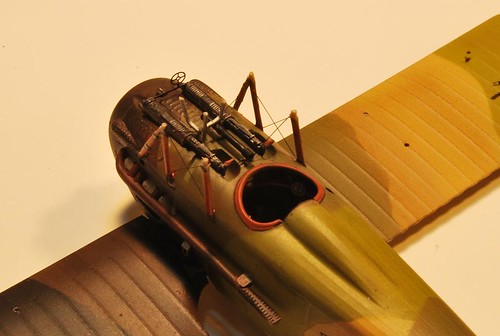
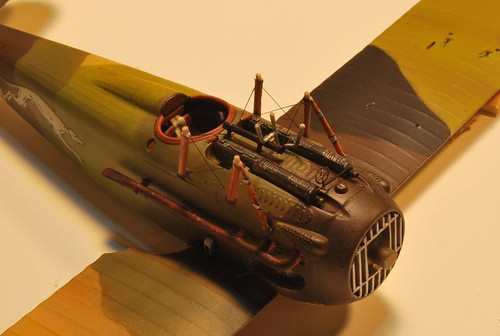
I did get a few of the turnbuckles installed. Here is a shot of the fuselage

 /image.file" BORDER="0">
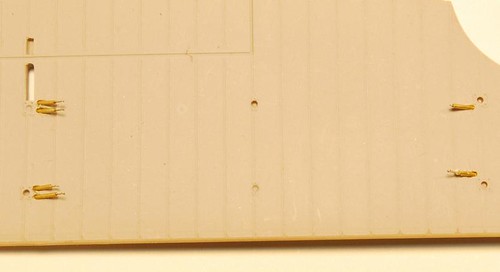
and a shot of the upper wing
I did get a few of the turnbuckles installed. Here is a shot of the fuselage
/image.file" BORDER="0">and a shot of the upper wing

OEFFAG_153

Joined: February 19, 2010
KitMaker: 1,473 posts
AeroScale: 1,450 posts

Posted: Monday, February 18, 2013 - 07:58 PM UTC
Nice job on the turnbuckles Mobious! Looking forward to more.
Mikael
Mikael

Mgunns
Joined: December 12, 2008
KitMaker: 1,423 posts
AeroScale: 1,319 posts

Posted: Wednesday, February 20, 2013 - 12:48 AM UTC
It will be interesting to see how you attach the rigging to the interplane struts. I have seen it done in 1/32nd and it is amazing. Lots of fabricating. Looking forward to seeing how you do it. Good luck.
Best
Mark
Best
Mark
Mobious
Joined: May 18, 2008
KitMaker: 210 posts
AeroScale: 80 posts
Posted: Saturday, February 23, 2013 - 07:08 PM UTC
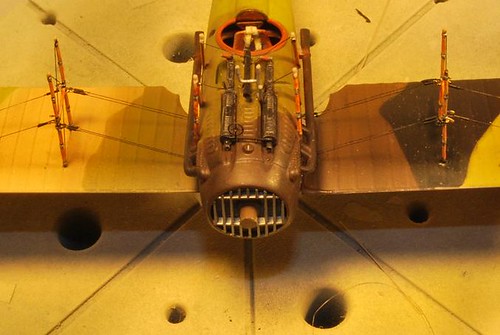
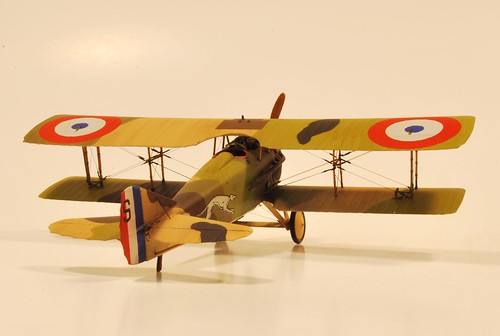
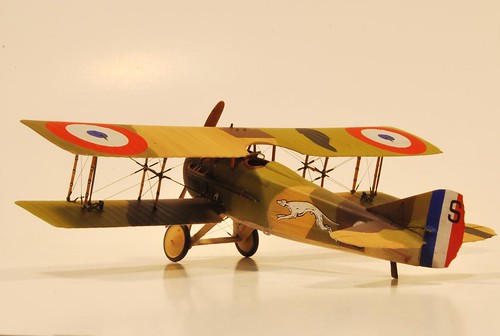
Spent the better part of the weekend trying to figure out 5 color camouflage. The instruction sheets, as mentioned in Jackflash's review, are black/white. I was left trying to decipher the colors by the box art profiles. I did get the SPAD painted and the decals in place.
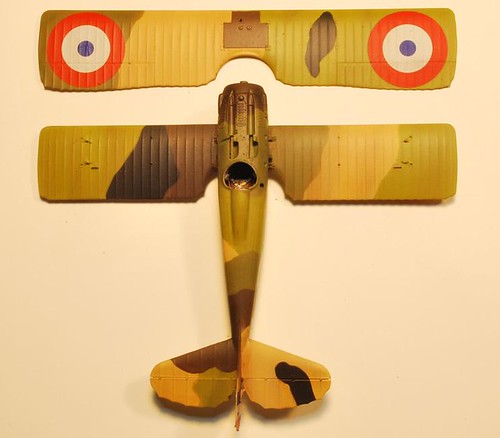
and a shot of the twin .303 Vickers
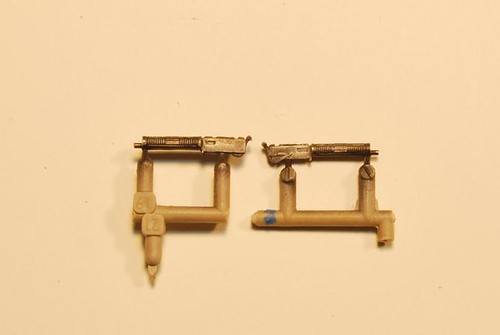
Still need to paint the struts and fix them before the rigging can begin.
Thanks for checking in.
and a shot of the twin .303 Vickers
Still need to paint the struts and fix them before the rigging can begin.
Thanks for checking in.
JackFlash
Joined: January 25, 2004
KitMaker: 11,669 posts
AeroScale: 11,011 posts
Posted: Saturday, February 23, 2013 - 07:36 PM UTC
Quoted Text
Spent the better part of the weekend trying to figure out 5 color camouflage. The instruction sheets, as mentioned in Jackflash's review, are black/white. I was left trying to decipher the colors by the box art profiles. I did get the SPAD painted and the decals in place. . .
For anyone interested.
Mobious
Joined: May 18, 2008
KitMaker: 210 posts
AeroScale: 80 posts
Posted: Monday, February 25, 2013 - 02:39 PM UTC
Made a little progress on the cabane struts.
Thanks for checking in
Thanks for checking in
Mobious
Joined: May 18, 2008
KitMaker: 210 posts
AeroScale: 80 posts
Posted: Saturday, March 09, 2013 - 01:18 PM UTC
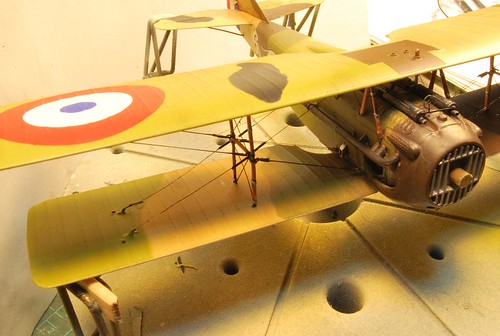
Had some trouble, broke one of the lower wings and one of the inner struts. Added brass pins to the wing, but the inner strut is too thin. Hopefully the glue and the lower half of the rigging will hold it in place.
Here's a shot of the progress.
This is an overhead shot.
Need to assemble the actuators, getting close to attaching the upper wing. Sorry it took so long for the update.
Here's a shot of the progress.
This is an overhead shot.
Need to assemble the actuators, getting close to attaching the upper wing. Sorry it took so long for the update.

Gremlin56
Joined: October 30, 2005
KitMaker: 3,897 posts
AeroScale: 564 posts
KitMaker: 3,897 posts
AeroScale: 564 posts
Posted: Saturday, March 09, 2013 - 06:47 PM UTC
Looks gorgeous ! Magnificent build so far,
Julian
Julian
OEFFAG_153
Joined: February 19, 2010
KitMaker: 1,473 posts
AeroScale: 1,450 posts
Posted: Sunday, March 10, 2013 - 08:54 PM UTC
This is looking absolutely fantastic!
Mikael
Mikael
Mobious
Joined: May 18, 2008
KitMaker: 210 posts
AeroScale: 80 posts
Posted: Friday, March 15, 2013 - 01:54 PM UTC
Hello,
I decide to add the upper wing prior to setting the outer struts in order to make rigging of the upper half a tad bit easier.
Here's a shot of the upper rigging added.
I've had to make a few minor adjustments to the inner strut bracing as the upper wing was aligned and the outer struts were added and final bracing was installed. Also the landing gear has been added and is ready for rigging. I hope to have more progress pics up soon.
Thanks everyone for the encouragement, It really has helped and is greatly appreciated.
Mobious
Joined: May 18, 2008
KitMaker: 210 posts
AeroScale: 80 posts
Posted: Sunday, March 17, 2013 - 11:26 AM UTC
Hello,
Finished up the SPAD late last night and got a couple of photos
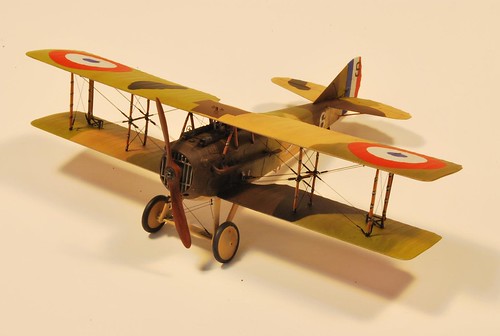
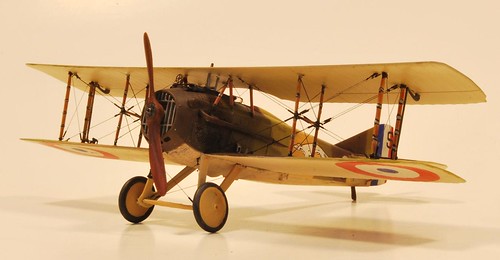
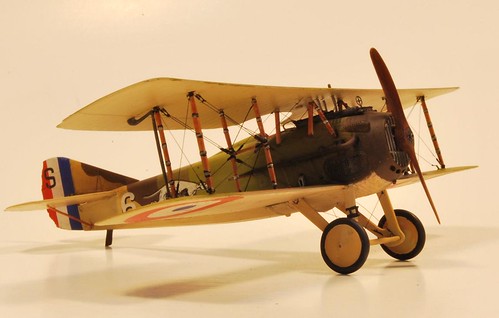
Thanks for checking in
PS would it be possible to enter another project?
Finished up the SPAD late last night and got a couple of photos
Thanks for checking in
PS would it be possible to enter another project?
JackFlash
Joined: January 25, 2004
KitMaker: 11,669 posts
AeroScale: 11,011 posts
Posted: Sunday, March 17, 2013 - 06:54 PM UTC
Absolutely, and don't forget to upload your finished build images to the gallery. See the sign up thread for that location.

lcarroll
Joined: July 26, 2010
KitMaker: 1,032 posts
AeroScale: 1,025 posts
Posted: Monday, March 18, 2013 - 10:15 AM UTC
Mobious,
Beautiful to behold! Great colours and the hardware on the rigging is particularly well done. Hope your pride in this excellent Build is as strong as the pleasure it brings to others to view it. I look forward to following your next entry.
Well done!
Cheers,
Lance

Beautiful to behold! Great colours and the hardware on the rigging is particularly well done. Hope your pride in this excellent Build is as strong as the pleasure it brings to others to view it. I look forward to following your next entry.
Well done!
Cheers,
Lance

GhostHawk

Joined: January 27, 2011
KitMaker: 268 posts
AeroScale: 264 posts
Posted: Monday, March 18, 2013 - 10:58 AM UTC
Hello:
Really Cool Job...!!!
Congrats & BTW....!
Diego
Really Cool Job...!!!
Congrats & BTW....!
Diego
Mobious
Joined: May 18, 2008
KitMaker: 210 posts
AeroScale: 80 posts
Posted: Wednesday, March 20, 2013 - 08:42 AM UTC
Thanks for the positive comments. Fear struck me when, as I was tying the outboard strut bracing wires and fumbled the tweezers down thru the center of the struts. I had to set everything down, step away from the scene, regain composure, and assess the damage. Fortunately the tweezers broke only a single outside strut, which was easily fixed with the wires still attached. I'm still applying some pastels and tinkering with a few things. Thanks again for the positive comments from everyone. Hope to be starting another build soon.
 |

WEB HOSTING BY


Copyright ©2021 AeroScale and Kitmaker Network, a subsidiary of Silver Star Enterprises
All Rights Reserved. Please read our Conditions of Use and Privacy Policy.
All Rights Reserved. Please read our Conditions of Use and Privacy Policy.