_GOTOBOTTOM
Cold War (1950-1974)
Discuss the aircraft modeling subjects during the Cold War period.
Hosted by Tim Hatton
DH Venom in glorious 1/48
raypalmer
_VISITCOMMUNITY
Ontario, Canada
Joined: March 29, 2010
KitMaker: 1,151 posts
AeroScale: 985 posts
Posted: Saturday, March 30, 2013 - 02:31 PM UTC
Here's a question:

What colour for the wheel bays and struts? Owing to the crouched stance of the thing it's very hard to get a look in photos... It looks like bare aluminum struts and bays? Possibly light grey?

Here's a picture of some some Swiss Venoms out for a romp to get the blood pumping.

Jessie_C
_VISITCOMMUNITY
British Columbia, Canada
Joined: September 03, 2009
KitMaker: 6,965 posts
AeroScale: 6,247 posts
Posted: Saturday, March 30, 2013 - 02:50 PM UTC
According to Warpaint #44 it looks as though they're painted aluminium, which makes sense given that they were first done in overall high speed silver paint. The wells would probably be a bit dirty what with hydraulic fluid, airfield dust and brake dust.
raypalmer
_VISITCOMMUNITY
Ontario, Canada
Joined: March 29, 2010
KitMaker: 1,151 posts
AeroScale: 985 posts
Posted: Saturday, March 30, 2013 - 03:24 PM UTC
Well here it is with panel lines and a coat of Dark Sea Grey. I haven't got any PRU blue yet... Will try and apply the green tomorrow. Eagle eyed among you will notice the dorsal inlet missing. I have lost it. So unless it reappears this Venom will just have to do without.

Jessie_C
_VISITCOMMUNITY
British Columbia, Canada
Joined: September 03, 2009
KitMaker: 6,965 posts
AeroScale: 6,247 posts
Posted: Saturday, March 30, 2013 - 03:57 PM UTC
It shouldn't be too difficult to smash-mould a replacement.
raypalmer
_VISITCOMMUNITY
Ontario, Canada
Joined: March 29, 2010
KitMaker: 1,151 posts
AeroScale: 985 posts
Posted: Monday, April 01, 2013 - 03:30 PM UTC


Ah what fun. Vallejo is a bit delicate isn't it. The alcohol thinner in my white highlighting pass burned through it in a few spots. Now the enjoyment of touch ups.

Jess, I fear my sculpting ability is not yet at a point where I can do inlets. It's probably going to have to be an omitted part
Jessie_C
_VISITCOMMUNITY
British Columbia, Canada
Joined: September 03, 2009
KitMaker: 6,965 posts
AeroScale: 6,247 posts
Posted: Monday, April 01, 2013 - 04:02 PM UTC
Actually you don't really need much in the way of sculpting talent, you just need to be able to sand a piece of sprue to the shape of the inlet. Take a look in chukw1's Me-509 thread for the technique. It's in this picture.
raypalmer
_VISITCOMMUNITY
Ontario, Canada
Joined: March 29, 2010
KitMaker: 1,151 posts
AeroScale: 985 posts
Posted: Sunday, April 07, 2013 - 02:38 PM UTC

Quoted Text

Actually you don't really need much in the way of sculpting talent, you just need to be able to sand a piece of sprue to the shape of the inlet. Take a look in chukw1's Me-509 thread for the technique. It's in this picture.

I'm still boned I think. It's extremely similar to the air intake on early spitfires. I tried to smash it with some plasticard but there are compound curves yadda yadda. Rather annoyed with myself.

I may just touch up the paint on the topside now and move on.
Jessie_C
_VISITCOMMUNITY
British Columbia, Canada
Joined: September 03, 2009
KitMaker: 6,965 posts
AeroScale: 6,247 posts
Posted: Sunday, April 07, 2013 - 03:45 PM UTC
According to the drawings in the aforementioned book, the FB-1 wasn't equipped with that particular intake anyway, so you may as well polish off the mounting point and paint it all over.
raypalmer
_VISITCOMMUNITY
Ontario, Canada
Joined: March 29, 2010
KitMaker: 1,151 posts
AeroScale: 985 posts
Posted: Monday, April 08, 2013 - 04:52 AM UTC
Dammit Classic Airframes. I thought I could trust the instructions on this one.

Oh well, losing that piece was a blessing in disguise.
raypalmer
_VISITCOMMUNITY
Ontario, Canada
Joined: March 29, 2010
KitMaker: 1,151 posts
AeroScale: 985 posts
Posted: Wednesday, April 10, 2013 - 03:02 PM UTC
Ok so I touched up the topside blemishes but forgot to sand away the spot for the dorsal scoop. Everything about this build us taking too long so I'm just going to leave it. It doesn't have to be a Steinway...


Topsides. I think I used a not quite right vallejo for the green but what can you do.


PRU blue looks bang on in person. Transition needs major touch ups. I masked the whole topside but plum forgot to do the nose so there it is, making work for myself as usual.

After touch ups I'll paint aluminium in the wheel bays, paint the jet pipe and then decals.

raypalmer
_VISITCOMMUNITY
Ontario, Canada
Joined: March 29, 2010
KitMaker: 1,151 posts
AeroScale: 985 posts
Posted: Friday, April 12, 2013 - 02:30 PM UTC
This thread is degrading to a confab between Jessica and myself. But the show must go on!

Does anyone know the story with the funky front tyre? I thought the kit inexplicably provided only a rim for the nosewheel, but careful squinting at reference photos indicated it was indeed a strange bifurcated tyre. A non-pneumatic tyre?


SITREP: Decaling has begun, belly finished save red dots on roundels. Undercarriage preliminary painting complete.
Jessie_C
_VISITCOMMUNITY
British Columbia, Canada
Joined: September 03, 2009
KitMaker: 6,965 posts
AeroScale: 6,247 posts
Posted: Friday, April 12, 2013 - 04:19 PM UTC
It's an anti-shimmy tire. Many different British aircraft had them.
SHarjacek
_VISITCOMMUNITY
Croatia Hrvatska
Joined: January 29, 2011
KitMaker: 977 posts
AeroScale: 263 posts
Posted: Friday, April 12, 2013 - 04:38 PM UTC
Looks cool Ray!
raypalmer
_VISITCOMMUNITY
Ontario, Canada
Joined: March 29, 2010
KitMaker: 1,151 posts
AeroScale: 985 posts
Posted: Thursday, April 18, 2013 - 02:14 PM UTC
SITREP:

The Aztek broke. Diagnosis: A part that should be made of metal is made of plastic.

Recommendation: Do not buy an Aztek.

Anyway I fixed the Aztek for now. Here we have the belly, no weathering yet, mostly will just do panel lines and dull down the interior surfaces.


Surface pre decals. Looks okay, will likely fade this once decals are on.


Surface, into decaling.


It's okay. I want to go over it with a thin colour, like the armour folks do with buff. I'm thinking of using light grey????

raypalmer
_VISITCOMMUNITY
Ontario, Canada
Joined: March 29, 2010
KitMaker: 1,151 posts
AeroScale: 985 posts
Posted: Saturday, April 20, 2013 - 08:52 AM UTC
Jess we need status reports!!!!

I have finished the decals. Hopefully tonight I can future the brute!


Jessie_C
_VISITCOMMUNITY
British Columbia, Canada
Joined: September 03, 2009
KitMaker: 6,965 posts
AeroScale: 6,247 posts
Posted: Saturday, April 20, 2013 - 11:30 AM UTC

Quoted Text

Jess we need status reports!!!!


Matters still stand as they did at my last update. I've been concentrating on the Voyager and Sabre lately. Now that they're done I can do some work on the Venom. Aeroscale supplies not a few white metal bits with which to festoon the inside of the cockpit. I'll need to lay them out and figure out which bit goes where.
raypalmer
_VISITCOMMUNITY
Ontario, Canada
Joined: March 29, 2010
KitMaker: 1,151 posts
AeroScale: 985 posts
Posted: Sunday, April 21, 2013 - 02:02 PM UTC
Well as I mentioned elsewhere, all that's left is for a particularly juicy whisker to come off a cat and I'll have the antenna.

Otherwise we are complete.


Conclusions:

I would build another classic airframes kit. But only if it were the only kit available or the clearly more accurate offering in a given scale on a given subject, the Sparviero jumps to mind...

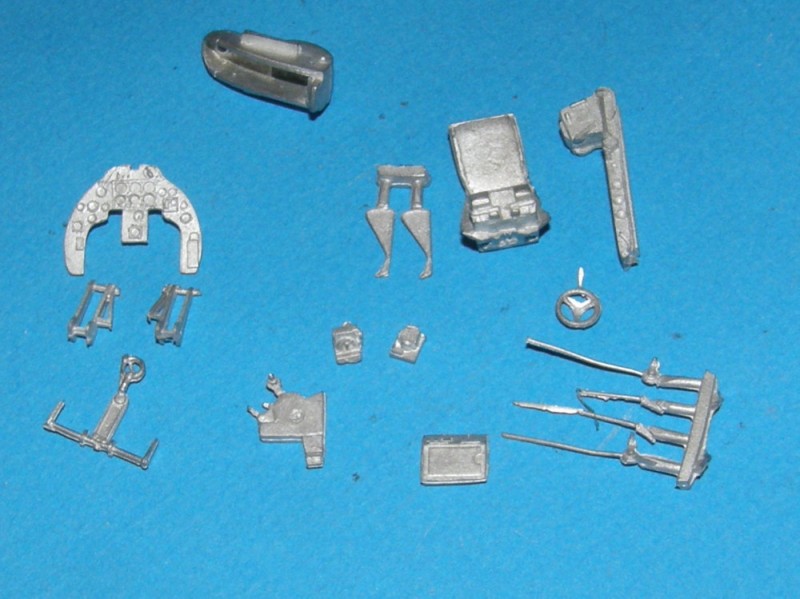
Pros: Nicely detailed cockpit. Accurate model. Good decals (although the blue on mine was ever so slightly off centre).

Cons: Instructions lacking, fit it middle of the road, panel lines not crisp. More like panel indents. Lend themselves to being sanded away.

Edit: Forgot to mention the instructions don't tell you HOW MUCH weight to put in the nose. So, not wanting to strain the delicate nose fork, I stuffed the whole nose full of modelling clay, instead of the customary lead sinker.

Did not cut it....
Jessie_C
_VISITCOMMUNITY
British Columbia, Canada
Joined: September 03, 2009
KitMaker: 6,965 posts
AeroScale: 6,247 posts
Posted: Sunday, April 21, 2013 - 04:14 PM UTC
Aeroclub's injection parts are thick and glossy. The sprue gates are quite chunky, and should be cut with a saw to avoid damaging the parts. The plastic responds well to liquid glue, squeezing out and sealing the halves together wonderfully.
Booms and tip tanks

Nose, cockpit floor and rear bulkhead

Cockpit floor and bulkhead posed more or less in their proper position.

All of the metal bits which belong in the cockpit. The nose wheel well, ejection seat and headrest are substantial lumps of metal which will help to keep the model from being a tail-sitter. Remaining parts are the throttle quadrant, instrument panel, rudder pedals, joystick, gunsight, random junction box, right side console and a few other greeblies which go on the cockpit walls. I'm going to have to spend some quality time with my references to see what kind of pipes and wires I can add to the office, keeping in mind that it's all going to be painted dark grey inside.
 _GOTOTOP