_GOTOBOTTOM
Cold War (1950-1974)
Discuss the aircraft modeling subjects during the Cold War period.
Hosted by Tim Hatton
DH Venom in glorious 1/48
raypalmer
_VISITCOMMUNITY
Ontario, Canada
Joined: March 29, 2010
KitMaker: 1,151 posts
AeroScale: 985 posts
Posted: Monday, February 18, 2013 - 04:55 PM UTC
Hi all,

I've decided I'm going to do my second build log here. This time the its going to be Classic Airframes' De Havilland Venom FB 1.

I've never done a Classic Airframes kit, but from what I can see in the box, and from people's sentiments online, this is a firm that should come back out of hiding from the economic bogeyman.

I intend to buy one of the Alley Cat Vampires for a loose comparison. Somewhere down the line...

Anyway, the box art is top shelf, one of CA's hallmarks. Inside is an all resin cockpit, intakes, turbine blades, the styrene is not Tamegawa by any measure, but free from flash and sinks. PE is not present but I think we'll manage...

Watch this space!
Jessie_C
_VISITCOMMUNITY
British Columbia, Canada
Joined: September 03, 2009
KitMaker: 6,965 posts
AeroScale: 6,247 posts
Posted: Monday, February 18, 2013 - 05:38 PM UTC
It might be fun to do this one in a parallel build
spaarndammer
_VISITCOMMUNITY
Noord-Holland, Netherlands
Joined: January 28, 2007
KitMaker: 1,945 posts
AeroScale: 388 posts
Posted: Monday, February 18, 2013 - 11:51 PM UTC
So, that makes already four builds of the DH Venom / Vampire. Nice!

If I only had some time left, I would for sure join in...
raypalmer
_VISITCOMMUNITY
Ontario, Canada
Joined: March 29, 2010
KitMaker: 1,151 posts
AeroScale: 985 posts
Posted: Tuesday, February 19, 2013 - 12:31 AM UTC

Quoted Text

It might be fun to do this one in a parallel build

Dueling De Havillands!
Jessie_C
_VISITCOMMUNITY
British Columbia, Canada
Joined: September 03, 2009
KitMaker: 6,965 posts
AeroScale: 6,247 posts
Posted: Tuesday, February 19, 2013 - 05:06 AM UTC

Quoted Text

So, that makes already four builds of the DH Venom / Vampire. Nice!


6 more and we have a campaign!
(Cue Dorothy...)
Vampires and Venoms and Vixens, oh my!
spaarndammer
_VISITCOMMUNITY
Noord-Holland, Netherlands
Joined: January 28, 2007
KitMaker: 1,945 posts
AeroScale: 388 posts
Posted: Tuesday, February 19, 2013 - 07:20 AM UTC
If it becomes a campaign, I am in.

*start looking for a kit...

Jelger
Jessie_C
_VISITCOMMUNITY
British Columbia, Canada
Joined: September 03, 2009
KitMaker: 6,965 posts
AeroScale: 6,247 posts
Posted: Tuesday, February 19, 2013 - 11:02 AM UTC
We are faced with a choice. Do we:

a) try and drum up enough support for an official DH campaign?
b) just relax and do parallel builds in an 'unofficial' campaign?

If b is chosen, do we hijack Richard's thread or start a fresh one. I vote for the fresh one
raypalmer
_VISITCOMMUNITY
Ontario, Canada
Joined: March 29, 2010
KitMaker: 1,151 posts
AeroScale: 985 posts
Posted: Tuesday, February 19, 2013 - 01:29 PM UTC
But then what would I do for "anything goes?"

Seriously though we could do a De Havilland campaign but I wouldn't be allowed to do my favourite De Havilland.

SgtRam
Staff MemberEditor-at-Large
AEROSCALE
#197
_VISITCOMMUNITY
Ontario, Canada
Joined: March 06, 2011
KitMaker: 3,971 posts
AeroScale: 511 posts
Posted: Tuesday, February 19, 2013 - 01:33 PM UTC
I would be up for a DH campaign. I have the same Classic Airframes kit in my stash that I would like to start. Or it would give me a reason to look for a DH-9 to build.

Kevin
vanize
_VISITCOMMUNITY
Texas, United States
Joined: January 30, 2006
KitMaker: 1,954 posts
AeroScale: 1,163 posts
Posted: Wednesday, February 20, 2013 - 07:55 AM UTC
de Havilland campaign!!!! do it!
raypalmer
_VISITCOMMUNITY
Ontario, Canada
Joined: March 29, 2010
KitMaker: 1,151 posts
AeroScale: 985 posts
Posted: Thursday, February 21, 2013 - 03:35 PM UTC
Alright so I've gotten to it a bit now. The resin cockpit is pretty good, but not amazing.


The Martin Baker ejector seat is pretty close to bullseye, but the cabin sides are very spartan and only loosely follow the real thing. The control panel is exceedingly simplified... Here is the reference photo I'm using.


So anyway I noticed that the bulkhead behind the ejector is totally blank on the starboard side, I couldn't find any images of this area so I just decided it was a good place for GNDN plumbing. I also added the ejector handle and breaker. All made of Cat5 wire.


So I'm slowly plugging through the painting of the cockpit. I'm enjoying this cockpit for a change, let's see if I can do anything god with it. I would add more detail to it but my scratchbuilding skills are still only nascent.
Jessie_C
_VISITCOMMUNITY
British Columbia, Canada
Joined: September 03, 2009
KitMaker: 6,965 posts
AeroScale: 6,247 posts
Posted: Thursday, February 21, 2013 - 03:39 PM UTC

Quoted Text

..let's see if I can do anything god with it.


"Let there be light!"

Because once you close up that black cockpit you won't be able to see anything anyway

I recommend doing '50s Brit aircraft in dark grey rather than pure black, then drybrush over with Neutral Grey to give the place a few highlights.
raypalmer
_VISITCOMMUNITY
Ontario, Canada
Joined: March 29, 2010
KitMaker: 1,151 posts
AeroScale: 985 posts
Posted: Monday, February 25, 2013 - 03:28 PM UTC
AAAAAAAAhhhh fuzz. I just typed a whole epistle and accidentally closed the tab before submitting

Once again...

Here's my progress thus far.


I saw the back rests on the martin baker in several different colours so just went with brown. Some seats had butt pads and others didn't, one imagines taller pilots had to do without. So mine has no butt pad.

I'm no master but I feel I'm improving. Have to say I owe it to all the builders on here that post build logs or just informative things.

I sifted the internet paint conversion databases and bought these for the exterior scheme, hopefully I'm close to the mark.


AussieReg
Staff MemberAssociate Editor
AUTOMODELER
#007
_VISITCOMMUNITY
Victoria, Australia
Joined: June 09, 2009
KitMaker: 8,156 posts
AeroScale: 3,756 posts
Posted: Monday, February 25, 2013 - 05:50 PM UTC

Quoted Text

AAAAAAAAhhhh fuzz. I just typed a whole epistle . . .


I had an epistle once, my doctor gave me a shot and it cleared up in a couple of days !

Very nice work so far, I will be following your build right through.

Cheers, D
raypalmer
_VISITCOMMUNITY
Ontario, Canada
Joined: March 29, 2010
KitMaker: 1,151 posts
AeroScale: 985 posts
Posted: Saturday, March 02, 2013 - 05:28 PM UTC
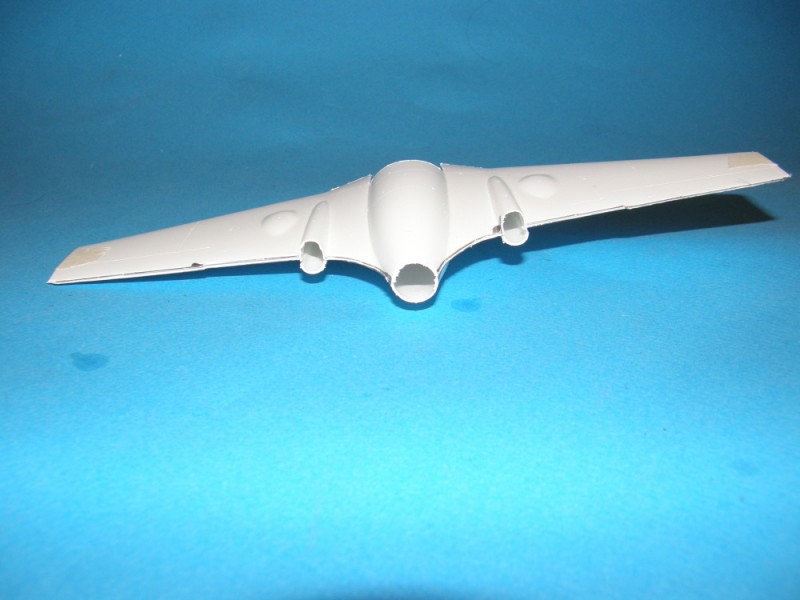
Well the cockpit assembly falls into the "sorta fits" category, but nothing terrible. I got it in, but there is a bit of a little gap on the belly. I expected this to mean I would need to bisect the separate ventral panel and build it out with styrene to make it that sixteenth wider on one end. But strangely, it fit perfectly. The gap is accounted for maybe?

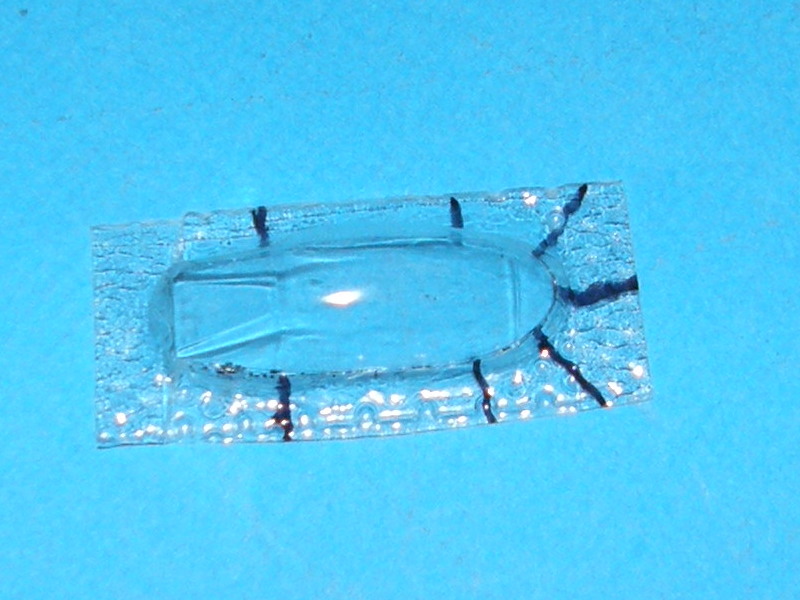
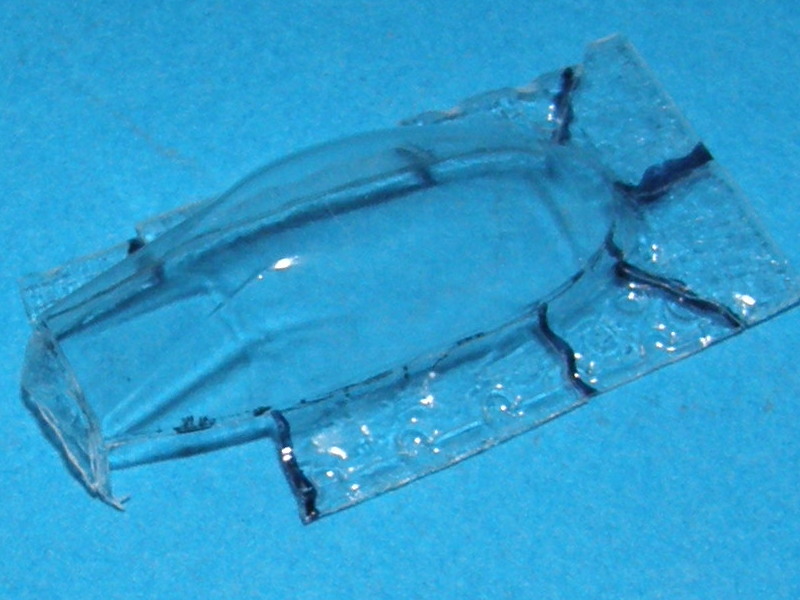
Anyway owing to the tight fit around the cockpit I broke with convention and used a spring clamp. Unfortunately this model is not quite so rugged and the clamp fractured the fuselage on either side of the nose. 
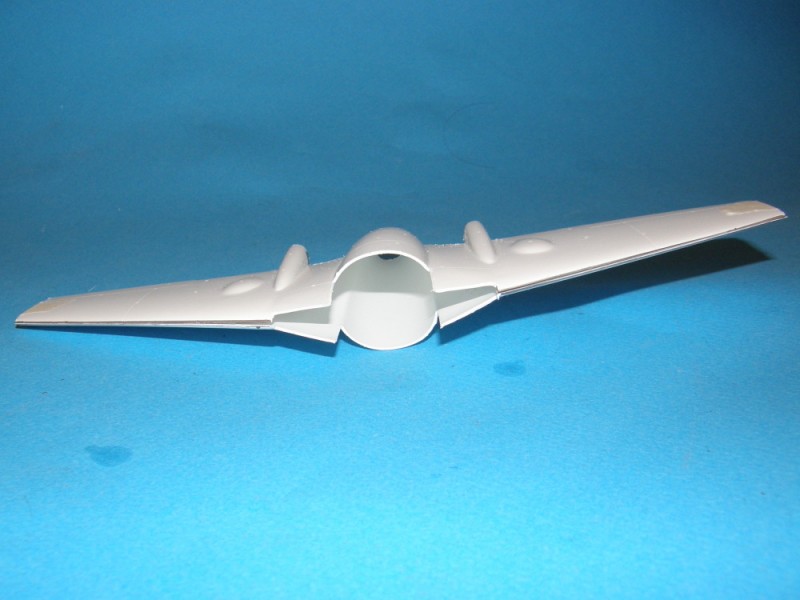
One piece came free and left it looking like it took a 30mm strike.


Cue green stuff.


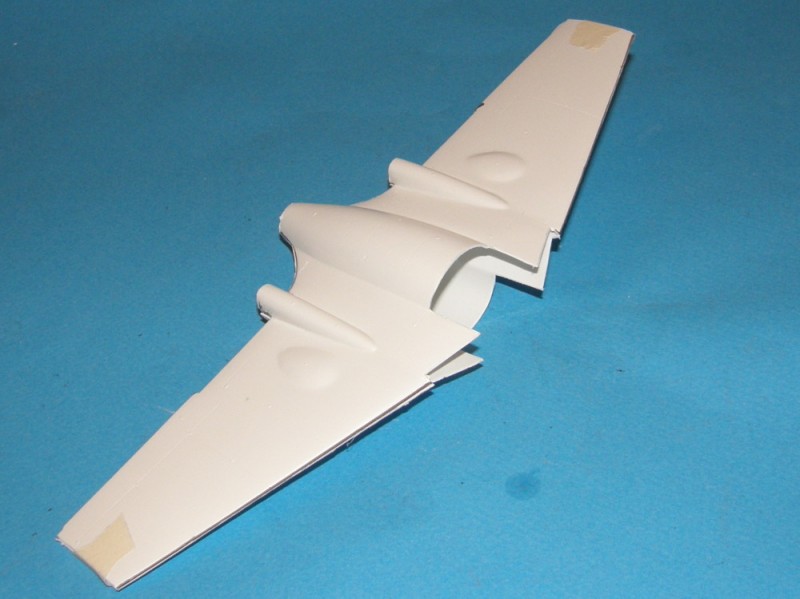
Starting to look like a Venom.

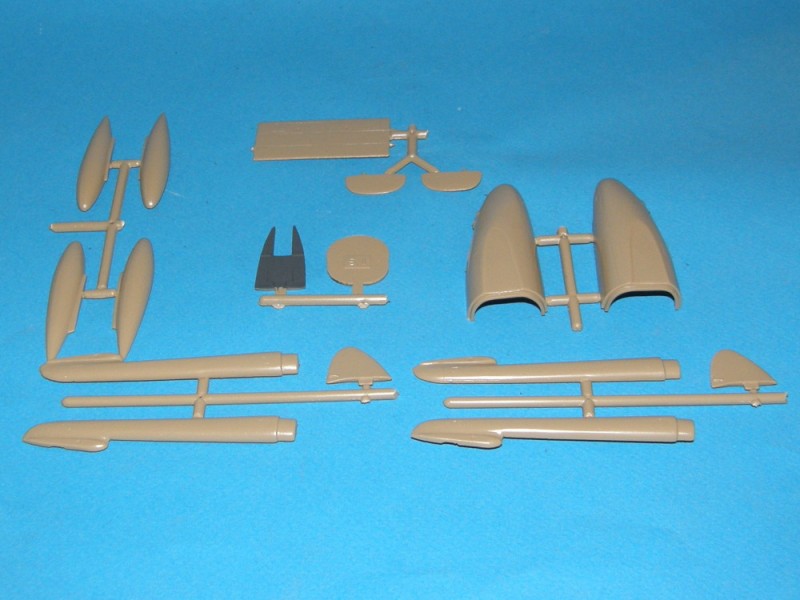
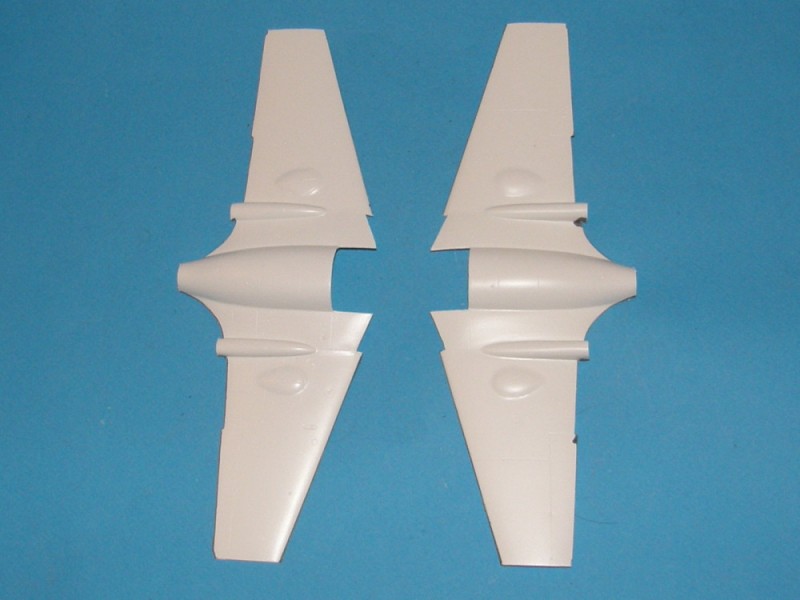
Anyway it's going along now. There are ejector marks that must be gouged away. There are a few instances of inconsequential flash and two major ones. Essentially monster flash fills in part of the landing gear holes on the underside of either wing, they need to be carved and sanded out.

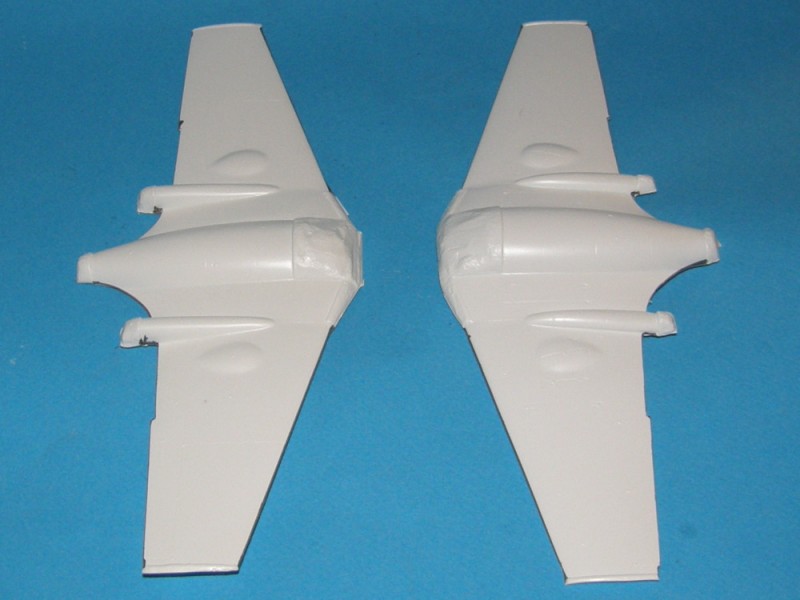
The two fuselage halves were a solid 32nd apart in length, but the panel lines agree enough that I could just sand away the difference.

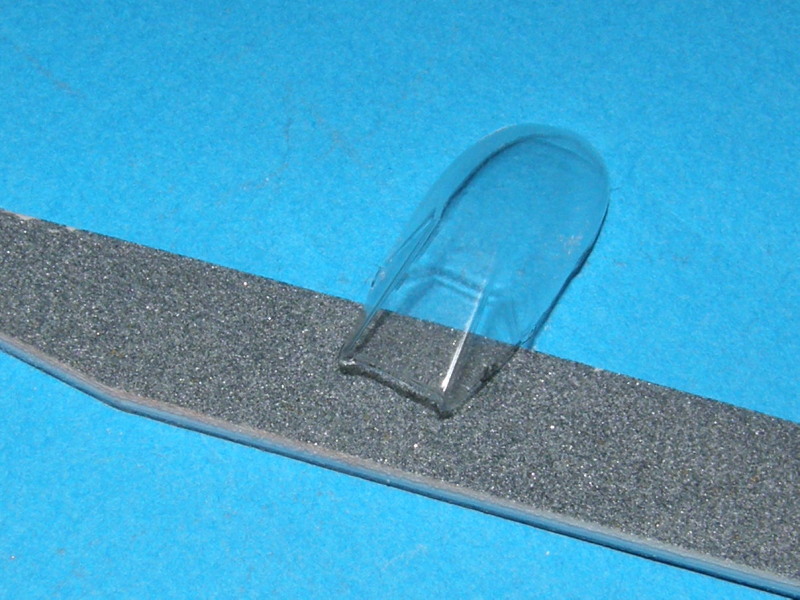
The jetpipe mold wasn't set quite correctly on this one, the result is the pipe is hair-thin on one side and quite thick on the other. Considerably cautious sanding brought the edge to as close of a uniformly sharpness as I was willing to risk.

Having said all this, it's a shorter run kit. It's what was at least, a less common subject. And it's still a very good kit. Just a bit like cheez whiz, it has personality.
Jessie_C
_VISITCOMMUNITY
British Columbia, Canada
Joined: September 03, 2009
KitMaker: 6,965 posts
AeroScale: 6,247 posts
Posted: Saturday, March 02, 2013 - 06:04 PM UTC
Rowan and Jean Luc did a parallel build of FW_190Ds a couple of years ago. Would you be willing to share your thread with a half vac kit? Of course it would mean that I'd have to catch up...
raypalmer
_VISITCOMMUNITY
Ontario, Canada
Joined: March 29, 2010
KitMaker: 1,151 posts
AeroScale: 985 posts
Posted: Saturday, March 02, 2013 - 06:10 PM UTC

Quoted Text

Rowan and Jean Luc did a parallel build of FW_190Ds a couple of years ago. Would you be willing to share your thread with a half vac kit? Of course it would mean that I'd have to catch up...

most assuredly yes Jess. I don't think you'll have trouble catching me. I'm lucky to get four hours a week at it.
Jessie_C
_VISITCOMMUNITY
British Columbia, Canada
Joined: September 03, 2009
KitMaker: 6,965 posts
AeroScale: 6,247 posts
Posted: Saturday, March 02, 2013 - 06:26 PM UTC
Okay, then here goes. First a look inside the Aeroclub box:
Wings/rear fuselage. I've roughly trimmed them out of their backing sheet, but there's still a lot of scrap to remove.

Injection parts, made from Aeroclub's thick taffy-coloured plastic. This is very short-run stuff here.

Quite a lot of white metal. This is most of the interior detail, plus landing gear and other detail bits.
raypalmer
_VISITCOMMUNITY
Ontario, Canada
Joined: March 29, 2010
KitMaker: 1,151 posts
AeroScale: 985 posts
Posted: Wednesday, March 13, 2013 - 05:14 AM UTC
About to lay the first primer coat. Likely will need significant sanding again after that. The primer shows all...

The fit situation around the resin intakes is not great.


spaarndammer
_VISITCOMMUNITY
Noord-Holland, Netherlands
Joined: January 28, 2007
KitMaker: 1,945 posts
AeroScale: 388 posts
Posted: Wednesday, March 13, 2013 - 09:25 AM UTC
Hi Richard,

Nice to see your build going on. A very nice cockpit. Although a lot of putty is required, the final result will be nice.

Also nice to see Jessica starting a build as well. Interesting to see how both kits will compare.


Jelger
Jessie_C
_VISITCOMMUNITY
British Columbia, Canada
Joined: September 03, 2009
KitMaker: 6,965 posts
AeroScale: 6,247 posts
Posted: Wednesday, March 13, 2013 - 01:32 PM UTC
Oh, did somebody call? Herewith, the progress of the Aeroclub kit:
Wings sanded and trimmed

Now two pieces of masking tape allow for a test fit


There remains some tidying up to do before I can glue them together.
raypalmer
_VISITCOMMUNITY
Ontario, Canada
Joined: March 29, 2010
KitMaker: 1,151 posts
AeroScale: 985 posts
Posted: Thursday, March 21, 2013 - 03:32 PM UTC


Why am I still sanding this??!?!


Aaaaaargh
Jessie_C
_VISITCOMMUNITY
British Columbia, Canada
Joined: September 03, 2009
KitMaker: 6,965 posts
AeroScale: 6,247 posts
Posted: Tuesday, March 26, 2013 - 03:35 AM UTC
There's an art to doing vac canopies. First, the Aeroclub canopy as supplied:

You want to score gently around the black line with a brand new razor knife blade. Don't use a dull one unless you want it to slip and ruin your canopy. Go slowly and do only a short distance at a time.

Then using small sharp pointed scissors, cut from the edge of the scrap up to the scored line. Start at a clearly defined point such as the windscreen corner for the first cut

You want to make several of these cuts around the perimeter of the canopy. Make them close together at sharply curved areas to avoid putting too much stress on the canopy

Then carefully bend the scrap plastic down and away from the scored line until it snaps free. You'll likely need to bend it back and forth a few times

Once the canopy has been freed from the scrap, you can clean up the rough edges with a sanding stick
GhostHawk
_VISITCOMMUNITY
Cordoba, Argentina
Joined: January 27, 2011
KitMaker: 268 posts
AeroScale: 264 posts
Posted: Tuesday, March 26, 2013 - 05:38 AM UTC
Hello,

It's a very usefull tip...

Thanks You Very Much Jessi...!

Diego
spaarndammer
_VISITCOMMUNITY
Noord-Holland, Netherlands
Joined: January 28, 2007
KitMaker: 1,945 posts
AeroScale: 388 posts
Posted: Tuesday, March 26, 2013 - 07:41 AM UTC
Very useful how to on the Vac canopy. Will use that for a future build.


Jelger
 _GOTOTOP