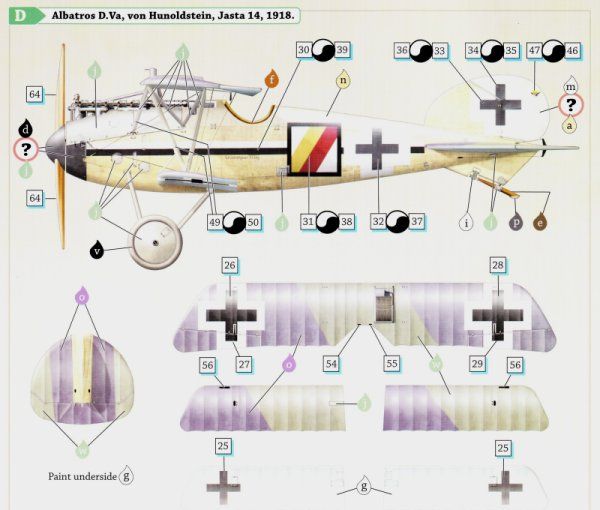
KotS III GB Albatros D.Va
New Jersey, United States
Joined: June 02, 2006
KitMaker: 1,212 posts
AeroScale: 468 posts
Posted: Friday, May 03, 2013 - 04:17 AM UTC
Hello lads and ladettes. Been a long time since of posted here mainly because I have not done a string bag in a while. But here we go again. I am building another D.Va for a WWI aviation group build over at FSM. Figured Id come back and say hi to some old friends. Been lurking here quite often though and still impressed with the quality of work here.
Pretty basic WIP so far

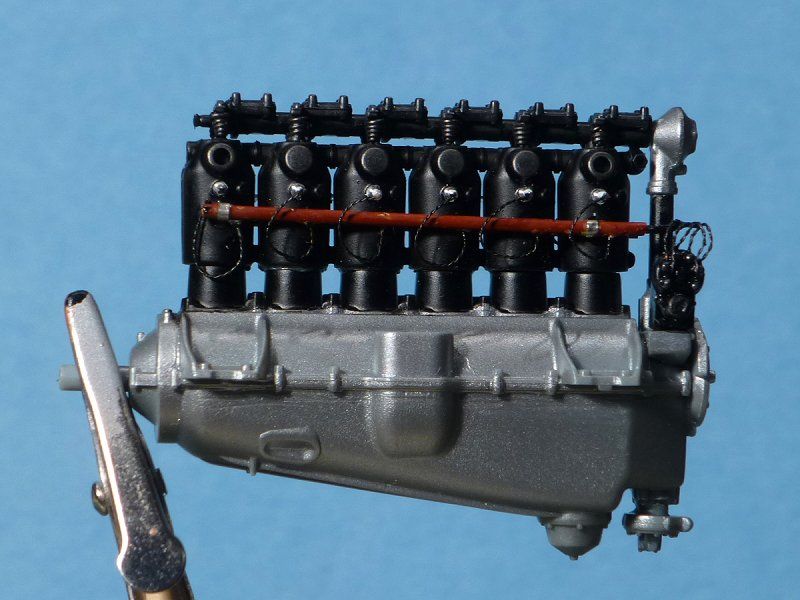
I just love these wee little spark plugs.
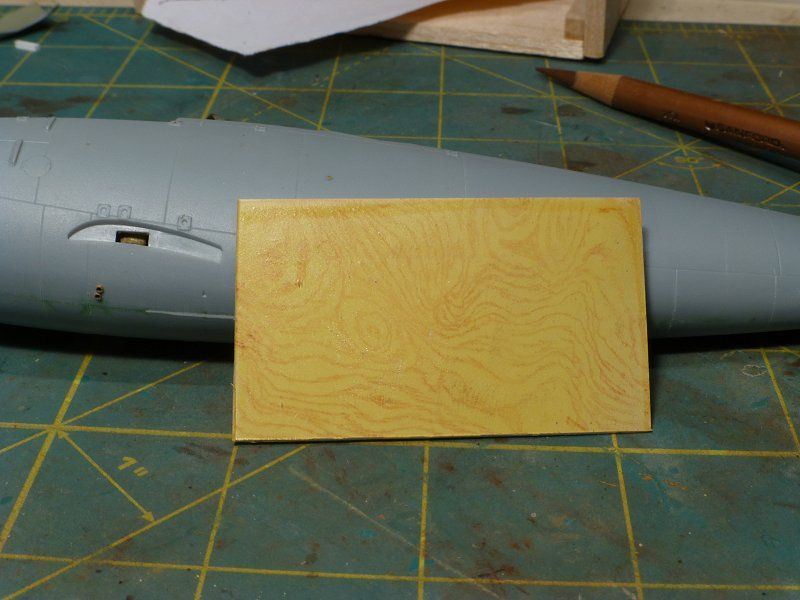
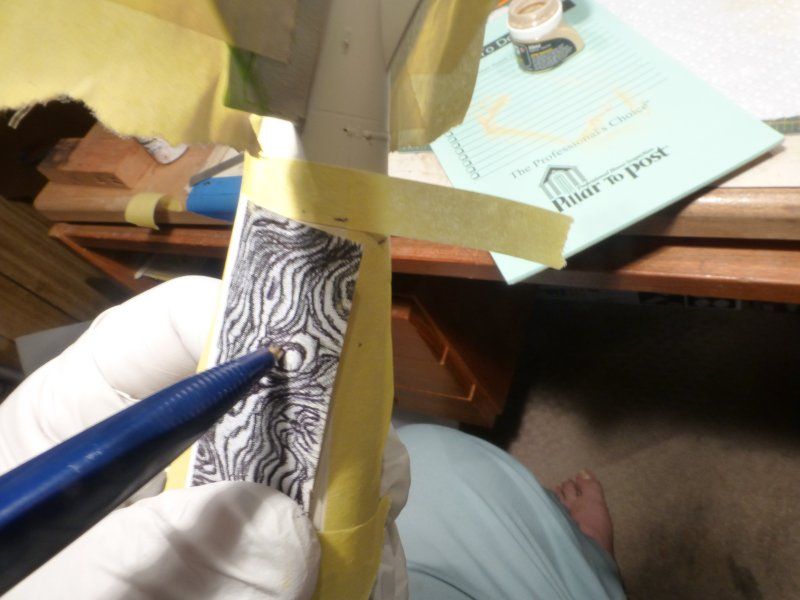
The latest plywood test
My only 2 bipes have had the lozenge so I have a question on this scheme. What kind of edge on the camo? A hard masked edge or a tight feathered edge?
Alberta, Canada
Joined: April 07, 2010
KitMaker: 1,028 posts
AeroScale: 939 posts
Posted: Friday, May 03, 2013 - 04:24 AM UTC
Wow, Marc. I have two V's and a Va in the stash, but certainly cannot raise you. Very well done, indeed!!! Will keep looking for more. Ben
To prevent being called an 'expert', screw something up good every now and again.
Cordoba, Argentina
Joined: January 27, 2011
KitMaker: 268 posts
AeroScale: 264 posts
Posted: Friday, May 03, 2013 - 06:43 AM UTC
Hi,
it is a really outstanding built...!!!

Congrats...

Diego

Colorado, United States
Joined: January 25, 2004
KitMaker: 11,669 posts
AeroScale: 11,011 posts
Posted: Friday, May 03, 2013 - 07:08 AM UTC
Quoted Text
Hello lads and ladettes. . .My only 2 bipes have had the lozenge so I have a question on this scheme. What kind of edge on the camo? A hard masked edge or a tight feathered edge?
As a general rule for most airframes.
Hard edge = in the field application or factory (especially when they got behind in contract orders).
Soft edge = Binks spray gun in the factory.
". . .The most important thing is to know why you build and then get the most that you can out of building." via D.D.
New Jersey, United States
Joined: June 02, 2006
KitMaker: 1,212 posts
AeroScale: 468 posts
Posted: Friday, May 03, 2013 - 09:35 AM UTC
Thanks for the comments guys. And thanks for the info. Buity how doe sone know whoch it is? See ms in there is a possibilty of a factory or filed "spray" job it is likley I'll be pretty safe with that. Good... that's what I wanted to do anyway

Indiana, United States
Joined: May 18, 2008
KitMaker: 210 posts
AeroScale: 80 posts
Posted: Monday, June 03, 2013 - 05:28 AM UTC
Nice work, the ply wood effect looks awesome.
"I don't give a d@mn what command says about anything, I'll tell'em when to hold!" Big Joe
New Jersey, United States
Joined: June 02, 2006
KitMaker: 1,212 posts
AeroScale: 468 posts
Posted: Monday, June 03, 2013 - 09:43 AM UTC
Jack, thanks for the transfer
Mobious, thanks for the comment. Appreciate it.
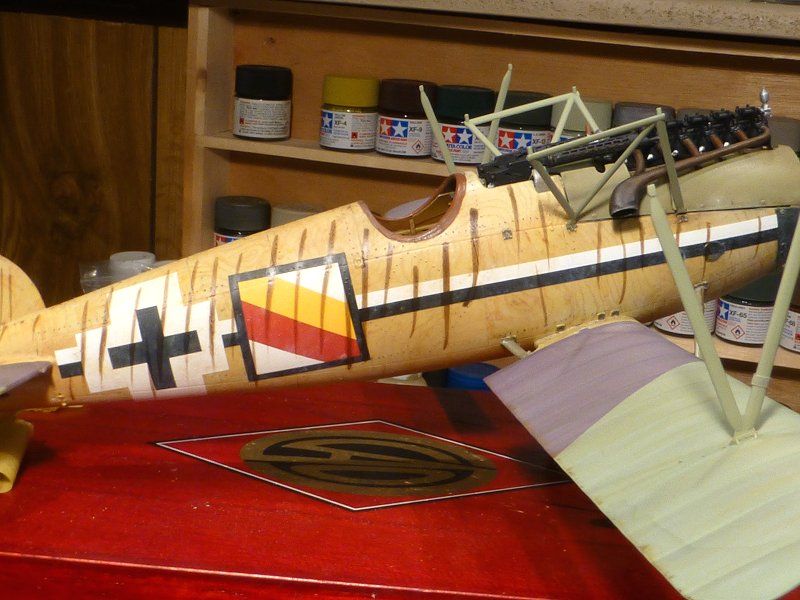
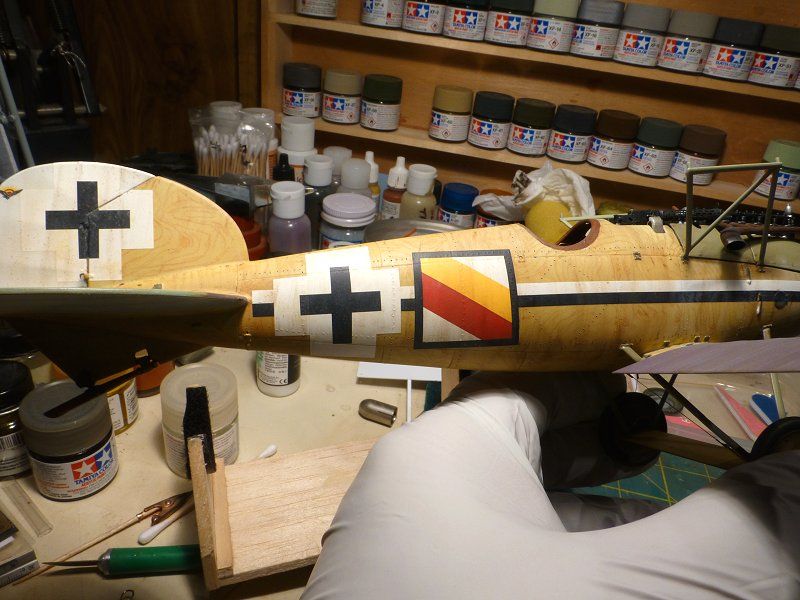
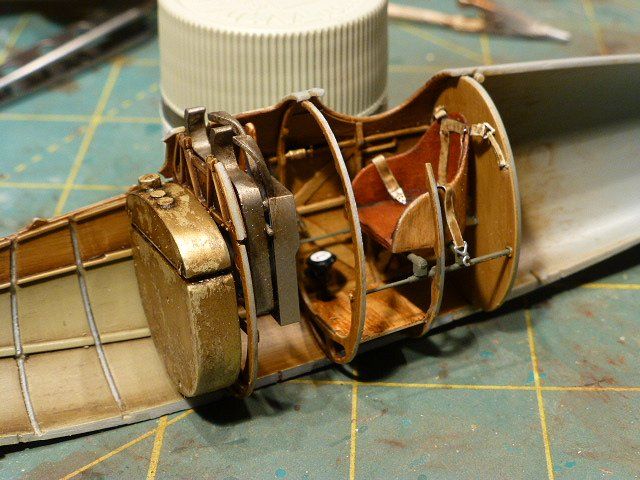
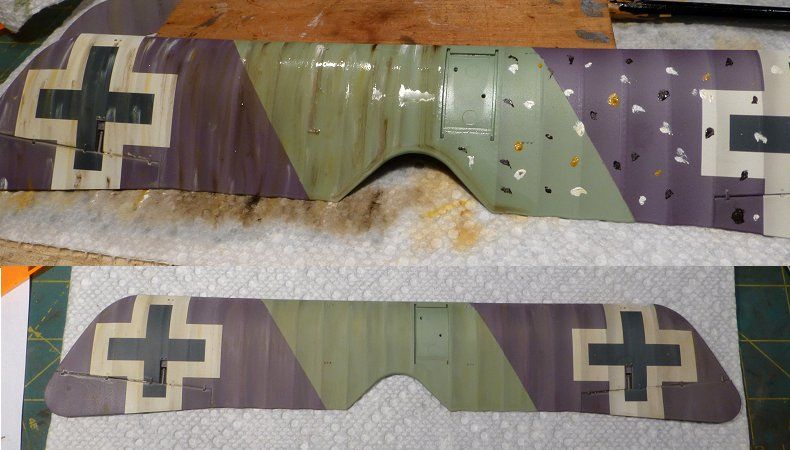
This is where I am at the moment
Dot filter on the upper wing for streaking and fading. If youve not heard of this it is a very common technique used by armor guys. When I went for all aircraft all the time to armor I had never heard of it. One side of each rib is shaded with alight spray of Tamiya Smoke.
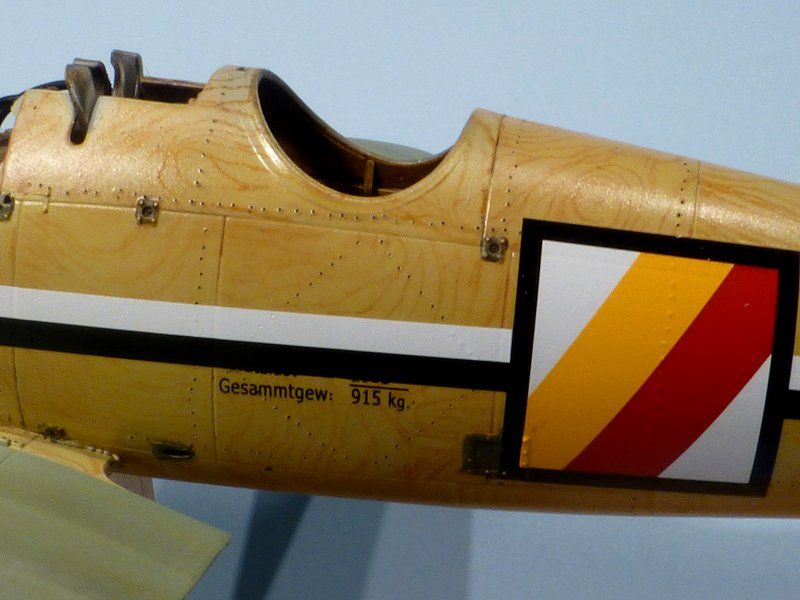
The plywood application
base color is a very lightened Tamiya Buff and the back of the wood grain paper has been coated with MIG Natural Wood pigment.
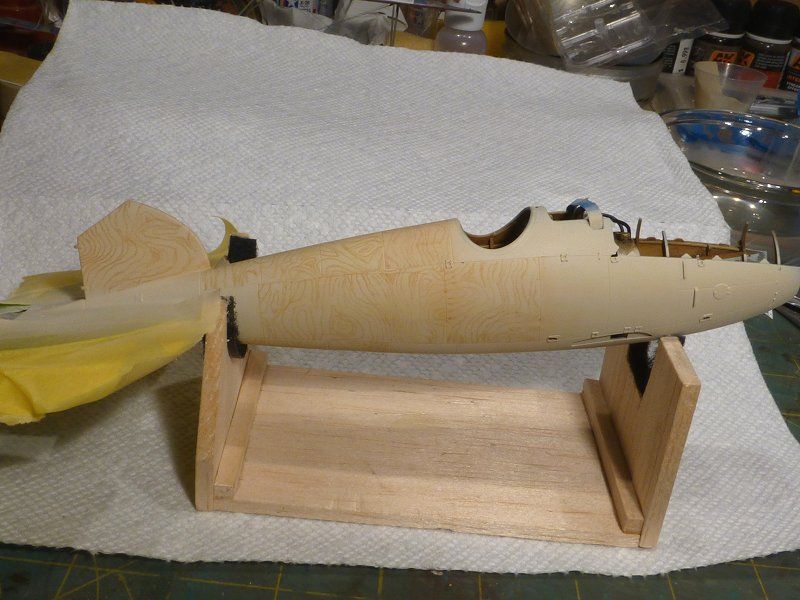
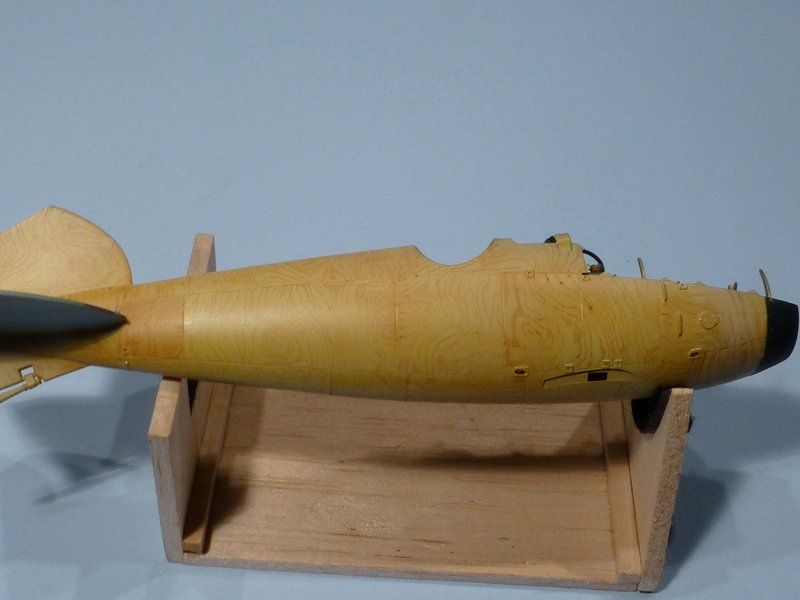
Thin coats of clear yellow applied.
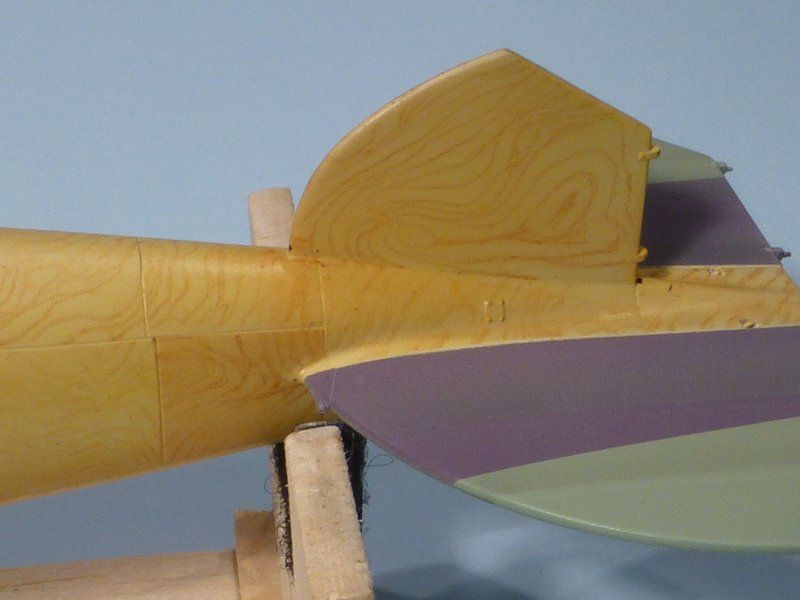
With some of the decals applied.

And nails
lots and lots of nails.
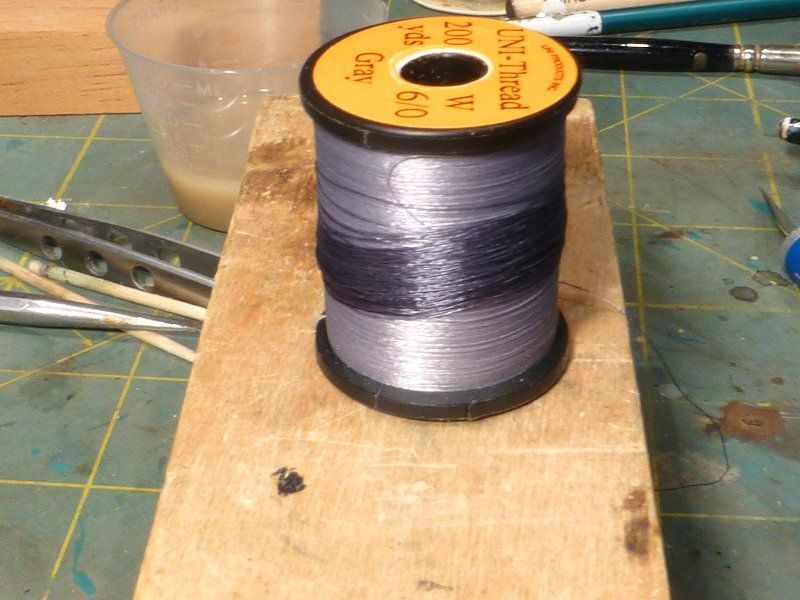
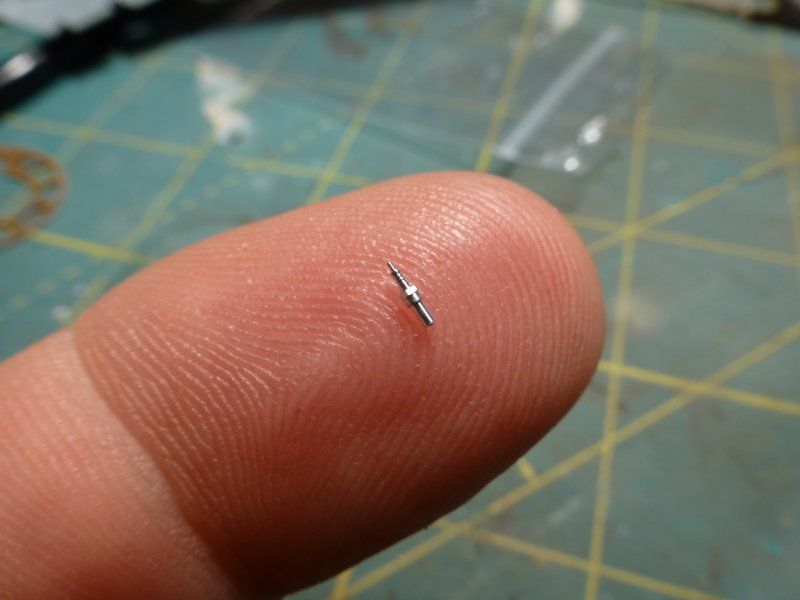
I am going to be using this little gem from Gaspatch as well as their turnbuckles.

England - East Midlands, United Kingdom
Joined: November 06, 2005
KitMaker: 753 posts
AeroScale: 311 posts
Posted: Monday, June 03, 2013 - 10:26 AM UTC
Brilliant work so far!
Gary
Indiana, United States
Joined: May 18, 2008
KitMaker: 210 posts
AeroScale: 80 posts
Posted: Monday, June 03, 2013 - 12:59 PM UTC
Very nice. Thanks for sharing the "How to Wood Grain". Everything is looking great. Be staying tuned in for updates.
"I don't give a d@mn what command says about anything, I'll tell'em when to hold!" Big Joe
New Jersey, United States
Joined: June 02, 2006
KitMaker: 1,212 posts
AeroScale: 468 posts
Posted: Tuesday, June 04, 2013 - 04:24 AM UTC
Gary, Mobious... thanks guys.
Västra Götaland, Sweden
Joined: February 19, 2010
KitMaker: 1,473 posts
AeroScale: 1,450 posts
Posted: Tuesday, June 04, 2013 - 10:29 PM UTC
Marc very nice textures and execution of wood and your dot filtering is first rate! Love the result (I learned the same technique from an armor builder)
Mikael
_________________________________________________________
Just finished the Wingnut Wings Taube. On to the Junkers D.1
New Jersey, United States
Joined: June 02, 2006
KitMaker: 1,212 posts
AeroScale: 468 posts
Posted: Thursday, June 06, 2013 - 11:58 PM UTC
Thanks Mikael.
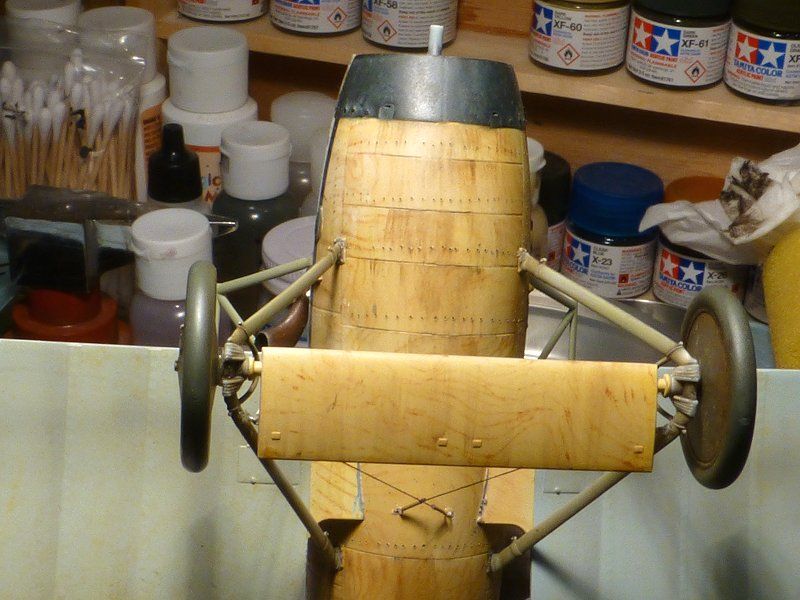
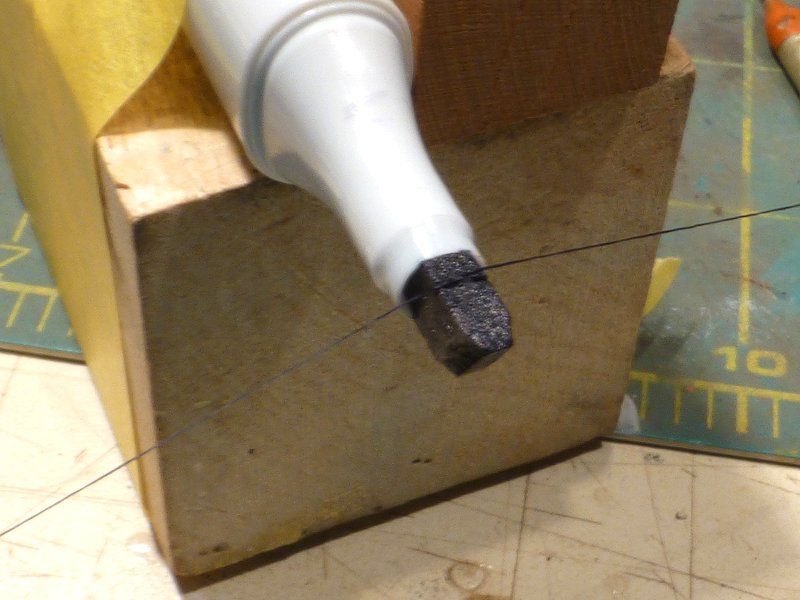
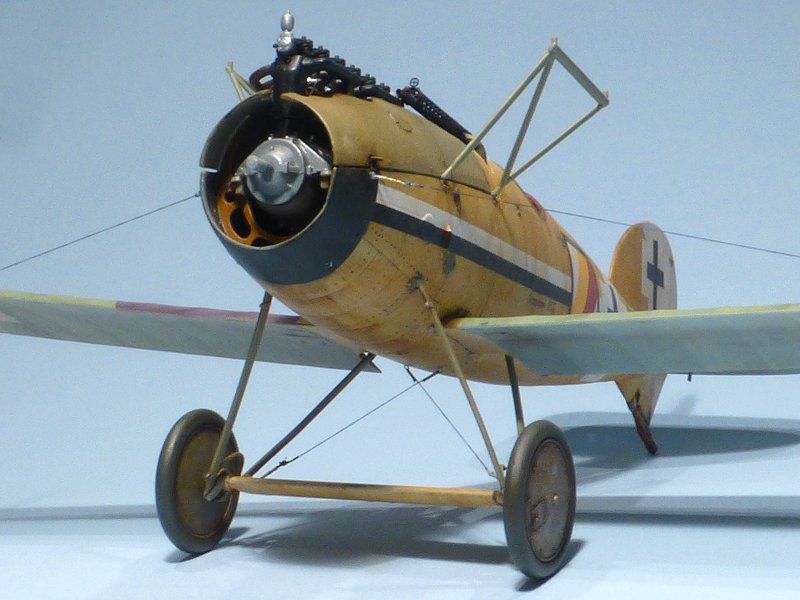
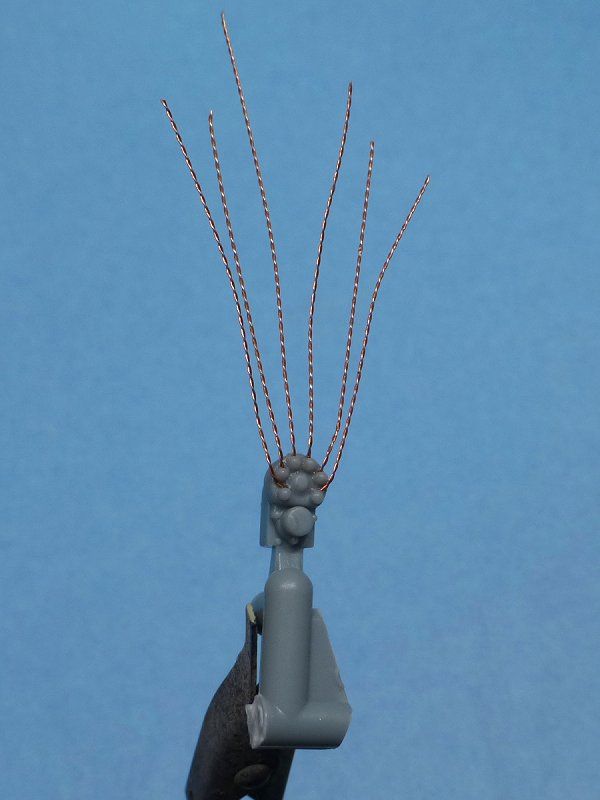
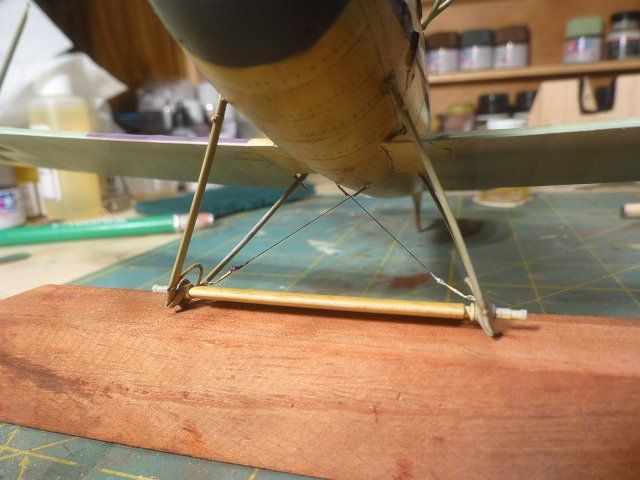
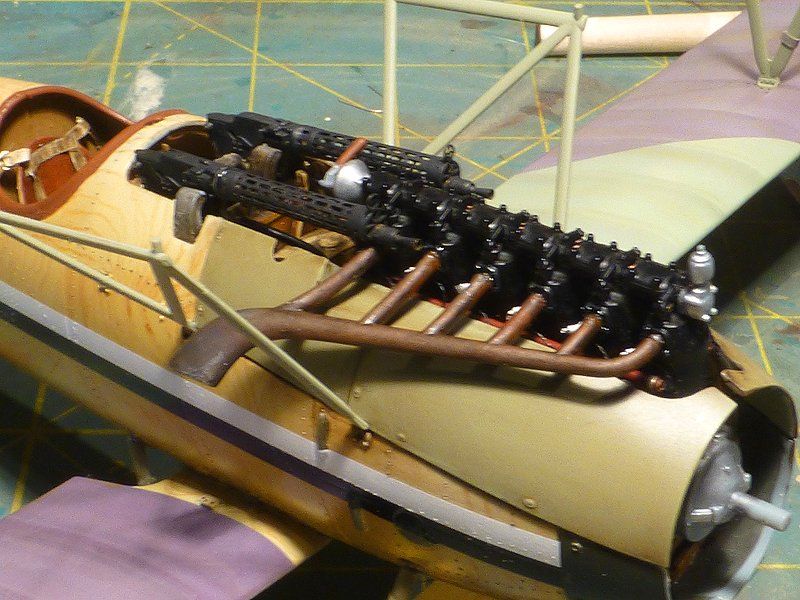
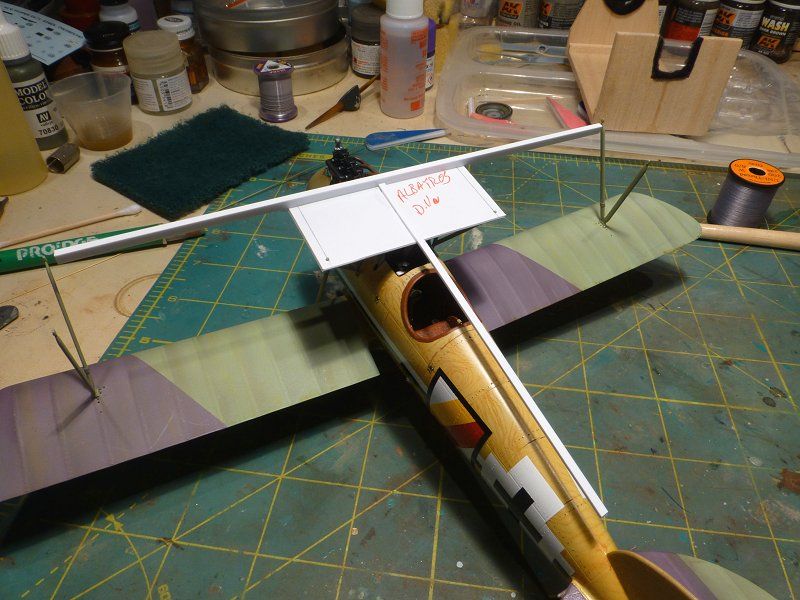
Still very busy with jobs but managing to find a few minutes here and there to get things done. Got the LG installed and rigged. MGs and exhaust on the motor. If you recall the alignment jig i made using the holes for the cabanes struts on the bottom of the upper wing and the previous D.Va, here it is in use again.
Indiana, United States
Joined: May 18, 2008
KitMaker: 210 posts
AeroScale: 80 posts
Posted: Friday, June 07, 2013 - 04:18 AM UTC
The woodwork is amazing. Nice work on the engine and the MG's. I got ask, are the LG struts plastic?
"I don't give a d@mn what command says about anything, I'll tell'em when to hold!" Big Joe
New Jersey, United States
Joined: June 02, 2006
KitMaker: 1,212 posts
AeroScale: 468 posts
Posted: Friday, June 07, 2013 - 12:22 PM UTC
Thanks mobious. yes they are plastic. And bloody fragile until you get them on. If you look at the right rear strut it's gray. I snapped that early on. Drilled, pinned and sanded... just needs a dab of paint. The rigging actually makes it pretty sturdy.
Alberta, Canada
Joined: July 26, 2010
KitMaker: 1,032 posts
AeroScale: 1,025 posts
Posted: Sunday, June 09, 2013 - 01:25 PM UTC
Marc,
Absolutely beautiful work, and a very attractive scheme. Looking forward to the completion phase!
Cheers,
Lance
Officially Retired as of 20 August 2013 and looking forward to some un-interrupted bench time. Currently starting Roden's Nieuport 28 and hoping to follow that with another WNW Fokker DVII.
New Jersey, United States
Joined: June 02, 2006
KitMaker: 1,212 posts
AeroScale: 468 posts
Posted: Tuesday, June 11, 2013 - 03:46 AM UTC
Hey Lance. Thanks for stopping in and appreciate comments.
Colorado, United States
Joined: January 25, 2004
KitMaker: 11,669 posts
AeroScale: 11,011 posts
Posted: Tuesday, June 11, 2013 - 04:08 AM UTC
Another "gem" Marc. I just wish with all the info we have on Jasta 14 that we could nail down the pilot.
Quoted Text
"Albatros D.Va serial unknown Jasta 14 pilot is unknown. May - July 1918. From Greg VanWyngarden - ". . .The original (or at least one original) is in the Bayerische Kriegsarchiv. The lengthwise black/white stripe on the fuselage identifies this machine as a Jasta 14 aircraft - or at least, it served in that unit at one time. This photo has long been a puzzle. There's little doubt that the fellow in the photo is actually Ltn. Wilhelm von Poschinger, who never (AFAIK) served in Jasta 14. He did serve in Jasta 12, and (according to Rick Duiven and Mückler) came to Jasta 32b on 27 March 1917. He served as the OzbV ( the Officer for special duties) from 27 May 1917 to 29 June 1917 (or 17 July 1917 according to Mueckler) when he left the unit, either for FA 296A or FEA 1b. However, he seems to have returned to von Schleich's Jagdgruppe 8b staff, as he appears in the well-known series of group photos taken at Epinoy on 8 June 1918. I would assume (which is always dangerous) that he was simply posing in front of the Jasta 14 Albatros D.Va for that photo above, but I don't know the time or location. As you say, Ltn. Gustav Freiherr Vogt von Hunoltstein (gen Stein-Kallenfels) also served in Jasta 32b as OzbV, coming from FA 296A in September 1917. He too, appears in those group photos, which may be where the confusion came from. Sorry, but I don't know which Jasta 14 pilot flew that particular Albatros D.Va - but I really doubt that it was either von Poschinger or von Hunoltstein."
". . .The most important thing is to know why you build and then get the most that you can out of building." via D.D.
New Jersey, United States
Joined: June 02, 2006
KitMaker: 1,212 posts
AeroScale: 468 posts
Posted: Tuesday, June 11, 2013 - 01:24 PM UTC
Thanks for that bit of info Stephen.
New Jersey, United States
Joined: June 02, 2006
KitMaker: 1,212 posts
AeroScale: 468 posts
Posted: Thursday, June 13, 2013 - 05:35 AM UTC
Colorado, United States
Joined: January 25, 2004
KitMaker: 11,669 posts
AeroScale: 11,011 posts
Posted: Thursday, June 13, 2013 - 05:50 AM UTC
Very decent work. That method of streaking the grime stain really adds dimension.
". . .The most important thing is to know why you build and then get the most that you can out of building." via D.D.
Indiana, United States
Joined: May 18, 2008
KitMaker: 210 posts
AeroScale: 80 posts
Posted: Thursday, June 13, 2013 - 09:41 AM UTC
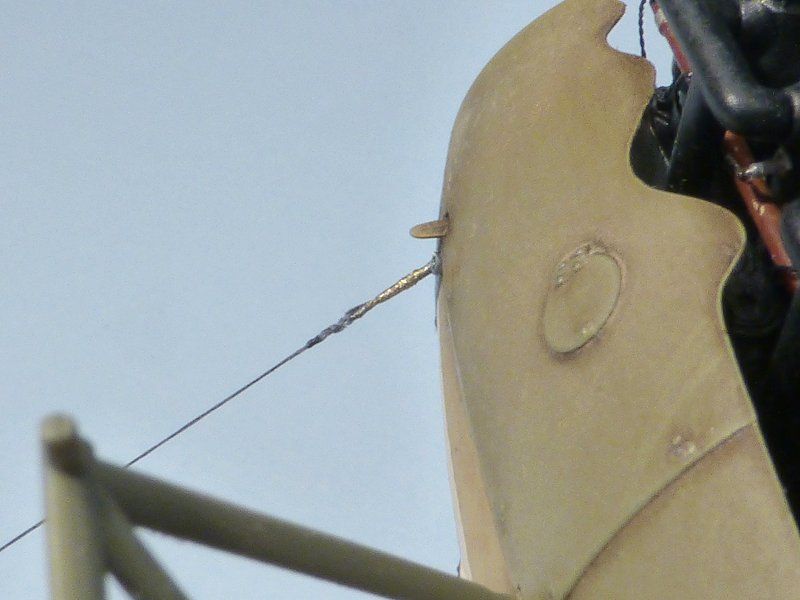
Very nice work. I like the subtle effects you've achieved with the "oils". The turnbuckle looks incredible. I have to ask the origins of those "Turnbuckle Beauties".
Thanks
"I don't give a d@mn what command says about anything, I'll tell'em when to hold!" Big Joe
New Jersey, United States
Joined: June 02, 2006
KitMaker: 1,212 posts
AeroScale: 468 posts
Posted: Thursday, June 13, 2013 - 11:43 AM UTC
Thanks Stephen. More armor techniques carried over.
Mobiuos... thanks. the turnbuckles are from Gaspatch.
Colorado, United States
Joined: January 25, 2004
KitMaker: 11,669 posts
AeroScale: 11,011 posts
Posted: Thursday, June 13, 2013 - 01:29 PM UTC
". . .The most important thing is to know why you build and then get the most that you can out of building." via D.D.
New Jersey, United States
Joined: June 02, 2006
KitMaker: 1,212 posts
AeroScale: 468 posts
Posted: Sunday, June 16, 2013 - 05:34 AM UTC
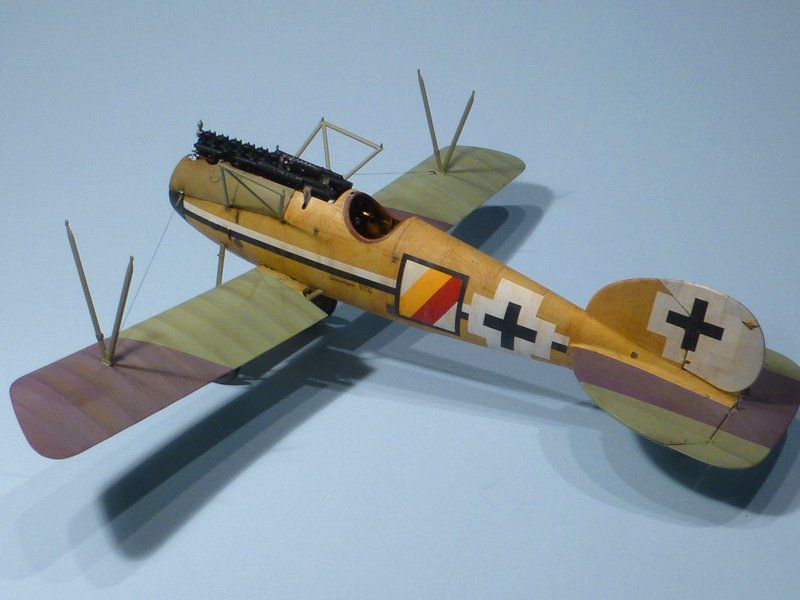
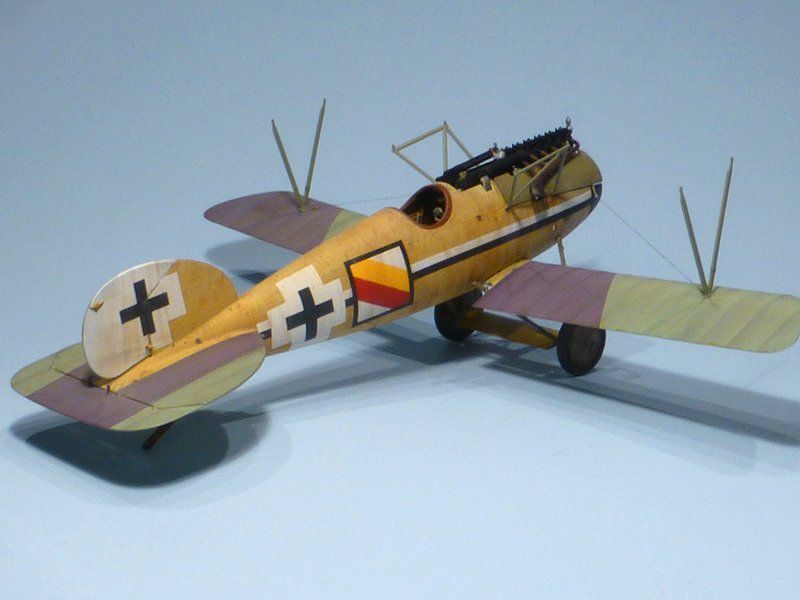
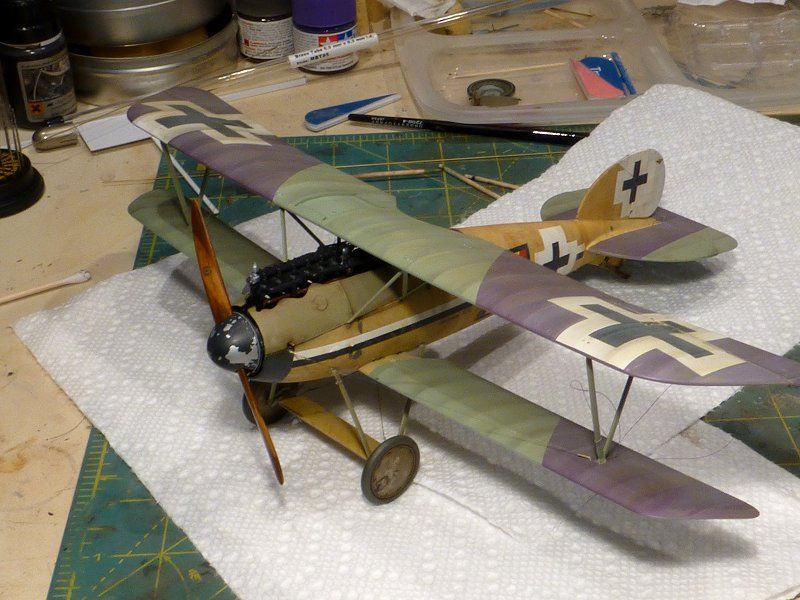
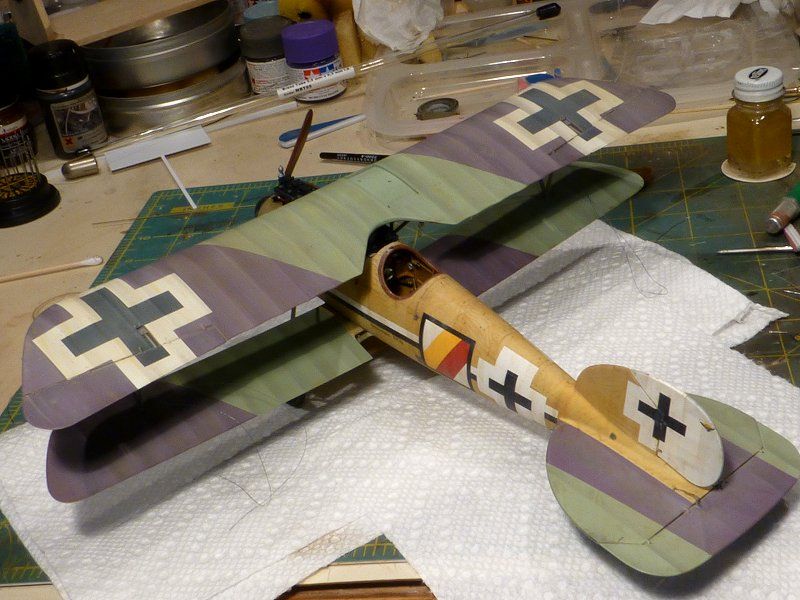
It's official... IT'S A BIPLANE!!!
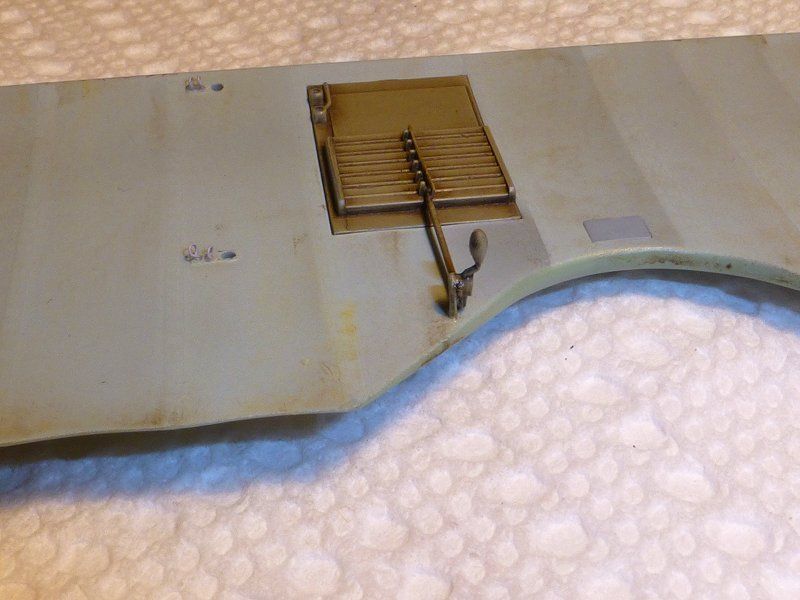
Got all the eyelets in place, and cobbled together the radiator louver handle and it was finally time to mount the upoper wing. That jug I used worked great and the wing was in perfect alignment.
Colorado, United States
Joined: January 25, 2004
KitMaker: 11,669 posts
AeroScale: 11,011 posts
Posted: Sunday, June 16, 2013 - 06:41 AM UTC
". . .The most important thing is to know why you build and then get the most that you can out of building." via D.D.