England - South West, United Kingdom
Joined: September 01, 2012
KitMaker: 123 posts
AeroScale: 47 posts
Posted: Saturday, June 01, 2013 - 03:38 AM UTC
Hi Guys,
While my Airifx OP Herrick models await the release of the Airfix vehicle crew sets I have been dabbling in the realm of the airliner. This will be my third build on the foum, so please bear with me, i am also being very brave by putting this up on the forum as my airliners are...not great; especially when it comes to the decals stage. I think that building the A319 on the forum should help improve my build, so constructive criticism and comments all round please!
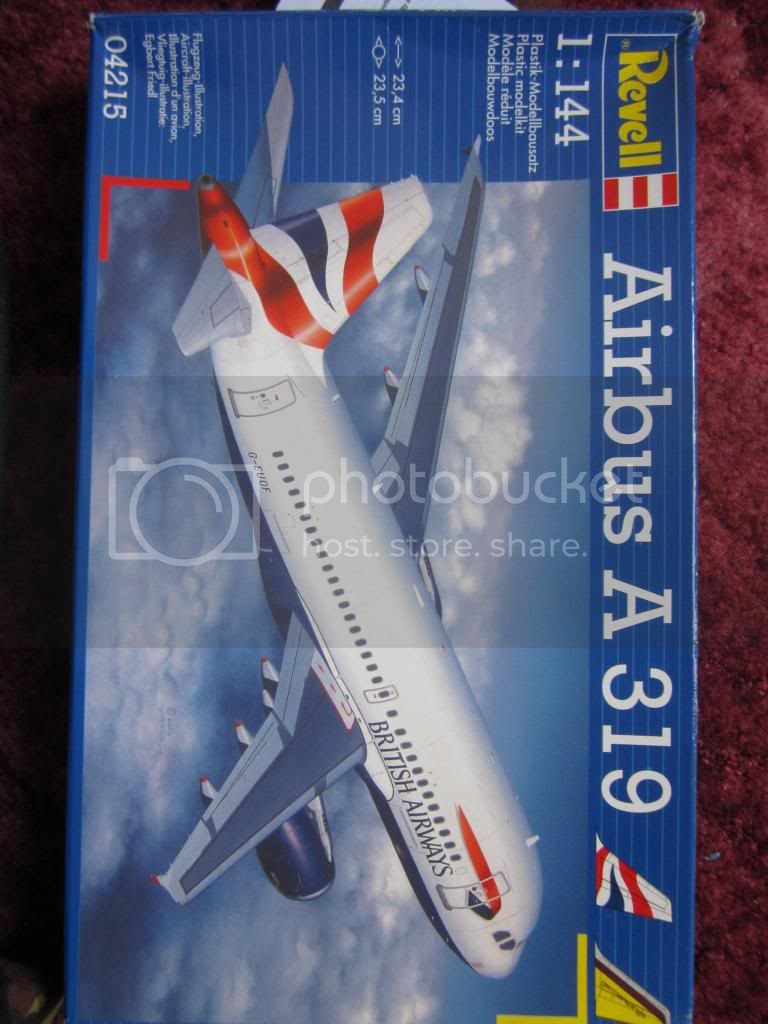
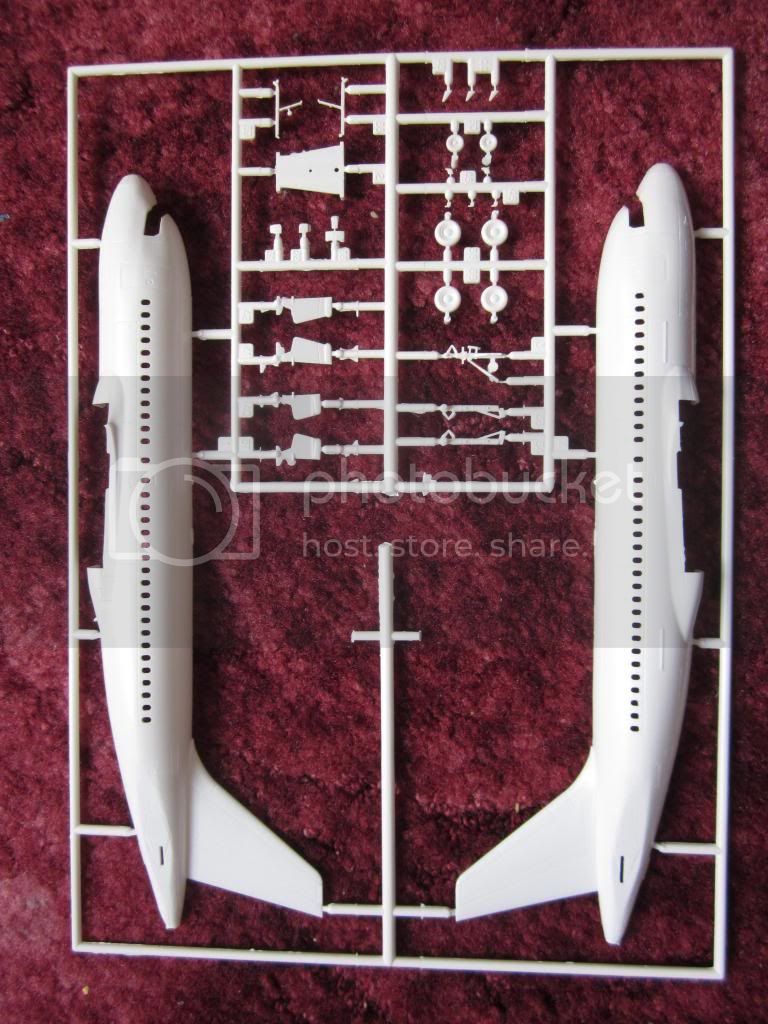
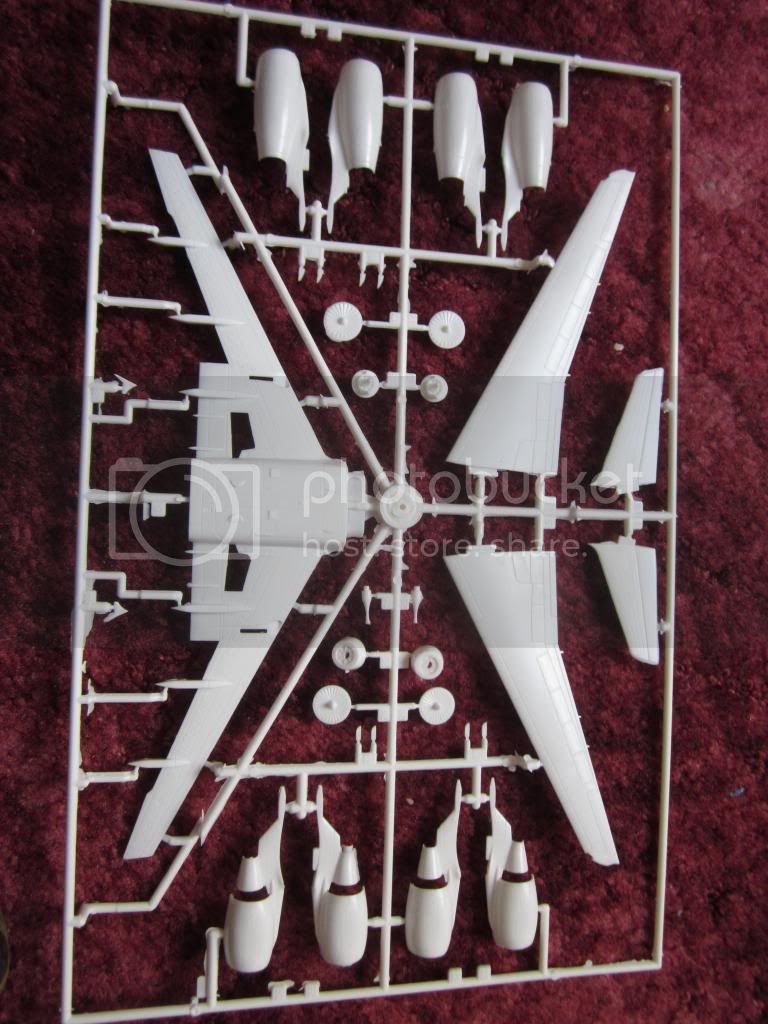
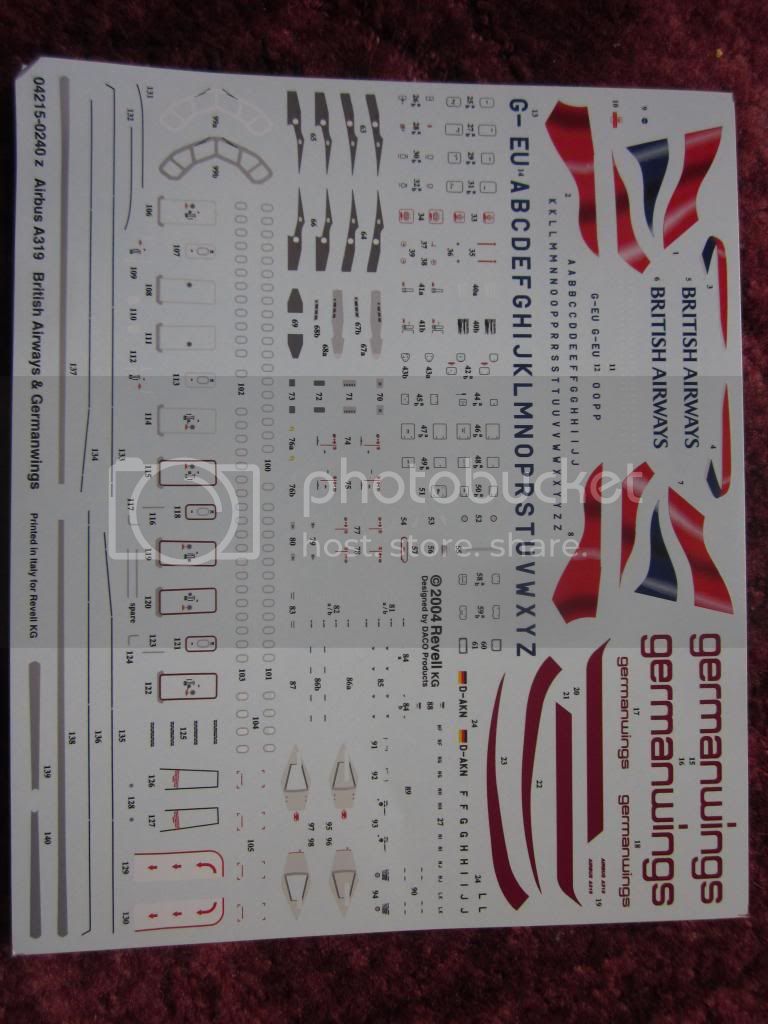
The kit is the Revell BA A319 release, which also comes with the German Wings Decals. The sprues are looking OK and the decal sheet looks pretty good as well. However I am toying with the idea of building it with the EasyJet decal (the decals in the kit are quite good, so who knows). Pictures and things:
British Columbia, Canada
Joined: September 03, 2009
KitMaker: 6,965 posts
AeroScale: 6,247 posts
Posted: Saturday, June 01, 2013 - 04:18 AM UTC
It's a really nice kit with one little trap. Revell accidentally gave it an A-321 wing with the extra flap fairings. Look at the tiny fairings between the main ones. They're not supposed to be there, so you'll have to shave them off, and fill the extra flap line which runs about 2 mm in from the trailing edge.
That extra flap is needed on the -321 because it's heavier than the -319/320.
The wing tip fences are also a little small so they could be replaced with new ones cut from plastic card.
When once you have tasted flight you will walk the Earth with your eyes turned skyward.
For there you have been, and there you will always long to return.
-Leonardo Da Vinci
England - South West, United Kingdom
Joined: September 01, 2012
KitMaker: 123 posts
AeroScale: 47 posts
Posted: Saturday, June 01, 2013 - 04:47 AM UTC
Hi Jessie, I was wondering when you would find this

Yeah I have read your kit reviews and I will be following your advice very carefully throughout this build. I will probably go for the German Wings one, as it will allow me to get some practice on the decals front, without having to get a white coat together
Ontario, Canada
Joined: February 04, 2008
KitMaker: 2,507 posts
AeroScale: 1,814 posts
Posted: Saturday, June 01, 2013 - 08:14 AM UTC
Thank you Jessica.
I have this kit in my stash and when i build it I will include your mod's.

" The Die Hards"
43rd MIDDLESEX REGIMENT
MACHINE GUN CORPS
XXX CORP
The most effective way to do it, is to do it.
- Amelia Earhart
England - South West, United Kingdom
Joined: September 01, 2012
KitMaker: 123 posts
AeroScale: 47 posts
Posted: Sunday, June 02, 2013 - 08:14 AM UTC
Some progress has been achieved on the A319 today.
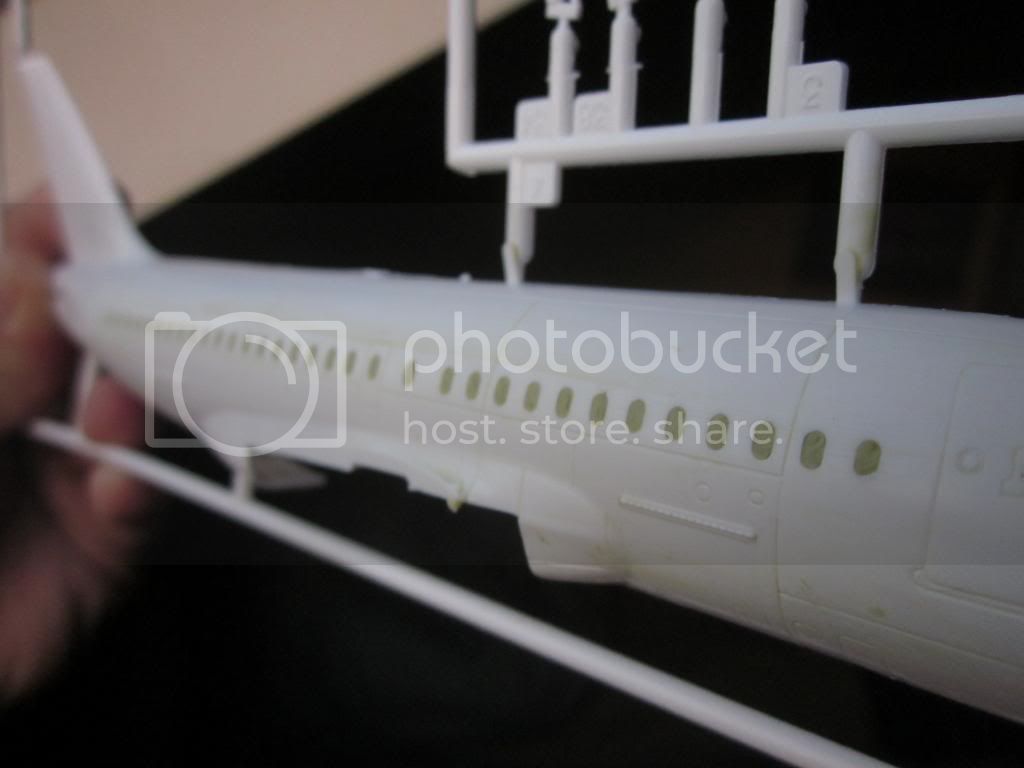
The windows have been filled with yellow milliput (I am trying differet varieties, this one is more like blu-tac and is smellier than the white one.
The fairings were removed from the scene
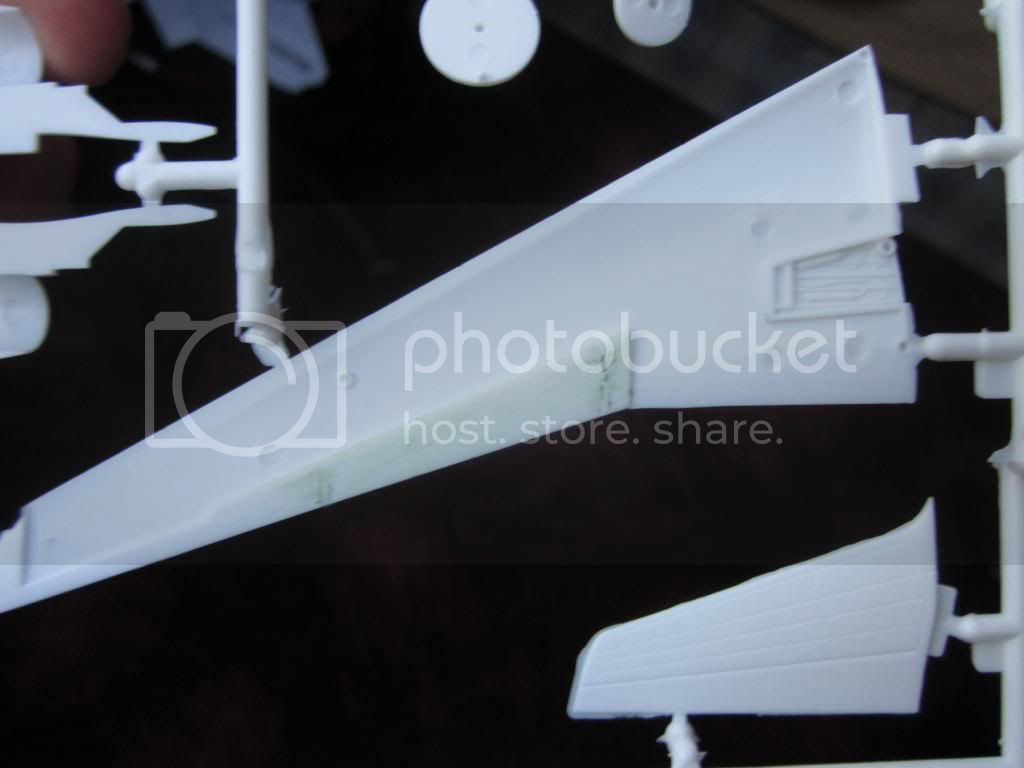
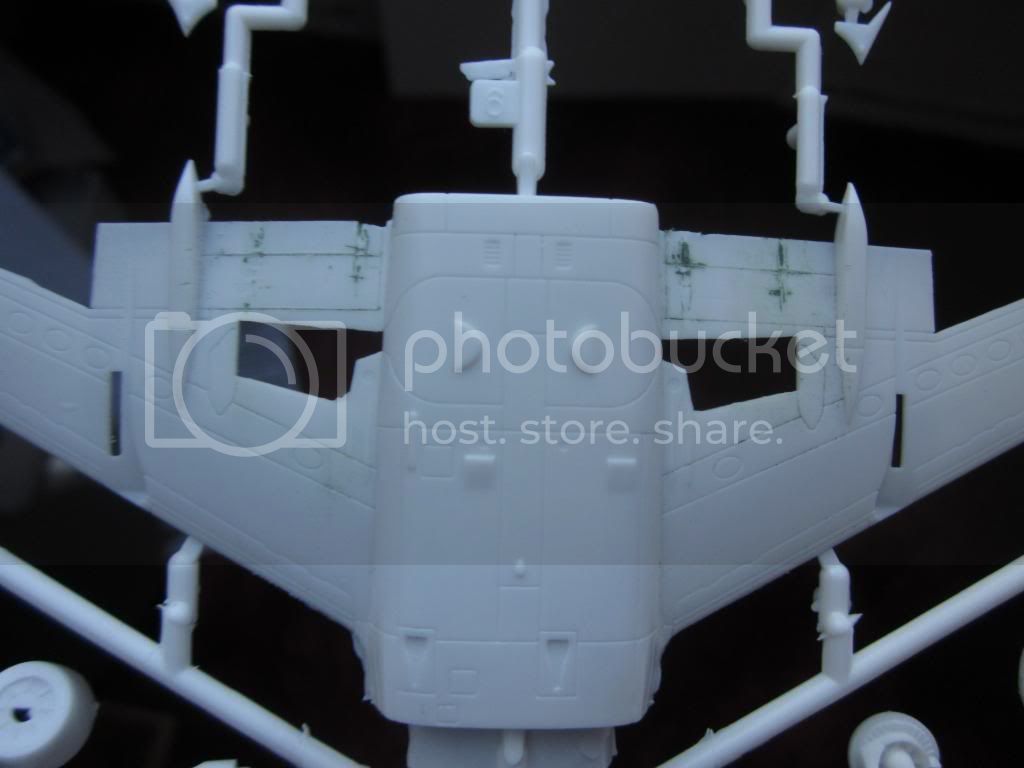
As you can see from these shots the kit has quite a bit of flash on the sprues. The extra flap line was also filled in. The dark green filler is liquid greenstuff from Games Workshop.

England - South West, United Kingdom
Joined: September 01, 2012
KitMaker: 123 posts
AeroScale: 47 posts
Posted: Monday, June 03, 2013 - 08:22 AM UTC
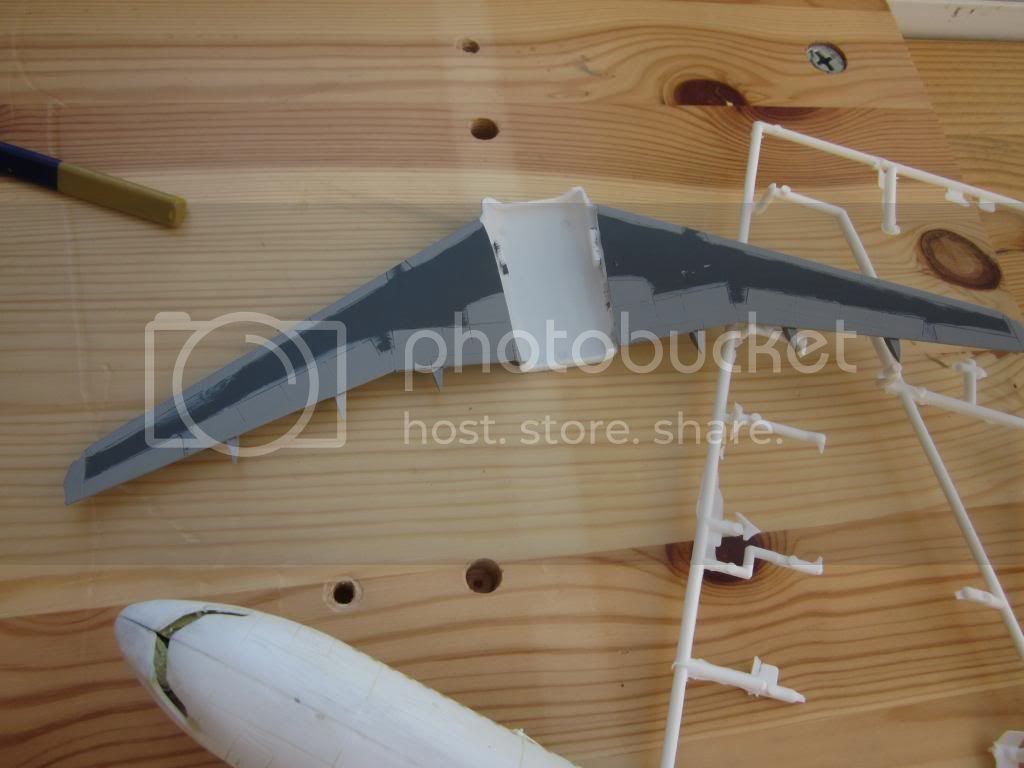
Even more progress today the wings are together

and the fuselage is together

not much sanding required thank goodness!
I have also decided that i will be building the German wings variant, reg- D-ANKH
England - South West, United Kingdom
Joined: September 01, 2012
KitMaker: 123 posts
AeroScale: 47 posts
Posted: Tuesday, June 04, 2013 - 04:12 AM UTC
Today has been a day of painT! As you can see from the number of updates:number of days since the project started ratio I am currently job hunting and have spare time! I have also been sat in the sun and it has frazzled my brain

The wings have been started
The engines have been constructed

And the yellowing of the tail has begun. Normally i despise painting yellow on anything, it is as bad as white in that it never ever applies to anything withing 3 coats and I am never patient enough to do more than 5!

However I looked up some hints and decided to give it a stab!
Here are three coats of Iyanden Darksun foundation paint from GW (my paint was hard and needed to be applied in thin coats as i washed the pot out)

Here are an additional 4 coats of sunburst yellow... its going to need a few more than that!


England - South West, United Kingdom
Joined: September 01, 2012
KitMaker: 123 posts
AeroScale: 47 posts
Posted: Tuesday, June 04, 2013 - 07:11 AM UTC
It appears as though (now a total at 3 base layers and 6 other layers) that the yellow paint is 'lumpy', as in; the surface is uneven. Has anyone got any tips on how to rectify this problem? do I need to strip the plane and start again or is there another trick i can us that smooths the surface out?
Thanks
British Columbia, Canada
Joined: September 03, 2009
KitMaker: 6,965 posts
AeroScale: 6,247 posts
Posted: Tuesday, June 04, 2013 - 09:37 AM UTC
Try wet sanding with very fine grit sandpaper: 1000 grit or finer. You just want to polish the paint down a bit, not take it off so be careful not to use too much pressure. If you're brush painting you may want to thin the paint a tiny bit to keep it from going too lumpy from the brush strokes.
When once you have tasted flight you will walk the Earth with your eyes turned skyward.
For there you have been, and there you will always long to return.
-Leonardo Da Vinci
England - South West, United Kingdom
Joined: September 01, 2012
KitMaker: 123 posts
AeroScale: 47 posts
Posted: Tuesday, June 04, 2013 - 11:19 AM UTC
Thanks Jessie, yeah I am brushing, i am going to try vallejo paints and thinning them down with acrylic thinner. After the sanding/polishing down of the tail section.
Stockholm, Sweden
Joined: October 24, 2012
KitMaker: 202 posts
AeroScale: 92 posts
Posted: Tuesday, June 04, 2013 - 12:29 PM UTC
A tip that I read somewhere about making a surface flat when brush painting is to brush solvent on it. I have only tried this on Humbrol but there it works great. What you do is brush your basecoat on, then let I dry for perhaps 10 minutes so that it isn't wet anymore. The next step is to dip the brush in an appropriate thinner, white spirit if your using Humbrol, and then lightly brush the surface with it.
The goal is to solve the top of the coat but leaving the majority solid. This makes the surface as smooth as one can accomplish using really thinned out paint but still being able to get good coverage. It takes some practices to get it right but when you do the surface looks almost airbrushed. Lastly this only works with enamels as acrylics dry to fast.
Good luck and let me know if my explanation was hard to understand.
Jakob

England - South West, United Kingdom
Joined: September 01, 2012
KitMaker: 123 posts
AeroScale: 47 posts
Posted: Tuesday, June 04, 2013 - 11:34 PM UTC
Hi J8kob, thanks for the tip, but sadly i rarely paint with enamels now, I used them a few months ago to do a certain project but I try my best to stay away! However that advice will be tucked away in case I ever get them back out!
Scotland, United Kingdom
Joined: February 15, 2013
KitMaker: 1,273 posts
AeroScale: 200 posts
Posted: Tuesday, June 04, 2013 - 11:43 PM UTC
Hi Chris
Your 319 is coming along fine. I might have a few pictures tucked away somewhere if you want them. I work at EDI airport and have worked on the BA Eazyjet and German wings planes here.
Cheers Pete
England - South West, United Kingdom
Joined: September 01, 2012
KitMaker: 123 posts
AeroScale: 47 posts
Posted: Tuesday, June 04, 2013 - 11:59 PM UTC
Hi Noddy,
Thank you! Real photos from airports are great, I have found several flying pics on spotting forums online but you may have more detailed pictures. If you have any close ups of things like landing gear that should be interesting, I have some fine wire and I was thinking of and some cables and things! Any general pics of the original G-Wings A319s (all have registrations with D-ANK)that would be very useful as well, especially if they are dirty, i might get some oil streaks on! G-Wings bought the original 9 from Lufthansa, and they all had CFM engines, whereas all the later ones have engines and more markings that I don't have access to sadly
Scotland, United Kingdom
Joined: February 15, 2013
KitMaker: 1,273 posts
AeroScale: 200 posts
Posted: Wednesday, June 05, 2013 - 12:18 AM UTC
Hi Chris
Yeah the German Wings engines are longer than the eazy or BA ones. German wings is a sister company of Lufty....I only know this cos we won the contract for Lutfy after getting German Wings. What I will do for you is tomorrow when I am at work I will take some good close ups of the wheels and landing gear, also the pitot tubes and leading edges etc. Give me a couple of days and I'll see what I can knock up for you. I think the German wings is here about 40 mins before I finish work so should be able to get what you will need. And yes they are dirty, most planes don't get washed very often. lol
Pete
England - South West, United Kingdom
Joined: September 01, 2012
KitMaker: 123 posts
AeroScale: 47 posts
Posted: Wednesday, June 05, 2013 - 12:30 AM UTC
I was meant to say IAE engines. That is very kind of you, thank you very much! I look forward to seeing them.
England - South West, United Kingdom
Joined: September 01, 2012
KitMaker: 123 posts
AeroScale: 47 posts
Posted: Wednesday, June 05, 2013 - 11:38 AM UTC
Hi guys,
After taking Jessie's advice the tail situation has been sorted and the rest of the paint has been applied.


The wings have also bee largely finished and will be attached after decalling, as will the engines.

There should be little lights or markings on the end of the flap fairings, would these be a red of some kind? They are not marked on any instructions i can find. Next step is the undercarriage and other sections.
C
British Columbia, Canada
Joined: September 03, 2009
KitMaker: 6,965 posts
AeroScale: 6,247 posts
Posted: Wednesday, June 05, 2013 - 12:04 PM UTC
Sometimes the ends of flap fairings are painted bright red (especially the starboard side ones) to keep service vehicles from running into them but
these pictures don't show any markings.
When once you have tasted flight you will walk the Earth with your eyes turned skyward.
For there you have been, and there you will always long to return.
-Leonardo Da Vinci
England - South West, United Kingdom
Joined: September 01, 2012
KitMaker: 123 posts
AeroScale: 47 posts
Posted: Wednesday, June 05, 2013 - 12:16 PM UTC
Ah I see, thanks for that Jessie, I will leave them. Thanks also for the explanation, I had never realised
Scotland, United Kingdom
Joined: February 15, 2013
KitMaker: 1,273 posts
AeroScale: 200 posts
Posted: Wednesday, June 05, 2013 - 11:36 PM UTC
England - South West, United Kingdom
Joined: September 01, 2012
KitMaker: 123 posts
AeroScale: 47 posts
Posted: Wednesday, June 05, 2013 - 11:59 PM UTC
See these shots are very interesting, the inside of the wheel well appears to be a yellowy colour but the instructions tell me that I should be going for a light silvery green. So I shall be following the pictures on that, I will also intall these undercarriage cables if I can. I have not seen any triangular plates on the kit. But I am not overly sure what these are. Thanks for those pic Noddy, they have been a great help!
Scotland, United Kingdom
Joined: February 15, 2013
KitMaker: 1,273 posts
AeroScale: 200 posts
Posted: Thursday, June 06, 2013 - 12:25 AM UTC
The triangular plates are called a wingtip fence, the aid in reducing the wingtip drag. They increase the lift at the wingtip by smoothing the air over the upper wingtip leading edge. I like Jessies thought on them, but alas if they were used to warn ground agents they were too close mucho wings would be damaged. At the airport we have a 2 metre rule ( no closer than 2 mts) or a no drive diamond. The cost to repair just the wingtip of an Airbus would be 100s of thousands of pounds. But a new one costs about 60 million. When we move around the aircraft we have banksmen to guide us, as you can imagine the airlines like to keep their kites in one piece. All new 319s have the wingtip fence and the BA and Easyjet ones here have them, so I would think Germanwings would too, as an upgrade at least. You could make them from thin plastic Chris, at 144 size I would leave the static wicks......too fiddly lol.
Cheers Pete
Scotland, United Kingdom
Joined: February 15, 2013
KitMaker: 1,273 posts
AeroScale: 200 posts
Posted: Thursday, June 06, 2013 - 12:26 AM UTC
Chris
Just checked they do have the wing fence ......they are yellow
Pete
England - South West, United Kingdom
Joined: September 01, 2012
KitMaker: 123 posts
AeroScale: 47 posts
Posted: Thursday, June 06, 2013 - 01:32 AM UTC
Ahh I see, like smaller versions of the 737 winglets. Yeah those are in the instructions. Jessie says they are too small, but I may leave them as they are. I am not quite up to running about scratchbuilding lots of fiddly pieces, maybe one day i will make some up and replace them. Thanks for the assist!
British Columbia, Canada
Joined: September 03, 2009
KitMaker: 6,965 posts
AeroScale: 6,247 posts
Posted: Thursday, June 06, 2013 - 02:19 AM UTC
Quoted Text
I like Jessies thought on them, but alas if they were used to warn ground agents they were too close mucho wings would be damaged.
Here's an example of the kind of warning markings I'm speaking about. This is an Air Canada -319 with reflective green tape on the tip fence and flap fairings.
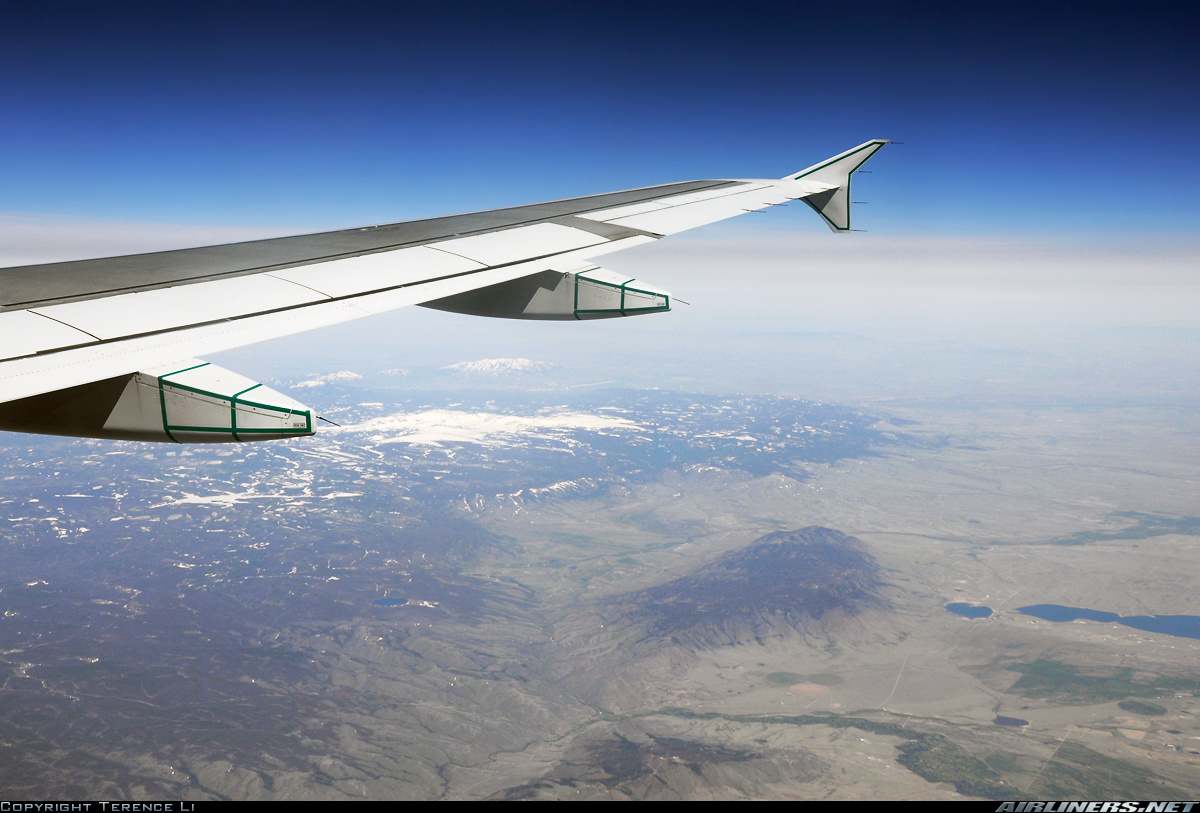
The baggage conveyor vehicles have to get fairly close to the trailing edge of the wing in order to unload the aft baggage compartment, and the markings are just an extra reminder to be careful. There's more tape on the fairing just forward of the baggage door as well.

It may be a North American thing.
When once you have tasted flight you will walk the Earth with your eyes turned skyward.
For there you have been, and there you will always long to return.
-Leonardo Da Vinci