Rather than post in the Hanger Queen III Campaign thread I thought that I would try posting this here. There seems to be more posting going on in the campaigns and all the different posts make it difficult to follow any one particular build.
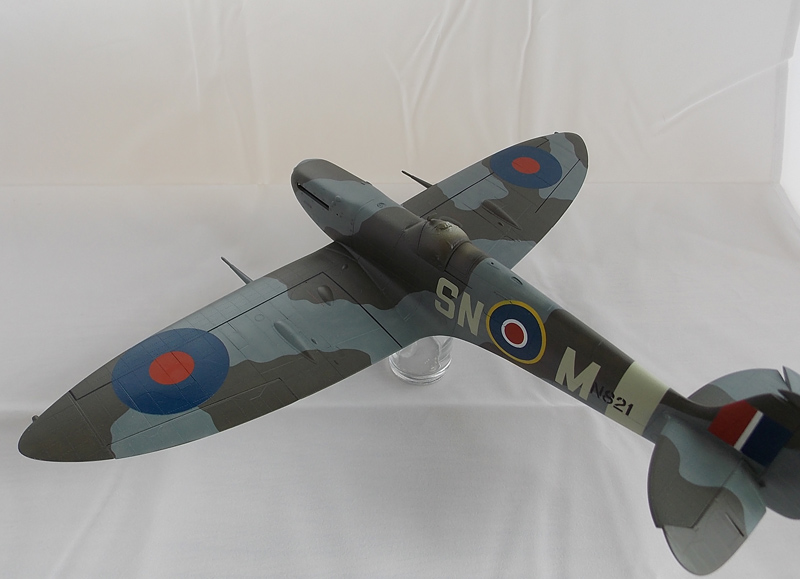
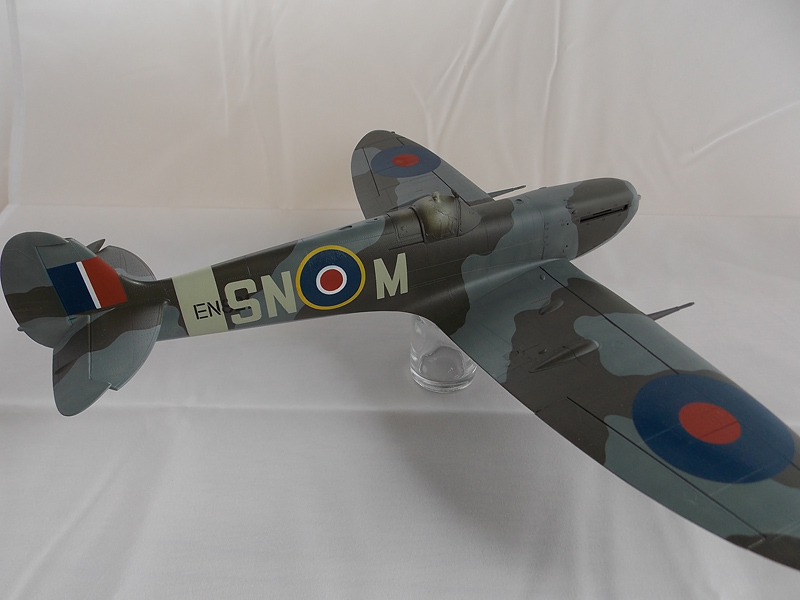
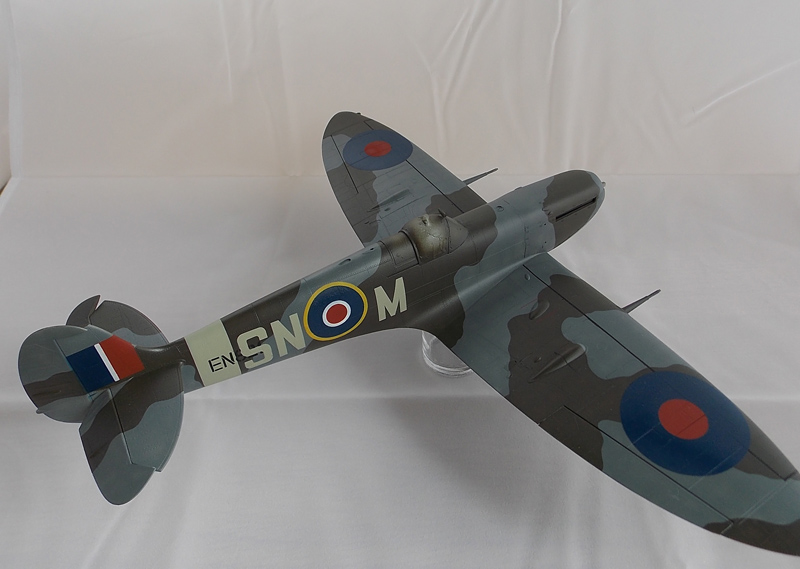
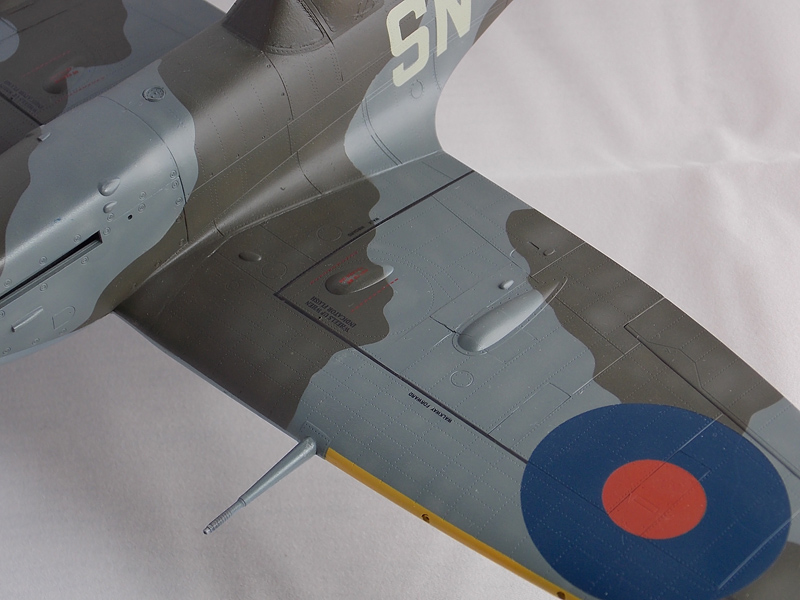
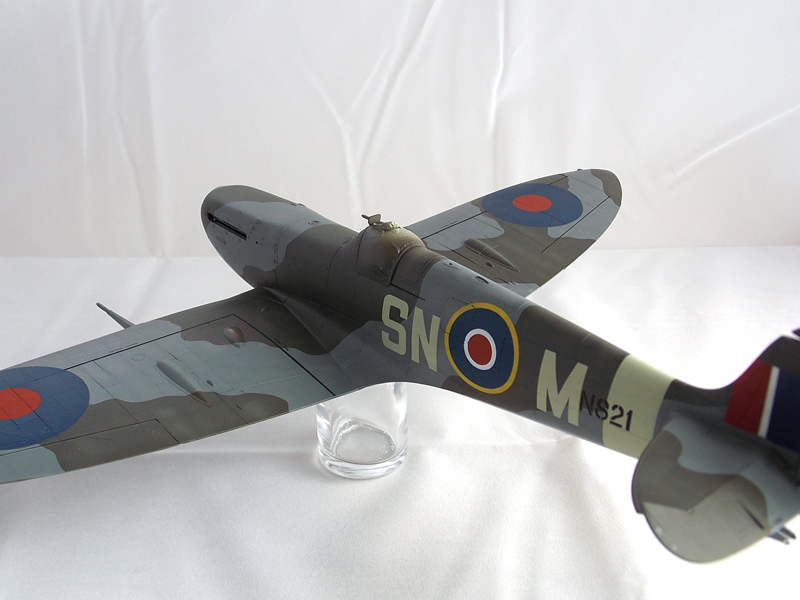
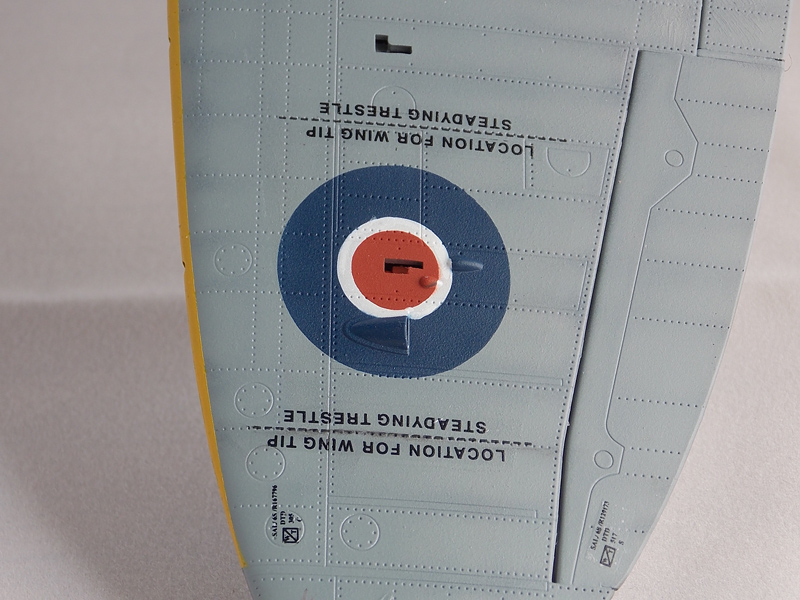
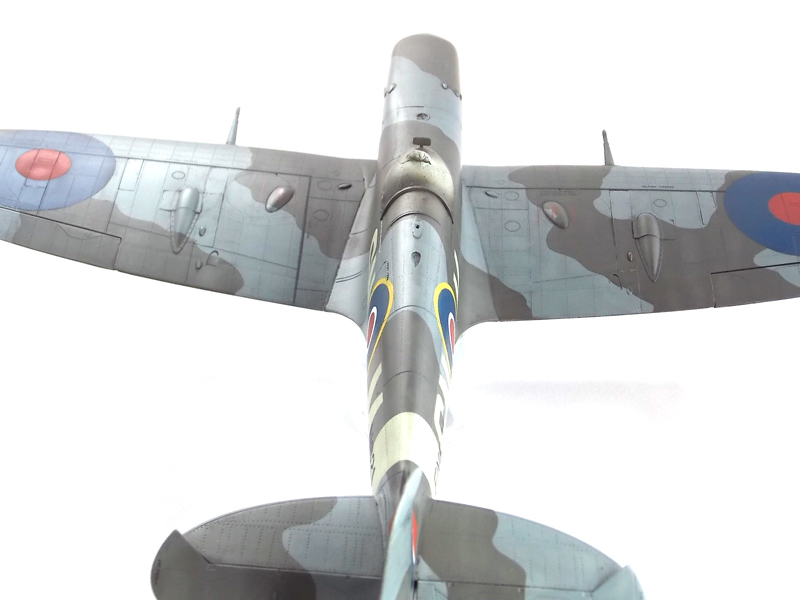
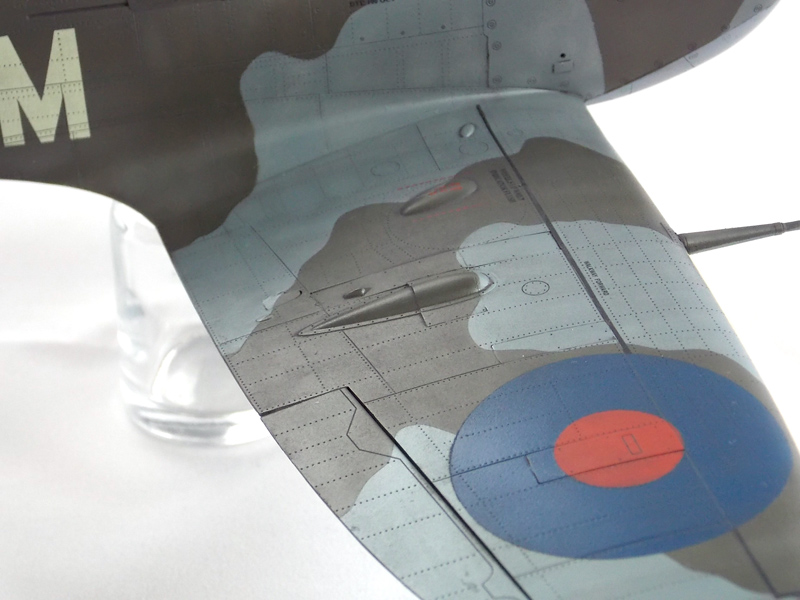
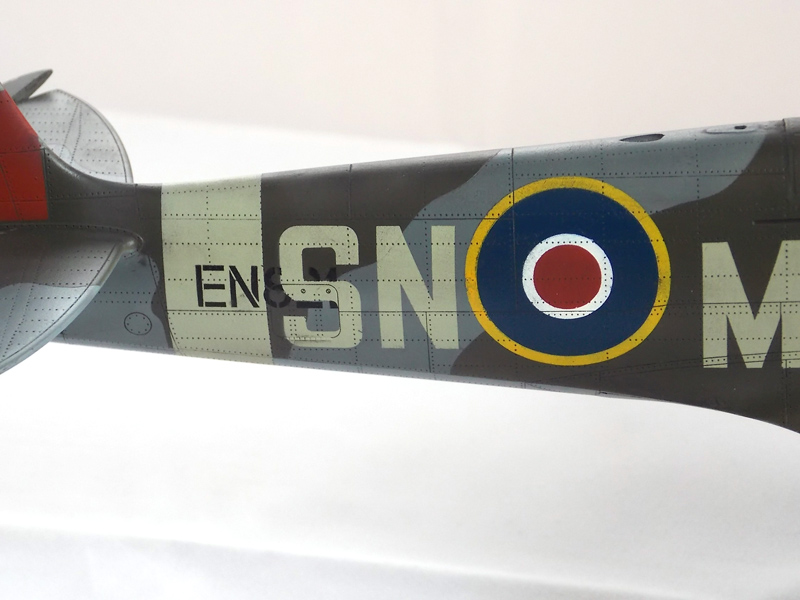
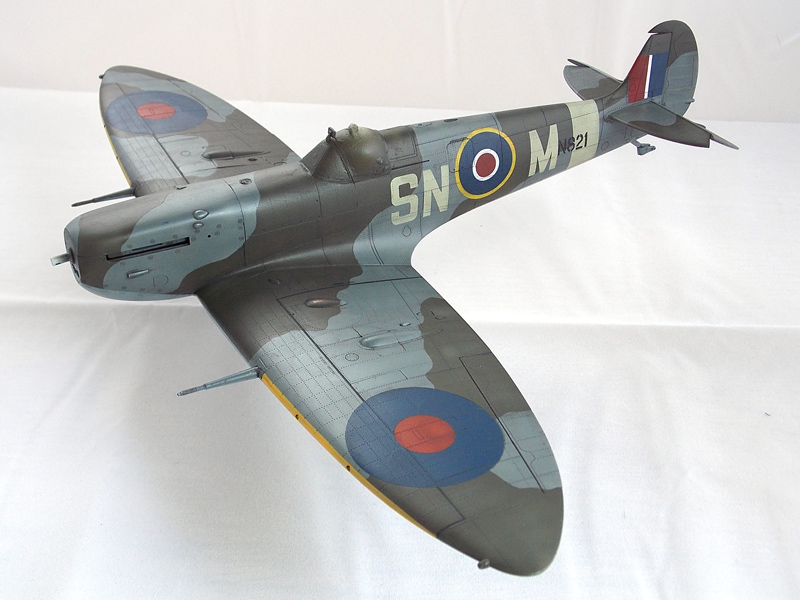
There are some pictures on the HQIIIC thread. These are of the markings all painted on and waiting for the few decals to be added.Everything that you see here has been masked and painted, including the camouflage and the dashed lines for the wing tip trestles under the wings and the red no walk areas over the wheel wells..
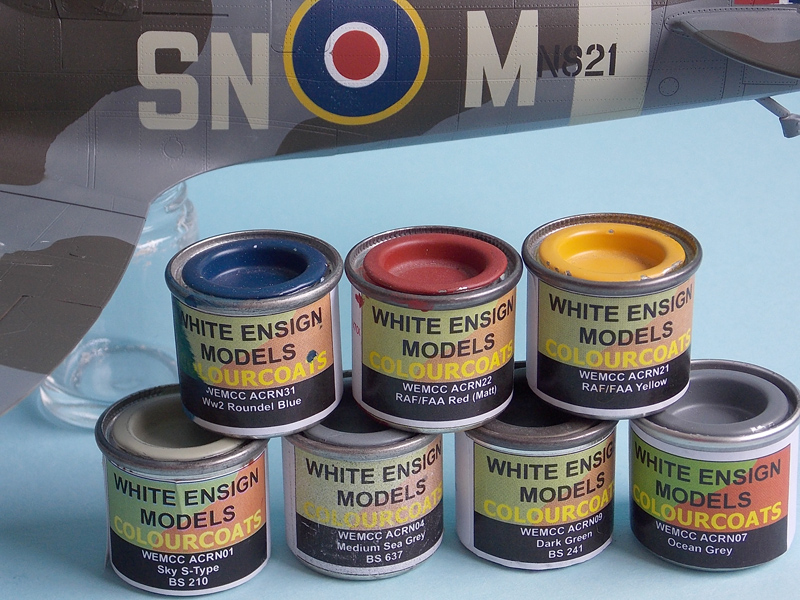
Paints Used:
Hosted by Rowan Baylis
HQIIIC Spitfire MkVb
Posted: Friday, July 26, 2013 - 06:40 PM UTC
rochaped
Lisboa, Portugal
Joined: August 27, 2010
KitMaker: 679 posts
AeroScale: 669 posts
Joined: August 27, 2010
KitMaker: 679 posts
AeroScale: 669 posts
Posted: Friday, July 26, 2013 - 09:07 PM UTC
Hi Mal,
Fantastic job with the camouflage scheme, looks factory fresh.
What scale is this?
Keep it up
Cheers
Pedro
Fantastic job with the camouflage scheme, looks factory fresh.
What scale is this?
Keep it up
Cheers
Pedro
Mcleod
Alberta, Canada
Joined: April 07, 2010
KitMaker: 1,028 posts
AeroScale: 939 posts
Joined: April 07, 2010
KitMaker: 1,028 posts
AeroScale: 939 posts
Posted: Saturday, July 27, 2013 - 01:16 AM UTC
Outstanding!!! Your work-in-progress proudly displays the Spitfire as being one of the most stylish aircraft of all time.
I really do like this.
I believe insignia and markings mask are a wave of the future. Likely won't replace decals, but, will become a very strong alternative.
I really do like this.
I believe insignia and markings mask are a wave of the future. Likely won't replace decals, but, will become a very strong alternative.
Joel_W
Associate Editor
New York, United States
Joined: December 04, 2010
KitMaker: 11,666 posts
AeroScale: 7,410 posts
Joined: December 04, 2010
KitMaker: 11,666 posts
AeroScale: 7,410 posts
Posted: Saturday, July 27, 2013 - 02:51 AM UTC
Mal, simply outstanding. The time and effort you put into masking certainly paid off. No decaling can ever look this consistently good, as there is always a few goof spots. Just the nature of the beast.
As for you comment of how difficult it is to follow a build in a busy campaign, I'm trying to work with Allen to correct that very issue in my now enlist Grumman's campaign. My original thought was to require everyone to have a separate build thread in the appropriate era forum, but as Allen pointed out, that would make it almost impossible to follow many of them. One solution would be to subscribe to those that you want to follow, but one's in box could easily be over run with emails. Allen is working with Jim to have a sub forum in the campaign thread where we can all post our build blogs threads. This certainly would be a fantastic option.
Joel
Posted: Saturday, July 27, 2013 - 03:09 AM UTC
Quoted Text
Hi Mal,
Fantastic job with the camouflage scheme, looks factory fresh.
What scale is this?
@Pedro, Thanks, it looks factory fresh because it is, but it will be weathered
Quoted Text
Outstanding!!! Your work-in-progress proudly displays the Spitfire as being one of the most stylish aircraft of all time.
I really do like this.
I believe insignia and markings mask are a wave of the future. Likely won't replace decals, but, will become a very strong alternative.
@Ben, Thanks, and we all know that you just can't have too many Spitfires
Most modellers seem reluctant to try painted on markings but they aren't any more difficult than decals
Quoted Text
Mal, simply outstanding. The time and effort you put into masking certainly paid off. No decaling can ever look this consistently good, as there is always a few goof spots. Just the nature of the beast.
@Joel Thanks, and yes you are right no decal, however well it is used can truly give that painted on look, plus they never truly match any paint.
take a look at the P-39 "Air-A-Cutie on my facebook page, the nose art was also done using my masks. While you are there take a look at some of the other models Miracle Paint Masks on Face Book
Mmmm, I would have thought that having separate blogs is the way to go, simply give them a title that shows which campaign they belong to and everyone can follow along. The blogs are then sort of part of the campaign as well as being part of the rest of the forums?
Posted: Saturday, July 27, 2013 - 06:42 PM UTC
Ooops, sorry Pedro I forgot to mention the scale, it is the 1/32 scale Hobby Boss kit
Joel_W
Associate Editor
New York, United States
Joined: December 04, 2010
KitMaker: 11,666 posts
AeroScale: 7,410 posts
Joined: December 04, 2010
KitMaker: 11,666 posts
AeroScale: 7,410 posts
Posted: Monday, July 29, 2013 - 01:12 AM UTC
[quote]
@Joel Thanks, and yes you are right no decal, however well it is used can truly give that painted on look, plus they never truly match any paint.
take a look at the P-39 "Air-A-Cutie on my facebook page, the nose art was also done using my masks. While you are there take a look at some of the other models Miracle Paint Masks on Face Book
Mal, I sure did. Saw your P-39's build blog and marveled at your masks then. Of course both aircraft models are 1st class builds as well.
I checked your whole facebook page but can't find any listing of masks for sale. Would love to try them. Next model up is the 1/48 scale GWM TBD-1 Devastator for the Douglas Prop campaign.
Joel
rochaped
Lisboa, Portugal
Joined: August 27, 2010
KitMaker: 679 posts
AeroScale: 669 posts
Joined: August 27, 2010
KitMaker: 679 posts
AeroScale: 669 posts
Posted: Monday, July 29, 2013 - 06:41 AM UTC
Mal,
I sure hope to see the finished Spit.
Upon reading another thread was i aware you produce your own masks, so no wonder the painting overall is superb.
I have limited experience using masks, only used them once, but i did like it's simplicity and fast track results, much against what i assumed when i bought them...
Cheers
Pedro
Posted: Monday, July 29, 2013 - 08:02 PM UTC
Quoted Text
Mal, I sure did. Saw your P-39's build blog and marveled at your masks then.
The p-39 isn't mine but I have ordered a 1/32 scale kit to use this masks set myself
Quoted Text
Would love to try them. Next model up is the 1/48 scale GWM TBD-1 Devastator for the Douglas Prop campaign.
Joel
KitMaker network members get 10% discount and I produce masks to order. I am working on a product line but if I have that the mask sets will need placement information (commission stuff doesn't as the customer has already researched that) and therefore 4 view profiles. I am looking at doing generic type stuff and I do have Spitfire camouflage masks (used on this build) and D-Day stripe helpers.
I have produced one of the Barckley schemes as masks for the GWM TBD-1 Devastator Check out Alexander Glass' web site Uschi van der Rosten All the masks on here are produced by me If you want a set of the Barckley scheme masks let me know and I will have a word with Alex to get you the 10% off (I'm not sure how that will work because I can't leave Alex short but I'm sure that I will come up with something ) If you want any other scheme just let me know via my email address
Quoted Text
Mal,
I sure hope to see the finished Spit.
Upon reading another thread was i aware you produce your own masks, so no wonder the painting overall is superb.
I have limited experience using masks, only used them once, but i did like it's simplicity and fast track results, much against what i assumed when i bought them...
Cheers
Pedro
Yes Pedro, I've been doing it for a while now but I don't shout about it too much because I have too much work as it is Commission stuff is great to do but doesn't pay, or I don't charge, what it's really worth. That is mainly because I want more modellers to try using paint masks. I do it to keep me in modelling tokens but I have produced paint masks for several other companies, including AK Interactive If I have a USP (Unique Selling Point) it is my instructions (and maybe the unique material that I use)which walk the user through a known successful sequence so that they aren't left in the dark. A third USP is the fact that I provide 4 of each mask, so that you have spares if you cock it up Really what I am saying is that there is really no excuse for not trying Paint Masks, especially mine
markchis
Kuwait / لعربية
Joined: February 09, 2009
KitMaker: 467 posts
AeroScale: 60 posts
Joined: February 09, 2009
KitMaker: 467 posts
AeroScale: 60 posts
Posted: Tuesday, July 30, 2013 - 03:26 AM UTC
very nice Mal -- the tight camo pattern looks superb !
best
Mark
best
Mark
Posted: Tuesday, July 30, 2013 - 07:49 PM UTC
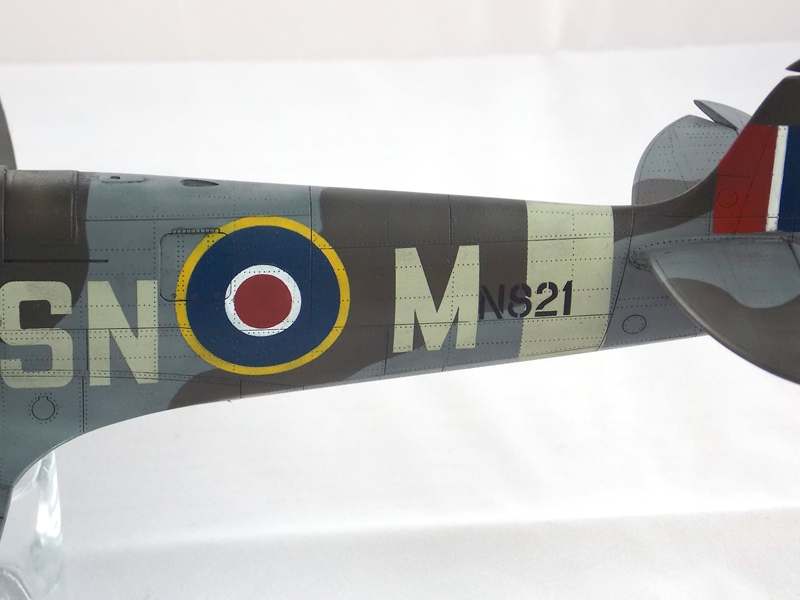
Hi Mark, thanks I have subtly changed the main mask (that goes from the port wing and over the fuselage) to more accurately reflect the actual camo pattern. I shied away from producing these masks because I have always free handed the camo on RAF machines. I did like the ease of doing this though and it is accurate to the scale plans of the actual como. The "B" version is also available I'm going to start work on more RAF camo patterns but they take a long time to get right The Hurricane or Mosquito are up next
chukw1
California, United States
Joined: November 28, 2007
KitMaker: 817 posts
AeroScale: 729 posts
Joined: November 28, 2007
KitMaker: 817 posts
AeroScale: 729 posts
Posted: Thursday, August 01, 2013 - 02:43 AM UTC
Beautiful stuff, Mal! I urge any curious parties to take the plunge and try these masks- the results are so very satisfying- and fun!
Posted: Thursday, August 01, 2013 - 05:38 PM UTC
Hi Chuck,
Thanks Yes very satisfying, the expectation before removing the masks,tinged with a slight dread, is rewarded by perfectly painted markings and a real sense of achievement and delight. A warning though, you won't want to use decals again, they just don't cut it anymore
I am also in the process of painting a Spitfire Mk 1 in 1/72 scale. The masks are a little trickier to use, purely because of the small size, but perform just the same as in the larger scales:
1/72 scale? you must be joking!
Quoted Text
Beautiful stuff, Mal! I urge any curious parties to take the plunge and try these masks- the results are so very satisfying- and fun!
Thanks Yes very satisfying, the expectation before removing the masks,tinged with a slight dread, is rewarded by perfectly painted markings and a real sense of achievement and delight. A warning though, you won't want to use decals again, they just don't cut it anymore
I am also in the process of painting a Spitfire Mk 1 in 1/72 scale. The masks are a little trickier to use, purely because of the small size, but perform just the same as in the larger scales:
1/72 scale? you must be joking!
Posted: Thursday, August 08, 2013 - 02:31 AM UTC
A small update, the few stencil decals are on:
A wash has been applied using "promodeller" washes, black, mud brown and light earth mixed.
Joel_W
Associate Editor
New York, United States
Joined: December 04, 2010
KitMaker: 11,666 posts
AeroScale: 7,410 posts
Joined: December 04, 2010
KitMaker: 11,666 posts
AeroScale: 7,410 posts
Posted: Thursday, August 08, 2013 - 03:31 AM UTC
Mal, your overall camo paint scheme is just perfect. As I said before, your masks are world's ahead of even the best decaling efforts. I looked and looked at your stencil decals, and they look as good as your masks. Truly a sensational build.
Joel
Joel
Posted: Thursday, August 08, 2013 - 07:40 AM UTC
Thanks Joel,
Yes painted markings knock decals into a cocked hat in many respects, correct size, correct colours and you wouldn't get as crisp effect with a wash no matter how well you got your decals to conform (whatever you think about the surface detail ) The decals aren't mine, they are from the kit but I have only used what I had to, the dashed lines are masked and painted as well. I have tried to produce stencil data as dry transfers but the process is far too expensive! I do have a theory though that I could cut small enough if I had a laser to play with
markchis
Kuwait / لعربية
Joined: February 09, 2009
KitMaker: 467 posts
AeroScale: 60 posts
Joined: February 09, 2009
KitMaker: 467 posts
AeroScale: 60 posts
Posted: Friday, August 09, 2013 - 10:23 PM UTC
looking perfect Mal - and great photos to show it off
best
Mark
best
Mark
Posted: Sunday, August 11, 2013 - 06:32 PM UTC
Thanks Mark I'm winding up for the home stretch, which is going to be delayed due to the fact that my Daughter and Grand Daughter will be down here for a couple of weeks today
Posted: Tuesday, August 20, 2013 - 06:00 PM UTC
I seem to have lost my modelling mojo! I can't decide how best to continue with this? With 3 years without doing any real modelling this is the first model that I am trying to complete. I know what I want to do but I just don't seem able to decide what is the right course of action. It might be that this is the first 1/32 scale kit of a Spitfire that I have done and feel that the painting details need to be that little bit more accurate or that I have really lost it?
I want to replicate the oil staining under the fuselage and I intend to use some Lifecolor Tensacrom "oil" blown back using my airbrush. That should work wonderfully but it needs to be done before the matt coat but if I matt over it it will lose its sheen, can I risk trying this technique over the matt finish? Does anyone know or do I need to do a test piece?
chukw1
California, United States
Joined: November 28, 2007
KitMaker: 817 posts
AeroScale: 729 posts
Joined: November 28, 2007
KitMaker: 817 posts
AeroScale: 729 posts
Posted: Wednesday, August 21, 2013 - 02:40 AM UTC
You can always go back and brush a little stain clear over the oil stains. Don't over-percolate, Mal!
Posted: Thursday, August 22, 2013 - 02:08 AM UTC
Thanks Chuck you are right I just need to get on and do it!
golfermd
Maryland, United States
Joined: March 01, 2013
KitMaker: 152 posts
AeroScale: 98 posts
Joined: March 01, 2013
KitMaker: 152 posts
AeroScale: 98 posts
Posted: Thursday, August 22, 2013 - 02:36 AM UTC
Fabulous job, Mal.
Posted: Thursday, August 22, 2013 - 06:59 PM UTC
Thanks Dan
I am also trying to work out the best way to depict the IFF fixing device on the end of each of the tail planes. The IFF aerial wires are usually depicted simply glued to the tail planes but in 1/32 scale I should be able to fabricate them. I should have built and added them before painting but I wasn't going to include the IFF wires until I discovered that this aircraft had them. A simple small diameter tube will do, I'll probably need to stretch some tube but gluing them will mean removing a little paint. I'll crack on and see what I come up with
phumbles
Australia
Joined: June 14, 2013
KitMaker: 82 posts
AeroScale: 81 posts
Joined: June 14, 2013
KitMaker: 82 posts
AeroScale: 81 posts
Posted: Thursday, August 22, 2013 - 11:18 PM UTC
Great looking model Mal especially the markings but a silly question are the paints enamels Thank you Phil
Posted: Friday, August 23, 2013 - 02:57 AM UTC
Thanks Phil and yes the paints are enamels:
Paints Used:
I use White Ensign Models (WEM) "Colourcoats" exclusively
I have moved on a little by sorting out what I will use for the IFF wire fixings on the tail planes, Albion Alloys aluminium tube (sold by WEM). I had forgotten that I had been given some at Scale Modelworld last year, thanks Mathew