My Tamiya Mosquito turned up today and having only ever built Airfix and Revell branded kits, I am really pleased with how good this one is.
Here is the box:
I've chosen to build the 143 squadron version because I thought the rockets and colours looked cool:
I'm awaiting a big order of paint to get started properly but I've got some of the metal/dark colours from previous kits so was able to get started on the undercarriage assembly.
I'm pleased how they've come out. I plan to wash some mud into the treads and some brake dust around the bottom near the wheels.
Looking forward to my paint arriving so I can crack on! Later posts will have better pictures, it's a bit dark in here and I can't find my flash!!
Hosted by Rowan Baylis
Tamiya 1/48 Mosquito
adam_b
England - East Anglia, United Kingdom
Joined: July 31, 2013
KitMaker: 10 posts
AeroScale: 9 posts
Joined: July 31, 2013
KitMaker: 10 posts
AeroScale: 9 posts
Posted: Wednesday, July 31, 2013 - 08:04 AM UTC
MrMtnMauler
Washington, United States
Joined: January 15, 2011
KitMaker: 224 posts
AeroScale: 223 posts
Joined: January 15, 2011
KitMaker: 224 posts
AeroScale: 223 posts
Posted: Wednesday, July 31, 2013 - 11:06 AM UTC
Great choice for a subject Adam. It looks like you're off to a good start. I am really looking forward to following along with your build. Thanks a bunch for including us in your build. Take care and thanks again
Jim
Jim
Joel_W
Associate Editor
New York, United States
Joined: December 04, 2010
KitMaker: 11,666 posts
AeroScale: 7,410 posts
Joined: December 04, 2010
KitMaker: 11,666 posts
AeroScale: 7,410 posts
Posted: Wednesday, July 31, 2013 - 12:51 PM UTC
Excellent kit. Tamiya's kits are top of the line. You're going to really enjoy the build.
Joel
Joel
raypalmer
Ontario, Canada
Joined: March 29, 2010
KitMaker: 1,151 posts
AeroScale: 985 posts
Joined: March 29, 2010
KitMaker: 1,151 posts
AeroScale: 985 posts
Posted: Wednesday, July 31, 2013 - 01:16 PM UTC
Keep it up boss! Looking good so far.
adam_b
England - East Anglia, United Kingdom
Joined: July 31, 2013
KitMaker: 10 posts
AeroScale: 9 posts
Joined: July 31, 2013
KitMaker: 10 posts
AeroScale: 9 posts
Posted: Sunday, August 04, 2013 - 06:05 AM UTC
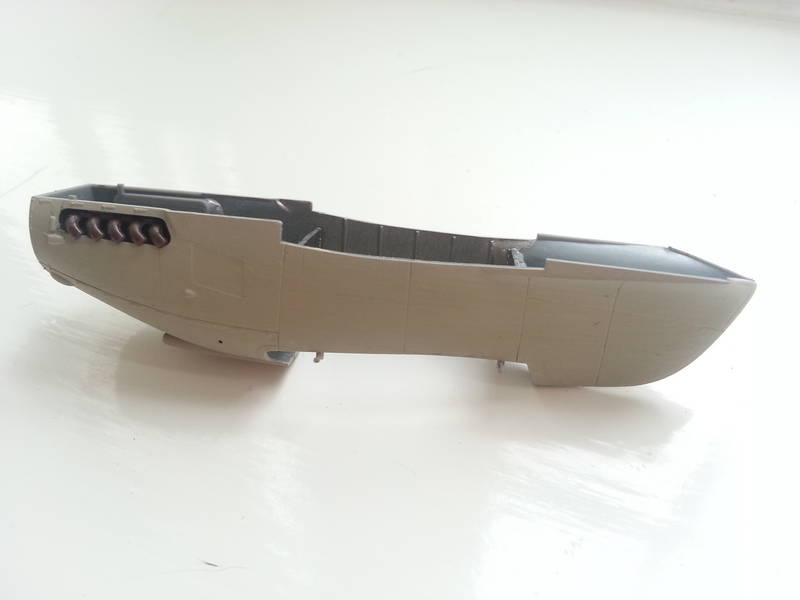
Couple of tiny updates, first off the engine pod thing:
I put a bit more red in the grey of the engine exhausts to make them look more "seasoned" and am quite pleased with it!
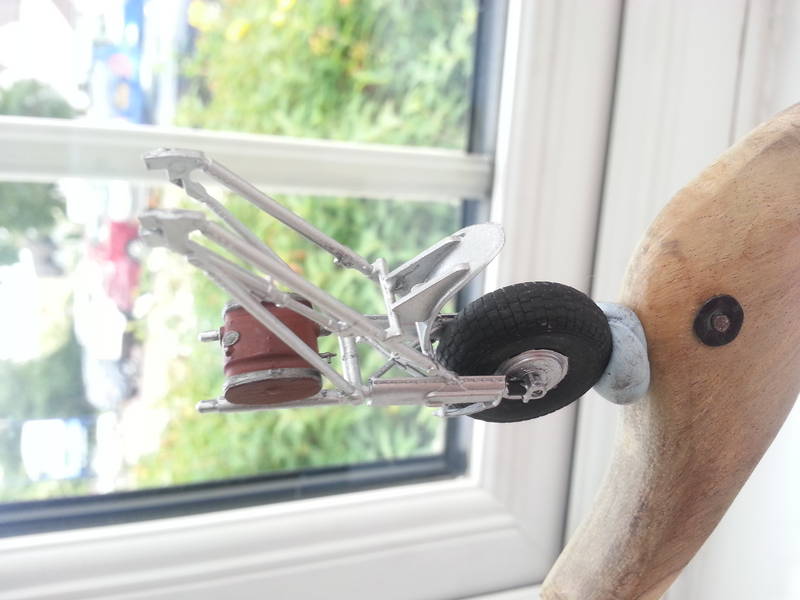
Finally here are the wheels all finished with the red tanks attached. They were fiddly to paint! Sorry it's on side/blue tacked to a duck!
I put a bit more red in the grey of the engine exhausts to make them look more "seasoned" and am quite pleased with it!
Finally here are the wheels all finished with the red tanks attached. They were fiddly to paint! Sorry it's on side/blue tacked to a duck!
BlackWidow
European Union
Joined: August 09, 2009
KitMaker: 1,732 posts
AeroScale: 1,336 posts
Joined: August 09, 2009
KitMaker: 1,732 posts
AeroScale: 1,336 posts
Posted: Sunday, August 04, 2013 - 06:45 AM UTC
Adam, I have both Tamiya Mossie kits and built this one you have a few years ago. It really is a thankfull and enjoyable kit. You will like it. Btw, I painted it in the same markings as you do.
Torsten
Torsten
adam_b
England - East Anglia, United Kingdom
Joined: July 31, 2013
KitMaker: 10 posts
AeroScale: 9 posts
Joined: July 31, 2013
KitMaker: 10 posts
AeroScale: 9 posts
Posted: Sunday, August 04, 2013 - 08:13 AM UTC
Thanks Torsten! I've just looked at a picture of the mossie you made and it looks great! Hope I do as good a job.
Posted: Sunday, August 04, 2013 - 06:49 PM UTC
Hi Adam,
I have also built one of these, an awesome kit, you will enjoy it
A nice start, but little mistake which it is too late to do anything about, so don't worry about it; The wheels of the Mosquito were not handed, so the brake drums should both be on the Starboard side. I think that most get this wrong, so don't worry about it I just wanted to take the opportunity to let members know for the future
Joel_W
Associate Editor
New York, United States
Joined: December 04, 2010
KitMaker: 11,666 posts
AeroScale: 7,410 posts
Joined: December 04, 2010
KitMaker: 11,666 posts
AeroScale: 7,410 posts
Posted: Wednesday, August 07, 2013 - 07:08 AM UTC
[quote... The wheels of the Mosquito were not handed, so the brake drums should both be on the Starboard side. I think that most get this wrong, so don't worry about it I just wanted to take the opportunity to let members know for the future [/quote]
I'm sure that you're correct, just seems somewhat unusual to me. Is this a usual practice for British aircraft, or just the Mosquito?
Joel
I'm sure that you're correct, just seems somewhat unusual to me. Is this a usual practice for British aircraft, or just the Mosquito?
Joel
adam_b
England - East Anglia, United Kingdom
Joined: July 31, 2013
KitMaker: 10 posts
AeroScale: 9 posts
Joined: July 31, 2013
KitMaker: 10 posts
AeroScale: 9 posts
Posted: Thursday, August 08, 2013 - 11:45 PM UTC
Ah nooo! What a pain. Oddly the wheels have a drum on one side and then an option to put another on the other side for the "B" variant of the model or just a wheel shape for the night fighter or standard camo mossie. I'll take a picture later and show you what I mean.
adam_b
England - East Anglia, United Kingdom
Joined: July 31, 2013
KitMaker: 10 posts
AeroScale: 9 posts
Joined: July 31, 2013
KitMaker: 10 posts
AeroScale: 9 posts
Posted: Thursday, August 08, 2013 - 11:53 PM UTC
Big update, I've finished the wings.
Here is the engine pod and wheel assembly:
And one of the rockets, which were very fiddly!
Now, you may have notice one of the rockets looks wrong, it's easier to see here:
The little pin that holds the rail to the mounts is missing so I'm going to try and make something to replace it. I know it's a tiny detail but I want it to be right.
Finally here is the whole wing. I'm really pleased with the finish on the wing top, I used a much larger brush and only needed two layers so the rivet and panel details are much more obvious than the engine pods. The colour was a nice surprise too because it looked much too grey in the pot but has dried the correct greyish blue.
Next up is the cockpit so I'm having a little break. My hands are still incredibly shaky due to recent surgery so I can only do a few fiddly bits at a time!
Mcleod
Alberta, Canada
Joined: April 07, 2010
KitMaker: 1,028 posts
AeroScale: 939 posts
Joined: April 07, 2010
KitMaker: 1,028 posts
AeroScale: 939 posts
Posted: Friday, August 09, 2013 - 12:59 AM UTC
Well, this is going to be interesting, Adam. I'm not sure I've ever seen anyone paint the main-frame of an airplane in totally completed sub-assemblies like that.
It looks really nice, I just hope you don't require filling and sanding when you attach wings to fuse.
Joel_W
Associate Editor
New York, United States
Joined: December 04, 2010
KitMaker: 11,666 posts
AeroScale: 7,410 posts
Joined: December 04, 2010
KitMaker: 11,666 posts
AeroScale: 7,410 posts
Posted: Sunday, August 11, 2013 - 09:55 AM UTC
Adam, As Ben said, this is an unusual build method for sure. I'll be very interested to see how you would handle issues of fit that might require sanding and filling. Hopefully this won't be an issue. Looking forward to your next update.
Joel
Joel
adam_b
England - East Anglia, United Kingdom
Joined: July 31, 2013
KitMaker: 10 posts
AeroScale: 9 posts
Joined: July 31, 2013
KitMaker: 10 posts
AeroScale: 9 posts
Posted: Friday, August 30, 2013 - 01:44 AM UTC
It is an odd way to do things, but I'm still a bit shakey so not sure I'd be able to paint a straight line on the wing! I could have masked it I suppose.
I've been waiting for my copy of modelling the de havilland mosquito (osprey) for some pointers on the cockpit so sorry for the lack of updates.
Here is the finished cockpit, I bought a windsor and newton 000 paintbrush to do all the tiny details with!
And here it is with the tiny pilots in place. The instructions call for their jumpsuits to be grey which I'm not sure is 100% accurate.
I've started paiting the interior of the fuselage now so will soon be ready to put it all together!
phumbles
Australia
Joined: June 14, 2013
KitMaker: 82 posts
AeroScale: 81 posts
Joined: June 14, 2013
KitMaker: 82 posts
AeroScale: 81 posts
Posted: Friday, August 30, 2013 - 11:46 PM UTC
Adam It is looking good and I will keep an eye out for your next post Have fun Phil