

Bruce, nice to hear that. Just work at your own pace.
As for me, my lovely wife has really been getting on my case of not doing much of anything around the house. Just modeling in my spare time from work. Looks like I'll have to go back to one day a week is dedicated to my "Honey to Do" list.
Joel
Cold War (1950-1974)
Discuss the aircraft modeling subjects during the Cold War period.
Discuss the aircraft modeling subjects during the Cold War period.
Hosted by Tim Hatton
Skyraider A-1H
Joel_W

Joined: December 04, 2010
KitMaker: 11,666 posts
AeroScale: 7,410 posts
Posted: Thursday, October 31, 2013 - 02:47 AM UTC


bdanie6
Joined: November 09, 2008
KitMaker: 615 posts
AeroScale: 459 posts

Posted: Friday, November 15, 2013 - 03:22 AM UTC
@Joel, well if the list is getting long enough 
As for me, the Skyraider is masked now for the Gull Grey to go on.
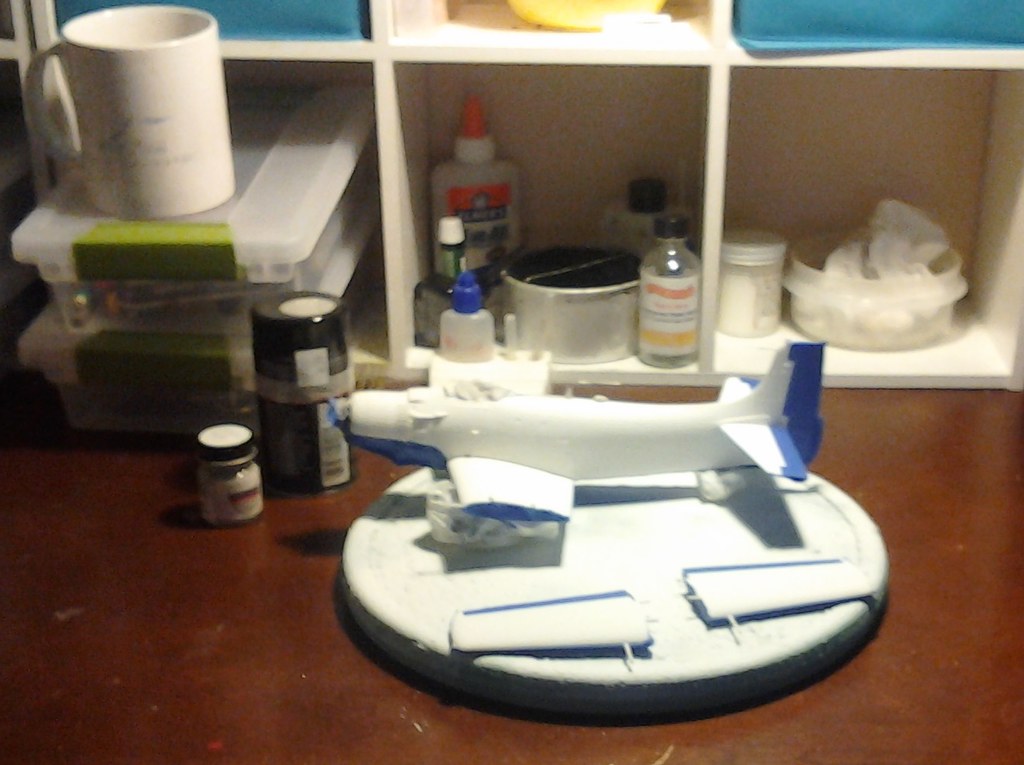
So at this point I have the Grey on and I'm just waiting for the colour coat to dry before removing the masking and then have at the decals
Later
As for me, the Skyraider is masked now for the Gull Grey to go on.
So at this point I have the Grey on and I'm just waiting for the colour coat to dry before removing the masking and then have at the decals
Later
Joel_W
Joined: December 04, 2010
KitMaker: 11,666 posts
AeroScale: 7,410 posts
Posted: Friday, November 15, 2013 - 03:41 AM UTC
If you're painted with Acrylics, by the time you clean your airbrush, you can safely remove the masking tape. Sometime I don't even wait to clean the gun other then shooting some lacquer thinner through it, and then remove the tape. Never had an issue. Acrylics dry that fast.
Joel
Joel
bdanie6
Joined: November 09, 2008
KitMaker: 615 posts
AeroScale: 459 posts
Posted: Friday, November 15, 2013 - 05:36 AM UTC
True, but I used the rattlecan in the background to put on the grey, so I'll wait the few hours and then take the masking tape and moist paper towels off it.
Later
Later
bdanie6
Joined: November 09, 2008
KitMaker: 615 posts
AeroScale: 459 posts
Posted: Friday, November 22, 2013 - 03:39 AM UTC
Don't worry folks, I'm still working on this one 
Got the Gull Grey on and the masking off and wound up with this;
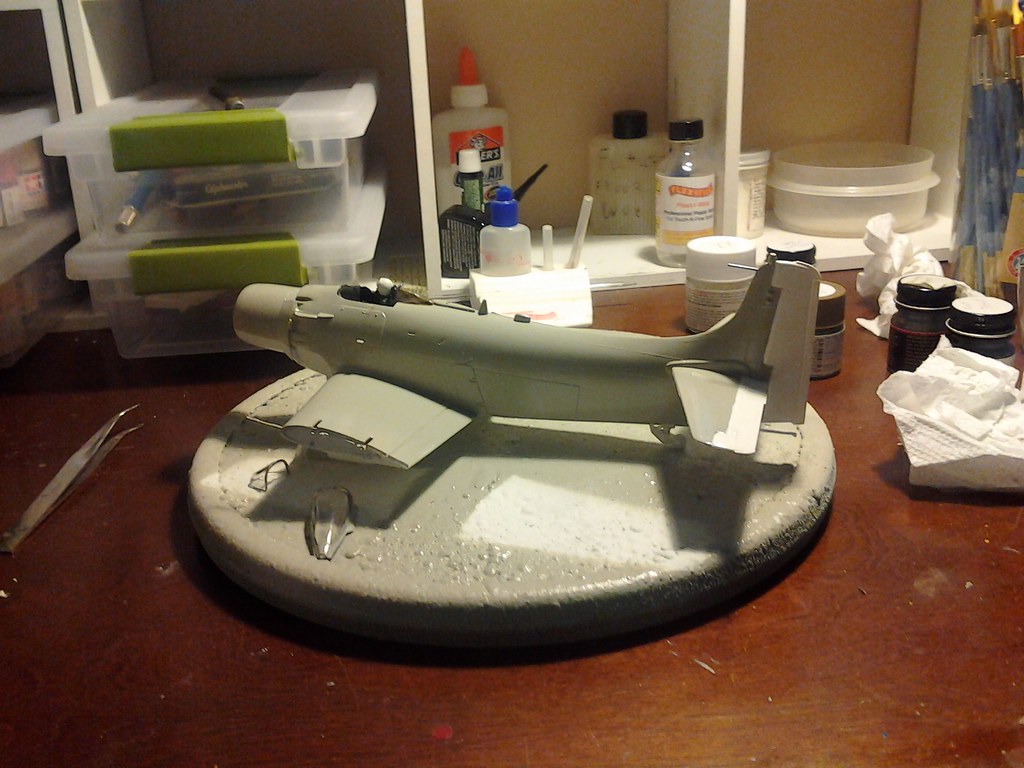
Then I brush painted the anti=glare panel flat black and then attached the prop and wheels. I also painted the TACAN antenna flat black, as these where bare plastic.
At this point now, I want to match the green on the decal sheet to what the rudder fin cap needs to be.
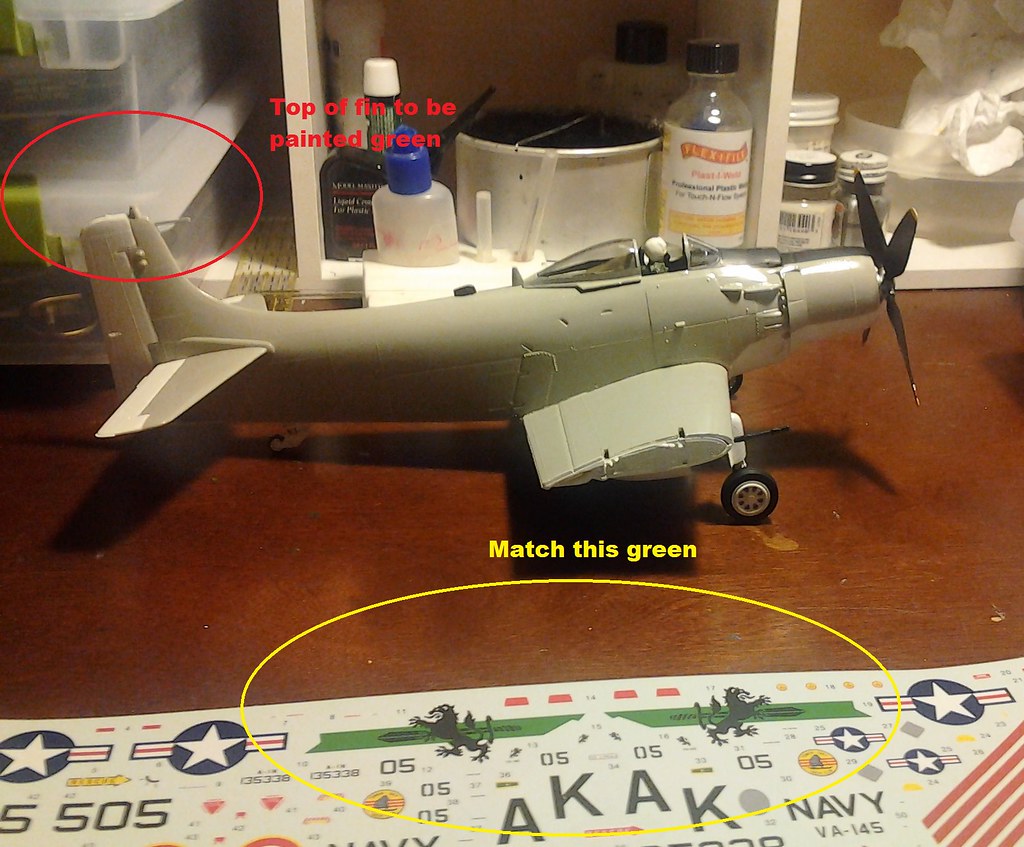
I'm going to be using Tamiya bottle paints, X-28 Glos park Green, XF-11 Japanese Navy Green, XF-58 Olive Green, and XF-4 Chromate Yellow
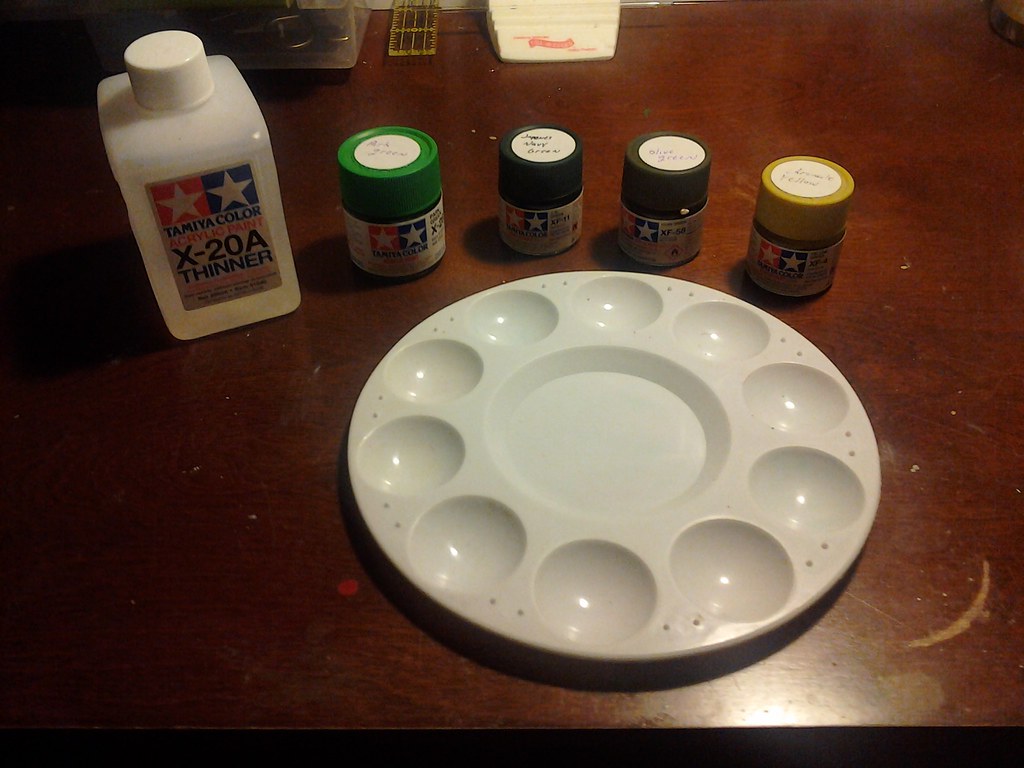
And that's where we are right now. So, off to the work bench and see how good I am at mixing colours
Later
Got the Gull Grey on and the masking off and wound up with this;
Then I brush painted the anti=glare panel flat black and then attached the prop and wheels. I also painted the TACAN antenna flat black, as these where bare plastic.
At this point now, I want to match the green on the decal sheet to what the rudder fin cap needs to be.
I'm going to be using Tamiya bottle paints, X-28 Glos park Green, XF-11 Japanese Navy Green, XF-58 Olive Green, and XF-4 Chromate Yellow
And that's where we are right now. So, off to the work bench and see how good I am at mixing colours
Later
Joel_W
Joined: December 04, 2010
KitMaker: 11,666 posts
AeroScale: 7,410 posts
Posted: Friday, November 22, 2013 - 05:11 AM UTC
Why did you opt to hand paint the anti-glare panel? Mask and airbrush would give you perfect results. Are there any bush marks to deal with?
Joel
Joel
bdanie6
Joined: November 09, 2008
KitMaker: 615 posts
AeroScale: 459 posts
Posted: Friday, November 22, 2013 - 07:57 AM UTC
Joel, the honest answer is that I'm a bloody lazy old sod, and after all the masking and painting for the main colours I just couldn't see myself remasking the entire plane just to do a small piece of it. I taped off the panel with Tamiya tape and used Model Master Flat Black (thinned with a drop of tap water). I used a small flat bristle brush, went in one direction only and came out with a perfectly flat panel, no brush marks at all. 
Fact is I only have a basic single stage airbrush.
Later
Fact is I only have a basic single stage airbrush.
Later
Joel_W
Joined: December 04, 2010
KitMaker: 11,666 posts
AeroScale: 7,410 posts
Posted: Saturday, November 23, 2013 - 09:39 AM UTC
Bruce, as long as it meets your expectations, your decision to hand paint worked out fine.
Joel
Joel
Holdfast

#056

Joined: September 30, 2002
KitMaker: 8,581 posts
AeroScale: 4,913 posts

Posted: Saturday, November 23, 2013 - 08:34 PM UTC
Nice one Bruce, you are doing some good work with this old kit  I love the Skyraider and used to have the Tamiya 1/48 kit but since moving up to 1/32 I sold it. I do regret that a bit but I can still get a 1/32 scale kit and it will be done in the same markings as Joel's model, only the hornet, and the rest of the markings will be painted on
I look forward to seeing the rest of your build
I love the Skyraider and used to have the Tamiya 1/48 kit but since moving up to 1/32 I sold it. I do regret that a bit but I can still get a 1/32 scale kit and it will be done in the same markings as Joel's model, only the hornet, and the rest of the markings will be painted on I look forward to seeing the rest of your build

bdanie6
Joined: November 09, 2008
KitMaker: 615 posts
AeroScale: 459 posts
Posted: Sunday, November 24, 2013 - 07:18 AM UTC
Thanks Mal, more to come soon. I have about half the plane decaled now
Later
Later
bdanie6
Joined: November 09, 2008
KitMaker: 615 posts
AeroScale: 459 posts
Posted: Monday, December 02, 2013 - 01:13 AM UTC
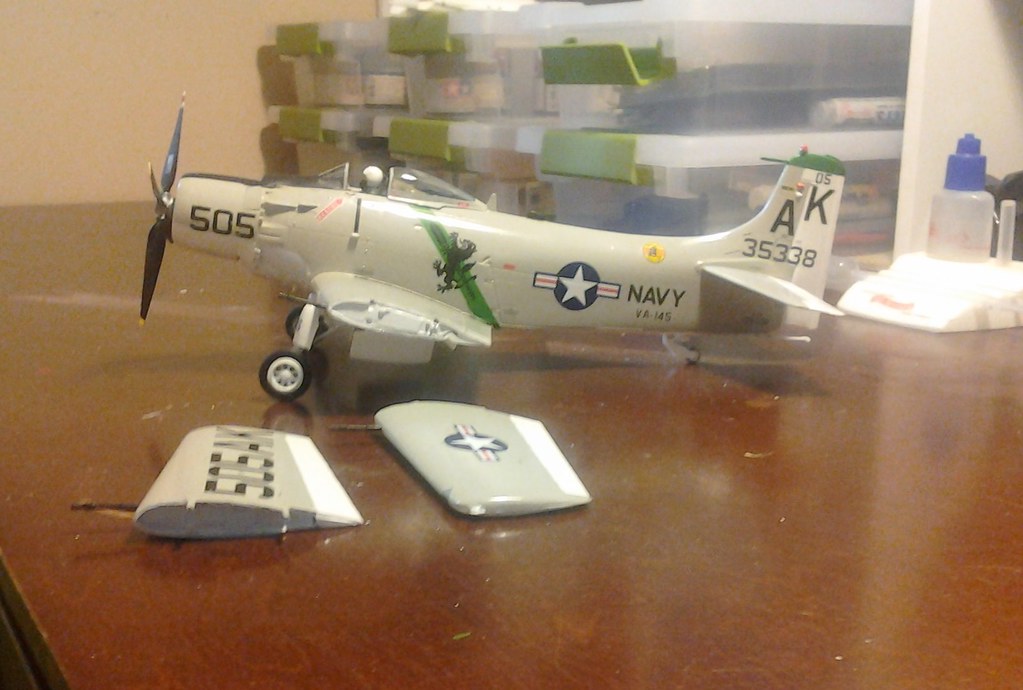
Started on the decaling;
Here, the Skyraider is done, and I am starting on the weapons pylons which have 4 decals each. I did find out that some decals are mis-numbered So you need to read each one to make sure that is it's proper place
Then there is the problem that the panel lines in the decal guide are correct, but bare no resemblance to the panel lines on the model!
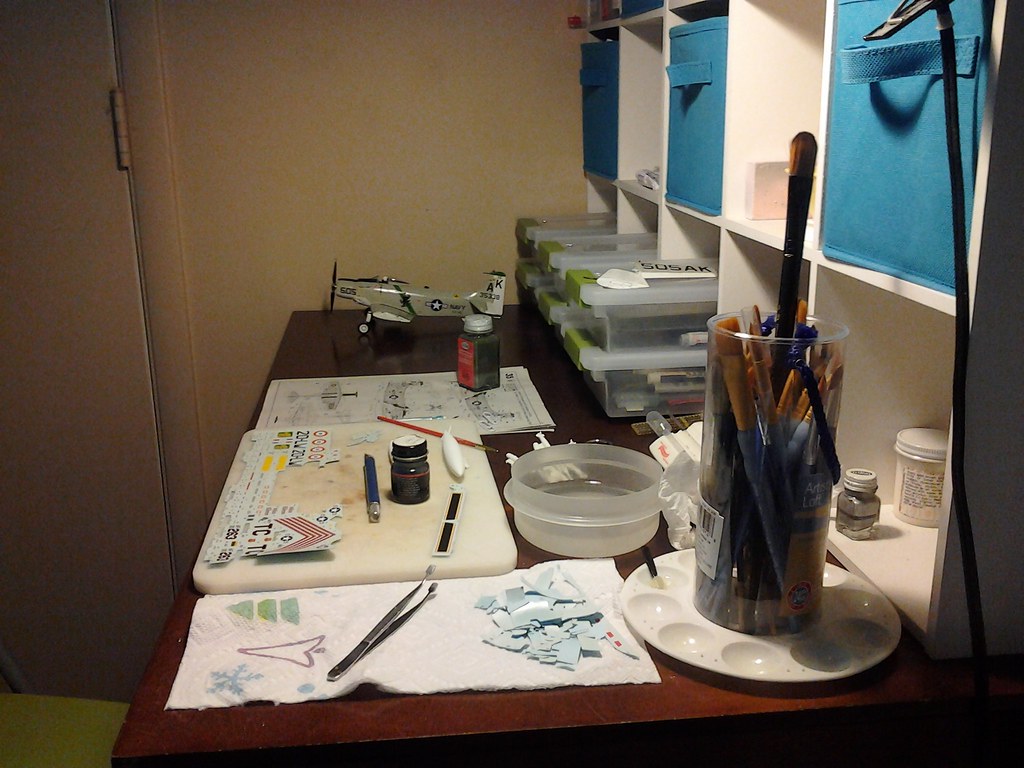
As I went thru the decal sheet I also crossed off each one as I placed it. Makes it much easier to keep track of where I am
More to come
Later
Here, the Skyraider is done, and I am starting on the weapons pylons which have 4 decals each. I did find out that some decals are mis-numbered
So you need to read each one to make sure that is it's proper place Then there is the problem that the panel lines in the decal guide are correct, but bare no resemblance to the panel lines on the model!
As I went thru the decal sheet I also crossed off each one as I placed it. Makes it much easier to keep track of where I am
More to come
Later
Joel_W
Joined: December 04, 2010
KitMaker: 11,666 posts
AeroScale: 7,410 posts
Posted: Monday, December 02, 2013 - 02:03 AM UTC
Bruce, from what I can see, the decaling looks great. looking forward to your next update.
And Mal, I can't wait to see how you do the Bumble Bee in 1/32 with masks. Like I said, it takes talent, and skill way above what the average modeler has.
Joel
And Mal, I can't wait to see how you do the Bumble Bee in 1/32 with masks. Like I said, it takes talent, and skill way above what the average modeler has.
Joel
bdanie6
Joined: November 09, 2008
KitMaker: 615 posts
AeroScale: 459 posts
Posted: Monday, December 02, 2013 - 09:20 AM UTC
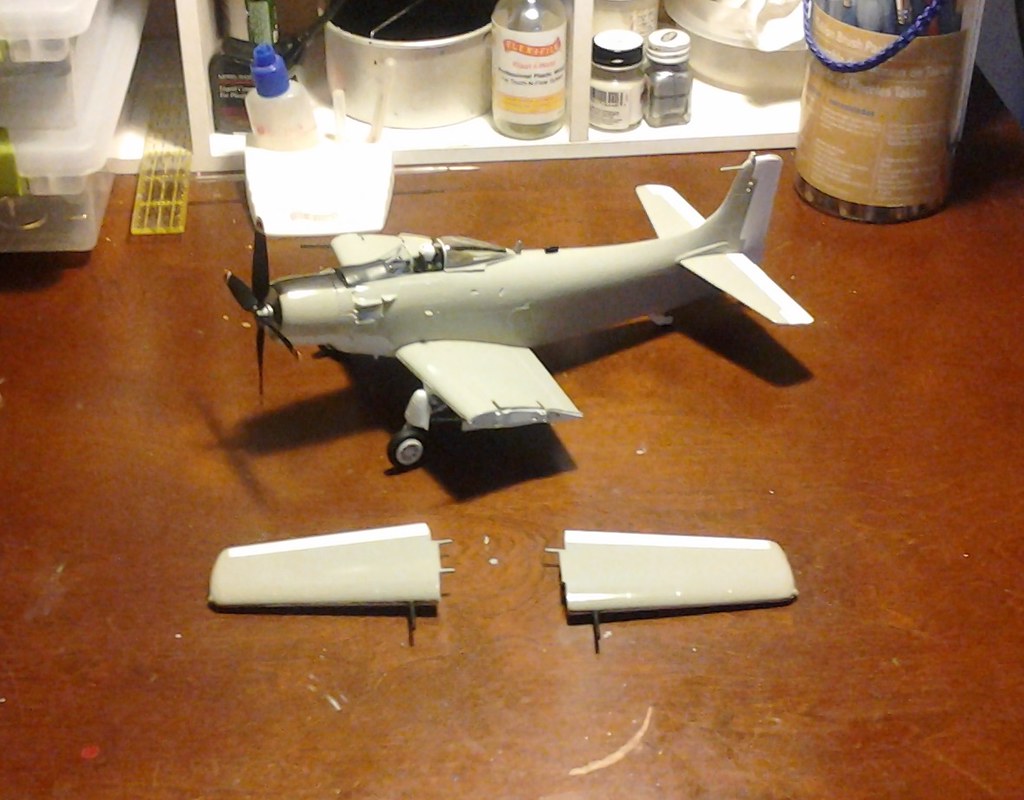
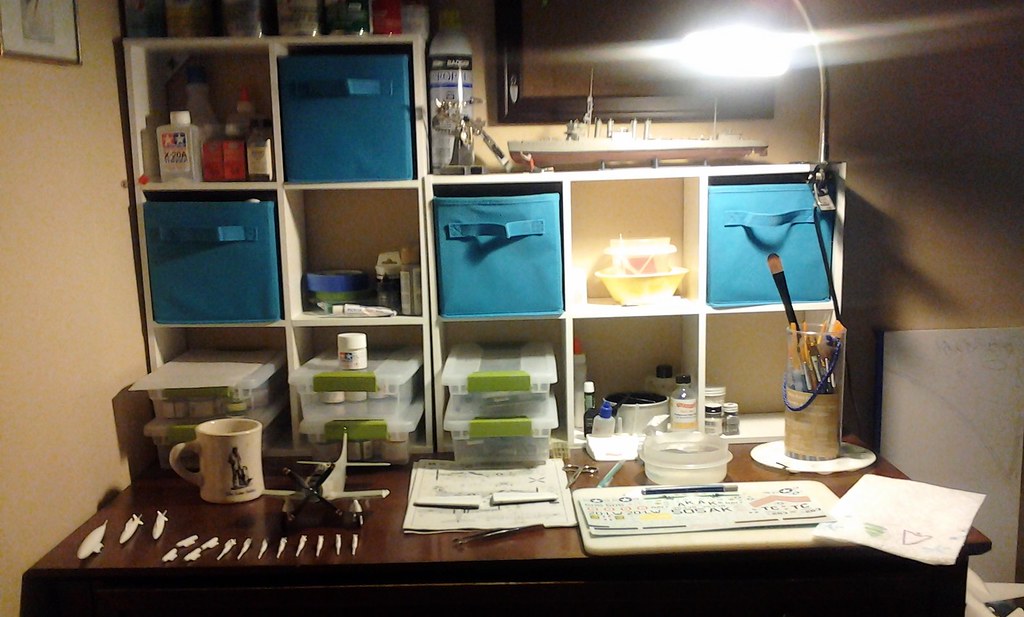
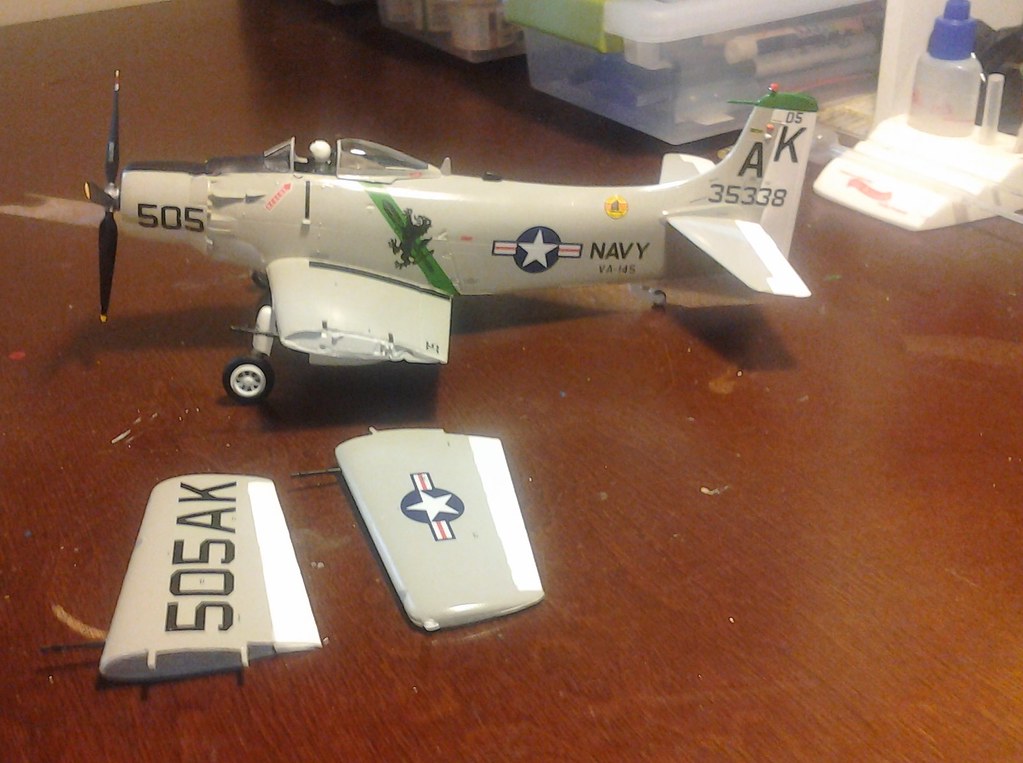
Joel, yeah, the plane is too far away in that picture. So here is a closer look;
Awhile back I mentioned that when you cut the wing tops apart to allow the wings to be displayed folded, that the posts that are left are fragile...to say the least
I also have the problem of limited display space and the need to transport the models from event to event. So I need to keep the wings secured to the model and keep them removable for storage,
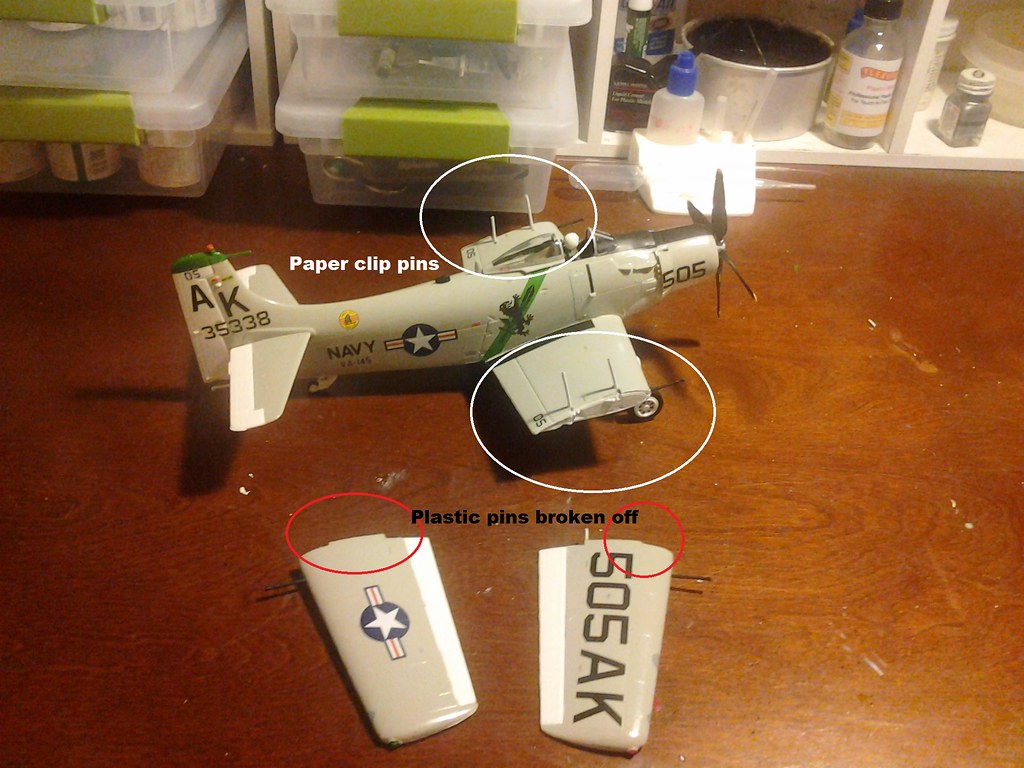
and with wings added;
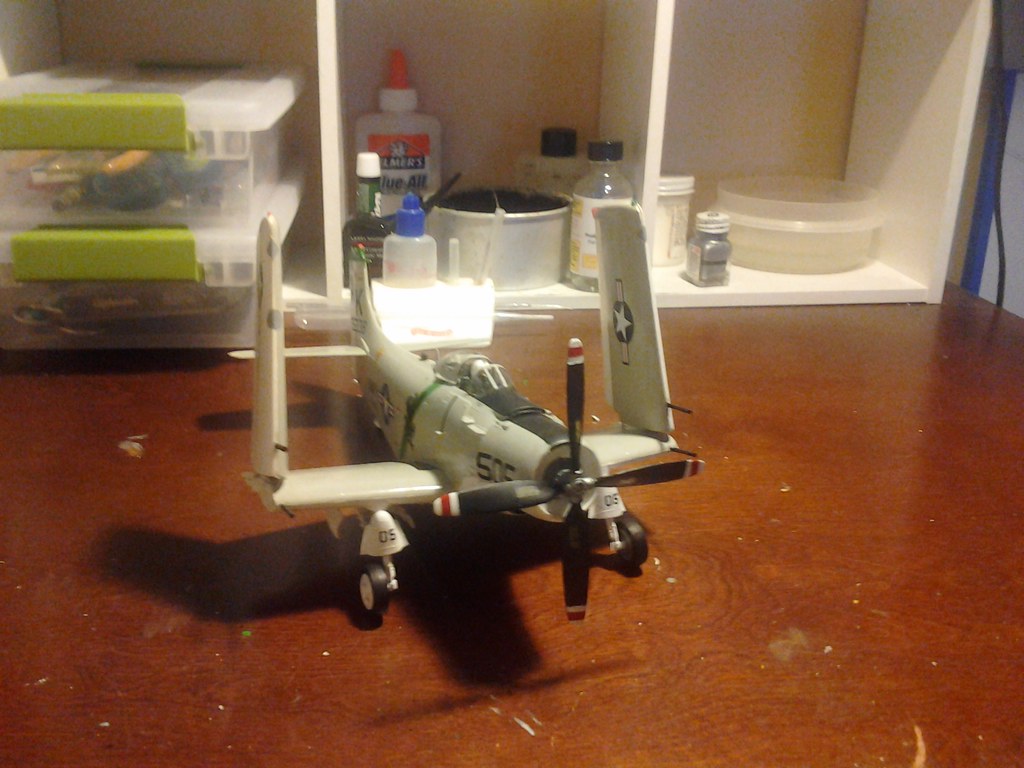
Now comes weathering and weapons
Stay tuned, more to come
Later
Awhile back I mentioned that when you cut the wing tops apart to allow the wings to be displayed folded, that the posts that are left are fragile...to say the least
I also have the problem of limited display space and the need to transport the models from event to event. So I need to keep the wings secured to the model and keep them removable for storage,
and with wings added;
Now comes weathering and weapons
Stay tuned, more to come
Later
Joel_W
Joined: December 04, 2010
KitMaker: 11,666 posts
AeroScale: 7,410 posts
Posted: Tuesday, December 03, 2013 - 07:28 AM UTC
Bruce, Decals in the close up pictures are looking really good. I like your decision to go with the paper clip pins. No chance of breaking off during transport, or for the long display haul.
Storage is always an issue for me too, and I have my own man cave. I've taken to stackable plastic bins that I stack two high on shelving unist. I Can stack them directly in a corner, etc. Plenty of options as my collection continues to grow.
Joel
Storage is always an issue for me too, and I have my own man cave. I've taken to stackable plastic bins that I stack two high on shelving unist. I Can stack them directly in a corner, etc. Plenty of options as my collection continues to grow.
Joel
bdanie6
Joined: November 09, 2008
KitMaker: 615 posts
AeroScale: 459 posts
Posted: Thursday, December 05, 2013 - 01:17 AM UTC
Joel,I've become Targets best friend when it comes to stackable storage bins
This bird is finally done, weapons and weathering done. 4 rocket pods, 8 daisy cutters and 3 drop tanks later we get this;
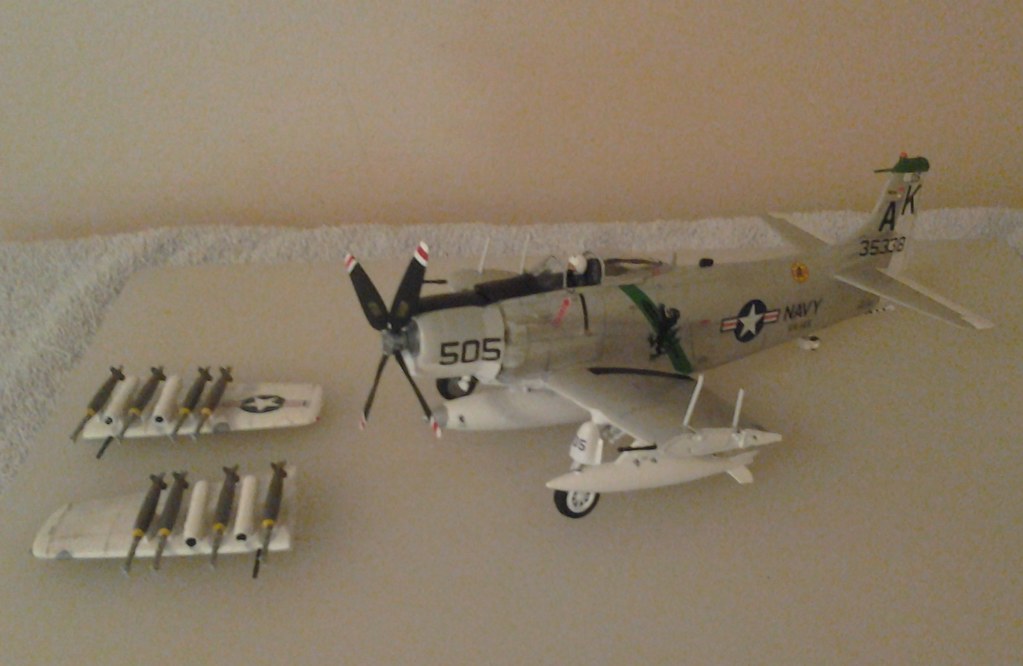
I kept weathering to a minimum simply because after all the time and energy put into one of these I hate to dirty it up, but for the sake or realism I do some light weathering, so we'll just say this is at the beginning of its tour of duty
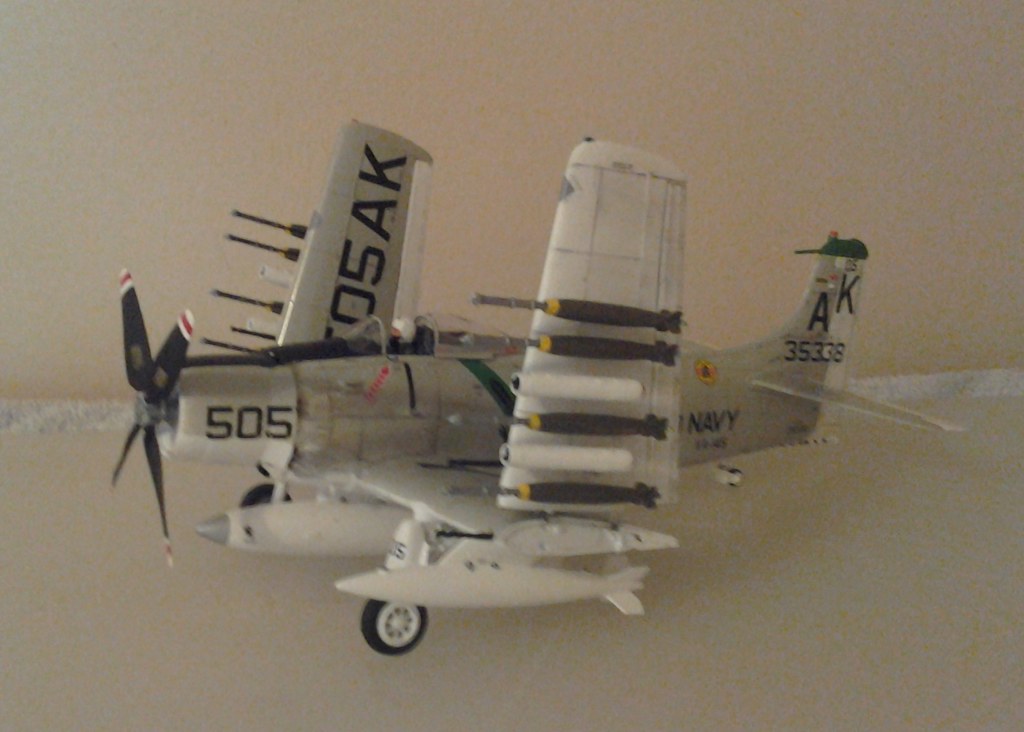
I did a real basic weathering job. I used a fine point pencil for the panel lines, wiped with a paper towel (always in the direction of travel) and then use pastel chalk for the exhaust stains
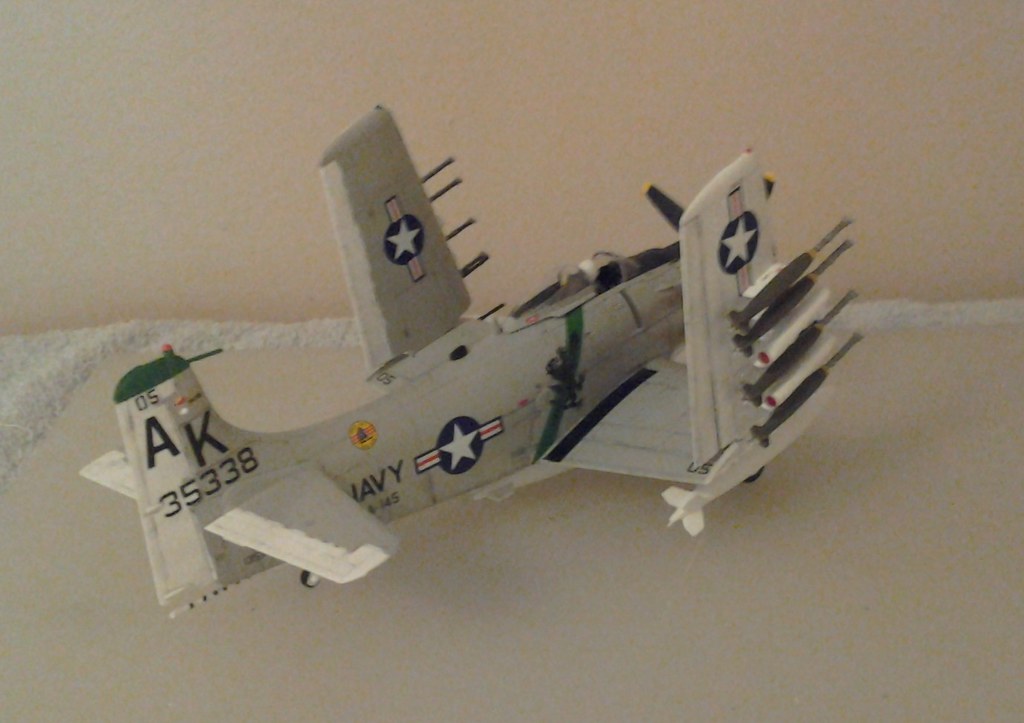
And that's it. Thank you for looking. Comments always welcomed.
Later
This bird is finally done, weapons and weathering done. 4 rocket pods, 8 daisy cutters and 3 drop tanks later we get this;
I kept weathering to a minimum simply because after all the time and energy put into one of these I hate to dirty it up, but for the sake or realism I do some light weathering, so we'll just say this is at the beginning of its tour of duty
I did a real basic weathering job. I used a fine point pencil for the panel lines, wiped with a paper towel (always in the direction of travel) and then use pastel chalk for the exhaust stains
And that's it. Thank you for looking. Comments always welcomed.
Later
Joel_W
Joined: December 04, 2010
KitMaker: 11,666 posts
AeroScale: 7,410 posts
Posted: Thursday, December 05, 2013 - 03:10 AM UTC
Bruce, It's been a enjoyable journey tagging along your build. The end results are certainly worth it. Weathering while lite, still adds just enough to bring out the details. I particularly like your use of a pencil for panel lines. I'll certainly be trying out that technique for certain applications where a pin wash becomes a major effort. 
Joel
Joel
 |

WEB HOSTING BY


Copyright ©2021 AeroScale and Kitmaker Network, a subsidiary of Silver Star Enterprises
All Rights Reserved. Please read our Conditions of Use and Privacy Policy.
All Rights Reserved. Please read our Conditions of Use and Privacy Policy.