_GOTOBOTTOM
World War II: Great Britain
Aircraft of Great Britain in WWII.
Hosted by Rowan Baylis
Typhoons: four in 1/72
robot_
_VISITCOMMUNITY
United Kingdom
Joined: March 08, 2009
KitMaker: 719 posts
AeroScale: 691 posts
Posted: Tuesday, September 03, 2013 - 12:29 AM UTC
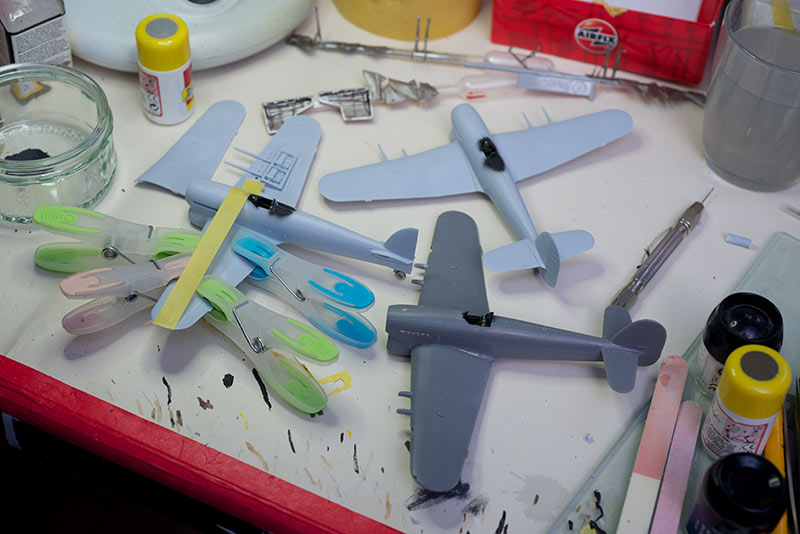
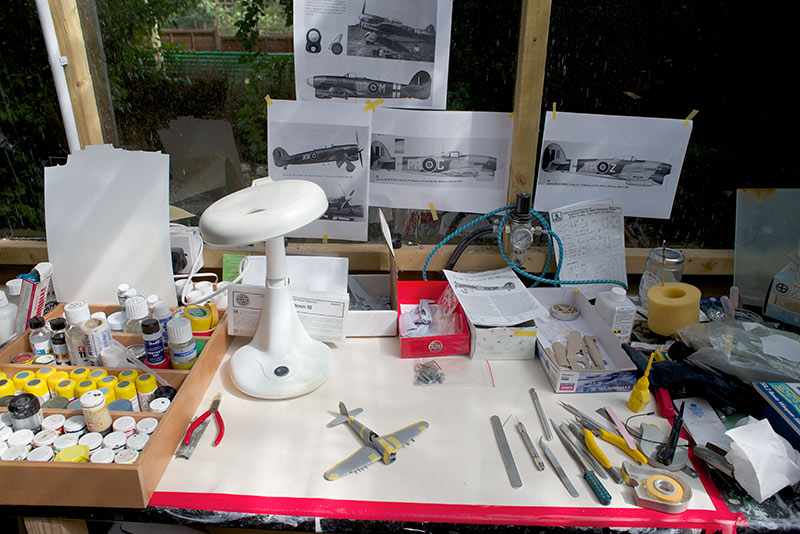
After trying to build two Typhoons simultaneously a few years ago, and failing, I decided it would be easier to build four(!) at the same time. One of the four is the left-over from the first attempt, see this thread: Tale of Two Tiffies .

I am using three different kits: the Pavla car-door, the Brengun bubble-top, and two of the Airfix late-war version with 4 blade prop and Tempest tail planes.

The schemes I have chosen are:
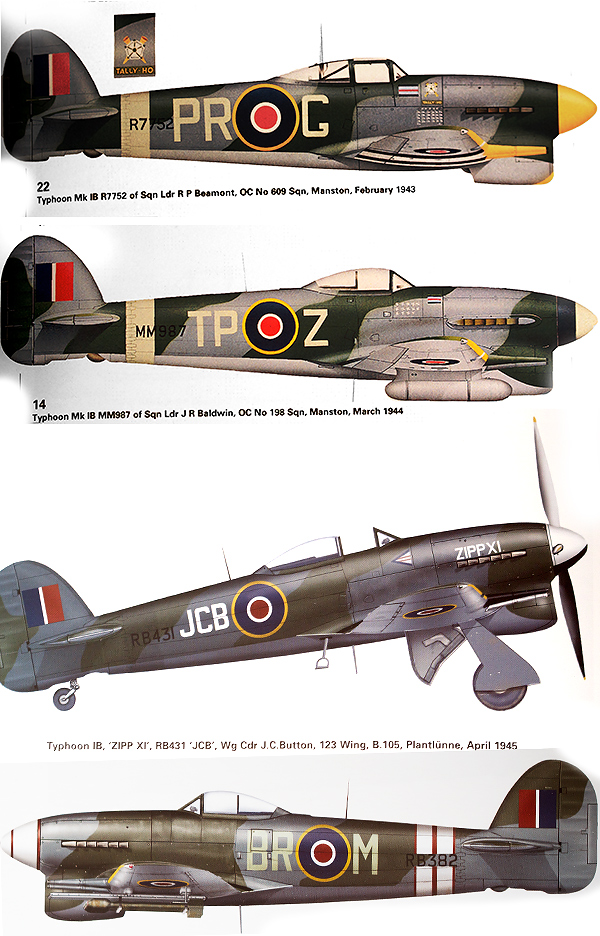

(Top two profiles by Chris Davey from Osprey's Typhoon and Tempest Aces of World War 2 by Chris Thomas; bottom two profiles by Chris Thomas from 2nd Tactical Airforce Vol. 4 by Shores and Thomas)


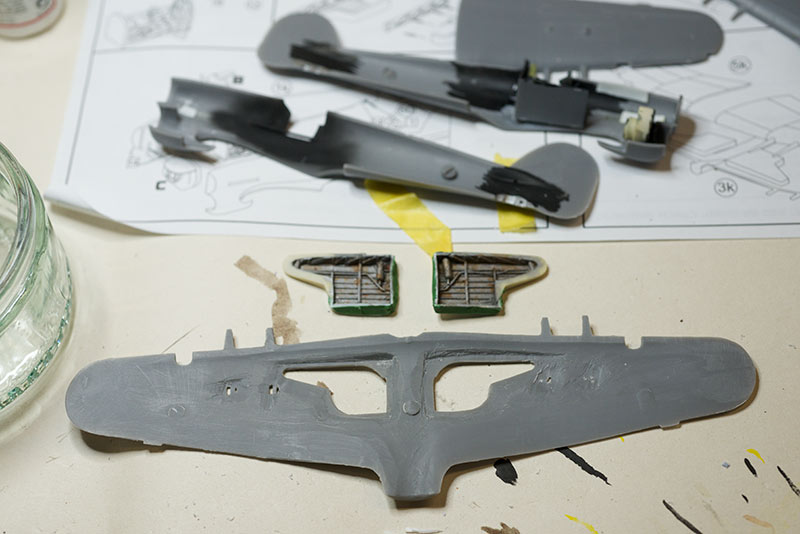
I have spent several days already on getting the parts to fit together, which for the Pavla kit has been a considerable hassle! The wings and fin have had to be thinned considerably, as have the cockpit areas (and still the resin cockpit doesn't fit as intended).


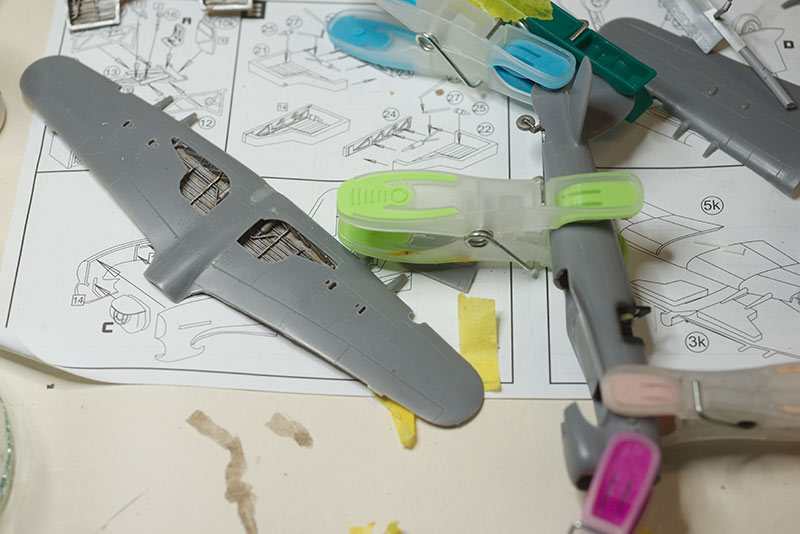
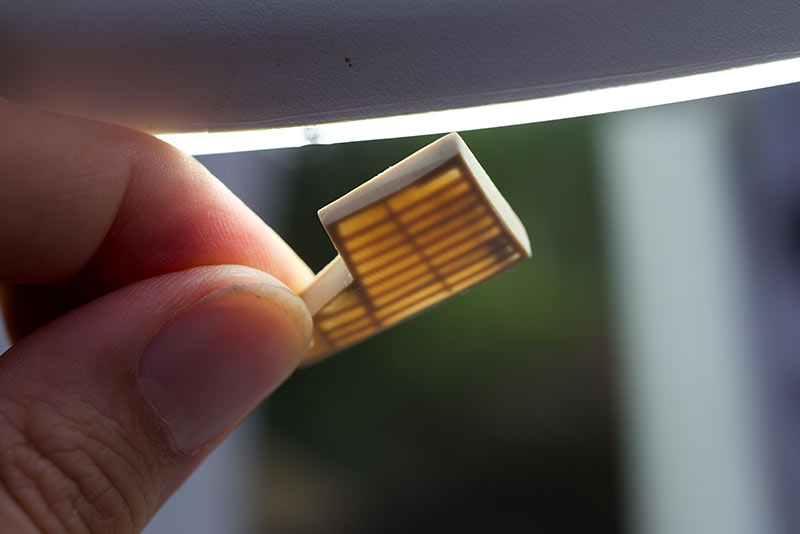
Both the Airfix and Brengun kits mainly need the height of the wheel wells reduced to allow the wings to close properly. In the case of the Brengun, the tops surfaces were sanded to translucency, as well as the bottom edges coming up too.
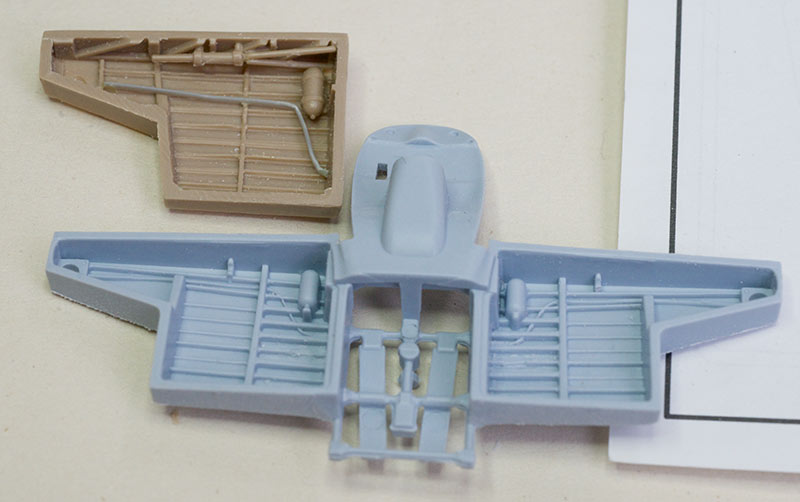


The Brengun has the edge over the Airfix wheel wells, and in detail and accuracy in general, but every part needed some clean-up.
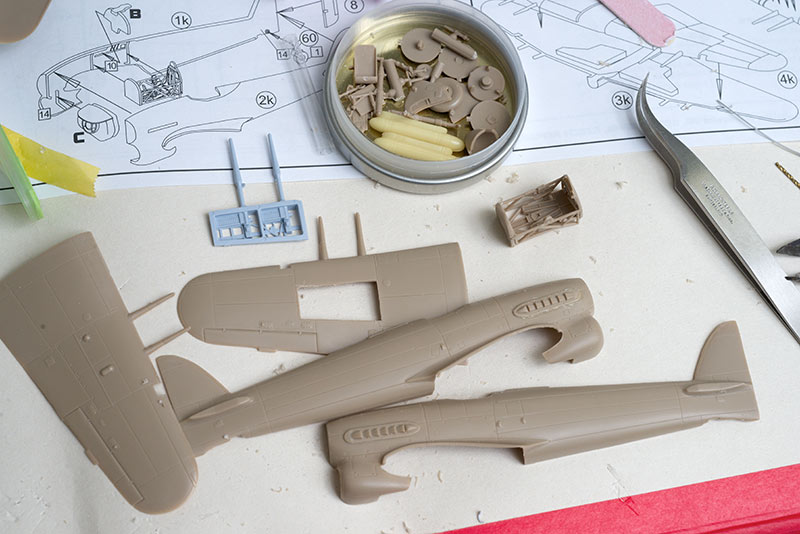


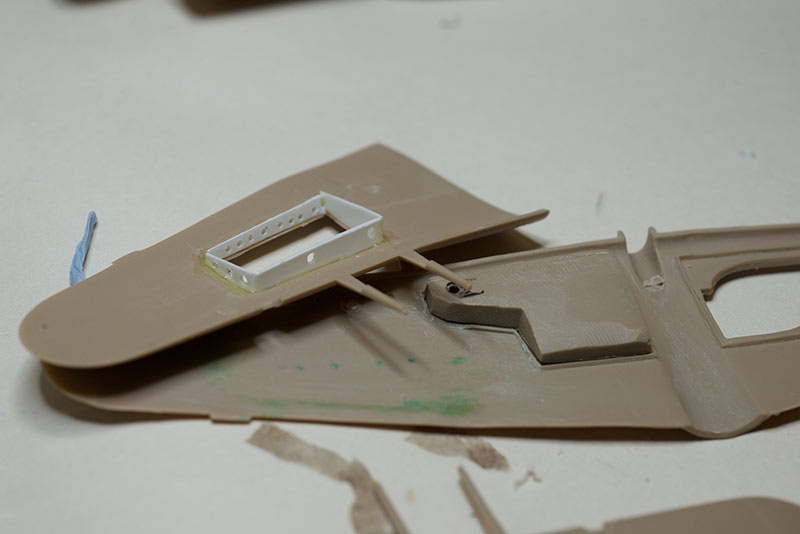
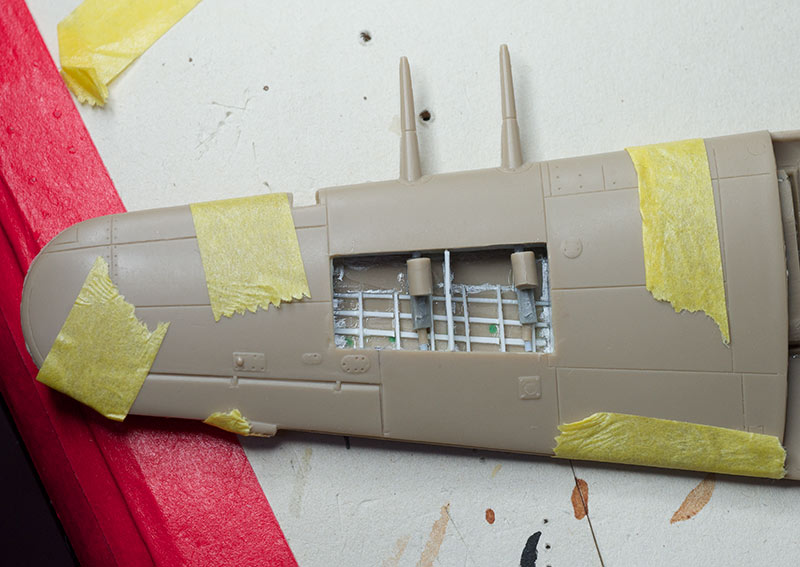
The Airfix open gun panels inspired me to open one wing on the Brengun kit, originally intending to use the Airfix parts in the wing. However, on closer inspection 1) they weren't a good fit, and 2) are not accurate enough. So I'll have to scratch build something.
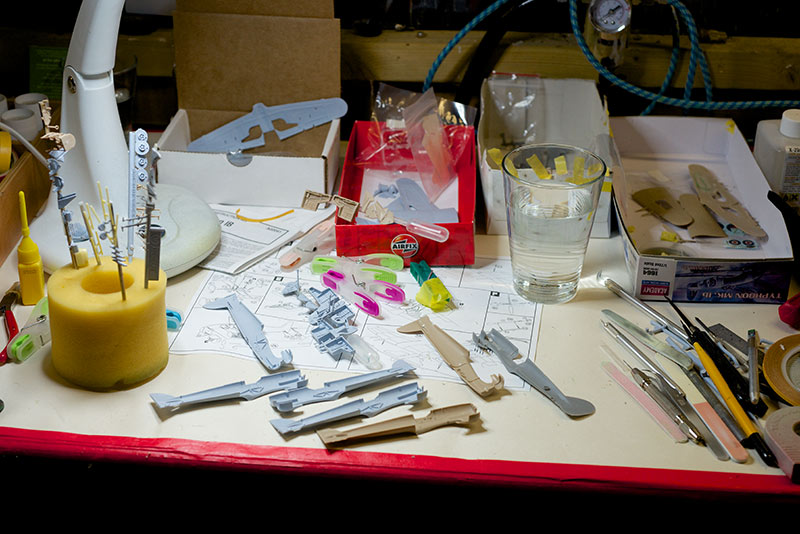
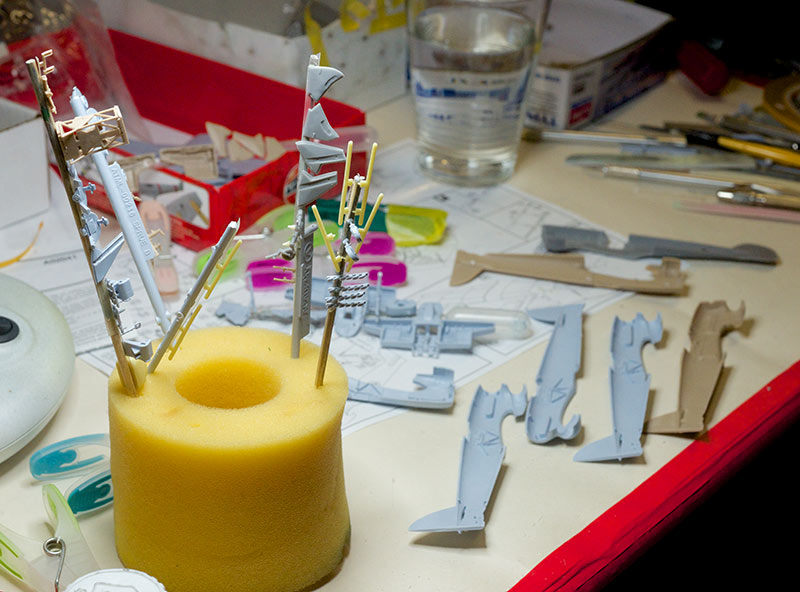


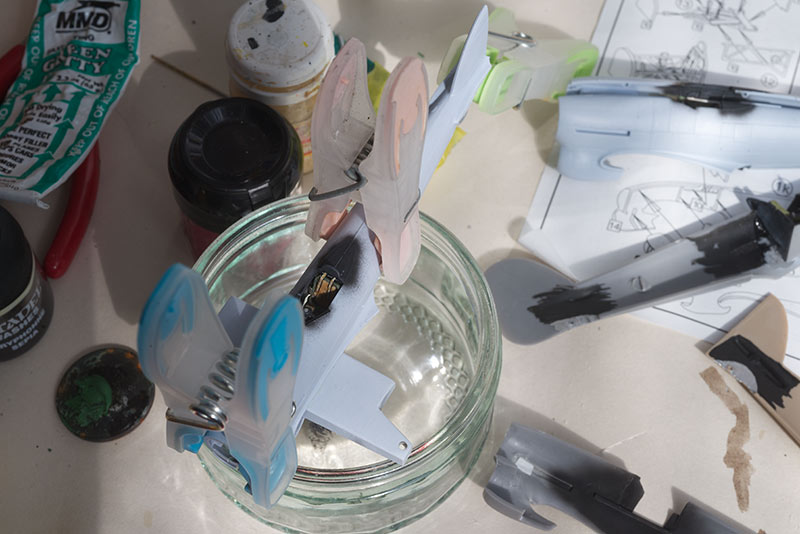
All the parts needing silver painting were stuck to sticks and airbrushed, then given a brown wash.

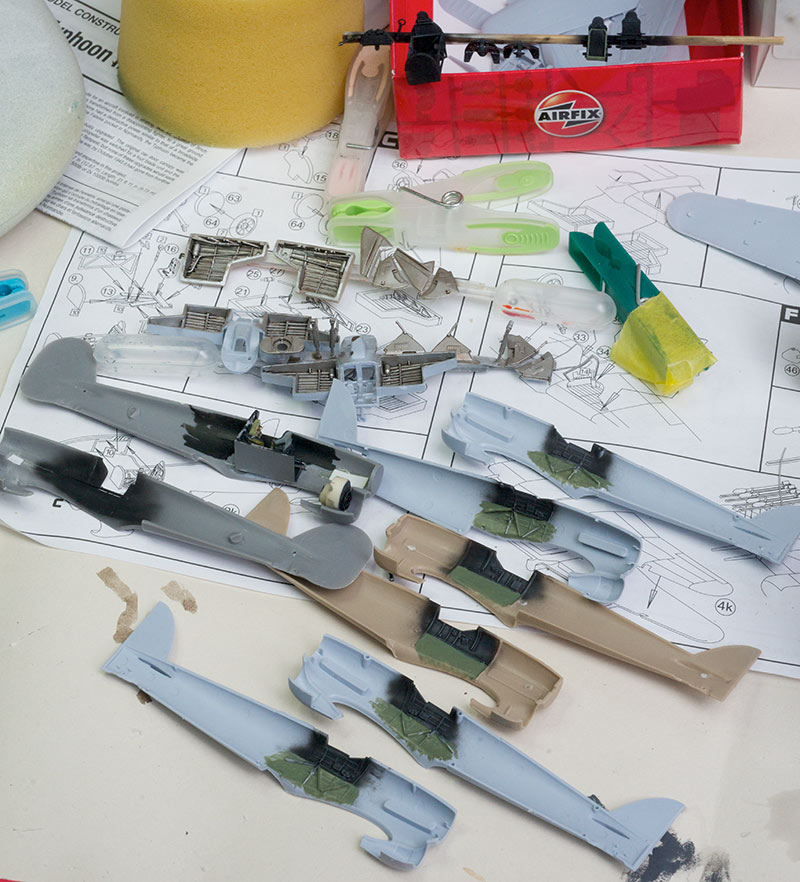


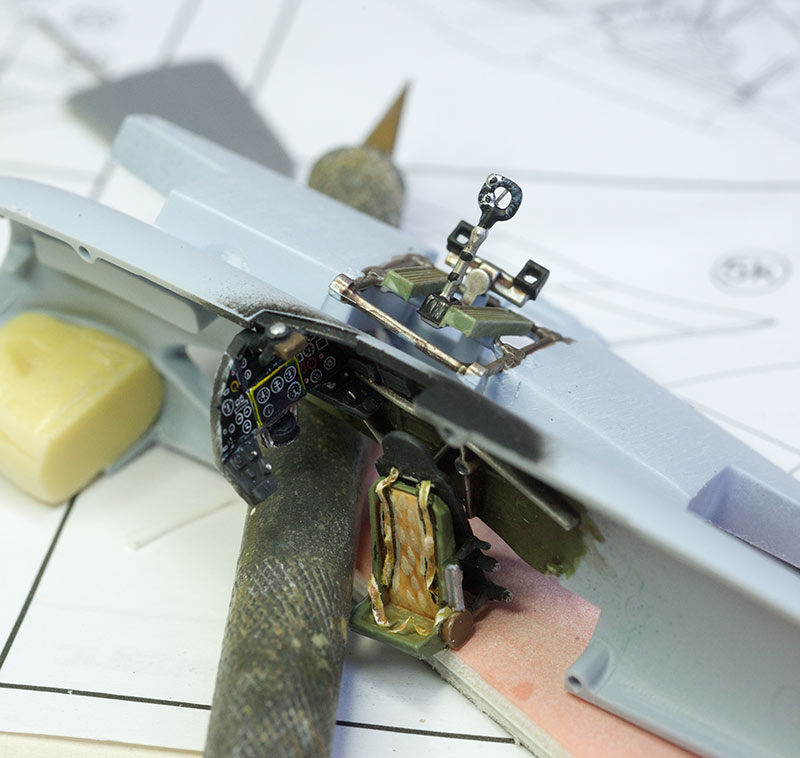
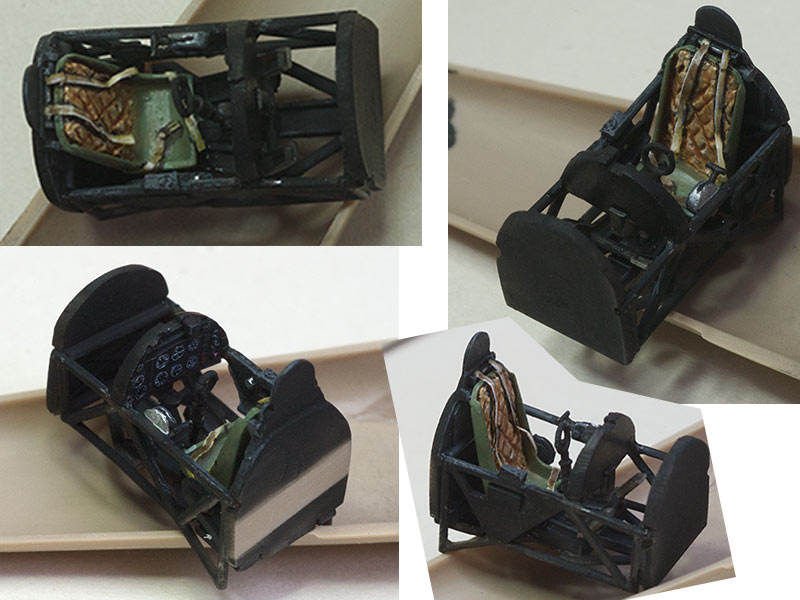
I'm onto the cockpit painting now (black above the tubular framework, dry brushed with grey, grey-green below). The Airfix instrument panel transfers look OK, and for this scale, and considering it is really hard to see into the cockpit of the Typhoon, they will be fine.
Joel_W
Staff MemberAssociate Editor
AUTOMODELER
_VISITCOMMUNITY
New York, United States
Joined: December 04, 2010
KitMaker: 11,666 posts
AeroScale: 7,410 posts
Posted: Tuesday, September 03, 2013 - 04:37 AM UTC
Ben, you're a better man then I. Can't see even how you keep all those parts for 4 builds organized, and a game plan for each one.

Looking forward to your next mega update.

Joel
drabslab
_VISITCOMMUNITY
European Union
Joined: September 28, 2004
KitMaker: 2,186 posts
AeroScale: 1,587 posts
Posted: Tuesday, September 03, 2013 - 05:24 AM UTC
I will follow this very interested. I wonder if making four in parallel gives some time economies compared to making four, one after the other.
robot_
_VISITCOMMUNITY
United Kingdom
Joined: March 08, 2009
KitMaker: 719 posts
AeroScale: 691 posts
Posted: Wednesday, September 04, 2013 - 06:04 AM UTC
I think it is quicker. Although some parts are much longer, and so test patience (several days of separating parts from sprues and clean-up and test fits, then organising by what colours they need).

But the spraying saves time, many fewer changes are needed compared to making one model after another.

I don't think I would have the stamina to make four Typhoons one after another, so a big blitz like this should hopefully get them all done whilst I still have interest in the subjects.

Made quite a bit of progress today- most cockpits are ready for fuselages to be closed. The first aircraft (Airfix kit, will be 'Zipp' Button's) is closed already, and wings on, drying right now. Hopefully do an update later tonight with some photos.
robot_
_VISITCOMMUNITY
United Kingdom
Joined: March 08, 2009
KitMaker: 719 posts
AeroScale: 691 posts
Posted: Wednesday, September 04, 2013 - 08:30 AM UTC
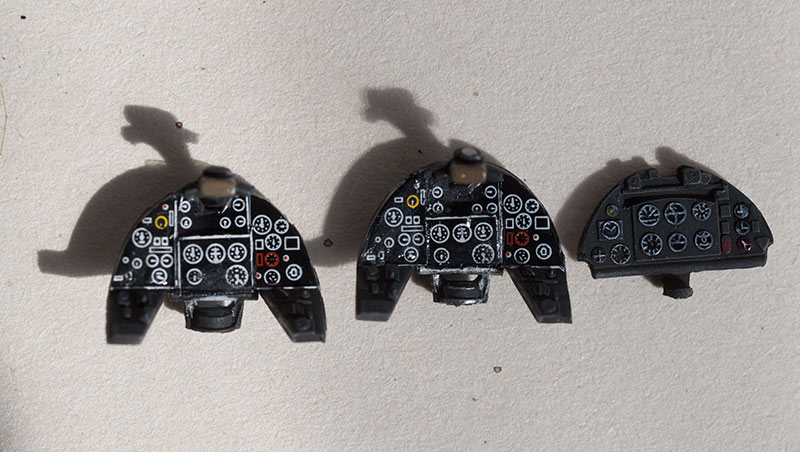
Comparison of instrument panels:
Airfix, Airfix, Brengun


The Brengun was drybrushed grey, then the dials picked out with a small brush, then drops of Klear put on top of the dials to replicate glass.


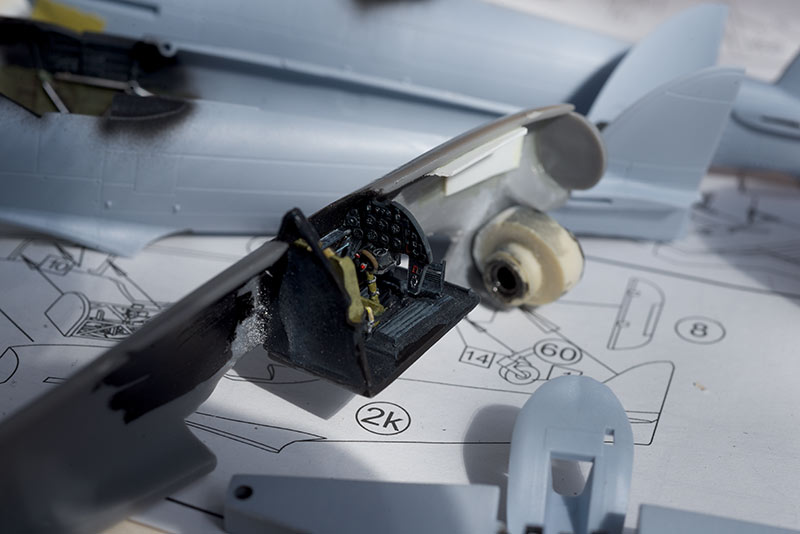
Pavla cockpit in place. The instrument panel is actually from the Academy kit. The cannon and camera buttons weren't really red!
I've added a styrene strip to the cowling joint, as the other side of the fuselage is twisted, and needs this to hold it straight.
 

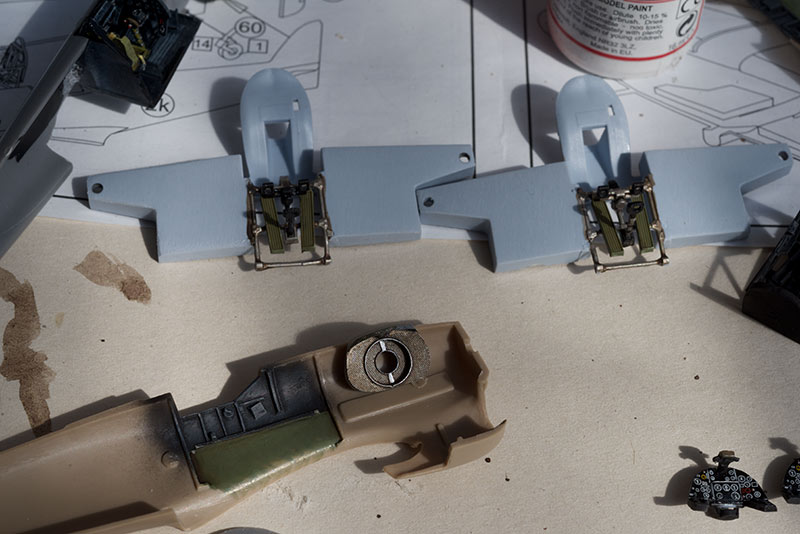
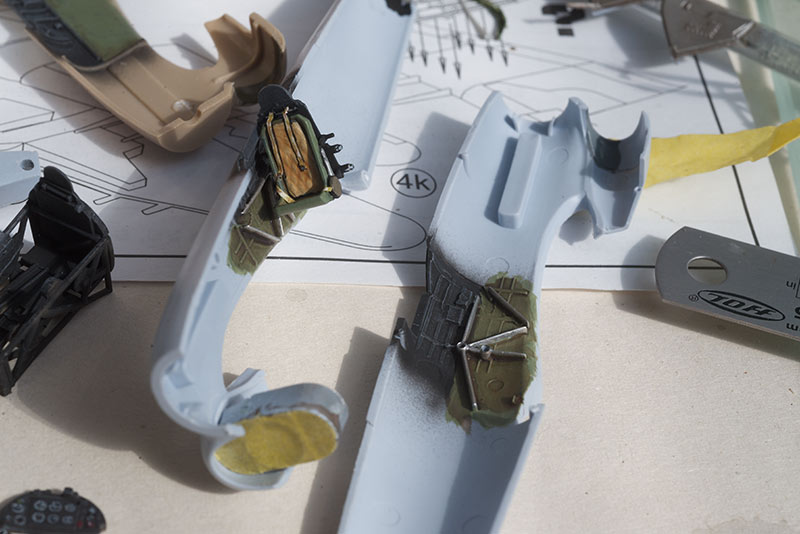
Brengun fuselage with ResinArt Radiator on it (fits well, even though it is made for the Academy kit). Two Airfix cockpit lower halves above.


First Airfix ready for closing up. This is going to be 'Zipp' Button's aircraft. Note the mask added to the radiator before closing the fuselage.
 
In hindsight, I should have dry fitted/sanded more, as the radiator is too big for the fairing, and there is now a big gap under the chin....


Closed. It now has wings and tail feathers, but I forgot to take a photo.
 
Tonight was the Pavla kit's turn. I've being working on and off on this kit for four years!


I've been scraping the insides of these wings for hours and hours. I hate opening up shell chutes (the Airfix kit is missing the link chute next to each casing chute, but no way am I adding them...).


Finally got the wheel wells glued in place, and have closed the fuselage. This will be PR-G, 'Bee' Beamont's aircraft.
vonHengest
_VISITCOMMUNITY
Texas, United States
Joined: June 29, 2010
KitMaker: 5,854 posts
AeroScale: 372 posts
Posted: Wednesday, September 04, 2013 - 12:52 PM UTC
I know some people like to harp on the aesthetics of these aircraft, but I've always loved Typhoons. I think the Airfix kit is really impressive for the price, and it's better than some of the older 1/48 kits out there in my opinion. I really like the car-door variant, can't wait to see that one built up I hear you on dry fitting the radiators, I've always been wary of their fit in any kit.
Joel_W
Staff MemberAssociate Editor
AUTOMODELER
_VISITCOMMUNITY
New York, United States
Joined: December 04, 2010
KitMaker: 11,666 posts
AeroScale: 7,410 posts
Posted: Thursday, September 05, 2013 - 02:25 AM UTC
Ben, great progress. I'm still amazed how you can focus on 4 kits at once. Out of the two IP,I actually prefer the Brengun one.

Joel
robot_
_VISITCOMMUNITY
United Kingdom
Joined: March 08, 2009
KitMaker: 719 posts
AeroScale: 691 posts
Posted: Thursday, September 05, 2013 - 05:29 AM UTC
Jeremy: I really like something about the appearance of the Typhoon too, not sure what it is, but it looks really purposeful. As a child I really liked the Mosquito, Spitfire and Typhoon, but for some reason in my younger days of model building, only ever made the mosquito out of those three.

Joel: I much prefer the Brengun IP too. I don't really understand why Airfix choose to use decals for instrument panels.

Today has been fun closing up the fuselages and adding wings and tails, but with a major down point too...


Here is the second Airfix cockpit. I painted the white outline of the blind-flying instruments in yellow, as there are photos online of a preserved cockpit with this feature. The other white borders of the segments of the panel were painted in dark grey I made belts as before out of Tamiya tape. I didn't make any fitting for them, as you can't see too much, and also because I am still unsure where they had Q-type or Sutton harnesses. I stuck on a piece of stretched sprue onto the back of the spade grip as the brake lever.


Pavla has wings and tailplanes on now...
 
But there is a problem...


The port wing has completely the wrong dihedral from the cannons outwards. I knew something was wrong when test fitting, but I couldn't tell what it was, nor correct it. Anyway, this kit is really time-consuming, and I would never make another one of these old-style short-run kits from Pavla. I could have carved the plane from a solid block of styrene in the same time. In fact, judging from the weight of the aircraft even after all the craving inside the wings, and fuselage, it is not far from being a solid model.


OK, three of them are now Typhoon-shaped. Now I have to do some scratch-building for the open cannon bay of the Brengun.
Joel_W
Staff MemberAssociate Editor
AUTOMODELER
_VISITCOMMUNITY
New York, United States
Joined: December 04, 2010
KitMaker: 11,666 posts
AeroScale: 7,410 posts
Posted: Friday, September 06, 2013 - 12:56 AM UTC
Ben, the dihedral on the Pavla kit is completely out of whack. One really has to wonder if they ever even looked at it during the mock up stage, or just let it go as it would require major re-work on the mold. So what's your plan of attack to correct it the best you can? Anything certainly would be an improvement.

Joel
robot_
_VISITCOMMUNITY
United Kingdom
Joined: March 08, 2009
KitMaker: 719 posts
AeroScale: 691 posts
Posted: Friday, September 06, 2013 - 03:49 AM UTC
Hi Joel,

I saw your post just as I was heading out to the shed to start today's work on the Typhoons. I must admit, yesterday I was so annoyed, I was resigned to not bothering with correcting it. However, your post got me thinking, and a few minutes later the razor-saw had cut half way through the wing from the underside.


In went some styrene strip, check the dihedral- too much now- a bit of shaving it down with a blade, then on to sticking it back together.


That is when things went a little wrong! As I spread the gap to get the liquid cemet in both side of the strip, the top part of the wing began to crack quite severely! I am glad the wing stayed in one piece! With a bit of tape to hold the crack closed, hopefully it wil all fuse back together with the cement, and after some Mr Surfacer, no-one will notice....

JClapp
#259
_VISITCOMMUNITY
Massachusetts, United States
Joined: October 23, 2011
KitMaker: 2,265 posts
AeroScale: 1,715 posts
Posted: Friday, September 06, 2013 - 04:30 AM UTC
Cool project, nice work!
I like the approach of building multiple units with variants.
robot_
_VISITCOMMUNITY
United Kingdom
Joined: March 08, 2009
KitMaker: 719 posts
AeroScale: 691 posts
Posted: Friday, September 06, 2013 - 09:07 AM UTC
Thanks!

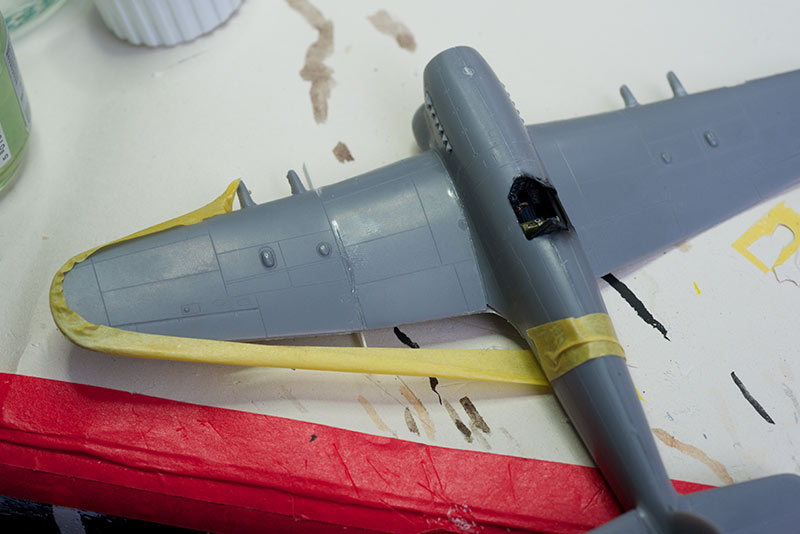
OK, so the dihedral issue hasn't gone away, but the problem is more complex than I first thought, the first section with slight anhedral is different each side, so when the wing tips are level, there is more of an elbow on one side. And I am not convinced that both wings are the same thickness at the elbow point, either....

As a reminder, this is before my butchering job:

and after:

 
Anyway, that is how it will stay...
 
The Airifx kit has more fit problems than I realised, and  it's outer dihedral looks too steep to me, especially on the model where I sanded the radiator to fit, the other one with the gap under the chin has less dihedral issues, maybe because of the spreading effect of the radiator...
 
Made the sides of the gun bay for the Brengun kit. I am liking the Brengun more and more.
 
Jessie_C
_VISITCOMMUNITY
British Columbia, Canada
Joined: September 03, 2009
KitMaker: 6,965 posts
AeroScale: 6,247 posts
Posted: Friday, September 06, 2013 - 09:58 AM UTC
It looks like the entire left wing is misshapen. It looks thicker than the right, and it seems to have more anhedral than the right one which is likely why you needed to adjust the dihedral.

Such are the hazards of building limited-run kits
FirstSergeant
_VISITCOMMUNITY
Michigan, United States
Joined: January 02, 2012
KitMaker: 139 posts
AeroScale: 70 posts
Posted: Friday, September 06, 2013 - 11:19 AM UTC
I think the rework on the second pic looks better than where it started in the first pic.
Regards,
FirstSergeant
Joel_W
Staff MemberAssociate Editor
AUTOMODELER
_VISITCOMMUNITY
New York, United States
Joined: December 04, 2010
KitMaker: 11,666 posts
AeroScale: 7,410 posts
Posted: Saturday, September 07, 2013 - 11:24 AM UTC
Ben, while your adjustment looks way better, there's still some major issues. Looking straight on as Jessica said, the left wing root has more anhedral then the right wing. That's where I would start my corrections, then work your way out. Your original correction is most likely way too much or not even needed.

Joel
robot_
_VISITCOMMUNITY
United Kingdom
Joined: March 08, 2009
KitMaker: 719 posts
AeroScale: 691 posts
Posted: Tuesday, September 10, 2013 - 04:14 AM UTC
I've slowed a bit over the last few days, just did a bit of cockpit work and some more to the gun bay, all for the Brengun.
 
Still a long way to go on the open bay:


This kit's cockpit is the best out-of-the-box that I've seen, I think. I needed to add the quilted seat back, and the belts... arghhh... just realised as I typed that the kit came with PE belts... oh well... I can recycle them on another build.
 
Still needs more painting:
 
Joel_W
Staff MemberAssociate Editor
AUTOMODELER
_VISITCOMMUNITY
New York, United States
Joined: December 04, 2010
KitMaker: 11,666 posts
AeroScale: 7,410 posts
Posted: Tuesday, September 10, 2013 - 04:40 AM UTC
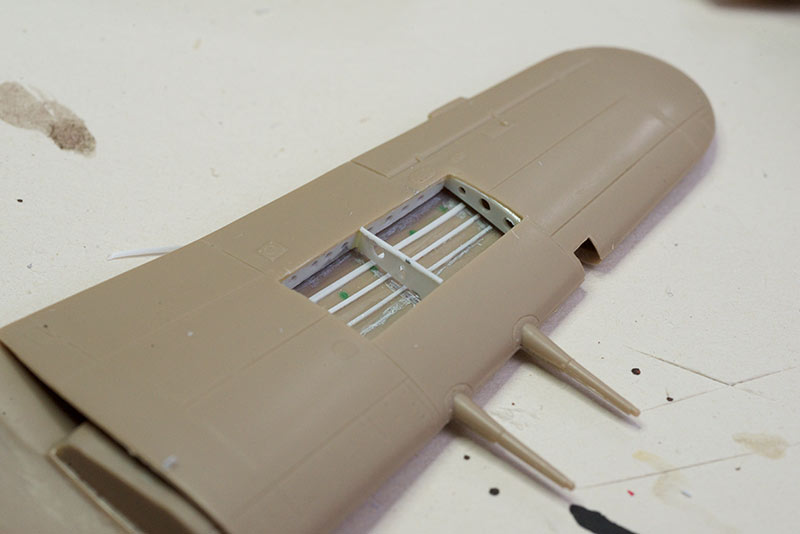
Ben, the cockpit looks great. One question, it looks like you have the wing stringers running under the ribs. They should run from on rib to the next one level with the ribs surface.

Joel
robot_
_VISITCOMMUNITY
United Kingdom
Joined: March 08, 2009
KitMaker: 719 posts
AeroScale: 691 posts
Posted: Tuesday, September 10, 2013 - 05:31 AM UTC
Hi Joel, I'm going to add more little ribs that are a little higher than the stringers. The wing is not closed, and the top was just sat on. Depedning on fit, I will either cut through the stringers where the main 'wall' ribs are, or I will put them on top of the stringers, and fill underneath so you don't see under like you can now. Thanks for the critical feedback- keeping me on my toes!
Joel_W
Staff MemberAssociate Editor
AUTOMODELER
_VISITCOMMUNITY
New York, United States
Joined: December 04, 2010
KitMaker: 11,666 posts
AeroScale: 7,410 posts
Posted: Tuesday, September 10, 2013 - 05:36 AM UTC

Quoted Text

Hi Joel, I'm going to add more little ribs that are a little higher than the stringers. The wing is not closed, and the top was just sat on. Depedning on fit, I will either cut through the stringers where the main 'wall' ribs are, or I will put them on top of the stringers, and fill underneath so you don't see under like you can now. Thanks for the critical feedback- keeping me on my toes!


Ben, The way that I've been doing on my Dauntless build is to place the ribs in their correct position, then I measure and cut each stringer so it just fits between them. Takes forever, but it works. Here's a picture of the dive flap fuselage area that shows what I'm trying to convey.
Joel

robot_
_VISITCOMMUNITY
United Kingdom
Joined: March 08, 2009
KitMaker: 719 posts
AeroScale: 691 posts
Posted: Saturday, September 14, 2013 - 08:59 AM UTC
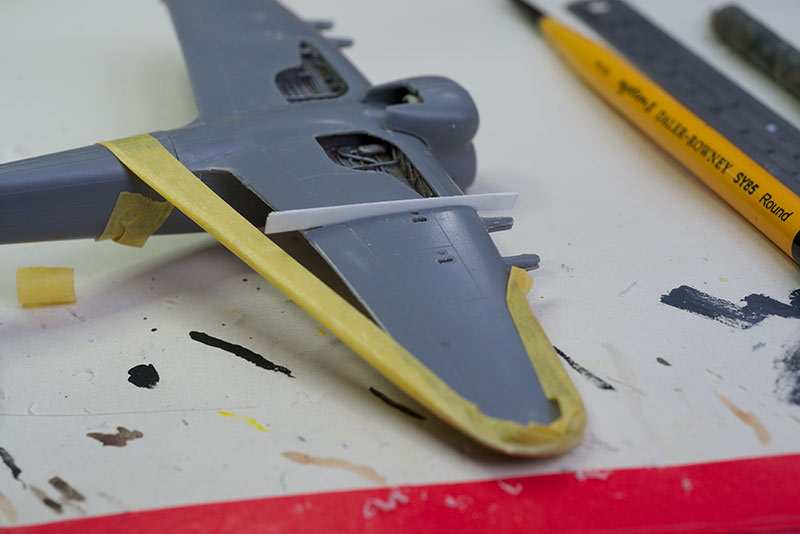
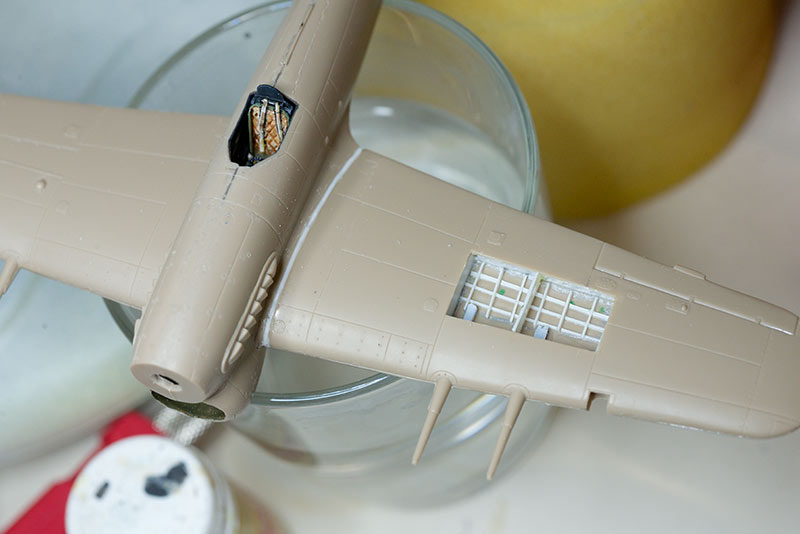
I seem to be having more dihedral issues in these builds than I have had in all the time since returning to modelling about 5 years ago. I had to put a spacer into the Brengun's wing root (even though when dry fitting it was fine...).

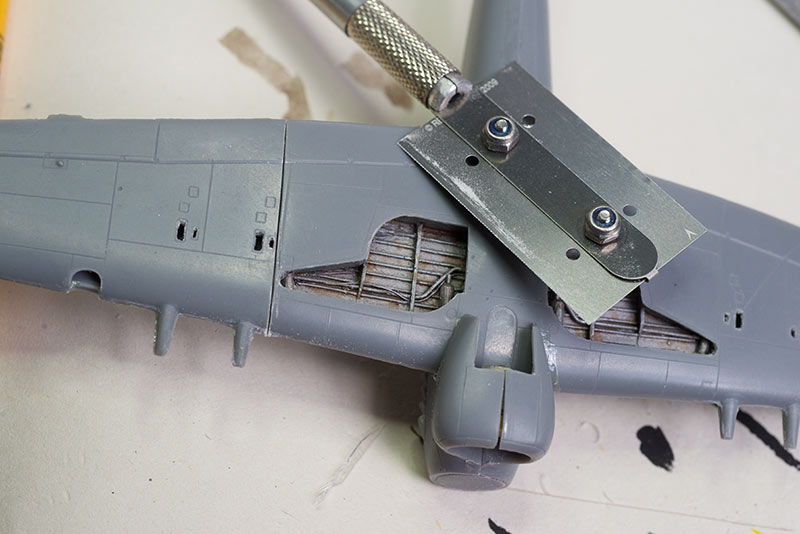
Anyway, more gun bay work on the Brengun was done before the wing halves were joined. Joel: I ended up cutting through the stingers that I have glued down (two parallel cuts very close to each other, then tweaking out the little piece between the cuts), and adding taller ribs going through them that way.


I know the ammo feed drums look poor- I have since sanded them with squarer ends...


I painted a few more bits in the cockpit, like the trim wheel in red-brown (bakelite), and the tubes in silver. Then closed the fuselage. And added the wings. The cannons are still removable, those blocks raise them so the barrels to be at the right height.


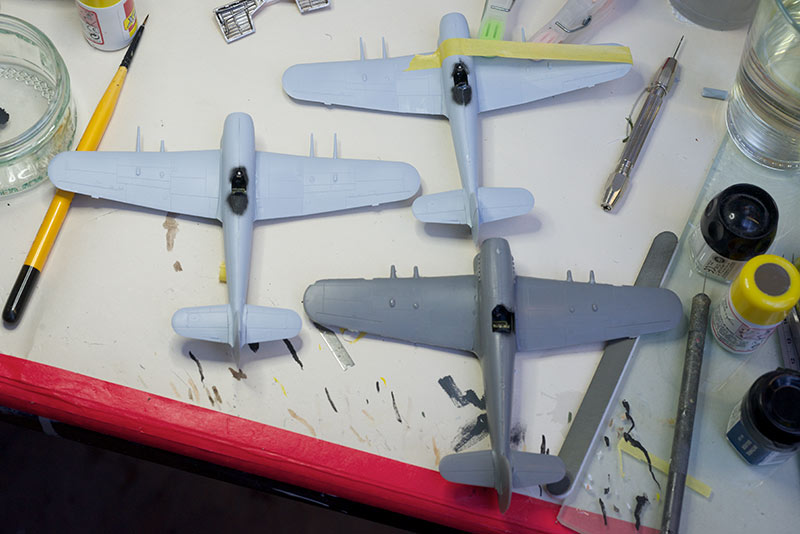
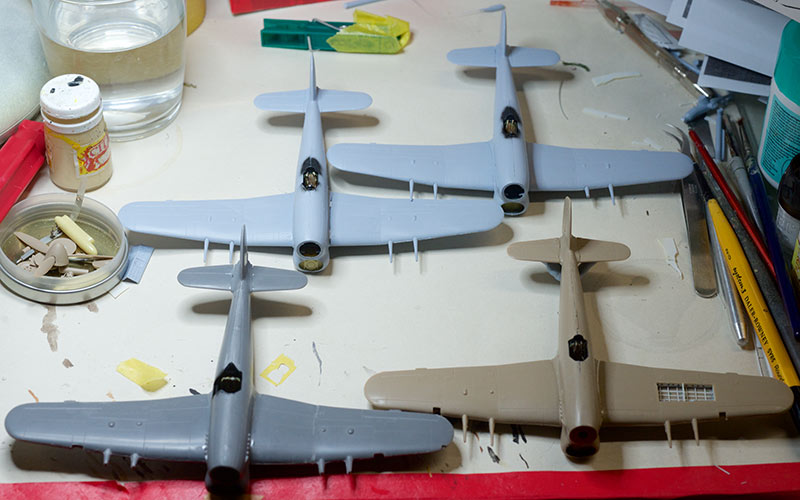
All four at the same stage now.

I don't think I mentioned that I used a steel tube (needle) for the tailplanes of the Pavla (dark grey), and today I used a couple of brass wire pins for the same joints. Both these kits had no locating tabs/slots for these. As I was drilling these holes in the Brengun parts, I noticed that a couple of panel lines needed rescribing on each of these, which was a nuisance, but quite quick with the RB Scribe-R tool. There are more panel lines on the fuselage, and on the underside of one aileron, that need a similar treatment.

On the subject of panel lines, the Airfix tooling seems unable to cope with lines engraved on steep sides. The panel lines on the top cowling panel are shallow, and the lowest panels lines of the fuselage running to the tail has very shallow engraving, and the top-most lines running to the tail along the fuselage are not present at all.

I think the Brengun is increasing its lead in my mind as best Typhoon kit overall, despite the wing root needing work (if you look at the left Airfix model, I had to add as much to that port wing root too).
Joel_W
Staff MemberAssociate Editor
AUTOMODELER
_VISITCOMMUNITY
New York, United States
Joined: December 04, 2010
KitMaker: 11,666 posts
AeroScale: 7,410 posts
Posted: Saturday, September 14, 2013 - 09:21 AM UTC
Ben, You're really making great progress on all 4 kits.
Joel
AussieReg
Staff MemberAssociate Editor
AUTOMODELER
#007
_VISITCOMMUNITY
Victoria, Australia
Joined: June 09, 2009
KitMaker: 8,156 posts
AeroScale: 3,756 posts
Posted: Saturday, September 14, 2013 - 11:33 AM UTC
Great work Ben, and a very interesting thread to follow. I am planning a similar build with 1/48 Boomerangs (x5) over the next couple of years, but 3 of them are very short-run kits so I certainly won't be working at the same pace as you are here!

Keep the updates coming.

Cheers, D
 _GOTOTOP