_GOTOBOTTOM
World War II
Discuss WWII and the era directly before and after the war from 1935-1949.
Hosted by Rowan Baylis
Tale of Two Tiffies
robot_
_VISITCOMMUNITY
United Kingdom
Joined: March 08, 2009
KitMaker: 719 posts
AeroScale: 691 posts
Posted: Thursday, September 03, 2009 - 10:42 AM UTC
I am starting to build two 1/72 Typhoons in parallel. The in-box review of the Academy kit is up, and the Pavla one should be on the site in a couple of days.

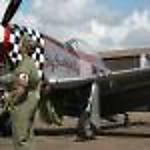
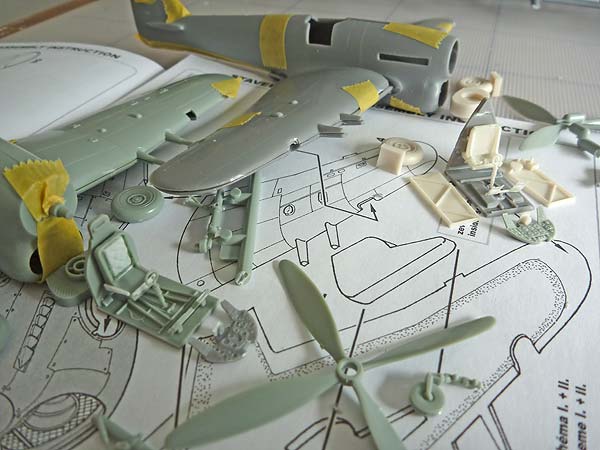
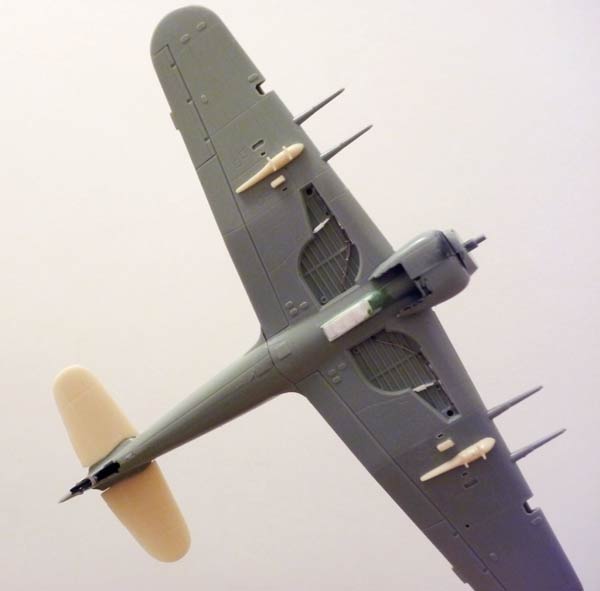
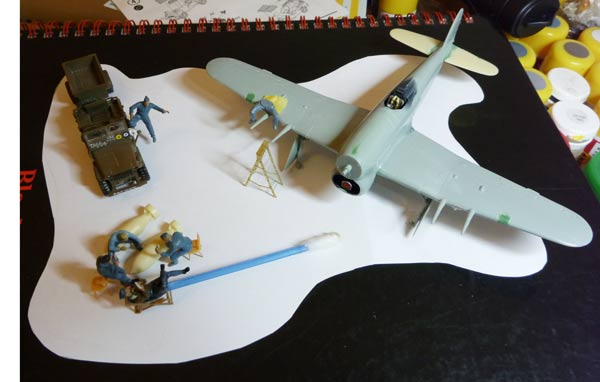
I am building Roland Beamont's PR-G, and will be painted with yellow spinner and yellow cannon fairings. This will be build using the Pavla car door kit, which includes these markings.

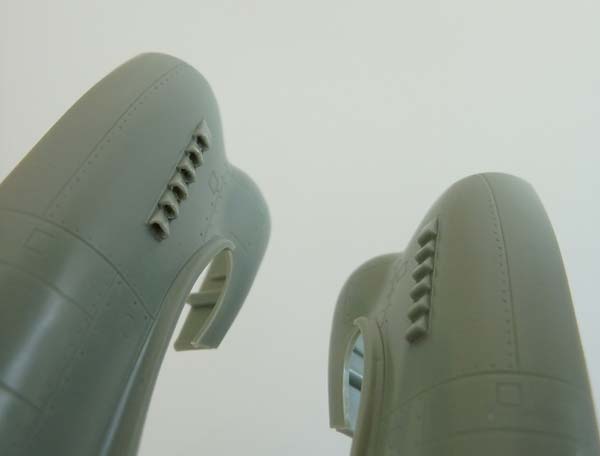
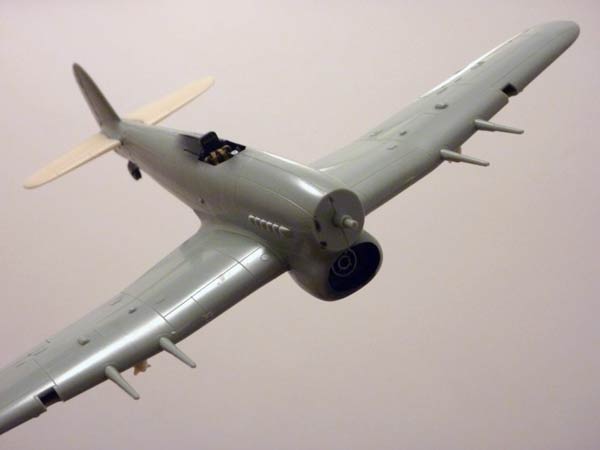
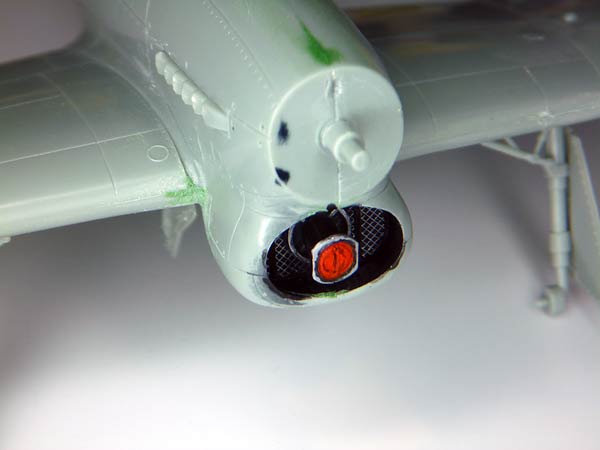
The second aircraft is a very late or post-war typhoon with 4 blade prop and Tempest tailplanes (I am using Airwaves resin parts for these). It is a 193 squadron plane, DP-E. It will be built using the Academy kit with serial codes from a generic 'sky' codes sheet, and serial numbers printed by me. The spinner was red, as were the cannons, which I think will look good with the yellow spinner and cannons of the other tiffie.

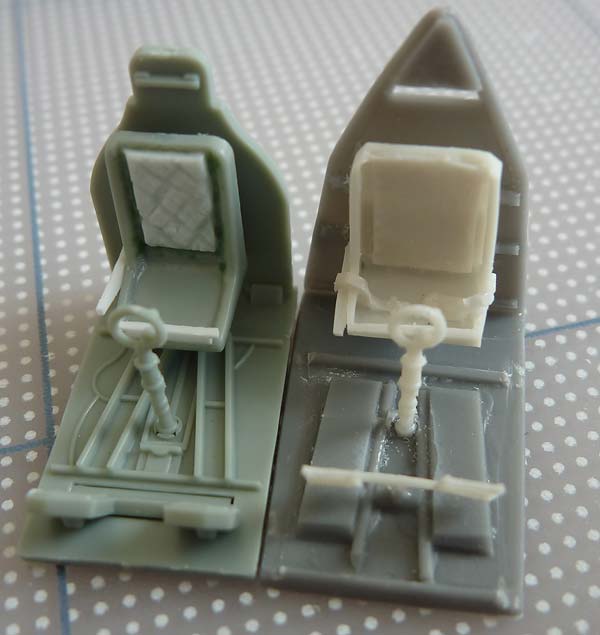
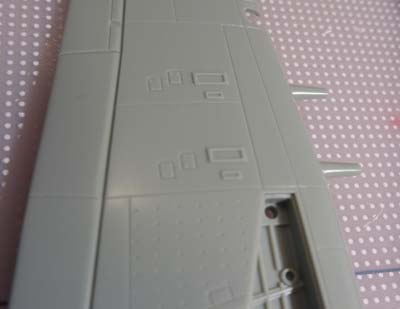
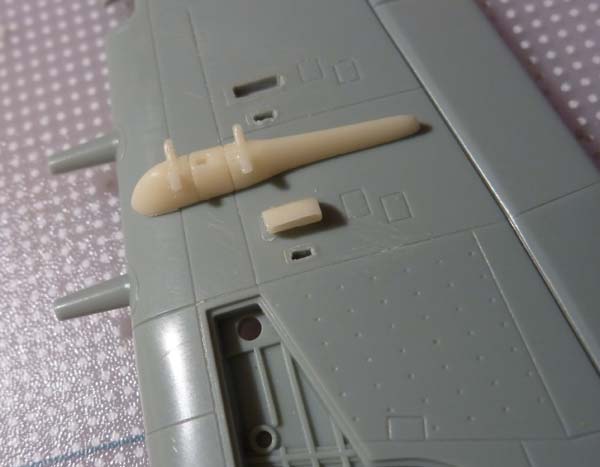
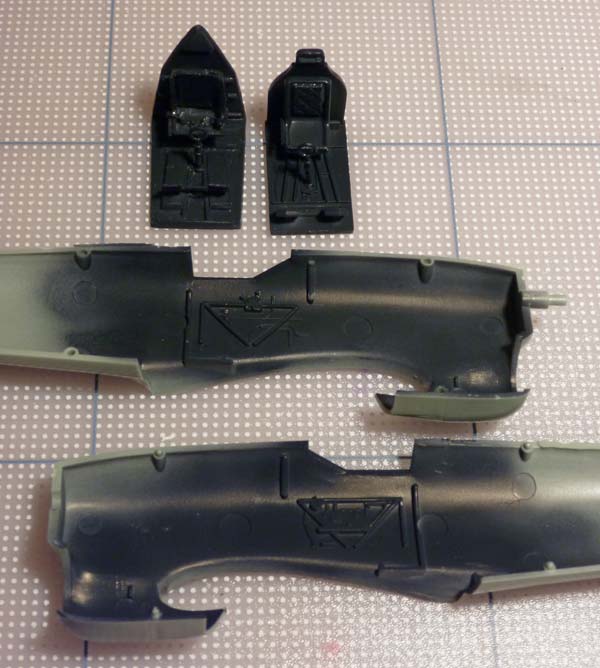
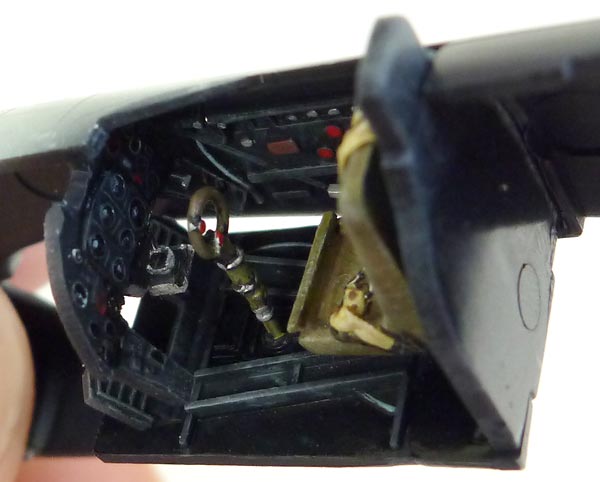
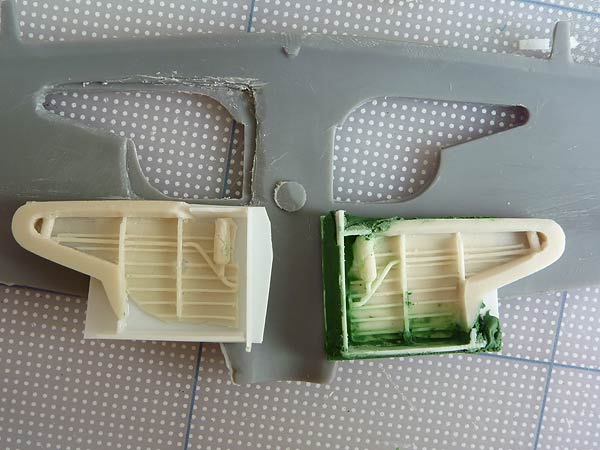
I am using the instrument panel from the Academy kit in the Pavla cockpit, and visa-versa, as the Pavla part has a big sink mark, and it would be more visible in the car door version, as I am modelling it with the door open. The bubble-top will also be open.


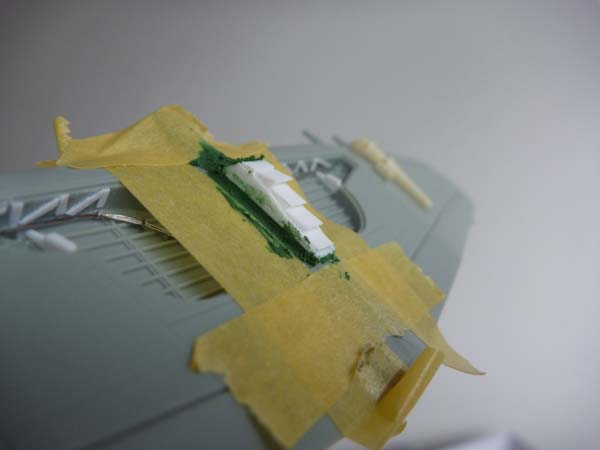
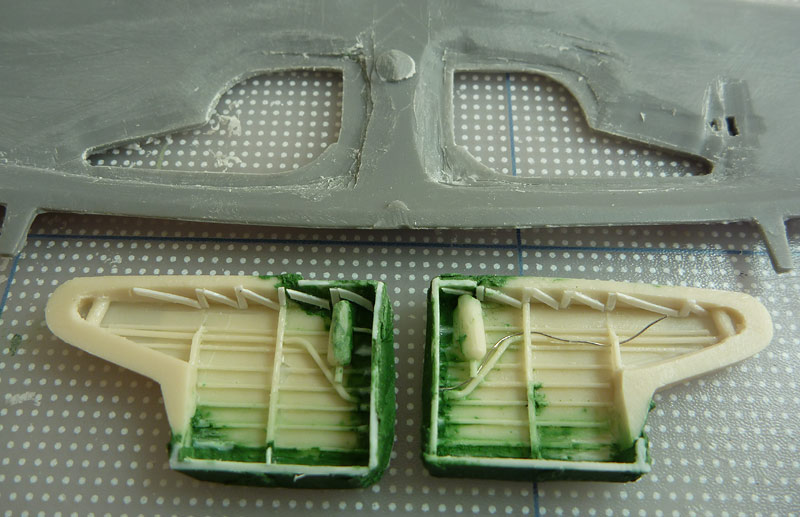
I added some quilting to DP-E's seat, as well as a lip and the front, and the lever on the right side.


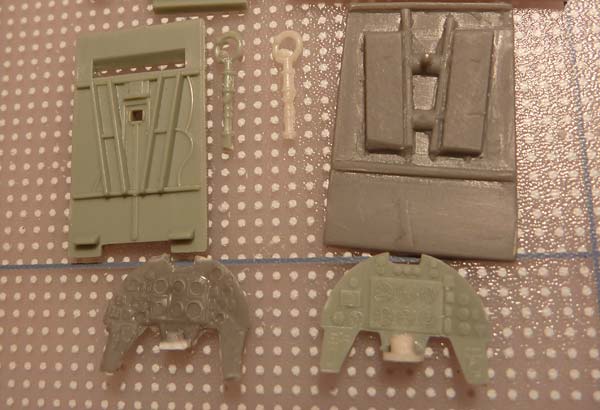
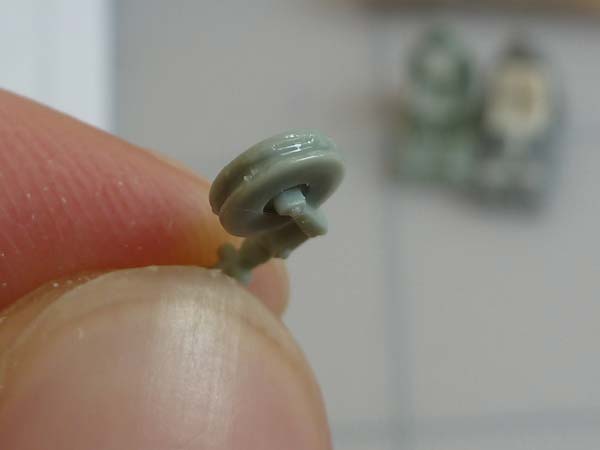
I added the resin compass from the Pavla kit to the Academy instrument panel (going in PR-G), and scratch-built a replica of it for the Pavla part that will be used in DP-E.


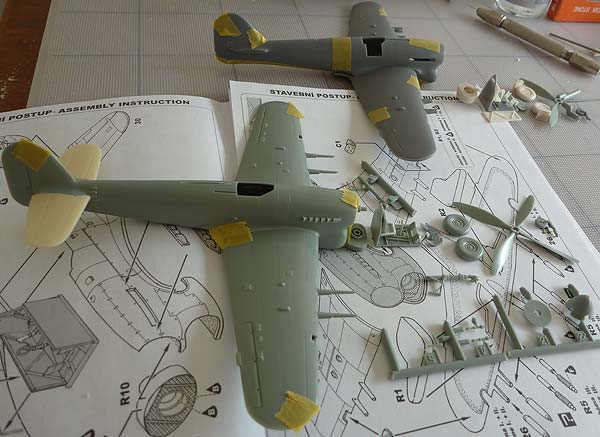
PR-G (Pavla) on the right, DP-E (Academy) on the left.
MikeMx
_VISITCOMMUNITY
England - North East, United Kingdom
Joined: May 22, 2008
KitMaker: 649 posts
AeroScale: 434 posts
Posted: Thursday, September 03, 2009 - 01:02 PM UTC
Just reading your review and it's a shame there isn't more models of the Typhoon in 1/72. I do believe I saw a Hobby boss one but I'd have to check. Either way I've already built my Academy Typhoon and I think it's a nice little kit too. I'll take your word for it on the accuracy issues, as I haven't a clue myself! Overall I agree with you though, it's a good kit with something for everyone and for most people including myself, it looks like a Typhoon! I will be most interested in the results of your build. I've also built the Academy Tempest and enjoyed that and keeping within the family, I've also done the Trumpeter Sea Fury. It's good to see how Hawker developed the line.
thanks
Mike
robot_
_VISITCOMMUNITY
United Kingdom
Joined: March 08, 2009
KitMaker: 719 posts
AeroScale: 691 posts
Posted: Saturday, September 05, 2009 - 01:29 AM UTC
Hi Mike, thanks for your comments- yes, Hobby Boss do a bubble-top too, I didn't mention it in the review.

Now that I'm getting further on in the builds, I really appreciate the ease of assembly of the Academy kit. I have assembled 5 kits since returning to the hobby, and only one of those has been a mainstream modern one (Tamiya Spitfire- but I made things worse for myself by adding a Aires cockpit). Seeing how accurately made this cheap Academy kit is compared to the short-run ones is eye-opening. The Pavla is going to take a lot more time (and putty). I am aiming to spend much more time dry-fitting than I have in the past, and I hope that a few minutes extra sanding of parts pre-assembly will reduce the hours of filling and sanding post-assembly I have experienced with other short-run kits.


I've not made a huge amount of progress. Next it's painting the cockpits.

Anyone have a good method of cleaning out the little bits of plastic trapped in panel lines after sanding or scribing new lines? I am thinking something along the lines of an electric contact-cleaning pen (a bundle of glass fibres, I think) or a tiny soft wire brush.
TedMamere
_VISITCOMMUNITY
Moselle, France
Joined: May 15, 2005
KitMaker: 5,653 posts
AeroScale: 4,347 posts
Posted: Saturday, September 05, 2009 - 01:43 AM UTC
Hi Ben,

Very interesting project...


Quoted Text

Anyone have a good method of cleaning out the little bits of plastic trapped in panel lines after sanding or scribing new lines? I am thinking something along the lines of an electric contact-cleaning pen (a bundle of glass fibres, I think) or a tiny soft wire brush.


Some people apply Tamiya thin cement into the panel lines. This "eats" away the little bits of plastic. I don't do that.

My method is the following:
1 - scribe the panel lines
2 - sand the surface smooth
3 - run a toothpick (wood) into the panel line
4 - clean with a stiff brush

I will follow your builds with great interest...

Jean-Luc
robot_
_VISITCOMMUNITY
United Kingdom
Joined: March 08, 2009
KitMaker: 719 posts
AeroScale: 691 posts
Posted: Saturday, September 05, 2009 - 11:44 AM UTC
Thanks for sharing your technique Jean-Luc, I will give it a go.

I have been drilling and whittling and fiddling with tiny bits tonight. Still not paint on the cockpit. I've drilled out half of DP-E's exhausts, got bored, drilled half of one side of PR-G's, got bored, moved onto drilling out the shell ejector chutes.


Original ejector chute detail.


Drilled out and with extension fitted to direct casings away from payload. Not 100% sure the long bomb rack is the correct type... location is correct for 90 gal tanks and 1000 lb bombs (500 lb or 44 gal were mounted closer to the inboard cannon).

I will be attempting to make the tropical filter described by Chris Thomas in the July 09 issue of Model Aircraft Monthly- this can be seen in a number of photos from Typhoons in 1945.
robot_
_VISITCOMMUNITY
United Kingdom
Joined: March 08, 2009
KitMaker: 719 posts
AeroScale: 691 posts
Posted: Sunday, September 06, 2009 - 10:43 AM UTC
Another day of slow progress on bits and bobs. Managed to get a coat of my scale version of night (mixed from equal parts Xtracyrlix Night, Extra Dark Sea Grey, and 15+ year old Citadel Colour Ultramarine Blue) on the cockpit parts and the radiators.


I added the wing spar bits that should be visible in the wheel wells of DP-E (PR-G will get these too when I am brave enough to clean up the wings to fit the resin wheel wells).


I have constructed the tropical filter. I am not happy with it, but I don't think I can do any better. I meant for the louvres to be within the structure, and not stick out, even when they are open, but I guess it is possible that they did stick out like this. These were introduced after Typhoons had engine problems caused by dust intake. The air intake is usually from the centre of the radiator, but even with the 'cuckoo-door' filter at the front, it was thought it would be better to have a filtered air supply for when the engine was running on the ground. The tropical filter has louvres at the rear that open when on the ground, and the air passes through a filter. When air-bourne, these were closed and a valve operated to allow air in from the usual radiator inlet.

Hopefully my version of this filter will look better with a coat of paint....

I will also be dropping the flap at the back of the radiator, as these are down in a lot of photos.

Next I will paint the detail in the cockpits, and maybe do some more cleaning up of the Pavla kit (PR-G).
Tango-India-Mike
_VISITCOMMUNITY
Western Australia, Australia
Joined: August 31, 2009
KitMaker: 88 posts
AeroScale: 79 posts
Posted: Monday, September 07, 2009 - 12:02 AM UTC
Hello Ben,

Lucky you for getting your hands on the Pavla kit! Overall, it appears far more accurate than the Academy kit. Incidentally, the Hobby Boss kit is nothing more than a simplified copy of the Academy and reproduces the inaccuracies...even worse regarding the shape of the canopy! Surely others have noticed the Hobby Boss habit of copying kits from other companies...I can't be the only one!

Anyway, you're doing a nice job on both kits and I'll be watching your progress with interest.

All the best,

Tim.
robot_
_VISITCOMMUNITY
United Kingdom
Joined: March 08, 2009
KitMaker: 719 posts
AeroScale: 691 posts
Posted: Monday, September 07, 2009 - 10:20 AM UTC
Thanks for you nice comments Tim.


I am still making progress, slowly. DP-E's cockpit is looking nearly ready, PR-G's has had shoulder straps added to the resin seat (which had lap belts already). I had to re-scribe the cushioned effect on the resin, as it was completely lost with one coat of paint. The plan is to get these little detail bits done during the week, then get the fuselage closed ready for big assembly steps on the weekend (closing the fuselage and adding the wings and tail).
robot_
_VISITCOMMUNITY
United Kingdom
Joined: March 08, 2009
KitMaker: 719 posts
AeroScale: 691 posts
Posted: Wednesday, September 09, 2009 - 09:32 PM UTC
DP-E's fuselage is very nearly ready to be closed- just need to paint and attached the gun sight.


PR-G's instrument panel looks quite good- the embossed detail in the dials made it easy to paint the hands/markings in white.

robot_
_VISITCOMMUNITY
United Kingdom
Joined: March 08, 2009
KitMaker: 719 posts
AeroScale: 691 posts
Posted: Thursday, September 10, 2009 - 10:36 AM UTC
Made good progress tonight on DP-E (Academy):
opened the radiator rear flap,
opened the remaining half of the exhausts,
painted the gun sight
engraved new panel lines on engine cowlings
glued wings together
glue fuselage together, and added the wings
glued on the resin Tempest tailplanes


I had previously been very annoyed with clothes pegs flying across the room when I tried to clamp the leading and trailing edges of wings. Especially if you try to pinch just the edges, they just can't grip. Placing them nearer the middle of the wing causes the seam to gape as the plastic is squashed. Being a cheap-skate, and not wanting to buy special clamps, I cut strips from washing-up gloves (just a bit of the cuff was needed), and super-glued them to the pegs. Now they grip like a gecko to any angle of surface.


robot_
_VISITCOMMUNITY
United Kingdom
Joined: March 08, 2009
KitMaker: 719 posts
AeroScale: 691 posts
Posted: Friday, September 18, 2009 - 01:38 AM UTC
I can't believe I've not added to this thread in a week...

I'll take some photos tonight, but the following have been done to DP-E:

Removed the resin shell chutes, as they were not fitted.

Opened the kit's shell slots that had been under the resin bits.

Added about 1.5 mm to the length fo the spinner. This was done by gluing it to a stack of three layers of styrene sheet, then cutting and sanding it from the outside, then drilling and opening up the inside. I then closed the existing blade holes with more sheet and putty, before opening new holes for the blades. I used the Pavla spinner as a size guide, and it looks much better now.

Closed the landing lights with filler. I've heard that these were faired-over on rocket-armed Typhoons (rockets melting the covers?), but I just think the late production models didn't have them in the first place (as even the bomb-only armed squadrons didn't have them in most photos from 1945).

Sanded down all the funny raised panels on wings.

Filled gaps (only very small gaps where the back part of underside of wings meets fuselage, and around the wing to radiator joint).

Smoothed in larger resin tail plane- involved a couple of rounds of filling and panel line etching.

I found Jean-Luc's scribing method to be excellent- I used a sharpened piece of sprue instead of the tooth-pick, as I had none. Works really well using the sharp sprue alone to get sanding dust out of original kit panel lines.

Reduced the length of the bomb racks a little, and refined their shape.

Scratch built the intake filter in front of the radiator (need to add the thin supports for this after painting).

Opened out the three rear-facing cockpit vents (added to prevent carbon monoxide build-up), and reduced their size by half.

Tonight I'll add the gas(?) bottles in the undercarriage bays, and build some little pistons for the legs, then glue on the undercarriage. I will fully assemble it all (apart from the wheels) before spraying, and brush paint the natural metal finish after the under-surface colour is sprayed- I don't feel like masking them!

I hope to add some more detail to PR-G's cockpit before closing the fuselage- and I've been putting it off. I will look at some references, and aim to close the fuselage on the weekend.
jaypee
_VISITCOMMUNITY
Scotland, United Kingdom
Joined: February 07, 2008
KitMaker: 1,699 posts
AeroScale: 1,384 posts
Posted: Friday, September 18, 2009 - 02:39 AM UTC
you HAVE been busy! Look forward to seeing the progress on these little monsters. Neat work on the exhausts. v impressive.
robot_
_VISITCOMMUNITY
United Kingdom
Joined: March 08, 2009
KitMaker: 719 posts
AeroScale: 691 posts
Posted: Friday, September 18, 2009 - 09:44 AM UTC
Thanks John-Paul. I have one side of the Pavla kit's exhausts still to go- they were quite easy to hollow out. I drilled two 0.3mm holes, then hacked about with a new, very pointy blade.

I forgot to mention earlier that I have made the radiator flap too.

Anyway... on to the photos:


magnusf
_VISITCOMMUNITY
Stockholm, Sweden
Joined: May 02, 2006
KitMaker: 1,953 posts
AeroScale: 1,902 posts
Posted: Friday, September 18, 2009 - 10:06 AM UTC
Right now this is one of my favourite build threads, keep up the good work! Good choice of markings as well!


Magnus
robot_
_VISITCOMMUNITY
United Kingdom
Joined: March 08, 2009
KitMaker: 719 posts
AeroScale: 691 posts
Posted: Sunday, September 20, 2009 - 09:33 PM UTC
Thanks Magnus!

Slow progress this weekend, I was painting stinking creosote replacement on our fence instead. I have got a bit carried away with the wheel wells on PR-G (Pavla had the opportunity to make the wells the right shape, as they were separate parts from the wings, but instead they went for rounded corners). I suspect the Pavla wells are based more on the Hasegawa 1/48 wells than the real thing.


Original kit wells.


I'm thinning the wings around the wells, and enlarged and squared-off the wells. This way, when I add the wing strut detail (as I did for DP-E) it won't protrude into the well, but still be visible. With some cleaning up, and more detail added, I think it will look OK.

I was very tempted to go ahead and paint DP-E, but I have decided to carry on as I initially planned, and keep both models going in parallel.
robot_
_VISITCOMMUNITY
United Kingdom
Joined: March 08, 2009
KitMaker: 719 posts
AeroScale: 691 posts
Posted: Friday, October 02, 2009 - 04:00 AM UTC
Not much progress to report (have been concentrating on the Fokker Dr.I review build), but I have done more work to the wheel wells on PR-G- I just need to carve more plastic from the wings so they fit in!

I have been looking at the 1/72 Academy Tempest, and it looks a lot, lot more accurate.
http://www.hyperscale.com/2009/galleries/tempestv72ff_1.htm
So much so that I think for making a late Typhoon it is easier to kit-bash the fuselage of the Tempest onto the Typhoon wings, cut out the vertical tail fillet and change the tail wheel well. Works out almost as cheap, as you don't need after-market canopy, tail planes, and you get two 500 lb bombs.

The areas which are more accurate in the Academy Tempest are:
Correct panel lines on nose.
End of nose is less pointy, and the spinner looks much bigger, and accurate.
Seat looks much better, interior detail is maybe a bit coarser, but more accurate. I would use the Typhoon's instruments though.
Head armour is correct shape- Academy Typhoon's is almost square, with a headrest that the aircraft never had.
Radiator has the late-type filter for the air intake in the middle, and this is located towards the bottom of the intake, which is correct (when I made the intake filter for DP-E, I had to have it sloping violently downwards to get the end to be low enough to look right).
You don't need to replace the horizontal tail planes with resin ones to be corect for a late-war typhoon.
Exhausts look better, and are separate parts making the easier to paint.
Includes the IFF antenna and foot-hold that drops below the trailing edge of the wing.
Canopy looks much, much better. Less tall, and the back part tapers in height nicely like the real thing.

I might have to make a third typhoon to see how this kit-bash would work...!
magnusf
_VISITCOMMUNITY
Stockholm, Sweden
Joined: May 02, 2006
KitMaker: 1,953 posts
AeroScale: 1,902 posts
Posted: Friday, October 02, 2009 - 04:19 AM UTC
Typhoon and Tempest fuselages are far from identical, the Tempest has a much longer nose due to an extra fuel tank between the cockpit and the engine. I also think an extension was made to the rear fuselage to conserve CofG.

Look around the exhaust area, on a Tempest they are (almost) all forward of the wing leading edge while on the Typhoon the rear three are behind the leading edge.

Also check the cooler area below the nose: On a Tiffie the wing attaches to the side of the cooler while on the Tempest the cooler ends forward of the wing leading edge.


Two photos of my Tempest showing (I hope) what I mean !

There is another kit available for the modeller looking for a late-type Typhoon: High Planes do a nice one.

Sorry to ruin your day!


Magnus
robot_
_VISITCOMMUNITY
United Kingdom
Joined: March 08, 2009
KitMaker: 719 posts
AeroScale: 691 posts
Posted: Friday, October 02, 2009 - 04:38 AM UTC
Magnus: thank-you, I was not being very observant, was I! Still, the Tempest kit might be a good donor for the radiator with filter, canopy, seat, bombs, tail planes, and maybe the spinner.
magnusf
_VISITCOMMUNITY
Stockholm, Sweden
Joined: May 02, 2006
KitMaker: 1,953 posts
AeroScale: 1,902 posts
Posted: Friday, October 02, 2009 - 04:43 AM UTC

Quoted Text

Magnus: thank-you, I was not being very observant, was I! Still, the Tempest kit might be a good donor for the radiator with filter, canopy, seat, bombs, tail planes, and maybe the spinner.


Your'e probably right! I like the Tempest a lot, it is based on the old but very good Heller kit (parts are interchangeable, I have tried!). And it isn't expensive either so it might be worth a try!


Magnus
MEBM
_VISITCOMMUNITY
Indiana, United States
Joined: July 19, 2003
KitMaker: 1,055 posts
AeroScale: 61 posts
Posted: Friday, October 02, 2009 - 08:42 AM UTC
I've always been a fan of the Typhoon and Tempest, and you're doing a GREAT job with this! I can't wait to see the finished project!
robot_
_VISITCOMMUNITY
United Kingdom
Joined: March 08, 2009
KitMaker: 719 posts
AeroScale: 691 posts
Posted: Sunday, October 11, 2009 - 10:57 AM UTC
I am slowly working on the Pavla kit. It takes so much more work to prepare the parts- to get the trailing edges to be anywhere near respectable, I'm going to have to sand the inside for hours. And the fin is also very thick.

It will need a lot of pegs and tape to hold the fuselage when I glue it- it doesn't like staying in the right place at all!


Spot the mistake!


I made the radiator dividing tubes from carefully cut pieces of the thinnest plasicard I have. The Pavla resin radiator made no attempt at representing this.


I now realise that the bakelite wheel can't even be seen as it is behind the seat. The wiring on the cockpit wall is not taken from any reference, but I wanted some more interest on that side of the cockpit (which will be very visible with the open car-door.
magnusf
_VISITCOMMUNITY
Stockholm, Sweden
Joined: May 02, 2006
KitMaker: 1,953 posts
AeroScale: 1,902 posts
Posted: Sunday, October 11, 2009 - 09:22 PM UTC
When thinning trailing edges, try scraping with a rounded scalpel blade instead. This removes a lot more material than sanding! You can then finish it off with coarse sandpaper. Another trick I use occasionally is sanding the insides until I get tired of it, glueing the wing together and then sanding the outside from the lower surface. Cheating, I know, but few people ever get to see the lower surfaces of my models !


Magnus
robot_
_VISITCOMMUNITY
United Kingdom
Joined: March 08, 2009
KitMaker: 719 posts
AeroScale: 691 posts
Posted: Saturday, March 06, 2010 - 07:35 AM UTC
S-L-O-W-L-Y making progress on the diorama for the 193 Squadron Typhoon DP-E. Awaiting delivery of a large number of jerry cans.


magnusf
_VISITCOMMUNITY
Stockholm, Sweden
Joined: May 02, 2006
KitMaker: 1,953 posts
AeroScale: 1,902 posts
Posted: Tuesday, March 09, 2010 - 08:43 AM UTC
I am happy to see that you are working actively on this project again Ben! Are you using Preiser figures?


Magnus
robot_
_VISITCOMMUNITY
United Kingdom
Joined: March 08, 2009
KitMaker: 719 posts
AeroScale: 691 posts
Posted: Tuesday, March 09, 2010 - 09:26 PM UTC
Thanks Magnus- yes, they are Preiser Luftwaffe figures. The moulding it very, very nice. The chairs are so detailed- the legs are really thin. I've not seen anything else moulded that thin before. The step ladder is a Flightpath etched item, with stretched sprue rungs. Took a lot of patience assembling that!
The jeep and trailer are from the Academy P51 africa boxing. I wish now I have read some reviews, as it seems the Heller jeep and trailer are the best in this scale (I had assumed that the Heller/Airfix ones were ancient). Hopefully will look better with the back and front seats piled high with jerry cans, and the trailer full of them too.

I am getting rein jerry can made by Mars. The have separately moulded handles- I was tempted by some ExtraTech ones with etch handles, but they were more expensive. I need 40 of them- it took 20 x 4.5 gal jerry cans to fill each 90 gal drop tank. Mars also make a rest of refuelling accessories- and I will be using one of the funnels from that set for filing the tank.

The legs on the wing will be attached to a torso holding the funnel, and there will be a man on the ladder pouring a jerry can.
 _GOTOTOP