_GOTOBOTTOM
Cold War (1950-1974)
Discuss the aircraft modeling subjects during the Cold War period.
Hosted by Tim Hatton
Hasegawa F-4B Phantom II 1/72 Jolly Rogers
spaarndammer
_VISITCOMMUNITY
Noord-Holland, Netherlands
Joined: January 28, 2007
KitMaker: 1,945 posts
AeroScale: 388 posts
Posted: Wednesday, September 04, 2013 - 08:31 AM UTC
Hi all,

Now I finished my Canberra PR9 (final photos soon), I would like to share my current build, the Hasegawa F-4B Phantom II in 1/72 scale. I started this build long before the start of the very nice Fab Phantom campaign, so this build will be separate from that.

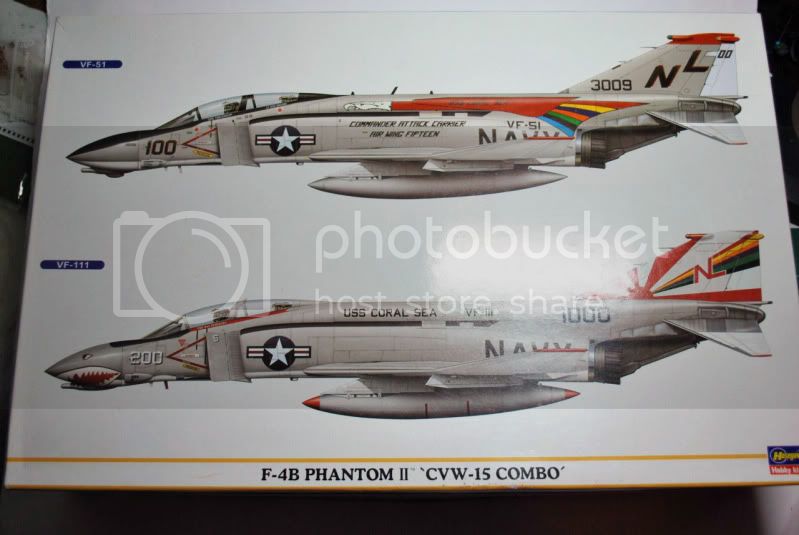
The build started at the annual Scale Model Challenge (a great show organised by the people of the Scale Model factory) when I and a fellow Dutch modeler bought this kit:


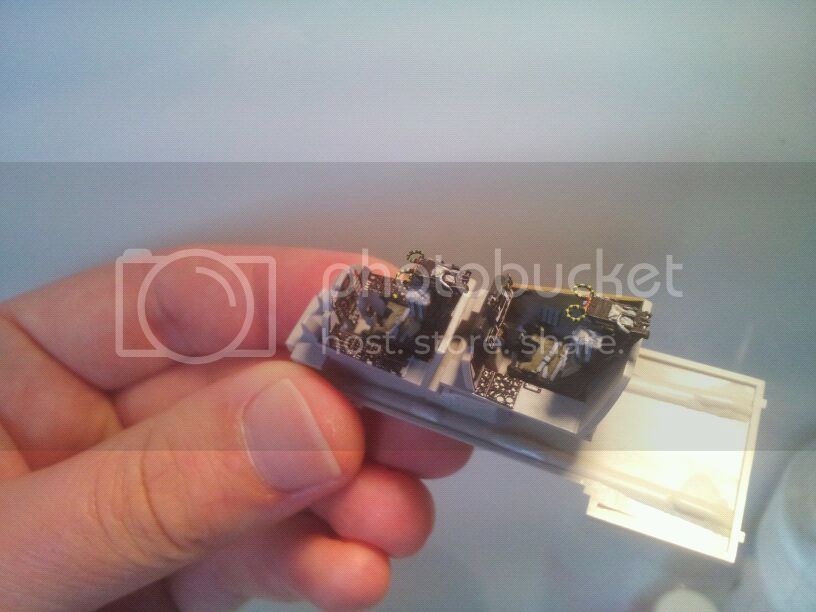
To enhance the detail of the cockpit, I bought very nicely detailed resin bangseats from Wolfpack and an Eduard PE set.


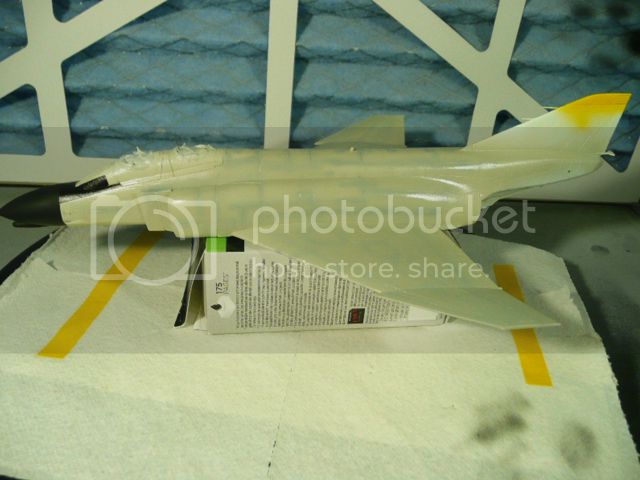
The next step was to close up the fuselage and add all necessary stuff to make a plane fly.


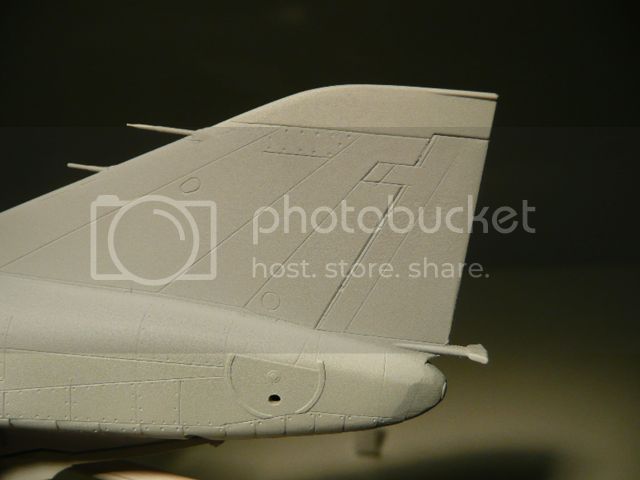
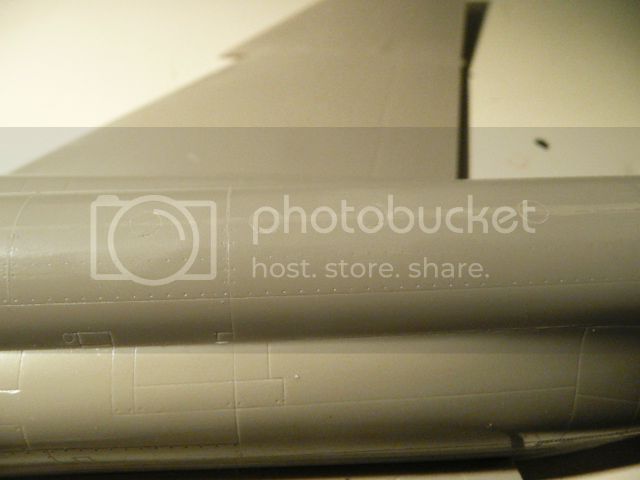
Due to sanding some detail was lost, like the fuel caps on top, which were re-scribed. Scribing was a first and it looks like that everything went well, except for one circle. I have some doubts about the depth of the scribed lines and I hope it doesn't disappear under the coat of primer/paint.


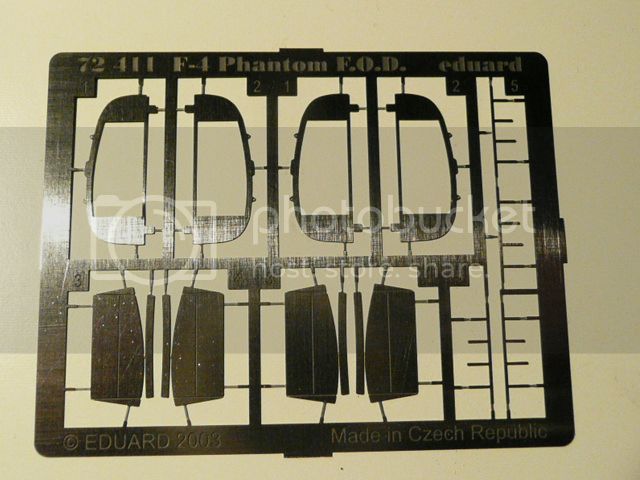
As the Hasegawa kit has no detail of an engine and all that you can see when looking in the intakes is a wall of plastic, I decided to add FOD covers to obscure the emptiness. I bought an Eduard set for this and the FOD covers are currently under construction.


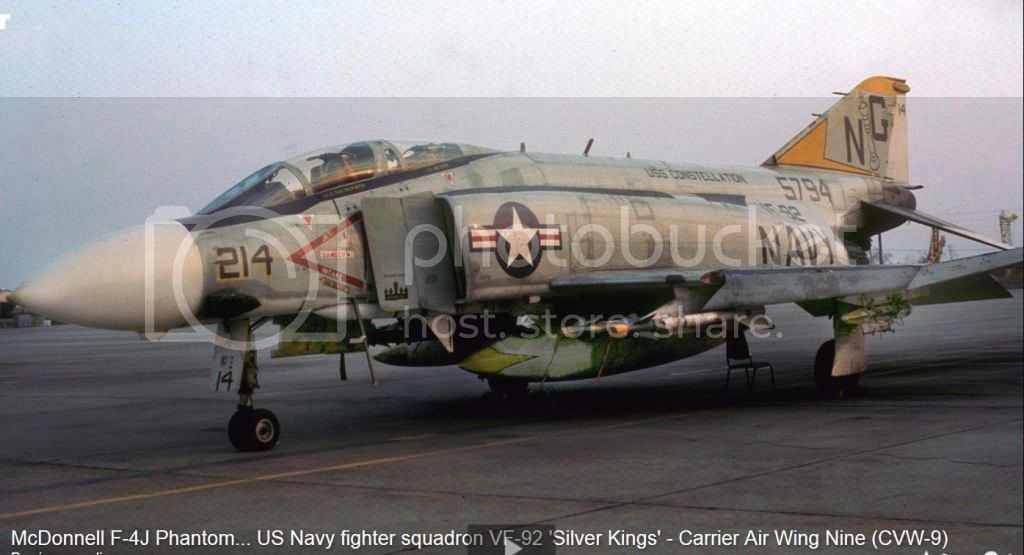
Finally, as the title of this topic already indicated and for obvious reasons, I will build a Jolly Rogers F-4B. For this I use the extensive detail set from Double Ugly Decals. The decals come in a nice colourful booklet with profiles of the planes that can be build with the decals.


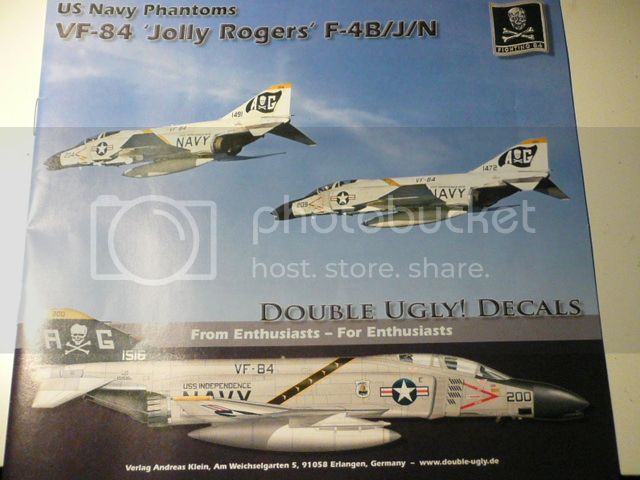
The mean machine that I am planning to build is shown on the bottom of the title page.


Jelger
Keeperofsouls2099
_VISITCOMMUNITY
Florida, United States
Joined: January 14, 2009
KitMaker: 2,798 posts
AeroScale: 2,443 posts
Posted: Wednesday, September 04, 2013 - 01:54 PM UTC
Built that exact bird in 1/48 you can see it in my display cases on my sr-71 page I will be watching love the jollys
Keeperofsouls2099
_VISITCOMMUNITY
Florida, United States
Joined: January 14, 2009
KitMaker: 2,798 posts
AeroScale: 2,443 posts
Posted: Wednesday, September 04, 2013 - 01:55 PM UTC
Almost forgot nice pit detail
Joel_W
Staff MemberAssociate Editor
AUTOMODELER
_VISITCOMMUNITY
New York, United States
Joined: December 04, 2010
KitMaker: 11,666 posts
AeroScale: 7,410 posts
Posted: Thursday, September 05, 2013 - 02:46 AM UTC
Jelger, You're off to a excellent start. The cockpit looks really busy, especially for 1/72 scale. Have to admit that I'm always envious of modelers who can re-scribe. I have a tendency to shake while doing detailed work, so my re-scribing just doesn't cut the mark very often. Yours really looks good.

Will be following your build as F4's are as modern of the jet era as I go these days.

Joel

spaarndammer
_VISITCOMMUNITY
Noord-Holland, Netherlands
Joined: January 28, 2007
KitMaker: 1,945 posts
AeroScale: 388 posts
Posted: Tuesday, December 10, 2013 - 12:48 AM UTC
Hi all,

Finally an update on my Phantom. Modelling has come second the last months, as we were very busy with baby preparations (1st ).

After finishing the construction, it is time for the painting stage. For this I tried for the first time Vallejo Acrylic Polyurethane primer, which can be sprayed from the airbrush. On previously models, I used Tamiya fine surface primer, but given its ease of use, I just gave the Vallejo stuff leaving all details visible(which it does). As the phantom will be white on its belly and grey on top, I used the white primer.


It took me a while before I got the feeling of spraying the primer well and on the tail not everything went well.


The pitot tube and ram jet intake are aftermarket. Very nice, but difficult to get on the model as the trailing edge of the tail is very thin to drill in.

To remove the bad spots on the tail, I wet sanded it with 1000 grit sanding paper.

As I want to have a very smooth finish (unlike my Canberra) and the primer came on a little bit grainy, I decided to wet sand the plane with grit 2000 to smoothen the surface. The result can already be felt and hopefully will also be seen when paint is on.

Unfortunately, during wet sanding of the nose and despite being very careful, some primer came of the nose. I was aware that Vallejo Primer is known for this as it seems not to stick very well to the model. So I have to repair this scratch which is hopefully not too difficult.

The next step is repairing the scratch and preshade everything.

I do not know when the next update will be posted as my life will be busy soon.


Jelger
Joel_W
Staff MemberAssociate Editor
AUTOMODELER
_VISITCOMMUNITY
New York, United States
Joined: December 04, 2010
KitMaker: 11,666 posts
AeroScale: 7,410 posts
Posted: Tuesday, December 10, 2013 - 05:18 AM UTC
Jelger,
Nice to see an update report.
Why did you decide not to use the Tamiya grey or white primers as they work perfectly every time? I don't use a primer often, but when I do, it's always either one of the Tamiya primers. Being lacquer based, there is the strong odor to be concerned about. That's when I use my spray booth.

Joel
spaarndammer
_VISITCOMMUNITY
Noord-Holland, Netherlands
Joined: January 28, 2007
KitMaker: 1,945 posts
AeroScale: 388 posts
Posted: Wednesday, December 11, 2013 - 12:27 AM UTC
Hi Joel,

The reason that I used the Vallejo stuff was to just give it a try and you are able to put down a very thin layer of primer. Not that I didn't like the Tamiya primer. On the contrary, when warmed up in water it sprays a nice and durable coat.


Jelger
Joel_W
Staff MemberAssociate Editor
AUTOMODELER
_VISITCOMMUNITY
New York, United States
Joined: December 04, 2010
KitMaker: 11,666 posts
AeroScale: 7,410 posts
Posted: Wednesday, December 11, 2013 - 04:39 AM UTC

Quoted Text

Hi Joel,

The reason that I used the Vallejo stuff was to just give it a try and you are able to put down a very thin layer of primer. Not that I didn't like the Tamiya primer. On the contrary, when warmed up in water it sprays a nice and durable coat.


Durability
Jelger


Jelger,
Durability was a major issue when I tested the model Master acrylic primer. I found that it separated from the raw plastic way too easily, especially when using even Tamiya tape. That was the major issue why I went back to the lacquer based Tamiya primers. Now if the Vallejo acrylic primers are nearly as tough as the Tamiya primers, I really have to purchase some, and give it a try.

Joel
spaarndammer
_VISITCOMMUNITY
Noord-Holland, Netherlands
Joined: January 28, 2007
KitMaker: 1,945 posts
AeroScale: 388 posts
Posted: Wednesday, December 11, 2013 - 06:29 AM UTC

Quoted Text


Quoted Text

Hi Joel,

The reason that I used the Vallejo stuff was to just give it a try and you are able to put down a very thin layer of primer. Not that I didn't like the Tamiya primer. On the contrary, when warmed up in water it sprays a nice and durable coat.


Durability
Jelger


Jelger,
Durability was a major issue when I tested the model Master acrylic primer. I found that it separated from the raw plastic way too easily, especially when using even Tamiya tape. That was the major issue why I went back to the lacquer based Tamiya primers. Now if the Vallejo acrylic primers are nearly as tough as the Tamiya primers, I really have to purchase some, and give it a try.

Joel


hi Joel,
I think there is some misunderstanding as I meant that that the Tamiya primer seems to be much more durable than the Vallejo stuff. So tonight I do some respraying and hopefully I can fix the scratch on the nose.


Jelger
Joel_W
Staff MemberAssociate Editor
AUTOMODELER
_VISITCOMMUNITY
New York, United States
Joined: December 04, 2010
KitMaker: 11,666 posts
AeroScale: 7,410 posts
Posted: Wednesday, December 11, 2013 - 06:33 AM UTC

Quoted Text


Quoted Text


Quoted Text

Hi Joel,

The reason that I used the Vallejo stuff was to just give it a try and you are able to put down a very thin layer of primer. Not that I didn't like the Tamiya primer. On the contrary, when warmed up in water it sprays a nice and durable coat.


Durability


Jelger


Jelger,
Durability was a major issue when I tested the model Master acrylic primer. I found that it separated from the raw plastic way too easily, especially when using even Tamiya tape. That was the major issue why I went back to the lacquer based Tamiya primers. Now if the Vallejo acrylic primers are nearly as tough as the Tamiya primers, I really have to purchase some, and give it a try.

Joel


hi Joel,
I think there is some misunderstanding as I meant that that the Tamiya primer seems to be much more durable than the Vallejo stuff. So tonight I do some respraying and hopefully I can fix the scratch on the nose.


Jelger


Jelger,
Thanks for clearing that issue up. Guess I'll stick to my smelly old Tamiya primers.

Joel
AirLedge
_VISITCOMMUNITY
Cork, Ireland
Joined: July 26, 2007
KitMaker: 292 posts
AeroScale: 265 posts
Posted: Friday, December 13, 2013 - 09:20 AM UTC
Great work on the phantom!

Regarding the Vallejo primers, I've used the USN Ghost Grey primer on my Eduard Hellcat recently and I was pleased enough. however it's definitely not the most durable and needs to be left for 2/3 days to cure completely before sanding, you can see it here Eduard Hellcat build
spaarndammer
_VISITCOMMUNITY
Noord-Holland, Netherlands
Joined: January 28, 2007
KitMaker: 1,945 posts
AeroScale: 388 posts
Posted: Saturday, December 14, 2013 - 04:18 AM UTC
Thanks for the comments and thumbs up!

So, time for another update.

I tried to repair the scratch on the nose, but even with careful sanding and spraying a bit of new primer, I suspect that it will remain visible.

To determine the final look of the Phantom, I browsed the internet to find any examples of nice finishes. Many Phantom builds show quite some weathered birds, but when looking at operational planes, these were quite clean machines. This is not surprising though. However, it makes it more difficult to make an interesting finish.

Now I also found some pictures showing Phantoms with quite clear dark lines and spots on it. Like this one:


This will be an interesting starting point for my finish. The lines appear to me a bit random (it is probably not) so I took the airbrush and made some preshades at random panellines.


I hope that this is not to random and that in the end it will turn out nice. We will see. Being a scientist by education i am not afraid like to experiment and I am curious what you will think about it to please share your opinions


Jelger
Jessie_C
_VISITCOMMUNITY
British Columbia, Canada
Joined: September 03, 2009
KitMaker: 6,965 posts
AeroScale: 6,247 posts
Posted: Saturday, December 14, 2013 - 05:56 AM UTC
Those dark lines and panels are evidence of spot repainting done by the ship's maintenance crew. The harsh environment at sea causes incremental damage to the paint, so the worn spots get sprayed on a regular basis. The contrast between the new and faded paint is often quite striking. It's usually concentrated around the edges of panels which get removed frequently during routine servicing and operation. Contrast an aircraft at the beginning of a tour at sea with one at the end.
AirLedge
_VISITCOMMUNITY
Cork, Ireland
Joined: July 26, 2007
KitMaker: 292 posts
AeroScale: 265 posts
Posted: Saturday, December 14, 2013 - 08:51 AM UTC
Looks good to me, not overdone at all. Should break up the final finish to give a more interesting look. I got the Academy 1/48 Phantom recently so I'll be following yours with interest to see how it turns out. Great stuff so far
Joel_W
Staff MemberAssociate Editor
AUTOMODELER
_VISITCOMMUNITY
New York, United States
Joined: December 04, 2010
KitMaker: 11,666 posts
AeroScale: 7,410 posts
Posted: Saturday, December 14, 2013 - 09:25 AM UTC
Jelger, I must say that's a rather interesting example of a weathered F4. Never really seen one with panel lines quite that way. Jessica's explanation sounds more then plausible. Your preshading should really help to bring out that random pattern.

Joel
spaarndammer
_VISITCOMMUNITY
Noord-Holland, Netherlands
Joined: January 28, 2007
KitMaker: 1,945 posts
AeroScale: 388 posts
Posted: Friday, December 27, 2013 - 08:51 AM UTC
Hi all,

Another update about my Phantom.


After some discussion with fellow modellers on the Benelux branch of Kitmaker, I decided to preshade most of the panels and let go of the random pattern.

I then started to spray the bottom with Mr. Hobby White. It took at least 3 sessions to tone down the preshade. It seems that coverage of this Mr. Hobby white is not so good (or I spray too thin). The same was for the top part, which is Mr. Hobby Light gull grey, which took me 2 sessions for reasonable coverage. The anti-glare panel was painted with Mr. Hobby black, but this turned out way too gloss. As I wanted to have a tonal difference between the anti-glare panel and the nose, I decided to spray the nose with Tamiya flat black, which is really flat . This turned out really nice, because due to the flat color, the nose really looks big now. All Mr. Hobby colors are per Double Ugly! Decals instructions.

With different parts receiving different colors and only want to spend a max of 2- hrs per day, enough time to do only one part, it takes quite some time to finish painting. And still a few things have to be done:
- black on the lower tail (at exhaust)
- Alclad on these parts
- Alclad on the leading edge of the wings, vertical stabilizer and intakes
- White on top part of flaps
- Black on the vertical stabilizer.

And then landing gear, drop tanks and horizontal stabilizers have to be painted as well.

In other words, there is enough to do, so we keep on going!


Jelger
Joel_W
Staff MemberAssociate Editor
AUTOMODELER
_VISITCOMMUNITY
New York, United States
Joined: December 04, 2010
KitMaker: 11,666 posts
AeroScale: 7,410 posts
Posted: Saturday, December 28, 2013 - 12:10 PM UTC
Jelger, Looking good. Your more conventional pre-shading certainly shows through the base colors just enough for the proper effect. The light Gull Gray looks some what glossy, as does the anti glare panel. Are the Mr. Hobby paints a semi gloss finish?

From your paint to do list, I would have painted the white flying surfaces prior to the base color, as it would have made your life that much easier when it came to masking. But your method should work just fine, just a little more work involved.

So when is the baby due?

Joel
 _GOTOTOP