Jakcob, I'm no expert by any means. From my research, the box art depicts a TBD-1 that has been repainted to the new Naval war two tone intermediate blue/neutral gray scheme. The interior should have been repainted at the same time to Interior Green or Bronze Green. Color variations depends on what company actually mixed the paint.
By Midway just about all Naval aircraft repaints had been modified to remove the red/white rudder, and the red meatball, as it was to close to the Japanese National Red Circle used on all aircraft.
The GWH kit that you have shown a picture of comes with bombs, not a torpedo. Also there are two paint schemes offered, the one shown on the box VT-6 stationed at Wake Island 1942, and a all Neutral Gray scheme that would have an Aluminum Lacquer interior, VT-3 USS Saratoga circa 1937.
The Midway kit only offers the Intermediate Blue/Neutral Gray scheme. Both aircraft are from VT-8 USS Hornet. ENS George Gay, and Squadron Commander LCDR John Waldron.
Hope I was somewhat helpful.
Joel
World War II
Discuss WWII and the era directly before and after the war from 1935-1949.
Discuss WWII and the era directly before and after the war from 1935-1949.
Hosted by Rowan Baylis
GWH 1/48 scale TBD-1 Devastator
Joel_W

Joined: December 04, 2010
KitMaker: 11,666 posts
AeroScale: 7,410 posts

Posted: Wednesday, October 16, 2013 - 10:05 AM UTC
J8kob_F

Joined: October 24, 2012
KitMaker: 202 posts
AeroScale: 92 posts

Posted: Wednesday, October 16, 2013 - 11:06 AM UTC
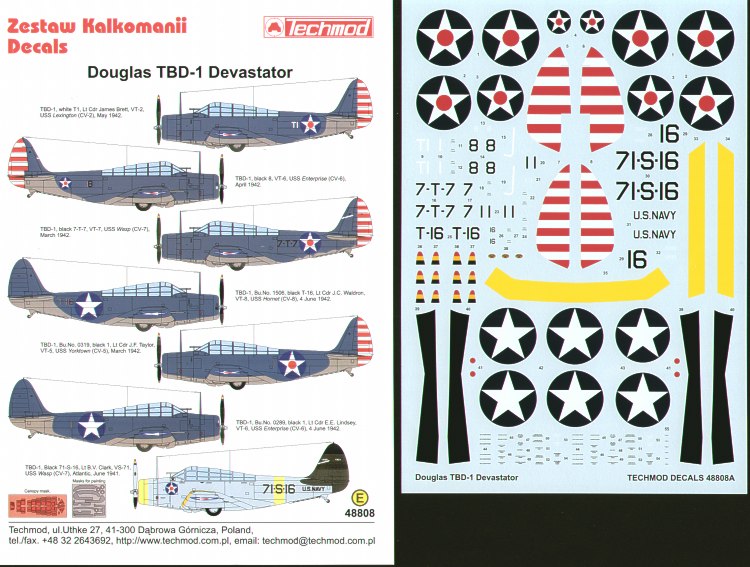
Okay thnx, then the green it is. I'm planing on buying techmod decals and there the plane has the red/white rudder in may 1942. I'm buying the version with the torpedo i just showed the other one to illustrate the scheme.
Jakob
Jakob
Joel_W

Joined: December 04, 2010
KitMaker: 11,666 posts
AeroScale: 7,410 posts

Posted: Wednesday, October 16, 2013 - 11:27 AM UTC
Good choice. All TBDs had the option of Torpedo or 2 bombs. It's the kit limitations that makes you pick. Paint the Red & white rudder, don't use the decals, it will never come out that good. Ask Mal for a set of masks if need be.
Looking forward to your build.
Joel
Looking forward to your build.
Joel
Joel_W

Joined: December 04, 2010
KitMaker: 11,666 posts
AeroScale: 7,410 posts

Posted: Thursday, October 17, 2013 - 01:51 AM UTC
Ok, worked a deal with my brother, and I'm trading him the torpedoes for the 2 bombs. Problem solved.
Joel
Joel

Peterpools

Joined: June 08, 2013
KitMaker: 197 posts
AeroScale: 193 posts

Posted: Thursday, October 17, 2013 - 11:10 AM UTC
JA
I'm still calculating the interest
Bro
I'm still calculating the interest
Bro
Joel_W

Joined: December 04, 2010
KitMaker: 11,666 posts
AeroScale: 7,410 posts

Posted: Tuesday, October 22, 2013 - 01:42 PM UTC
Slowly but surely, I've been working on the TBD-1. Finally got enough done for a small update.
1st issue of business is the missing engine cowling. Peter, my brother, lent me the one from his kit so I could continue moving forward with my build until the replacement one came from Guido. Thanks Bro for stepping up. And today, the replacement arrived from Germany that Guido sent. Guido, I can't thank you enough for sending me the replacement cowling. You're truly a life saver.
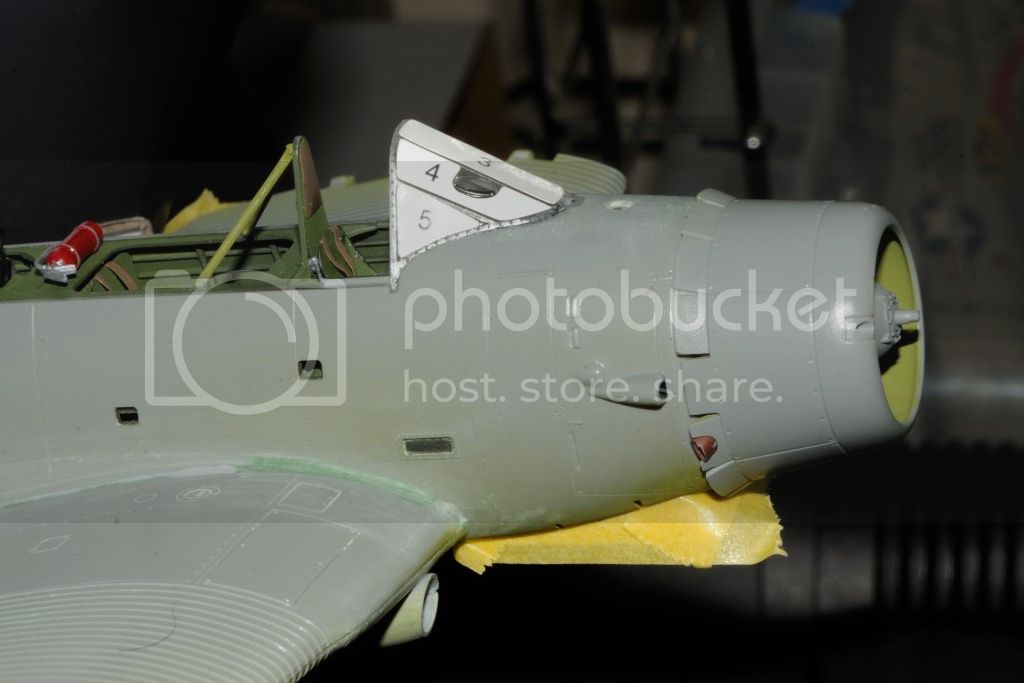
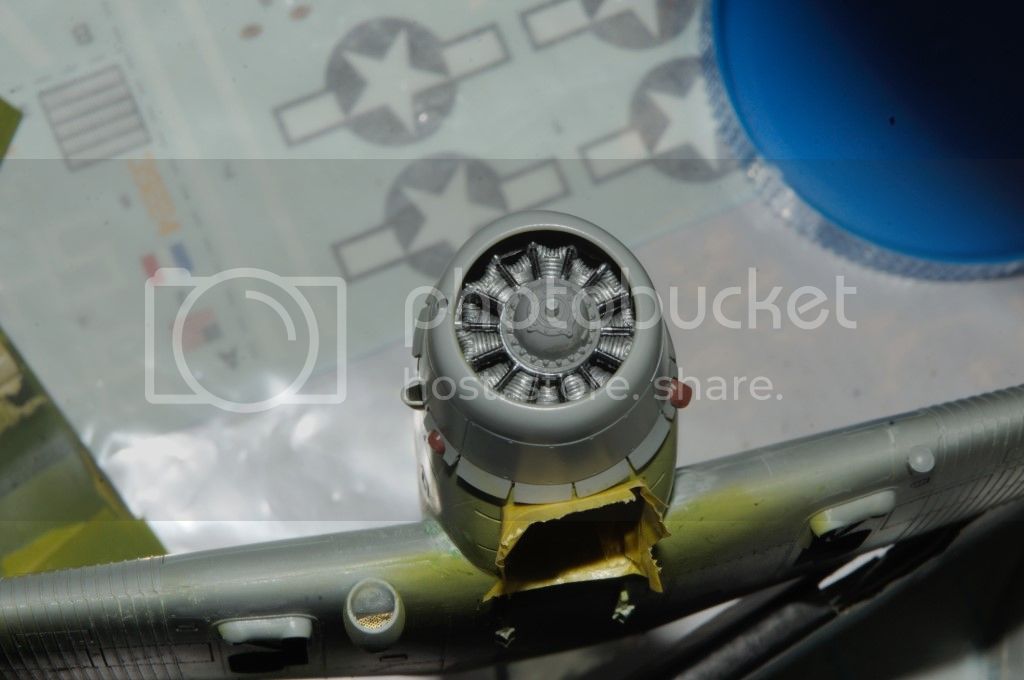
I decided on the open cowl flaps, as the kit have both the open and closed flacowl flaps as separate parts. I cut out the recessed plastic between the cowl flaps, and glued it up to the engine cowl, then painted the inside Interior Green. Finished the engine including the exhaust manifold and headers, and temp glued them to the fuselage to get ready for painting.
All the wing spars have been glued up into the main wing sections, as well as the folding wing sections. I couldn't find a definitive answer to what they were painted with the two tone paint scheme, so I went with Interior Green.
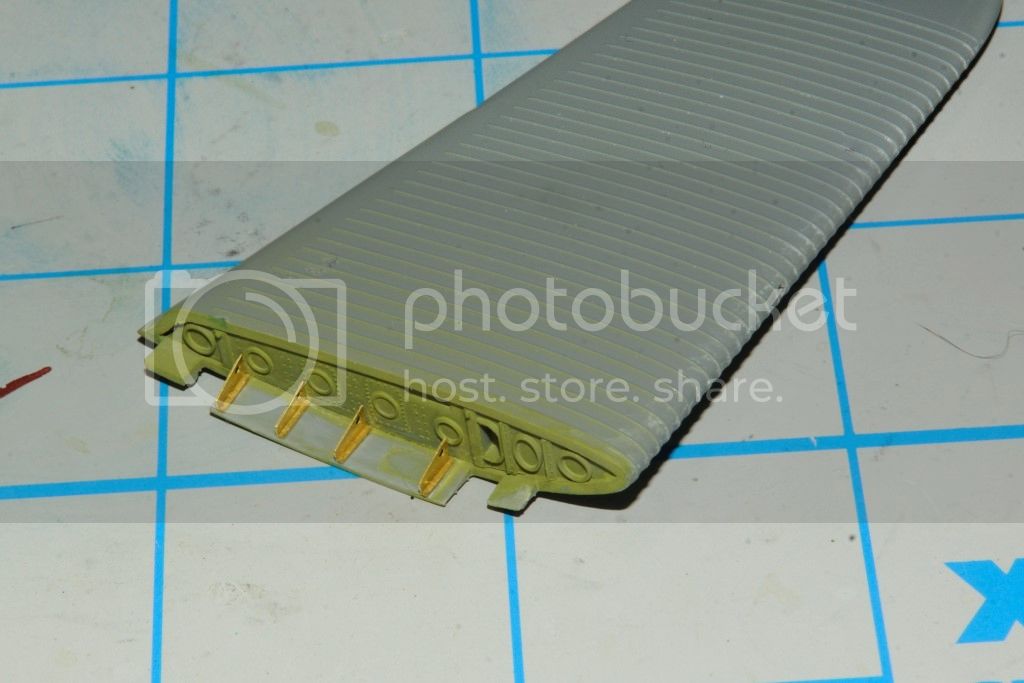
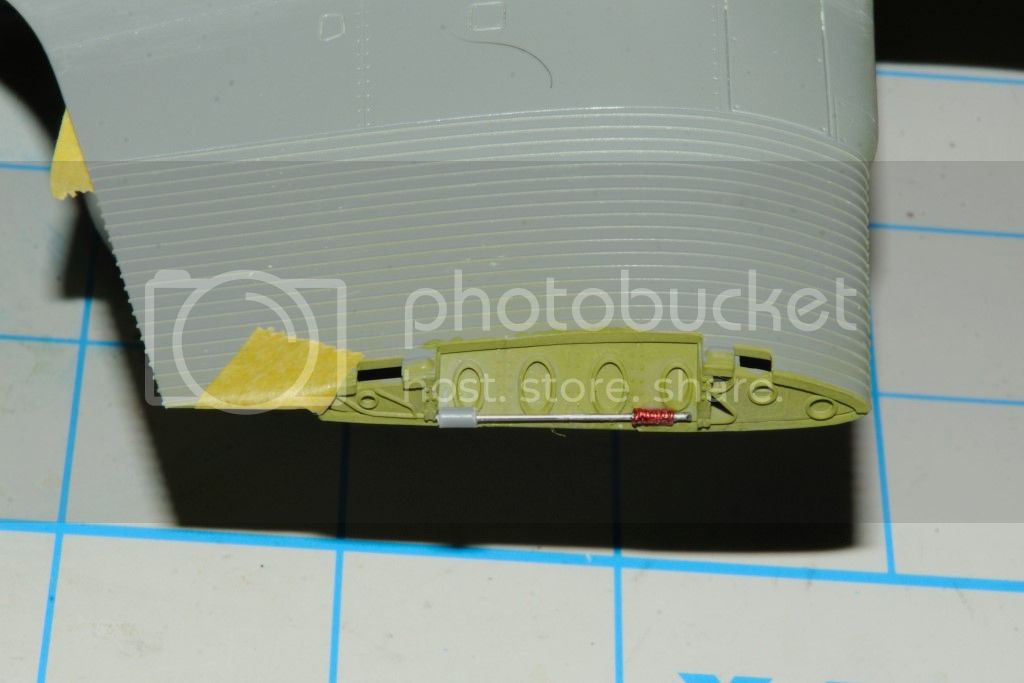
Part of the wing folding mechanical mechanism, is a massive spring on a stainless steel shaft. The kit uses PE and plastic parts to make the assembly, but I just couldn't get the PE to conform to what I needed. So I scraped the whole assembly, and scratched one out of steel rod, wire, and some sprue. Here's what it looks like before painting.
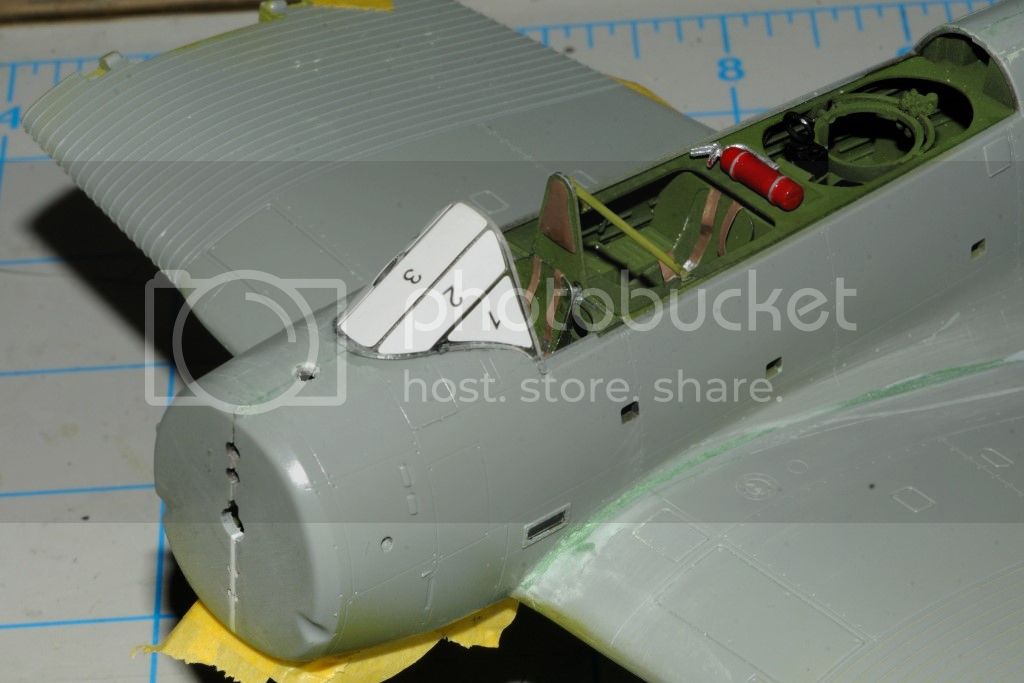
Several kit reviews adviced caution with using the supplied masks. I tried them on the windscreen, and had no issues. All that's left to do is a little putty work to blend it in.
Thanks for stopping by, and taking the time to checkout my build.
Joel
1st issue of business is the missing engine cowling. Peter, my brother, lent me the one from his kit so I could continue moving forward with my build until the replacement one came from Guido. Thanks Bro for stepping up. And today, the replacement arrived from Germany that Guido sent. Guido, I can't thank you enough for sending me the replacement cowling. You're truly a life saver.
I decided on the open cowl flaps, as the kit have both the open and closed flacowl flaps as separate parts. I cut out the recessed plastic between the cowl flaps, and glued it up to the engine cowl, then painted the inside Interior Green. Finished the engine including the exhaust manifold and headers, and temp glued them to the fuselage to get ready for painting.
All the wing spars have been glued up into the main wing sections, as well as the folding wing sections. I couldn't find a definitive answer to what they were painted with the two tone paint scheme, so I went with Interior Green.
Part of the wing folding mechanical mechanism, is a massive spring on a stainless steel shaft. The kit uses PE and plastic parts to make the assembly, but I just couldn't get the PE to conform to what I needed. So I scraped the whole assembly, and scratched one out of steel rod, wire, and some sprue. Here's what it looks like before painting.
Several kit reviews adviced caution with using the supplied masks. I tried them on the windscreen, and had no issues. All that's left to do is a little putty work to blend it in.
Thanks for stopping by, and taking the time to checkout my build.
Joel

Keeperofsouls2099

Joined: January 14, 2009
KitMaker: 2,798 posts
AeroScale: 2,443 posts

Posted: Tuesday, October 22, 2013 - 02:08 PM UTC
Is it done yet geez  looking great man love the hinge and what you got going man looking good
  don't rush
 looking great man love the hinge and what you got going man looking good
  don't rush
Tailor

Joined: May 26, 2008
KitMaker: 1,168 posts
AeroScale: 199 posts

Posted: Tuesday, October 22, 2013 - 05:14 PM UTC
Joel-
I am glad it worked out so fast!
Nice to see your build coming along. Keep up the good work, brother!
Cheers,
Guido
I am glad it worked out so fast!
Nice to see your build coming along. Keep up the good work, brother!
Cheers,
Guido
Joel_W

Joined: December 04, 2010
KitMaker: 11,666 posts
AeroScale: 7,410 posts

Posted: Wednesday, October 23, 2013 - 12:31 AM UTC
Quoted Text
Is it done yet geezlooking great man love the hinge and what you got going man looking good
don't rush

Justin, thanks. It's a fun build, and the level of detail in the GWH kits is amazing. Really no need to do much detailing.
But I'm biting at the bit to start the GWH P-61A which is even more amazing. You'll be done with the interior before I even crack the box lid.
And Guido, again thanks. I owe you big time for stepping up.
Joel
Joel_W

Joined: December 04, 2010
KitMaker: 11,666 posts
AeroScale: 7,410 posts

Posted: Thursday, October 24, 2013 - 12:36 AM UTC
Been working on masking all the greenhouse glass, and there is a "ton" of glass to do. Finally found out what all the reviewers were saying about the masks. They were fine on flat glass, but just don't have enough adhesive to maintain contact to any rounded areas, hence, they just lift off some. Also a few panels are cut to big, which isn't any problem to adjust with a sharp blade and straight edge.
What I really like about them is that they have the proper rounded corners, that I'm ending up squaring off when masking with tape.
Joel
What I really like about them is that they have the proper rounded corners, that I'm ending up squaring off when masking with tape.
Joel

Peterpools

Joined: June 08, 2013
KitMaker: 197 posts
AeroScale: 193 posts

Posted: Saturday, October 26, 2013 - 06:25 AM UTC
JA
Awesome progress on the Devastator. Very impressed with the wing fold spring assembly and how well you and cowl flaps. Hopefully, the TBD should be ready for the paint shop with a few weeks.
Bro
Awesome progress on the Devastator. Very impressed with the wing fold spring assembly and how well you and cowl flaps. Hopefully, the TBD should be ready for the paint shop with a few weeks.
Bro
Joel_W

Joined: December 04, 2010
KitMaker: 11,666 posts
AeroScale: 7,410 posts

Posted: Sunday, October 27, 2013 - 12:43 AM UTC
Quoted Text
JA
Awesome progress on the Devastator. Very impressed with the wing fold spring assembly and how well you and cowl flaps. Hopefully, the TBD should be ready for the paint shop with a few weeks.
Bro
Bro, Thanks for stopping bye and your more then positive comments. The TBD-1 hopefully will be in the paint shop some time this coming week.
Joel
Joel_W

Joined: December 04, 2010
KitMaker: 11,666 posts
AeroScale: 7,410 posts

Posted: Monday, November 04, 2013 - 04:42 AM UTC
Time for a major update, but just a few pictures.
I completed the painting stage except for the propeller and wheels. Mal, of Miracle Masks
https://www.facebook.com/miraclemasks
is making me a set of masks for the main wheels, as I prefer to airbrush the tires and the wheels. I must say that I'm really looking forward to trying them.
As with all my two tone USA Navy WW11 aircraft painted in the two tone Coral Sea/Midway scheme, I use Tamiya acrylics, custom mixed on the light side to help define fading due to the tropical sun and salt water.
Intermediate Blue/Gray is a 1:1 mix of FX 18 Medium Blue & FX19 Sky Gray with a few drops of FX-1 black.
Faded intermediate Blue/Gray is the above mix with FX-2 White added till it looked about right.
Light Grey undersides is a mix of FX-20 Medium Gray with a few drops of FX-2 White.
The fading usually wasn't uniform, so I over sprayed the Intermediate the Intermediate blue/gray with a the light shade in a random blotchy pattern.
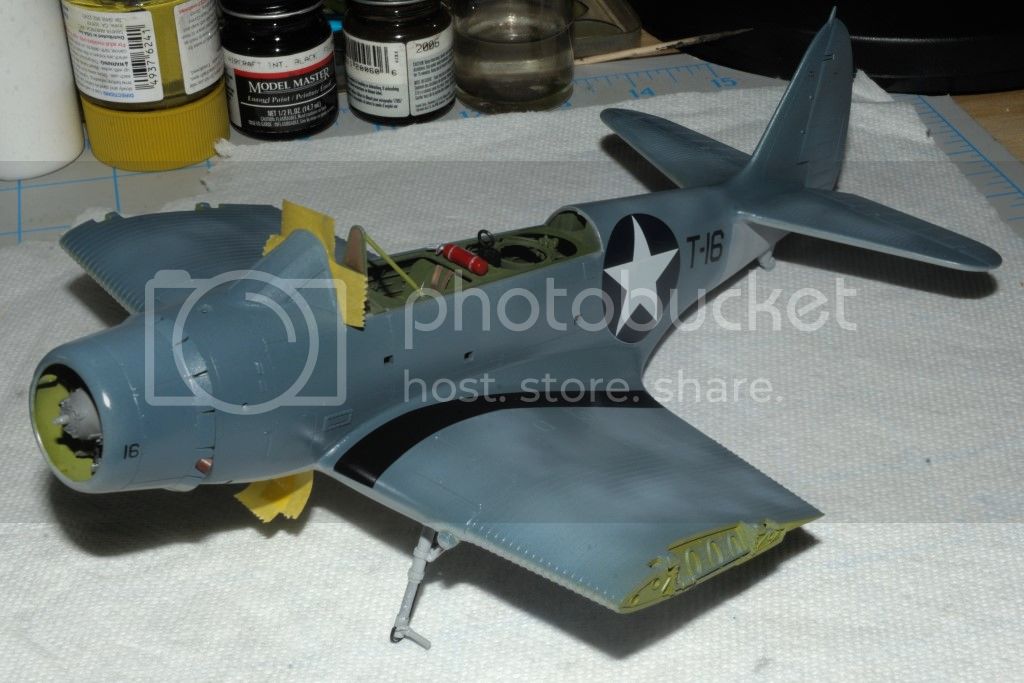
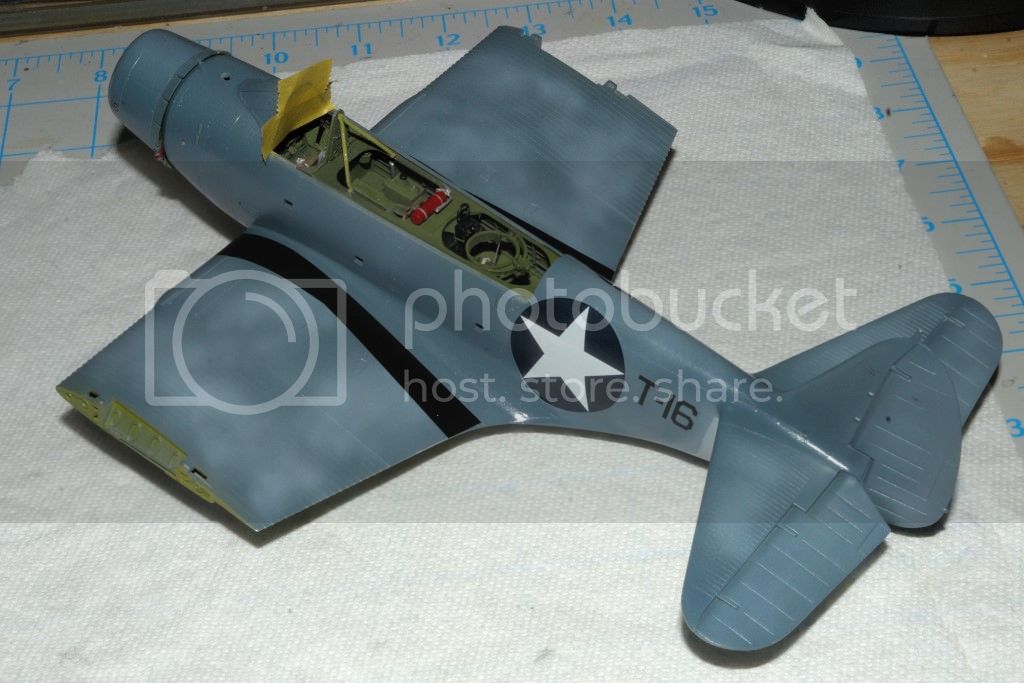
When the paint had dried for a day, I coated all the surfaces by air brushing on a few coats of Pledge/Future. When dry, the decals were applied using the Microscale Set/Sol system. Kit decals were used, and I was really impressed with the quality of the GWH decals. Colors and registration were perfect, slightly glossy, and whatever glue they use, really sticks to the Pledge. moving the decals was an issue till I tried using a #5/0 brush that I slid under the decal. They then all moved quite easily. The following day when I checked the decals, they looked painted on as they just settled into all the recesses. The only issue I had was the circles & stars on the ribbed wings. Asking decals to conform to that undulation was always a major issue, that required much time and effort, and didn't always work out as one hoped it would. The GWH decals with just a good overcoat of Sol settled down just fine, with only a few spots that needed further work the following day. I used a needle to poke some holes so I could work the trapped air out, then Set on a Qtip with. A few spots did require another application of Sol, but the end result was near perfect.
A few more coats of Pledge/Future was air brushed on all surfaces, when dry, the weathering process started.
Started the weathering process the following day for the bottom of the aircraft with just Flory Dark wash to help tone down, stain, and created blackened panel lines.
The upper surfaces was process that I tested on one outer wing 1st.
Overall coat of Dark Flory wash
blotchy, uneven coat of light wash trying to follow the airbrush fading to some degree. In this case, close was good enough.
no matter how I tried to not get any light wash into the panel lines, I did that in many places. So I carefully applied a pin wash of MM enamel Black. A slight clean up with a Qtip dampened with Mineral Spirits worked just fine. Here's two pictures. The 1st is one outer wing weathered, with the other not weathered for comparison.
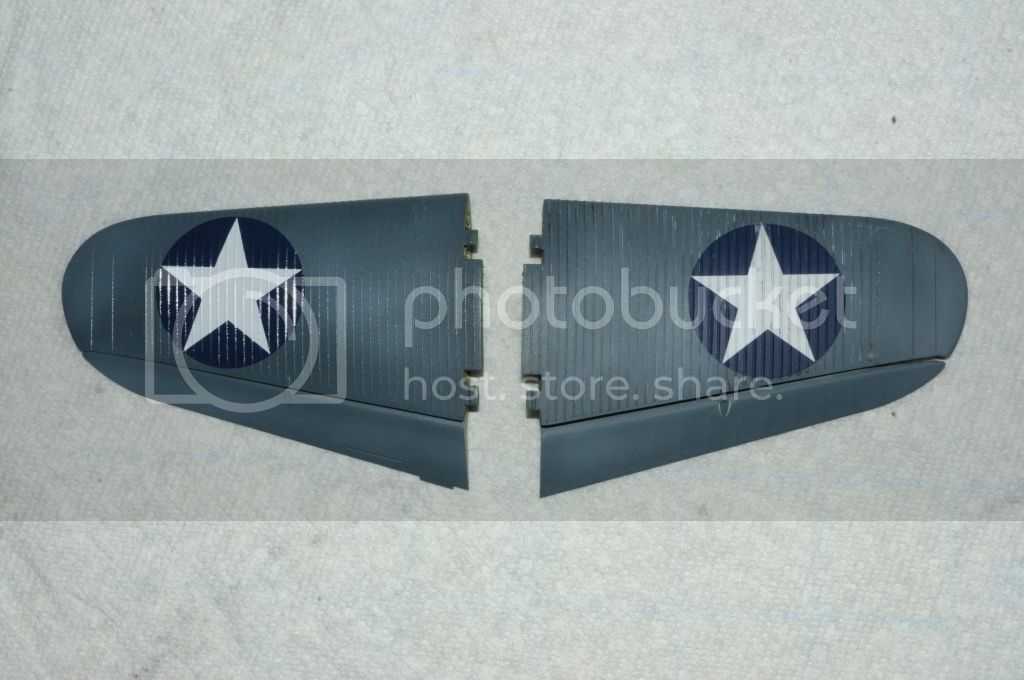
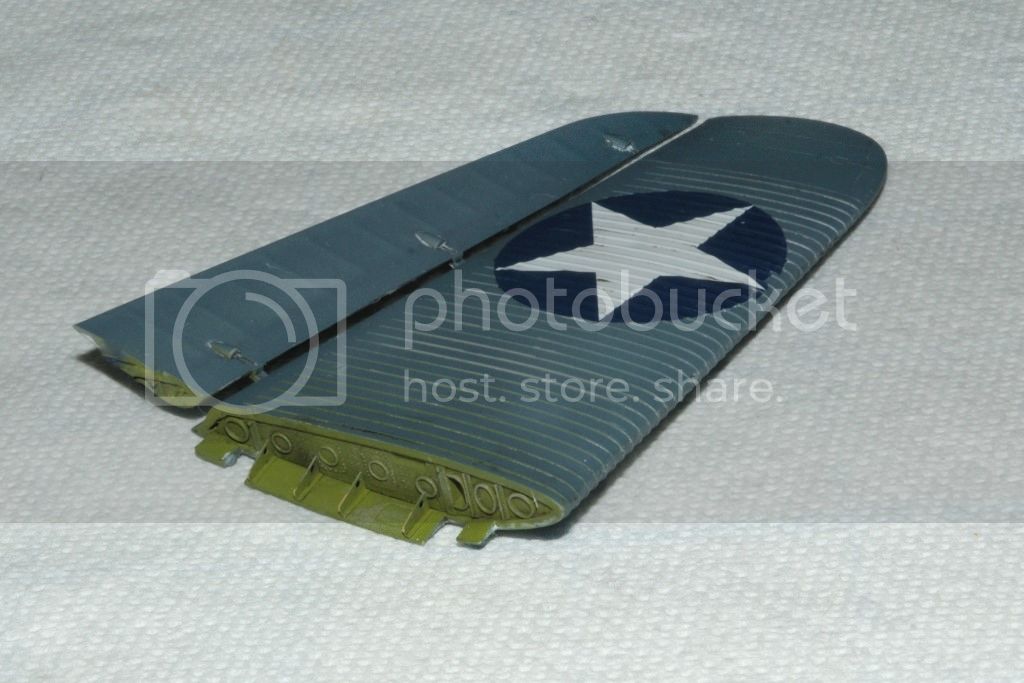
Thanks for stopping by and having a look.
Joel
I completed the painting stage except for the propeller and wheels. Mal, of Miracle Masks
https://www.facebook.com/miraclemasks
is making me a set of masks for the main wheels, as I prefer to airbrush the tires and the wheels. I must say that I'm really looking forward to trying them.
As with all my two tone USA Navy WW11 aircraft painted in the two tone Coral Sea/Midway scheme, I use Tamiya acrylics, custom mixed on the light side to help define fading due to the tropical sun and salt water.
Intermediate Blue/Gray is a 1:1 mix of FX 18 Medium Blue & FX19 Sky Gray with a few drops of FX-1 black.
Faded intermediate Blue/Gray is the above mix with FX-2 White added till it looked about right.
Light Grey undersides is a mix of FX-20 Medium Gray with a few drops of FX-2 White.
The fading usually wasn't uniform, so I over sprayed the Intermediate the Intermediate blue/gray with a the light shade in a random blotchy pattern.
When the paint had dried for a day, I coated all the surfaces by air brushing on a few coats of Pledge/Future. When dry, the decals were applied using the Microscale Set/Sol system. Kit decals were used, and I was really impressed with the quality of the GWH decals. Colors and registration were perfect, slightly glossy, and whatever glue they use, really sticks to the Pledge. moving the decals was an issue till I tried using a #5/0 brush that I slid under the decal. They then all moved quite easily. The following day when I checked the decals, they looked painted on as they just settled into all the recesses. The only issue I had was the circles & stars on the ribbed wings. Asking decals to conform to that undulation was always a major issue, that required much time and effort, and didn't always work out as one hoped it would. The GWH decals with just a good overcoat of Sol settled down just fine, with only a few spots that needed further work the following day. I used a needle to poke some holes so I could work the trapped air out, then Set on a Qtip with. A few spots did require another application of Sol, but the end result was near perfect.
A few more coats of Pledge/Future was air brushed on all surfaces, when dry, the weathering process started.
Started the weathering process the following day for the bottom of the aircraft with just Flory Dark wash to help tone down, stain, and created blackened panel lines.
The upper surfaces was process that I tested on one outer wing 1st.
Overall coat of Dark Flory wash
blotchy, uneven coat of light wash trying to follow the airbrush fading to some degree. In this case, close was good enough.
no matter how I tried to not get any light wash into the panel lines, I did that in many places. So I carefully applied a pin wash of MM enamel Black. A slight clean up with a Qtip dampened with Mineral Spirits worked just fine. Here's two pictures. The 1st is one outer wing weathered, with the other not weathered for comparison.
Thanks for stopping by and having a look.
Joel

Jessie_C


Joined: September 03, 2009
KitMaker: 6,965 posts
AeroScale: 6,247 posts

Posted: Monday, November 04, 2013 - 04:45 AM UTC
Now that's really nice!
Joel_W

Joined: December 04, 2010
KitMaker: 11,666 posts
AeroScale: 7,410 posts

Posted: Monday, November 04, 2013 - 04:54 AM UTC
Quoted Text
Now that's really nice!
Jessica, Why thank you.
Joel

Peterpools

Joined: June 08, 2013
KitMaker: 197 posts
AeroScale: 193 posts

Posted: Monday, November 04, 2013 - 05:35 AM UTC
JA
Impressive weathering and decal work. Sure looks good on my end.
Keep 'em coming
Bro
Impressive weathering and decal work. Sure looks good on my end.
Keep 'em coming
Bro
vanize

Joined: January 30, 2006
KitMaker: 1,954 posts
AeroScale: 1,163 posts

Posted: Monday, November 04, 2013 - 05:53 AM UTC
very nice! you might just have inspired me top get back to my TBD build.
Joel_W

Joined: December 04, 2010
KitMaker: 11,666 posts
AeroScale: 7,410 posts

Posted: Monday, November 04, 2013 - 06:25 AM UTC
Bro, thanks for the thumbs up. Still not in your league but getting there little by little.
Vance, Go for it. It's a great kit.
Joel
Vance, Go for it. It's a great kit.
Joel

Keeperofsouls2099

Joined: January 14, 2009
KitMaker: 2,798 posts
AeroScale: 2,443 posts

Posted: Monday, November 04, 2013 - 01:43 PM UTC
Good job sir 


Mcleod

Joined: April 07, 2010
KitMaker: 1,028 posts
AeroScale: 939 posts

Posted: Monday, November 04, 2013 - 04:49 PM UTC
I'm really liking your work on this, Joel. It's so inspired me, that I ordered the kit myself; the bomber version. 

Joel_W

Joined: December 04, 2010
KitMaker: 11,666 posts
AeroScale: 7,410 posts

Posted: Tuesday, November 05, 2013 - 04:54 AM UTC
Justin, thanks buddy.
And Ben, you won't be sorry, it's a fantastic kit. My only issue with it, is the same that I've read online about all the GWH kits, the masks. They really don't stick to compound curves very well, and many individual masks are to big.
Joel
And Ben, you won't be sorry, it's a fantastic kit. My only issue with it, is the same that I've read online about all the GWH kits, the masks. They really don't stick to compound curves very well, and many individual masks are to big.
Joel

AirLedge

Joined: July 26, 2007
KitMaker: 292 posts
AeroScale: 265 posts

Posted: Monday, November 11, 2013 - 08:59 AM UTC
Hi Joel,
Just spotted this build thread, some great stuff, well done. I've had my eye on this kit for a while now and your endeavors are making it look like a serious Xmas present contender
Just spotted this build thread, some great stuff, well done. I've had my eye on this kit for a while now and your endeavors are making it look like a serious Xmas present contender

Joel_W

Joined: December 04, 2010
KitMaker: 11,666 posts
AeroScale: 7,410 posts

Posted: Monday, November 11, 2013 - 09:24 AM UTC
Quoted Text
Hi Joel,
Just spotted this build thread, some great stuff, well done. I've had my eye on this kit for a while now and your endeavors are making it look like a serious Xmas present contender
Mike, you won't be sorry. It's one of the best models I've ever built straight out of the box.
Joel
Joel_W

Joined: December 04, 2010
KitMaker: 11,666 posts
AeroScale: 7,410 posts

Posted: Monday, November 11, 2013 - 10:00 AM UTC
The other day I received from Mal of Miracle Masks, 4 pages of 1/48 scale masks. Never having used any masks previously, I was really curious to see just how effective, and easy they were to use.
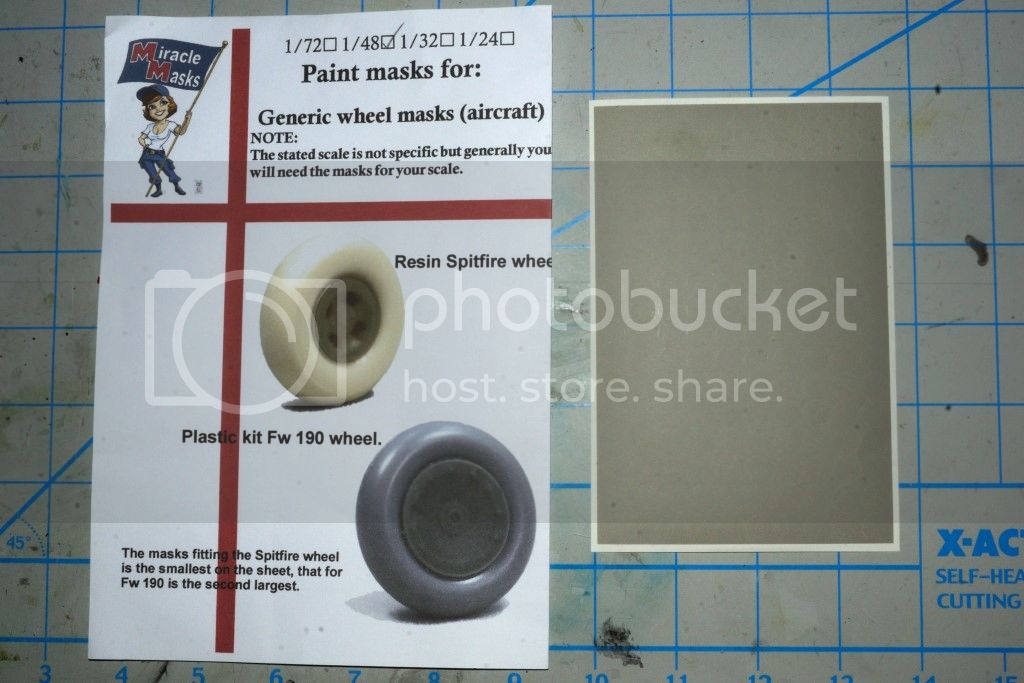
I went with the largest size mask, and was surprised to find that they're translucent, which makes exact placement fool proof. They stick very well to a painted surface, but didn't lift any paint off when I removed them.
You can see that the wheels/tires would be nearly impossible to paint without the use of masks.
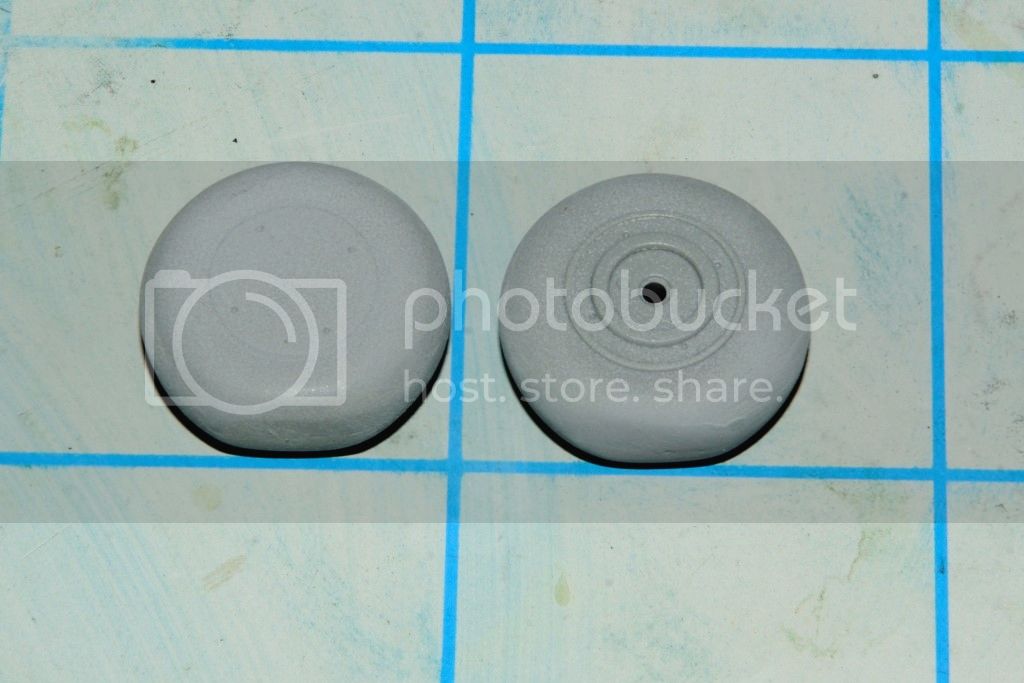
And here's the finished wheels, installed on the landing gear.
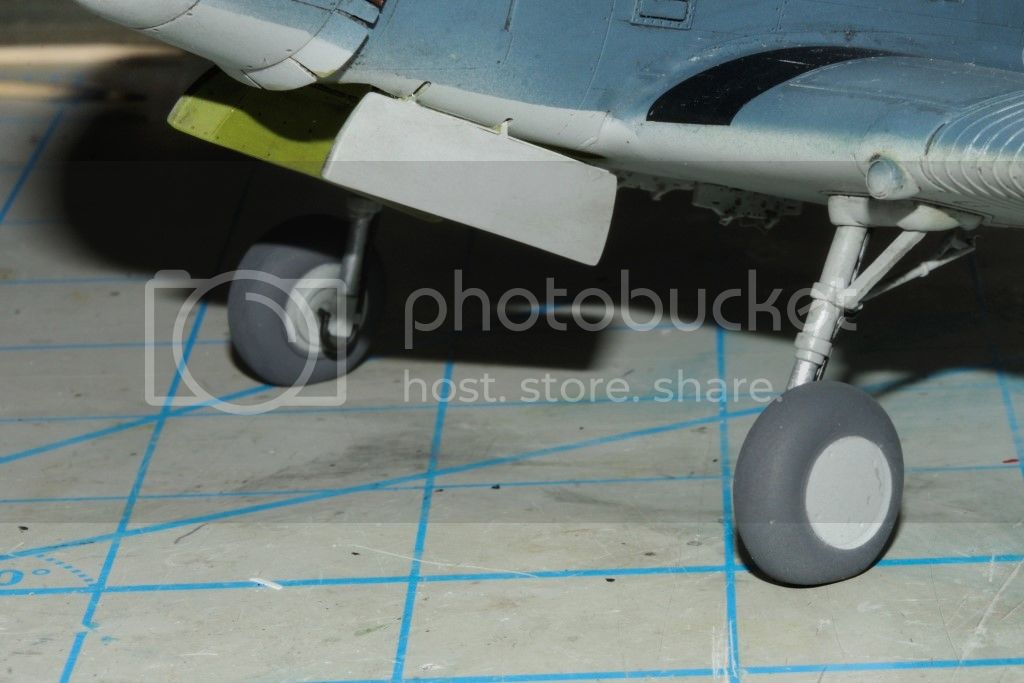
Joel
I went with the largest size mask, and was surprised to find that they're translucent, which makes exact placement fool proof. They stick very well to a painted surface, but didn't lift any paint off when I removed them.
You can see that the wheels/tires would be nearly impossible to paint without the use of masks.
And here's the finished wheels, installed on the landing gear.
Joel
Joel_W

Joined: December 04, 2010
KitMaker: 11,666 posts
AeroScale: 7,410 posts

Posted: Wednesday, November 13, 2013 - 09:58 AM UTC
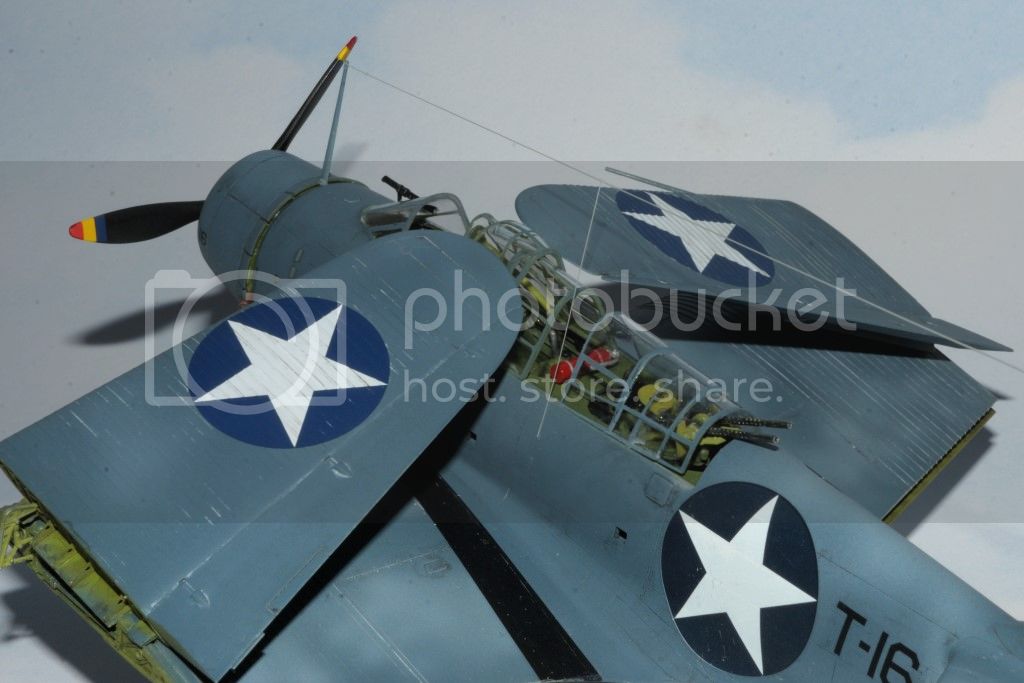
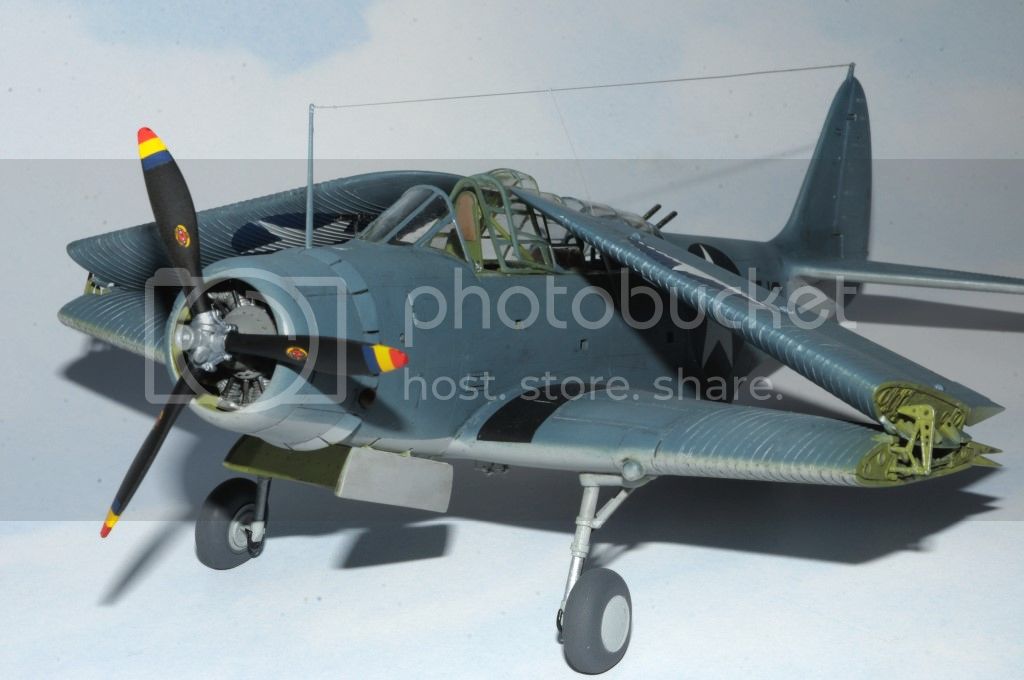
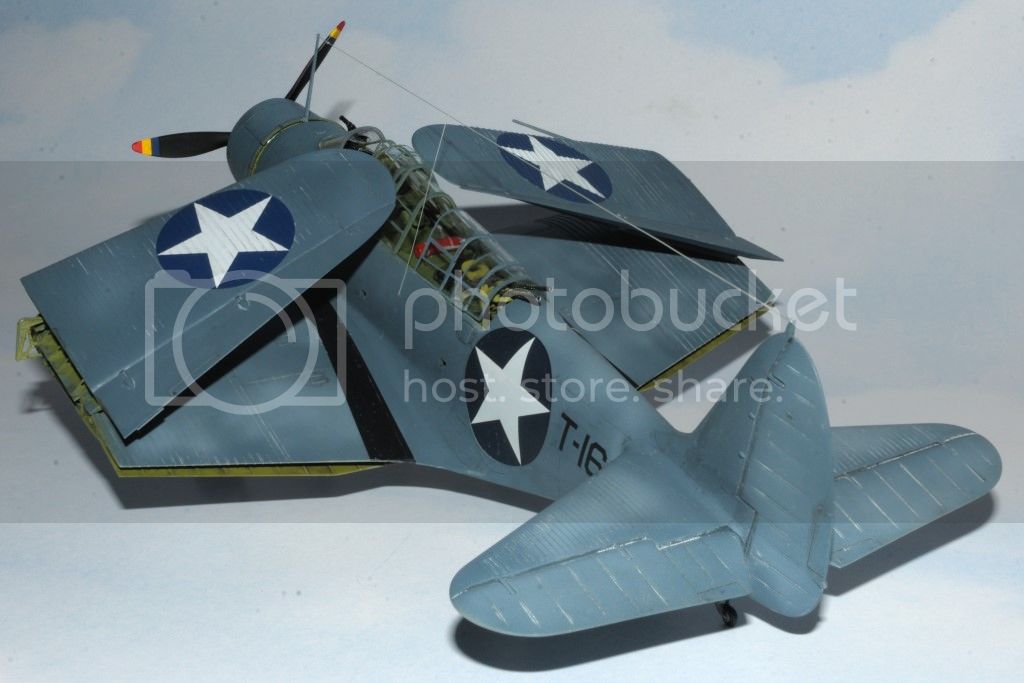
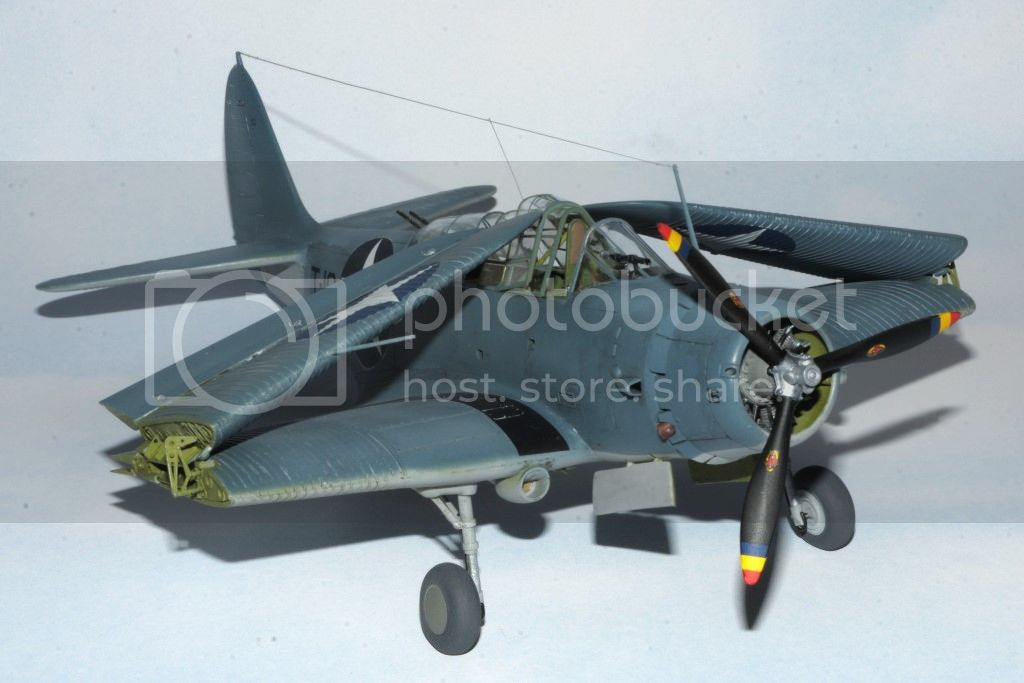
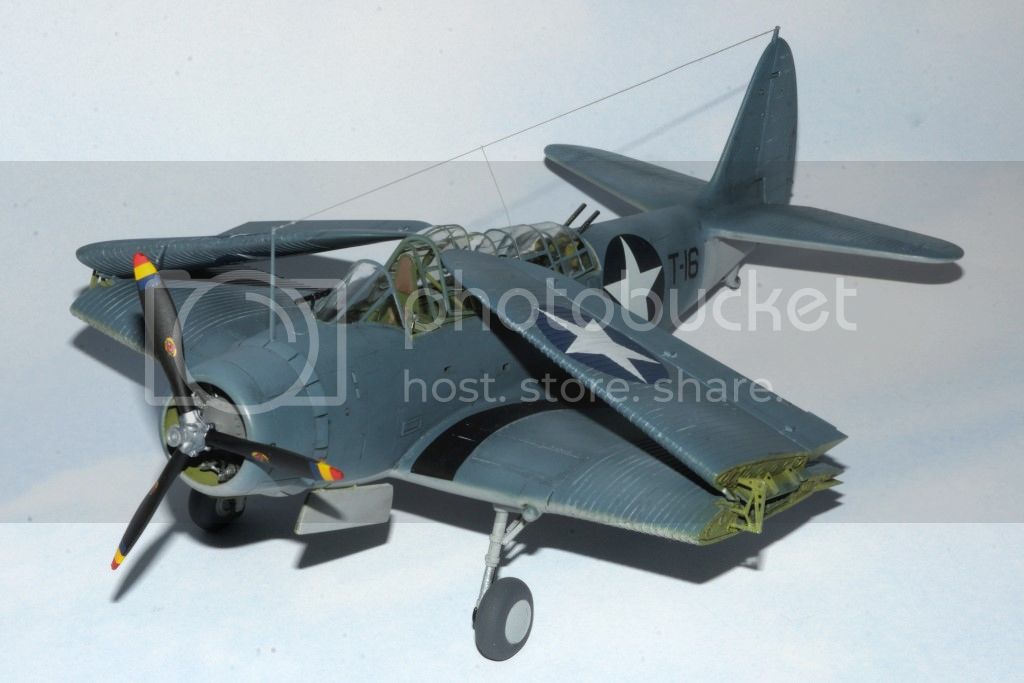
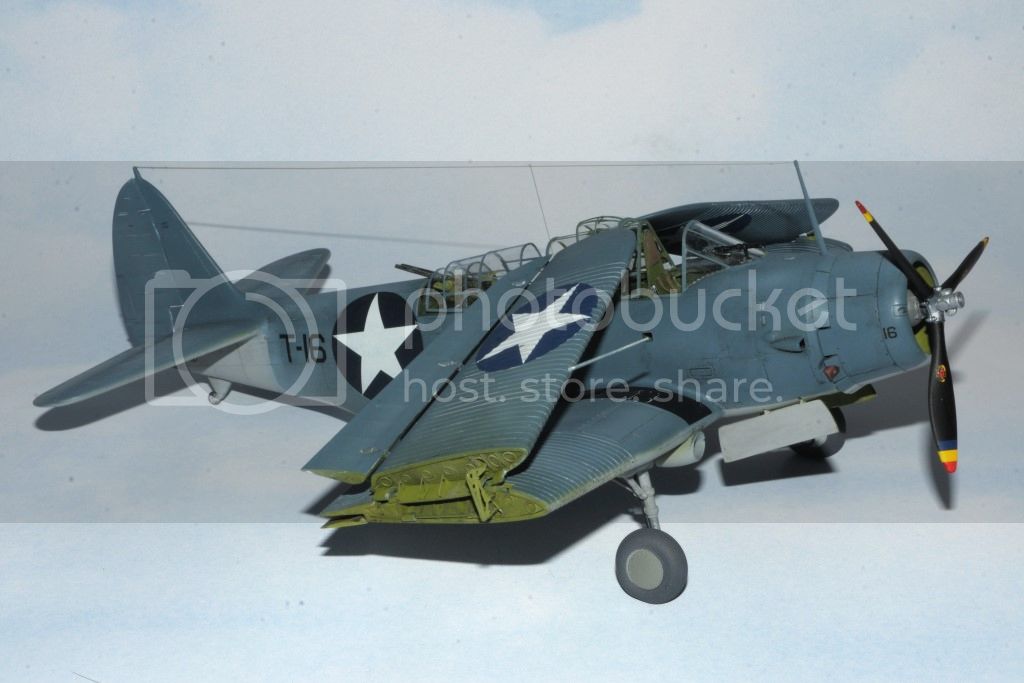
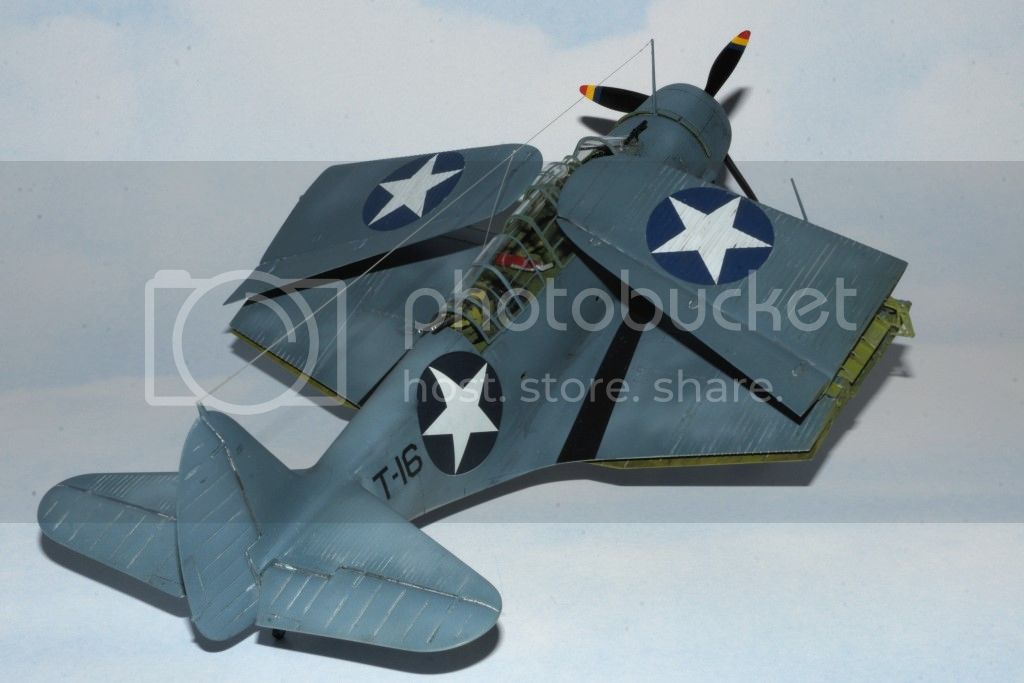
Well, today I finished my GWH 1/48 Scale TBD-1 Devastator, Midway version. The hardest part of the build was the last step, attaching and hanging the folding wings. GWH was smart enough to make the attachment folding mechanism out of white metal rather then plastic, as it's going to have to bear the load of the outer wings until I make the wing tip to fuselage brackets to further support them. Will be doing that in the next day or two.
After the Hasegawa 1/48 scale SBD-4 Dauntless build, the GHW TBD-1 Devastator certainly should be classified as state of the art. It's that good of a kit. All the parts fit, and are well detailed. The wing ribbing is exceptional, and caused no issues, which was something I was concerned about. Decals, with the use of the Microscale system, laid down without any problems over the wing ribbing.
What I felt fell far short in quality was the vinyl masks. Most were too large, cut to the wrong shape, and just didn't stick to the curved clear canopy sections. I thought about using the masks for the blue circles, and white stars, but the stars have rounded tips (?). So I went with the decals, and was very glad I did. Also the individual canopy sections are way to thick to stack. I ended up ruining a few of them trying to work around that issue. They also supply a one piece canopy, but cutting it up into the needed sections wouldn't solve my problem. I ended up ordering from the Squadron Shop the vacuum form canopy for the Accurate Miniature's kit, which worked out just fine.
Here's some pictures of the finished TBD-1.
Joel
 |


