_GOTOBOTTOM
World War II: Germany
Aircraft of Germany in WWII.
Hosted by Rowan Baylis
Eduard Bf110C-6 build
russamotto
_VISITCOMMUNITY
Utah, United States
Joined: December 14, 2007
KitMaker: 3,389 posts
AeroScale: 375 posts
Posted: Thursday, November 14, 2013 - 02:58 PM UTC
After doing an inbox review of this kit, I was anxious to get started with the actual construction. I am doing my best to follow the instructions exactly. I normally build straight out of the box, which in this case already includes all the extras. I am following the painting guide in the instructions, which may or may not be correct on the interior colors. Paints used are Model Master acrylics.

First step is to remove some of the fuselage from the front end underside, for later installation of the 30mm cannon. After that is assembly of the cockpit. Here is how the parts built up. I only lost a couple of small bits to the carpet.


As you can see, ModelMaster RLM 02 is not the same as that provided on the etch parts.

After the pilot's seat, the rear of the cockpit was assembled. The radio suite may not have been used in the C-6, but I stuck with the instructions and built it.


Up to this point, there were no fit issues and everything went along nicely. I did forget to fill the seams on the rear gunner's seat. The join seam will need to be sanded down, but no gaps occurred here.

Next up was assembly of the nose. The lower half was also cut out for the cannon installation. None of the internal assembly of the gun platform will be visible on my kit but I provided basic detail for this review. The upper half had some flash issues and odd blobs of plastic that I had to remove. I will need to touch it up, and fix some seams here.


At the same time I worked on the rear gun and ammo rack. I found an issue here as the instructions show placement of 6 ammo drums, apparently on 6 pins on the rack arms. I followed this instruction and found it a little challenging to get them to fit properly. The diagram showing installation of the actual assembled ammo racks shows five ammo drums per arm, which is correct, each going between the pins on the arms. This will allow the drums to sit squarely. There is also a small strap attached across the top of the drums. Also, there are two different mounts for the machine gun. One is for the stowed position, the other for it in firing position. You will note from the position of the locator pin which is which.


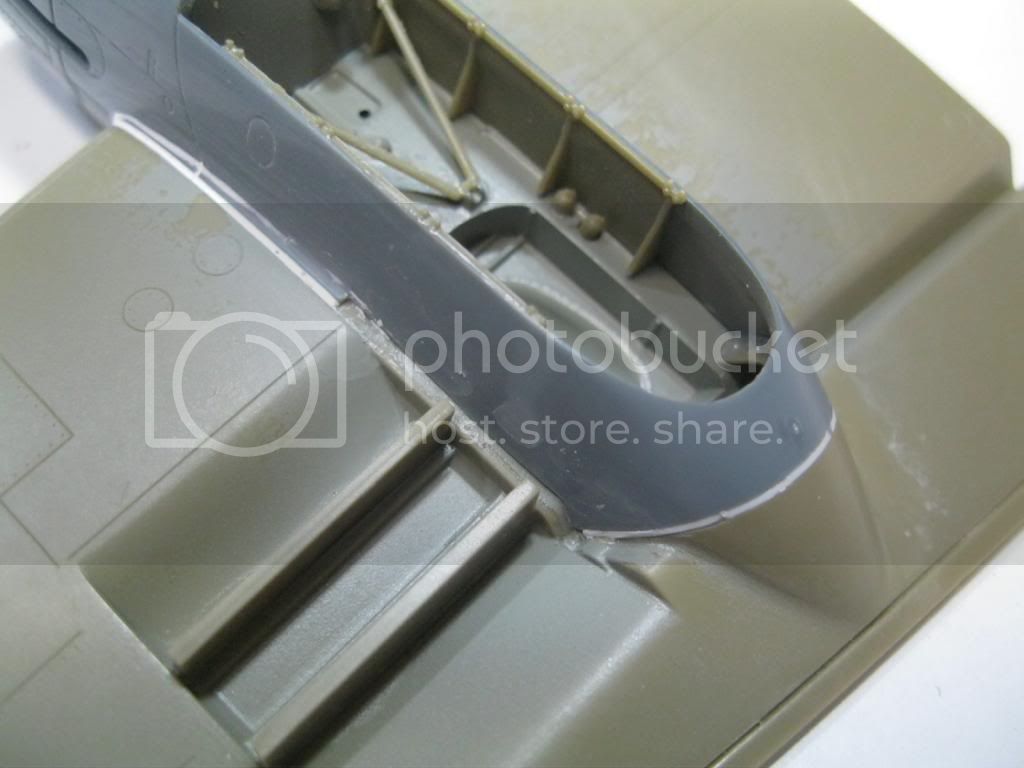
I assembled the engine nacelles and installed them on the wings. These parts will require some extensive filling as there are a number of gaps present. There was also some flash present on these parts that was missed in the in box. I will need to do some riveting and learn how to re-scribe panels properly.


I will fill the gaps before I attach the wings to the fuselage as they are easier for me to manage when separate. Tips or suggestions are most welcome.
Jessie_C
_VISITCOMMUNITY
British Columbia, Canada
Joined: September 03, 2009
KitMaker: 6,965 posts
AeroScale: 6,247 posts
Posted: Thursday, November 14, 2013 - 03:42 PM UTC
I may be teaching you to suck eggs, but outlining the areas around the nacelle joins with tape before filling will help to preserve the nearby detail.
Antoon3103
_VISITCOMMUNITY
Antwerpen, Belgium
Joined: March 31, 2012
KitMaker: 224 posts
AeroScale: 146 posts
Posted: Thursday, November 14, 2013 - 07:30 PM UTC
Russ,

off to a great start. I will follow with interest.
I have one of Eduards 110 in the stash, but never started it due to the poor fit of the engine nacelles and engine nacelle/wing joint.
I always hoped the Eduard would correct it in their later releases, but alas...
Anyway keep up the good work and maybe it will inspire me to start my 110 (the D that is).

Keep it up.

Tony
russamotto
_VISITCOMMUNITY
Utah, United States
Joined: December 14, 2007
KitMaker: 3,389 posts
AeroScale: 375 posts
Posted: Friday, November 15, 2013 - 01:14 AM UTC
Jessica, thanks for the tip. I remember hearing about it but I need the constant reminders.

Thanks, Tony. I have card stock that will fit, and some stretched sprue may do the job nicely as well. I'll need to get out the putty for a few areas. I'll post photos of what I do, regardless of my success or failure.
Joel_W
Staff MemberAssociate Editor
AUTOMODELER
_VISITCOMMUNITY
New York, United States
Joined: December 04, 2010
KitMaker: 11,666 posts
AeroScale: 7,410 posts
Posted: Friday, November 15, 2013 - 02:43 AM UTC
Russ, will be following along with interest,as I enjoy a well built OOB model, and how one over comes all the associated issues with the build. Never know when a new idea or technique comes up.

I've used the tape on either or both sides of areas to be puttied with mixed results. small seam lines work best. But when it's major putty time, I tend to use to much, and in the sanding process just destroy the tape and end up sanding the plastic as well. Also the final blending and polishing phases, I've found rather difficult to accomplish working with tape.

Joel
rochaped
_VISITCOMMUNITY
Lisboa, Portugal
Joined: August 27, 2010
KitMaker: 679 posts
AeroScale: 669 posts
Posted: Friday, November 15, 2013 - 03:12 AM UTC
Russ,

I have Eduard 110 C for the BoB period laying idle for a year or so, some 80% finished.
I have vivid memories of the hard work made to get a smooth finish on those engine nacelles.
I used large size tamiya tape placed some 2-3 out the gap, and even then some detail was lost and had to remade.

The C version had a small bump situated on top of the nacelles, along the air intake line. As far as I know no kit has such feature although it's clearly seen on photos. I made mine with milliput, easy deal.

Great build so far!

Cheers
Pedro
russamotto
_VISITCOMMUNITY
Utah, United States
Joined: December 14, 2007
KitMaker: 3,389 posts
AeroScale: 375 posts
Posted: Saturday, November 16, 2013 - 05:38 AM UTC
I revisited the "reading the seams" blog and read about Perfect Plastic Putty. I then read Darren Baker's review of it and it sounds like just what I need. I have some on order now which should arrive next week. Hopefully that will spare the kit from my heavy handedness. Whether right or wrong, I'll show how to do it.
CMOT
Staff MemberEditor-in-Chief
ARMORAMA
_VISITCOMMUNITY
England - South West, United Kingdom
Joined: May 14, 2006
KitMaker: 10,954 posts
AeroScale: 290 posts
Posted: Saturday, November 16, 2013 - 06:36 AM UTC
Russ I have been invited to the Deluxe Materials factory to see how their products are made and developed, i hope to go some time in the next couple of weeks. One thing that I was shown by them is to squeeze the putty out of the supplied tube and use it in a syringe with needle instead, this provides fantastic control over application and placement and makes clean up far easier, and in the belief that you have a cover for the needle it does not set in the needle. This method also prevents the wastage from using the nozzle supplied as other than putting a nail or pin in the opening no cap is supplied.
russamotto
_VISITCOMMUNITY
Utah, United States
Joined: December 14, 2007
KitMaker: 3,389 posts
AeroScale: 375 posts
Posted: Saturday, November 16, 2013 - 07:19 AM UTC
Darren, thanks for the tip. That makes me wonder if some type of cake decorating device might work as they have to keep the icing fresh as well. I'll look for a suitable syringe.
CMOT
Staff MemberEditor-in-Chief
ARMORAMA
_VISITCOMMUNITY
England - South West, United Kingdom
Joined: May 14, 2006
KitMaker: 10,954 posts
AeroScale: 290 posts
Posted: Saturday, November 16, 2013 - 08:09 AM UTC
Just buy one at the chemist or in the UK at least some fishing tackle shops sell them to inject air into baits.
Ginger
_VISITCOMMUNITY
Jordan
Joined: March 15, 2004
KitMaker: 1 posts
AeroScale: 1 posts
Posted: Saturday, November 23, 2013 - 07:41 AM UTC
The gaps shown in the last pic can be helped a lot by shimming under the nacelle by 5 to 10 thou.
chukw1
_VISITCOMMUNITY
California, United States
Joined: November 28, 2007
KitMaker: 817 posts
AeroScale: 729 posts
Posted: Saturday, November 23, 2013 - 09:25 AM UTC
That looks fantastic, Russ! I've got three of these things and look forward to whacking them together some sunny day. I'll be using this thread as reference, for sure. Styrene shims beat putty any day for strength and speed- a little putty after the initial smoothing will finish out the job. Don't forget to use lengths of sprue fit across the inside volumes to push things into place. I did that with one of the wing roots in my Helldiver and it really fixed a big gap.
Holdfast
Staff MemberPresident
IPMS-UK KITMAKER BRANCH
#056
_VISITCOMMUNITY
England - South West, United Kingdom
Joined: September 30, 2002
KitMaker: 8,581 posts
AeroScale: 4,913 posts
Posted: Saturday, November 23, 2013 - 08:51 PM UTC
A nice start Russ, yes tape either side of a seem works wonders at saving detail. I actually apply the tape then the putty then remove the tape. This removes all of the excess putty leaving just a sliver filling the gap. I then apply more tape, butted up to the proud strip of putty and sand. Because there is only a thin strip of putty sanding takes no time at all and you don't need to apply very much pressure; you can therefore use a high grit paper so that you don't sand through the tape. For something like a fuselage to wing joint place the tape over the joint, cut the tape with a sharp blade, using the gap as a guide, remove the tape and do it a second time. Move these second cut pair apart just a smige, apply the putty, remove the tape, apply the first pieces that you cut, butted up to the putty, sand. You get a pretty much perfect seem without any loss of detail

I have some of the Delux "Perfect Plastic Putty" and it is interesting that the company advises decanting it into a syringe? Its expensive so no cap for the dispenser seems a bit mean! I have yet to use it but I have been told good things about it.
JohnVasco
_VISITCOMMUNITY
England - East Anglia, United Kingdom
Joined: July 27, 2008
KitMaker: 54 posts
AeroScale: 49 posts
Posted: Monday, November 25, 2013 - 12:43 PM UTC
Will your finished build be 2N+RH of 1./Erpr. Gr. 210?
JohnVasco
_VISITCOMMUNITY
England - East Anglia, United Kingdom
Joined: July 27, 2008
KitMaker: 54 posts
AeroScale: 49 posts
Posted: Tuesday, November 26, 2013 - 03:58 AM UTC
I said in the review thread that I would post up pics here of the damage to 2N+RH on 29th July 1940. Here's a scan of the page from my book on Erprobungsgruppe 210:

zipper104
_VISITCOMMUNITY
Milano, Italy
Joined: December 14, 2010
KitMaker: 6 posts
AeroScale: 5 posts
Posted: Tuesday, November 26, 2013 - 05:56 AM UTC
My rendering - 1/48 - of the C-6 last year using a Dragon D plus some scratch and vacuforming.

russamotto
_VISITCOMMUNITY
Utah, United States
Joined: December 14, 2007
KitMaker: 3,389 posts
AeroScale: 375 posts
Posted: Wednesday, November 27, 2013 - 01:56 AM UTC
Thanks all for the comments and especially the helpful tips.

John, thanks for the photos. I do plan on building that aircraft. Was it a write off or was it repaired and put back into service?

I have made slight progress this past week, and hope to have a few more photos to post soon.
JohnVasco
_VISITCOMMUNITY
England - East Anglia, United Kingdom
Joined: July 27, 2008
KitMaker: 54 posts
AeroScale: 49 posts
Posted: Thursday, November 28, 2013 - 05:01 AM UTC
Riccardo,
Excellent model! However you need to remove the rear central panel of the Bordfunker's canopy.

Russ,
I don't know what happened to 2N+RH after 29th July 1940. However I do have a photo of S9+RH, which would tend to indicate that 2N+RH was either scrapped, or sent to a repair depot.

Here's S9+RH:


Here's a view of 2N+RH showing the removed central rear canopy:


Here's a view of the panels around the 'trough' for the 30 mm. cannon, one of which appears not to be the same as for a standard Bf 110. Pilot is Uffz. Balthasar Aretz of 2. Staffel:


Hope the above helps.
zipper104
_VISITCOMMUNITY
Milano, Italy
Joined: December 14, 2010
KitMaker: 6 posts
AeroScale: 5 posts
Posted: Thursday, November 28, 2013 - 08:26 AM UTC
Thanks a lot John! I wanted to make a C6 since your very first book about Erprobungsgruppe 210 I purchased from you in 1993 !
I fullfilled my dream only in 2012!

I will modify the canopy asap. (quite interesting new photo endeed)
russamotto
_VISITCOMMUNITY
Utah, United States
Joined: December 14, 2007
KitMaker: 3,389 posts
AeroScale: 375 posts
Posted: Wednesday, December 04, 2013 - 06:28 AM UTC
Well, it is time for an update. If you are going to do it, do it big, for everyone to see. I used some plastic stock to fill in big gaps on the nacelles and gun cowling, and had to use a piece to fill in at the rear of the cockpit. Then applied putty to fill in gaps as carefully as I could. Added some primer to see how it worked, then patched and filled some more. The primer wipes away easily and I haven't cleaned everything up, but it looks better (at least to me) than how it was before. Some detail was still lost so I'll need to learn how to do rivets properly, although this was minimalized by tape, and crudely using a pin to indent those I was afraid of losing a little more, as well as pre-scribing some panel lines for the same reason.


This is where the plastic shim was used to fill in the gap. I had pre-assembled and painted the part per the instructions. My skills aren't as advanced, but I am learning.


Putty on this side.


It was a fight getting the nose assembled in the first place, with a lot of trimming and fitting. Then attaching it here, the nose sat a little high.


The underside had a slight recess right at the joining edge that my sanding of the seam line enhanced. Putty again to make it level.


The engines look ugly with the primer half wiped off. The top join is still off-the gray engine assembly sits lower than the tan wing by just a bit, but enough to notice.


I am using 800 and 2000 grit paper and a couple of flexible nail files with buff and shine surfaces. These are a four sided block and have worked well in the past for polishing sanded surfaces, but the block I used here left some deep scratches. Time now to carefully clean up the panel lines and fix some rivets, and do another primer test. Again, any help is most appreciated.

alpha_tango
_VISITCOMMUNITY
Germany
Joined: September 07, 2005
KitMaker: 5,609 posts
AeroScale: 5,231 posts
Posted: Wednesday, December 04, 2013 - 06:43 AM UTC
For a short moment I thought about telling you not to close this one:


now I am sad I did not. The flap bulge is "sliding" into the nacelle when dropped ...

all the best

Steffen
russamotto
_VISITCOMMUNITY
Utah, United States
Joined: December 14, 2007
KitMaker: 3,389 posts
AeroScale: 375 posts
Posted: Thursday, December 05, 2013 - 01:41 AM UTC
Thanks, Steffen. I will need to carefully rescribe there as well. The gap was large, and on one side there was a step where the two halves of the engine nacelle were uneven, but it would have been much easier if I had left some room.

I should have two of every kit-one for learning on, and one for getting right, or at least better.
Joel_W
Staff MemberAssociate Editor
AUTOMODELER
_VISITCOMMUNITY
New York, United States
Joined: December 04, 2010
KitMaker: 11,666 posts
AeroScale: 7,410 posts
Posted: Thursday, December 05, 2013 - 03:47 AM UTC
Russ, nice job filling those gaps with sheet, then a little putty. No one would guess that it's your 1st attempt using sheet plastic as a filler.

Wish I could give you some expert advice on re-scribing, but I'm still terrible at it. For something that I keep on reading is an easy fix, it drives me nuts. I make more mistakes then I fix, time after time.

Joel
russamotto
_VISITCOMMUNITY
Utah, United States
Joined: December 14, 2007
KitMaker: 3,389 posts
AeroScale: 375 posts
Posted: Thursday, December 05, 2013 - 07:04 AM UTC
Thanks, Joel. Thats pretty much where I am. I have a couple of flexible rulers and masking tape. I am surprised no aftermarket company has come out (that I know of) with a set of tips for making the various small access panels, latches and other odd sized surface details that seem to frequently get lost. Of course, I have repeatedly proven that nothing is idiot proof.
Jessie_C
_VISITCOMMUNITY
British Columbia, Canada
Joined: September 03, 2009
KitMaker: 6,965 posts
AeroScale: 6,247 posts
Posted: Thursday, December 05, 2013 - 07:22 AM UTC
There have been various scribing templates available over the years with hatches, doors and the like. Verlinden did one of the earliest ones back in the '80s and they're still available.
 _GOTOTOP