Start Here (for Beginners)
This forum is for younger modelers or people just starting out in the hobby.
This forum is for younger modelers or people just starting out in the hobby.
Hosted by Jim Starkweather
Aircraft paint review
vicmeister

Joined: October 03, 2013
KitMaker: 22 posts
AeroScale: 19 posts
Posted: Saturday, December 07, 2013 - 03:23 AM UTC
Hi, I have been out of the hobby for a long time, am retired, and would like to review my understanding for painting 1/144 aircraft. 1st coat- primer. 2. lightest color 3. darker color 4. Camo if needed 5. Gloss coat for decals 6. Flat coat over decals. Is this correct? Thanks

Mcleod

Joined: April 07, 2010
KitMaker: 1,028 posts
AeroScale: 939 posts

Posted: Saturday, December 07, 2013 - 03:54 AM UTC
Quoted Text
1st coat- primer. 2. lightest color 3. darker color 4. Camo if needed 5. Gloss coat for decals 6. Flat coat over decals. Is this correct? Thanks
Theoretically speaking, your sequence thoughts are sound. There are as many variations as there are paints, though.
For weathering purposes, I've taken to like putting down a metal coat enamal immediately after a quality primer coat (provided were talking aluminum). Then I put down the acrylic top colors, camo or solid.
I've had no issues with conflicting paint compositions, provided I allow sufficient dry time. I even have laquers under acrylics in some cases.
This allows for using a thinner dampened Q-tip to gently rub top coat colors, exposing the under-lying silver color.
I believe this has more realistic effect than dabbing silver onto the topcoat.
Most weathering should fit in between your steps 5 & 6.
Posted: Saturday, December 07, 2013 - 07:03 AM UTC
Hi Vic,
Welcome!
Ben gave you good council. If you have further questions, post again and/or PM an individual.

Welcome!

Ben gave you good council. If you have further questions, post again and/or PM an individual.

Posted: Tuesday, December 10, 2013 - 04:20 AM UTC
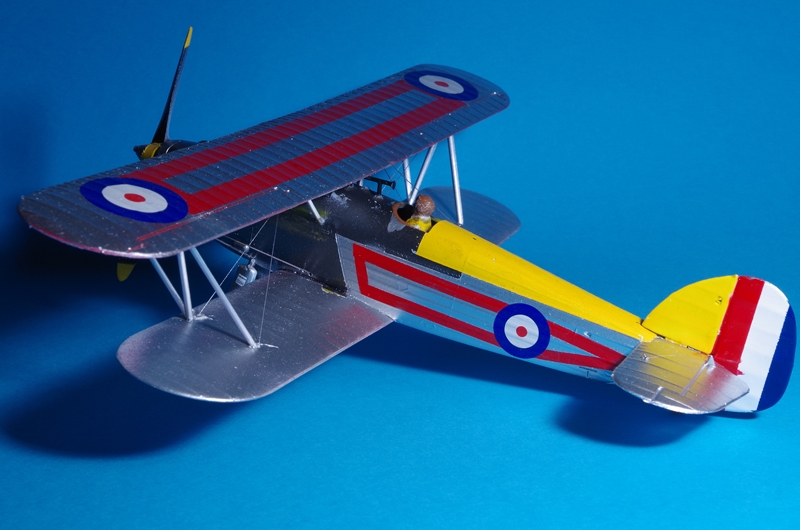
Broadly right but watch for odd combinations, just done an IAF Tempest should have painted al black, masked tips and stripes paint all silver, did it the hard way. Doing a Hawker Fury No 1 Sqn, paint sequence was primer, black laquer, NMF finish, mask NMF,rudder white, mask rudder, yellow (lightest) mask yellow, red all over(mask stripes), silver all over, remove rudder tip mask, rudder blue, decals.
I have used inkjet decal paper to alter the serial to K2065. The clear decal paper is only good for dark colours but it is another way of remarking kits.

Touching in and clear coat to follow.
I have used inkjet decal paper to alter the serial to K2065. The clear decal paper is only good for dark colours but it is another way of remarking kits.

Touching in and clear coat to follow.
Joel_W

Joined: December 04, 2010
KitMaker: 11,666 posts
AeroScale: 7,410 posts

Posted: Tuesday, December 10, 2013 - 05:52 AM UTC
Vic, welcome back to the hobby. Just started semi retirement 3 wks ago. I love it, my wife hates it. 
While I don't build 1/144 scale aircraft, your decaling sequence doesn't follow the accepted profile.
Gloss coat: most use a Future based acrylic finish these days.
Decal
Gloss coat over decals to blend the decals in so that they look like they were painted on.
Weathering, etc.
Joel

While I don't build 1/144 scale aircraft, your decaling sequence doesn't follow the accepted profile.
Gloss coat: most use a Future based acrylic finish these days.
Decal
Gloss coat over decals to blend the decals in so that they look like they were painted on.
Weathering, etc.
Joel
 |


