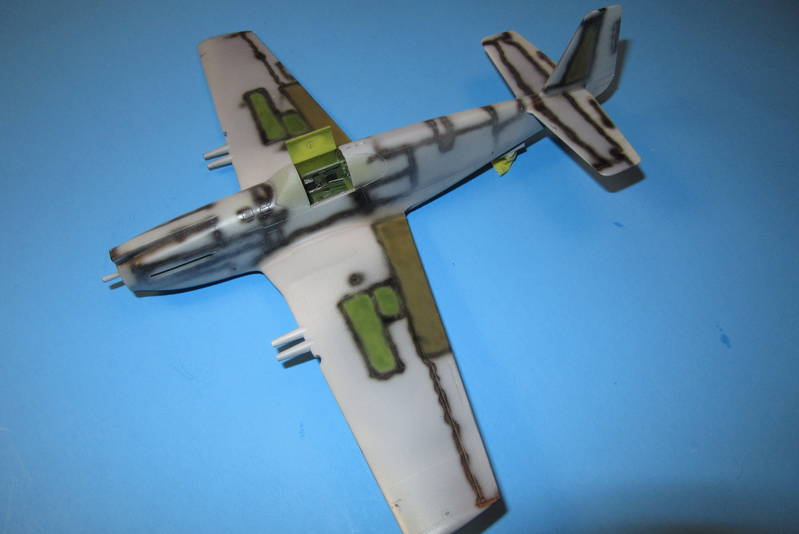
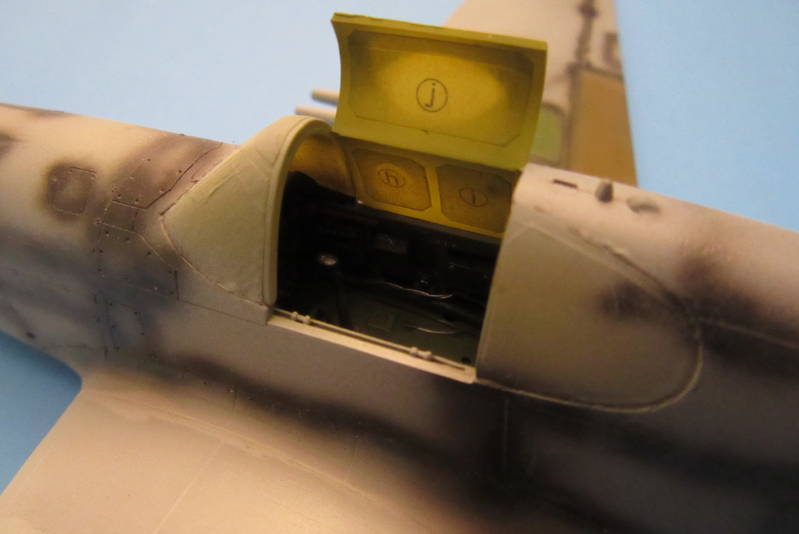
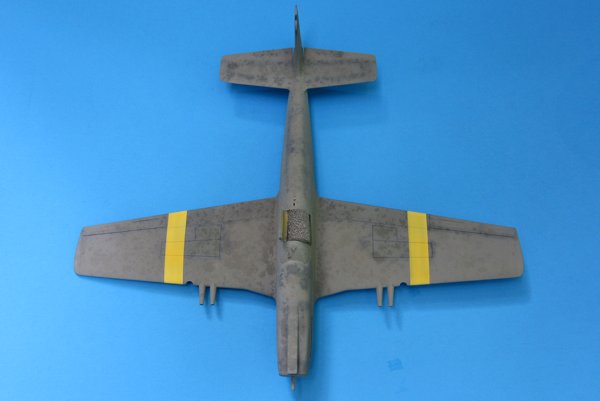
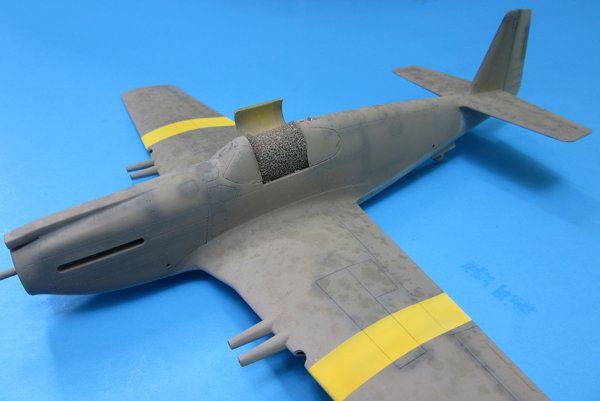
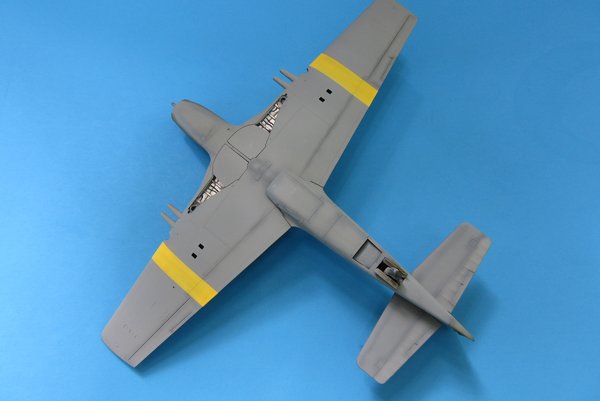
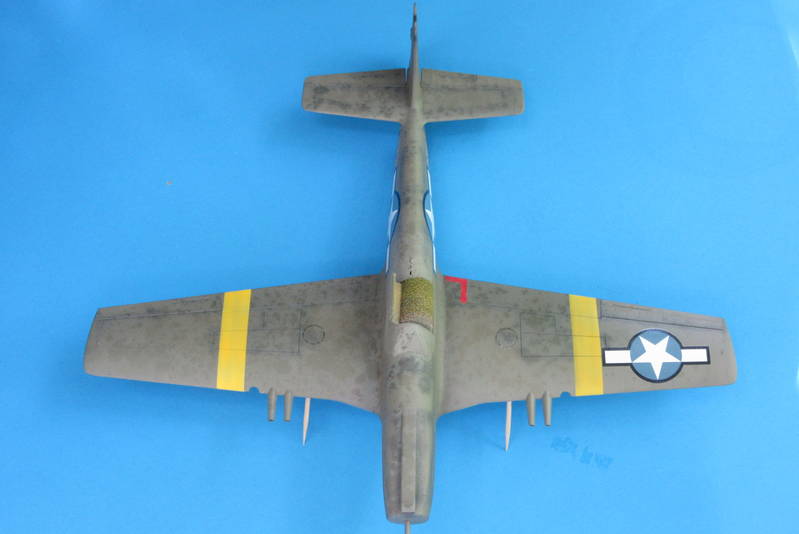
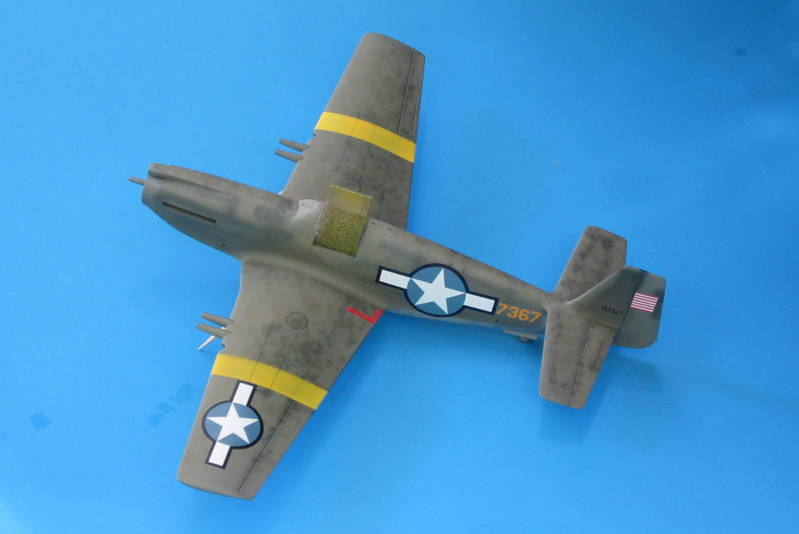
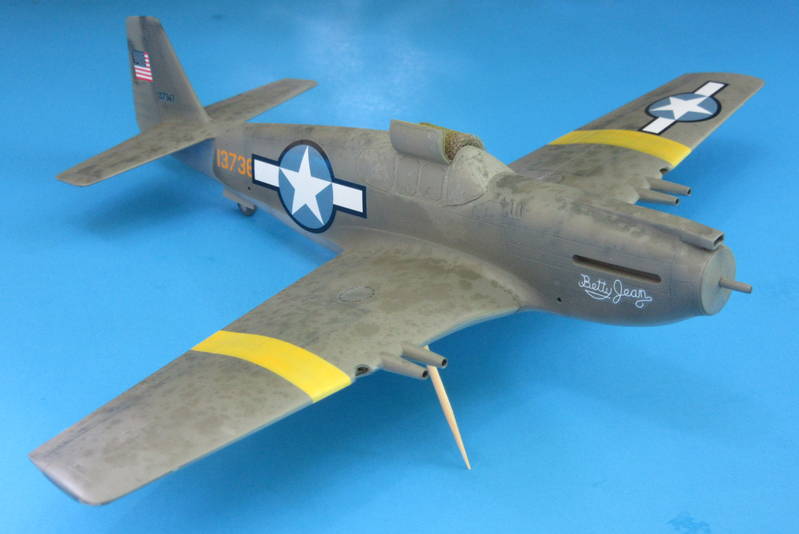
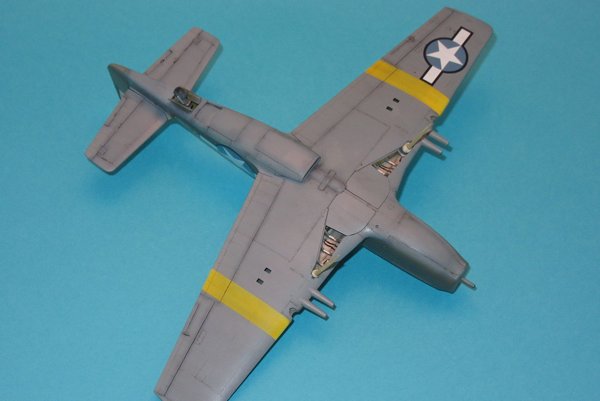
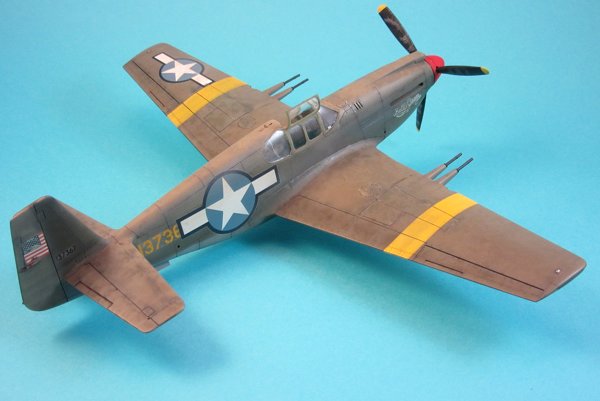
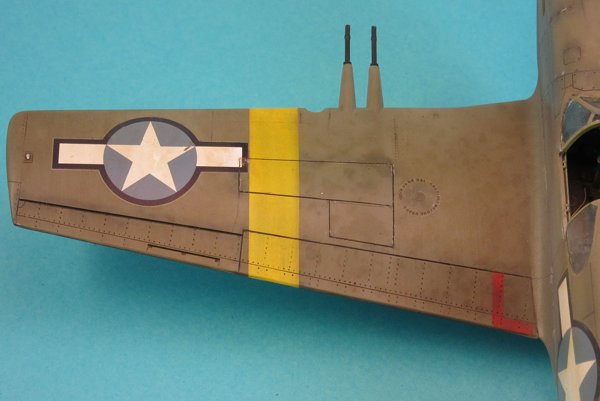
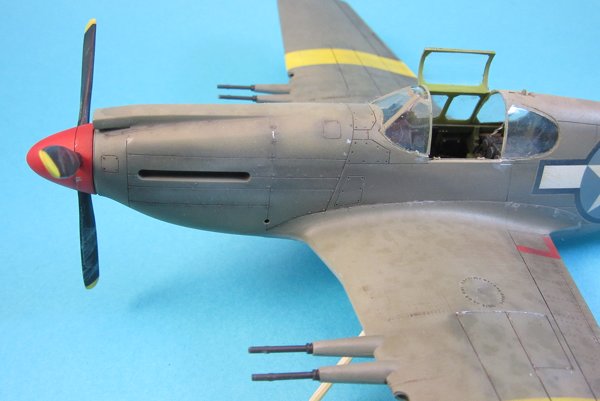
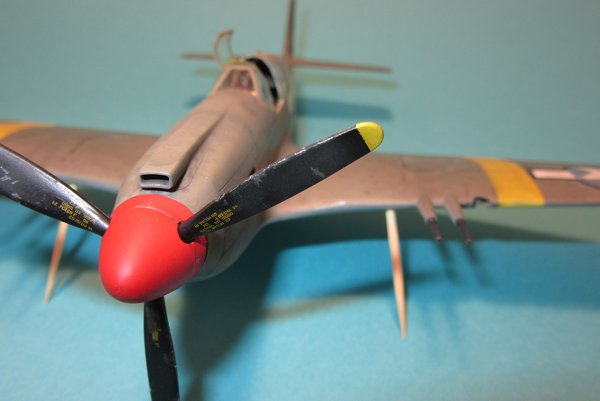
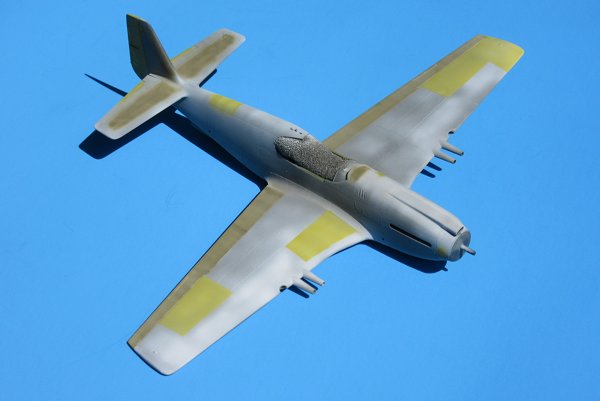
I got the seams fixed up and then pre-shaded and primed her with Tamiya white and medium gray misted on all surfaces. I sprayed a few panels with zinc chromate or olive drab to give the final paint some color differences, it should help to break up the monochrome OD / NG scheme. I noticed two small areas on the spine that I need to fix, and then it dawned on me that I had completely forgotten to fill the wing panel lines in. It's a Mustang, there shouldn't be panel lines in the wings other than the ammo bays! I debated forgetting about it and just continuing on with the paint job, but given the work I've already put into her I am going to fix the wings. No sense in being impatient now.
Pre-shading all done when I realized the panels lines were not filled. Oops!
More to come soon...
Pre-Flight Check
Constructive critique of your finished or in-progress photos.
Hosted by Jim Starkweather
AM P-51 'Betty Jean' build
Posted: Sunday, June 01, 2014 - 04:24 AM UTC
Joel_W
Associate Editor
New York, United States
Joined: December 04, 2010
KitMaker: 11,666 posts
AeroScale: 7,410 posts
Joined: December 04, 2010
KitMaker: 11,666 posts
AeroScale: 7,410 posts
Posted: Sunday, June 01, 2014 - 04:47 AM UTC
Paul,
Your pre-shading panels and flying surfaces is a brilliant idea. I'm going to have to steal this one from you. As for your decision to go back and refill the wing panel lines, you're certainly doing the right thing, as they were filled to aid in air flow over them. Just not sure which version they actually started doing this.
Joel
Posted: Tuesday, July 08, 2014 - 01:14 PM UTC
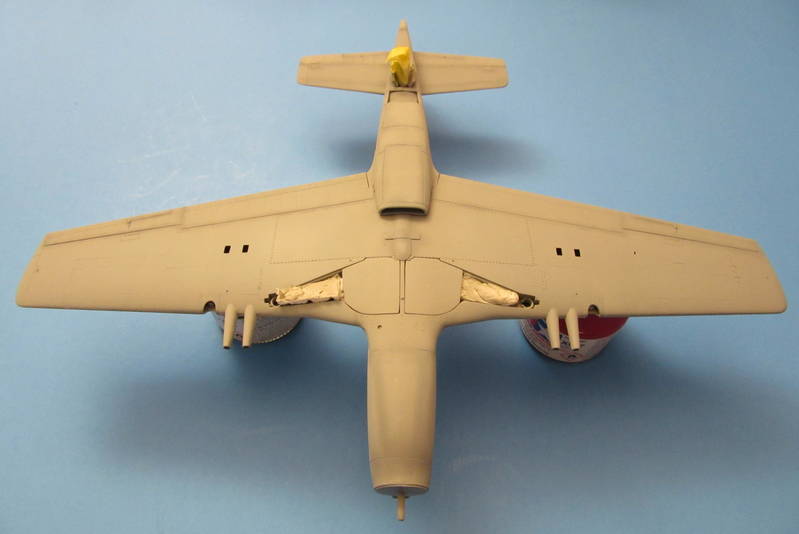
I went back and stripped the wings then filled in the panel lines. According to the Valiant Wings reference, all mustangs had the wings puttied so even an early P-51 shouldn't have panel lines on the wings. While I was busy with Mr. Surfacer 500 I came across an error on AM's part. The ammo bays on the kit are molded wrong for all but a few early prototypes. The large doors were done away with almost immediately and replaced with smaller ones at the back on the wing. I used the schematics from Valiant Wings to eyeball new doors and scribed them in, albeit a little heavy handedly. Once this was done I went back to painting. I primed it with Testor's light grey enamel primer decanted from a rattle can, and added some green to make the ammo doors stand out later.
Everything cleaned up and once again coated with primer. The green makes the new ammo doors obvious.
On an odd note, AM's other cannon-armed P-51 kits (the Mustang Mk.Ia and F-6A) both feature the correct ammo bay doors for the production version of the aircraft. I'm not sure why they modeled the prototype doors for this kit. If you have aftermarket decals you could avoid cutting up your wings by using those kits instead to build a P-51.
I had trimmed and sanded the vac canopy down to fit properly but in the end took the "easy" way out and sourced an open canopy from my old Tamiya P-51B kit. This should have been an easy step but it wasn't. Tamiya's canopy is a tiny bit smaller than AM's and will require filling a gap. Rather than just using card stock and adding a little to the canopy, I was dumb and thought I's use CA glue to fill the gap. This was not my best decision. I am now stuck sanding the CA glue and trying to make everything look smooth without scratching my glass up. I shouldn't have been a chicken and tried to use the vac canopy first, I doubt it would have been this difficult.
Tamiya P-51B canopy, the "easy" way out. There is a gap about 0.5mm at the aft end of the center section which I filled with CA. I'll try to get a better pic to show the consequences of my bad decisions.
The one bright spot in my last couple of sessions, I laid done the preshading and the Neutral Grey on the underside. At least that went well!
The bottom is painted. I'm halfway there right?
I split my time between working on this, the PBJ-1D for the Bomber Campaign, and decaling my Eduard Spitfire that has been sitting around painted for about 2 months now. I'm taking my time with the P-51 to prevent myself from getting annoyed when I make mistakes. I am at least learning a lot of things from my trial and error improvements to the basic kit. We're supposed to have fun while we learn better skills after all.
More to come this weekend. I'll get pics of my canopy up so feel free to offer input on ways to fix it.
Joel_W
Associate Editor
New York, United States
Joined: December 04, 2010
KitMaker: 11,666 posts
AeroScale: 7,410 posts
Joined: December 04, 2010
KitMaker: 11,666 posts
AeroScale: 7,410 posts
Posted: Thursday, July 10, 2014 - 03:31 AM UTC
Paul,
Sanding CA glue around a canopy calls for hands much steadier then mine. The NeutralGray with pre-shading looks great. Really looking forward to your OD topside.
So far this build is up to your high standards.
Joel
Sanding CA glue around a canopy calls for hands much steadier then mine. The NeutralGray with pre-shading looks great. Really looking forward to your OD topside.
So far this build is up to your high standards.
Joel
sweaver
Kentucky, United States
Joined: April 19, 2007
KitMaker: 759 posts
AeroScale: 184 posts
Joined: April 19, 2007
KitMaker: 759 posts
AeroScale: 184 posts
Posted: Thursday, July 10, 2014 - 09:22 AM UTC
Very nice work Paul. I've got the P-51A that I hope to build in a CBI scheme, so I'll be following your blog with interest.
Great work so far.
Great work so far.
Posted: Thursday, July 10, 2014 - 01:24 PM UTC
Thanks for the encouragement Samuel and Joel.
I went back to the bench today and figured out a way to fix the canopy, or at least clean it up. I debated just tearing it out totally and starting over but I wanted to avoid that if I could. Here's my problem...
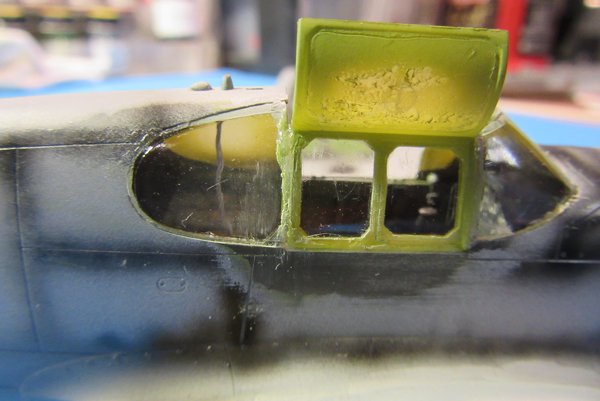
This pic shows the CA mess that resulted from trying to fill the gap at the back edge of the canopy side.
When I originally masked it, I used some old Tamiya P-51B masks on the inside and Parafilm M on the outside. This was the first kit I had tried masking with Parafilm, but I am sold. It was much, much easier than my old method of Tamiya tape. I will be sticking to Parafilm from now on unless the kit includes its own masks, or unless I have to use CA accelerator on the canopy...
When I filled the gap with thick CA and hit it with accelerator I was a tad overzealous with the accelerator. It cured the CA no problem at all but it also seemed to turn my Parafilm into goop. Like instantly. I scraped the goopy Parafilm all off, which is what you see in that pic.
You can see where I scratched it trying to sand down the CA. I set it aside after I made all of those scratches, and came back to it today with more patience. To avoid scratching it up worse, I ran Tamiya tape down the vertical edges and then hit it with a coarse sanding stick. That seemed to do the trick, I managed to smooth out that CA mess without doing any more damage. After I cleaned up the canopy seams to my satisfaction, I remasked the outside with Parafilm but this time I put on two layers just to be safe and got ready to paint.
I came across an SBD build that has one of the best faded paint jobs I have seen: http://www.arcair.com/tnt1/101-200/tnt158-weathering-Saltydog/00.shtm
I am going to try something similar here, except with enamels and in OD instead of blue. I will be using 4 shades of OD sprayed in thin layers. It will take a while but in the end it should look really great. I sprayed Model Master OD along the bottom demarcation line for the camouflage and on the fuselage sides where "Betty Jean" wouldn't have seen as much sun fading. I also hit the tail with a thin mist.
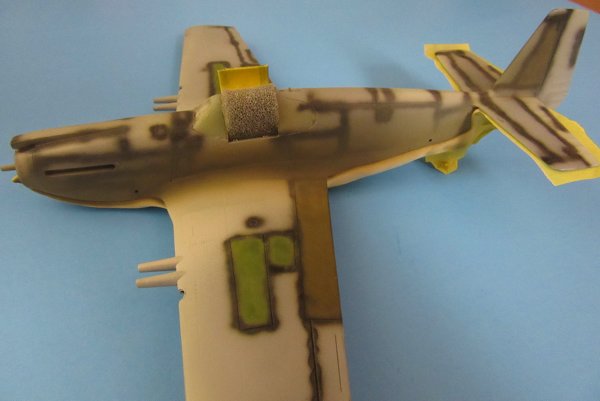
The first layer of paint laid down. Model Master enamel, FS34087 Olive Drab. I did not add any white for scale effect like I normally would.
I set her aside and mixed up the next color, Faded OD. I sprayed this on in a thin mist along the upper sides of the fuselage and on all horizontal surfaces. I kept misting it on until I was satisfied with how the preshading bled through.
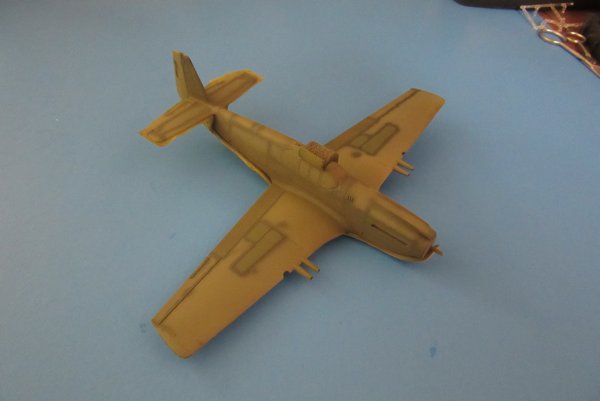
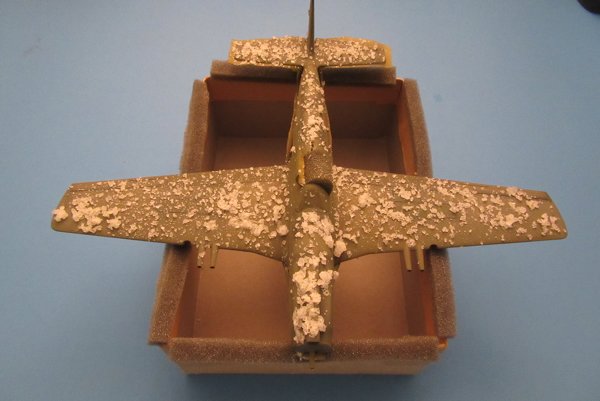
Second layer of paint down. I will let this cure for a couple of days before I start the salt weathering for the third layer.
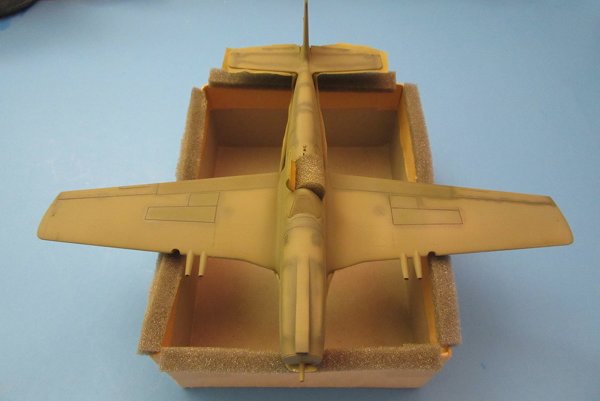
Front view after the second shade of OD was applied and I set her in my ultra high-tech drying stand. The next two layers will be cut with white to really get a blotchy fade effect on the upper surfaces.
So far, so good. The canopy won't look as great as it could have, but hopefully the paint job will come out looking first rate.
Joel_W
Associate Editor
New York, United States
Joined: December 04, 2010
KitMaker: 11,666 posts
AeroScale: 7,410 posts
Joined: December 04, 2010
KitMaker: 11,666 posts
AeroScale: 7,410 posts
Posted: Friday, July 11, 2014 - 02:05 AM UTC
Paul,
1st and foremost, just a outstanding SAVE !! You put way too much time into this build not to keep it at your high standards.
Next time you run into an issue similar to what you just had, try using an acrylic putty like Vallejo white putty. I use it for small seams and problem areas where the final result will have the seam still showing. I apply it so it's slightly higher then the surface, and let it dry. When dry I just rub across it with a damp (plain old water) Q-tip, and the excess just comes off. I usually have to do 2 or 3 applications, but I don't have to sand.
Really liking your paint and new technique. It's basically how I do my paint fading of late. It takes time, but the results are realistic, and it's easy to do. What's more you can go back and redue any areas for the effect you want as often as you want. No waiting for paint to dry for a day or so, which is another big plus.
Joel
Posted: Friday, July 18, 2014 - 11:59 AM UTC
I ended up doing 3 coats with salt masks, cutting the OD with a little more white each time. The last coat I added a little chrome yellow to bring out some brown, but it's pretty hard to tell.
Funny thing, my wife was fixing steaks for me to grill and wanted to know if I had seen the salt... She was amused at least.
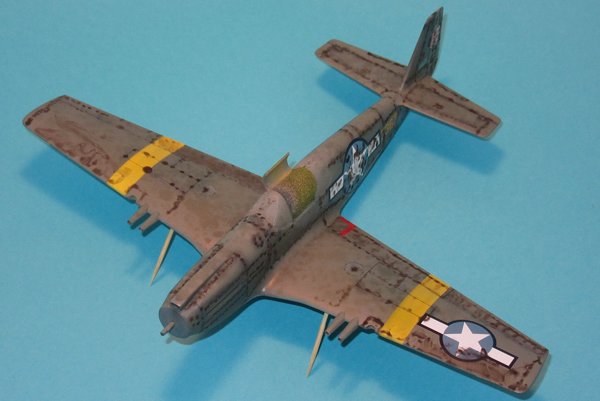
Three successive coats of salt and faded OD later, I masked and added the yellow MTO bands as well.
Closer in to show the blotched paint better. The pre-shading still shows through, but just barely.
The underside looking rather clean in comparison to the top.
I am pretty satisfied with the end result of the salt weathering. I do wish I had chosen to use a darker base coat like plain Olive Drab instead of Faded OD, the added layers are really faded now. Once I get her decals on and washed, I will do a final pass with a really thin mix of OD to blend everything together a little better.
I am going to polish the paint with some soft cotton to smooth and soften the finish, then give it a couple of coats of Future to prep for decals.
I really liked the results of the salt weathering, I will be adding that one to my book of tricks especially when I do some early Pacific birds.
Joel_W
Associate Editor
New York, United States
Joined: December 04, 2010
KitMaker: 11,666 posts
AeroScale: 7,410 posts
Joined: December 04, 2010
KitMaker: 11,666 posts
AeroScale: 7,410 posts
Posted: Saturday, July 19, 2014 - 02:18 PM UTC
Paul,
The salt technique really worked well. I still haven't tried it, but after seeing how yours turned out, I'm really thinking of trying it out on the A-6E for a little more variation of the faded upper surfaces.
Joel
The salt technique really worked well. I still haven't tried it, but after seeing how yours turned out, I'm really thinking of trying it out on the A-6E for a little more variation of the faded upper surfaces.
Joel
Posted: Monday, July 21, 2014 - 12:22 PM UTC
I buffed the paint out with an old tee shirt and then sprayed her with a coat of 80/20 Future / Tamiya X-20A to prep for decals. I have had issues with straight Future fisheyeing lately so the X-20A helps prevent it. Once that had cured I started with decals. I left most of the data stencils off, the Eagle Strike instructions show placement for P-51B stencils but not a P-51. I debated using them anyway but given how much weathering I intend to add it seemed wasteful to guess which were used only to cover them up; I saved them for a P-51B kit. In the end I went with serial numbers, wing fuel cap stencils, and data blocks on the prop blades. I have plenty of reference pics showing data blocks on the Curtiss Electric three blade prop, but not one pic showing the logos. I did mine the same way.
Eagle Strike's national insignia are done to represent the changes to Betty Jean from early '43 when she went to war until '44 when she is depicted. They changed from the plain star and circle, to added white bars, to added red surround, to the final star and bar with blue surround. The decals show oversized, faded stars and circles with added white bars and fresh insignia blue meant to represent the overpainted red surround. One the one hand they look really odd compared to most US insignia, but on the other it should make weathering them easier since the centers are pre-faded.
I masked and painted the red "no step" area on the inner edge of the port flap. The decal was bright fire engine red and looked really out of place with the faded paint.
After I buffed the paint out some I was much happier with the salt weathering effect.
I'll tone down the decals with my final post-shading, especially the flags on the replacement rudder.
She is finally coming together. I have some more painting to do yet: another coat of Future to seal the decals; post-shading to blend everything together a bit; panel line wash and adding stains/exhaust; a final coat of Dullcote to finish her off.
I may darken the MTO bands on the wings with a little red, I am thinking the color should match the serial numbers on the fuselage.
Once I have those things done it will be time for the little bits and pieces. I still need to drill out the wheels and paint/detail the landing gear. But it's getting there at last...
diseasedspawn
Florida, United States
Joined: September 22, 2012
KitMaker: 97 posts
AeroScale: 30 posts
Joined: September 22, 2012
KitMaker: 97 posts
AeroScale: 30 posts
Posted: Monday, July 21, 2014 - 05:17 PM UTC
Excellent build so far. Excited to follow
Your dressmakers pin idea for the landing lights is genius! I am never satisfied with landing lights on any plane I build. They always look fake. Yours look realistic. I should be able to adapt the technique so thanks.
I also use a base coat of metalizer and I use acrylics. Not much problem of peeling but I am in love with Tamiya tape. Also, do you wash the kit in soapy water before building to get the mold release off? Also, I wash my kit with a soapy paper towel then a dry one right before I paint. After that first application I wear nitryl gloves whenever I touch it. I am paranoid about finger prints, oils, or hair. I do a light wash before each painting.
I do wanna put my two sense in about colors. My father was military so I have been around well used tanks and vehicles, and I have spoken with quite a few Vets about colors. My assessment is that you will never get the right color because each vehicle changes the moment it leaves the factory. There are even differences if the planes were sprayed with two different barrels of the same color. An individual plane can have two different colors if they tech didn't stir the barrel up enough before starting it. The color gets darker the closer it gets to the bottom I just aim for colors that LOOK right.
Finally, please explain the salt technique in detail!!!!!!!! I have attempted it. I have read about it. But always turns into a colossal mess! A tutorial or a DETAILED (like all the steps between the steps) would be appreciated.
Keep up the good work!
Your dressmakers pin idea for the landing lights is genius! I am never satisfied with landing lights on any plane I build. They always look fake. Yours look realistic. I should be able to adapt the technique so thanks.
I also use a base coat of metalizer and I use acrylics. Not much problem of peeling but I am in love with Tamiya tape. Also, do you wash the kit in soapy water before building to get the mold release off? Also, I wash my kit with a soapy paper towel then a dry one right before I paint. After that first application I wear nitryl gloves whenever I touch it. I am paranoid about finger prints, oils, or hair. I do a light wash before each painting.
I do wanna put my two sense in about colors. My father was military so I have been around well used tanks and vehicles, and I have spoken with quite a few Vets about colors. My assessment is that you will never get the right color because each vehicle changes the moment it leaves the factory. There are even differences if the planes were sprayed with two different barrels of the same color. An individual plane can have two different colors if they tech didn't stir the barrel up enough before starting it. The color gets darker the closer it gets to the bottom I just aim for colors that LOOK right.
Finally, please explain the salt technique in detail!!!!!!!! I have attempted it. I have read about it. But always turns into a colossal mess! A tutorial or a DETAILED (like all the steps between the steps) would be appreciated.
Keep up the good work!
Posted: Tuesday, July 22, 2014 - 12:53 AM UTC
Thanks for the comments Mark.
For the salt weathering I followed the technique in the link I posted for the most part. I can't take any credit for his ideas but I can give a more in depth explanation of exactly what I used and how I implemented his techniques for my build. I'll try to get that done in the next few days when I can find time. I am really happy with the result personally, if a little intimidated to try it out for the first time and risk ruining my model.
I am a big fan of surgical gloves myself. I wash my kit sprues in the sink with soapy water and let them air dry, then I repack everything in the box. Once I wash and dry them, I make it a point not to touch the plastic again unless I am wearing the gloves. I have never had issues with paint adherence doing this so I stick to what has been working. I will normally decide which kit is "on deck" to be built next and wash the plastic while I am still working on my current project. It keeps the assembly line moving. I am one of those people who like to have several projects going, so I try to keep a couple of kits prepped in case I want to work on something else for a bit.
I was going to try Ben's Alclad chipping method but decided to go with a silver pencil to keep it simple this time and try that on something I want to really focus showing wear on, like maybe a Zero. I hear what you are saying about not worrying over paint matching, I just feel I need to darken the MTO bands a little. They contrast too much with the serials. I should have used Insignia Yellow for them, I used straight Tamiya XF-3 Yellow. It doesn't have to be perfect, but my OCD will kick in if I don't make it a little closer to the serials.
More to come soon hopefully...
Joel_W
Associate Editor
New York, United States
Joined: December 04, 2010
KitMaker: 11,666 posts
AeroScale: 7,410 posts
Joined: December 04, 2010
KitMaker: 11,666 posts
AeroScale: 7,410 posts
Posted: Tuesday, July 22, 2014 - 01:35 AM UTC
Paul,
I'm truly impressed with your over painting coupled with the salt weathering technique, as well as your perfect application of decals. The results certainly speak for themselves. Not sure I agree with matching the wing yellow bands to the serial numbers. They look a little too orange in the picture, but photos do lie as the light fads off. Chrome Yellow is darker from Red being added, but certainly looks yellowish.
Interesting that you dilute Future/Pledge with X20-A as this is the 1st time I've heard of it being used. Just about everyone uses Windex-D. Will certainly test it out as I have quite a lot of X20-A just laying around since I switched to Tamiya's Yellow top lacquer thinner for thinning their acrylics. I still use Windex to clean my airbrush. Are you doing the same or cleaning with Alcohol?
I never bother to wash any plastics before or during the build process, as I just get them dirty for sanding, and handling. Once I'm ready for paint, I do clean everything with 70% Iso Alcohol. I try to wear white cotton gloves as I hate having my hand or hands in those vinyl gloves. I've tried and like the surgical roll on fingers, which work great, are very easy to put on and take off, and your hand doesn't sweat. What's more they're dirt cheap at any drug store.
Joel
Posted: Tuesday, July 22, 2014 - 02:34 AM UTC
Thanks Joel.
About the Future mix, I started out spraying it cut with alcohol at about 20ish p.s.i. This made it dry quicker but I needed to do a few coats to get good coverage. Later I tried spraying it straight, but that led to fisheyes or pooling even if I dialed back the pressure some. Lately I have been misting it on in that 80/20 mix at about 15 p.s.i. I have been very happy with my coverage doing it this way. It may not even be as much as 80/20, maybe more like 90/10. I just eyeball it and add "a little" X-20A.
For airbrushing, I have an Iwata that I just love. My Badger was nice but that silly vinyl bushing for the needle gave me fits and I benched it. I typically clean acrylics with alcohol and enamels with white spirits Joel, and when I finish for the day I like to run a little laquer thinner through to get out anything stubborn I may have missed.
I am hoping that after I finish the post shading the serials will not contrast as badly with the theater bands. They are indeed rather orangish-yellow at the moment. A light misting over them may help. For some reason my brain just insists they should be similar when I look at them, no matter how much I tell myself otherwise. OCD meets AMS, maybe?
Posted: Friday, July 25, 2014 - 12:12 PM UTC
Ran into another small snag of my own creation. The decals did not want to snug down over the panel lines very well despite hitting them twice with MicroSol. Genius me, I decided to give it a third try with MM decal solvent and a hair dryer. This resulted in some very tiny wrinkles in a couple of decals after they dried out. I debated trying MicroSol again to see if they would smooth out but decided they were so small I could just live with them. After spraying them with Future to seal everything I did the panel line wash.
The underside with panel lines accented.
Upper surfaces waiting to be wiped down. Notice the beading.
I decided to switch up my wash to oils instead of enamels. Unfortunately I haven't quite gotten my mix to that sweet spot where it will just flow along the lines. Maybe I should have waited to try a new medium! Accurate Miniatures' panel lines are also a bit narrow which doesn't help either. I did the wash for my Eduard Spitfire IX at the same time using the same mix, and it went much smoother so it wasn't all my fault.
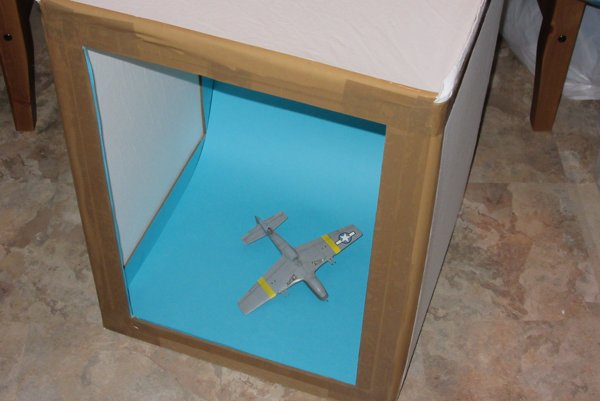
I also took a little time to build a DIY photo booth following plans posted in the photography forum thread. I think I spent a total of $10 on materials, I just need to get another light for it. Excellent information in there by the way.
Cheap but extremely effective DIY photo booth.
She's almost done. Filters, dullcote, and fiddly bits to go yet.
Joel_W
Associate Editor
New York, United States
Joined: December 04, 2010
KitMaker: 11,666 posts
AeroScale: 7,410 posts
Joined: December 04, 2010
KitMaker: 11,666 posts
AeroScale: 7,410 posts
Posted: Saturday, July 26, 2014 - 01:07 PM UTC
Paul,
the bottom really looks good. Panels lines turned out quite nicely. As for the top, it's in that real ugly duckling stage. Can't wait to see your follow up pictures with the excess wash rubbed off.
Your paint booth is quite impressive. Just might have to build one myself.
Joel
the bottom really looks good. Panels lines turned out quite nicely. As for the top, it's in that real ugly duckling stage. Can't wait to see your follow up pictures with the excess wash rubbed off.
Your paint booth is quite impressive. Just might have to build one myself.
Joel
Posted: Monday, July 28, 2014 - 02:07 PM UTC
Thanks Joel.
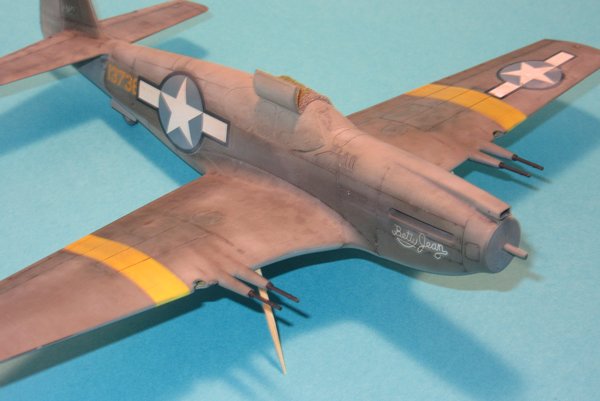
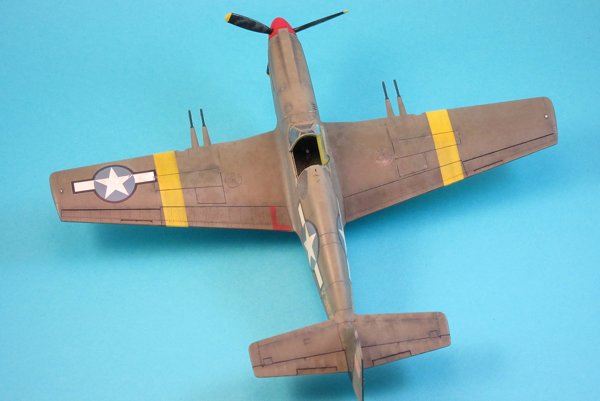
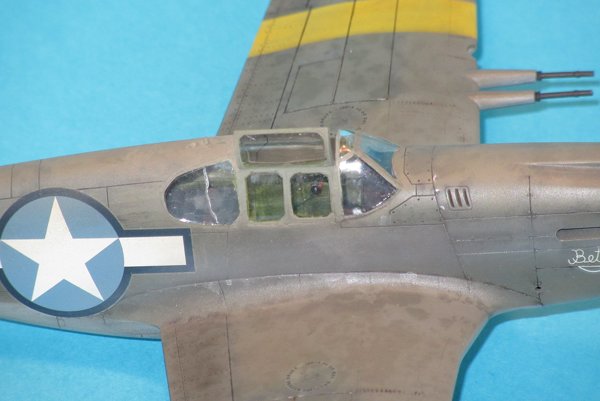
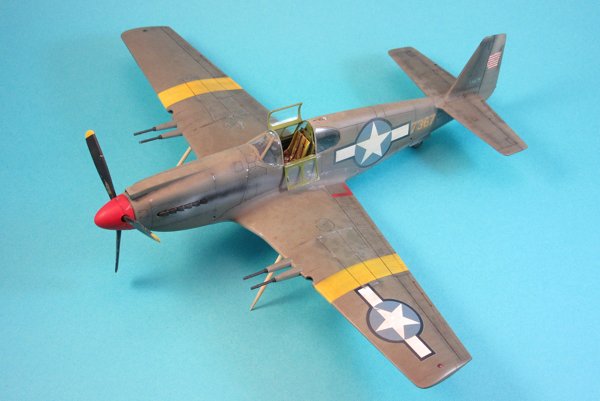
I managed to accomplish a lot this weekend, the paint job is finished. I redid the wash on the upper surfaces and managed to get my mix just right this time. Once the wash was done I applied several filters to dull down the decals and help everything blend together some. For each filter I dipped a #1 brush in Tamiya acrylics and added that to an eyedropper full of alcohol in my airbrush color cup. I just swirled the brush in the alcohol to clean it and it left me with a very thin mix of each color. I used XF-19 Sky Grey on all lower surfaces and all of the national insignias, followed by XF-62 Olive Drab on all upper surfaces and upper insignias. I then mixed XF-57 Buff with the -62 and sprayed the fuselage sides, then a filter of straight XF-57 on the top of the fuselage, the forward wing areas, and the rudder. I layered the final color repeatedly to get the effect I wanted, the paint was faded to an almost tan on the top but still OD lower down. The filters also did a great job of blending the salt weathering together, I am really satisfied with the final look of tonal variations in the basic OD/NG camo. Once the filters were done I CA'ed the resin guns in place and added the prop.
The final version of the paint scheme.
All of that paint work wasn't without problems. Before spraying the filters, I tried scuffing the national insignia on the upper wing using micromesh and ended up tearing it. Badly. I spent some time repositioning the pieces as best I could but close inspection shows a tear. You do have to look closely though, it isn't noticible at a glance. Also, I am not sure if it was because of the damage I did to the decals using different solvents or if I didn't layer the future on thick enough, but when I sprayed the filters half of my decals silvered instantly. I repaired this as best I could by slicing them with a fresh #11 and lightly applying MicroSol. This fixed it for the most part but there is still a little spot of silvering here or there. I may need to repeat this again.
I sealed the decals after the MicroSol had dried using Tamiya X-22 clear gloss. I wanted something heavier than Future after all the work it took to fix things. Once this had cured I sprayed Dullcote cut 50% with lacquer thinner to finish the paint job.
I am thrilled with the final result of the salt-weathered and filtered OD.
The torn decal after repair. Nothing I could do about the little missing chunk, it disappeared.
Some light chipping done with a silver prismacolor pencil. The prop came out great.
Some of the filtered Buff managed to sneak inside the canopy on the rear window. I am hoping it will come off with a cotton swab and some alcohol. The starring on the front windscreen is inside the glass. I am not sure how it got there but fear I am stuck with it.
The major paint work is effectively done at this point, just need to finish the exhaust staining and take care of the colored light lenses. I need to detail the landing gear and then get her on her feet so I can add the final bits and string antenna wire.
Almost there!
Joel_W
Associate Editor
New York, United States
Joined: December 04, 2010
KitMaker: 11,666 posts
AeroScale: 7,410 posts
Joined: December 04, 2010
KitMaker: 11,666 posts
AeroScale: 7,410 posts
Posted: Tuesday, July 29, 2014 - 01:43 AM UTC
Paul,
Just an outstanding weathered paint scheme from top to bottom. Much thought went into it, and it really shows.
The salt technique just adds that little extra that I always seem to be missing on my WW11 birds, so I'll be trying it out on my next prop build.
The various washes and filters worked as they should. The top of the fuselage is the most weathered, as it would have received the most weathering effects. Top of the wings next, and so on, yet each area does blend into the next naturally.
The silvering of the decals is a hard one to pin down. I usually airbrush on two mist coats of Future thinned 1:1 with Windex-D. Let set up, then two heavier coats. You also polished out the paint, so your surface should have been quite smooth. For decal application I use the Microscale system, and never vary my procedures no matter how small the decal is. From your description that they started to silver as soon as they got wet, it sounds like they just didn't fully settle down when they were drying. Not really sure why. I usually roll a damp Q-tip over them to remove the last bit of air, and to really get them to settle into the nooks and crannies. Strike Eagle decals have a solid rep,so I doubt it from a decal issue unless they were very old.
Anyway, you repaired that damage, and the final results look perfect.
Joel
Posted: Tuesday, July 29, 2014 - 09:56 AM UTC
This really is an awesome build, Paul. I am super impressed.
Posted: Tuesday, July 29, 2014 - 12:55 PM UTC
Thanks for the kind words and encouragement guys.
Continuing my own personal little Greek tradgedy, I decided to drill out the wheel spokes tonight while watching TV with my wife. Bad decision, lol.
I butchered the spokes on one wheel mostly because working with a micro drill while sitting on the couch and watching "The Killing" is a recipe for disaster! My wife was kind of confused with my language mid-episode, heh. I put an order in with Barracuda to get replacements, hopefully they come by the weekend so I can finish.
Joel_W
Associate Editor
New York, United States
Joined: December 04, 2010
KitMaker: 11,666 posts
AeroScale: 7,410 posts
Joined: December 04, 2010
KitMaker: 11,666 posts
AeroScale: 7,410 posts
Posted: Wednesday, July 30, 2014 - 03:24 AM UTC
Paul,
It's only a set of wheels. It could have been much worse. This is coming from a guy who watches tv (mostly sports) on my computer while modeling. My concentration does vary quite a bit during those work sessions.
Joel
It's only a set of wheels. It could have been much worse. This is coming from a guy who watches tv (mostly sports) on my computer while modeling. My concentration does vary quite a bit during those work sessions.
Joel
Posted: Saturday, August 02, 2014 - 01:37 PM UTC
Well my new wheels from Barracuda didn't arrive this weekend, but I decided to get as much done on her as I could anyway. I finished painting all of the fiddly bits and completed the final detailing and weathering. Exhaust staining was added using Tamiya XF-19 and XF-1, the fishtail exhaust stacks were sprayed with Alclad Exhaust Manifold over a layer of Future. I was a little heavy-handed on the starboard side but the port side is exactly what I wanted.
All paint work complete.
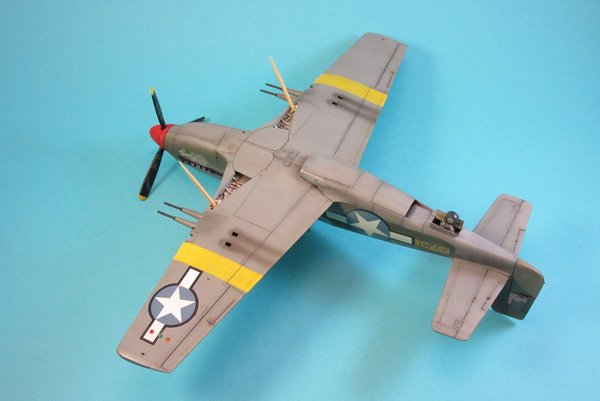
Powder stains were added to the underside using Tamiya Smoke. I sprayed it pretty heavy from the ejection ports back and lightly around the barrel shrouds which seemed to match my reference photos for P-51's.
Underside weathering complete.
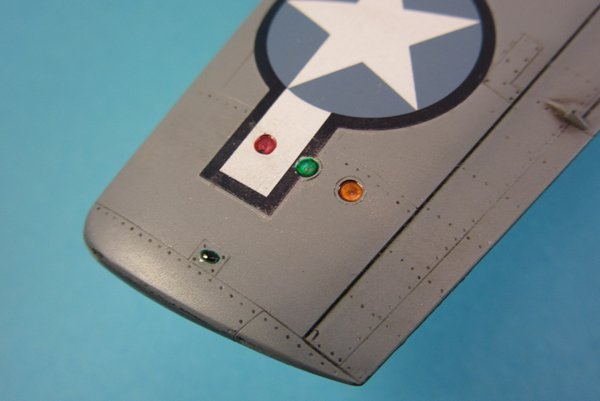
All lights were done by painting the lenses with Vallejo Model Air Aluminum and then adding Testor's Clear Parts Cement for the glass. The aluminum works nicely to make the lights shiny under the clear glue. Colored lenses were done by mixing a drop of food coloring with a small puddle of the cement. The mixture was applied with a toothpick to each light.
Red/Green/Amber recognition lights and the starboard wingtip light in green.
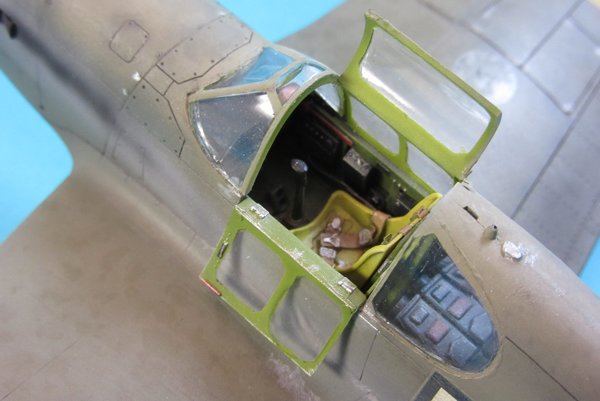
I glued the rollover cage and seat with armor plate into the cockpit. This proved a lot harder to do than when I had test fit everything earlier. It dawned on me the canopy was not attached when I had done the test fitting, working around it now was a pain. After about 15min of messing with the rollover cage I had everything set and added the final open section of canopy.
The cockpit came out great, the Ultracast seat really pops.
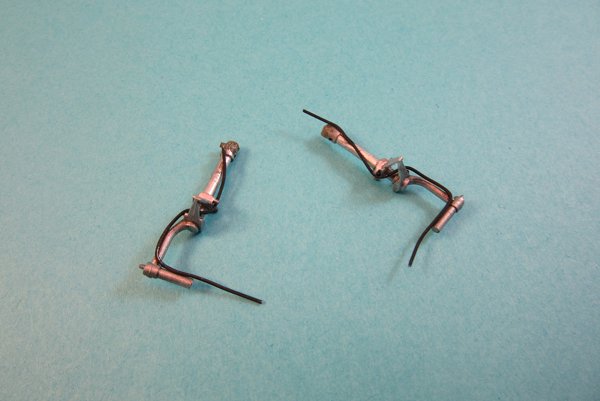
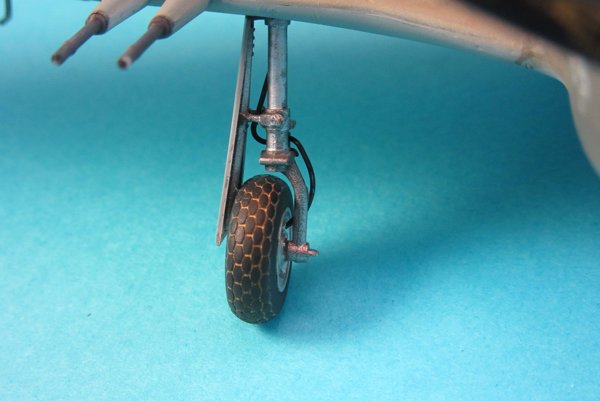
Although I don't have my wheels yet, I went ahead and painted the legs Vallejo Model Air Aluminum and dirtied them up a bit with a raw umber oil wash. I sprayed a section of .020mm lead fly tying wire with Tamiya XF-1 and then formed brake lines for the legs. They just need trimmed once the wheels are added.
I may add chrome bare metal foil to the oleos to make them really shine.
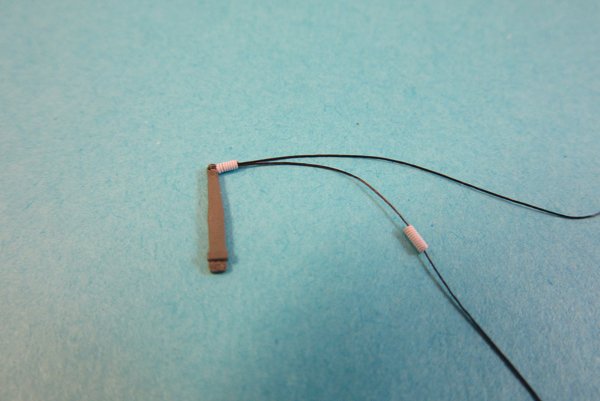
Lastly, I set up the antenna wire and mast to add at the very end of the build. I drilled a hole through the top of the antenna mast using a #80 bit to make it easier to secure the wire. I made insulators by coiling 34 gauge jeweler's wire in the same manner I used to make the oxygen hose for the cockpit and spraying them white with Tamiya XF-2. Then I threaded fine sized EZ Line through one of the insulators, through the hole atop the mast, and then back through the insulator so the loose end can be secured to the top of the fuselage behind the mast. I slid the insulator up to the mast and fixed everything in place with a tiny drop of thick CA glue. I threaded the second insulator for the tail onto the long end of the EZ Line and then set the whole thing aside. I will attach this as the final step once everything else is totally done.
Antenna mast with EZ Line wire and insulators. They are not "scale" but I think they look so much better than a blob of glue painted white.
At this point all I need is the wheels to arrive. The pitot tube is painted and just need attached, likewise with the landing gear doors. Once I add the wheels I'll glue the antenna wire assembly in place and she'll be ready for her spot on the shelf.
Joel_W
Associate Editor
New York, United States
Joined: December 04, 2010
KitMaker: 11,666 posts
AeroScale: 7,410 posts
Joined: December 04, 2010
KitMaker: 11,666 posts
AeroScale: 7,410 posts
Posted: Saturday, August 02, 2014 - 01:53 PM UTC
Paul,
It's really coming together now. I've copied and saved your method for making antennas. It's that good of a procedure. Of course I'll have to buy the EZ wire, but I can see it working just fine with stretched sprue.
Joel
It's really coming together now. I've copied and saved your method for making antennas. It's that good of a procedure. Of course I'll have to buy the EZ wire, but I can see it working just fine with stretched sprue.
Joel
Posted: Friday, August 15, 2014 - 11:21 AM UTC
I had to wait a week for Barracuda to send me my new wheels, but they finally arrived and I was able to get her on her feet. Roy's wheels are a nice, two-piece affair similar to Eduard's style of wheels but for about the same cost as True Details. They are well-detailed and accurate, even having valve stems molded. My set did have a flaw along the mold seam, the tread patterns didn't line up when I removed the mold seams. It was only on one wheel, and was a very small area on the bottom so I didn't worry about it. I sprayed the hubs with Alclad II aluminum and the treads with Tamiya Nato Black, then weathered them with a thick wash of burnt umber/ochre mixed about 70/30 to replicate the mud and dust shown in my reference photos.
Finally standing on her feet. The little arms between the leg and door were sratched from stretched sprue.
I did have a little trouble with the landing gear. Accurate Miniatures did a poor job designing the gear-to-wing connection in my opinion. There is a small tab at the top of each leg, designed to sit in a small notch inside the gear wells. It would be fine except AM left the sockets for the legs open all the way to the inside of the upper wing. The end result is the gear leg has no support in its socket except that small tab and notch ensuring it is oriented straight. It doesn't butt up against anything along the top, which is where the weight is beared. I had the exact same problem with their A-36, and I am sure it exists with all of their P-51 subtypes.
I didn't take any pictures of the area I am talking about. To be honest, I was a little impatient after needing to order new wheels and this little hiccup just made me want to fix it and finish the kit.
I ended up adding stretched sprue to the top of each gear leg to improve the weight-bearing, my legs now meet the inside of the upper wing instead of "floating" in their sockets. I also had an issue with the gear door arms on the legs. Either one was molded short or I hacked it off without realizing it. Either way, I had to scratch new arms out of stretched sprue again. The end result looks pretty good to me.
Lastly, I added the fiddly bit: antenna mast with my insulators and EZ Line wire, pitot tube under the starboard wing, and landing light glass. The last clear pieces fit terribly; sanding and trimming didn't fix them and I had to fill gaps with clear parts cement. They don't even match the contour of the openings molded in the wings. Poor job by AM.
When I do a P-51A I intend to glue these before painting so I can sand them flush and then polish them back to clarity, then just mask them. That should yield a much more satisfying result. I am not happy with how mine fit but I'm not destroying my paint job to fix them.
Posted: Friday, August 15, 2014 - 11:32 AM UTC