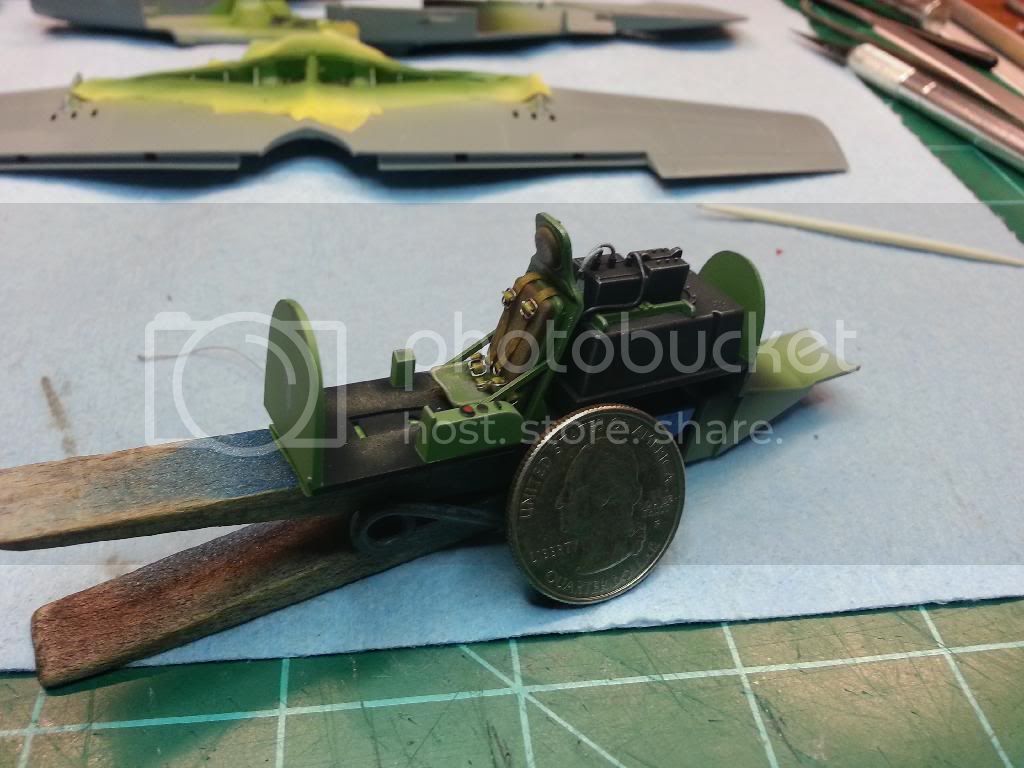
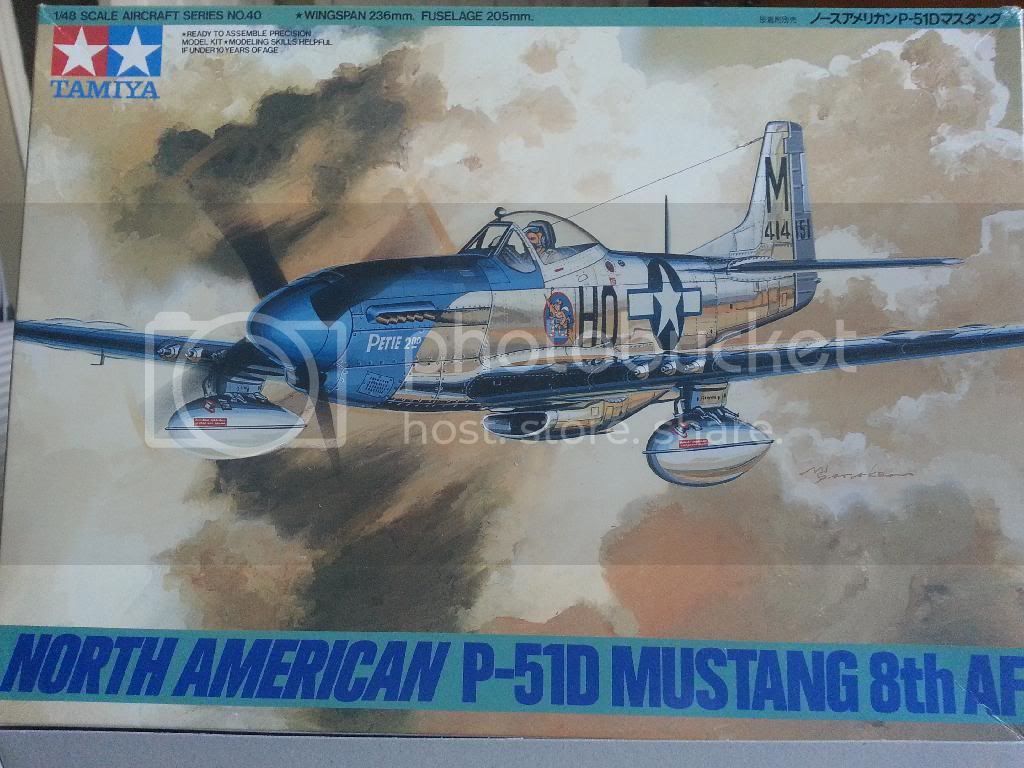
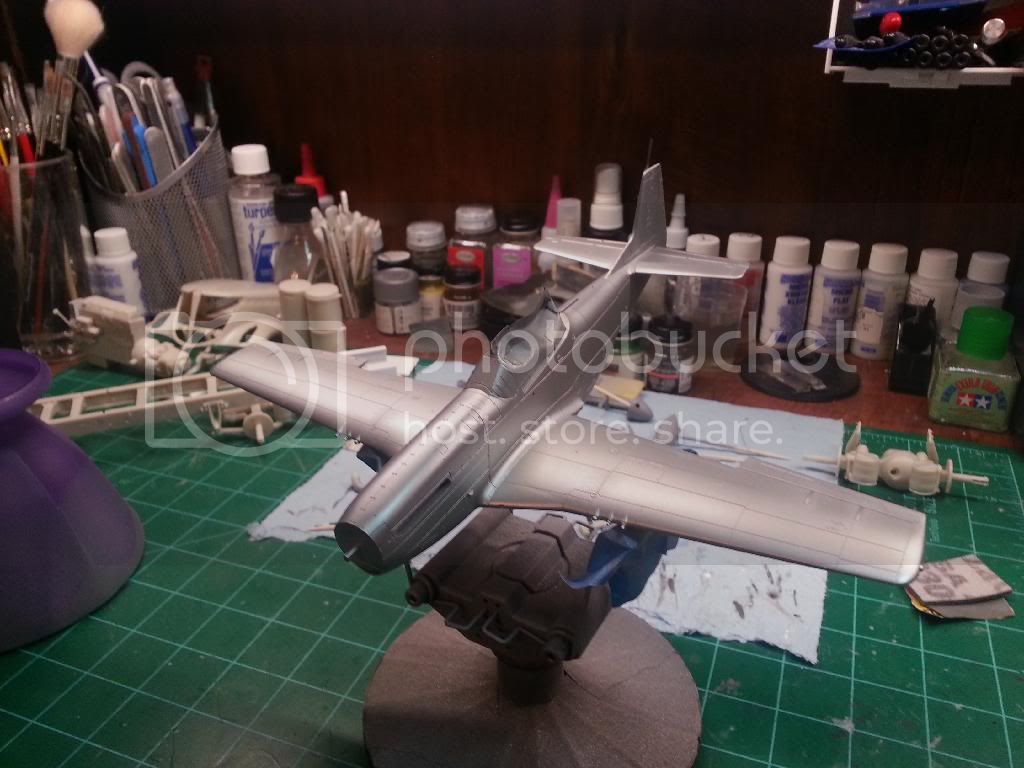
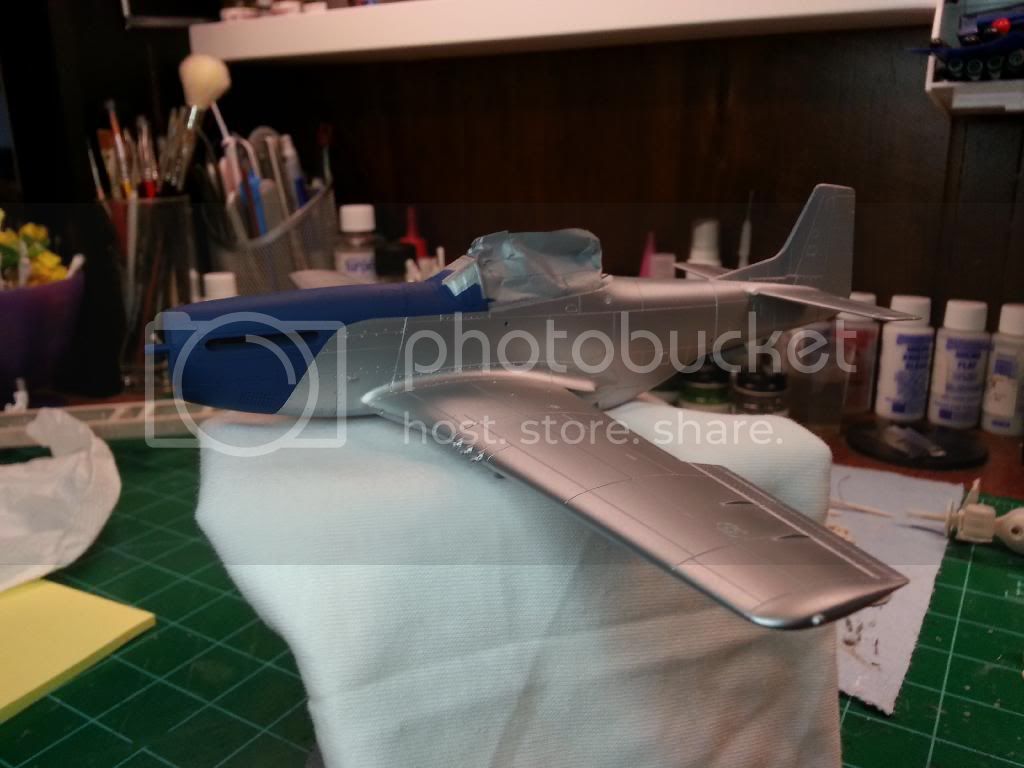
I have started my first plane project. I usually build automotive and some military subjects but have been wanting to do a plane. Comments and critism welcome as i am not well versed in these planes.
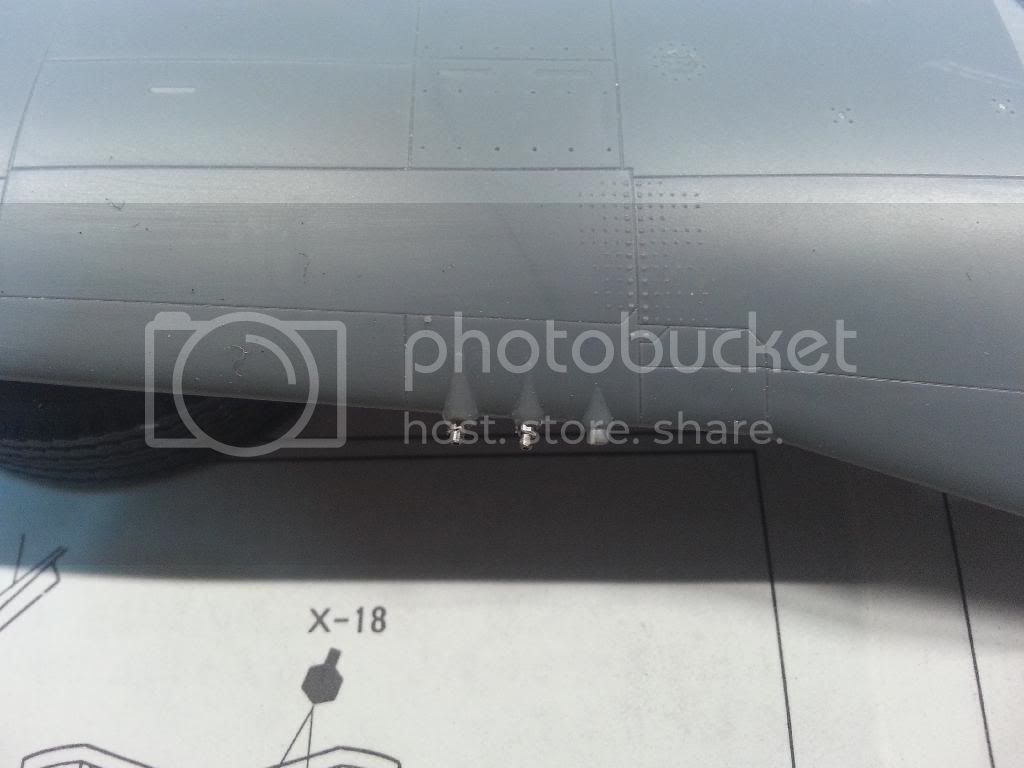
I changed the outer gun barrels for hypodermic needles and drilled out the inner
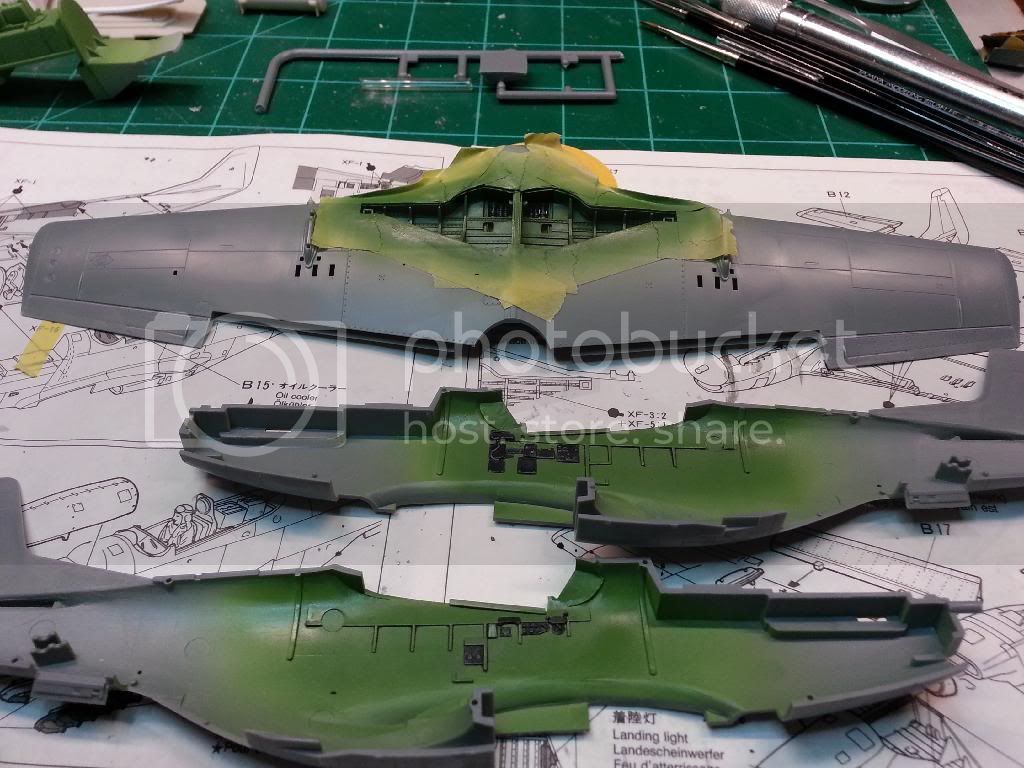
I used Model Master Acrylic green zinc chromate for interior amd wheelwells.
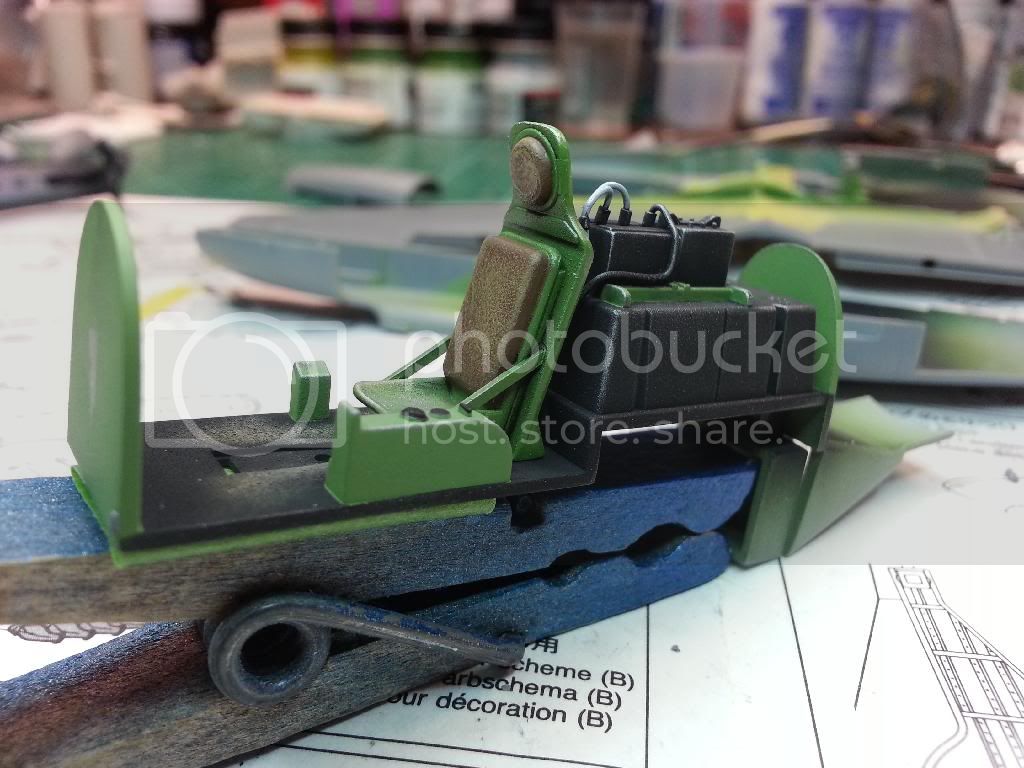
I added seat braces and wire to the radio equipment behind seat.
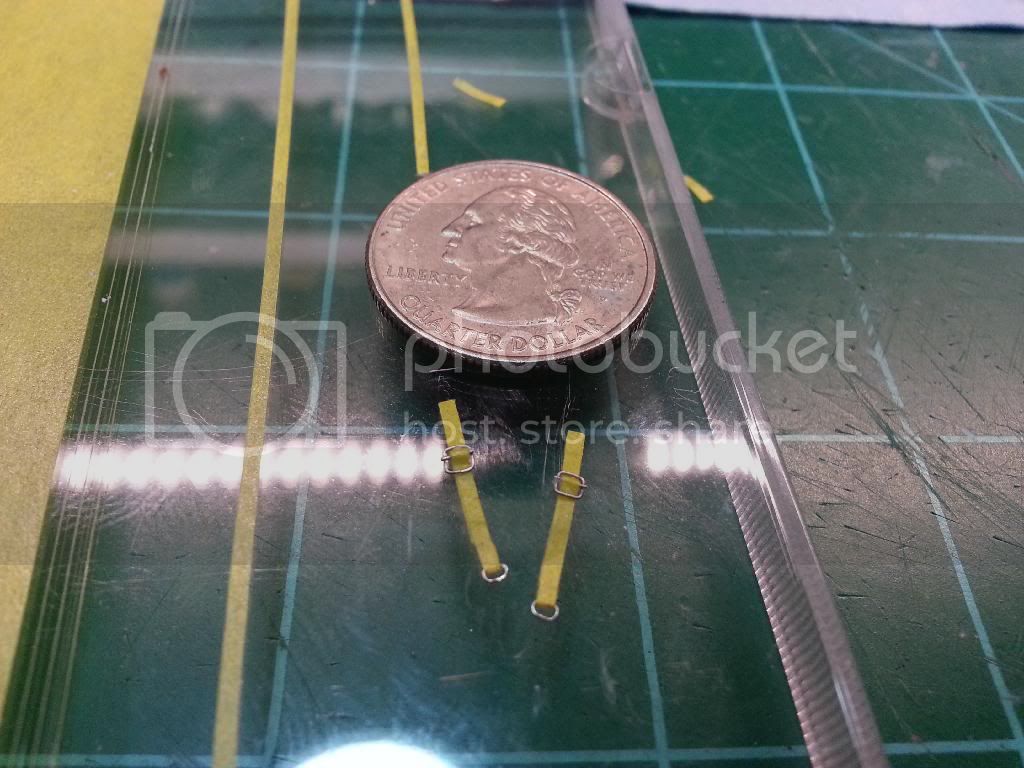
I made seat belts from masking tape and wire. Washed with AK interactive wash.
World War II
Discuss WWII and the era directly before and after the war from 1935-1949.
Hosted by Rowan Baylis
Tamiya 1/48 P51D
mach1revo
Florida, United States
Joined: June 08, 2013
KitMaker: 26 posts
AeroScale: 20 posts
Joined: June 08, 2013
KitMaker: 26 posts
AeroScale: 20 posts
Posted: Sunday, February 09, 2014 - 04:48 PM UTC
Jessie_C
British Columbia, Canada
Joined: September 03, 2009
KitMaker: 6,965 posts
AeroScale: 6,247 posts
Joined: September 03, 2009
KitMaker: 6,965 posts
AeroScale: 6,247 posts
Posted: Sunday, February 09, 2014 - 05:59 PM UTC
That's looking really great. Mustang cockpits were usually a darker green called 'interior green' FS34151. You can probably get something pretty close by doing an overall wash with brown oils so that you don't lose all the hard work you've already done.
The radiator trunking area was bare metal, so you'll want to mask the cockpit sides from the floor line upwards and spray silver below that. Don't forget to do the tail wheel well in green
Posted: Sunday, February 09, 2014 - 08:24 PM UTC
A nice start Jason, I particularly like the gun barrels and seat belts
mach1revo
Florida, United States
Joined: June 08, 2013
KitMaker: 26 posts
AeroScale: 20 posts
Joined: June 08, 2013
KitMaker: 26 posts
AeroScale: 20 posts
Posted: Monday, February 10, 2014 - 02:17 AM UTC
Thanks, I dont have any reference books on this plane so i used pics off the internet and it seems like few of them are the same color wise. Especially after restoration and just maintence in general. If this one turns out good i intend on getting Tamiyas 1/32 scale P51 and investing in some proper reference materials. Thank you for the input , i really appreciate it!!
Joel_W
Associate Editor
New York, United States
Joined: December 04, 2010
KitMaker: 11,666 posts
AeroScale: 7,410 posts
Joined: December 04, 2010
KitMaker: 11,666 posts
AeroScale: 7,410 posts
Posted: Monday, February 10, 2014 - 02:24 AM UTC
Jason, Nice start to your 'Stang. An excellent kit and choice of subject for your 1st aircraft model.
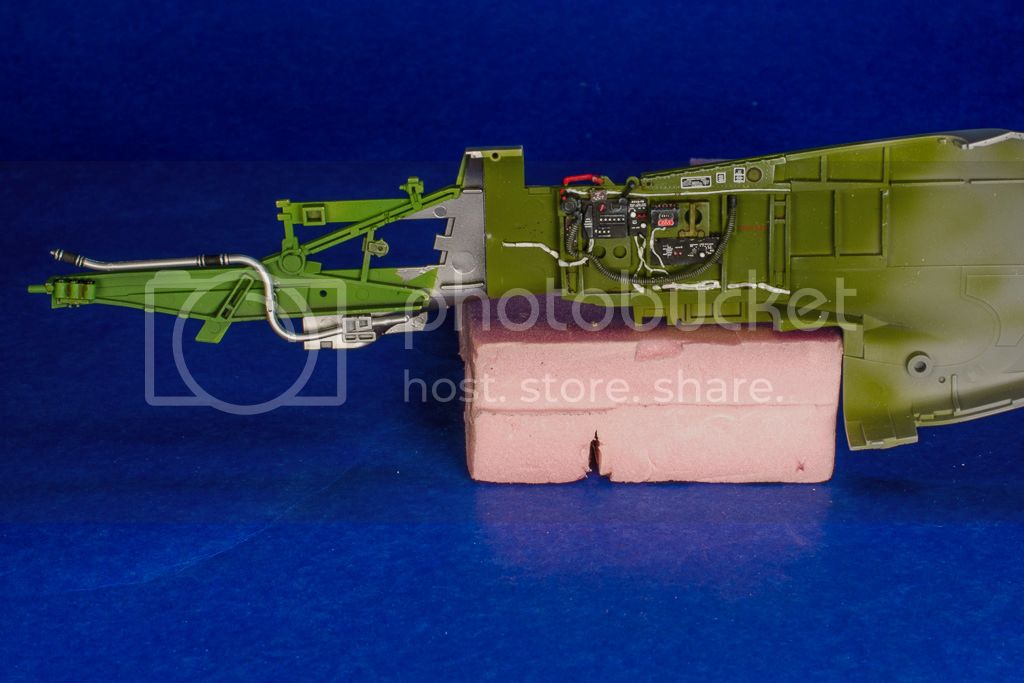
As Jessica alluded to, the interior of most USA WW11 aircraft was post 1942-43 was Interior Green. It's a much brighter/Brownish color then Green Zinc Chromate. I've posted a few pictures of one of my brothers P-51D builds. He's done a ton of research, and has the interior colors down to a science.
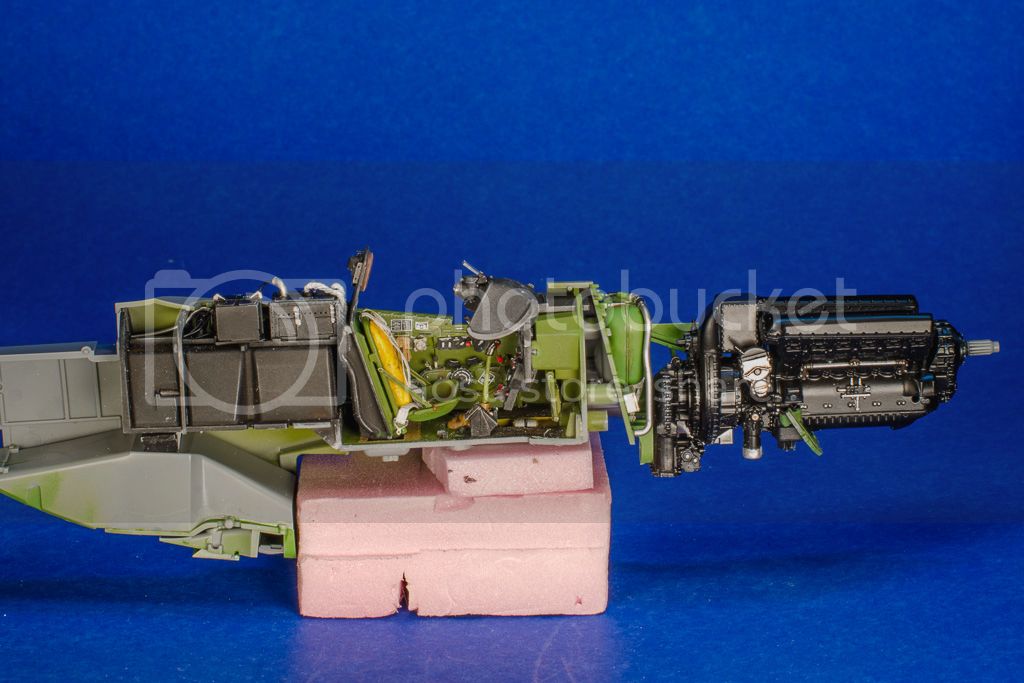
Also the turtle deck behind the seat is various shades of flat black.
The Engine compartment is basically Green Zinc Chromate, while the Oil and water tank compartment for our purposes is NMF
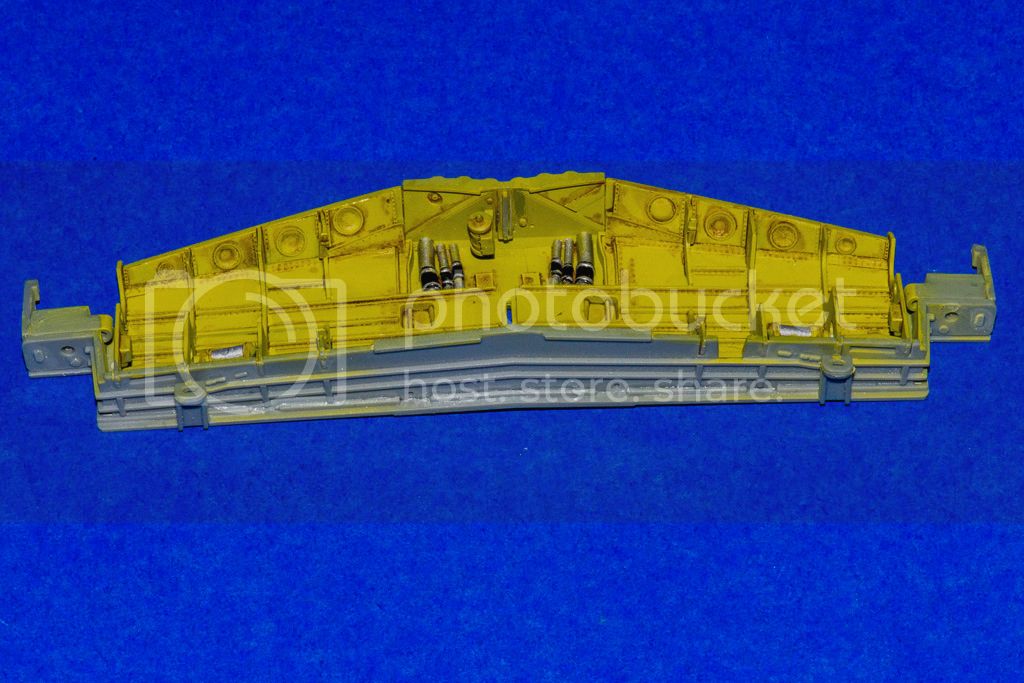
The Wheel Wells and tail wheel usually were Yellow Zinc Chromate
I'm really impressed with your machine guns. They look spectacular. Same for your custom made belts and harnesses.
Looking forward to your next update.
Joel
As Jessica alluded to, the interior of most USA WW11 aircraft was post 1942-43 was Interior Green. It's a much brighter/Brownish color then Green Zinc Chromate. I've posted a few pictures of one of my brothers P-51D builds. He's done a ton of research, and has the interior colors down to a science.
Also the turtle deck behind the seat is various shades of flat black.
The Engine compartment is basically Green Zinc Chromate, while the Oil and water tank compartment for our purposes is NMF
The Wheel Wells and tail wheel usually were Yellow Zinc Chromate
I'm really impressed with your machine guns. They look spectacular. Same for your custom made belts and harnesses.
Looking forward to your next update.
Joel
mach1revo
Florida, United States
Joined: June 08, 2013
KitMaker: 26 posts
AeroScale: 20 posts
Joined: June 08, 2013
KitMaker: 26 posts
AeroScale: 20 posts
Posted: Monday, February 10, 2014 - 02:27 AM UTC
Joel is that the Tamiya 1/32 kit you are showing? Beautiful work!!! Thanks
GastonMarty
Quebec, Canada
Joined: April 19, 2008
KitMaker: 595 posts
AeroScale: 507 posts
Joined: April 19, 2008
KitMaker: 595 posts
AeroScale: 507 posts
Posted: Monday, February 10, 2014 - 09:01 PM UTC
Watch the dihedral with care, as it wants to go flat on assembly.
Gaston
Joel_W
Associate Editor
New York, United States
Joined: December 04, 2010
KitMaker: 11,666 posts
AeroScale: 7,410 posts
Joined: December 04, 2010
KitMaker: 11,666 posts
AeroScale: 7,410 posts
Posted: Tuesday, February 11, 2014 - 02:27 AM UTC
Quoted Text
Joel is that the Tamiya 1/32 kit you are showing? Beautiful work!!! Thanks
Yes it is. My brother has built two of them, both with outstanding NMF, which are full build threads on the LSP forums. As a matter of fact, the 1st build: Big Beautiful Doll, he just finished stripping it down to bare plastic, and re-painted it. I thought he was nuts, but the effort is now up to the same standards as his Old Crow build.
Joel
Peterpools
New York, United States
Joined: June 08, 2013
KitMaker: 197 posts
AeroScale: 193 posts
Joined: June 08, 2013
KitMaker: 197 posts
AeroScale: 193 posts
Posted: Tuesday, February 11, 2014 - 03:31 AM UTC
Jason
Very nice start on your Tamiya Mustang. My brother Joel posted a few pictures from one of my 32nd scale Tamiya builds - awesome kits. Please be careful in following Tamiya's color callouts as there are a lot or mistakes and incorrect colors.
Jessica is quite correct in that the basic interior front offcie color is interior green not zinc chromate. You can make interior, if you don't have a bottle;
10 parts green zinc chromate to 1 part black.
The floor colors in the instructions are wrong and most of the back deck radio/fuel tank are also incorrect.
For the most part Mustang's left the factory with yellow zinc chromate wheel wells. If I can be of any help, please let me know.
Peter
Very nice start on your Tamiya Mustang. My brother Joel posted a few pictures from one of my 32nd scale Tamiya builds - awesome kits. Please be careful in following Tamiya's color callouts as there are a lot or mistakes and incorrect colors.
Jessica is quite correct in that the basic interior front offcie color is interior green not zinc chromate. You can make interior, if you don't have a bottle;
10 parts green zinc chromate to 1 part black.
The floor colors in the instructions are wrong and most of the back deck radio/fuel tank are also incorrect.
For the most part Mustang's left the factory with yellow zinc chromate wheel wells. If I can be of any help, please let me know.
Peter
Posted: Tuesday, February 11, 2014 - 04:14 AM UTC
Jason, your P-51 looks great! I am eager to see updates.
Posted: Tuesday, February 11, 2014 - 04:15 AM UTC
Quoted Text
...interior of most USA WW11 aircraft was post 1942-43 was Interior Green...a few pictures of one of my brothers P-51D builds. He's done a ton of research, and has the interior colors down to a science.
Peter, NAA used a "house color" "Dull Dark Green" in crew areas early on; I've seen B-25H & Js, original WW2 color pix and preserved airframes, plus P-51B/C with that in the cockpit. Has your research indicated that NAA eventually transitioned to Interior Green?
WW2 cockpit colors - I love learning about them! I recall a Korean war B-29 at USAF Museum has the Boeing dark green in the cockpit areas. A preserved Republic P-47 (Curtiss-built Jugs used the Interior Green) has a dark green cockpit, too.
mach1revo
Florida, United States
Joined: June 08, 2013
KitMaker: 26 posts
AeroScale: 20 posts
Joined: June 08, 2013
KitMaker: 26 posts
AeroScale: 20 posts
Posted: Tuesday, February 11, 2014 - 05:32 AM UTC
Thanks for all the input guys! Honestly im too far into this one to change any of the colors. Not a big deal though. I will in future builds strive to be more accurate. This being my first plane build i want to push on and finish it to experience the other challenges a plane kit brings. My original intent was to do it boxstock but i couldnt resist adding a few details. Most of my unbuilt plane collection is modern jets but ive always liked the P51's and the B-17 's. I picked this kit for its fit and it relative simplicity to be my first. But i am enjoying it. I hope to get some more pics up soon
Joel_W
Associate Editor
New York, United States
Joined: December 04, 2010
KitMaker: 11,666 posts
AeroScale: 7,410 posts
Joined: December 04, 2010
KitMaker: 11,666 posts
AeroScale: 7,410 posts
Posted: Tuesday, February 11, 2014 - 06:16 AM UTC
Fred, I've read a few articles on the issues of P-47 Jugs built in Farmingdale, New York. Seems that the interior Green they used was very dark, darker then the official chip. The reason that has always been given is that the supplier of the paint just got it wrong, or the pigments available to them was wrong.
At least we're only talking about shades of Green. When you get to early war USN colors, it's a real crap shoot.
Joel
At least we're only talking about shades of Green. When you get to early war USN colors, it's a real crap shoot.
Joel
BlackWidow
European Union
Joined: August 09, 2009
KitMaker: 1,732 posts
AeroScale: 1,336 posts
Joined: August 09, 2009
KitMaker: 1,732 posts
AeroScale: 1,336 posts
Posted: Tuesday, February 11, 2014 - 08:25 AM UTC
Jason, great start on your pony there! You will love this kit, there's nothing to worry about. I've built a Tamiya P-51 D and -B last year and had lots of fun building them. Funny to see that you originally come from the military vehicles as I'm going there from time to time now and will finish my next Leopard this month.
Fred, it looks like you have the same discussion over there with your FS-colours as we have here on the other side of the waves with our RLM-colours. In the meantime I've learned about the 1000 shades of Olive Drab ....
Torsten
Fred, it looks like you have the same discussion over there with your FS-colours as we have here on the other side of the waves with our RLM-colours. In the meantime I've learned about the 1000 shades of Olive Drab ....
Torsten
Peterpools
New York, United States
Joined: June 08, 2013
KitMaker: 197 posts
AeroScale: 193 posts
Joined: June 08, 2013
KitMaker: 197 posts
AeroScale: 193 posts
Posted: Tuesday, February 11, 2014 - 08:26 AM UTC
Fred
Nothing surprises me at all when it comes to paint and war time shortages. My research pretty much was concentrated on the D models from -20 and on and by that time, interior green seems to be the standard color and per specs. I know there are controversies all over the place as to the colors of the floor and behind the pilots seat for the rear deck. I tried to go with the colors my research showed. Of course, once a Mustang was out in the field, anything goes.
Peter
jowady
Joined: June 12, 2006
KitMaker: 1,027 posts
AeroScale: 131 posts
KitMaker: 1,027 posts
AeroScale: 131 posts
Posted: Wednesday, February 12, 2014 - 07:30 AM UTC
Quoted Text
Watch the dihedral with care, as it wants to go flat on assembly.
Gaston
I thought that it was just me and that I was doing something wrong. I find myself sanding the wing roots like mad, am I missing an easier trick?
mach1revo
Florida, United States
Joined: June 08, 2013
KitMaker: 26 posts
AeroScale: 20 posts
Joined: June 08, 2013
KitMaker: 26 posts
AeroScale: 20 posts
Posted: Sunday, February 16, 2014 - 12:21 PM UTC
Posted: Tuesday, February 18, 2014 - 02:55 PM UTC
Oh Jason,
Looking good!
Looking good!
Posted: Tuesday, February 18, 2014 - 03:03 PM UTC
Gents,
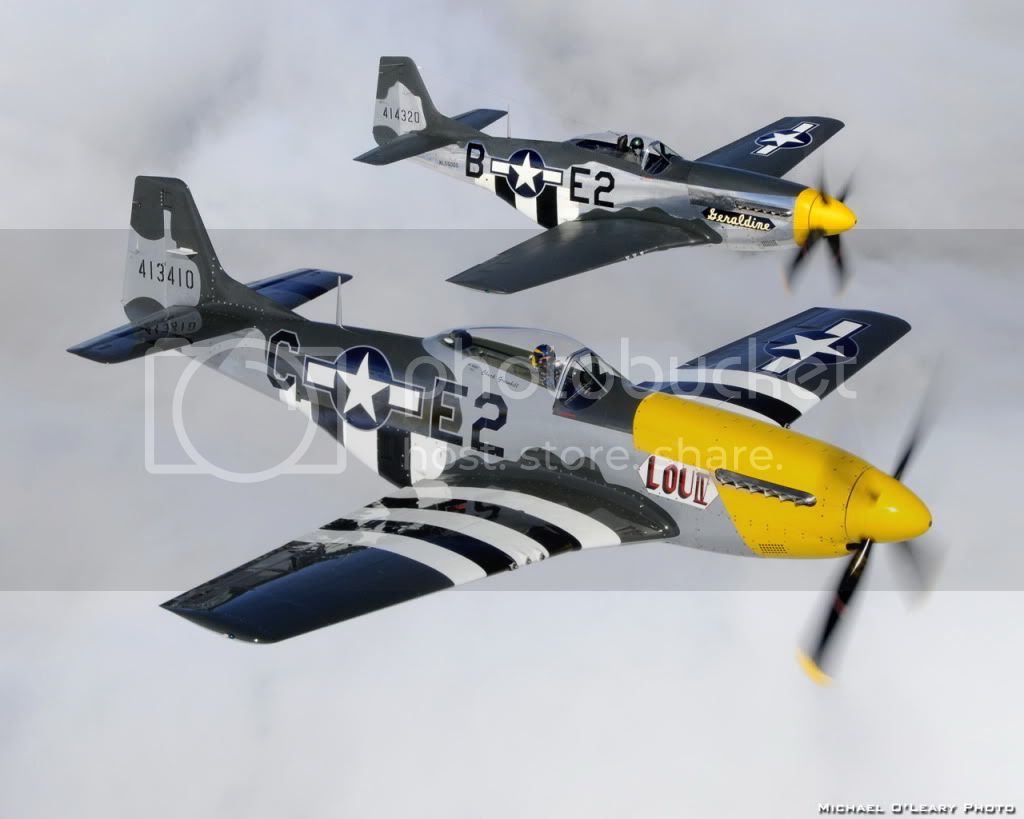
Just for fun I'm going to throw an incendiary into this thread, just because of the previous comments on colors and that Jason is building a Bodney blue-nose.
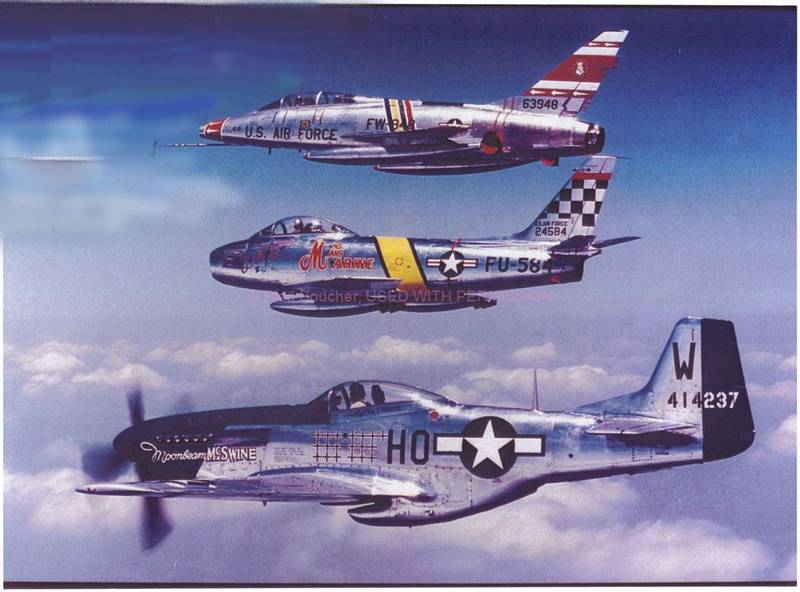
You know that controversy about whether yellow-nosed 361st FG Mustangs were blue or green on top? This photo (and photos of black steam locos having a bright blue sheen on sunny clear days) (AND what a previous Curator of the Air Force Museum told me about museum research) is why I believe they were green.
See all the blue reflections on the upper surfaces and sides?
GastonMarty
Quebec, Canada
Joined: April 19, 2008
KitMaker: 595 posts
AeroScale: 507 posts
Joined: April 19, 2008
KitMaker: 595 posts
AeroScale: 507 posts
Posted: Tuesday, February 18, 2014 - 03:20 PM UTC
Quoted Text
Quoted Text
Watch the dihedral with care, as it wants to go flat on assembly.
Gaston
I thought that it was just me and that I was doing something wrong. I find myself sanding the wing roots like mad, am I missing an easier trick?
Maybe carving the cockpit parts before assembly will relieve the pressure to "fatten" the fuselage?...
Once the cockpit is in, there is absolutely no shortcut to a huge amount of sanding/slicing... I think it is a major, major problem of this so-called "shake and bake" kit: Every single one I've ever seen built look like they fitted beautifully, but are quite a bit flatter in dihedral than the real thing (both B and D)...
Also the individual prop blades are very poor and unnecessary: I always replaced it with a Revell-Monogram single piece prop that is far thinner and more accurate, not to mention pre-aligned! I prefer another spinner as well, my choice being Hasegawa's.
Gaston
jowady
Joined: June 12, 2006
KitMaker: 1,027 posts
AeroScale: 131 posts
KitMaker: 1,027 posts
AeroScale: 131 posts
Posted: Tuesday, February 18, 2014 - 04:22 PM UTC
Quoted Text
Quoted TextQuoted Text
Watch the dihedral with care, as it wants to go flat on assembly.
Gaston
I thought that it was just me and that I was doing something wrong. I find myself sanding the wing roots like mad, am I missing an easier trick?
Maybe carving the cockpit parts before assembly will relieve the pressure to "fatten" the fuselage?...
Once the cockpit is in, there is absolutely no shortcut to a huge amount of sanding/slicing... I think it is a major, major problem of this so-called "shake and bake" kit: Every single one I've ever seen built look like they fitted beautifully, but are quite a bit flatter in dihedral than the real thing (both B and D)...
Also the individual prop blades are very poor and unnecessary: I always replaced it with a Revell-Monogram single piece prop that is far thinner and more accurate, not to mention pre-aligned! I prefer another spinner as well, my choice being Hasegawa's.
Gaston
Thanks Gaston, I'll try it with my next kit. I also agree about the prop, I not a fan. The rest of the kit though is nice. I need to make at least four more Ds and a couple of Bs at least.
stooge
South Australia, Australia
Joined: June 20, 2013
KitMaker: 210 posts
AeroScale: 210 posts
Joined: June 20, 2013
KitMaker: 210 posts
AeroScale: 210 posts
Posted: Tuesday, February 18, 2014 - 04:52 PM UTC
Quoted Text
You know that controversy about whether yellow-nosed 361st FG Mustangs were blue or green on top? This photo (and photos of black steam locos having a bright blue sheen on sunny clear days) (AND what a previous Curator of the Air Force Museum told me about museum research) is why I believe they were green
Can you elaborate? My understandascope has a blockage with this.
As an aside the current Aeroplane Monthly has some good pics of blue noses, they may clarify your comments.
Posted: Tuesday, February 18, 2014 - 05:45 PM UTC
Quoted Text
...yellow-nosed 361st FG Mustangs were blue or green on top?...
Quoted Text
Can you elaborate? My understandascope has a blockage with this.
Hi Jason,
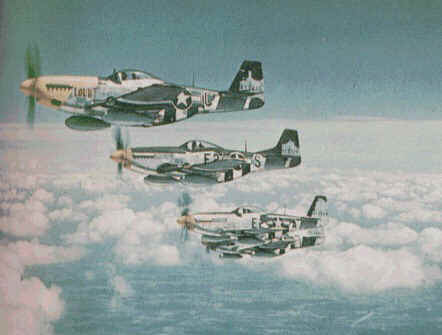
There was (is?) a controversy about the top camouflage color of P-51D Lou VI of the 361st group commander, LTC Thomas Christian. There is a famous color photo of him leading a flight. The NMF P-51s had wavy field-applied (probably OD) camo on the tops.
Color shift made the photo display the green topside camo as blue.
Starting back in the 1970s several restored P-51s were painted like his P-51, based on that color photo from summer, 1944. It makes a beautiful airplane with yellow noses and blue topsides! That blue camo started showing up everywhere - on models and the real deal.
http://www.mustangsmustangs.com/p-51/?survivors/serial/44-63350
It started an argument that simmers today, although it appears that most folks are now coming down on the side of green camo.
This photo shows how glossy OD under a clear sky can reflect blue:
Someday I might build a blue-topped 361st P-51 just for fun. Yet today, if I was commissioned to build it as accurately as possible, I would use a green.
Here's a very detailed thread from another site about the debate.
http://www.ipmsstockholm.org/magazine/1998/05/stuff_eng_ww2incolor_louiv.htm