


Sometimes you just wake up with a spontaneous idea. Something that sounds like fun, and you can't get out of your head. Well Yesterday was such a day. During the week I read the latest edition of Model world, in which a builder was ageing his cockpit with the method of spraying the whole cockpit black. And then adding the colour in thin layers. (A method i've seen here on this forum too, but I did't know from the dutch forum i'm a member off.) I also saw that a spitfire campaign started on the dutch forum I just mentioned. And I was reading a Flugzeug classic magazine, (a German magazine on classic airplanes) wich featured the Mk. Vb spitfire. In this really nice colourscheme...
.jpg)
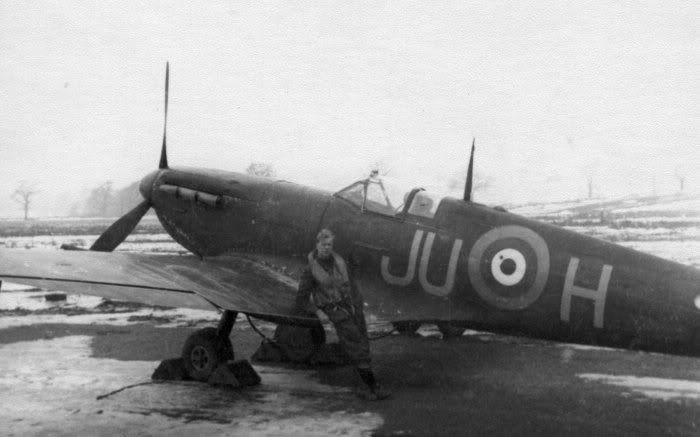
Yes, a nightfighter spitfire. Looking in to it a bit more, it turned out that the British were afraid a new blitzkrieg would be started in '42 by the germans.
In '41 Hurricanes were used as nightfighters with mediocre succes. In the winter of '41/'42
the decision was taken to try out the spitfire in the nightfighter role.
Therefore 3 squadrons were selected who painted there spitfires mattblack. The 41th, the 65st and the 111th.
The basic idea was to hunt the enemy on sight, with the help of the searchlights of the ground crews. A bit like the germans did with their wilde sau (wild boar) technique. The british trails went under codename 'smack'.
The trails soon showed the results wouldn't be great, while the risk of damage was quite high. Spitfires are not known for their good forward view. You need to bring it down in a curve to see your landing spot. And in the last moments you would be almost blind landing in the dark. The narrow set up of the landing gear also didn't help.
The torque of the engine was another accident waiting to happen..To quote a pilot..In a Spitfire theres one engine and torque going one way. It scared the [auto-censored] out of you. The first time you took off you didnt know where youre going, the swing was terrific and had to be corrected right away"
(quote and info taken from: http://www.ipmsstockholm.org/magazine/2006/06/stuff_eng_profile_night_spitfires.htm
So after three months the whole idea was thrown in the dustpin.
But I will happilly pull this project out of that dustpin again. As said in the beginning. I want an easy build to try out some things and get my airbrush skills to an ok standard. So a nice small kit that can be build strait out of the box woill be perfect. The victim in this case will be The 1/72 Revell Supermarine spitfire Mk. Vb kit. One of a whole series of budget kit that revell, Italeri and Airfix all have in their catalogue.
.jpg)
They can be re-issues, that bring tears to your eyes..But in this case it is a recent mould.
.jpg)
Three moulds to be precise. Two grey styreen sprues with not to many components. And a closed canopy in -off course- clear...(duh)
.jpg)
Mould quality is not bad at all. Detailling I find ok for the price.
.jpg)
.jpg)
.jpg)
.jpg)
A pre-trail to see how everything would fit shows a bit of work on the belly. And some flash. But nothing dramatic.
.jpg)
.jpg)
.jpg)
The instructions are standard Revell stuff...
.jpg)
So in eleven steps you should have a nice Mark 5 on your bench...
.jpg)
Wich you can then decorate with these decals...
.jpg)
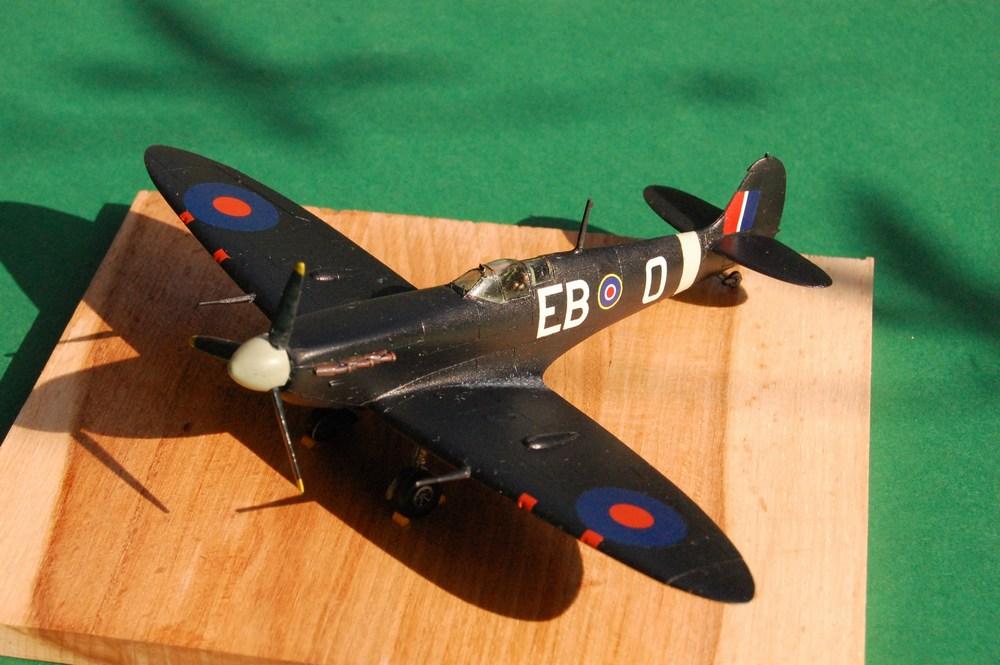
Possible are two versions. The clipped version of S/L Jeff Northcott. D.S.O. D.C.F. Based on Duxford in 1943. And the G-AZ ' flown by Axel A. Svendsen. Stationed at Tangmere in 1942.
.jpg)
But I was going for a night' fire. First job as always was cleaning up the cockpit parts.
Nothing special here. A bit of sanding, cleaning up the seams. All nice and easy.
Although I would advice a not-spitfire-specialist to check some references on the joystick To prefent you from cleaning up to much. It ended up beeing a shape I didn't expect. So i'm glad I did.
.jpg)
.jpg)
As said, the whole thing started with me wanting to try the trick of using a black background to give more depth and age to the cockpitdetails. So here we go. A spray of black...
.jpg)
Followed by the interior green in thin layers ...I didn't have a pot of the real thing laying around. So I gave mixing it myself a go. Based on a reference picture of a Mk VII beeing restored. Using Olive drap, mixed with grey and a spot of blue.)...The dilution adviced was 30% extra fluid against paint.
.jpg)
.jpg)
.jpg)
.jpg)
I like the effect. I have to say...And the colour matches the reference picture nicely. Although i'm not sure the reference is right. But that's another story...
.jpg)
second step was to highlight the details...
.jpg)
.jpg)
A seriously diluted black mix was used as a pinwash for more shadow affect. Residue removed straight away with a cotton stick
.jpg)
And with the adding of some switches and clocks the fuselage was already done. Nice technique..One i'm gonna use more often..
.jpg)
.jpg)
Same technique was used on the other cockpit parts..
.jpg)
.jpg)
Here I do have some self critique. I'm not happy with my dashboard. The Black is to black in this scale I think. Next time I'm gonna go for a really dark grey. But this time it will do..
A small trick I discovered. My eyes are having a bit of trouble seeing the really small bits nowadays. Especially in black...
.jpg)
But some extra light from a flashlight solved that problem nice and easy.
.jpg)
So I ended up sticking the parts to my desk with some tack. Painting with a added flashlight in my left hand...(which brought a nice smile on my girlfriends face)
Some seatbelts are drying as we speak. The chair was a mess and I;m gonna redo that somewhere in the coming week. And then I can already assemble the whole bathtube. Just as I wanted. Nice and easy..


.jpg)
.jpg)
.jpg)
.jpg)


.jpg)
.jpg)
.jpg)
.jpg)
.jpg)
.jpg)
.jpg)
.jpg)
.jpg)
.jpg)
.jpg)
.jpg)
.jpg)
.jpg)
.jpg)
.jpg)
.jpg)
.jpg)
.jpg)
.jpg)
.jpg)
.jpg)
.jpg)
.jpg)


.jpg)
.jpg)
.jpg)
.jpg)
.jpg)
.jpg)
.jpg)
.jpg)
.jpg)
.jpg)
.jpg)
.jpg)
.jpg)
.jpg)
.jpg)
.jpg)
.jpg)
.jpg)
.jpg)
.jpg)
.jpg)
.jpg)
.jpg)
.jpg)
.jpg)
.jpg)
.jpg)
.jpg)
.jpg)
.jpg)
.jpg)
.jpg)
.jpg)
.jpg)
.jpg)
.jpg)
.jpg)
.jpg)
.jpg)
.jpg)
.jpg)
.jpg)
.jpg)

.jpg)
.jpg)
.jpg)
.jpg)
.jpg)
.jpg)
.jpg)
.jpg)
.jpg)
.jpg)
.jpg)
.jpg)
.jpg)
.jpg)
.jpg)
.jpg)
.jpg)
.jpg)
.jpg)
.jpg)
.jpg)
.jpg)
.jpg)
.jpg)
.jpg)
.jpg)
.jpg)
.jpg)
.jpg)
.jpg)
.jpg)
.jpg)
.jpg)
.jpg)
.jpg)
.jpg)
.jpg)
.jpg)
.jpg)
.jpg)
.jpg)
.jpg)
.jpg)
.jpg)


.jpg)
.jpg)
.jpg)
.jpg)
.jpg)
.jpg)
.jpg)
.jpg)


.jpg)
.jpg)
.jpg)

.jpg)
.jpg)
.jpg)
.jpg)
.jpg)
.jpg)
.jpg)
.jpg)
.jpg)
.jpg)
.jpg)
.jpg)
.jpg)
.jpg)
.jpg)
.jpg)
.jpg)
.jpg)
.jpg)
.jpg)
.jpg)
.jpg)
.jpg)
.jpg)
.jpg)
.jpg)
.jpg)
.jpg)
.jpg)
.jpg)
.jpg)
.jpg)
.jpg)
.jpg)
.jpg)
.jpg)
.jpg)
.jpg)
.jpg)
.jpg)
.jpg)
.jpg)
.jpg)
.jpg)
.jpg)
.jpg)
.jpg)
.jpg)
.jpg)
.jpg)
.jpg)
.jpg)
.jpg)
.jpg)
.jpg)
.jpg)
.jpg)
.jpg)
.jpg)
.jpg)
.jpg)
.jpg)
.jpg)


