Eduard 1/48th Mk IX Spitfire
United States
Joined: February 01, 2009
KitMaker: 1,233 posts
AeroScale: 663 posts
Posted: Friday, May 02, 2014 - 11:32 AM UTC
It is a fact that under equal conditions, large-scale battles and whole wars are won by troops which have a strong will for victory, clear goals before them, high moral standards, and devotion to the banner under which they go into battle.
-Georgy Zhukov
Alberta, Canada
Joined: January 19, 2008
KitMaker: 6,743 posts
AeroScale: 6,151 posts
Posted: Friday, May 02, 2014 - 11:46 AM UTC
Ian , I will be following this build closely , got the late version in the stash but before I tackle it . Hasegawa's will be built first which really isn't all that bad .
I do like your weathering in the interior especially the rudder control area , very nicely done !
Terri
United States
Joined: February 01, 2009
KitMaker: 1,233 posts
AeroScale: 663 posts
Posted: Friday, May 02, 2014 - 02:15 PM UTC
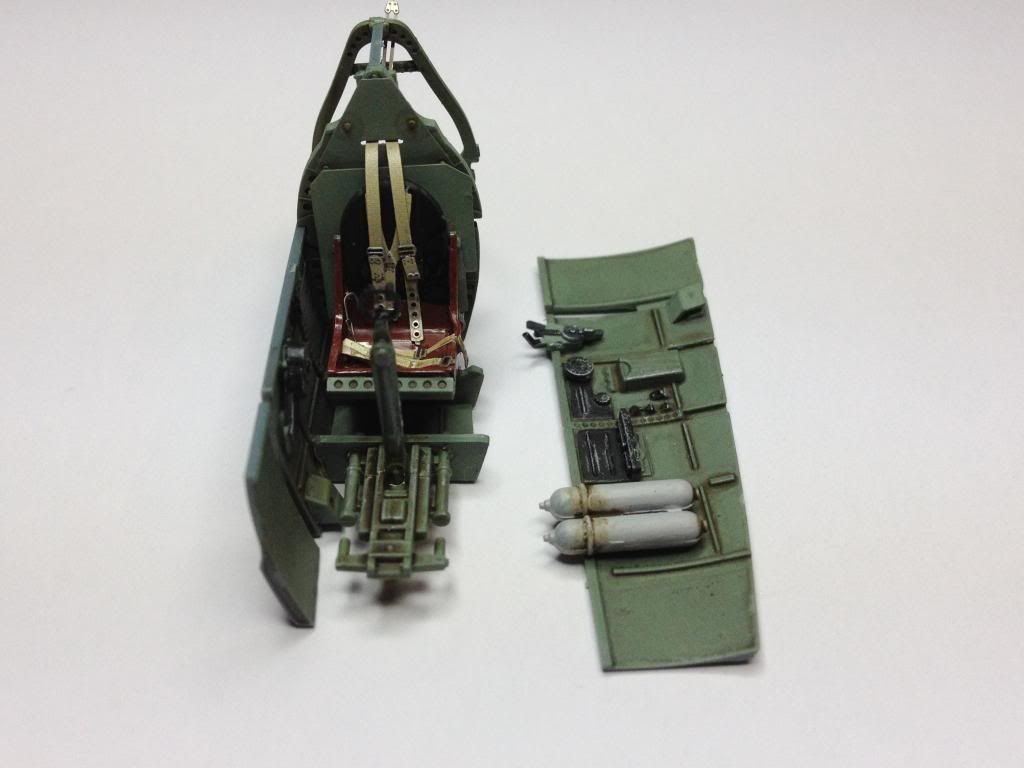
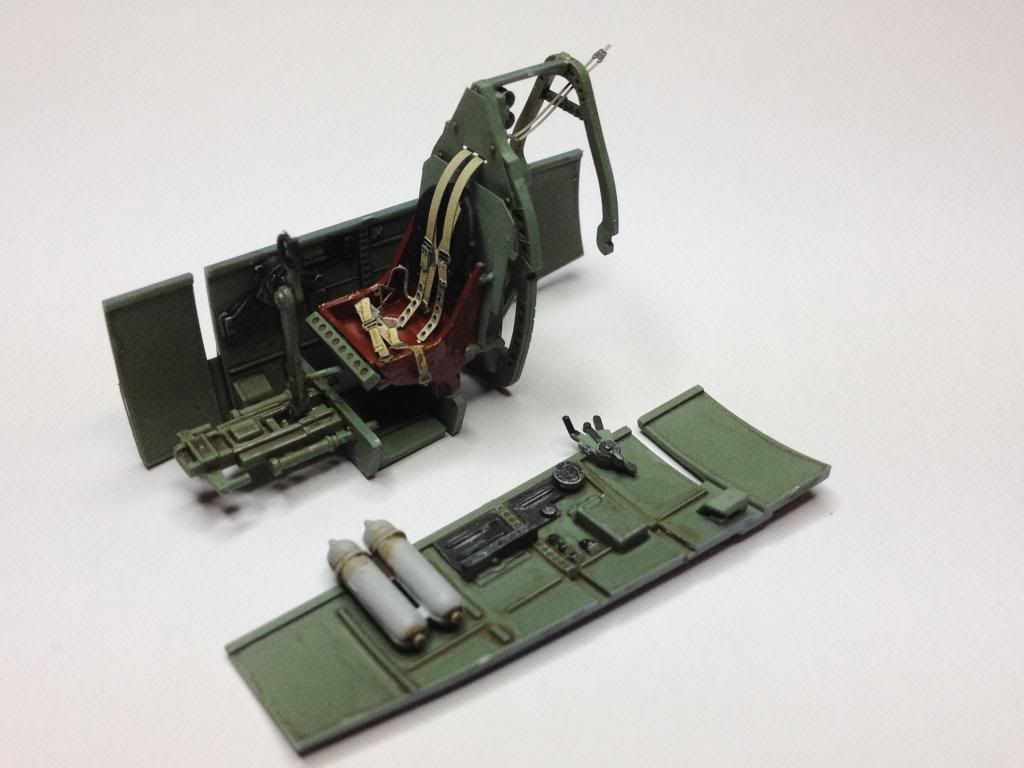
Thanks Terri! I must say the Eduard rendering of the MK IX cockpit is absolutely superb. The seat is complete and now installed. The instrument panel will be next.
Best wishes,
Ian
It is a fact that under equal conditions, large-scale battles and whole wars are won by troops which have a strong will for victory, clear goals before them, high moral standards, and devotion to the banner under which they go into battle.
-Georgy Zhukov

#226
British Columbia, Canada
Joined: February 20, 2012
KitMaker: 1,909 posts
AeroScale: 508 posts
Posted: Friday, May 02, 2014 - 06:10 PM UTC
Very nice so far Ian!

I have the Royal boxing of this kit along with all the Brassin and three sets of Overtrees.

So will be watching with interest.

Cheers Rob.
Anything without guns is a target!
27 completed campaigns and counting :)
United States
Joined: February 01, 2009
KitMaker: 1,233 posts
AeroScale: 663 posts
Posted: Saturday, May 03, 2014 - 01:31 AM UTC
Thanks Rob! I will be interested to see how Eduard's cockpit squeezes into the fuselage halves. I did notice that the Eduard offering has complete recessed rivet detailing on the skin which ICM and Hasegawa do not have on their IX's.
Best wishes,
Ian
It is a fact that under equal conditions, large-scale battles and whole wars are won by troops which have a strong will for victory, clear goals before them, high moral standards, and devotion to the banner under which they go into battle.
-Georgy Zhukov
England - East Midlands, United Kingdom
Joined: June 03, 2006
KitMaker: 574 posts
AeroScale: 573 posts
Posted: Saturday, May 03, 2014 - 04:31 AM UTC
If anything does not fit perfectly then you have done something wrong. There's no wriggling out of it. There's no room left for the glue.
The only problem I encountered was the top cowling. Even though the join between the two parts looked perfect and the seam polished, as soon as a coat of paint went on a shadow of the seam appeared as a thin dark line. Spent ages on it, stripped the paint off several times and repolished the seam but never entirely solved the problem. Still do not know what I did wrong but apparently I am not the only one to have this problem. The fit is so good that you can hold it in place with Blutac while you paint the model and then fit the exhausts and cowling permanently afterwards.

United States
Joined: February 01, 2009
KitMaker: 1,233 posts
AeroScale: 663 posts
Posted: Saturday, May 03, 2014 - 04:37 AM UTC
Antoni, thanks for the photo and the info on the cowling. I will note that when I get to that part of the build. Thanks for the input and I will let you know how it goes. Hopefully I will have the fuselage together this weekend.
Best wishes,
Ian
It is a fact that under equal conditions, large-scale battles and whole wars are won by troops which have a strong will for victory, clear goals before them, high moral standards, and devotion to the banner under which they go into battle.
-Georgy Zhukov
United States
Joined: February 01, 2009
KitMaker: 1,233 posts
AeroScale: 663 posts
Posted: Saturday, May 03, 2014 - 01:35 PM UTC
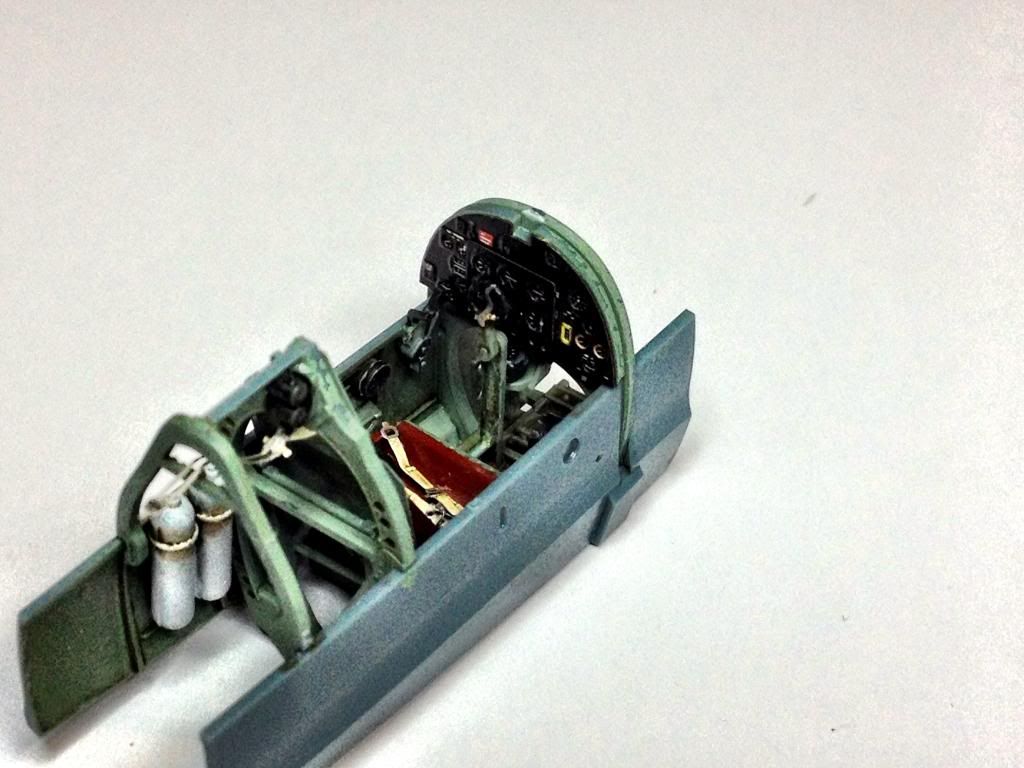
I got the instrument panel installed in the cockpit today so I am ready to move on to the fuselage. I thought the design of the cockpit area was very well designed on the part of Eduard.
Best wishes,
Ian
It is a fact that under equal conditions, large-scale battles and whole wars are won by troops which have a strong will for victory, clear goals before them, high moral standards, and devotion to the banner under which they go into battle.
-Georgy Zhukov
Joel_W
 Associate Editor
New York, United States
Joined: December 04, 2010
KitMaker: 11,666 posts
AeroScale: 7,410 posts
Posted: Sunday, May 04, 2014 - 03:31 AM UTC
Ian,
I've built but still haven't finished painting my Spitfire IX early ver.
Your cockpit came out quite well. There really isn't much else you can add to it. Once the fuselage is closed up, you see very little of it. Parts fit is excellent. I did have an issue with the wing roots, but I'm sure that it was my screwing up of the cockpit installation that caused it.
Antoni's issue with the engine cowl also was an issue for me. It just doesn't seat right.
Will be following your build with interest.
Joel
On my Workbench:
Monogram 1/24 scale 427 Shelby Cobra
Just Completed:
Beemax 1/24 scale BMW M3 E30 1992 Evolution II
England - South East, United Kingdom
Joined: January 21, 2006
KitMaker: 789 posts
AeroScale: 118 posts
Posted: Sunday, May 04, 2014 - 04:06 AM UTC
Watching with interest, as I have a few of these in the stash.
I love half-tracks and Tiger tanks. And Lancaster bombers. I model to please myself not others. I may not be the best of modellers, but I'm happy with what I end up with.
United States
Joined: February 01, 2009
KitMaker: 1,233 posts
AeroScale: 663 posts
Posted: Sunday, May 04, 2014 - 06:04 AM UTC
It is a fact that under equal conditions, large-scale battles and whole wars are won by troops which have a strong will for victory, clear goals before them, high moral standards, and devotion to the banner under which they go into battle.
-Georgy Zhukov
England - East Midlands, United Kingdom
Joined: June 03, 2006
KitMaker: 574 posts
AeroScale: 573 posts
Posted: Sunday, May 04, 2014 - 08:14 AM UTC
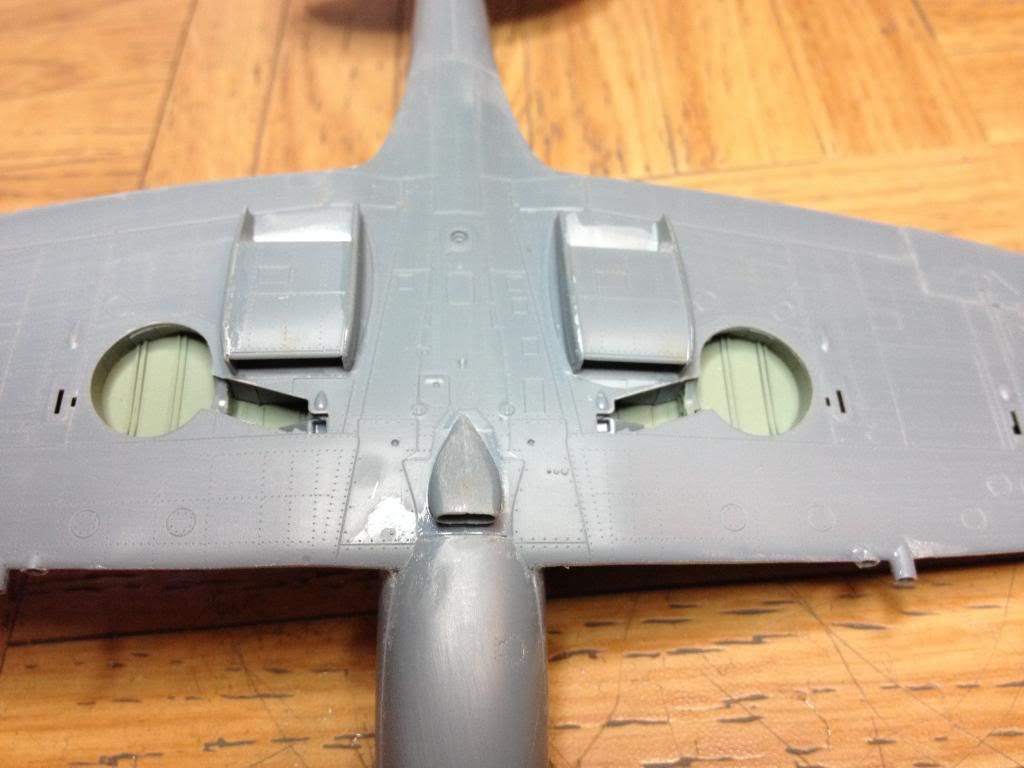
Won't belong now to reach the painting stage. Take care with the wheel well segments and make sure they are aligned properly. I found drilling out the holes for fuel cooler intake and gun camera a bit awkward and I think it would be easier to do after the part is assembled into the wing root.
Alberta, Canada
Joined: January 19, 2008
KitMaker: 6,743 posts
AeroScale: 6,151 posts
Posted: Sunday, May 04, 2014 - 12:26 PM UTC
Ian , I'm really impressed with how Eduard have engineered this kit with the cockpit assembly . Looking forward on your next installment

Terri
United States
Joined: February 01, 2009
KitMaker: 1,233 posts
AeroScale: 663 posts
Posted: Sunday, May 04, 2014 - 12:40 PM UTC
Thanks Terri! Being a MK IX addict, I believe I will have to get a few more Eduard's for the stack.
Regards,
Ian
It is a fact that under equal conditions, large-scale battles and whole wars are won by troops which have a strong will for victory, clear goals before them, high moral standards, and devotion to the banner under which they go into battle.
-Georgy Zhukov
Joel_W
Associate Editor New York, United States
Joined: December 04, 2010
KitMaker: 11,666 posts
AeroScale: 7,410 posts
Posted: Sunday, May 04, 2014 - 01:50 PM UTC
Ian,
Nice job getting the fuselage glued up. Just take your time with matting the wing assembly to it. I found it easier to glue the top wings to the lower 1 pc wing, then the wing assembly to the fuselage. I did have a slight issue with the wing fuselage seams, which I'm pretty sure was my fault.
Joel
On my Workbench:
Monogram 1/24 scale 427 Shelby Cobra
Just Completed:
Beemax 1/24 scale BMW M3 E30 1992 Evolution II
United States
Joined: February 01, 2009
KitMaker: 1,233 posts
AeroScale: 663 posts
Posted: Sunday, May 11, 2014 - 07:16 AM UTC
It is a fact that under equal conditions, large-scale battles and whole wars are won by troops which have a strong will for victory, clear goals before them, high moral standards, and devotion to the banner under which they go into battle.
-Georgy Zhukov
United States
Joined: February 01, 2009
KitMaker: 1,233 posts
AeroScale: 663 posts
Posted: Tuesday, May 27, 2014 - 02:06 PM UTC
I had some time to get back to work on the Spitfire. So far the overall fit has been great. I added a vacu-form slipper tank from the spares box and then primed the model with Model Master Lacquer Primer. Just a couple of spots to touch up and it will be ready for camo.
Best wishes,
Ian
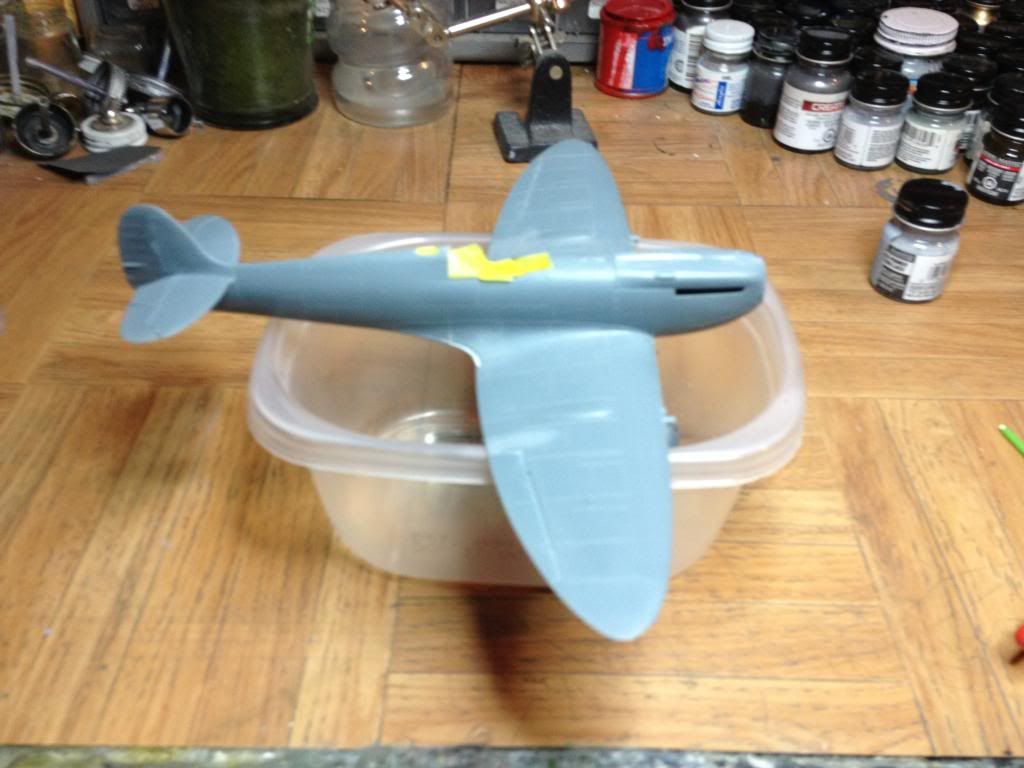
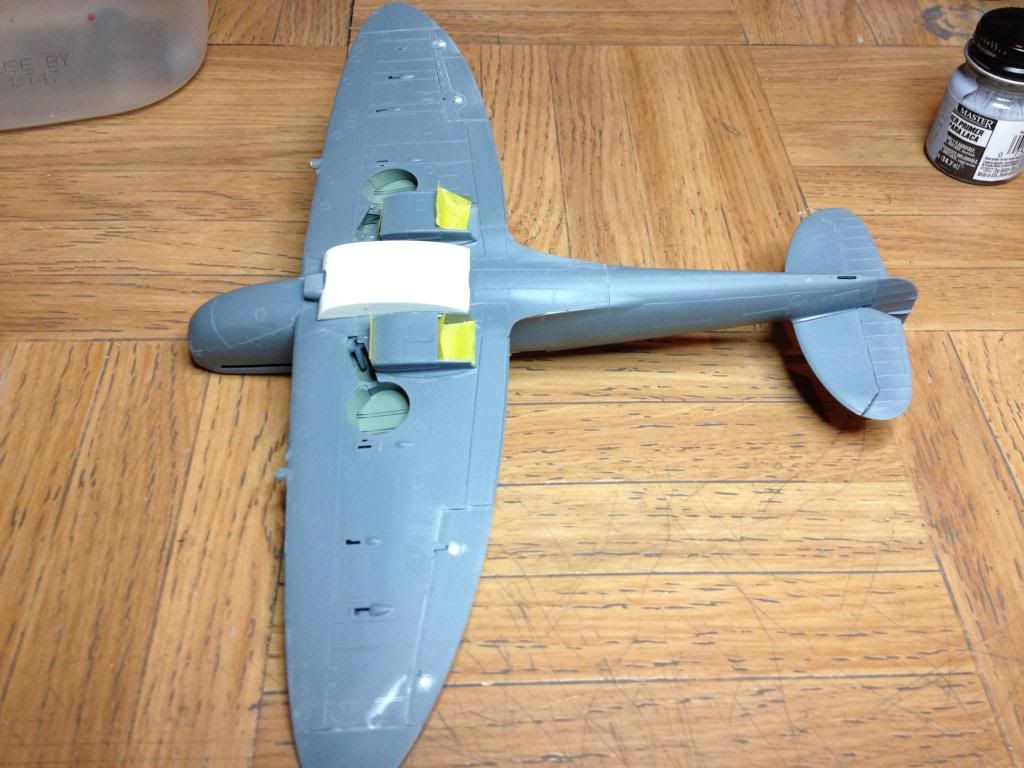
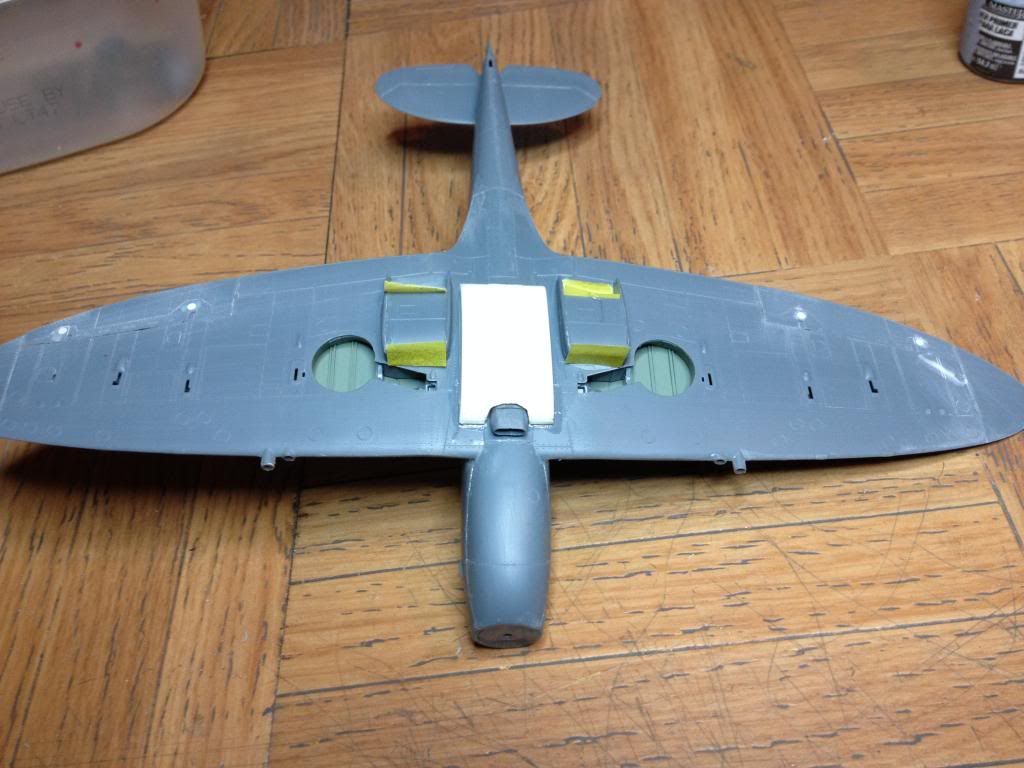
And with primer.........

It is a fact that under equal conditions, large-scale battles and whole wars are won by troops which have a strong will for victory, clear goals before them, high moral standards, and devotion to the banner under which they go into battle.
-Georgy Zhukov
Uppsala, Sweden
Joined: January 09, 2008
KitMaker: 92 posts
AeroScale: 90 posts
Posted: Tuesday, May 27, 2014 - 05:31 PM UTC
Nice build!
How did it go with the seam on the upper cowling? Is it all gone?
/Fredrik
United States
Joined: February 01, 2009
KitMaker: 1,233 posts
AeroScale: 663 posts
Posted: Tuesday, May 27, 2014 - 10:13 PM UTC
Fredrick,
As my fellow modelers indicated in this thread, that cowling seam is kind of persistent. It is almost gone now but I will apply some Mr.Surfacer 500 and steel wool that to get it completely blended. Almost there.
Best wishes,
Ian
It is a fact that under equal conditions, large-scale battles and whole wars are won by troops which have a strong will for victory, clear goals before them, high moral standards, and devotion to the banner under which they go into battle.
-Georgy Zhukov
Joel_W
Associate Editor New York, United States
Joined: December 04, 2010
KitMaker: 11,666 posts
AeroScale: 7,410 posts
Posted: Wednesday, May 28, 2014 - 01:36 AM UTC
Ian,
I've never used steel wool to blend in paint or filler on a model. After using it on wood varnish projects, the steel wool pieces went everywhere, and were a real pain to completely clean up. I would be concerned with some pieces just showing up in the clear coats.
Joel
On my Workbench:
Monogram 1/24 scale 427 Shelby Cobra
Just Completed:
Beemax 1/24 scale BMW M3 E30 1992 Evolution II
United States
Joined: February 01, 2009
KitMaker: 1,233 posts
AeroScale: 663 posts
Posted: Wednesday, May 28, 2014 - 02:50 AM UTC
Joel, I sand it wet and have no issues with the fibers. I just apply water as I am sanding and that cuts down on the debris.
Best wishes,
Ian
It is a fact that under equal conditions, large-scale battles and whole wars are won by troops which have a strong will for victory, clear goals before them, high moral standards, and devotion to the banner under which they go into battle.
-Georgy Zhukov
United States
Joined: February 01, 2009
KitMaker: 1,233 posts
AeroScale: 663 posts
Posted: Saturday, May 31, 2014 - 12:55 PM UTC
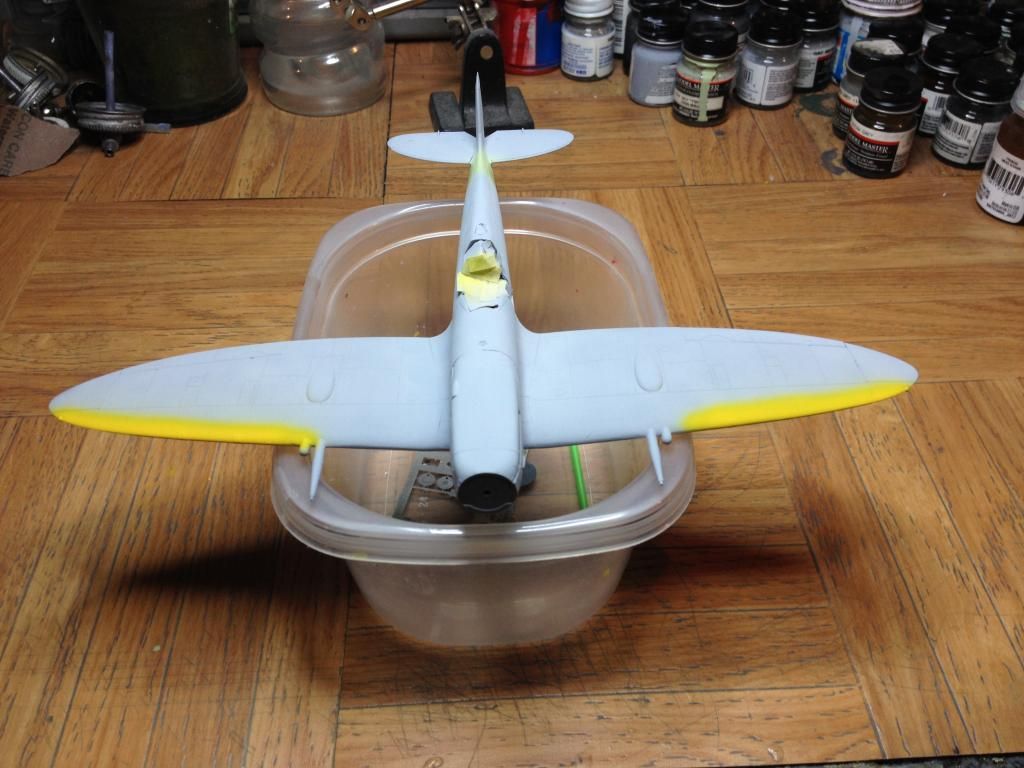
Slight update on the MK IX. The primer has been applied and that pesky cowling seam has been worked down. I applied the yellow leading edge trim and the Sky band on the fuselage. Medium Sea Grey is next.
Best wishes,
Ian

It is a fact that under equal conditions, large-scale battles and whole wars are won by troops which have a strong will for victory, clear goals before them, high moral standards, and devotion to the banner under which they go into battle.
-Georgy Zhukov
England - South East, United Kingdom
Joined: June 03, 2006
KitMaker: 397 posts
AeroScale: 384 posts
Posted: Saturday, May 31, 2014 - 07:56 PM UTC
Many years ago, I went on a fire safety course, and one of the items we were shown was how steel wool is flammable, and can be extremely dangerous. The demonstrator touched a ball of the wool onto the open terminals of an ordinary household battery of low voltage, and the wire reacted like fusewire. shorting out and bursting into flame; since then I've made sure to use (wet) wet-and-dry, like Micromesh.
Edgar
United States
Joined: February 01, 2009
KitMaker: 1,233 posts
AeroScale: 663 posts
Posted: Sunday, June 01, 2014 - 12:06 AM UTC
Well, that should mix well with the Methyl Ethyl Ketone, Toluene, Acetone, Lacquer, and Butyl Alcohol on my work bench.
Best wishes,
Ian
It is a fact that under equal conditions, large-scale battles and whole wars are won by troops which have a strong will for victory, clear goals before them, high moral standards, and devotion to the banner under which they go into battle.
-Georgy Zhukov
England - South East, United Kingdom
Joined: June 03, 2006
KitMaker: 397 posts
AeroScale: 384 posts
Posted: Sunday, June 01, 2014 - 01:54 AM UTC
Quoted Text
Well, that should mix well with the Methyl Ethyl Ketone, Toluene, Acetone, Lacquer, and Butyl Alcohol on my work bench.
Especially if you have them open, while stretching sprue over a candle.
Edgar


