1/32 Hasegawa J2M3 Raiden
Berlin, Germany
Joined: February 20, 2005
KitMaker: 204 posts
AeroScale: 99 posts
Posted: Monday, June 09, 2014 - 06:39 AM UTC
Hi to all,
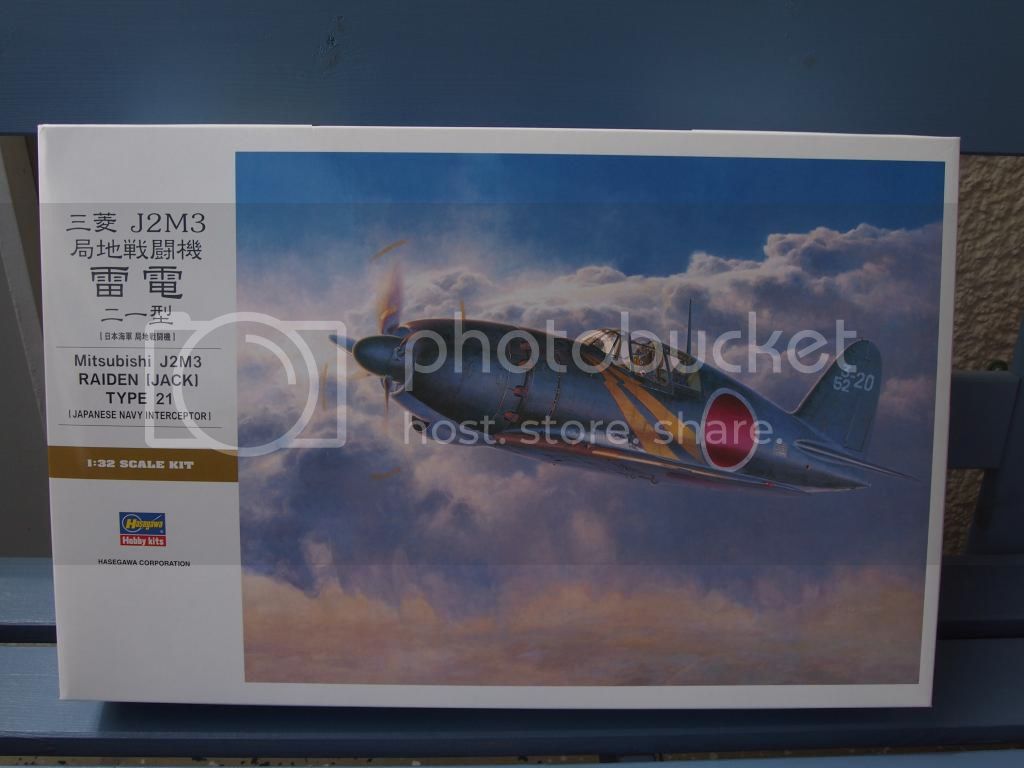
this is going to be my next project: Hasegawa's J2M3 Raiden in 1/32 scale. It will be an OOB build. I try to do a build log if there's enough interest.
The box says it's from 2011. All the parts are free of flash and there are a lot of crisp details. Looking through the instructions it should be a trouble free build. There are no seat belts but you have the option of a very nice pilot with three different heads. You got two different markings, first one is the well known 352nd Naval Flying Group with those big yellow flash on the fuselage sides. The second one is from the 302nd Naval Flying Group which I tend to use. I contacted Mal to get hopefully some of his wonderful masks for the scheme.
Thanks for stopping by. Best regards ro
Berlin, Germany
Joined: February 20, 2005
KitMaker: 204 posts
AeroScale: 99 posts
Posted: Monday, June 09, 2014 - 07:53 AM UTC
Ontario, Canada
Joined: June 07, 2014
KitMaker: 102 posts
AeroScale: 102 posts
Posted: Monday, June 09, 2014 - 07:56 AM UTC
Very nice kit to start with. I've only built two Japanese planes so far ( Shinden) and planning to do more. I'll be watching your build thread with lot of interests. Thanks for doing it.
Merlin
 Senior Editor
#017
United Kingdom
Joined: June 11, 2003
KitMaker: 17,582 posts
AeroScale: 12,795 posts
Posted: Monday, June 09, 2014 - 08:00 AM UTC
Hi Robert
Excellent! From my In-Box take a while ago, it's up there with the best largescale WW2 kits of recent years. It looks an absolute beauty, and I've been itching to build it myself.

All the best
Rowan
BEWARE OF THE FEW...
As I grow older, I regret to say that a detestable habit of thinking seems to be getting a hold of me. - H. Rider Haggard
Holdfast
President #056
England - South West, United Kingdom
Joined: September 30, 2002
KitMaker: 8,581 posts
AeroScale: 4,913 posts
Posted: Monday, June 09, 2014 - 05:35 PM UTC
Yes its a nicely detailed cockpit, I must get on with mine

When you get to the fill in pieces for the cowling gun troughs be aware that they don't seem to fit too well. They are tight and you need to push past the tightness and they will fit quite well. I found this out when I thought that I had the second one stuck, I got mean with it and gave it a really good push with my thumb and it clicked it place. The first one wasn't sat correctly and it is causing me paint to fill the unevenness!
I have bought Master gun barrels for the cannon and, Although they will need to be cut shorter, especially the outer pair, but they will certainly add to the finished model. I have also bought Eduards pre-painted seat belts, as HKW doesn't do them for the Raiden, which is a pity.
MAL the MASK
BULLDOG # 6 (President)
BEWARE OF THE FEW
Sappers: First in, last out. (UBIQUE)
It's not the same, better, but not the same.
Berlin, Germany
Joined: February 20, 2005
KitMaker: 204 posts
AeroScale: 99 posts
Posted: Monday, June 09, 2014 - 08:13 PM UTC
Quoted Text
Very nice kit to start with. I've only built two Japanese planes so far ( Shinden) and planning to do more. I'll be watching your build thread with lot of interests. Thanks for doing it.
Thanks a lot for your interest, I saw your two Shinden which came out very nice.
greetings ro
Removed by original poster on 06/10/14 - 08:17:55 (GMT).
Berlin, Germany
Joined: February 20, 2005
KitMaker: 204 posts
AeroScale: 99 posts
Posted: Monday, June 09, 2014 - 08:19 PM UTC
Quoted Text
Hi Robert
Excellent! From my In-Box take a while ago, it's up there with the best largescale WW2 kits of recent years. It looks an absolute beauty, and I've been itching to build it myself.
All the best
Rowan
Hi Rowan,
yes you're right about the kit. Hopefully I can do justice to it.
greetings ro
Berlin, Germany
Joined: February 20, 2005
KitMaker: 204 posts
AeroScale: 99 posts
Posted: Monday, June 09, 2014 - 08:25 PM UTC
Quoted Text
Yes its a nicely detailed cockpit, I must get on with mine
When you get to the fill in pieces for the cowling gun troughs be aware that they don't seem to fit too well. They are tight and you need to push past the tightness and they will fit quite well. I found this out when I thought that I had the second one stuck, I got mean with it and gave it a really good push with my thumb and it clicked it place. The first one wasn't sat correctly and it is causing me paint to fill the unevenness!
I have bought Master gun barrels for the cannon and, Although they will need to be cut shorter, especially the outer pair, but they will certainly add to the finished model. I have also bought Eduards pre-painted seat belts, as HKW doesn't do them for the Raiden, which is a pity.
Hi Mal,
thank you very much for your advice with the upcoming cowling. I will look for that. I also looked for some seat belts from HGW. Instead I bought some from FineMolds which also look nice but we will see how they work. As it's an OOB build (mostly) I will go with the barrels from the box.
kind regards ro
Berlin, Germany
Joined: October 12, 2008
KitMaker: 709 posts
AeroScale: 651 posts
Posted: Tuesday, June 10, 2014 - 12:44 AM UTC
Yep, Ro!
That's A good decision and start (for the Kit as well as for showing us a build-log)

I'm sure you'll fix it up it very well - keep on !!

I'll follow your progress.
P.S. I've seen the finemolds' belts, I'm not sure about that...

Sometimes you need to distance yourself to see things clearly - Lao Tzu -
... in scale and in real life -T.
Berlin, Germany
Joined: February 20, 2005
KitMaker: 204 posts
AeroScale: 99 posts
Posted: Tuesday, June 10, 2014 - 04:36 AM UTC
Thanks my friends, yeah the seat belts from Finemolds are made of plastic but they are micro detailed. So you will see ...
greetings ro
Berlin, Germany
Joined: February 20, 2005
KitMaker: 204 posts
AeroScale: 99 posts
Posted: Tuesday, June 10, 2014 - 04:47 AM UTC
Georgia, United States
Joined: August 08, 2011
KitMaker: 410 posts
AeroScale: 409 posts
Posted: Tuesday, June 10, 2014 - 07:15 AM UTC
I was just thinking about building something Japanese, and was thinking about this kit. Will be following with interest!
Doug
Berlin, Germany
Joined: February 20, 2005
KitMaker: 204 posts
AeroScale: 99 posts
Posted: Friday, June 13, 2014 - 11:30 PM UTC
Quoted Text
I was just thinking about building something Japanese, and was thinking about this kit. Will be following with interest!
Doug
Thanks for your interest Doug, it's a nice kit, get one ...
greetings ro
Berlin, Germany
Joined: February 20, 2005
KitMaker: 204 posts
AeroScale: 99 posts
Posted: Friday, June 13, 2014 - 11:39 PM UTC
Georgia, United States
Joined: August 08, 2011
KitMaker: 410 posts
AeroScale: 409 posts
Posted: Saturday, June 14, 2014 - 02:02 AM UTC
Looking good!
I've got the Eduard IP for this kit (and was looking at it and trying to decide between using the kit IP and decals or the Eduard IP. Based on your photo, I'll give the kit IP and decals a go!
You've inspired me to pull this kit off the shelf and I will be starting it next (unless the new FRROM 1/32 IAR-81C kit shows up for a build review first)
Doug
Holdfast
President #056
England - South West, United Kingdom
Joined: September 30, 2002
KitMaker: 8,581 posts
AeroScale: 4,913 posts
Posted: Saturday, June 14, 2014 - 06:14 PM UTC
Hi Robert,
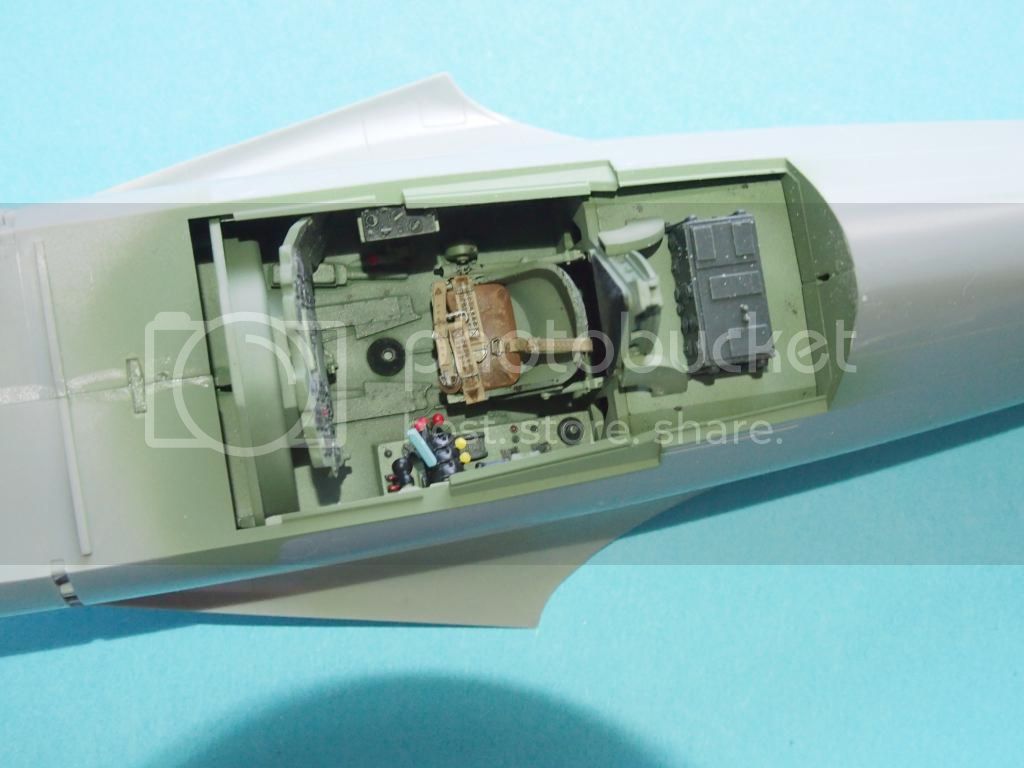
Can you tell me if the colours on the handles of the throttle, prop pitch etc, are correct and from any references? I have been searching to find this out and I did find one build that colours the throttle handle blue
MAL the MASK
BULLDOG # 6 (President)
BEWARE OF THE FEW
Sappers: First in, last out. (UBIQUE)
It's not the same, better, but not the same.
Berlin, Germany
Joined: February 20, 2005
KitMaker: 204 posts
AeroScale: 99 posts
Posted: Sunday, June 15, 2014 - 04:48 AM UTC
Quoted Text
Hi Robert,
Can you tell me if the colours on the handles of the throttle, prop pitch etc, are correct and from any references? I have been searching to find this out and I did find one build that colours the throttle handle blue
Hi Mal,
I'm not sure about the colours, my references don't show them. I know it's probably not correct but in the end my intention was to ad some visual interest.
kind regards ro
Berlin, Germany
Joined: February 20, 2005
KitMaker: 204 posts
AeroScale: 99 posts
Posted: Sunday, June 15, 2014 - 07:50 AM UTC
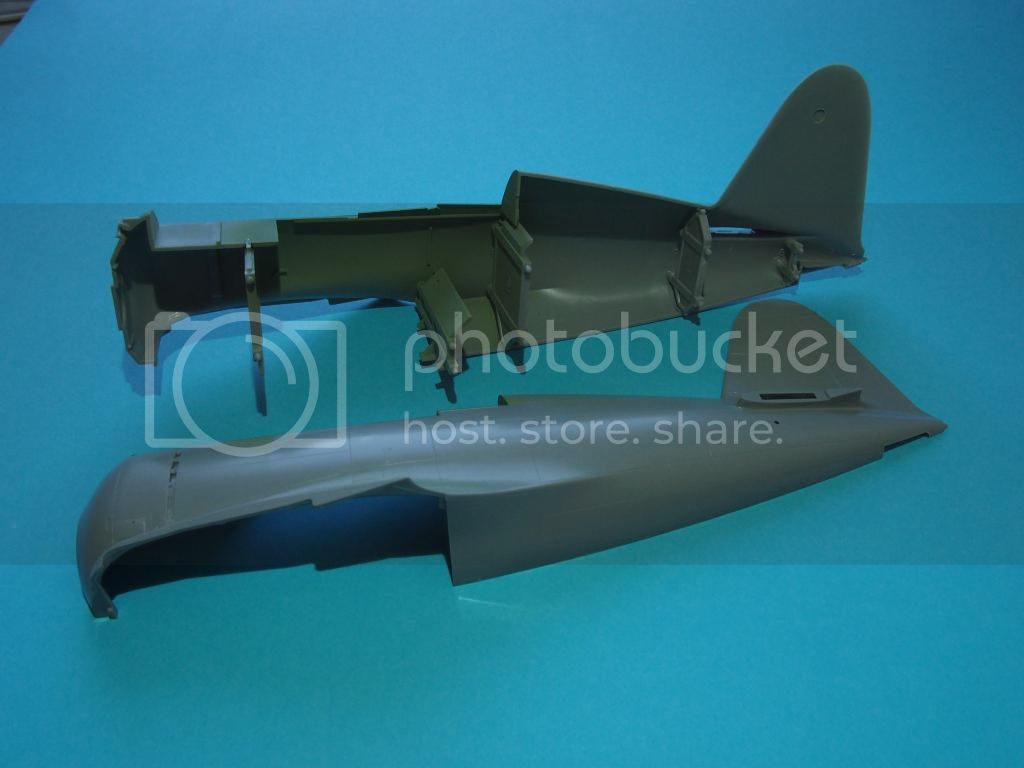
Hi there,
just a quick update. I prepared the fuselage halves with the interior green and installed the cockpit. There were no fit issues. I only had to take care of the center seam line.
greetings ro
Merlin
Senior Editor #017
United Kingdom
Joined: June 11, 2003
KitMaker: 17,582 posts
AeroScale: 12,795 posts
Posted: Sunday, June 15, 2014 - 09:10 AM UTC
Hi Robert
Looking really good!
All the best
Rowan
BEWARE OF THE FEW...
As I grow older, I regret to say that a detestable habit of thinking seems to be getting a hold of me. - H. Rider Haggard
Holdfast
President #056
England - South West, United Kingdom
Joined: September 30, 2002
KitMaker: 8,581 posts
AeroScale: 4,913 posts
Posted: Monday, June 16, 2014 - 05:20 PM UTC
I'm not too far behind you, even though mine has been on the go for very much longer


Something to watch out for is the fitting of the rear glass panels to part A25/A26. These parts sit a little low(or at least one of them does)I believe. The simple fix might be to open the top of the slot that takes the aerial mast tab, so that it/they can be fitted a little higher
If I can re-find where I saw this I'll post a link. If I remember correctly it was on Ralph Reise's build of the prototype
MAL the MASK
BULLDOG # 6 (President)
BEWARE OF THE FEW
Sappers: First in, last out. (UBIQUE)
It's not the same, better, but not the same.
Berlin, Germany
Joined: February 20, 2005
KitMaker: 204 posts
AeroScale: 99 posts
Posted: Monday, June 23, 2014 - 07:12 AM UTC
Mal,
thanks again for the tip, I will watch out for this one, I do appreciate those helpful tips.
Berlin, Germany
Joined: February 20, 2005
KitMaker: 204 posts
AeroScale: 99 posts
Posted: Monday, June 23, 2014 - 07:23 AM UTC
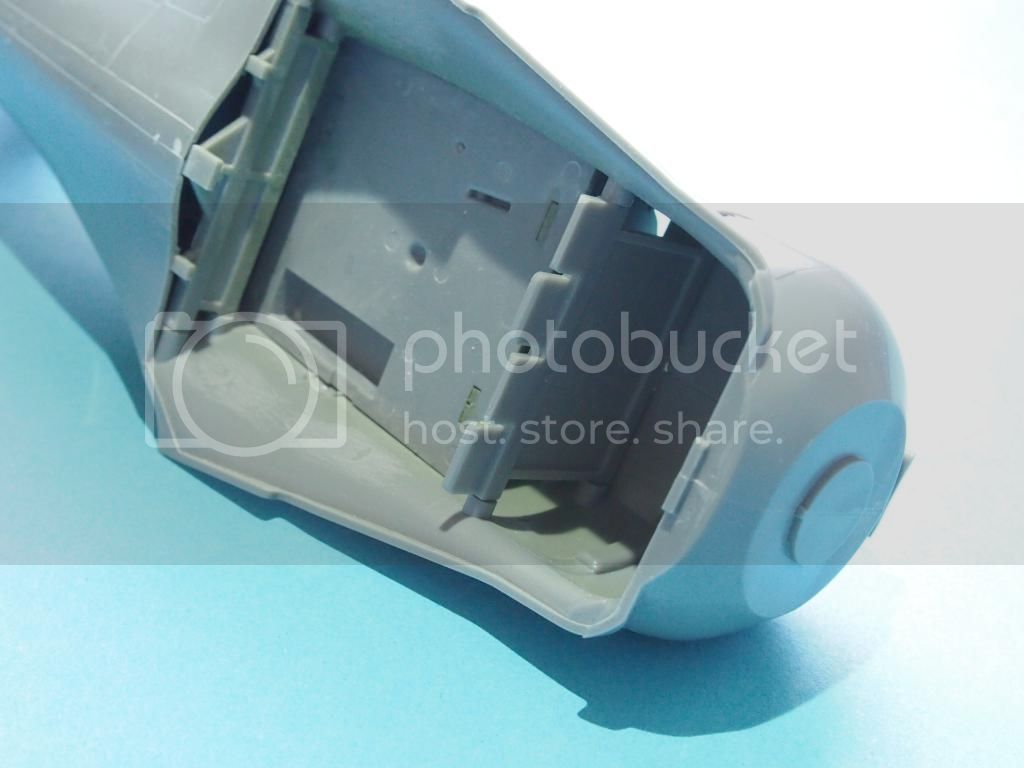
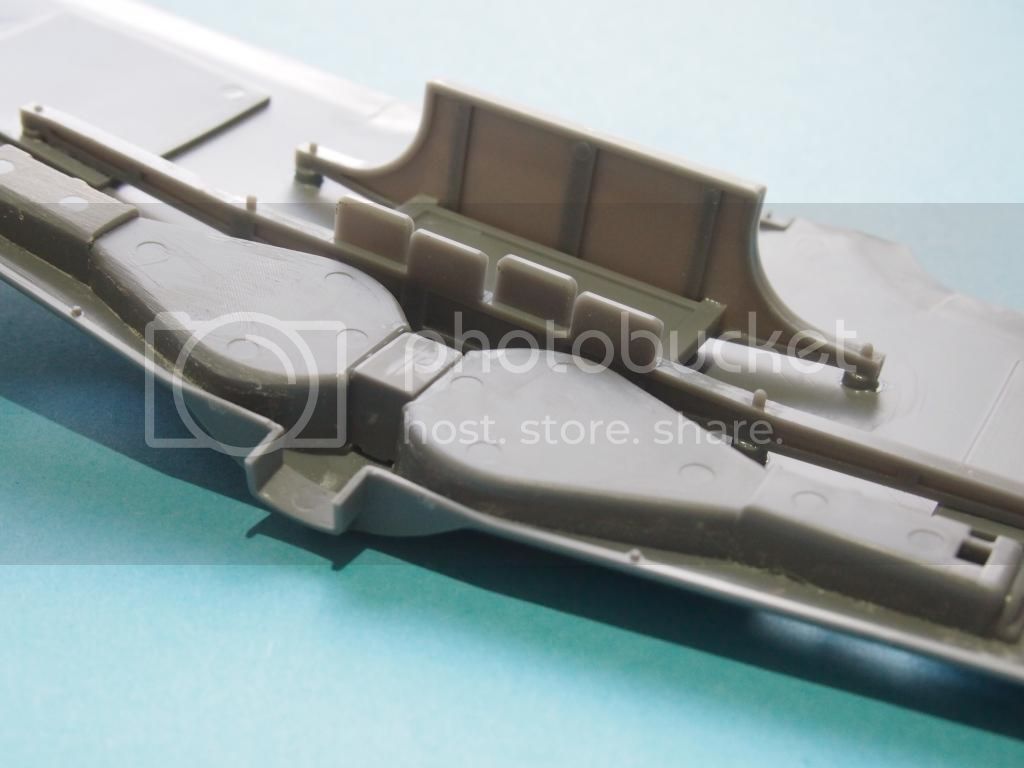
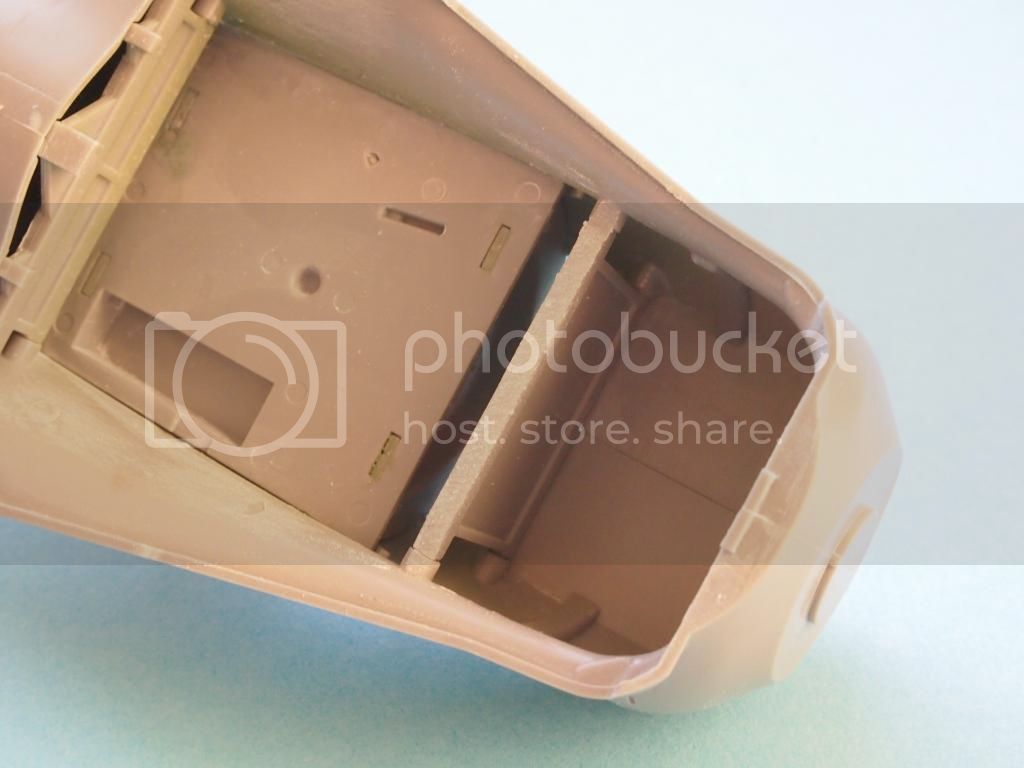
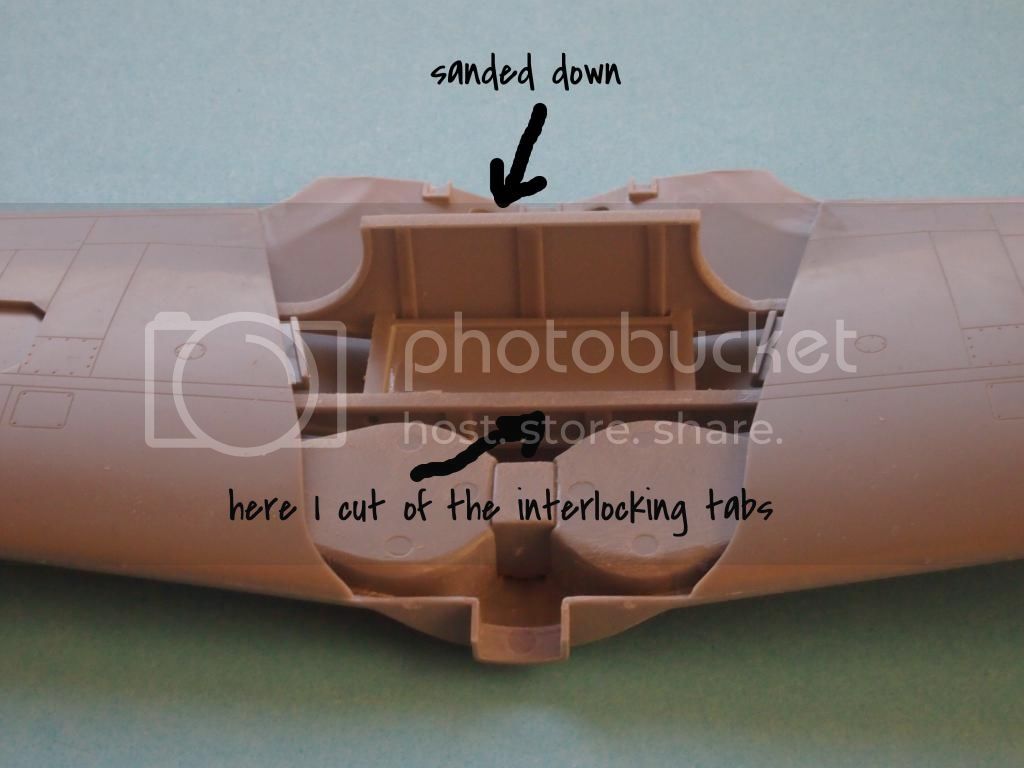
Hi there,
here is my small update for tonight. Next step was building the wings. On the following two pics you can see those interlocking tabs from the fuselage and the wing section. As a result I couldn't get a nice fit
I don't know if I did a mistake during construction but the idea was to cut them away. On top of this I also sanded down the marked piece. This solved my problems.
Thanks for looking, best regards ro
England - East Midlands, United Kingdom
Joined: November 06, 2005
KitMaker: 753 posts
AeroScale: 311 posts
Posted: Monday, June 23, 2014 - 07:36 AM UTC
Excellent progress so far and some tremendous detail and painting in evidence.
Thanks for the really clear pics.
Gary
Joel_W
Associate Editor New York, United States
Joined: December 04, 2010
KitMaker: 11,666 posts
AeroScale: 7,410 posts
Posted: Monday, June 23, 2014 - 09:56 AM UTC
Robert,
I just found your build blog, and have subscribed so I can follow your complete build. Nothing wrong with a detailed blog of an OOB build. Perfection in basics comes before detailing in my book.
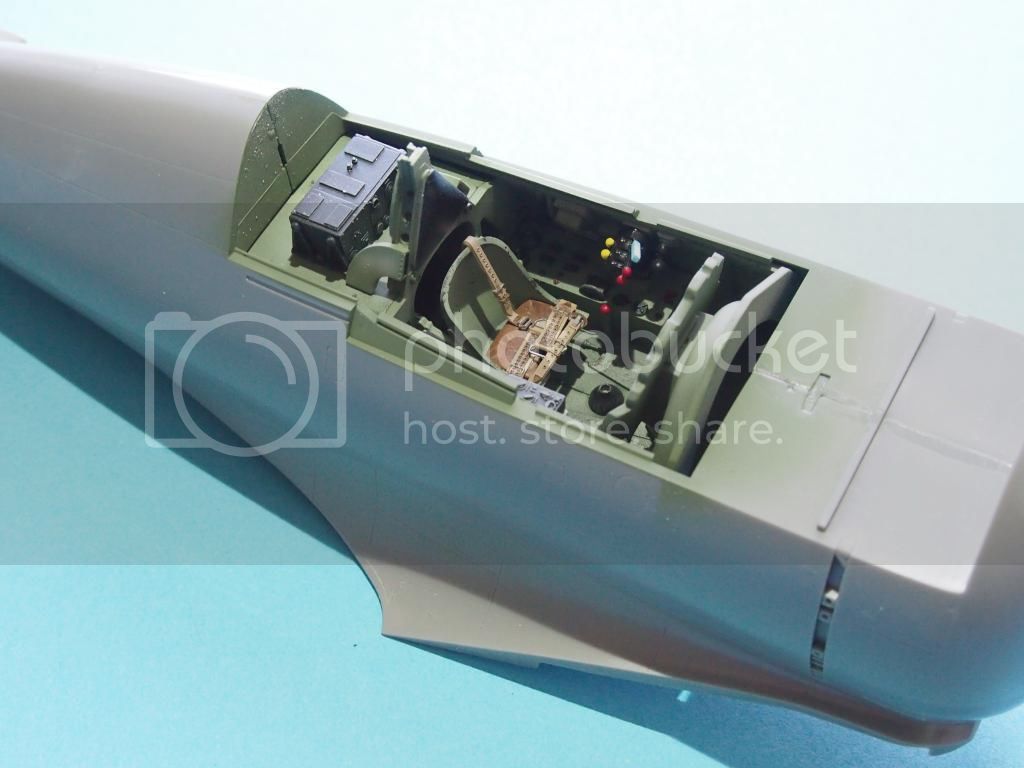
Your cockpit came out quite nice. I particularly liked your IP with the decal for instruments. In 1/32 scale it works well.
I've never seen AM plastic seatbelts and harnesses before. They do look a little on the thick side, but have exceptional detail. Since I've never built any Japanese aircraft, seeing one harness resting on the front of the seat did cause me some concern. I went back to your picture of the instructions for them, and sure enough, that's how they have it as well. Just seems odd to me. Can anyone offer an explanation?
Joel
On my Workbench:
Monogram 1/24 scale 427 Shelby Cobra
Just Completed:
Beemax 1/24 scale BMW M3 E30 1992 Evolution II