Dual Build Boeings: 737 and 767
British Columbia, Canada
Joined: September 03, 2009
KitMaker: 6,965 posts
AeroScale: 6,247 posts
Posted: Thursday, June 26, 2014 - 04:33 PM UTC
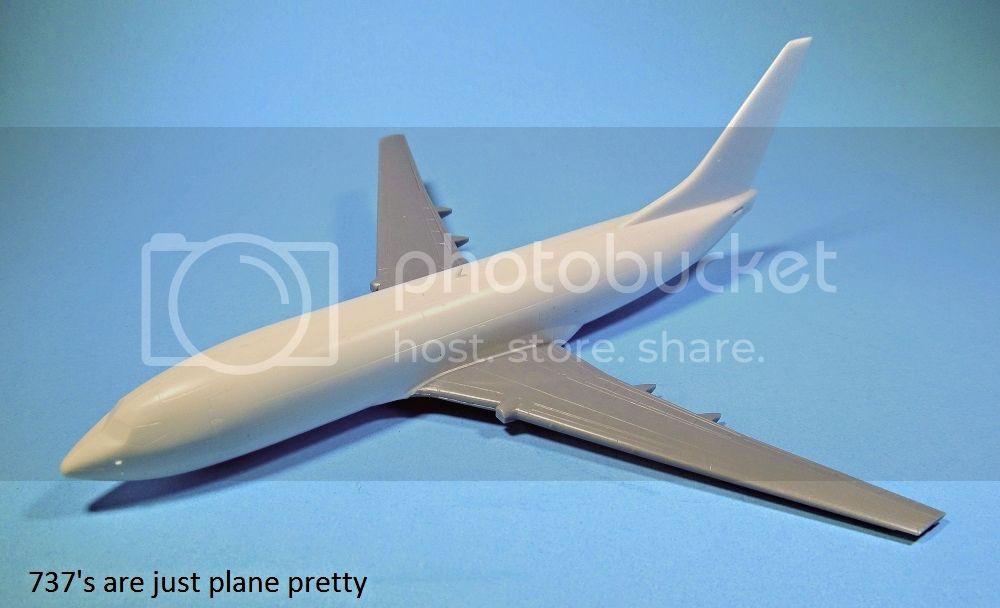
The last dual build was so much fun that Ben and I have decided to do it again. This time we're building the other airliner kits sent to us by Hobbico. Ben will tackle the 737-700
While I attempt the 767-300
This time the common link is that both kits will be finished in Air Do markings.
Are you seated comfortably? Then we'll begin!
When once you have tasted flight you will walk the Earth with your eyes turned skyward.
For there you have been, and there you will always long to return.
-Leonardo Da Vinci
Joel_W
 Associate Editor
New York, United States
Joined: December 04, 2010
KitMaker: 11,666 posts
AeroScale: 7,410 posts
Posted: Friday, June 27, 2014 - 04:23 AM UTC
Jess & Ben,
Then let the fun begin.
I must confess that I had absolutely no idea of what Air Do is, so I googled it. It's a low cost regional Japanese airline based in Tokyo.
After reading your review, are you planning on filling in the windows and using the kit window decals. Seems like the easiest and neatest way to go.
Joel
On my Workbench:
Monogram 1/24 scale 427 Shelby Cobra
Just Completed:
Beemax 1/24 scale BMW M3 E30 1992 Evolution II
British Columbia, Canada
Joined: September 03, 2009
KitMaker: 6,965 posts
AeroScale: 6,247 posts
Posted: Friday, June 27, 2014 - 11:41 AM UTC
What's an Air Do? It's wot you go to the Air Dresser for, silly!
When once you have tasted flight you will walk the Earth with your eyes turned skyward.
For there you have been, and there you will always long to return.
-Leonardo Da Vinci
British Columbia, Canada
Joined: September 03, 2009
KitMaker: 6,965 posts
AeroScale: 6,247 posts
Posted: Friday, June 27, 2014 - 11:42 AM UTC
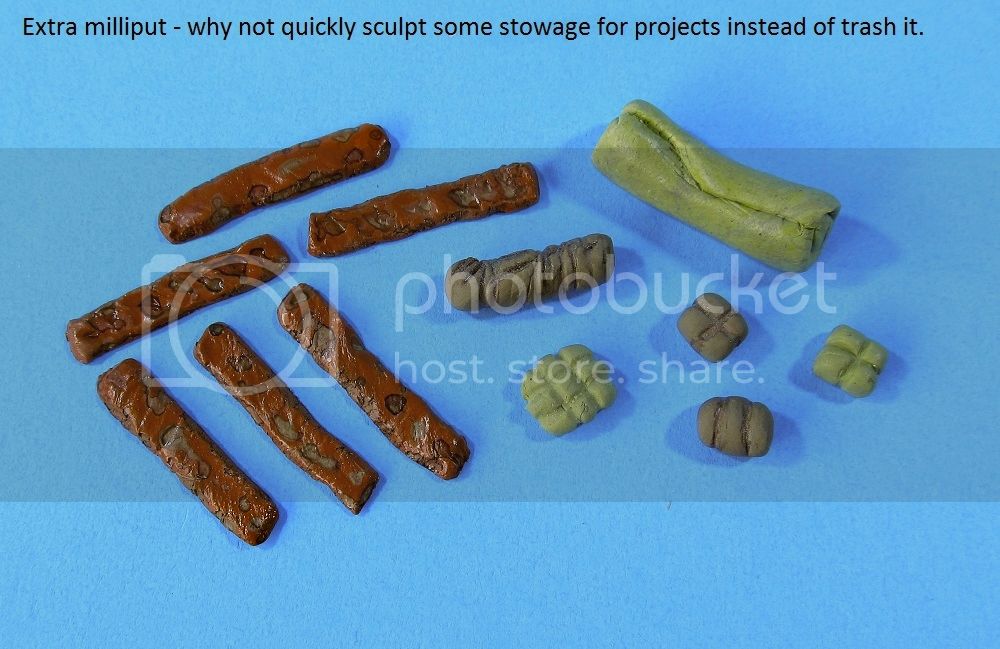
Yes, I plan to fill the windows using the same Milliput trick I used for the 777. Lucky Ben doesn't need to fill in his windows this time round

When once you have tasted flight you will walk the Earth with your eyes turned skyward.
For there you have been, and there you will always long to return.
-Leonardo Da Vinci
Alberta, Canada
Joined: April 07, 2010
KitMaker: 1,028 posts
AeroScale: 939 posts
Posted: Saturday, June 28, 2014 - 02:44 AM UTC
I am starting this kit today, and if your interested, there is a review
Here .
Anyway, I've been fondling the fuselage halves, wondering if I should build with wheels up in flight profile, or with wheels down. If it's wheels up, I will not weight the forward fuselage. Nor will I use the kit supplied stand as it looks way to bulky for the model size. So I've been considering making my own stand using a music wire filled brass tubing and wood affair:

Before I finalize on build attitude, it all starts here:
I do hope you are into a play by play.

To prevent being called an 'expert', screw something up good every now and again.
British Columbia, Canada
Joined: September 03, 2009
KitMaker: 6,965 posts
AeroScale: 6,247 posts
Posted: Saturday, June 28, 2014 - 05:59 AM UTC
The first thing to do with the 767 is to fill in those ugly windows. Once again I used my Milliput snake trick. The left fuselage half is filled while the right side waits
Push the putty through the windows so it sticks out and completely fills each aperture
Trim each window flush with the fuselage and then run a dampened fingertip down the window line to smooth everything off. This will help to reduce the amount of sanding which will be necessary, an important task for a kit which has raised panel lines. Once the windows have been filled, fuselage assembly goes quickly

As do the wings. Test fitting reveals that the fit is a trifle too sloppy to allow for the wings and fuselage to be painted separately.
My model will sit overnight to allow the putty and glue to cure.
When once you have tasted flight you will walk the Earth with your eyes turned skyward.
For there you have been, and there you will always long to return.
-Leonardo Da Vinci

#259
Massachusetts, United States
Joined: October 23, 2011
KitMaker: 2,265 posts
AeroScale: 1,715 posts
Posted: Saturday, June 28, 2014 - 06:29 AM UTC
Quoted Text
I do hope you are into a play by play.
thats what we're all here for - carry on, sir!
edit to add, waiting to see what the wooden match is for...
Joel_W
Associate Editor New York, United States
Joined: December 04, 2010
KitMaker: 11,666 posts
AeroScale: 7,410 posts
Posted: Saturday, June 28, 2014 - 09:36 AM UTC
Ben,
I love play by play builds.
Jessica,
Your Milliput snake really works great.
Joel
On my Workbench:
Monogram 1/24 scale 427 Shelby Cobra
Just Completed:
Beemax 1/24 scale BMW M3 E30 1992 Evolution II
British Columbia, Canada
Joined: September 03, 2009
KitMaker: 6,965 posts
AeroScale: 6,247 posts
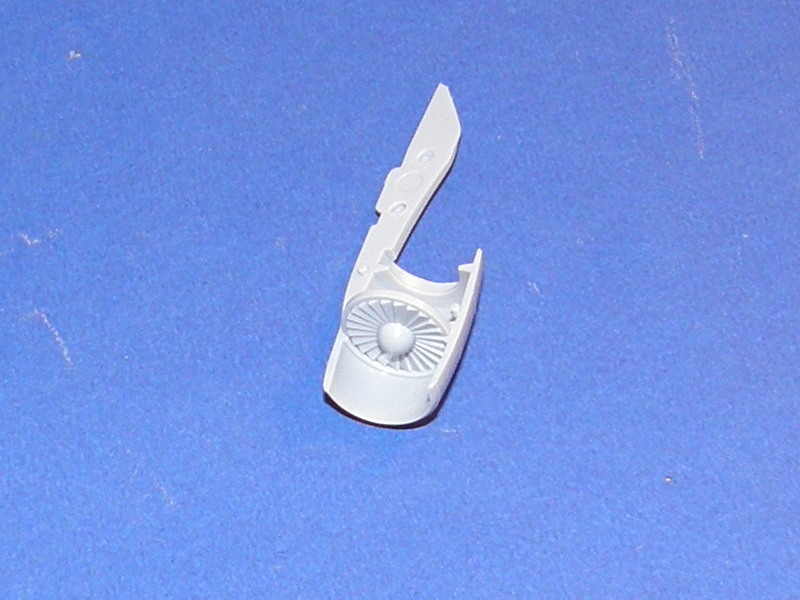
Posted: Saturday, June 28, 2014 - 10:12 AM UTC
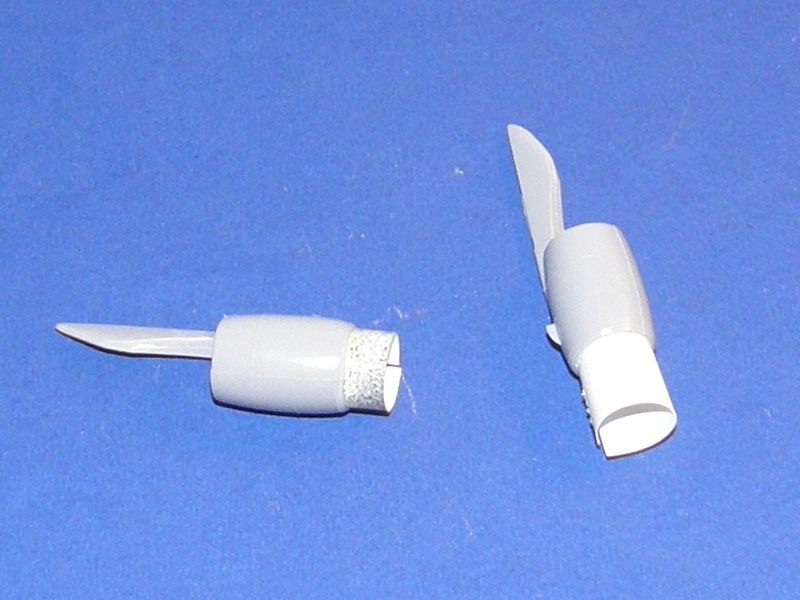
Now I turn to the engines. My task is to hide the seams and make the hollow inside of the engines resemble an actual intake duct. Here's what the kit gives you
I'm using sheet plastic to create an intake duct. First glue the engine together, and slide in a rolled sheet of paper
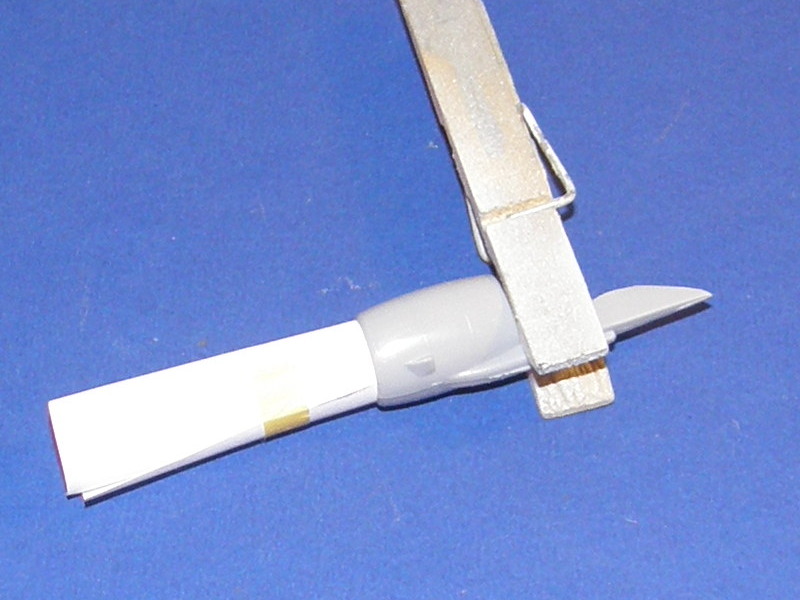
Mark where the paper overlaps. This will become the pattern for the plastic duct.
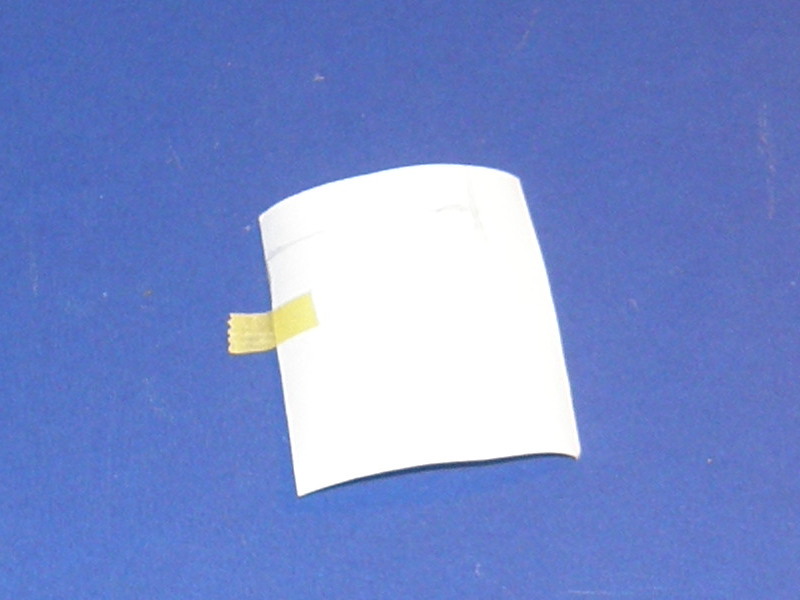
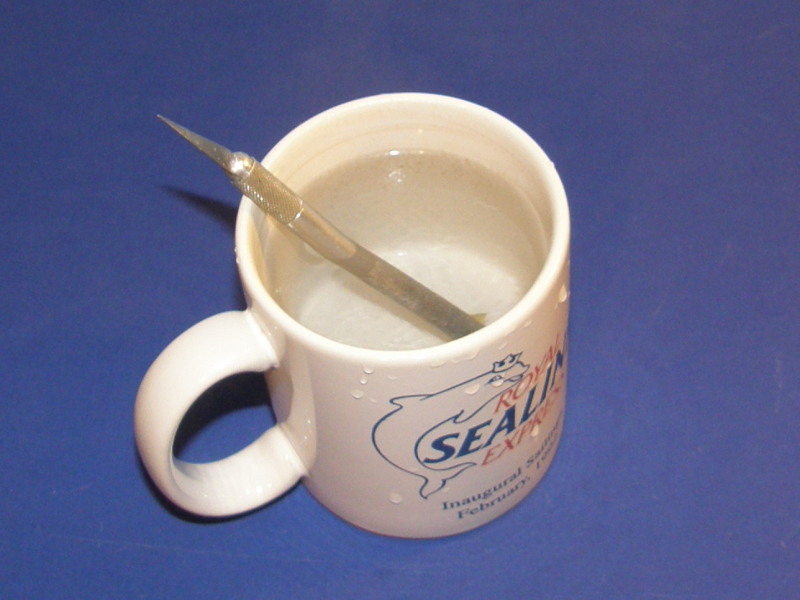
Cut some thin sheet plastic to size and roll it around a knife handle to induce it to curl. Tape it in place
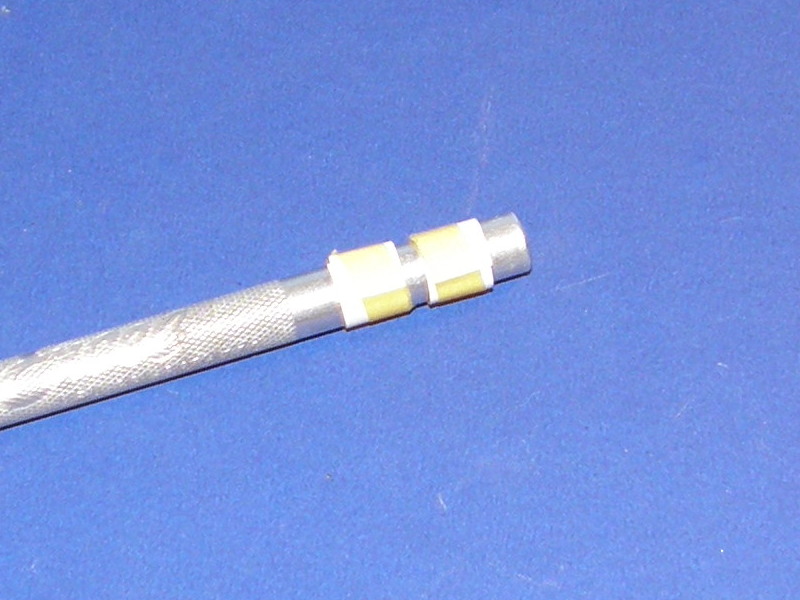
And dip it into freshly boiled water to set the curl
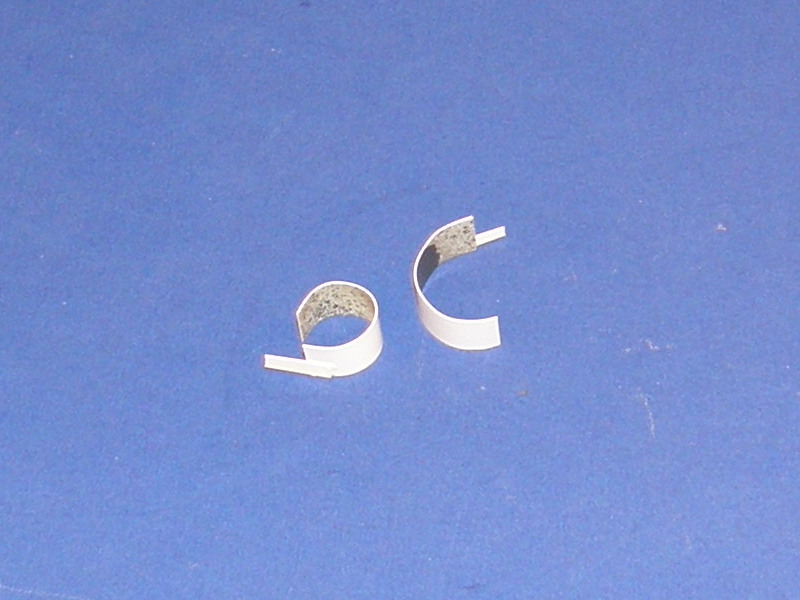
Glue small tabs cut from the sheet to the bottom of the curl. These will help to hold it in a tube because the gluing surface of the edges is very small. The tabs will be hidden inside the engine cowling
Roll the plastic into a tube and glue securely
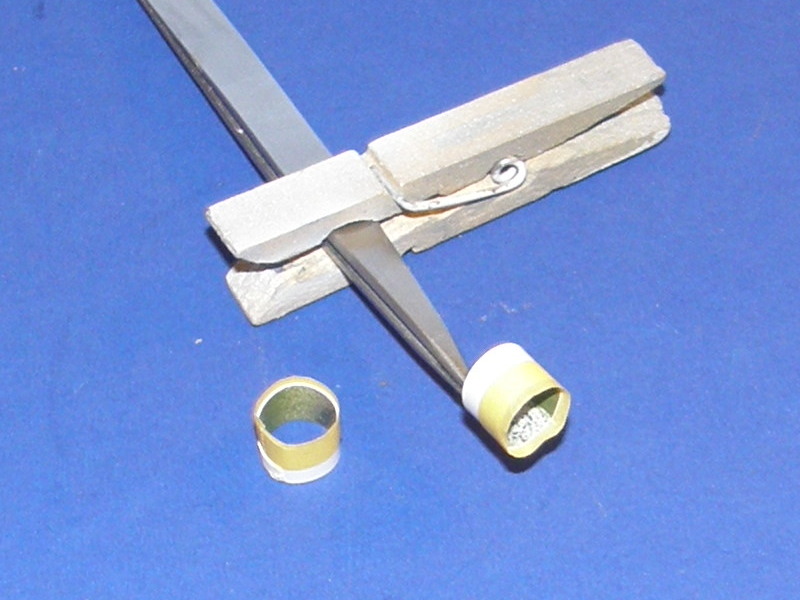
In the event, the tubes shown in these pictures were just a sliver undersized so I had to repeat the process. This time I made them wider so they'd stick out the front of the cowling. The excess will be trimmed off and sanded flush once the glue has dried
When once you have tasted flight you will walk the Earth with your eyes turned skyward.
For there you have been, and there you will always long to return.
-Leonardo Da Vinci
Alberta, Canada
Joined: April 07, 2010
KitMaker: 1,028 posts
AeroScale: 939 posts
Posted: Saturday, June 28, 2014 - 01:30 PM UTC
Quoted Text
waiting to see what the wooden match is for...
The match is simply a universally known size comparison rod. It can also be used to burn a messed up project.
Jessie - thanks for the highly educational new trick.
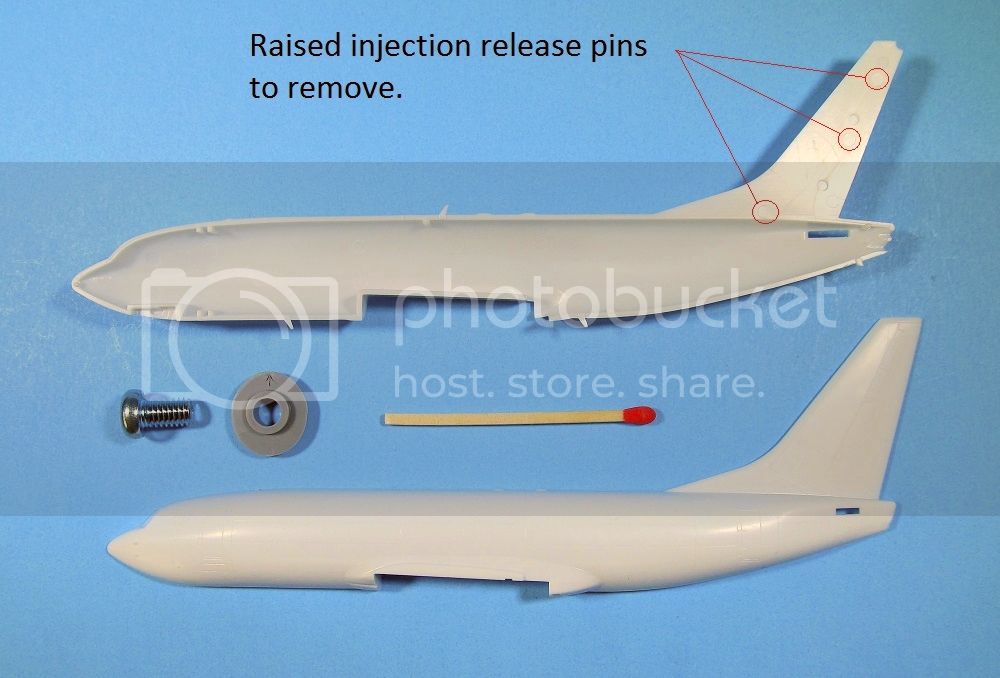
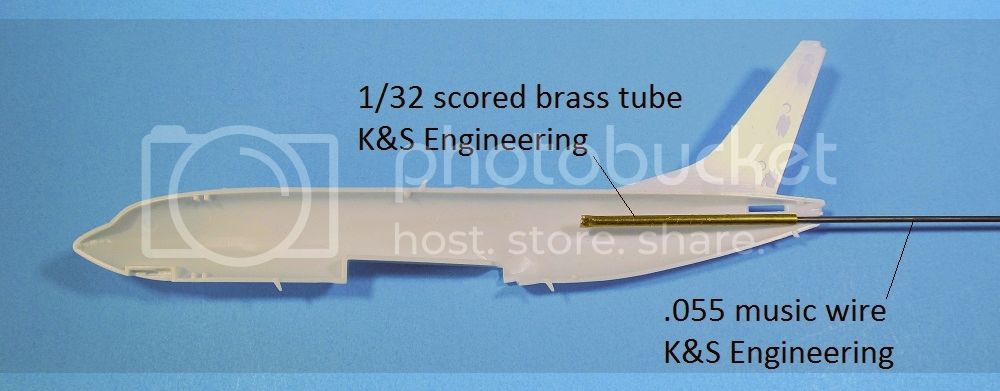
I've decided I'll model my 737 in flight attitude on a small display stand. So, I require a brass sleeve placed up the poop-shoot of the model. I've never put anything on a stand before, so this is new.
I'm trying to accomplish this with little interference on the model. Also, it would be nice if I can slide the model off the stand so I can play airplane (with associated noise's).

And on another note:
Edit: The brass tube should read 3/32", not 1/32.
To prevent being called an 'expert', screw something up good every now and again.
British Columbia, Canada
Joined: September 03, 2009
KitMaker: 6,965 posts
AeroScale: 6,247 posts
Posted: Saturday, June 28, 2014 - 01:31 PM UTC
And now the glue has dried, the excess plastic has been trimmed, sanded and tidied up. Now in place of the empty shell, my engines have intake ducts.
When once you have tasted flight you will walk the Earth with your eyes turned skyward.
For there you have been, and there you will always long to return.
-Leonardo Da Vinci
Alberta, Canada
Joined: April 07, 2010
KitMaker: 1,028 posts
AeroScale: 939 posts
Posted: Sunday, June 29, 2014 - 01:42 AM UTC
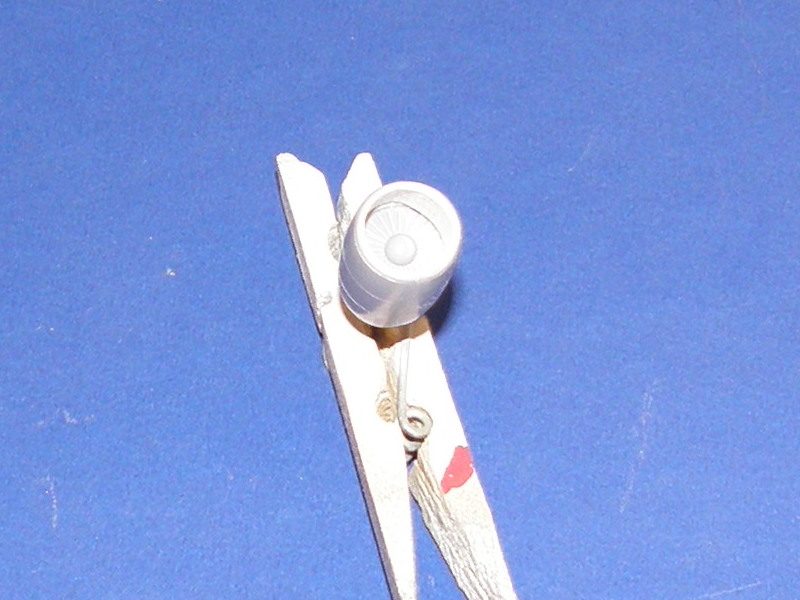
Tip of the engine exhaust cone:
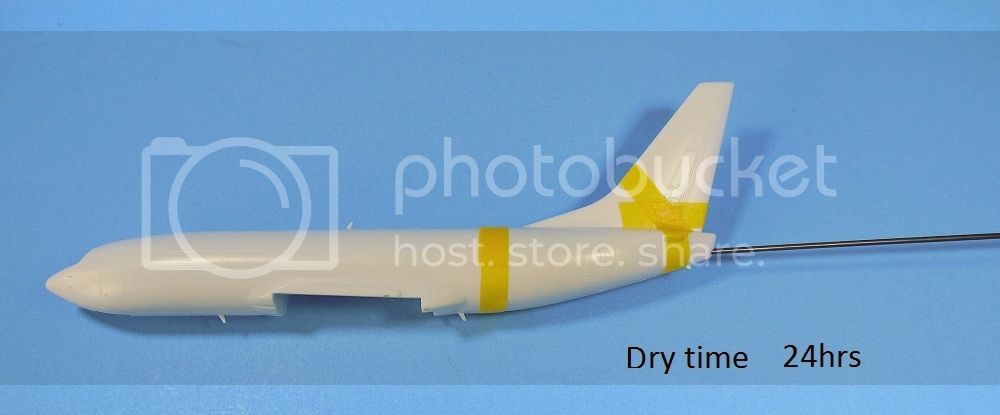
I decided to use the forward weight parts anyway. Helps to balance it out with that gob of Milliput in there. Both glued and Milliputed in, the brass sleeve isn't going anywhere.
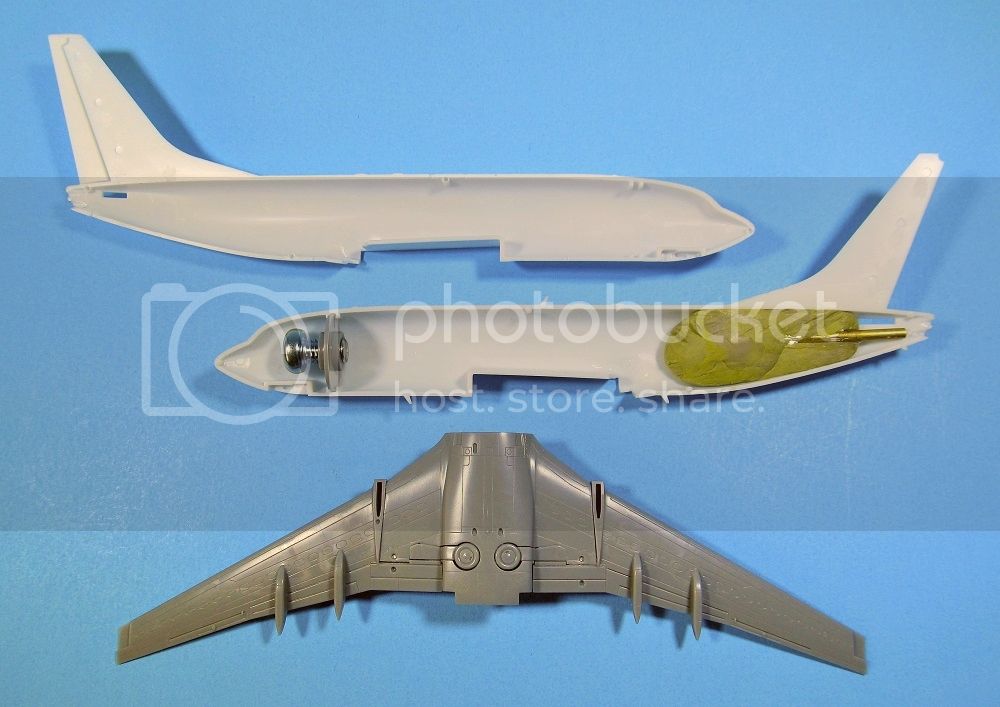
You'll see the flight attitude gear parts are glued in. Also, the three part wings are together with less than perfect, tight fit.
I should have this bunch glued together soon.
To prevent being called an 'expert', screw something up good every now and again.
Joel_W
Associate Editor New York, United States
Joined: December 04, 2010
KitMaker: 11,666 posts
AeroScale: 7,410 posts
Posted: Sunday, June 29, 2014 - 05:34 AM UTC
Jessica,
Nice work on the sleeve. I've used almost boiling water in attempts to re-shape sheet plastic from time to time, but like your sleeve it does start to loose it's shape. Some times there isn't enough room for a gluing tab, and I really struggle with the final shape, as it just isn't round.
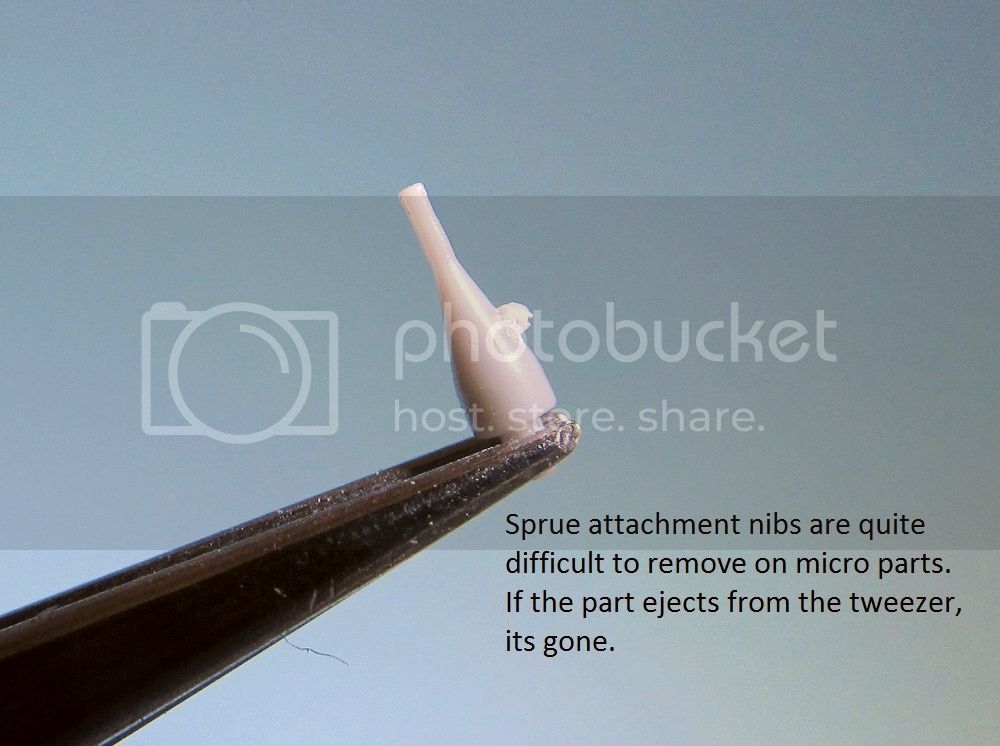
Ben,
At the rate you're adding weight to your build, you better plan on a heavy duty stand. BTW, I'm a master at launching parts from the tips of tweezers.

Joel
On my Workbench:
Monogram 1/24 scale 427 Shelby Cobra
Just Completed:
Beemax 1/24 scale BMW M3 E30 1992 Evolution II
Alberta, Canada
Joined: April 07, 2010
KitMaker: 1,028 posts
AeroScale: 939 posts
Posted: Sunday, June 29, 2014 - 08:28 AM UTC
Told you it would be play by play

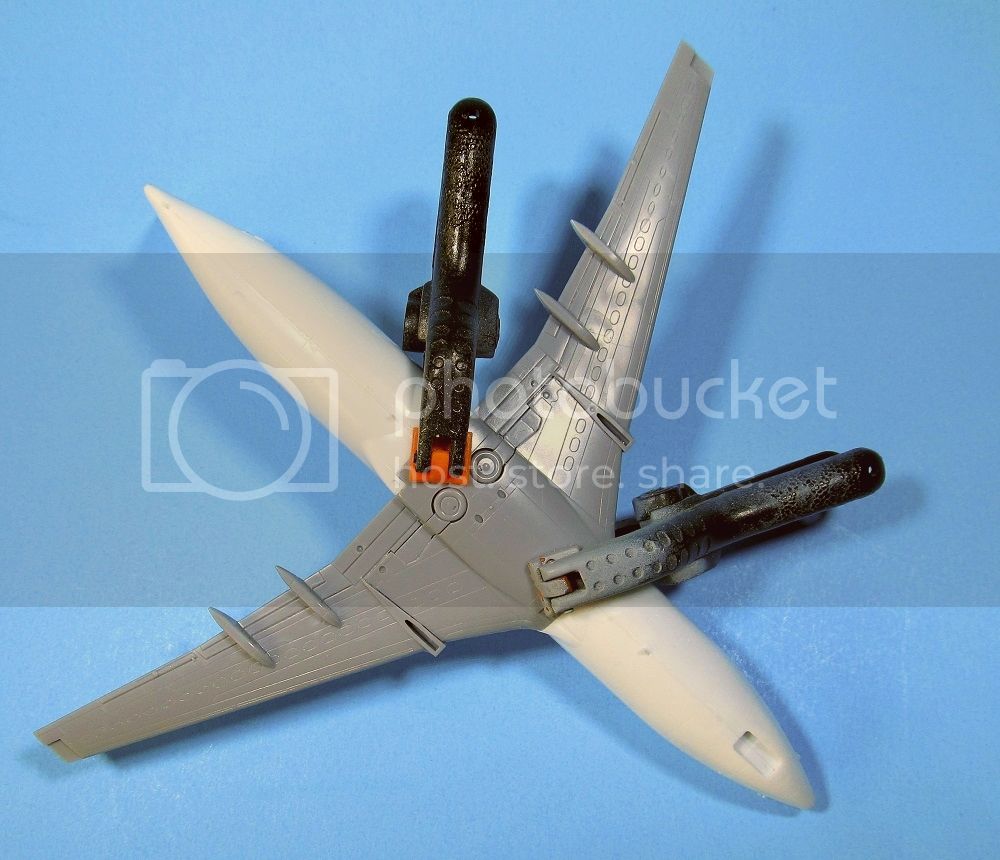
I did manage to get that bunch glued up. Some small alignment issues, but all-in-all, a very good fit.
Now, I'll let that part of the build set properly while I do some work on the engines.
To prevent being called an 'expert', screw something up good every now and again.
Alberta, Canada
Joined: April 07, 2010
KitMaker: 1,028 posts
AeroScale: 939 posts
Posted: Monday, June 30, 2014 - 04:26 PM UTC
To prevent being called an 'expert', screw something up good every now and again.
British Columbia, Canada
Joined: September 03, 2009
KitMaker: 6,965 posts
AeroScale: 6,247 posts
Posted: Monday, June 30, 2014 - 05:34 PM UTC
It's a pity they chose to put those ejector pins right there. Moved back a few mm they would have been completely out of sight once the fan goes in.
How do you plan on filling the top and bottom seams inside that intake?
When once you have tasted flight you will walk the Earth with your eyes turned skyward.
For there you have been, and there you will always long to return.
-Leonardo Da Vinci
Alberta, Canada
Joined: April 07, 2010
KitMaker: 1,028 posts
AeroScale: 939 posts
Posted: Tuesday, July 01, 2014 - 12:38 AM UTC
Quoted Text
How do you plan on filling the top and bottom seams inside that intake?
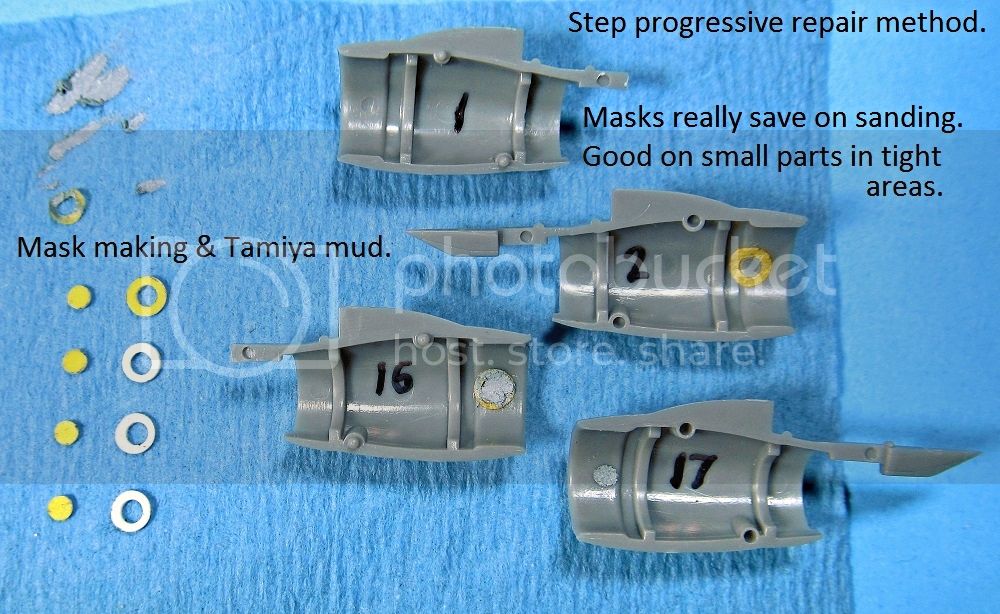
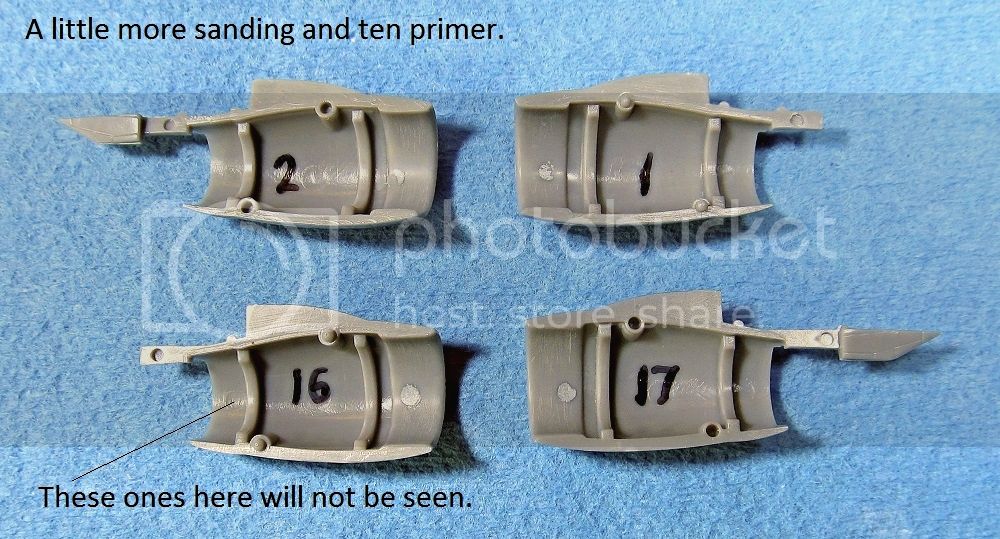
Probably using sanding paper curled on a 1/4" dowel and Tamiya mud. I've lost favor with Mr Surfacer 500, its too hard to sand down. There will be some masking involved in that, as well.
Small details are important to attend too.
To prevent being called an 'expert', screw something up good every now and again.
Joel_W
Associate Editor New York, United States
Joined: December 04, 2010
KitMaker: 11,666 posts
AeroScale: 7,410 posts
Posted: Wednesday, July 02, 2014 - 01:28 AM UTC
Ben,
I've been using Vallejo white putty to fill small seams and scratches rather then CA glue or Green stuff in tight confined areas, including blending in canopies. The advantage to is that you apply a little bead of it higher then surface. Let dry. Then using a wet finger, towel, or Qtip you slowly work along the seam and remove the excess. No sanding, no polishing. It's water soluble, so you need to be careful how you remove the excess. More then once I've had to do a 2nd or 3rd coating, but eventually it came out perfect.
Joel
On my Workbench:
Monogram 1/24 scale 427 Shelby Cobra
Just Completed:
Beemax 1/24 scale BMW M3 E30 1992 Evolution II
Alberta, Canada
Joined: April 07, 2010
KitMaker: 1,028 posts
AeroScale: 939 posts
Posted: Wednesday, July 02, 2014 - 02:19 AM UTC
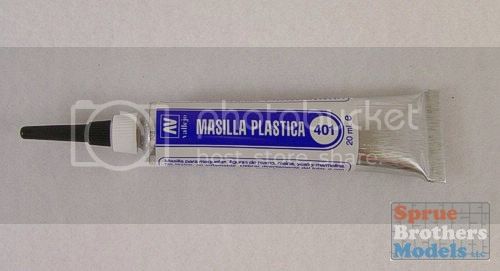
Thanks for the heads-up, Joel. If I can find Vallejo around here, I'll give it a go.
To prevent being called an 'expert', screw something up good every now and again.
Joel_W
Associate Editor New York, United States
Joined: December 04, 2010
KitMaker: 11,666 posts
AeroScale: 7,410 posts
Posted: Thursday, July 03, 2014 - 01:16 AM UTC
Quoted Text
Thanks for the heads-up, Joel. If I can find Vallejo around here, I'll give it a go.
Mark,
I bought mine from Sprue Brothers:
MSRP $4.00
Our Price: $3.59
Stock Status:In Stock
Product Code: VAL70401
Joel
On my Workbench:
Monogram 1/24 scale 427 Shelby Cobra
Just Completed:
Beemax 1/24 scale BMW M3 E30 1992 Evolution II
Alberta, Canada
Joined: April 07, 2010
KitMaker: 1,028 posts
AeroScale: 939 posts
Posted: Friday, July 04, 2014 - 04:31 PM UTC
To prevent being called an 'expert', screw something up good every now and again.
Joel_W
Associate Editor New York, United States
Joined: December 04, 2010
KitMaker: 11,666 posts
AeroScale: 7,410 posts
Posted: Sunday, July 06, 2014 - 04:12 AM UTC
Ben,
Your putty work is so much neater then mine. I just don't always have the patience to mask out everything, only later to wish I have spent the time to do it.
Joel
On my Workbench:
Monogram 1/24 scale 427 Shelby Cobra
Just Completed:
Beemax 1/24 scale BMW M3 E30 1992 Evolution II
Alberta, Canada
Joined: April 07, 2010
KitMaker: 1,028 posts
AeroScale: 939 posts
Posted: Sunday, July 06, 2014 - 02:15 PM UTC
To prevent being called an 'expert', screw something up good every now and again.
British Columbia, Canada
Joined: September 03, 2009
KitMaker: 6,965 posts
AeroScale: 6,247 posts
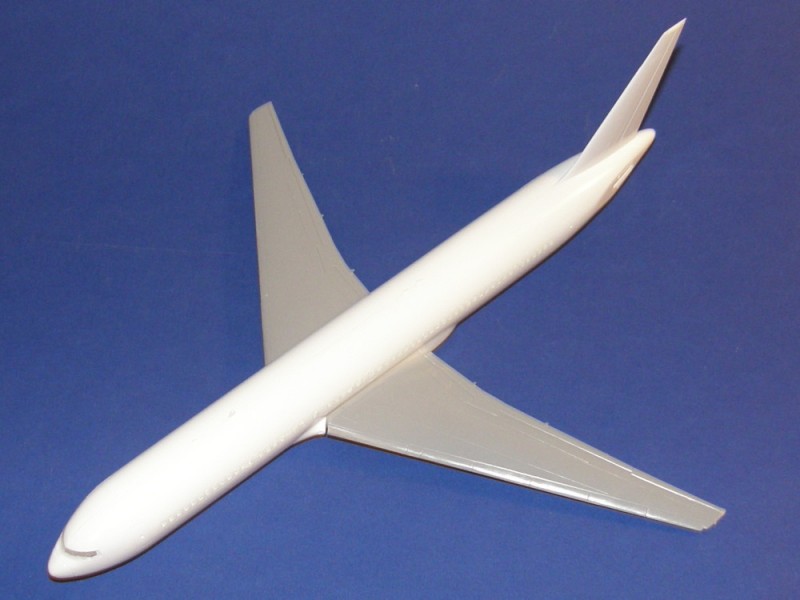
Posted: Sunday, July 06, 2014 - 02:44 PM UTC
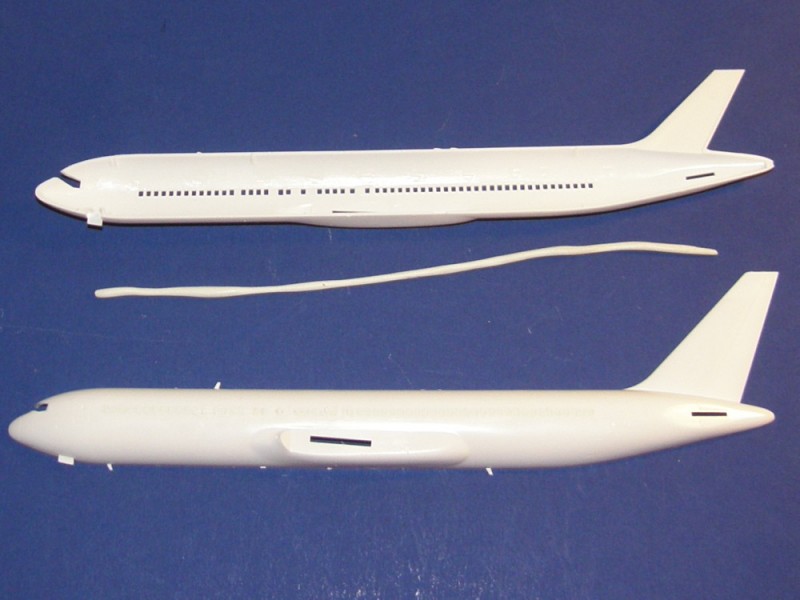
While Ben has been busy with his masking and puttying, I've managed a first coat of white primer on the 767
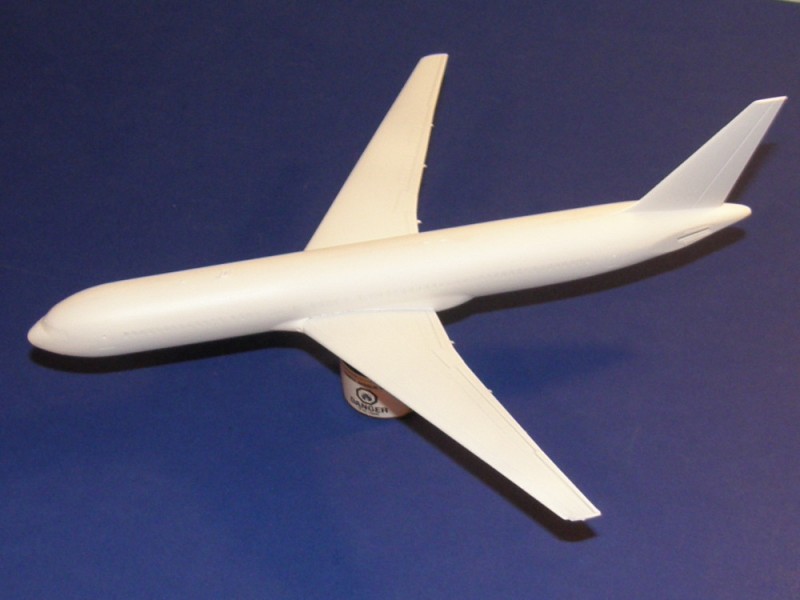
The fit is still quite nice for a 30 year old kit, but there were a few places where it needed improvement.
When once you have tasted flight you will walk the Earth with your eyes turned skyward.
For there you have been, and there you will always long to return.
-Leonardo Da Vinci
Alberta, Canada
Joined: April 07, 2010
KitMaker: 1,028 posts
AeroScale: 939 posts
Posted: Saturday, July 12, 2014 - 07:17 AM UTC
To prevent being called an 'expert', screw something up good every now and again.