_GOTOBOTTOM
Modern (1975-today): USA
Modern aircraft of the United States.
F-14D Tomcat VF-31
Tomcat31
#042
_VISITCOMMUNITY
England - North East, United Kingdom
Joined: November 18, 2006
KitMaker: 2,828 posts
AeroScale: 1,720 posts
Posted: Monday, July 14, 2014 - 12:47 AM UTC
Time to start a Blog for my next build. This time the model of choice is the Hasegawa F-14 Tomcat that I'm entering for the Gruman Campaign.

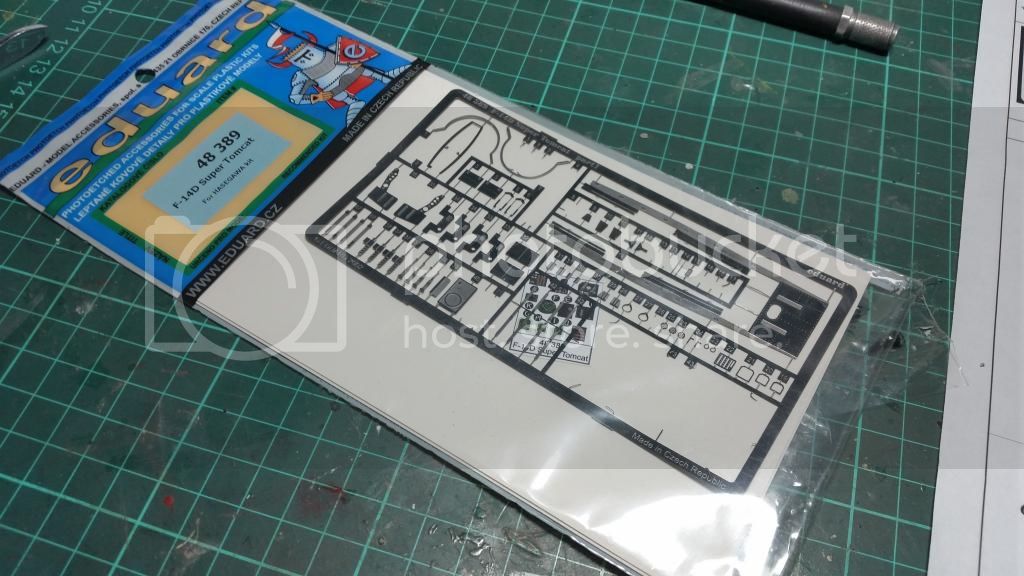
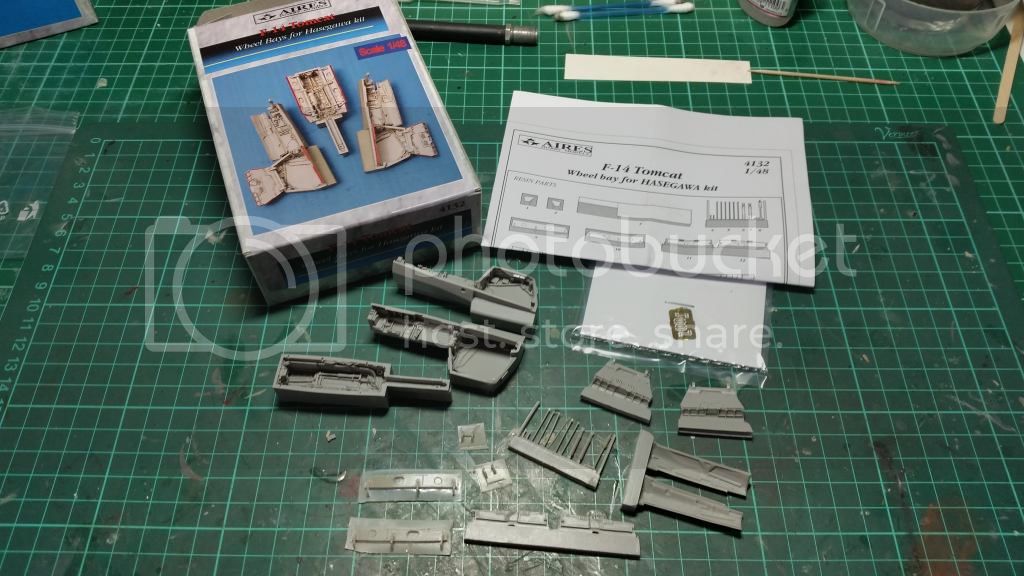
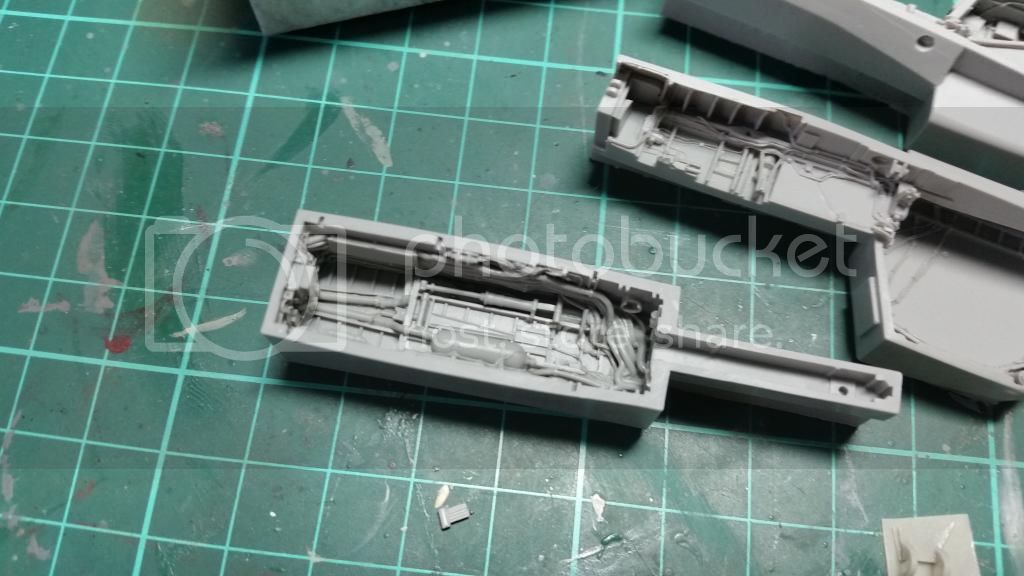
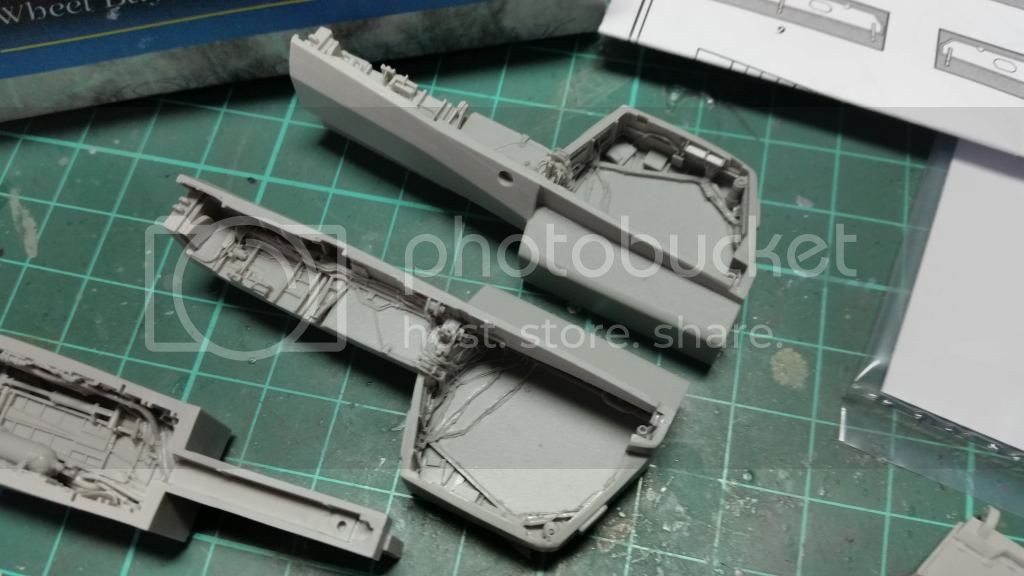
Decided to go all out for the build and ordered some extras for the 1/48 F-14D Tomcat that I'll be doing


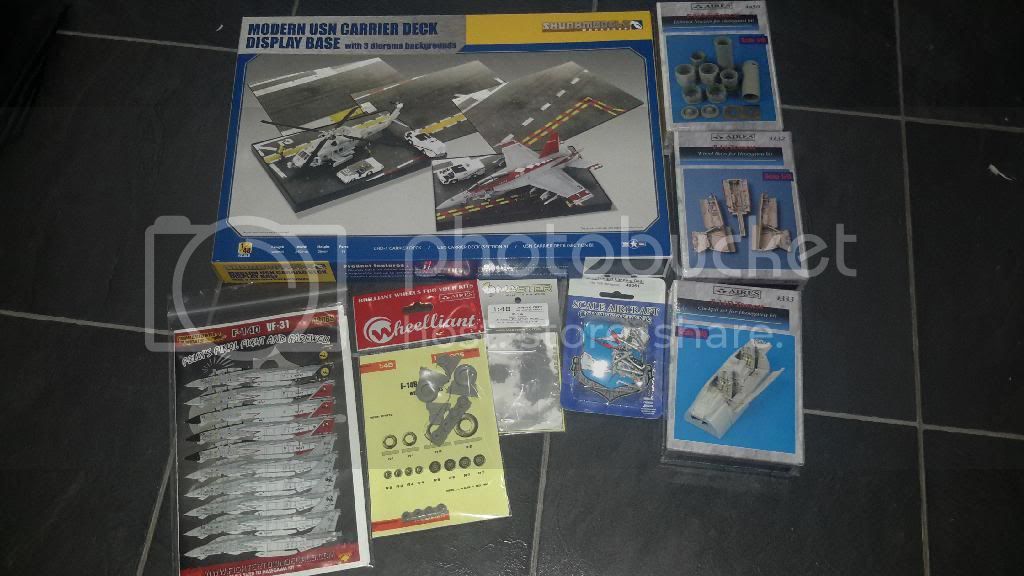
I realised after the bits arrived that I only have an the Hasegawa F-14A kit in the stash. All these 'D' parts will fit so the project has now also become a conversion but the only thing i was short of was the Chinpod. Fortunately thanks to a kind person on the F-14 lovers facebook page I've also managed to track down an aftermarket 'D' chinpod and also a Lantrin by a company called Steel Beach. Spruebrothers stock them but I'm finding it hard at the moment to justify the high postage cost to the UK (and also risk custom charges) for such small items (unless i can find something else I would like).

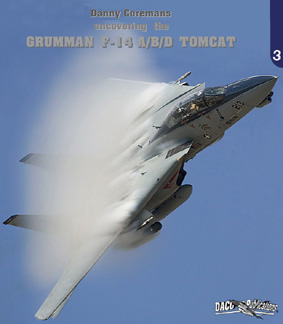
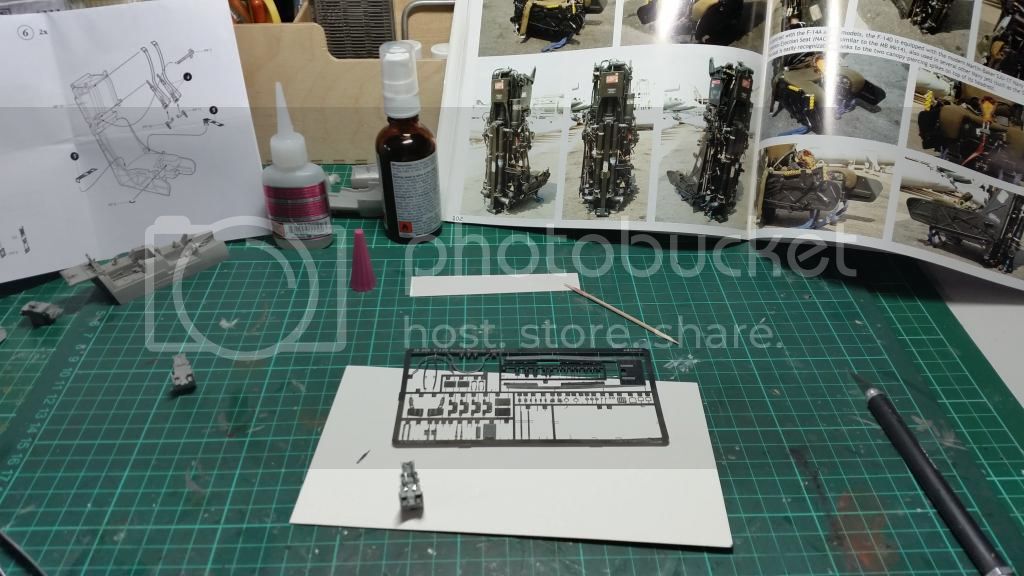
My primary reference book which I always seem to go to now over the vast selection of Tomact books will be this .


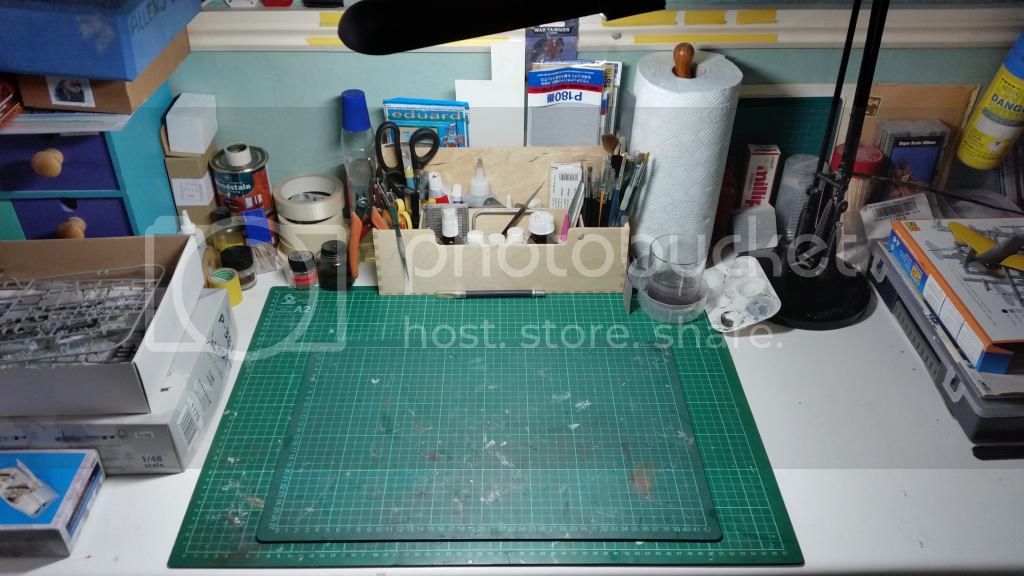
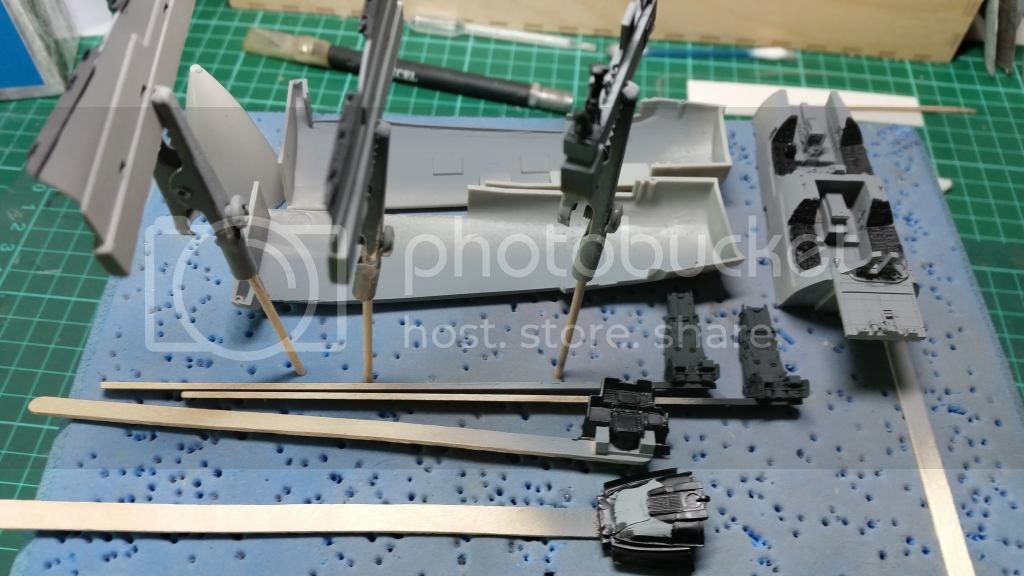
The first order of business was to tidy the workspace (which gets done around 3 times a year if its lucky).


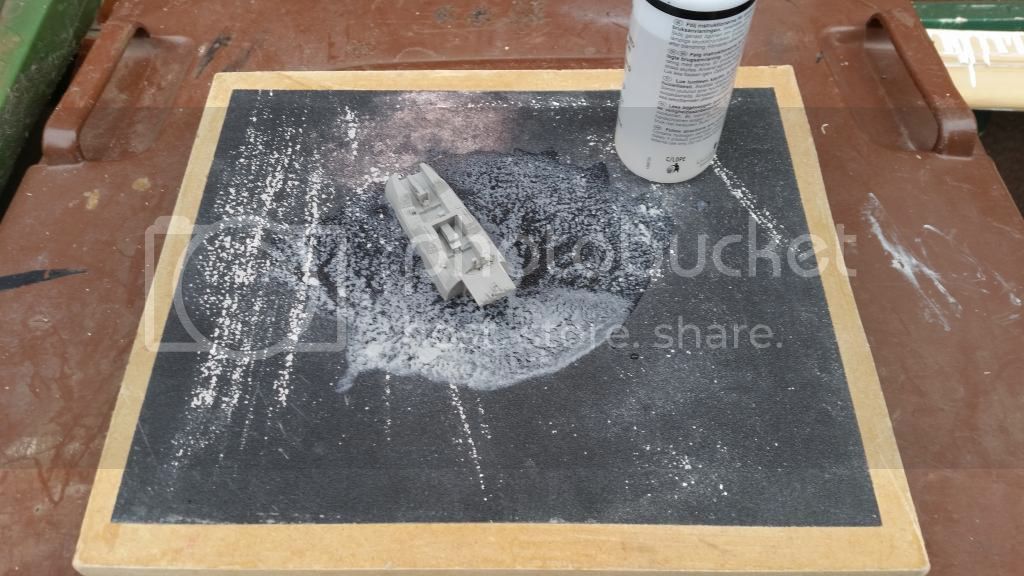
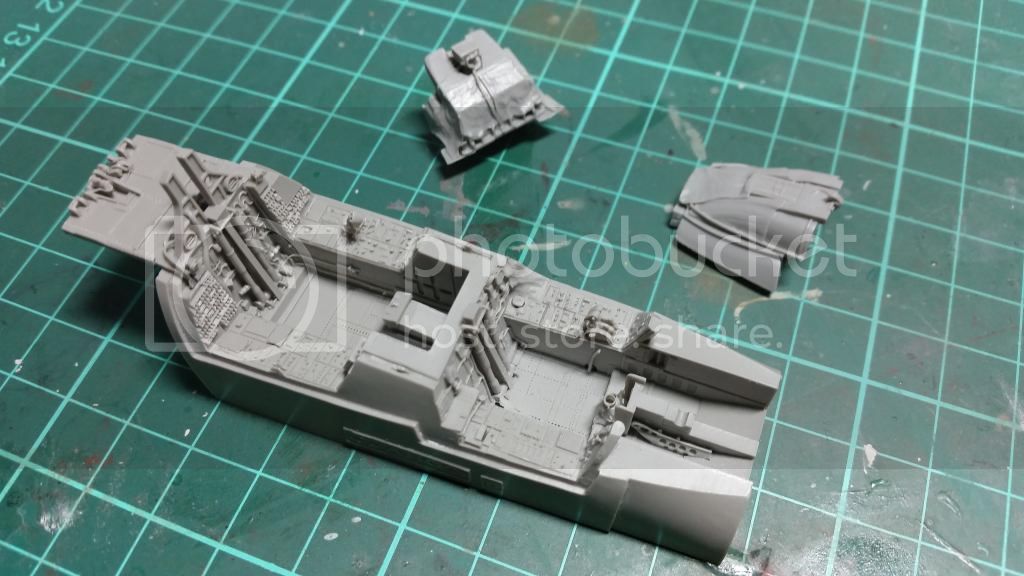
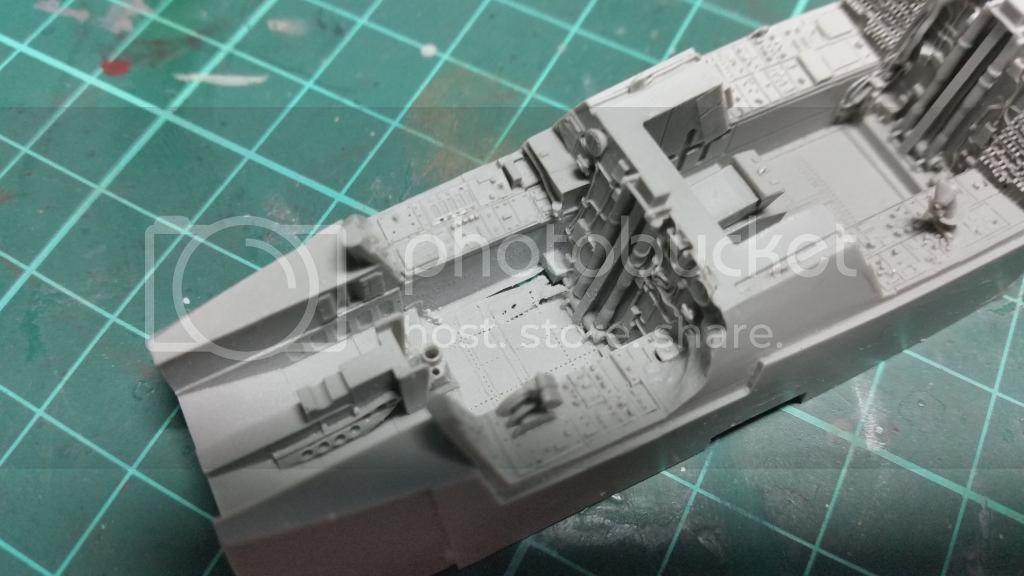
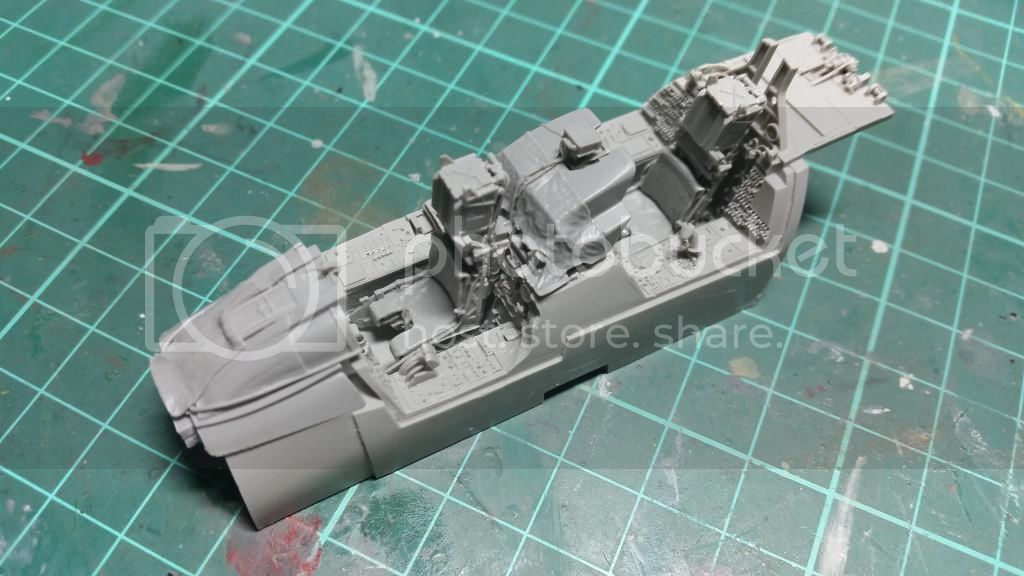
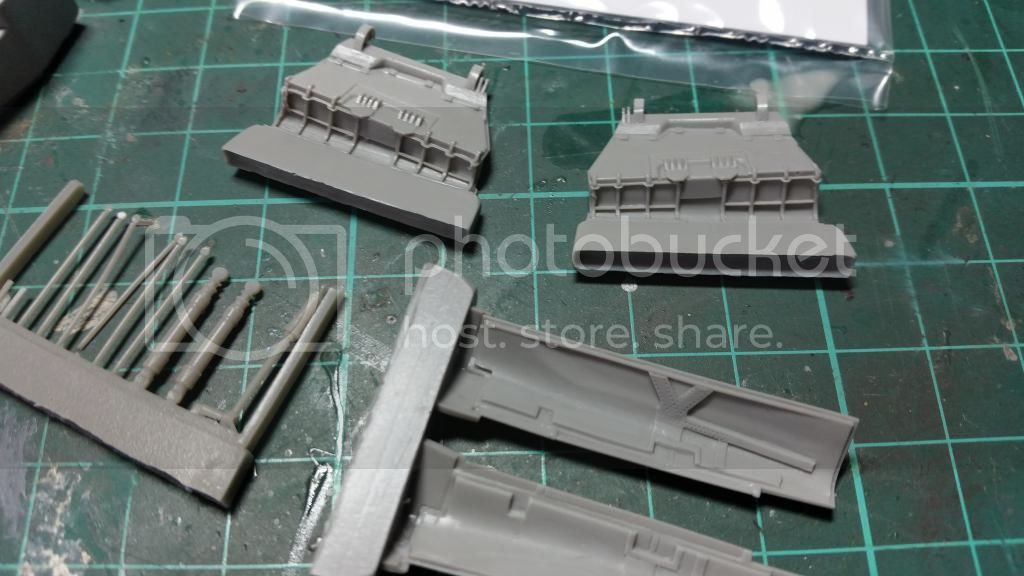
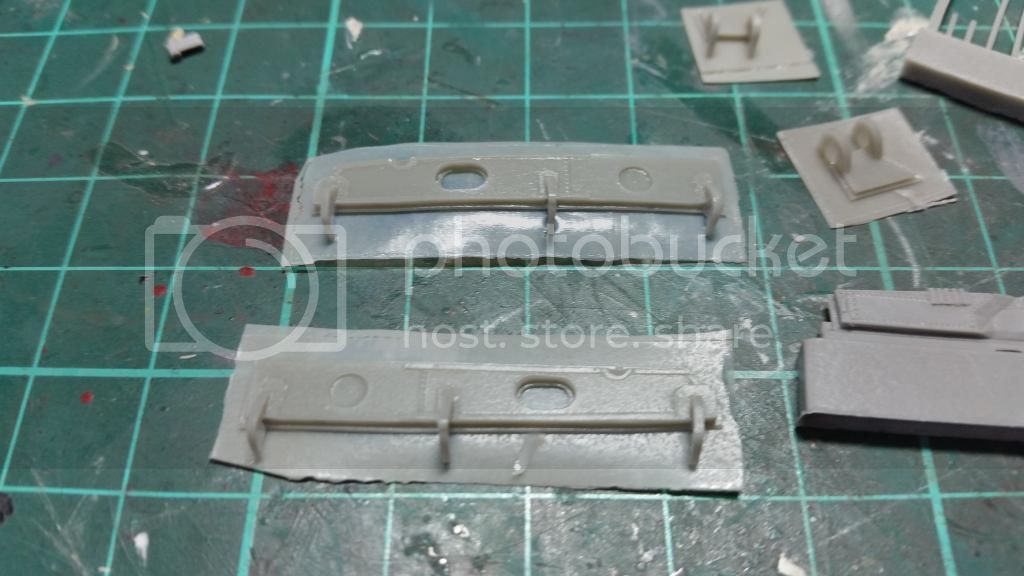
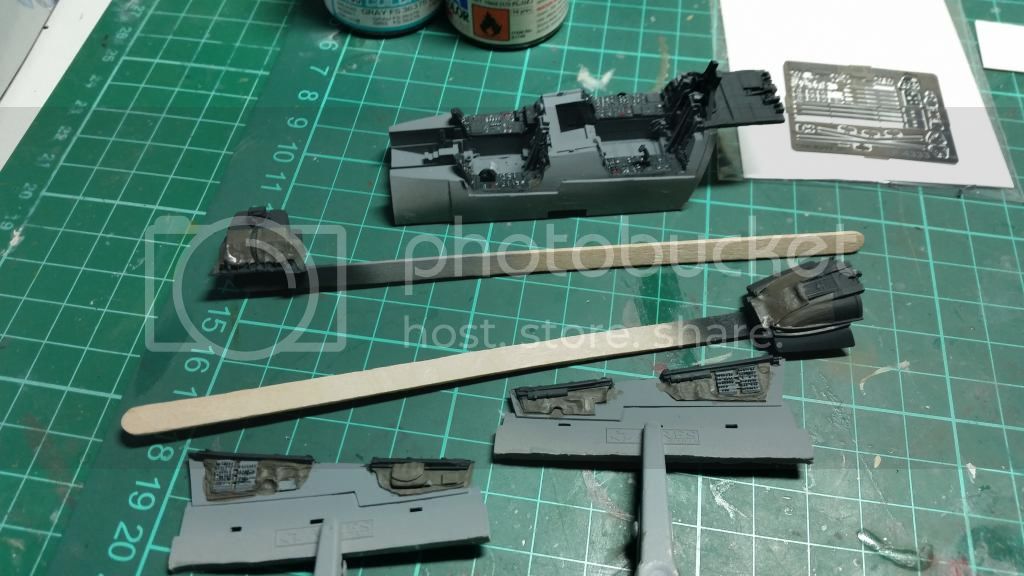
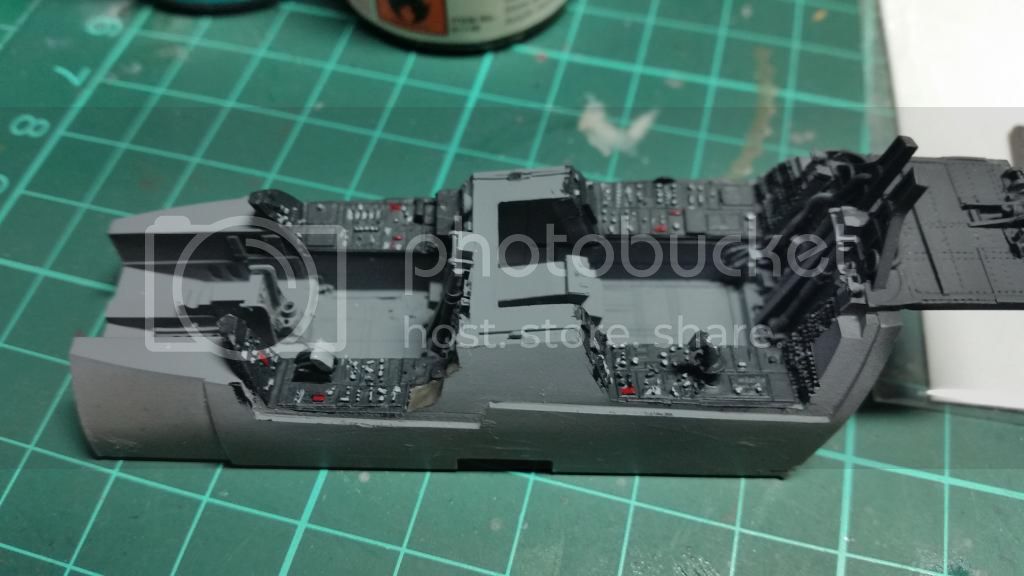
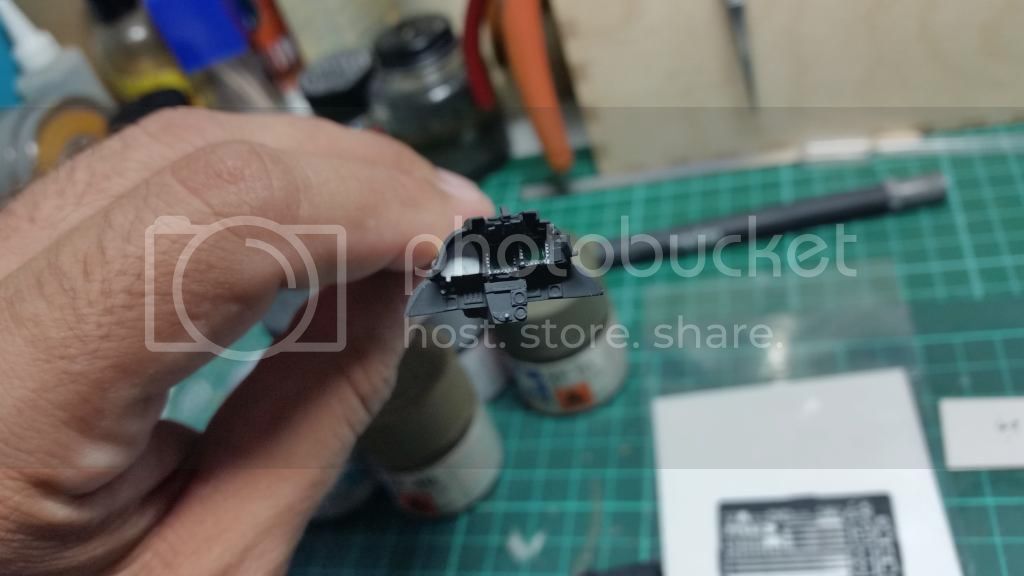
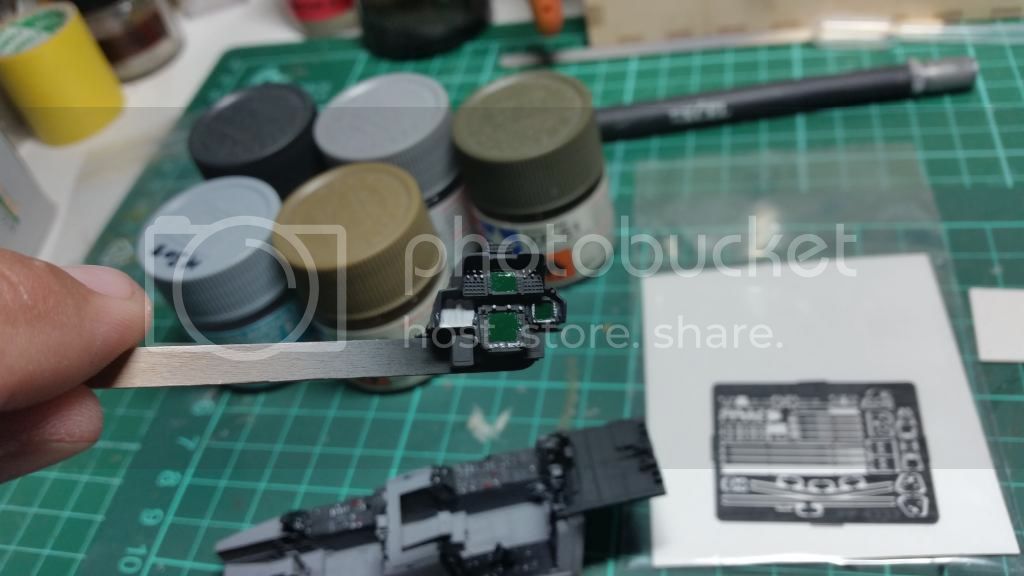
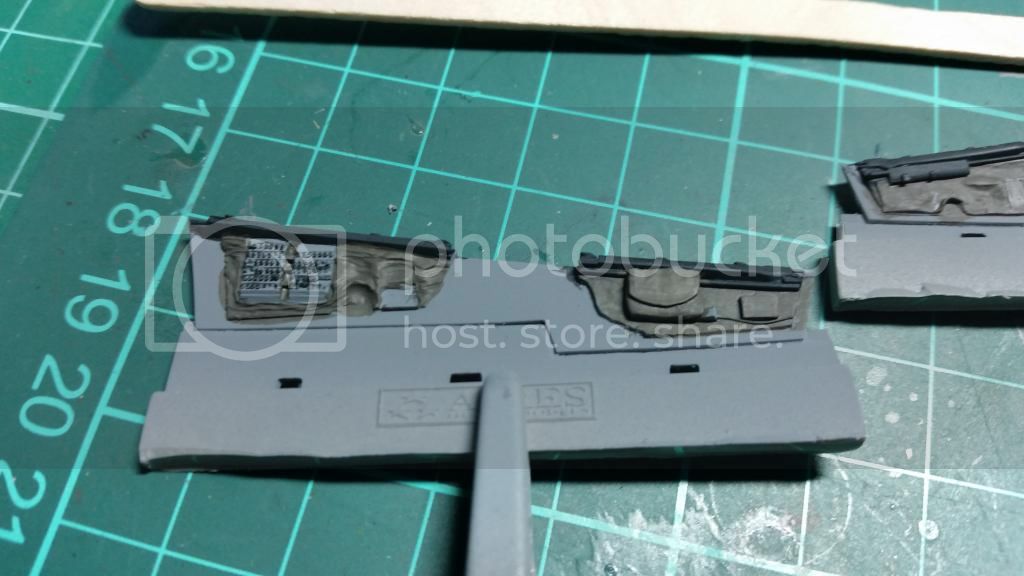
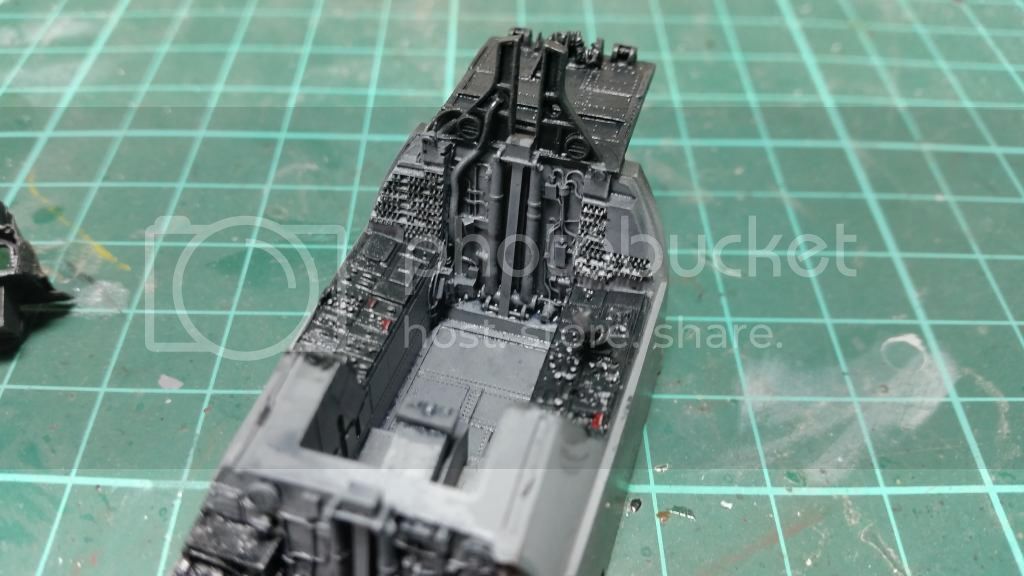
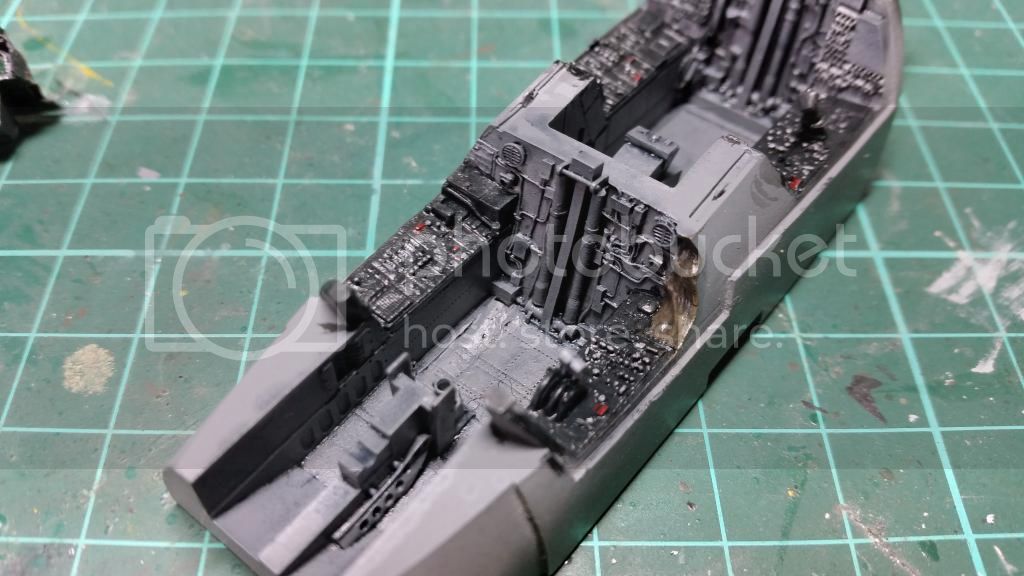
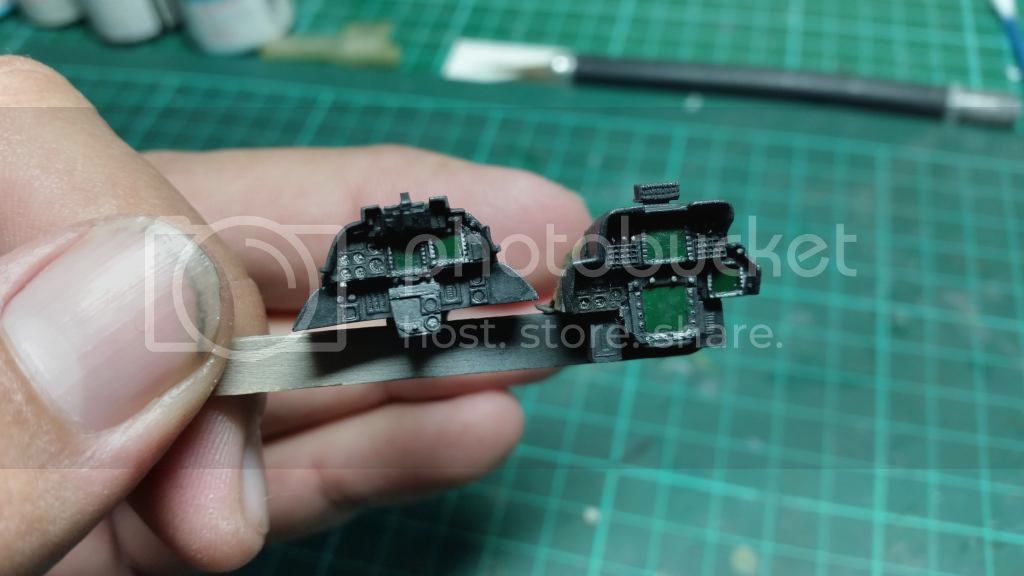
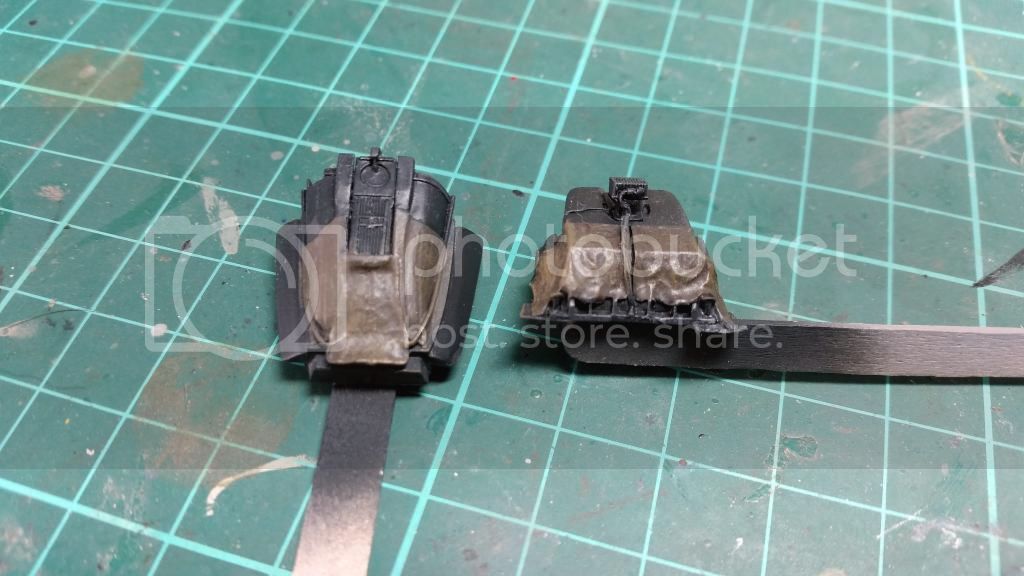
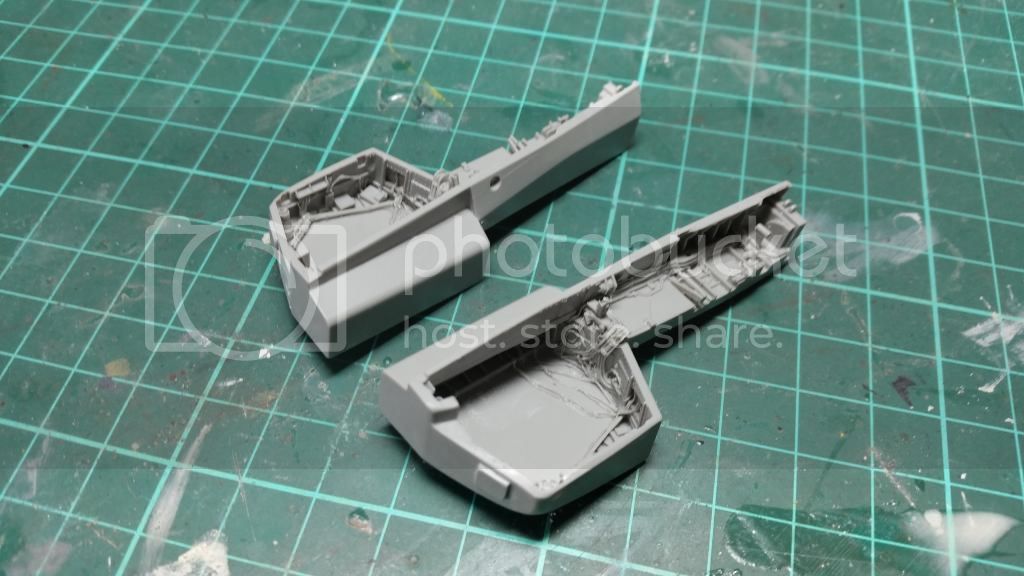
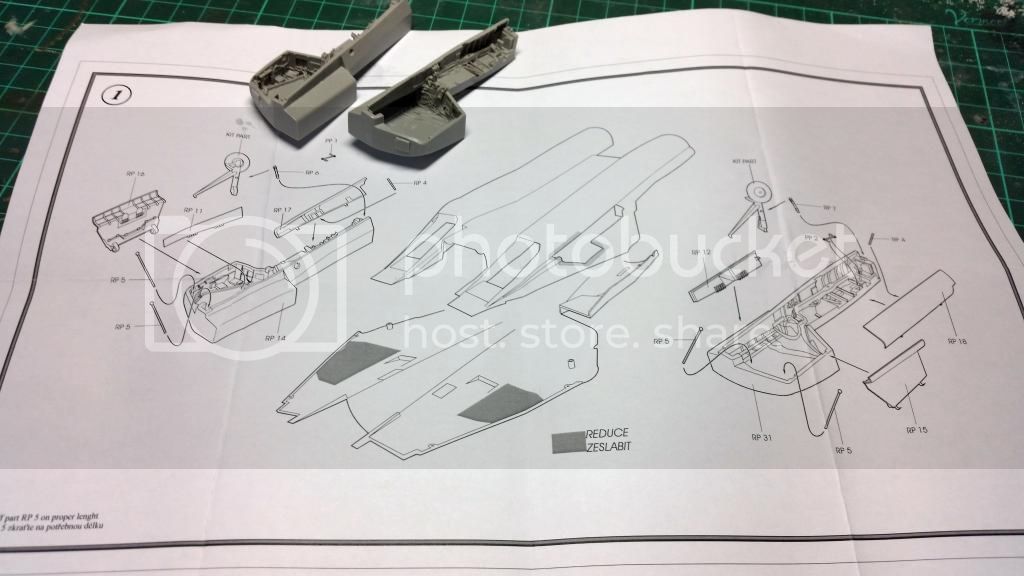
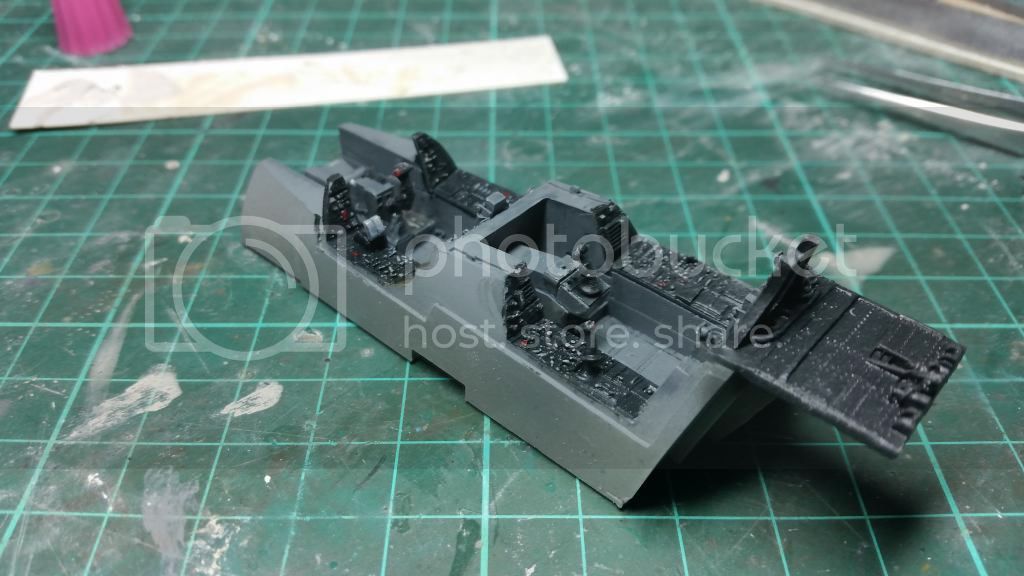
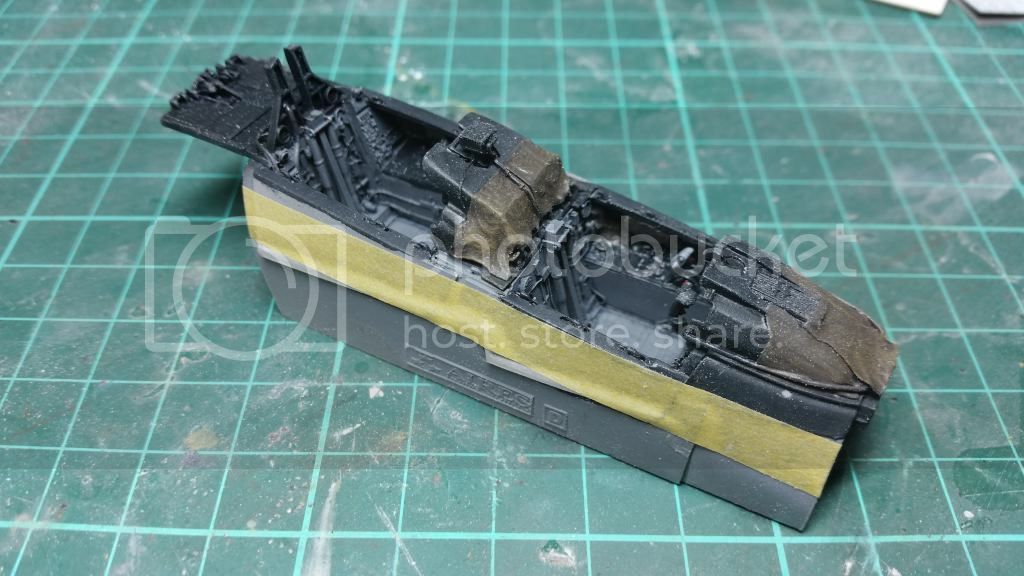
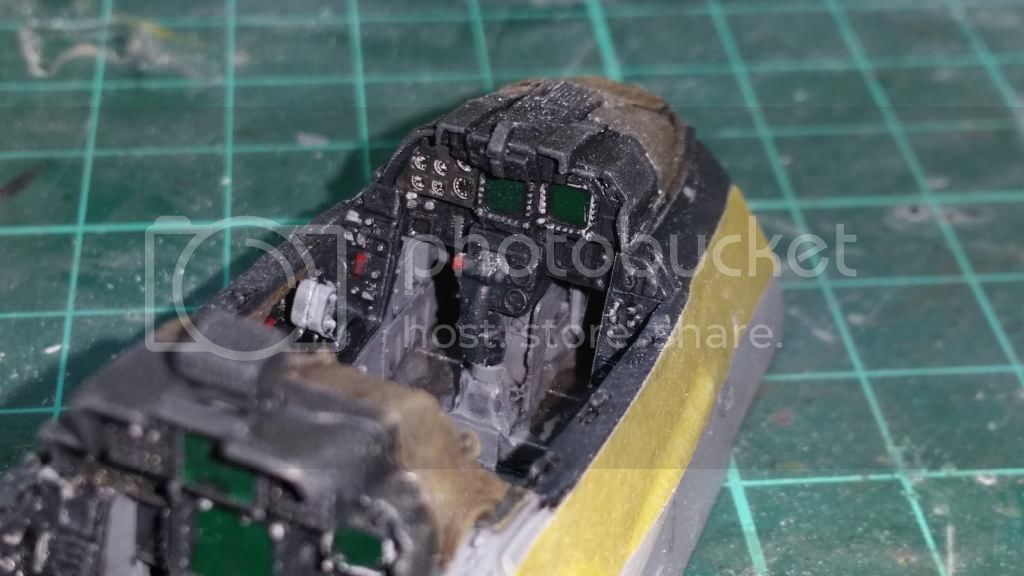
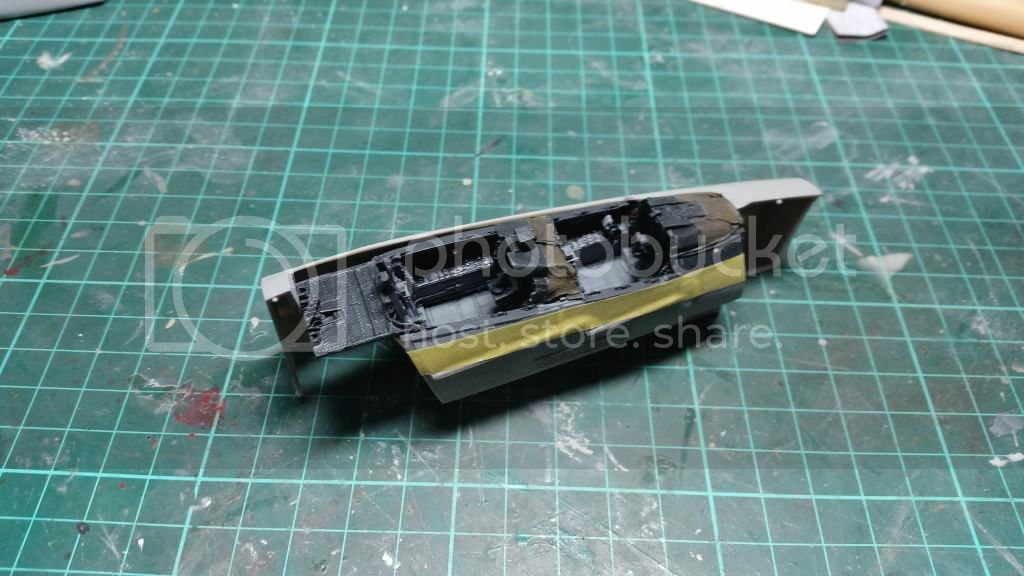
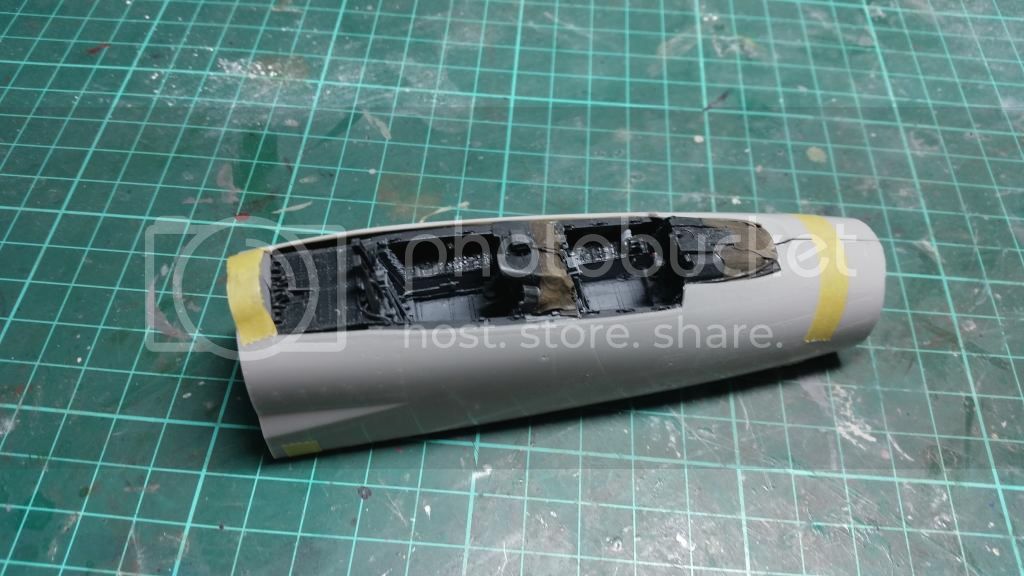
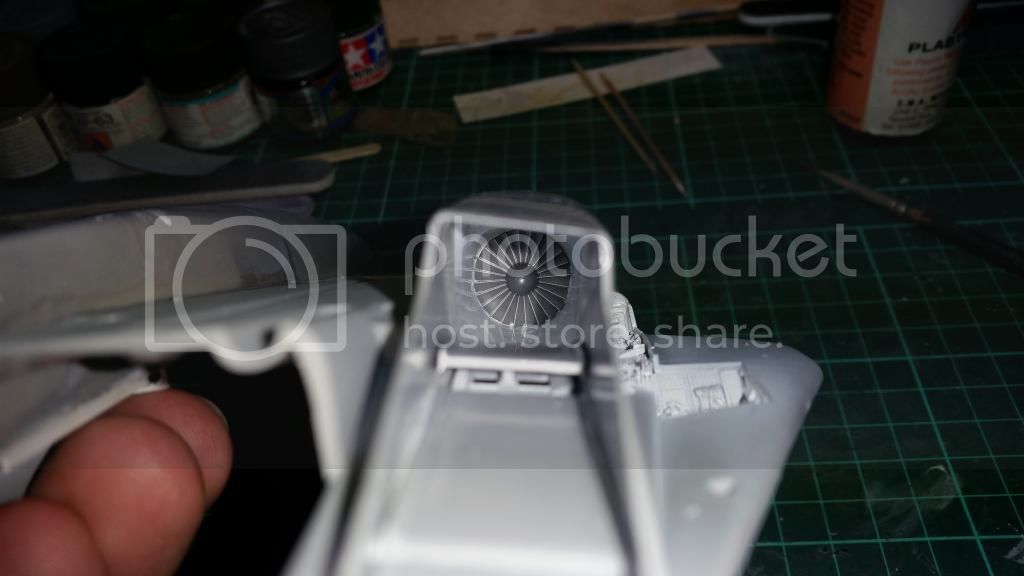
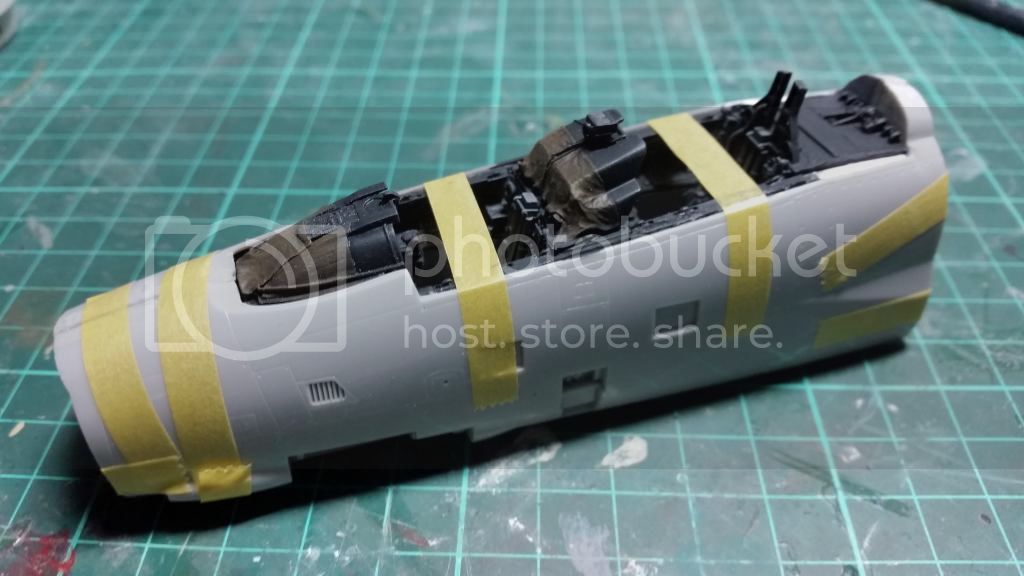
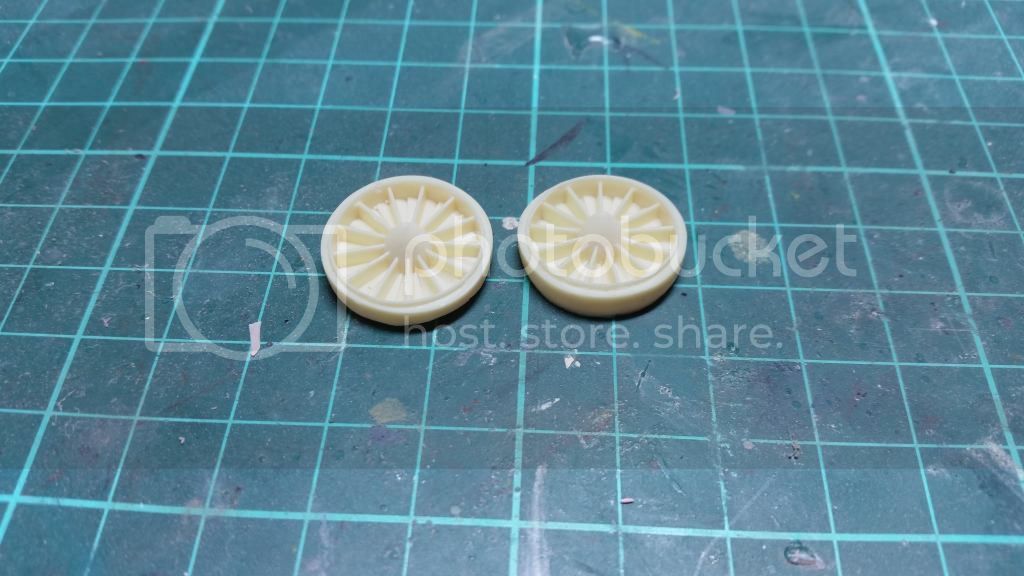
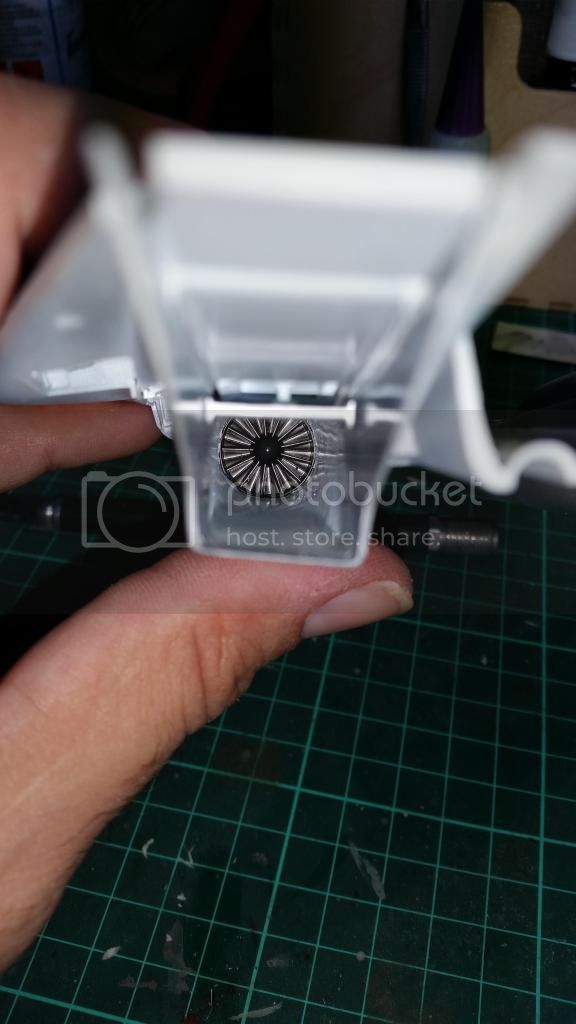
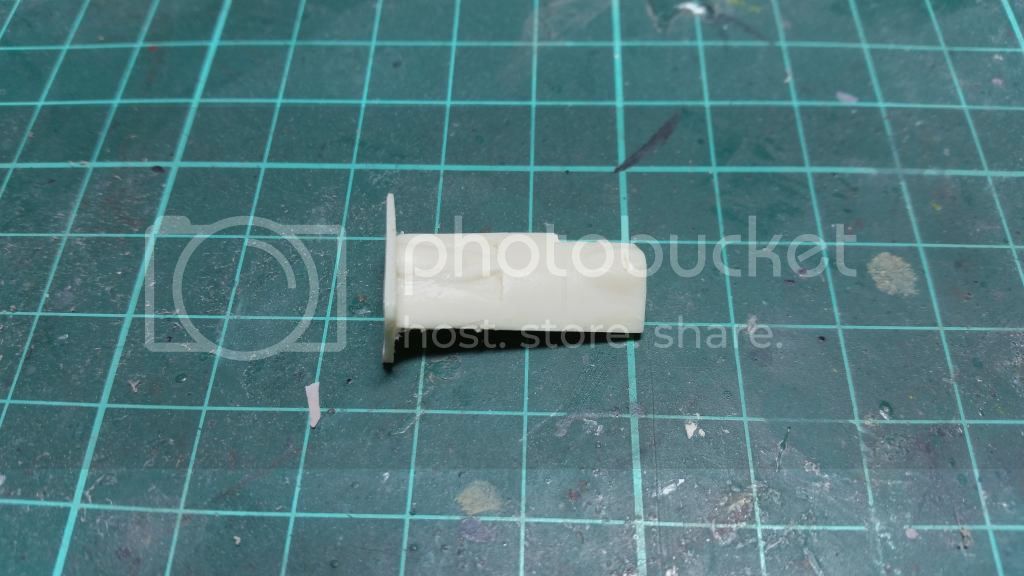
And then it was time to start. The first item on the agenda is the Aires resin cockpit with it incredible detail. These have been wash in some mild detergent and are ready for the excess resin to be removed.


Thats all for now but will hopefully get more of a start over the week.
Joel_W
Staff MemberAssociate Editor
AUTOMODELER
_VISITCOMMUNITY
New York, United States
Joined: December 04, 2010
KitMaker: 11,666 posts
AeroScale: 7,410 posts
Posted: Monday, July 14, 2014 - 01:54 AM UTC
Allen,
I'm certainly more then just casually interested in your Grumman F-14D build. Will be following it both here and in the campaign thread.

That Aires cockpit looks fantastic. Just wondering how much work it will take to get it to fit. I've never tried one, but so many builds I've followed that used an Aires cockpit is a small horror story about the fit issues. That tended to end with having paper thin walls for the fuselage halves, and grinding away a lot of the resin cockpit.

Joel
Tomcat31
#042
_VISITCOMMUNITY
England - North East, United Kingdom
Joined: November 18, 2006
KitMaker: 2,828 posts
AeroScale: 1,720 posts
Posted: Monday, July 14, 2014 - 10:04 AM UTC
Thanks Joel, I've had my ups and downs with Aires sets in general in the past so I hope I'm aware of what to look out for. The last time I did a F-14 Tomcat I used the Black Box cockpit set and that was a PITA unfortunately that kit never got finished and is still sat on the 'to do' shelf.
Joel_W
Staff MemberAssociate Editor
AUTOMODELER
_VISITCOMMUNITY
New York, United States
Joined: December 04, 2010
KitMaker: 11,666 posts
AeroScale: 7,410 posts
Posted: Wednesday, July 16, 2014 - 02:29 AM UTC
Allen,
Once question being a neophyte jet builder. The F-14 on the cover of the book has that "cloud" over it. From my very limited knowledge, is that from breaking the sound barrier, or just a photo effect?
Joel
Tomcat31
#042
_VISITCOMMUNITY
England - North East, United Kingdom
Joined: November 18, 2006
KitMaker: 2,828 posts
AeroScale: 1,720 posts
Posted: Friday, July 18, 2014 - 12:25 AM UTC
Hi Joel

It certainly isn't a photo effect (although it may have been touched up)as here is the original picture


My understanding is that these are condensation clouds that are created when an aircraft flys near or past the speed of sound.

A quick google shows quick a variation on the clouds that can be formed

f-14 tomcat flying through vapour

or

aircraft flying through vapour
Joel_W
Staff MemberAssociate Editor
AUTOMODELER
_VISITCOMMUNITY
New York, United States
Joined: December 04, 2010
KitMaker: 11,666 posts
AeroScale: 7,410 posts
Posted: Friday, July 18, 2014 - 10:44 AM UTC
Allen,
Thanks. That's really fascinating, especially to basically a prop guy.
Joel
Beauslx
_VISITCOMMUNITY
Nevada, United States
Joined: August 28, 2013
KitMaker: 159 posts
AeroScale: 116 posts
Posted: Friday, July 18, 2014 - 03:57 PM UTC

Quoted Text

Allen,
Once question being a neophyte jet builder. The F-14 on the cover of the book has that "cloud" over it. From my very limited knowledge, is that from breaking the sound barrier, or just a photo effect?
Joel


As Joel said at or near supersonic. The condensation also appears during high angles of attack while maneuvering. And it's not just fighter type aircraft...

Tomcat31
#042
_VISITCOMMUNITY
England - North East, United Kingdom
Joined: November 18, 2006
KitMaker: 2,828 posts
AeroScale: 1,720 posts
Posted: Tuesday, July 22, 2014 - 10:13 PM UTC
Work has slowly progessed on the cockpit. I apologise in advance for some dodgy photos as i'm using the camera on my new phone and haven't quite got it set up correctly

First I started by sawing the majority of the casting blocks off of the part and then a final sand on my homemade sanding board to smooth things out


unfortunately i had a slight mishap and slipped while swaing and got to close to the cockpit floor when sanding.


Good news is you can't see it when the seat is installed so a quick fix of applying some thin plasticard to the underside was the order of the day.


The next task was the seats. Aries provide the seat belts as separate etch items but the etch buckles are tiny


after nearly an hour I got as far as the one belt above and already lost a small strap and a buckle (possibly to the carpet monster) then i rememaber that I had some belts in a left over Eduard set from a prevoius build.


It only took just over an hour and a half for both seats.


Now that I was happy with the parts they were all mounted on cocktail and lolly sticks and primed. While waiting for the primer to dry i started work on the plastic parts that the cockpit will sit in.

I recalled having to remove some plastic for a previous build when I used the Black Box cockpit set for another build and after a quick test fit the same was the case for the Aries set (which isn't mentioned in the instructions) the parts highlighted in blue were duly removed


Blackbox also have you remove the foot steps (highlighted in green) to accomoate their cockpit set but I'm holding off on that for the Aires set until it time to insatll the completed cockpit.

The final progress of the weekend was to get some colour blocked in the part were painted with Tamiyas XF-54 Dark Sea Grey, the instruments matt black and the seats in Tamiya Nato Black


I'm thinking that I might repaint the panels in Nato black as the matt black looks quite stark but haven't decided on that yet.

As always comments, suugestions and criteque is always welcomed
Joel_W
Staff MemberAssociate Editor
AUTOMODELER
_VISITCOMMUNITY
New York, United States
Joined: December 04, 2010
KitMaker: 11,666 posts
AeroScale: 7,410 posts
Posted: Thursday, July 24, 2014 - 12:05 AM UTC
Allen,
Nice start to your build that I'm really looking forward to. Wow, the carpet monster sure made his ugly appearance quickly, he usually doesn't find my builds till I've been at it for several weeks.

Can't believe that you can work with buckles and latches that small in PE. One of the compromises that I make when using AM resin ejection seats, is that the seatbelts and harnesses are molded on. The Wolfpack seats for the A-6E are that way. The downside is that I can't reposition them, but for me it's a small price to pay.

Nice save with the cockpit floor. Like you said, no one will ever notice it.

From personal experience, the Nato Black just seems to me to have a better scale effect, but if you're going to be weathering the cockpit, and dry brushing with grays, it really wouldn't matter that much. Also once closed up, the consoles will be in the shades even when viewed.

Joel
Tomcat31
#042
_VISITCOMMUNITY
England - North East, United Kingdom
Joined: November 18, 2006
KitMaker: 2,828 posts
AeroScale: 1,720 posts
Posted: Friday, July 25, 2014 - 06:24 PM UTC
Hi Joel, I know what you mean with the seats I also prefer moulded in belts for ejector seats, but will happily use etch for WWII planes, go figure. I don't mind fiddly buckles with fabric belts in larger scales but the etch from Aires just didn't want to play ball, hence using the Eduard etch in the end

I looked through my stash and did find a couple from the a black box update set for a F-14B but they were larger in size the the Aires and looked wrong in the cockpit here's a comparison photo of the two. The one on the left is the Aires with Eduard etch and the right is the Black Box seat


I took a trip to the local model shop yesterday and picked up a new jar of Nato black (as the one I had, had been thinned for spraying) and repainted all the instrument panels. I feel happier now as at least a wash with help define the panels an they will also match shade of the seats
Joel_W
Staff MemberAssociate Editor
AUTOMODELER
_VISITCOMMUNITY
New York, United States
Joined: December 04, 2010
KitMaker: 11,666 posts
AeroScale: 7,410 posts
Posted: Saturday, July 26, 2014 - 12:58 PM UTC
Allen,
The differences in the size of the seats is certainly striking. They're not even close.
Joel
Tomcat31
#042
_VISITCOMMUNITY
England - North East, United Kingdom
Joined: November 18, 2006
KitMaker: 2,828 posts
AeroScale: 1,720 posts
Posted: Sunday, July 27, 2014 - 10:56 PM UTC

Quoted Text

Allen,
The differences in the size of the seats is certainly striking. They're not even close.
Joel

Scary isn't it, when I finally crack open the kit box and make a start I'll dig the kit seats out and do another comparison.

Not much done this weekend due to the nice weather and being too warm in the model room, but I did get a little bit done.

First I'll show you the detail in the Aires undercarriage set. I had to open this as I'll need to check the fit of the nose wheel bay when it come to the cockpit assembly.


unfortunately the front gear doors are slightly warped but hopefully some hot water will fix that.


I also started the laborious task of painting the dials knobs and switches in the cockpit.


The TDU's have had a coat of green added


And the side panels and canvas areas on the instrument panels have had a base coat of khaki drab.


As always any comments, suggestions and critique is always welcomed
Joel_W
Staff MemberAssociate Editor
AUTOMODELER
_VISITCOMMUNITY
New York, United States
Joined: December 04, 2010
KitMaker: 11,666 posts
AeroScale: 7,410 posts
Posted: Monday, July 28, 2014 - 01:22 AM UTC
Allen,
The cockpit and various side panels coming along quite nicely. I didn't realize that you can heat resin in water and bend it like plastic. I thought it was as is, and you would have to epoxy it into position a little bit at a time.

You can see just how little experience I have working with resin parts.

Joel
Tomcat31
#042
_VISITCOMMUNITY
England - North East, United Kingdom
Joined: November 18, 2006
KitMaker: 2,828 posts
AeroScale: 1,720 posts
Posted: Monday, July 28, 2014 - 08:34 AM UTC

Quoted Text

I didn't realize that you can heat resin in water and bend it like plastic. I thought it was as is, and you would have to epoxy it into position a little bit at a time.

Generally you can't due to the thickness if the resin but the front gear doors are so thin that I should be able to get them a little straighter
Joel_W
Staff MemberAssociate Editor
AUTOMODELER
_VISITCOMMUNITY
New York, United States
Joined: December 04, 2010
KitMaker: 11,666 posts
AeroScale: 7,410 posts
Posted: Tuesday, July 29, 2014 - 01:13 AM UTC
Allen,
Good luck with that effort. The little experience I've had with resin, I've managed to snap some fine pieces off.

I also just took another look at those gear doors, and noticed that while they're both seem to have been molded in the same orientation, one came out of the mold with a concave warp to it, while the other ended up with a convex warp. Now that does indeed seam strange.

Joel
Keeperofsouls2099
_VISITCOMMUNITY
Florida, United States
Joined: January 14, 2009
KitMaker: 2,798 posts
AeroScale: 2,443 posts
Posted: Thursday, July 31, 2014 - 02:08 PM UTC
Allen looks like a came back just in time to catch a great build. looking good so far I cant wait to see how you tackle those dreaded intakes
Tomcat31
#042
_VISITCOMMUNITY
England - North East, United Kingdom
Joined: November 18, 2006
KitMaker: 2,828 posts
AeroScale: 1,720 posts
Posted: Tuesday, September 02, 2014 - 11:10 PM UTC
Its been a while since the last update but as usual life has got in the way but I have managed to sneeak the odd 15 minutes in here and there.

Work continued in the cockpit with a light wash of Paynes Grey oil paint


And the instruments had their film for the dials and etch added. I noticed that some dials elsewhere on the dials has been missed but hopefully won't be noticible once installed.


The canvas covers for the instument hoods also recieved a wash and some drybrushing to bring out the raised detail.


While waiting for the wash in the cockpit to dry I started work on the next big task, the main wheel wells.

The new Aries Wheel wells after sanding the excess resin off to ensure a nice fit and to reduce any problems i sanded the wells to the point where the floor of the wells is so thin they are almost like tracing paper


The instruction only tell you to reduce the plastic on the top half of the fuselage but opted to only remove the raised detail in that area


And then the fun starts, a test fit shows more needs removing than the instructions state.


The the shaded area on both sides needs removing


A better fit but the wheel wells are 1mm short at the back end but a shim of plastic card can soon fixed that. there is also a lip that the intake should sit on but doesn't quite fit


A quick investigation show that this is the culprit and also need removing


Much better.


I diviated form the kit instruction slightly as fitting the intake correctly can be awkward so ensure a smooth fit. First was to drill our the holes for the drop tanks.


The instruction have you install the intake ramps that control the airflow for transonic and supersonic flight in the open positions (for supersonic flight) but this is never the case when the Tomcat is on the ground so I removed the piston locating lugs and glued the first two ramps into place. i wanted to add a little visual detain in the intake so decided to open the thrid ramp just a little so I trimmed the piston down until the fit looked just right, but i've left the thrid ramps off until after paint ( you'll see why later )


Last but not least the inatkes were assembled and filling and sanding has commenced to smooth out the join.


Back to the cockpit and the last couple of parts were added i decided not to paint the foot rest and left them in their natural ecth metal as the detail of the wording was just too nice to hide under paint


The instrument panels and side wall were added to the main tub


And a dry fit into the nose section, I'm glad i removed the plastic parts that I did earlier but found on the dry fit that even more around the canopy area needed removing (which I'll show in the next update)


Well thats all for now and as always any suggestions and comments are always welcomed
Joel_W
Staff MemberAssociate Editor
AUTOMODELER
_VISITCOMMUNITY
New York, United States
Joined: December 04, 2010
KitMaker: 11,666 posts
AeroScale: 7,410 posts
Posted: Thursday, September 04, 2014 - 02:26 AM UTC
Allen,
Your completed Aires cockpit looks fantastic. Weathering is just perfect, not too much and not too little.

Very interesting fix to the intakes. One quickly realizes that your no novice to the world of F-14s.

Joel
SiStorey
_VISITCOMMUNITY
England - North East, United Kingdom
Joined: March 14, 2014
KitMaker: 242 posts
AeroScale: 65 posts
Posted: Friday, September 05, 2014 - 05:55 AM UTC
Epic work on the cockpit, how many man hours went into getting it looking like that lol

berndm
_VISITCOMMUNITY
Niedersachsen, Germany
Joined: March 26, 2014
KitMaker: 844 posts
AeroScale: 630 posts
Posted: Friday, September 05, 2014 - 07:14 AM UTC
Awesome, a great build to follow !
Tomcat31
#042
_VISITCOMMUNITY
England - North East, United Kingdom
Joined: November 18, 2006
KitMaker: 2,828 posts
AeroScale: 1,720 posts
Posted: Saturday, September 06, 2014 - 09:12 AM UTC

Quoted Text

Allen,
Your completed Aires cockpit looks fantastic. Weathering is just perfect, not too much and not too little.

Very interesting fix to the intakes. One quickly realizes that your no novice to the world of F-14s.

Joel

Thanks Joel, you are right that I'm a fan of the Tomcat (hence my call sign) but a lot of my knowledge could be classed as basic, I joined a group on facebook called F-14 Lovers and there are plenty of ex pilots, crews that worked on them and fans all willing to share their knowledge and personal photos. Hopefully in the next update some of this will show on the intakes


Quoted Text

Epic work on the cockpit, how many man hours went into getting it looking like that lol

Thanks Si, I would say that there has been about 30 hours in total put into this so it's about 20-25 hours on the cockpit so far.
Tomcat31
#042
_VISITCOMMUNITY
England - North East, United Kingdom
Joined: November 18, 2006
KitMaker: 2,828 posts
AeroScale: 1,720 posts
Posted: Thursday, October 23, 2014 - 01:34 AM UTC
It been a while but life has taken over which always seem to be the case when I start a project like this. Work has continued slowly on the Tomcat so here we go.

Work continued on the intakes first i supported the back end on the intakes with a little wedge of sprue.


and then painted them to ease painting later. after a bit of reseach and assistance from former Tomcat crews I found that the intakes are painted with a demarcation between white and the exterior grey in a certain way.


and the end results


Next the intakes were installed to the fuslage with great care to avaiod any misalignment, i also created some locating tabs at the back end of the intakes for this purpose


The resin wheel bays don't leave much room but i noticed after glueing the intake that there is a gap down the inside edge.


The solution was to box these in with some scrap plastic card but unfortunatley the intake ramps should reach either side of the intakes. as they were all painted and glued in there nothing i can do abaout iyt now but at least i'll be aware for next time


I temporally installed the engine faces but was happy with them as they are the earlier P&W enginges that were fitted to the F-14A as I was building a D variant i needed som GE enginge faces.


I took the plunge and placed an order with Sprue Brothers and order a few accessories by Steel Beach, fortunately i got the order hig enough to justify postage to the UK and also didn't get charged custome fees either


F-14 Tomcat BOL Rails (loaded)
F-14 Tomcat GE Engine Faces
LANTIRN Update Set for F-14 Tomcat
F-14D Tomcat Chin Pod
F-14 Tomcat Antenna Set
F-14 Tomcat NACA Vent (Hasegawa kit)

The last part of this update takes us back to the cockpit. I finally wedged the cockpit and nose wheelbay into the fuselage halves and found an issue with the rear deck of the resin cockpit, its too small so a little more scrap plasticard to the rescue.


Thats all for now and hopefully it won't be as long till the next update.

As Always comments, criteque and suggestions are always welcomed
Joel_W
Staff MemberAssociate Editor
AUTOMODELER
_VISITCOMMUNITY
New York, United States
Joined: December 04, 2010
KitMaker: 11,666 posts
AeroScale: 7,410 posts
Posted: Thursday, October 23, 2014 - 06:55 AM UTC
Allen,
It's really nice to see you back at the bench, and working on your F-14D. I was beginning to wonder if the Grumman campaign had lost you.

A most impressive cockpit install. Your problem solving has over come every obstacle and hindrance. I must say that I really like how you painted those intakes.

Looking forward to your next update.
Joel
youngtiger1
_VISITCOMMUNITY
California, United States
Joined: May 14, 2008
KitMaker: 534 posts
AeroScale: 47 posts
Posted: Saturday, October 25, 2014 - 06:17 PM UTC
Allen, just saw this build and had to drop in a comment. Your doing a great work and the cockpit looks awesome. I guess, it should be expected since you have the best reference book on the mighty Cat.

Mike
Tomcat31
#042
_VISITCOMMUNITY
England - North East, United Kingdom
Joined: November 18, 2006
KitMaker: 2,828 posts
AeroScale: 1,720 posts
Posted: Wednesday, December 31, 2014 - 05:01 PM UTC
It been a while since my last entry on this blog as life and work keeps getting in the way but I have been slowly working on the Tomcat here and there when I get a chance, so in no particular order here some more updates.
First I painted and fitted the Steel Beach GE engine faces and was a lot happier with the outcome.


And finally the fuselage halves were mated, despite sanding the resin undercarriage bays and plastic to paper thickness to was still a tight fit and need lots of persuasion, tape and clamps


While the glue was setting I noticed that there was a bit of melting from when I glued the intakes to the engine nacelles (I didn’t think the plastic was that thin) so these were filled with Mr Surfacer and sanded smooth.


Next to be fitted was the Naca gun vents that are fitted to later variant Tomcats again Steel Beach to the rescue as Hasegawa don’t include them. It took a little fettling but I got it to fit in the end.


And the nose section was finally attached to the rear fuselage


The Hasegawa molds are showing their age in some places as the parts for the beaver tail show. These were cleaned up and attached to the rear fuselage as were the inflation bags for the wings.


Next up will be the engines and wings
 _GOTOTOP