Steffen,
Decals really do look good. Excellent job. That slipper tank sure does change the entire look, as it does jump right out at you and grab one's attention.
Joel
World War II
Discuss WWII and the era directly before and after the war from 1935-1949.
Discuss WWII and the era directly before and after the war from 1935-1949.
Hosted by Rowan Baylis
Spitfire Mk.VIII - 1/48 Eduard
Joel_W

Joined: December 04, 2010
KitMaker: 11,666 posts
AeroScale: 7,410 posts

Posted: Friday, March 27, 2015 - 08:08 PM UTC
Posted: Saturday, March 28, 2015 - 06:28 PM UTC
Many thanks Joel!
I have added the stencils and the fuselage band. It cost me a decal, but luckily I have a spare set.

all the best
Steffen
I have added the stencils and the fuselage band. It cost me a decal, but luckily I have a spare set.

all the best
Steffen
Joel_W

Joined: December 04, 2010
KitMaker: 11,666 posts
AeroScale: 7,410 posts

Posted: Saturday, March 28, 2015 - 06:57 PM UTC
Steffen,
There is an old saying that "All's well that ends well", and certainly applies to your fuselage band dilemma. It came out perfect.
Joel
There is an old saying that "All's well that ends well", and certainly applies to your fuselage band dilemma. It came out perfect.
Joel
Posted: Sunday, March 29, 2015 - 10:10 PM UTC
Well, it is not at end yet so better not praise the day before the evening (roughly translated german saying)
Yesterday I added the undercarriage and profiled wheels with 4 spoke rim from the Spit IX Royal class.

Next I'll focus on the propeller... if all goes well I might be able to finish it on friday
all the best
Steffen
Yesterday I added the undercarriage and profiled wheels with 4 spoke rim from the Spit IX Royal class.

Next I'll focus on the propeller... if all goes well I might be able to finish it on friday
all the best
Steffen
thegirl

Joined: January 19, 2008
KitMaker: 6,743 posts
AeroScale: 6,151 posts

Posted: Monday, March 30, 2015 - 07:04 AM UTC
I haven't heard that saying in along time Steffen .
Waiting for Friday
Terri
Waiting for Friday

Terri
Posted: Monday, March 30, 2015 - 09:50 PM UTC
Thanks Terri!
Well the prop is ready for the decals but I wanted to play a bit with the kit...

cheers
Steffen
Well the prop is ready for the decals but I wanted to play a bit with the kit...

cheers
Steffen
Joel_W

Joined: December 04, 2010
KitMaker: 11,666 posts
AeroScale: 7,410 posts

Posted: Tuesday, March 31, 2015 - 02:11 AM UTC
Steffen,
I'm more then impressed. Simply outstanding.
Joel
I'm more then impressed. Simply outstanding.
Joel
Posted: Wednesday, April 01, 2015 - 04:45 PM UTC
Hi again
I painted the exhaust stacks and gave the whole kit a nice flat coat (H20). The Masks are off and now it is time for some (very little) weathering
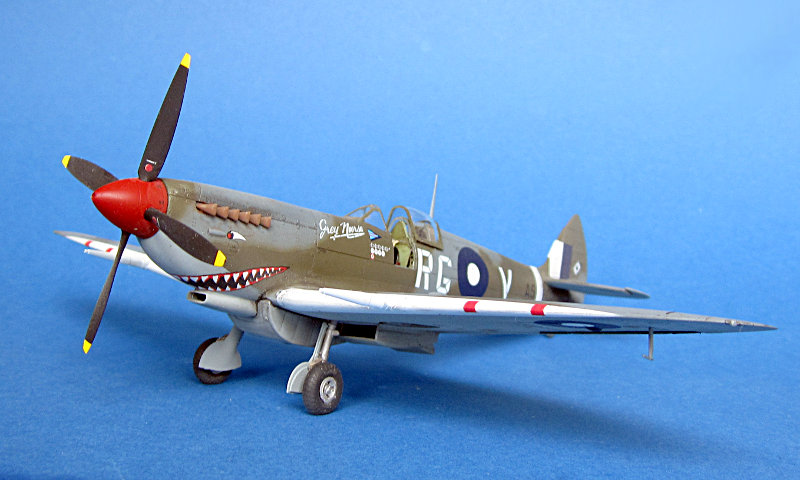

all the best
Steffen
I painted the exhaust stacks and gave the whole kit a nice flat coat (H20). The Masks are off and now it is time for some (very little) weathering


all the best
Steffen
Posted: Wednesday, April 01, 2015 - 04:50 PM UTC
Great work Steffen, that looks really good.
Wish I hadn't sent this boxing to Rowan now .
.
Andy
Wish I hadn't sent this boxing to Rowan now
 .
.Andy

Posted: Wednesday, April 01, 2015 - 06:38 PM UTC
Very nice indeed, beautiful work Steffen, and an excellent choice of markings!
Cheers, D
Cheers, D
Posted: Wednesday, April 01, 2015 - 09:48 PM UTC
Thank you, guys!
of course it is not yet finished, but I am gettig there. Sadly I do not have a cockpit door without crow bar at hand, but thats a minor problem and I will just build it with that item.
all the best
Steffen
of course it is not yet finished, but I am gettig there. Sadly I do not have a cockpit door without crow bar at hand, but thats a minor problem and I will just build it with that item.
all the best
Steffen
surgeon01

Joined: February 20, 2005
KitMaker: 204 posts
AeroScale: 99 posts

Posted: Thursday, April 02, 2015 - 12:10 AM UTC
Very nicely done Steffen, I always like the "shark mouth" themes.
greetings ro
greetings ro
Posted: Thursday, April 02, 2015 - 10:13 AM UTC
Now that does look good Steffen 
In the photo on page 2 there is a crow bar fitted to the door

Quoted Text
Sadly I do not have a cockpit door without crow bar at hand, but thats a minor problem and I will just build it with that item.
In the photo on page 2 there is a crow bar fitted to the door

thegirl

Joined: January 19, 2008
KitMaker: 6,743 posts
AeroScale: 6,151 posts

Posted: Thursday, April 02, 2015 - 10:38 AM UTC
Really looking forward to your final results Steffen 
Terri

Terri
Posted: Thursday, April 02, 2015 - 10:53 AM UTC
Thank you, Thomas, Mal and Terri!
Mal: eagle eyes! I missed that and took the other picture as main reference. I wanted to paint it iron, but I will do it in interior colour now.
Yesterday evening I was in the mood for some crazy PE stuff. That really isn't something for a mentally sane person...

(the cockpit door is something like 1x1cm...)
all the best
Steffen
Mal: eagle eyes! I missed that and took the other picture as main reference. I wanted to paint it iron, but I will do it in interior colour now.
Yesterday evening I was in the mood for some crazy PE stuff. That really isn't something for a mentally sane person...

(the cockpit door is something like 1x1cm...)
all the best
Steffen
EdgarBrooks

Joined: June 03, 2006
KitMaker: 397 posts
AeroScale: 384 posts

Posted: Thursday, April 02, 2015 - 01:59 PM UTC
Nobody's really sure, but the crowbar could have been bare steel (likeliest,) bronze green (possible if supplied by the same company who made them for the army,) or black (least likely.)
Here I go again; black & yellow handles are a post-war 'elf & safety innovation. Even the first ejection handles were red, not bi-coloured.
The only originals, that I've seen, were black, as was the rest of the mechanism.
Edgar
Here I go again; black & yellow handles are a post-war 'elf & safety innovation. Even the first ejection handles were red, not bi-coloured.
The only originals, that I've seen, were black, as was the rest of the mechanism.
Edgar
Posted: Thursday, April 02, 2015 - 02:35 PM UTC
Quoted Text
Here I go again; black & yellow handles are a post-war 'elf & safety innovation. Even the first ejection handles were red, not bi-coloured.
The only originals, that I've seen, were black, as was the rest of the mechanism.
Edgar
Thanks for the insight Edgar! The pic above just shows PE glued to the door .. not yet painted. As for the crowbar it looks like interior color on the mentioned picture, but cold be metal too. This it how it looks at the moment.

I do hesitate to post the reference picture from Eduards facebook site again, as it shows a mistake in decal placement, but here we go:

all the best
Steffen
Posted: Thursday, April 02, 2015 - 06:29 PM UTC
Hi again
I have added some more small parts to the kit and I also added some exhaust stains, though the picture 1 shows an exceptionally clean aircraft .. I also kept the wash light and "subtle". You can see some wear on the wing leading edge and tail, which I treid to replicate.

The guns show some dark tips. I am not sure if this is red tape or a dark metal colour. Input welcome!
Else I call this finished.
Thanks for following through this build, your encouragement, critique and background info (cheers Edgar!!) !
I will later post my 10 pic "walk around".
all the best
Steffen
I have added some more small parts to the kit and I also added some exhaust stains, though the picture 1 shows an exceptionally clean aircraft .. I also kept the wash light and "subtle". You can see some wear on the wing leading edge and tail, which I treid to replicate.

The guns show some dark tips. I am not sure if this is red tape or a dark metal colour. Input welcome!
Else I call this finished.
Thanks for following through this build, your encouragement, critique and background info (cheers Edgar!!) !
I will later post my 10 pic "walk around".
all the best
Steffen
EdgarBrooks

Joined: June 03, 2006
KitMaker: 397 posts
AeroScale: 384 posts

Posted: Thursday, April 02, 2015 - 08:56 PM UTC
The gun tips are probably the actual gun muzzles, since they had to be able to move with the recoil, and only the rear of the fairing was attached to anything. That means gunmetal, which I always replicate by matt black paint with pencil lead rubbed into it.
Some units covered the guns with the same fabric patches as the machine guns, while others used bungs pushed into the muzzles.
When experiments first began with cannon, rubber sheathes (not always from the chemist) were tried, but it was found that the cold froze the rubber, causing it to break up and enter the barrel, causing jams, so it was not encouraged.
Posted: Thursday, April 02, 2015 - 09:47 PM UTC
Thanks again for the input Edgar!! it is most appreciated.
I will paint it Iron (Gunze super metal paint) which gives a nice effect
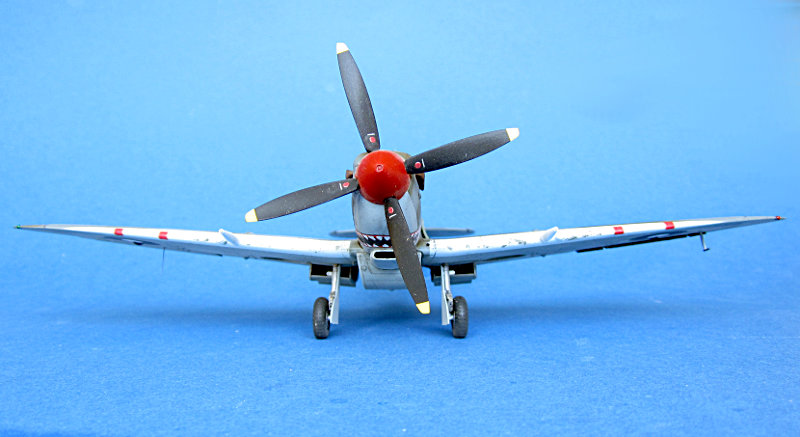
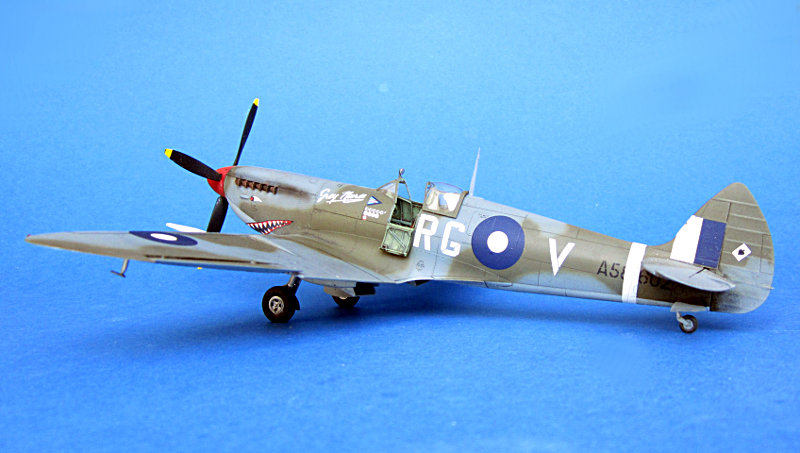
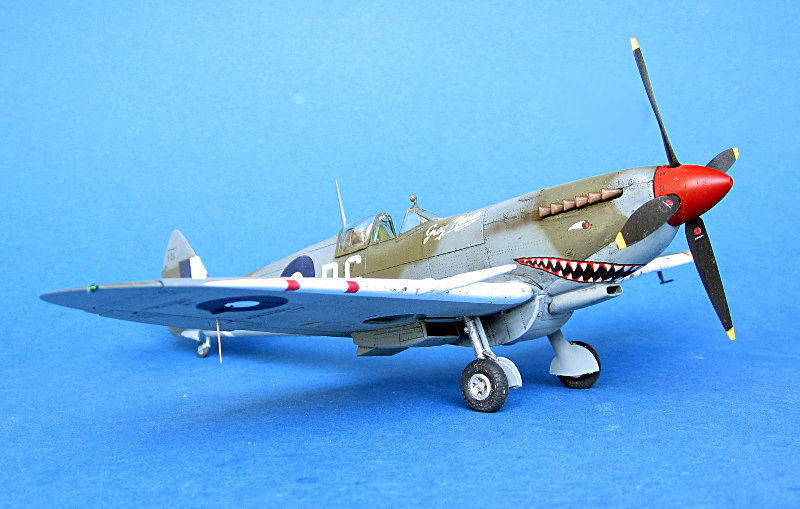
Here is the finished model (without painted guntips)




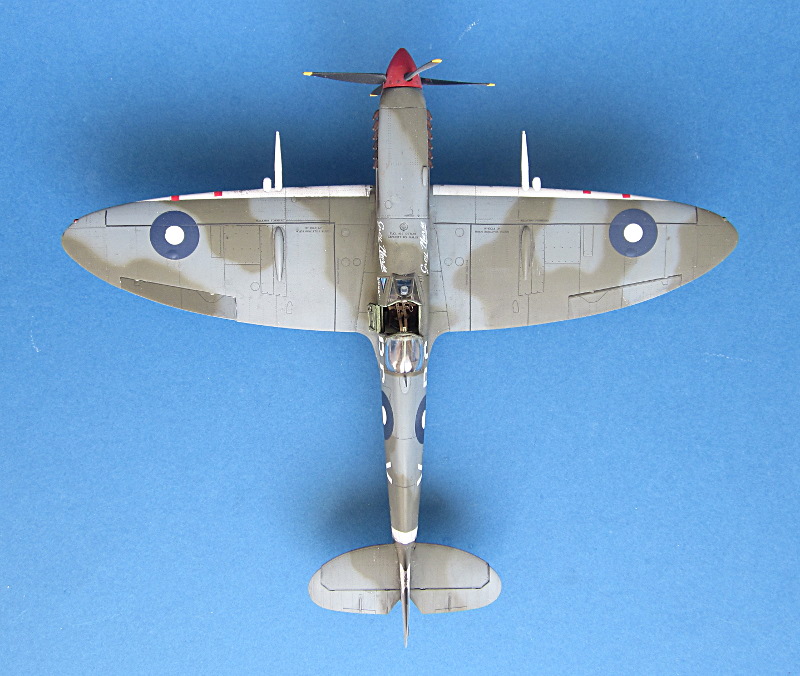
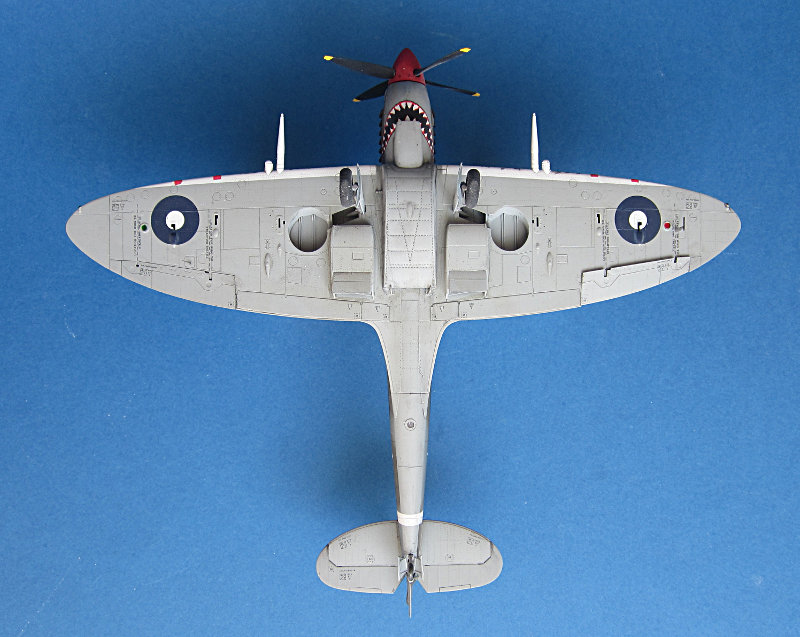
Thanks again to all!
Steffen
I will paint it Iron (Gunze super metal paint) which gives a nice effect
Here is the finished model (without painted guntips)


Thanks again to all!
Steffen
Joel_W

Joined: December 04, 2010
KitMaker: 11,666 posts
AeroScale: 7,410 posts

Posted: Friday, April 03, 2015 - 02:12 AM UTC
Steffen,
Impressive to say the least. Just a rock solid build. Thanks for sharing it with us.
Joel
Impressive to say the least. Just a rock solid build. Thanks for sharing it with us.
Joel
Posted: Friday, April 03, 2015 - 11:01 AM UTC
Very nicely done Steffen, you have got to love a shark mouth on a Spitfire 

Posted: Saturday, April 04, 2015 - 01:17 AM UTC
Thank you Joel and Mal!
Actually this shark mouth looks pretty friendly .. might be a reason why it was changed later
all the best
Steffen
Actually this shark mouth looks pretty friendly .. might be a reason why it was changed later
all the best
Steffen
thegirl

Joined: January 19, 2008
KitMaker: 6,743 posts
AeroScale: 6,151 posts

Posted: Saturday, April 04, 2015 - 04:03 AM UTC
She turned out really well Steffen , well done !
Terri
Terri
Posted: Saturday, April 04, 2015 - 12:45 PM UTC
Quoted Text
Thank you Joel and Mal!
Actually this shark mouth looks pretty friendly .. might be a reason why it was changed later
all the best
Steffen
Yes it does
 My masks set has the later mouth
What can look good with this scheme, and similar schemes where the upper wing roundels have been painted out and a smaller roundel in its place, is a circle of fresher paint depicting the painted out roundel. Not that anything is taken away from your build Steffen

 |


