OFFICIAL: Lockheed Air and Space Campaign

#259
Massachusetts, United States
Joined: October 23, 2011
KitMaker: 2,265 posts
AeroScale: 1,715 posts
Posted: Friday, May 29, 2015 - 08:46 PM UTC
eyup, Paul that is excellent!

Never mind hogging the thread, you are carrying this campaign on your back by your self! where is everyone else?!?

I hope to have an update worth showing on my Neptunes this week. I need to design and print some control panels for the cockpits, and I need to scratch up observers' seats for the noses, now I know they will be clearly visible.

#259
Massachusetts, United States
Joined: October 23, 2011
KitMaker: 2,265 posts
AeroScale: 1,715 posts
Posted: Friday, May 29, 2015 - 09:00 PM UTC
Scotland, United Kingdom
Joined: May 11, 2015
KitMaker: 768 posts
AeroScale: 656 posts
Posted: Friday, May 29, 2015 - 09:03 PM UTC
Thanks for the encouragement guys, much appreciated !
I'm hoping to get the nose attached, gap filled, and an overall coat of primer applied in the next few days.
And the line-up is looking great isn't it?
Pax & Pallets: Revell 1/48 Dakota
Terrible Teens : Revell 1/48 F15E Strike Eagle
Airfix IV : Airfix 1.72 Vulcan
England - South East, United Kingdom
Joined: January 11, 2003
KitMaker: 4,307 posts
AeroScale: 272 posts
Posted: Sunday, May 31, 2015 - 02:32 AM UTC
Just joined. Got Monogram's F-80 cheapo on Ebay. When I started modelling seriously the Monogram 1/48 kits were the mutts nuts, so a trip down memory lane too........
Bulldog#3
Grumpy Old Modeller No1
Growing old disgracefully!
Nordrhein-Westfalen, Germany
Joined: March 22, 2015
KitMaker: 671 posts
AeroScale: 614 posts
Posted: Sunday, May 31, 2015 - 01:33 PM UTC
Weekend was used for rough assembly. Here, first fitting problems were obvious.

Rather annoying are the misfitting canopies, that have to be filled and sanded.


What is best to have no fogging on the canopy: Putty or CA?

Oliver
On the desk: Probably a Panzer III.

#259
Massachusetts, United States
Joined: October 23, 2011
KitMaker: 2,265 posts
AeroScale: 1,715 posts
Posted: Sunday, May 31, 2015 - 04:24 PM UTC
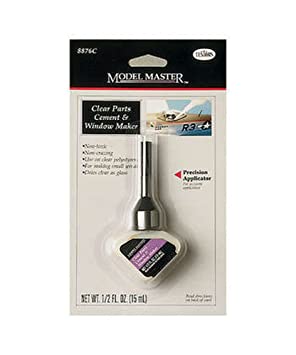
white glue, or "window maker" works well.

#363
Pennsylvania, United States
Joined: January 08, 2014
KitMaker: 425 posts
AeroScale: 401 posts
Posted: Sunday, May 31, 2015 - 06:01 PM UTC
Cement for watch crystals is also an excellent option for clear parts. No fogging and can be tidied up with rubbing alcohol before it hardens. I find it bonds stronger than clear parts cement but is not as easy to work with, so I go back and forth between them depending on the particular application.
On the Bench:
The Big Three: Eduard 1:48 Bf 109G-2 Trop
Radial Fighters: Hasegawa 1:48 Ki84 Frank
The Mighty Eighth: Eduard 1:48 P-51D-10
Vietnam
Joined: May 07, 2006
KitMaker: 416 posts
AeroScale: 89 posts
Posted: Sunday, May 31, 2015 - 08:43 PM UTC
Hi everyone,
My entry is the 1/72 Lockheed U-2, like Rob's, but from the Seminar Co., Korea.
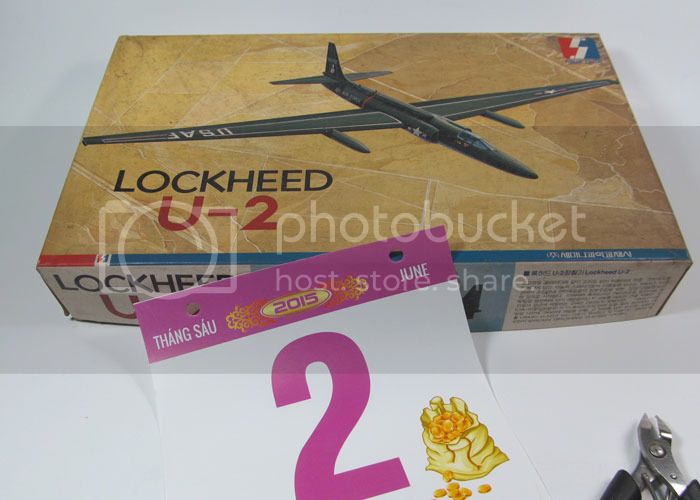
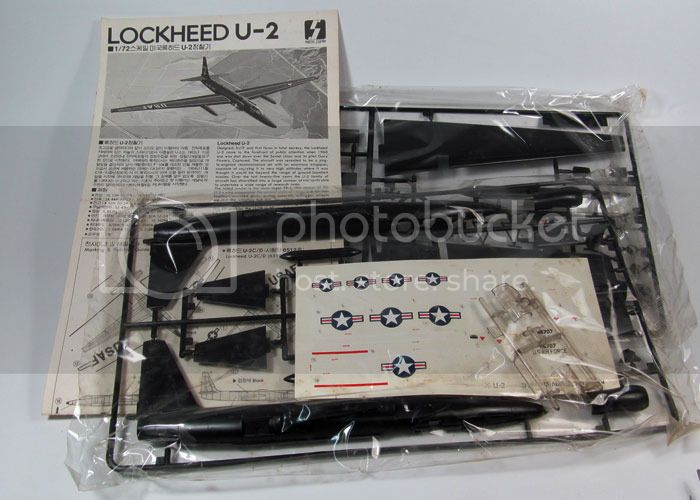
Regards,
K.

#259
Massachusetts, United States
Joined: October 23, 2011
KitMaker: 2,265 posts
AeroScale: 1,715 posts
Posted: Sunday, May 31, 2015 - 09:26 PM UTC
Welcome Dave Cox and Mr.K good to see more boxes opened!

Berlin, Germany
Joined: October 12, 2008
KitMaker: 709 posts
AeroScale: 651 posts
Posted: Sunday, May 31, 2015 - 09:40 PM UTC
Oliver: nice progress - and again a canopy problem...

Also shaked my box and opened it. After a bit of cleaning those parts now like to come together...

Thomas

Sometimes you need to distance yourself to see things clearly - Lao Tzu -
... in scale and in real life -T.
Scotland, United Kingdom
Joined: May 11, 2015
KitMaker: 768 posts
AeroScale: 656 posts
Posted: Sunday, May 31, 2015 - 09:41 PM UTC
Excellent to see more campaigners!
Oliver, those canopies look like hard work... i feel your pain.
Pax & Pallets: Revell 1/48 Dakota
Terrible Teens : Revell 1/48 F15E Strike Eagle
Airfix IV : Airfix 1.72 Vulcan
Nordrhein-Westfalen, Germany
Joined: March 22, 2015
KitMaker: 671 posts
AeroScale: 614 posts
Posted: Sunday, May 31, 2015 - 11:07 PM UTC
Jonathan and Paul: Thanks a lot. I will try this with white glue!
Thomas and Paul: Yes, again a canopy problem! I do not know if this sticks to me or to Revell canopies

. I definitely have to check the fitting more carefully. The F-104 TF should be easier to correct, as it has to be just to sand down. But the G-version has an evil horizontally run at its end and additionally a larger gap

.
Okay, nobody said 1/144 would be easy

Oliver

On the desk: Probably a Panzer III.
Scotland, United Kingdom
Joined: May 11, 2015
KitMaker: 768 posts
AeroScale: 656 posts
Posted: Friday, June 05, 2015 - 12:32 AM UTC
I've achieved less than I hoped over the last couple of days, had a plastic tragedy when masking one of the tiny clear parts on the underbelly - it popped out and went into the fuselage. (If you've ever lost a pick inside an acoustic guitar you know the feeling !

)
I managed to pry open the tail and shake it out. Bit of a messy fix getting it back in place though as the part has a lip round the edge to facilitate it sticking to the inside of the kit. Not easy to do when the whole thing is sealed up !
Anyhow.... i've now got an SR71 Greybird

Second coat after the first primer showed up all my bad filler spots

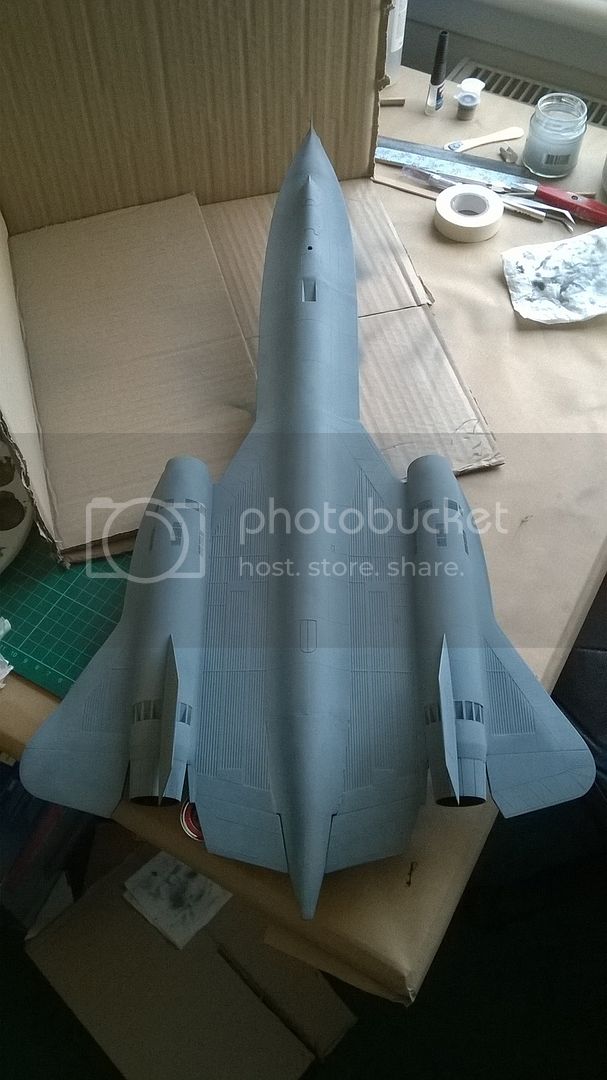
I'm realising that I may have been a little heavy handed with the brake chute door scribing but hey ho.
Pax & Pallets: Revell 1/48 Dakota
Terrible Teens : Revell 1/48 F15E Strike Eagle
Airfix IV : Airfix 1.72 Vulcan

#259
Massachusetts, United States
Joined: October 23, 2011
KitMaker: 2,265 posts
AeroScale: 1,715 posts
Posted: Friday, June 05, 2015 - 12:44 AM UTC
Quoted Text
...it popped out and went into the fuselage. (If you've ever lost a pick inside an acoustic guitar you know the feeling !  )
)
or a hand hole cap dropped inside a firetube boiler...

Quoted Text
Anyhow.... i've now got an SR71 Greybird
a completed airframe! Looks great from here. you are out in front now bud, take care!

#439
Washington, United States
Joined: November 05, 2005
KitMaker: 4,950 posts
AeroScale: 3,192 posts
Posted: Friday, June 05, 2015 - 10:55 AM UTC
@ Mr.K, I built that kit years ago. Not a bad one at all, plenty of options, don't get lost in it.

Hanger Queens in Waiting:
Monogram 1/72 F8F-1
Corsair the Sky Pirate - 1/72 Ace A-7D
Century Series - Airfix 1/72 F-105G
Anti Shipping - Academy 1/72 PBJ-1D
Academy 1/72 F-84E
Nordrhein-Westfalen, Germany
Joined: March 22, 2015
KitMaker: 671 posts
AeroScale: 614 posts
Posted: Saturday, June 06, 2015 - 02:08 AM UTC
Paul: What an impressive bird !
This week I had some more improvement with my starfigthers. The grinding of the TF-104 was no problem, but grinding the canopy of the single-seater, I ruined it beyond the possibility of repair (Thomas: some kind of dejavu compared to my experience in the swallow campaign). So I wanted to by a new vac-formed canopy, but I did not find any suitable. I was very lucky to find the superb report of Magnus Fridsell about moulding new canopies (Thanks from here Magnus

). I mainly followed the guidance, but I did not use a vac-form tool. I just made a new tool of my old canopy

and pulled some plastic sheet over it. Of ten to twelve canopies, two were quite useful.

I cut them out and sanded them for fitting and the better one was used.

.
Subsequently after using putty, the seam was sanded again.

I am quite happy with this result. The birds are now primed and are waiting for their new outfit.

Oliver

On the desk: Probably a Panzer III.

#259
Massachusetts, United States
Joined: October 23, 2011
KitMaker: 2,265 posts
AeroScale: 1,715 posts
Posted: Saturday, June 06, 2015 - 03:10 AM UTC
Oliver, that forming method has worked very nicely!

the super clear thin part looks so much nicer than the massive kit part!
Can you provide a link to the report of Magnus? I want to do that too.
Nordrhein-Westfalen, Germany
Joined: March 22, 2015
KitMaker: 671 posts
AeroScale: 614 posts
Posted: Saturday, June 06, 2015 - 03:54 AM UTC
Quoted Text
Oliver, that forming method has worked very nicely! 
the super clear thin part looks so much nicer than the massive kit part!
Can you provide a link to the report of Magnus? I want to do that too.
Jonathan, this is the link for the report:
http://www.ipmsstockholm.org/magazine/2002/08/stuff_eng_tech_moulding_canopies.htm The important thing, as Magnus mentioned, this method only makes sense, if You can´t buy a vac-formed canopy elsewhere. The amount of work You invest into a self-made form is rather high.
Oliver

On the desk: Probably a Panzer III.
Scotland, United Kingdom
Joined: May 11, 2015
KitMaker: 768 posts
AeroScale: 656 posts
Posted: Saturday, June 06, 2015 - 07:14 PM UTC
Nice work Oliver 😃
It does indeed look more in scale compared to a thicker kit part.
Pax & Pallets: Revell 1/48 Dakota
Terrible Teens : Revell 1/48 F15E Strike Eagle
Airfix IV : Airfix 1.72 Vulcan
Berlin, Germany
Joined: October 12, 2008
KitMaker: 709 posts
AeroScale: 651 posts
Posted: Sunday, June 07, 2015 - 01:12 AM UTC
Oliver: superb effort on this canopy-remake with these limited tools

Paul: You made big progress and memories come to my mind as I build the Revell Kit in the seventies.
Thomas

Sometimes you need to distance yourself to see things clearly - Lao Tzu -
... in scale and in real life -T.
England - South East, United Kingdom
Joined: January 11, 2003
KitMaker: 4,307 posts
AeroScale: 272 posts
Posted: Monday, June 08, 2015 - 10:43 PM UTC
Starting photo and first WIP pics. Decals are useless (I knew this was a risk when I bought it) so it'll be a fictitious bird using odds-n-sods from the spares bag
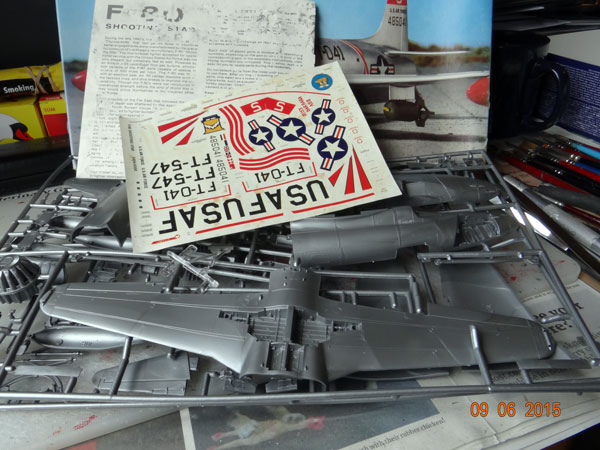
the pit
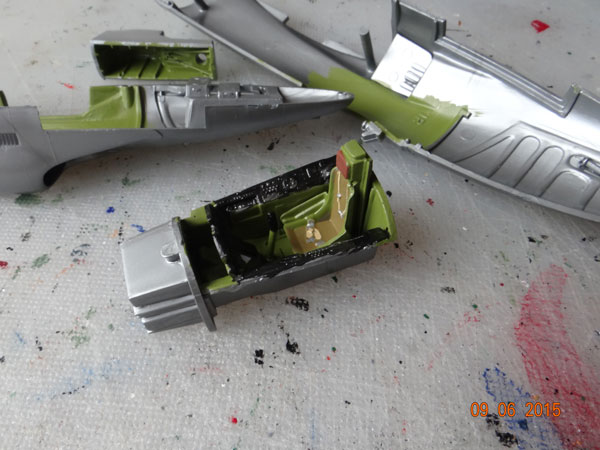
we have a problem.......loads of glue and tape needed
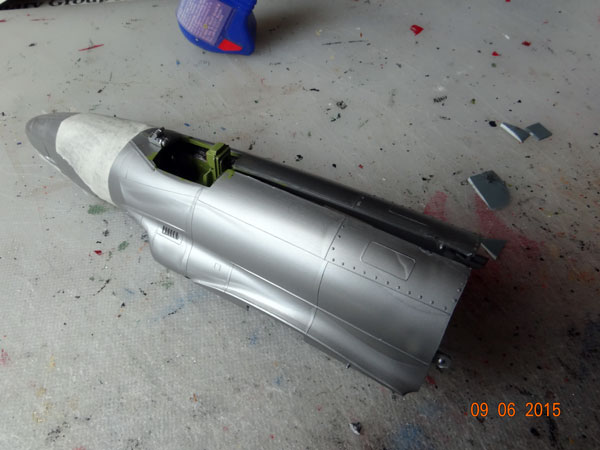
Bulldog#3
Grumpy Old Modeller No1
Growing old disgracefully!

#259
Massachusetts, United States
Joined: October 23, 2011
KitMaker: 2,265 posts
AeroScale: 1,715 posts
Posted: Tuesday, June 09, 2015 - 12:07 AM UTC
oh yeah, that's a classic!

If you can scan that decal and make a 300dpi png file, and e-mail it to me, I can reprint it for you on Microscale paper, if thats of interest.
England - South East, United Kingdom
Joined: January 11, 2003
KitMaker: 4,307 posts
AeroScale: 272 posts
Posted: Tuesday, June 09, 2015 - 12:31 AM UTC
Quoted Text
oh yeah, that's a classic! 
If you can scan that decal and make a 300dpi png file, and e-mail it to me, I can reprint it for you on Microscale paper, if thats of interest.
Thanks for the offer, but at the speed I work the post wouldn't have got back here before I'd finished!
Bulldog#3
Grumpy Old Modeller No1
Growing old disgracefully!

#259
Massachusetts, United States
Joined: October 23, 2011
KitMaker: 2,265 posts
AeroScale: 1,715 posts
Posted: Tuesday, June 09, 2015 - 12:35 AM UTC
Go man!


#439
Washington, United States
Joined: November 05, 2005
KitMaker: 4,950 posts
AeroScale: 3,192 posts
Posted: Wednesday, June 10, 2015 - 10:05 AM UTC
here's my Ventura, it's a little more started than I thought it was.
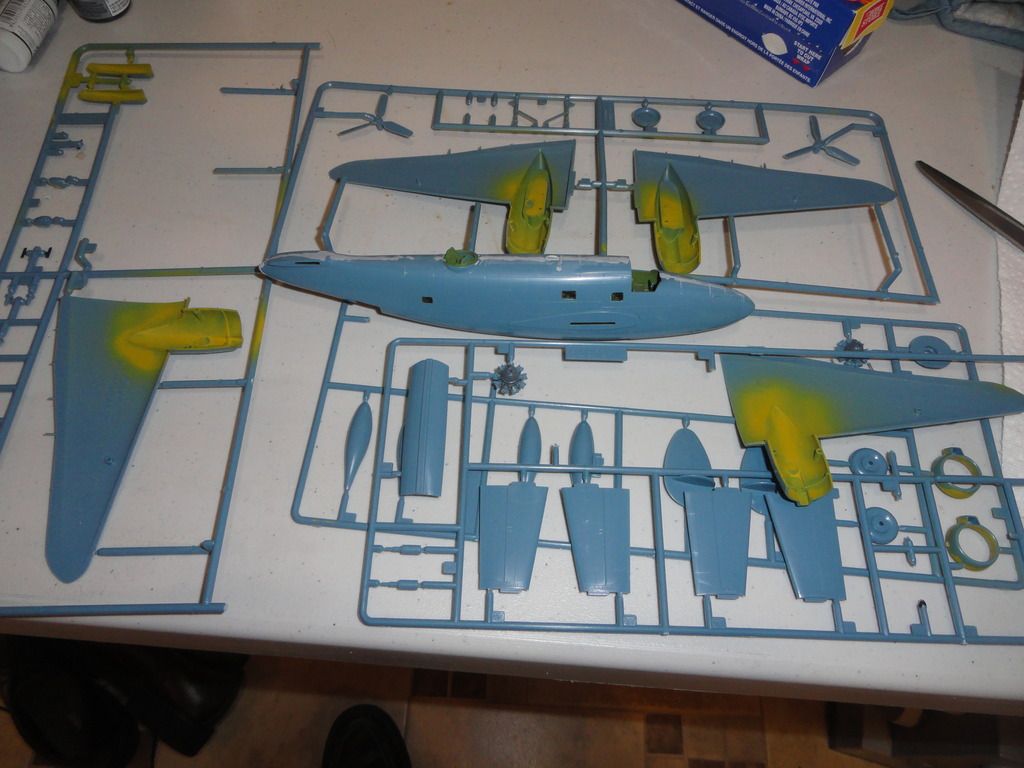
If it's OK I'd like to finish it in this campaign. If not, I've got a few other Lockheed kits I could use.

Hanger Queens in Waiting:
Monogram 1/72 F8F-1
Corsair the Sky Pirate - 1/72 Ace A-7D
Century Series - Airfix 1/72 F-105G
Anti Shipping - Academy 1/72 PBJ-1D
Academy 1/72 F-84E







 .
.


