OFFICIAL: Lockheed Air and Space Campaign
Berlin, Germany
Joined: October 12, 2008
KitMaker: 709 posts
AeroScale: 651 posts
Posted: Tuesday, May 12, 2015 - 07:36 PM UTC
Hi everybody!
Very nice kits and efforts in this thread!
Jonathan, I'll give you another type...
Whenever I manage to finish my Me-262 build for the campaign(Oliver aka "Antilles" know what I mean

) , I'd like to join this campaign with Italeri's YF-22A Lightning II. Since it is an Italeri-kit I expect bad fit issues but try my best. This will be the prototype, so I think not heavy weathering at all


Thomas

Sometimes you need to distance yourself to see things clearly - Lao Tzu -
... in scale and in real life -T.

#439
Washington, United States
Joined: November 05, 2005
KitMaker: 4,950 posts
AeroScale: 3,192 posts
Posted: Tuesday, May 12, 2015 - 08:14 PM UTC
Decisions, decisions. I've got the started Ventura or a pair of P-38s. A dual build would be neat, but displaying more of the Lockheed line is valuable too.

Not sure I have the time and space for all 3.

Hanger Queens in Waiting:
Monogram 1/72 F8F-1
Corsair the Sky Pirate - 1/72 Ace A-7D
Century Series - Airfix 1/72 F-105G
Anti Shipping - Academy 1/72 PBJ-1D
Academy 1/72 F-84E

#259
Massachusetts, United States
Joined: October 23, 2011
KitMaker: 2,265 posts
AeroScale: 1,715 posts
Posted: Tuesday, May 12, 2015 - 08:22 PM UTC
Ha Thomas, A superb choice! Not only a difficult kit to build

, but for Lockheed corporation, possibly the final nail in the coffin of a once great industry giant!

Scotland, United Kingdom
Joined: May 11, 2015
KitMaker: 768 posts
AeroScale: 656 posts
Posted: Wednesday, May 13, 2015 - 03:01 AM UTC
Hi all, total noob to the forums but why not get stuck right in ???
This is only going to be my second build since i came to my senses and started modelling again after a loooong break. By all accounts not the most friendly of kits either ! LoL
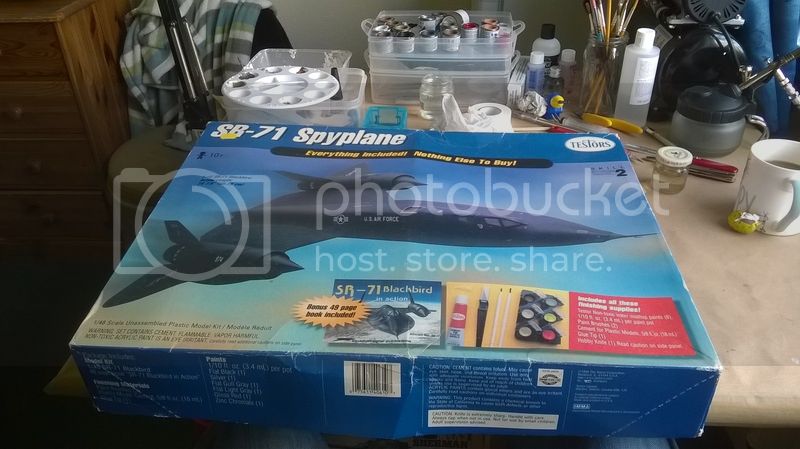
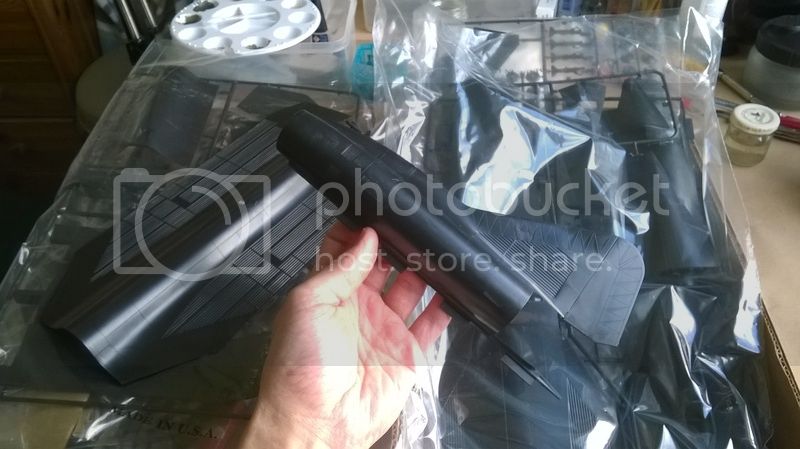
No aftermarket, straight out of the box, but hoping to put it on a nice base at least.
Pax & Pallets: Revell 1/48 Dakota
Terrible Teens : Revell 1/48 F15E Strike Eagle
Airfix IV : Airfix 1.72 Vulcan

#259
Massachusetts, United States
Joined: October 23, 2011
KitMaker: 2,265 posts
AeroScale: 1,715 posts
Posted: Wednesday, May 13, 2015 - 03:36 AM UTC
Welcome to Aeroscale Paul .

A lot of us have taken that long break

Very glad to have an SR-71 in the group. That's going to be a big model!
Nordrhein-Westfalen, Germany
Joined: March 22, 2015
KitMaker: 671 posts
AeroScale: 614 posts
Posted: Wednesday, May 13, 2015 - 03:57 AM UTC
Thomas: Wow, Italeri smells like more sanding! You really like it the hard way!
Paul: Hallo to Scotland. Nice to have You here!
On the desk: Probably a Panzer III.
Scotland, United Kingdom
Joined: May 11, 2015
KitMaker: 768 posts
AeroScale: 656 posts
Posted: Wednesday, May 13, 2015 - 01:59 PM UTC
Thanks, I'm looking forward to seeing the results of all our work.
Yep, this blackbird is going to be large to say the least.
One thing I've noticed after looking through the box is that I need to re-introduce the word "flash" into my vocabulary

this is how I remember kits back in the day where you weren't sure where the sprue finished and the part began !!!
Pax & Pallets: Revell 1/48 Dakota
Terrible Teens : Revell 1/48 F15E Strike Eagle
Airfix IV : Airfix 1.72 Vulcan
Germany
Joined: March 05, 2015
KitMaker: 28 posts
AeroScale: 28 posts
Posted: Thursday, May 14, 2015 - 12:46 PM UTC
Wow nice big ass SR71
Old Italerie models are like old Airfix ones a total pain in the ass

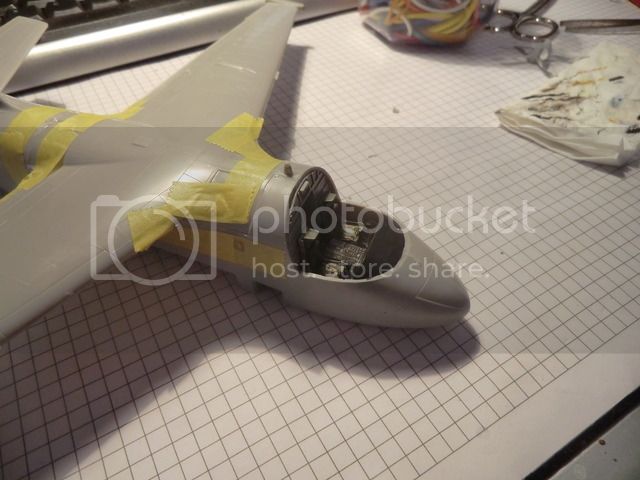
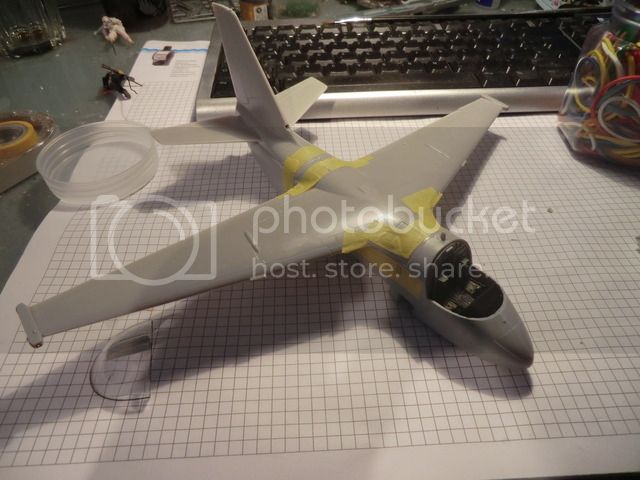
I managed to finish the cockpit and put the main body with the wings together.
I´m very glad that i decieded to buy thos Eduard parts. They are a big advantage for the cockpit, espacially with thos big windows.
I would nearly say that you have to buy the parts when you want to build this plan. They are a must have.
Enough talking, pictures !

Scotland, United Kingdom
Joined: May 11, 2015
KitMaker: 768 posts
AeroScale: 656 posts
Posted: Thursday, May 14, 2015 - 01:55 PM UTC
Hmm yes, I considered upgrading the blackbird cockpit but with the canopies closed and tiny windows it's not worthwhile.
Apparently the pilots rarely looked up from instruments - I don't suppose there was much to see at the edge of space!
Pax & Pallets: Revell 1/48 Dakota
Terrible Teens : Revell 1/48 F15E Strike Eagle
Airfix IV : Airfix 1.72 Vulcan
Berlin, Germany
Joined: October 12, 2008
KitMaker: 709 posts
AeroScale: 651 posts
Posted: Thursday, May 14, 2015 - 08:35 PM UTC
Paul, what a f*** bunch of plastic! This will need an amount of glue and color and of course patience and at least space to store

Thought my Italeri kit is bad but your Testors must be worse...!
Made a P-47 from Testors long since - awful

I also stayed a looong time away from our hobby, the Raptor here is a kind of practice some skills.
Anyway, welcome and good luck.
Jan: very nice progress, the cockpit looks great! Ancient Italeri & Airfix? You will love them after trying a Testors or Monogram.
Thomas

Sometimes you need to distance yourself to see things clearly - Lao Tzu -
... in scale and in real life -T.

#259
Massachusetts, United States
Joined: October 23, 2011
KitMaker: 2,265 posts
AeroScale: 1,715 posts
Posted: Thursday, May 14, 2015 - 11:58 PM UTC
Well and good, we have a campaign going now.

In my opinion, but I guess I am a bit of a deviant,
- the more difficult is the kit, the more rewarding is the final result.

I was not going to mention this before, so as not to overwhelm a returning model builder - but now that Thomas has so defamed the Testors products

- there was a fellow here a few years back who went
all the way with
that Testors Blackbird kit, an it took him almost two years to finish it, and just - wow


#259
Massachusetts, United States
Joined: October 23, 2011
KitMaker: 2,265 posts
AeroScale: 1,715 posts
Posted: Friday, May 15, 2015 - 12:07 AM UTC
ok, now i have made some headway on my project.
The fuselage halves of the Aeroclub P2V Neptune required all windows cockpit, and wheel well doors to be cut out (if desired).
so I spent a day with small sharp tools to get that done.
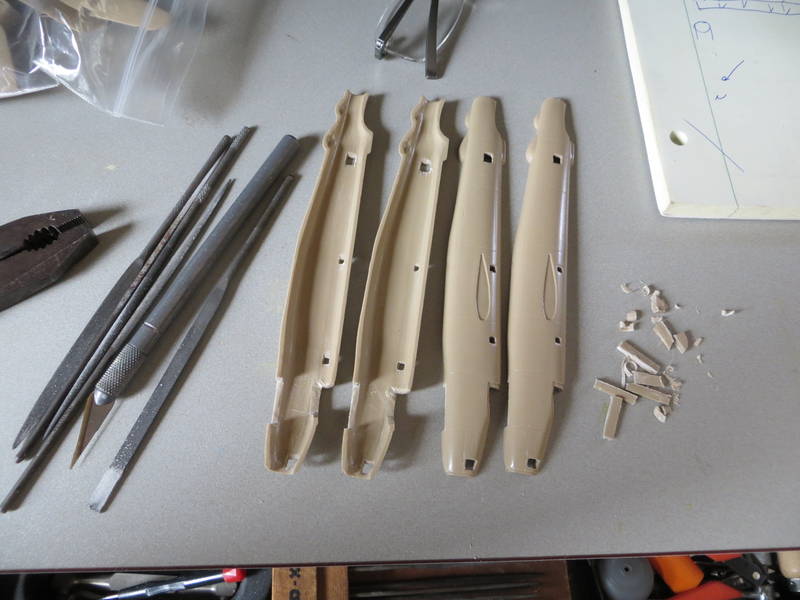
next I have do design and scratch-build some interior - cockpit, nose wheel compartment and doors, and lead ballast.
Scotland, United Kingdom
Joined: May 11, 2015
KitMaker: 768 posts
AeroScale: 656 posts
Posted: Friday, May 15, 2015 - 04:01 AM UTC
Quoted Text
I was not going to mention this before, so as not to overwhelm a returning model builder -
Heh heh i appreciate that but I only ever built budget old Airfix and Italeri kits in my youth. I was never spoiled by the quality of such as Tamiya so you see, I'm not scared off by a bit of filler !
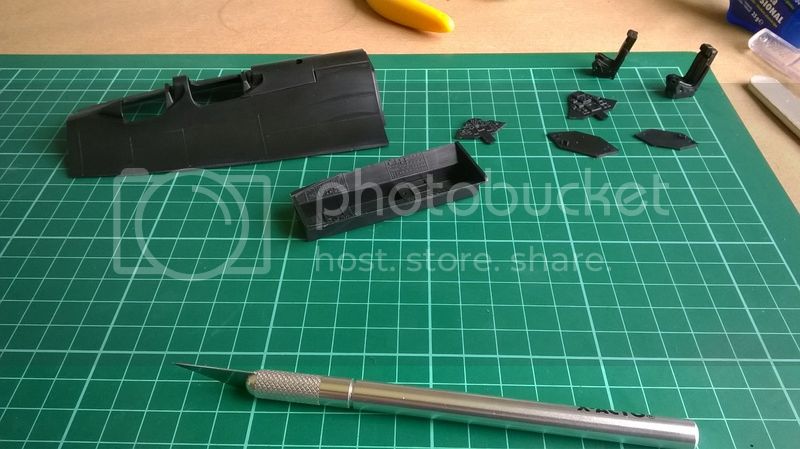
A bit of progress tonight, got things under way with the cockpit mostly painted up.

Pax & Pallets: Revell 1/48 Dakota
Terrible Teens : Revell 1/48 F15E Strike Eagle
Airfix IV : Airfix 1.72 Vulcan
Nordrhein-Westfalen, Germany
Joined: March 22, 2015
KitMaker: 671 posts
AeroScale: 614 posts
Posted: Friday, May 15, 2015 - 04:08 AM UTC
Well, that is great! Everybody can build a tamiya kit! I willl hang on !
Oliver

On the desk: Probably a Panzer III.
Nova Scotia, Canada
Joined: February 07, 2015
KitMaker: 58 posts
AeroScale: 19 posts
Posted: Saturday, May 16, 2015 - 11:48 PM UTC
Quoted Text
That is a nice kit. Everything fits well. you are right about those prop tip decals, but I think the most challenging part is masking the cockpit canopy.
Thanks Jonathan, the kit is very nice as straight forward to build with only 2 small pieces of flash on the whole kit. Unfortunately I don't have decals for the prop tips, all painting. But after looking at that canopy closer, I'm cringing at the masking of it. I have some Micro Mask that I'm going to try to use on it, never used it before so I thought this would be a good first attempt. Couple of progress pics below.
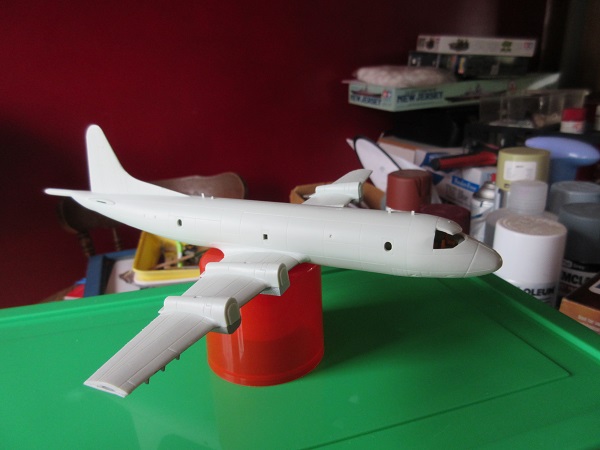
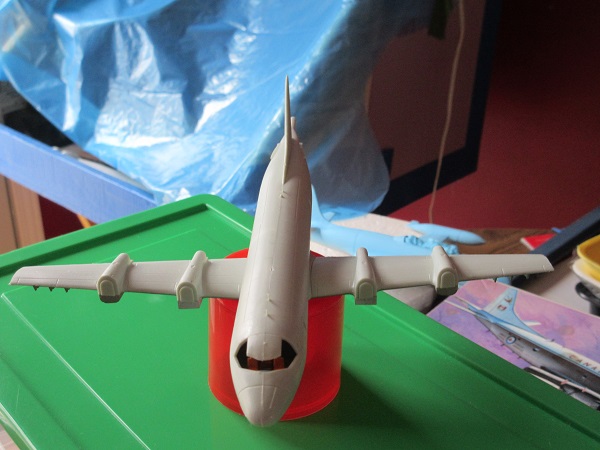
The wings are not glued on yet but they snug good against the body with no gaps. The seam on top and on the nose needs a little attention but I should be ready for painting by next week

All for now
Ron

#259
Massachusetts, United States
Joined: October 23, 2011
KitMaker: 2,265 posts
AeroScale: 1,715 posts
Posted: Sunday, May 17, 2015 - 03:36 AM UTC
Looking good Ron. You might be the first to finish.

Ive made some progress an my Neptunes.
I scratched together some cockpits and installed some massive lead ballast. The long heavy tail suggested as much lead as could fit in the nose.
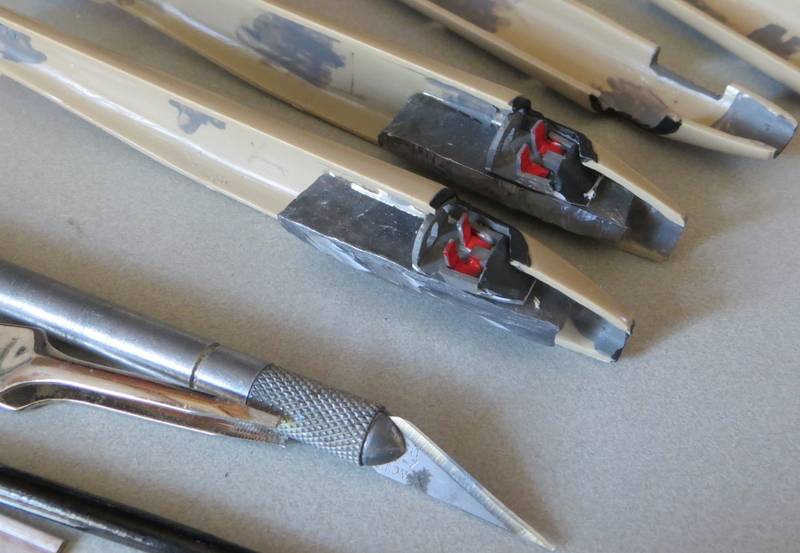
all welded shut. the cockpits are a bit crude, but should look ok under the canopies. I have to look at those soon, they are vacuform. Ive never done one of those before.
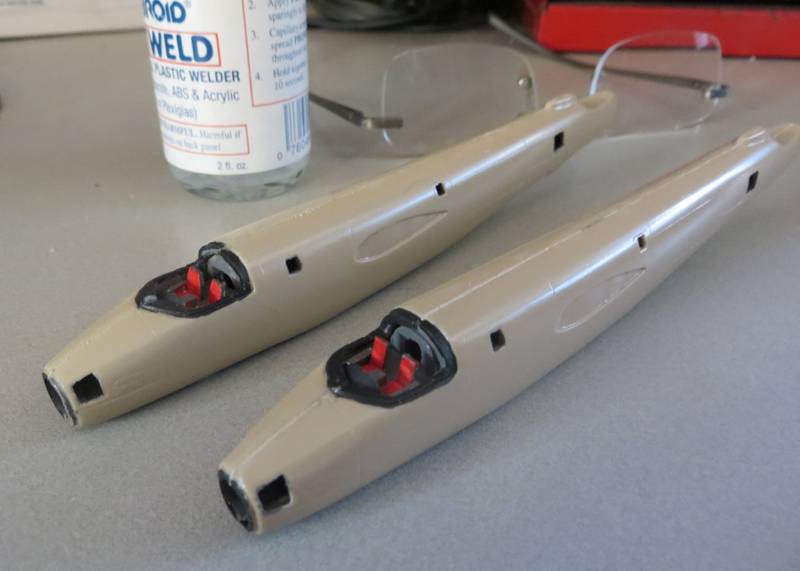

#226
British Columbia, Canada
Joined: February 20, 2012
KitMaker: 1,909 posts
AeroScale: 508 posts
Posted: Sunday, May 17, 2015 - 01:04 PM UTC
I will be building the Testors TR-1 (U2)

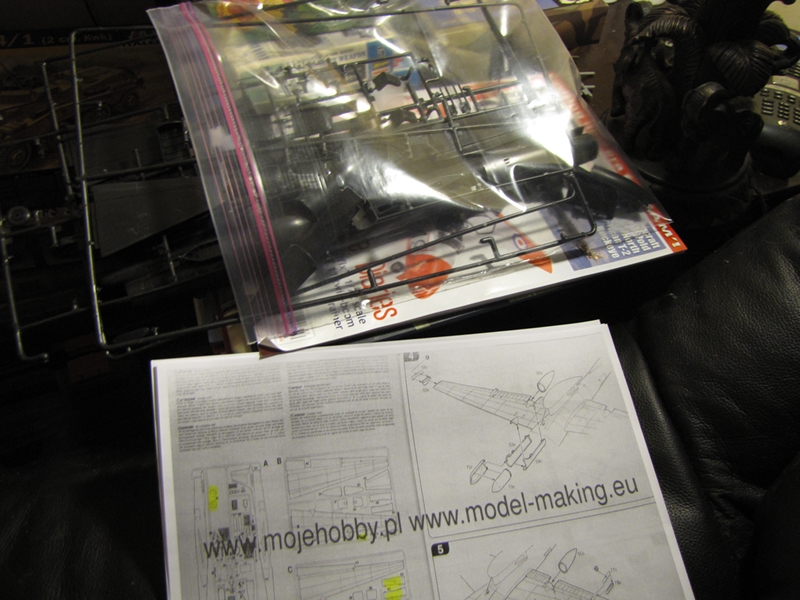
And just a note the Testors kits of the U-2, SR-71 and C-130 are Italeri kits. I have them all 2 of each of the U-2 and SR-71.


I wanted to do this kit so I could work on panel scribing before I start the others mentioned.

The pick is not the best as all of these kits were bagged kits from Squadron some time ago.

Cheers Rob.
Anything without guns is a target!
27 completed campaigns and counting :)
Scotland, United Kingdom
Joined: May 11, 2015
KitMaker: 768 posts
AeroScale: 656 posts
Posted: Sunday, May 17, 2015 - 11:35 PM UTC
That's awesome Rob, a great companion bird to mine.

Speaking of which i managed to get in a couple of hours (most of which i spent looking at reference and not actually handling plastic !) this afternoon.
Jonathan, thanks for that link to the blackbird build, very inspiring indeed. I toyed with the idea of scribing panels but i'm sure it would be a
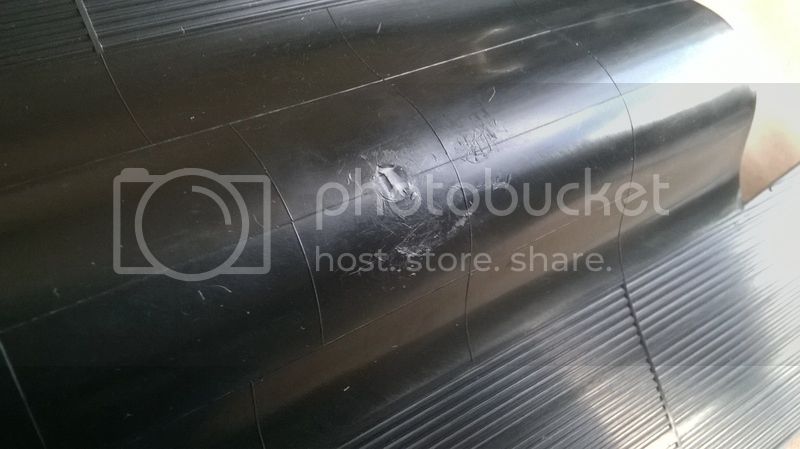
huge amount of work. I decided to add some missing detail, took a deep breath, and scribed the missing parachute doors on the upper fuselage. Not too shabby a result if i say so myself

Here's the before and after also showing off the incredibly bad injection mark.....

Pax & Pallets: Revell 1/48 Dakota
Terrible Teens : Revell 1/48 F15E Strike Eagle
Airfix IV : Airfix 1.72 Vulcan

#259
Massachusetts, United States
Joined: October 23, 2011
KitMaker: 2,265 posts
AeroScale: 1,715 posts
Posted: Monday, May 18, 2015 - 04:23 AM UTC
Hey Rob, we meet again, very happy to see a U2 in this campaign.
when we turn another page, I'll put up another set of profiles. still hoping to see a PV -1 or -2, and L1011.
KelticKnot, that is indeed a pleasing scribe line. Do remember, we need to finish this up in six months, so practice the arts, but please no doctoral dissertation this time out.

Ive got the tail groups and radoms on the neptunes. much gap filling ahead.
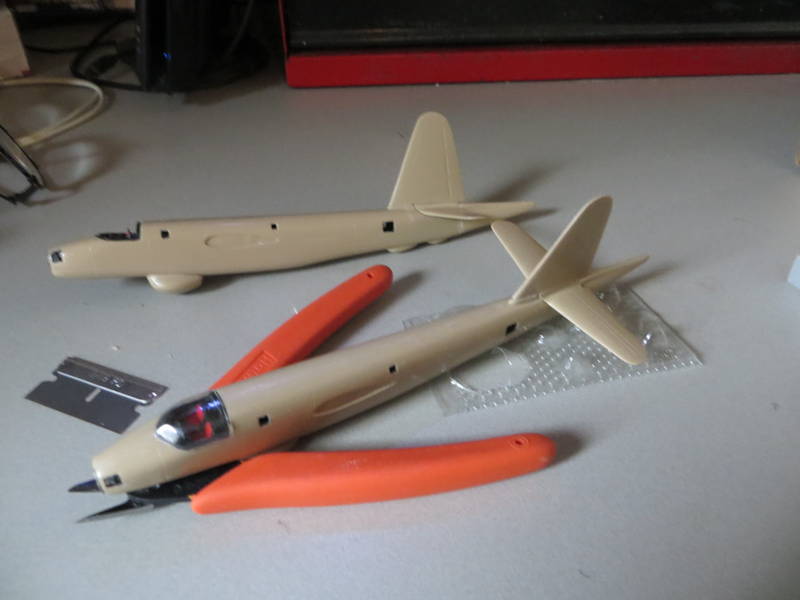
I also cut out and placed a vacuform canopy...
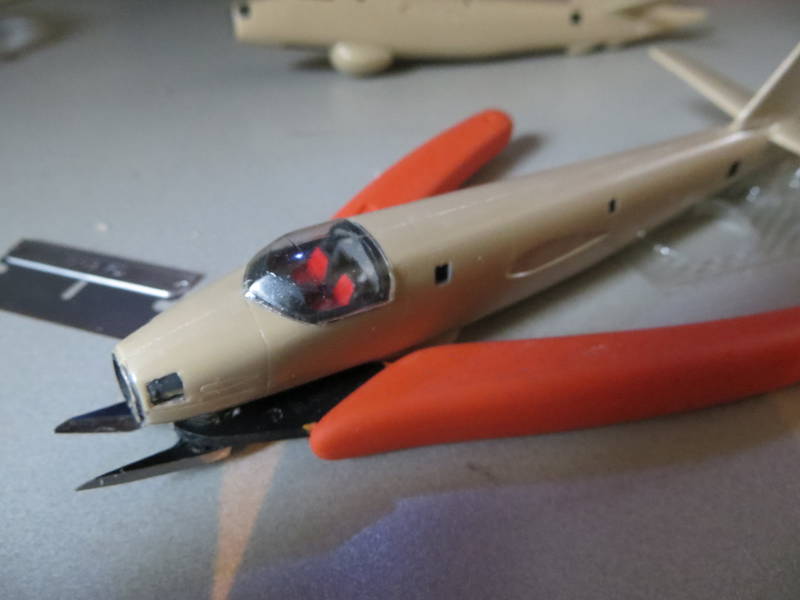
HOLY S**T vacuform canopy, where have you been all my life! this thing is like a magnifying glass, and it fits like it was meant to go there! Im going to have to work on the cockpits some more before I glue these canopies down!

Nordrhein-Westfalen, Germany
Joined: March 22, 2015
KitMaker: 671 posts
AeroScale: 614 posts
Posted: Thursday, May 21, 2015 - 07:33 PM UTC
Hallo Jonathan,
the vacu-formed canopy really fits nicely! I will look, if I find some for my starfighter, as the one of the kit is a rather thick part. Hopefully it has a lens-effect.

Progess this week was rather small. But I could not resist to add some things to the Martin Baker seat.

Oliver

On the desk: Probably a Panzer III.
Scotland, United Kingdom
Joined: May 11, 2015
KitMaker: 768 posts
AeroScale: 656 posts
Posted: Thursday, May 21, 2015 - 10:04 PM UTC
From the tiny to the ridiculously huge:
Fair bit of filling and sanding over the last couple of days. Plenty more yet to do but a dry fit of all the major components shows promising progress

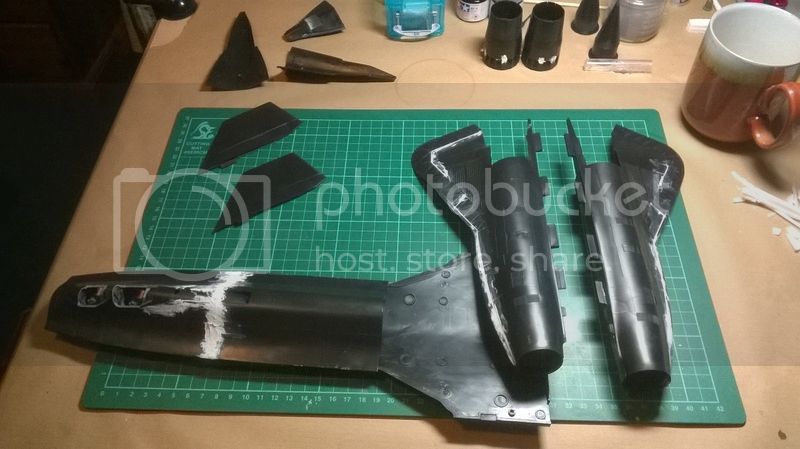
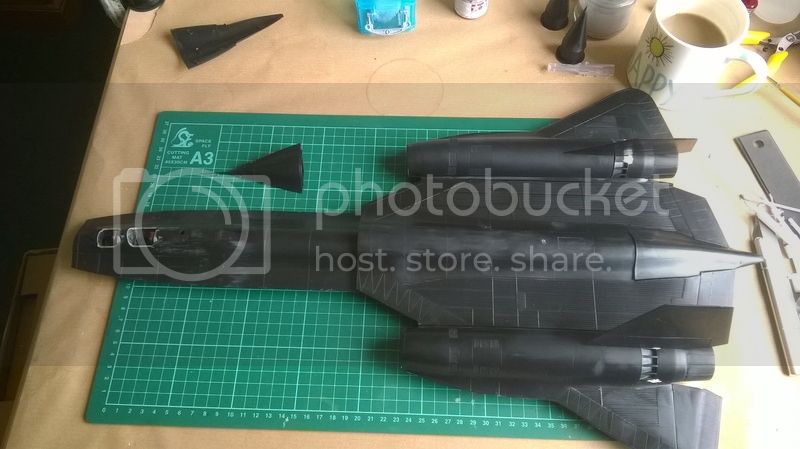
*EDIT* there seems to be a running theme of coffee mugs in my photos :o
Pax & Pallets: Revell 1/48 Dakota
Terrible Teens : Revell 1/48 F15E Strike Eagle
Airfix IV : Airfix 1.72 Vulcan
Nordrhein-Westfalen, Germany
Joined: March 22, 2015
KitMaker: 671 posts
AeroScale: 614 posts
Posted: Tuesday, May 26, 2015 - 07:15 PM UTC
Here is a small update of my starfighter build. Just finished the cockpit parts, that are now ready for assemby.

Paul: Like Your Mug Theme. Wonder what comes next. Counted two different ones so far!

Oliver
On the desk: Probably a Panzer III.
Scotland, United Kingdom
Joined: May 11, 2015
KitMaker: 768 posts
AeroScale: 656 posts
Posted: Wednesday, May 27, 2015 - 12:21 AM UTC
I cant get my head around working in such small scale ! I'll have to try a 1/144 just for the experience.

I've managed to get the main gaps in this kit filled and smoothed. To be honest it wasn't nearly as bad as i expected after hearing the nightmarish tales told about this particular kit. Like i said earlier, i may just have low expectations of build quality from my old days!

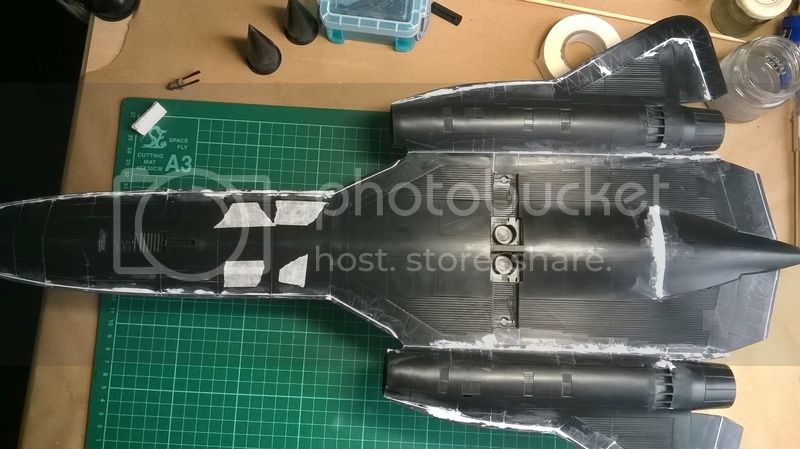
Pax & Pallets: Revell 1/48 Dakota
Terrible Teens : Revell 1/48 F15E Strike Eagle
Airfix IV : Airfix 1.72 Vulcan
Scotland, United Kingdom
Joined: May 11, 2015
KitMaker: 768 posts
AeroScale: 656 posts
Posted: Friday, May 29, 2015 - 08:25 PM UTC
Apologies for hogging the thread with updates but my progress is going rather well !
Got the canopies glued and masked for paint:
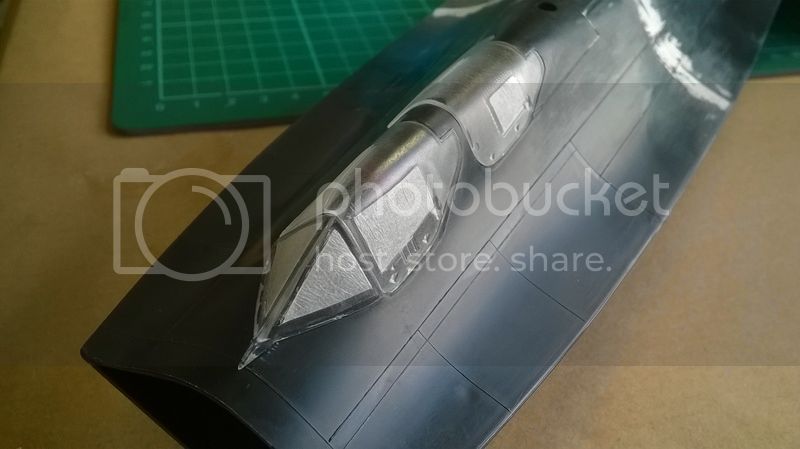
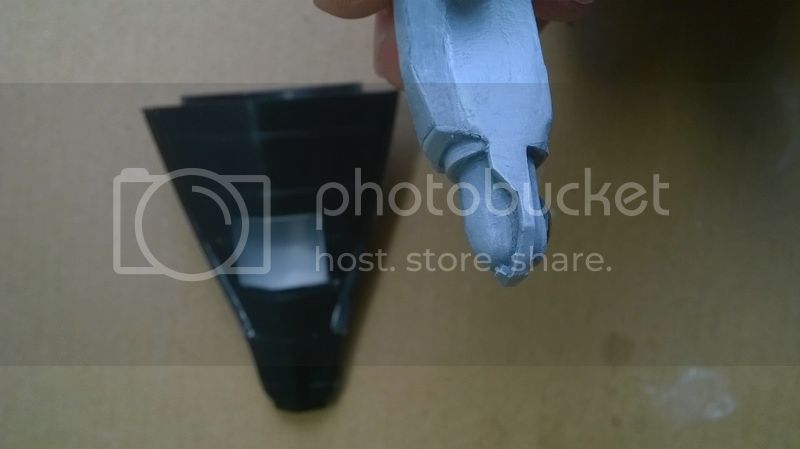
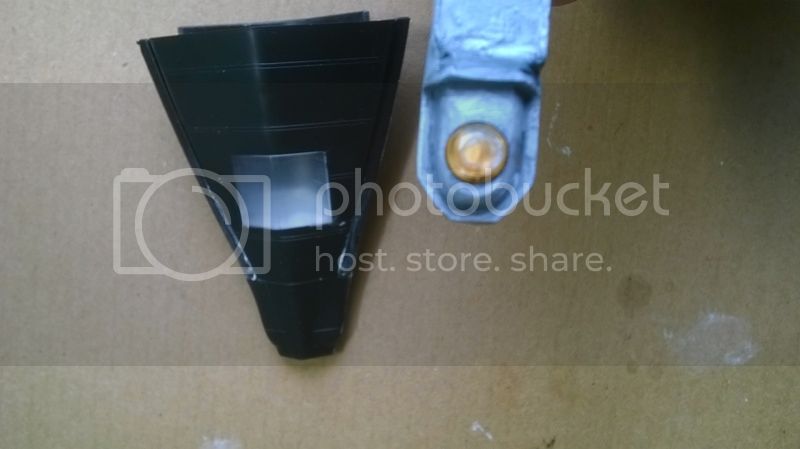
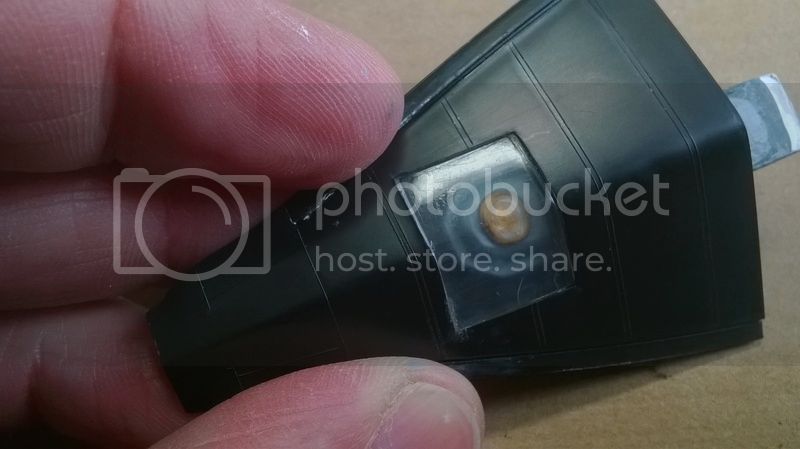
And the reason i've not attached the nose section is because i've been cooking up my very first little scratchbuilt project, something to add interest to the gaping sensor window under the nose.
I don't think i've seen anyone look at this aspect in other Habu builds ; Presenting the OBC (Optical Bar Camera), part of the Blackbird's array of sensor equipment.
It's an amateur affair after seeing some of the incredible work on the forums but you gotta start somewhere right???
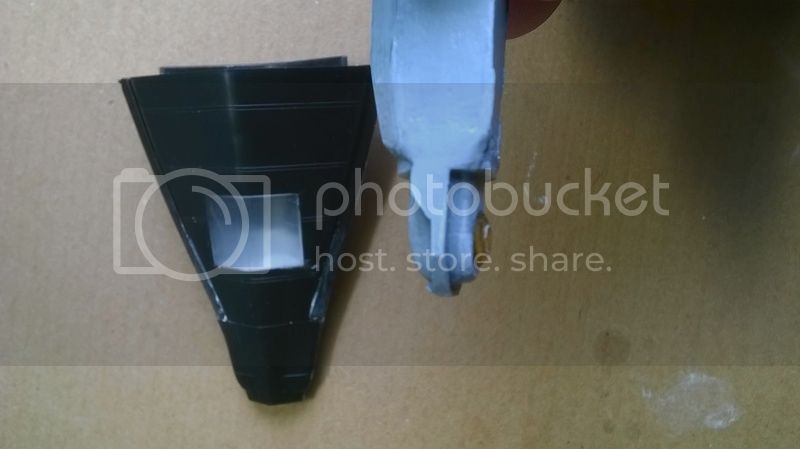
Pax & Pallets: Revell 1/48 Dakota
Terrible Teens : Revell 1/48 F15E Strike Eagle
Airfix IV : Airfix 1.72 Vulcan
Berlin, Germany
Joined: October 12, 2008
KitMaker: 709 posts
AeroScale: 651 posts
Posted: Friday, May 29, 2015 - 08:33 PM UTC
Paul, you really bringing life to your Blackbird - move on!
As for me, scratchbuilt is also far from the level shown here.
Thomas

Sometimes you need to distance yourself to see things clearly - Lao Tzu -
... in scale and in real life -T.
 ) , I'd like to join this campaign with Italeri's YF-22A Lightning II. Since it is an Italeri-kit I expect bad fit issues but try my best. This will be the prototype, so I think not heavy weathering at all


