_GOTOBOTTOM
World War II
Discuss WWII and the era directly before and after the war from 1935-1949.
Hosted by Rowan Baylis
Jay's Model Kits Reggiane RE-2005 a Build Log
GazzaS
#424
_VISITCOMMUNITY
Queensland, Australia
Joined: April 23, 2015
KitMaker: 4,648 posts
AeroScale: 1,938 posts
Posted: Wednesday, July 08, 2015 - 05:04 PM UTC
Hello Everyone!
After finishing my NMF P-47 I've decided to embark upon one of those few Italian aircraft of the war which could fight on equal terms with the best the Allies had to offer.
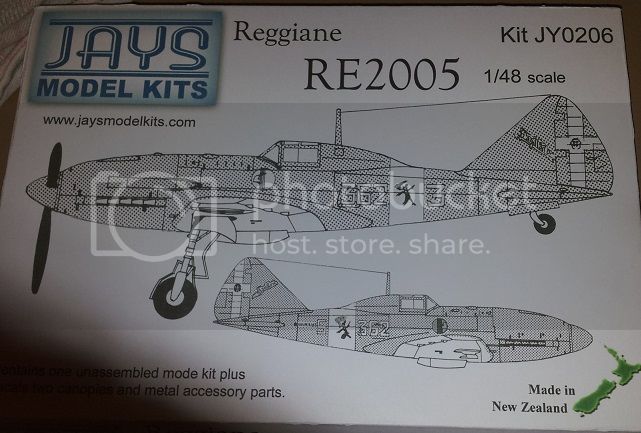


The kit doesn't have too many pieces. Only 34. Most are plastic. Some are white metal, and there are two vac-formed canopies.
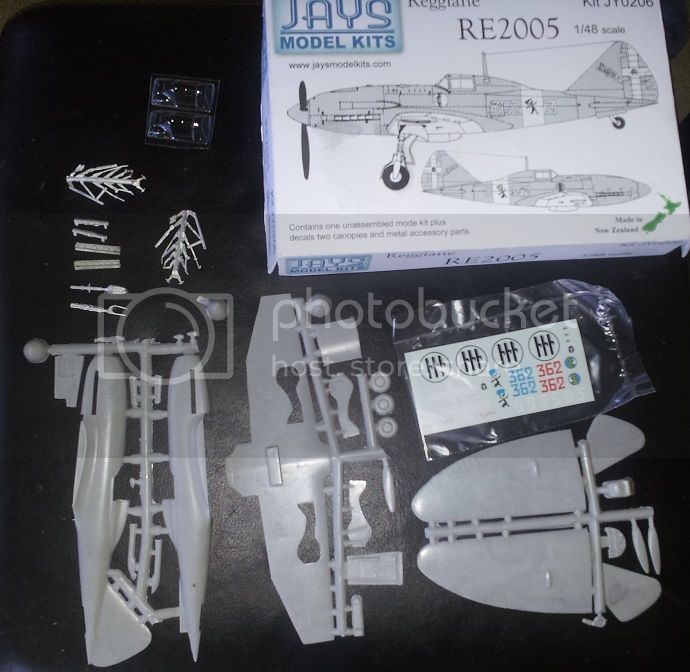


The aircraft only served with one Italian unit before the Italian surrender, so the decals give you three options within that one unit. The RE-2005 was photographed in German markings as well, so you have other options.


With only 34 parts, the instruction sheet isn't overly huge. But there are important things to read in that section we all ignore that says: "Read this first". Mainly it tells you a piece you need to make from scratch, and how to remove the parts from the sprue and how much to shave from parts like the inner fuselage.

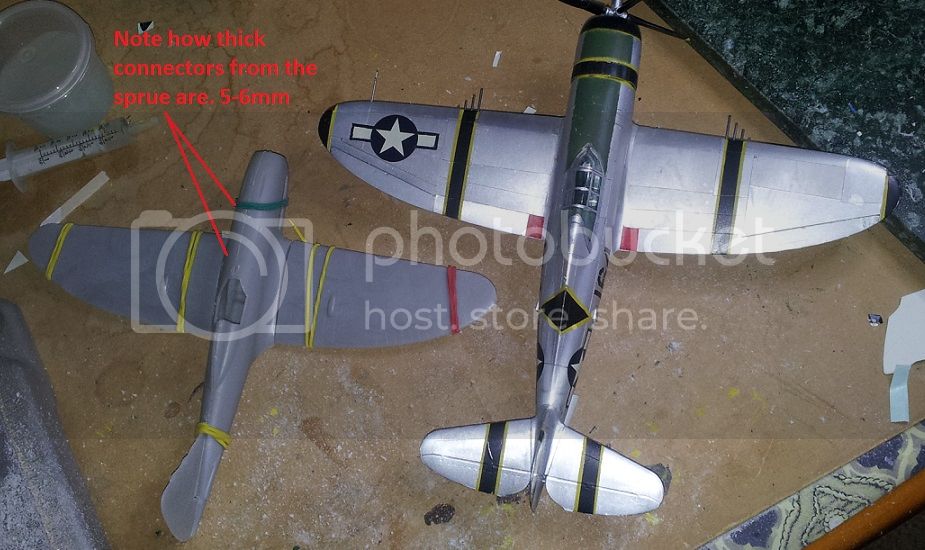
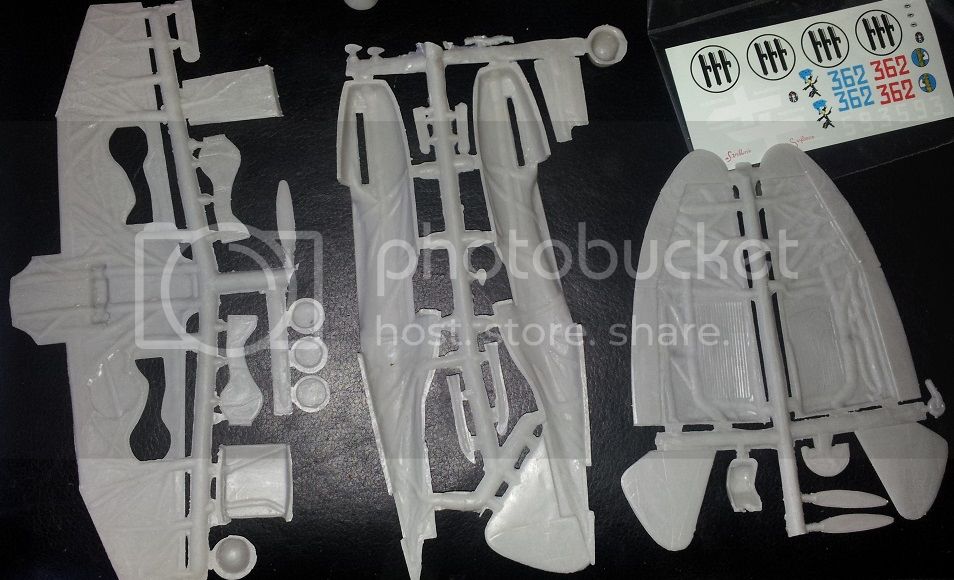
Despite the ultra fine panel lines, the underside of the parts looks like something prehistoric. The flow channels are thick, and it's recommended that you saw through the connectors. Honestly, it took me half an hour just to remove the lower half of the wings from it's sprue. That doesn't include cleaning it up...just removing it from the sprue.

My kit only has three main wheel halves. But three propeller spinners! Thankfully I can make one out of resin.

Thank you for reading!

Gary

Edit: content
GazzaS
#424
_VISITCOMMUNITY
Queensland, Australia
Joined: April 23, 2015
KitMaker: 4,648 posts
AeroScale: 1,938 posts
Posted: Friday, July 10, 2015 - 08:32 AM UTC
G'day Everyone!
Yesterday I spent many hours with my Dremel separating parts from the massive sprues and trimming them down. I used a small cylindrical engraving bit set at the lowest speed setting to avoid melting the plastic. Fortunately, I have a Dremel drill press, so I was able to have it all held and whirring away at a comfortable height while both hands could hold the part.

Then I fit-tested the parts. I was curious about the size, so I set her down next to my recently completed P-47.

If I had cut those connectors with my hands and a saw, it would have taken for-e-ver. Trying it with a blade proved very difficult.

Today I started painting and scratch-building parts. I poured the un-supplied resin wheel half as well as a propeller blade I thought I had lost. Using side cutters to remove pieces or cut the sprue makes other pieces fly off.

The color on the Regia Aeronautica chipset is called 'verde anticorrosione' I don't speak Italian, but I'll bet it's Corrosion Resistant Green.
The three-part wheel well covers come as a single piece. More delicate cutting for my fumble-fingers.

There are two identical white metal pieces which carry landing gear and other parts. The two main struts and their horizontal supports arrive unattached but inside a plastic ziploc bag.


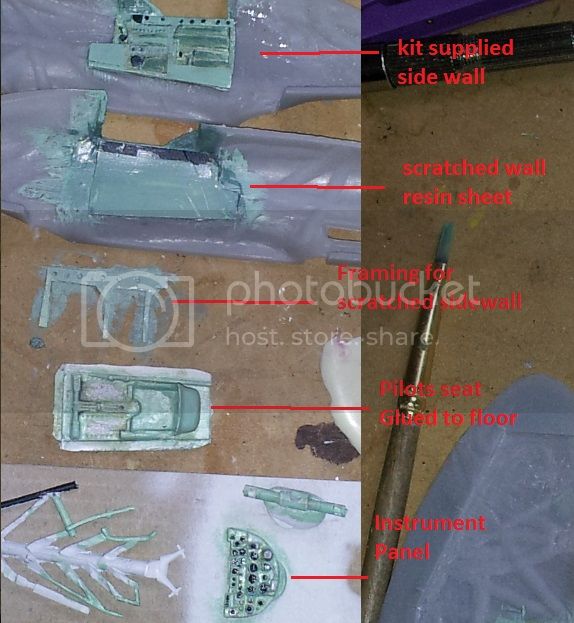
The cockpit doesn't come with a port side wall. I've made one and the major bracket that spans it from resin sheet. The directions come with interior shots of the cockpit. Only my laziness prevents me from making all of the necessary parts.

I feel I have the ability to make any part. Making it presentable is another story. Besides, the canopy is really tiny. I surmise that is because the 2000 series originally started with open cockpits.

I'm not overly motivated to spend much time on parts that I'll never see once the kit is completed. Outta sight - Outta mind. And, if you don't mind - it don't matter.

I've still to make my first set of seat belts. Perhaps there is an aftermarket set out there of generic seat belts on a photo-etch fret.

Thank you for reading!

Gary

Edit: typo
mrockhill
_VISITCOMMUNITY
Pennsylvania, United States
Joined: June 17, 2009
KitMaker: 566 posts
AeroScale: 507 posts
Posted: Saturday, July 11, 2015 - 11:06 PM UTC
Hello Gary,
Nice to see an aircraft of the Italian variety being built. This is a very interesting looking kit I look foward to following your progress, its lookin great so far!
GazzaS
#424
_VISITCOMMUNITY
Queensland, Australia
Joined: April 23, 2015
KitMaker: 4,648 posts
AeroScale: 1,938 posts
Posted: Sunday, July 12, 2015 - 05:13 AM UTC
Hi Mike,
Thank you for your kind words. I agree that there are too few Italian aircraft that are easy to find, or built often enough to be commonly thought of like the Spitfire, the P-51, the Zero, or the bf109.
This kit is a bit different to what I expect to find when I open a box. When you open a Tamiya or Hasegawa...or something from the other end of the scale... you are either ready for a nice fun kit, or something you will have to work on to make acceptable to your desired vision. This kit, I think, is more a blank canvas that I'm supposed to develop into something special.
The 'read-before-you-begin' section is highly important. One thing it emphasizes is that successful completion of this kit will rely more on careful trimming vice using lots of putty and sanding. I have found this to be true while dry-fitting the major components.

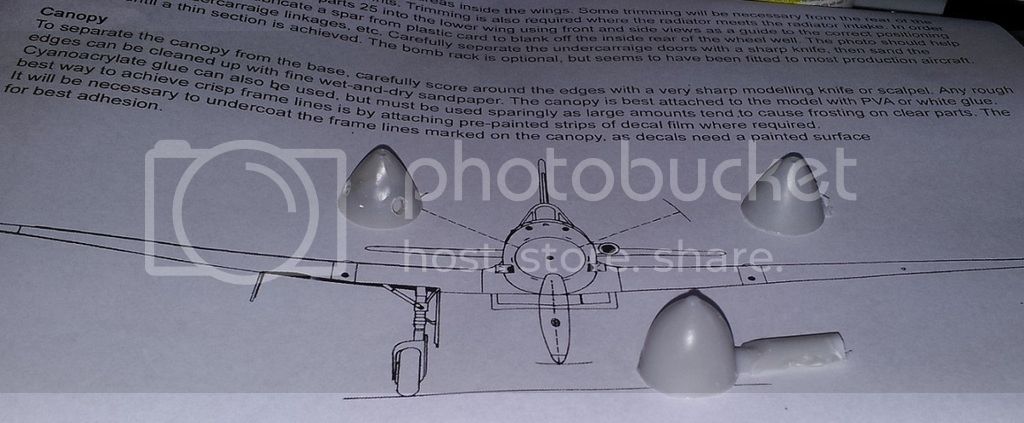
Here is the bottom end of the 'read-first' sheet. It comes with a convenient diagram to help align the propeller blades. You can also see three spinners came with the kit, and the one that I drilled out either has a molding flaw or a swirl of color in the plastic. The rounded spinner is for the prototype version of the a/c.

The plastic by the way is softer than most you find in a kit, but not so soft that it is difficult to tool.

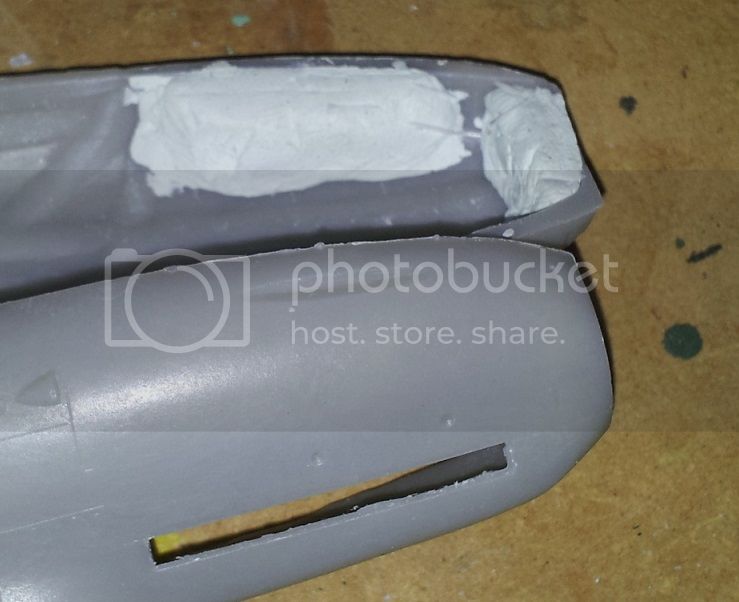
The 'read-first' also tells us too back-fill under the gun troughs and then drill and shape them. Unlike the troughs on the 109, these troughs are deep and narrow.

The built-up material is milliput. The area behind the spinner is a bit conical. I don't know if it would cause any trouble whilst adding a fixed propeller, but I always like my propellers to be able to spin. So, I filled it in and am contemplating building a base for the spinner and a shaft that will fit between the fuselage halves.

Here are the troughs nearly finished. 'Nearly' because I'm not certain how I'll get something in there to smooth them out. I need something cylindrical, between 800 and 1200 grit, and narrower than 1.6mm. You can see I've made some accidental marks on the outside of the nacelle.

Most exterior detail on the kit is very fine. More like a hint of it's existence. I fear that if I don't scribe, it will disappear under the faintest application of paint.

Thank you for reading!

Gary
mrockhill
_VISITCOMMUNITY
Pennsylvania, United States
Joined: June 17, 2009
KitMaker: 566 posts
AeroScale: 507 posts
Posted: Monday, July 13, 2015 - 03:11 AM UTC
Gary, Im not sure what all is available in your neck of the woods, but you might try super fine sand paper or krokus cloth that you can fold or wrap around some small diameter rod or glue some to a toothpick to get in there with.
AussieReg
Staff MemberAssociate Editor
AUTOMODELER
#007
_VISITCOMMUNITY
Victoria, Australia
Joined: June 09, 2009
KitMaker: 8,156 posts
AeroScale: 3,756 posts
Posted: Monday, July 13, 2015 - 08:53 AM UTC
Great thread Gary, I'm following along!

I use a set of small metal files for this type of work, you can get a set with 10 or 12 different profiles in a plastic wallet and clean them up with an old toothbrush after use. I've had mine for at least 20 years!

Cheers, D
GazzaS
#424
_VISITCOMMUNITY
Queensland, Australia
Joined: April 23, 2015
KitMaker: 4,648 posts
AeroScale: 1,938 posts
Posted: Monday, July 13, 2015 - 09:19 AM UTC
Hi Mike,
Thank you for the recommendation. Man, I haven't thought of krokus cloth in ages! I eventually wrapped some 1200 grit wet/dry around a 1 mm drill bit and got it to work without folding. It was a bit difficult for my fumble fingers being that the bit is less than 2 inches long, but it looks ok so far. Hopefully the next round of digital photos won't prove me wrong.

Hi Damian,
Glad to hear from you! I keep my eyes out for finer files than the set I have, all of the time. My set has a lot of profiles, but both cylindrical profiles are too thick for these narrow little troughs.

Gary

Edit: content & spelling
c4willy
#305
_VISITCOMMUNITY
Christchurch, New Zealand
Joined: February 01, 2006
KitMaker: 1,673 posts
AeroScale: 1,517 posts
Posted: Friday, July 01, 2016 - 04:25 AM UTC
HI Gaz the kit plastic looks familiar, the Kiwi wings kit of the boomerang (Now a Jays kit) also had the large channels on the underside of the mould for the low pressure injection process.

The interior of the Boomerang was also minimal and the kit instructions gave you plans for building the interior tubular framework. The panel lines were very light but didn't disappear under a couple of coats of paint. However the panel lines on your kit may differ.

So this kit is of a similar ilk you have to be some kind of crazy to build these ..... I guess we're some kind of crazy because I've built two of the Boomerang kits!
GazzaS
#424
_VISITCOMMUNITY
Queensland, Australia
Joined: April 23, 2015
KitMaker: 4,648 posts
AeroScale: 1,938 posts
Posted: Friday, July 01, 2016 - 04:37 AM UTC
TBH Chris,
It's more that I want something to show for the money and time. I know that it will never look as good as any mainstream (monogram, tamiya, hasegawa, etc.) kit no matter how much effort I throw into it.

I just don't want it to be a waste.

Gaz
stooge
_VISITCOMMUNITY
South Australia, Australia
Joined: June 20, 2013
KitMaker: 210 posts
AeroScale: 210 posts
Posted: Friday, July 01, 2016 - 02:16 PM UTC
A very interesting build Gary. Though you have scared me off looking at the kit even though I am interested in Italian aeroplanes.

Nice and awesome work so far.
 _GOTOTOP