REVIEW Hansa-Brandenburg W.12 (Early)
Merlin
 Senior Editor
#017
United Kingdom
Joined: June 11, 2003
KitMaker: 17,582 posts
AeroScale: 12,795 posts
Posted: Saturday, September 05, 2015 - 09:30 PM UTC
Here's a look at Wingnut Wings' beautifully designed and moulded kit of the Hansa-Brandenburg W.12 floatplane fighter.
Link to Item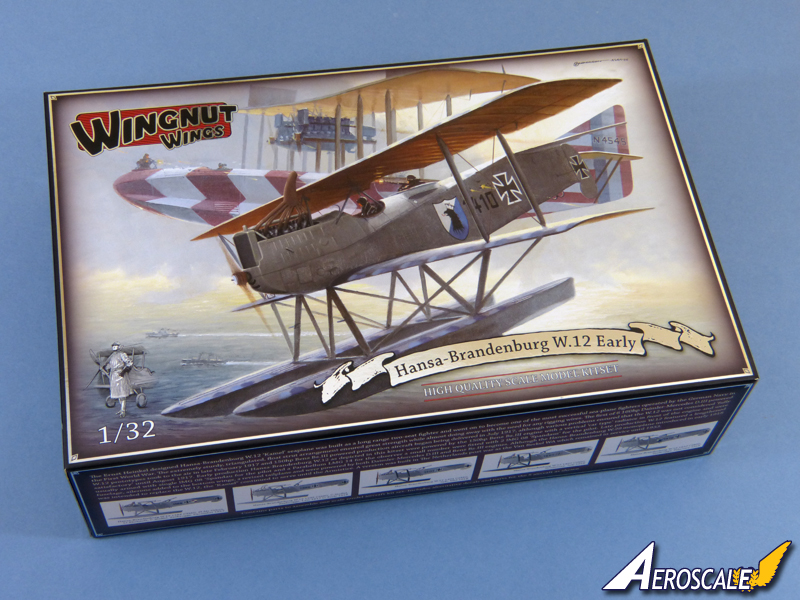
If you have comments or questions please post them here.
Thanks!
BEWARE OF THE FEW...
As I grow older, I regret to say that a detestable habit of thinking seems to be getting a hold of me. - H. Rider Haggard
European Union
Joined: January 28, 2015
KitMaker: 2,099 posts
AeroScale: 19 posts
Posted: Sunday, September 06, 2015 - 07:29 PM UTC
Never gonna' give EU up, never gonna' let EU down.
JPTRR
 Managing Editor
#051
Tennessee, United States
Joined: December 21, 2002
KitMaker: 7,772 posts
AeroScale: 3,175 posts
Posted: Monday, September 07, 2015 - 04:59 AM UTC
Another aircraft I have been waiting for in large scale.
If they demand your loyalty, give them integrity; if they demand integrity, give them your loyalty.--Col John Boyd, USAF
“Any plan where you lose your hat is a bad plan.”
Merlin
 Senior Editor
#017
United Kingdom
Joined: June 11, 2003
KitMaker: 17,582 posts
AeroScale: 12,795 posts
Posted: Monday, September 07, 2015 - 11:39 AM UTC
Hi Timothy and Fred
I must admit it's dreadfully tempting to start this beauty, even though I know I shouldn't!

All the best
Rowan

BEWARE OF THE FEW...
As I grow older, I regret to say that a detestable habit of thinking seems to be getting a hold of me. - H. Rider Haggard
JPTRR
 Managing Editor
#051
Tennessee, United States
Joined: December 21, 2002
KitMaker: 7,772 posts
AeroScale: 3,175 posts
Posted: Monday, September 07, 2015 - 05:48 PM UTC
And why should you not? Perhaps it will be the spark that ignites your modeling making conflagration! I just counted the parts and like you wrote, it looks like a straightforward - almost shake-the-box - kit. Just the way I like 'em. Perhaps the struts will require a few extra days but the rest of the model appears to be 'easy' to assemble. For me, probably the hang up would be over-researching the colors, yet I understand Wingnuts does a fine job of telling us what their research has found.
I just hope they make enough of these so I can get one after we settle into a place to live!
My inspiration:

If they demand your loyalty, give them integrity; if they demand integrity, give them your loyalty.--Col John Boyd, USAF
“Any plan where you lose your hat is a bad plan.”
Merlin
 Senior Editor
#017
United Kingdom
Joined: June 11, 2003
KitMaker: 17,582 posts
AeroScale: 12,795 posts
Posted: Monday, September 07, 2015 - 08:04 PM UTC
Hi Fred
You're wicked, encouraging me like that! If anyone moans, I'll just say "Fred made me do it!".

All the best
Rowan

BEWARE OF THE FEW...
As I grow older, I regret to say that a detestable habit of thinking seems to be getting a hold of me. - H. Rider Haggard
Merlin
 Senior Editor
#017
United Kingdom
Joined: June 11, 2003
KitMaker: 17,582 posts
AeroScale: 12,795 posts
Posted: Tuesday, September 08, 2015 - 12:19 AM UTC
My inspiration:

Hi again Fred
Believe me - if I had a hanger big enough, I'd go for the full Felixstowe vs W.12 combo. It would be the ultimate "Dogfight Double"!

All the best
Rowan

BEWARE OF THE FEW...
As I grow older, I regret to say that a detestable habit of thinking seems to be getting a hold of me. - H. Rider Haggard
California, United States
Joined: April 26, 2010
KitMaker: 346 posts
AeroScale: 292 posts
Posted: Tuesday, September 08, 2015 - 10:44 AM UTC
Looks like Pheon Decals just released their Christiansen's W12 decals, favorable price too!
May have to get one and slide it into the box, so I forget and are pleasantly surprised when I go build it!
Like, follow, find out what I've had for breakfast - your large scale frenemy starter kit.
bill_c
 Campaigns Administrator
New Jersey, United States
Joined: January 09, 2008
KitMaker: 10,553 posts
AeroScale: 1,198 posts
Posted: Friday, September 11, 2015 - 02:54 AM UTC
Rowan, you get to review all the cool kits!
Merlin
 Senior Editor
#017
United Kingdom
Joined: June 11, 2003
KitMaker: 17,582 posts
AeroScale: 12,795 posts
Posted: Saturday, September 12, 2015 - 12:10 AM UTC
Quoted Text
Rowan, you get to review all the cool kits!
Hi Bill
True enough. When I bought it I knew it would plug a gap in our list of WNW reviews.

This is a good opportunity to remind our readers that we're always looking for new reviews - so, if you've bought anything we haven't covered, please do get writing!

All the best
Rowan

BEWARE OF THE FEW...
As I grow older, I regret to say that a detestable habit of thinking seems to be getting a hold of me. - H. Rider Haggard
Merlin
 Senior Editor
#017
United Kingdom
Joined: June 11, 2003
KitMaker: 17,582 posts
AeroScale: 12,795 posts
Posted: Saturday, September 12, 2015 - 09:22 PM UTC
Hi again
As Steffen can vouch via our e-mails, I've been fighting the urge to start this beauty (no thanks to Fred!

) - But I've been a good boy (so far...) and stuck to projects I've already started. I'm not sure I'm safe, though:
The temptation is darned hard to resist - I nearly threw away my brief chance at the workbench today, just to clear a fresh space for the W.12! I'm sure Peter Jackson has invested his kits with some sort of "ring power"... the pull is so strong... I can hear drumming... getting closer... Found on a scrap of burnt parchment in the mines of Moria.
All the best
Rowan

BEWARE OF THE FEW...
As I grow older, I regret to say that a detestable habit of thinking seems to be getting a hold of me. - H. Rider Haggard
bill_c
 Campaigns Administrator
New Jersey, United States
Joined: January 09, 2008
KitMaker: 10,553 posts
AeroScale: 1,198 posts
Posted: Sunday, September 13, 2015 - 10:41 PM UTC
Is this one your Precious, Rowan, or the Kitty Hawk P-39?

Merlin
 Senior Editor
#017
United Kingdom
Joined: June 11, 2003
KitMaker: 17,582 posts
AeroScale: 12,795 posts
Posted: Monday, September 14, 2015 - 02:17 AM UTC
Quoted Text
Is this one your Precious, Rowan, or the Kitty Hawk P-39? 
Hi Bill
That's a tough one! Are we talking about the kits themselves, or the work that'll go in to bring them to fruition? They're both great subjects and packed with detail but, in terms of mould-engineering, it's a bit like comparing chalk and cheese (or lembas and miruvor, if we're sticking with Tolkien). I certainly have been using a few
precious expletives over all the ejection pin marks on the Airacobra - something that won't be a concern here.

All the best
Rowan

BEWARE OF THE FEW...
As I grow older, I regret to say that a detestable habit of thinking seems to be getting a hold of me. - H. Rider Haggard
JPTRR
 Managing Editor
#051
Tennessee, United States
Joined: December 21, 2002
KitMaker: 7,772 posts
AeroScale: 3,175 posts
Posted: Monday, September 14, 2015 - 05:34 AM UTC
Quoted Text
(no thanks to Fred!  )
)
Hee hee hee! My plan is coming to fruition.
As Galadriel might say if she were an Aeroscaler:
In the place of a W.12 you would have an Airacobra! Not floats but beautiful and terrible as the Morn! Treacherous as the Seas! Stronger than the foundations of the Earth! All shall love the P-39 and despair! (With apologies to LotR)
If they demand your loyalty, give them integrity; if they demand integrity, give them your loyalty.--Col John Boyd, USAF
“Any plan where you lose your hat is a bad plan.”
Connecticut, United States
Joined: October 26, 2009
KitMaker: 424 posts
AeroScale: 389 posts
Posted: Monday, September 14, 2015 - 09:06 PM UTC
Personally.... I would like to see a nice Curtiss "D" pusher - especially the headless pusher (without the canard plane). but then I am American and am totally unfamiliar with the Bristol Boxkite the English equivalent. And there are NO extant models of the "D"; though Cox once had a U-control line gas flyer way, WAY back. Or you can go into prehistory with the Cleveland stick and paper model.
Nice to dream (I have a picture of a Lewis gun mounted 'D'
Enjoy
Captn Tommy
Connecticut, United States
Joined: October 26, 2009
KitMaker: 424 posts
AeroScale: 389 posts
Posted: Monday, September 14, 2015 - 09:19 PM UTC
The W-12 though is outstanding but I am wading into the Hannover right now.
Enjoy
Captn Tommy
Merlin
 Senior Editor
#017
United Kingdom
Joined: June 11, 2003
KitMaker: 17,582 posts
AeroScale: 12,795 posts
Posted: Thursday, September 17, 2015 - 12:26 AM UTC
Quoted Text
The W-12 though is outstanding but I am wading into the Hannover right now.
Enjoy
Captn Tommy
Hi Tom
I'm
sooo tempted to buy one of those too! Do keep us up to date on your build.
All the best
Rowan

BEWARE OF THE FEW...
As I grow older, I regret to say that a detestable habit of thinking seems to be getting a hold of me. - H. Rider Haggard
Merlin
 Senior Editor
#017
United Kingdom
Joined: June 11, 2003
KitMaker: 17,582 posts
AeroScale: 12,795 posts
Posted: Monday, September 21, 2015 - 10:59 PM UTC
Hi again
Predictably, temptation got the better of me and I've made a start:

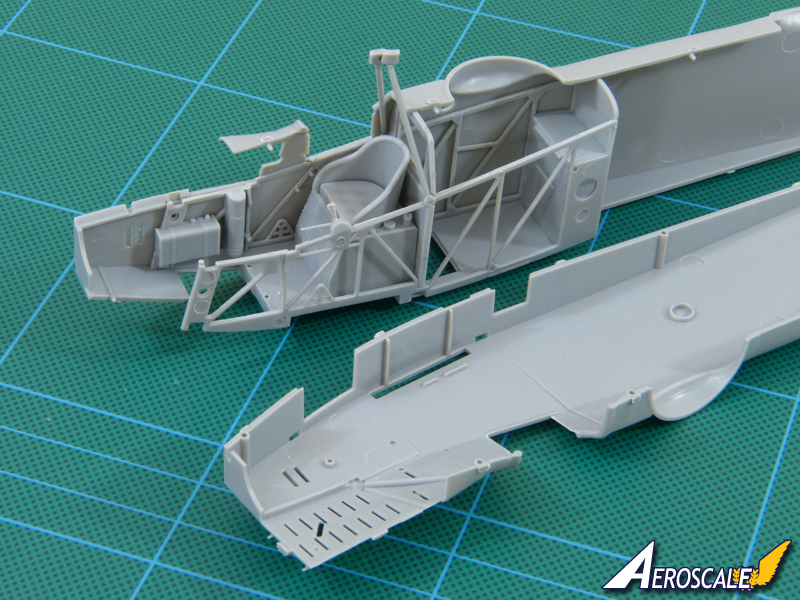
The fit of the interior parts is superb - no surprises there - and they are a joy to work with so far.
Work permitting, more soon, hopefully...

All the best
Rowan

BEWARE OF THE FEW...
As I grow older, I regret to say that a detestable habit of thinking seems to be getting a hold of me. - H. Rider Haggard
Merlin
 Senior Editor
#017
United Kingdom
Joined: June 11, 2003
KitMaker: 17,582 posts
AeroScale: 12,795 posts
Posted: Wednesday, September 23, 2015 - 12:12 AM UTC
Hi again
I had another tinker after work today:
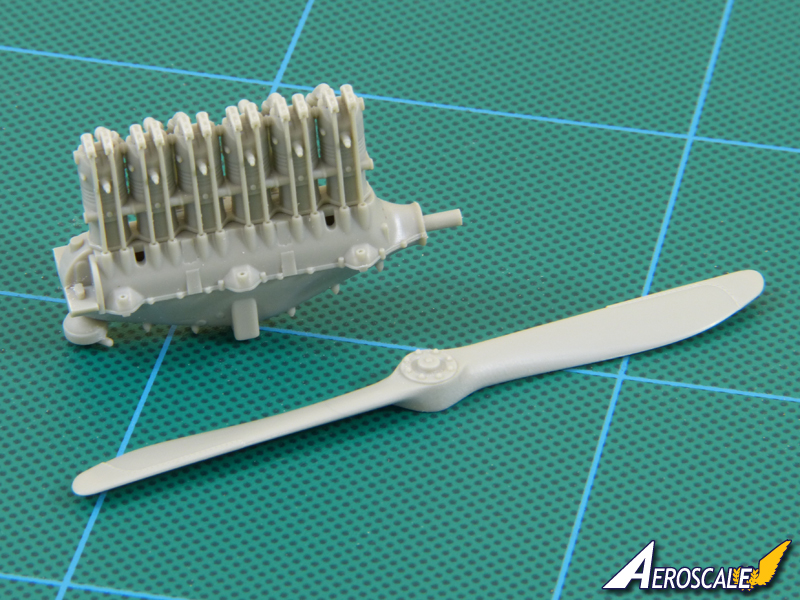
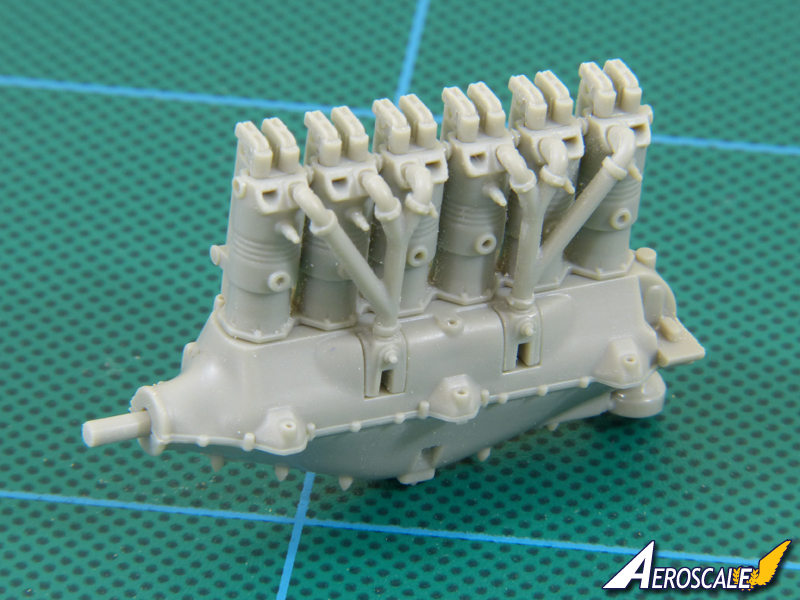
Everything's basically dry-fitted at this stage. The way the inlet manifolds fit is clever, but will need a dab of filler - so I'll depart from WNW's suggested assembly sequence slightly.
I've started playing with the photo-etch:
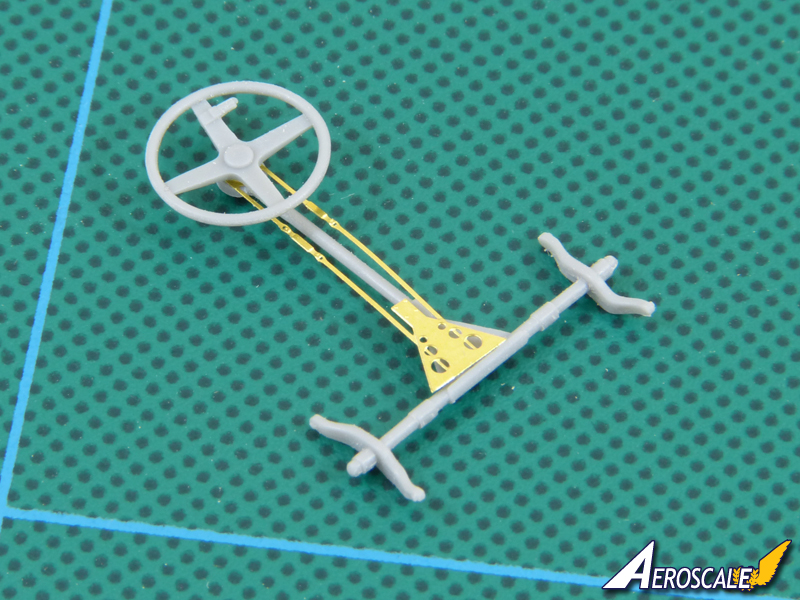
Forewarned from my experience with the
AEG. GIV is forearmed when it comes to the seat harnesses:
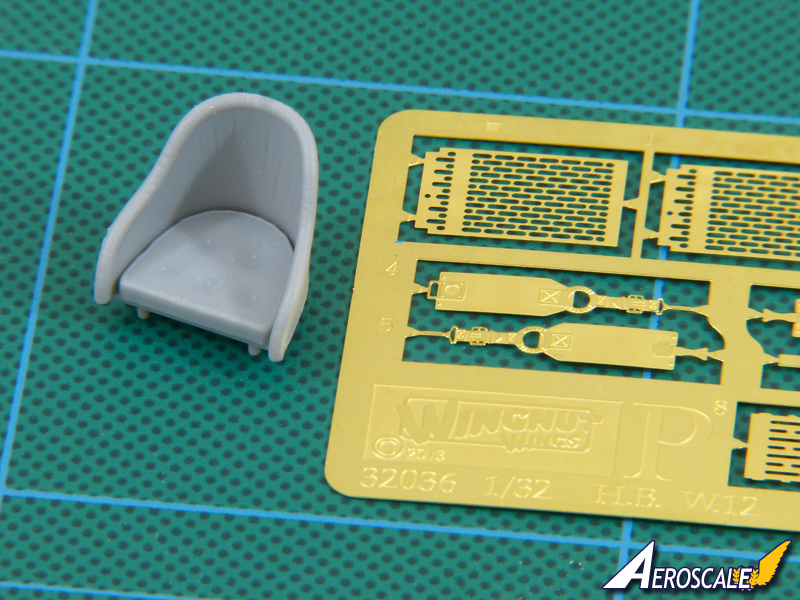
With that, I only started shaping them after I'd already painted the seats - and WNW's etch is quite robust (even after annealing) - so this time I'll tackle them early.
Of course, the easy (and obvious) thing to do would be to use fabric belts, such as those from HGW or RB Productions - but I want to keep this build as OOB as I can, because it should serve as a good entry point for anyone who hasn't tried a WNW kit yet.
All the best
Rowan

BEWARE OF THE FEW...
As I grow older, I regret to say that a detestable habit of thinking seems to be getting a hold of me. - H. Rider Haggard
Merlin
 Senior Editor
#017
United Kingdom
Joined: June 11, 2003
KitMaker: 17,582 posts
AeroScale: 12,795 posts
Posted: Thursday, September 24, 2015 - 01:31 AM UTC
Hi again
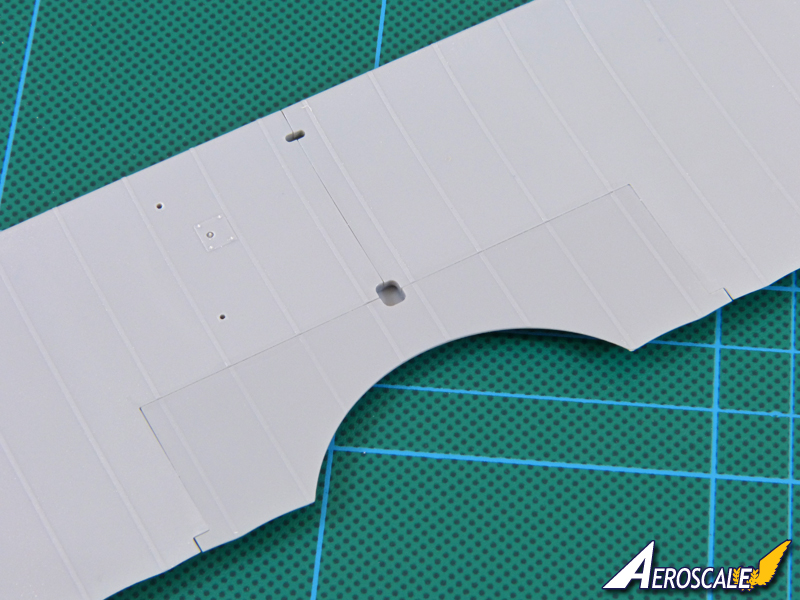
I couldn't resist jumping ahead a few stages to get the wings started, so I can play with the lozenge decals while continuing to work on the interior. The trailing edges are beautifully thin, while the fit between the outer panels and the upper wing centre-section is very good and the joint is sturdy.
On the topsides, the seam falls in clear space. Once it's filled and sanded, the lozenge decals should help hide it OK:
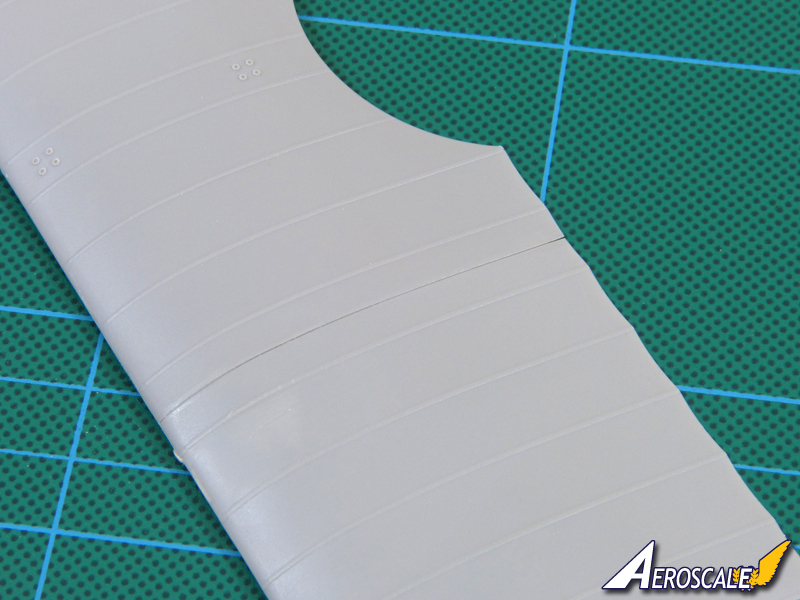
As good as the fit is, the underside will need treating carefully to avoid damaging the detail - and there'll be nowhere to hide, because it will have a clear doped linen finish that will expose any flaws:
All the best
Rowan

BEWARE OF THE FEW...
As I grow older, I regret to say that a detestable habit of thinking seems to be getting a hold of me. - H. Rider Haggard
Merlin
 Senior Editor
#017
United Kingdom
Joined: June 11, 2003
KitMaker: 17,582 posts
AeroScale: 12,795 posts
Posted: Sunday, September 27, 2015 - 10:29 PM UTC
Hi again
All set for painting - so it's time to break out the clothes pegs!:
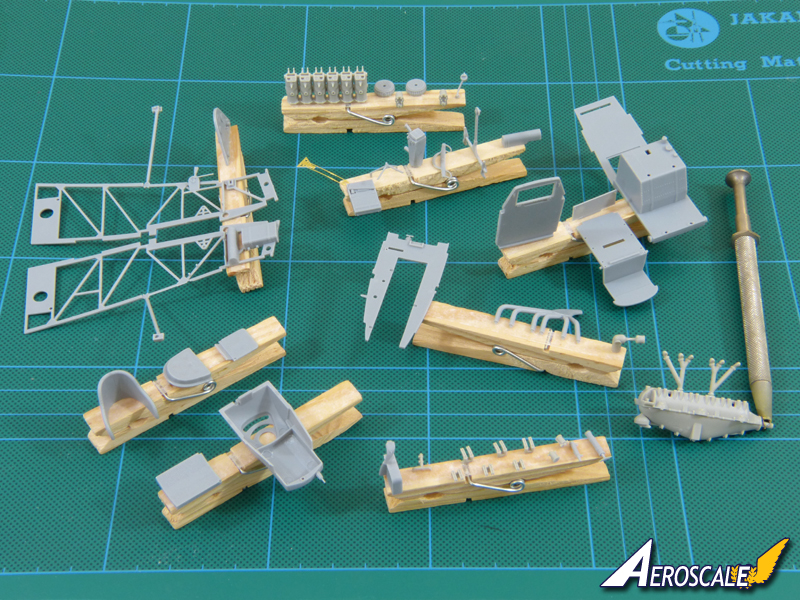
This was the scene earlier, with the smaller parts ready for spraying in their basic colours. That's done now, so I'll let them dry overnight before starting to play at doing woodgrain and weathering.

All the best
Rowan

BEWARE OF THE FEW...
As I grow older, I regret to say that a detestable habit of thinking seems to be getting a hold of me. - H. Rider Haggard
Connecticut, United States
Joined: October 26, 2009
KitMaker: 424 posts
AeroScale: 389 posts
Posted: Tuesday, September 29, 2015 - 02:01 AM UTC
merlin
parts are attached to cloths pins with rubber cement or something else?
Captn Tommy
Merlin
 Senior Editor
#017
United Kingdom
Joined: June 11, 2003
KitMaker: 17,582 posts
AeroScale: 12,795 posts
Posted: Tuesday, September 29, 2015 - 02:33 AM UTC
Quoted Text
merlin
parts are attached to cloths pins with rubber cement or something else?
Captn Tommy
Hi Tom
I use double-sided tape. For very delicate parts, I take a bit of the stickiness off by touching it with a fingertip first.
All the best
Rowan

BEWARE OF THE FEW...
As I grow older, I regret to say that a detestable habit of thinking seems to be getting a hold of me. - H. Rider Haggard
Merlin
 Senior Editor
#017
United Kingdom
Joined: June 11, 2003
KitMaker: 17,582 posts
AeroScale: 12,795 posts
Posted: Friday, October 09, 2015 - 02:15 PM UTC
Hi again
Sorry for the lull.

After a few days out of action through work, I'm looking forward to cracking on a bit.
Before I left, I gloss-coated the tail with Xtracolor Medium Sea Grey ready for a first play with the lozenge decals. This highlights some slight sinkage cause by the deep locating slots on the underside:
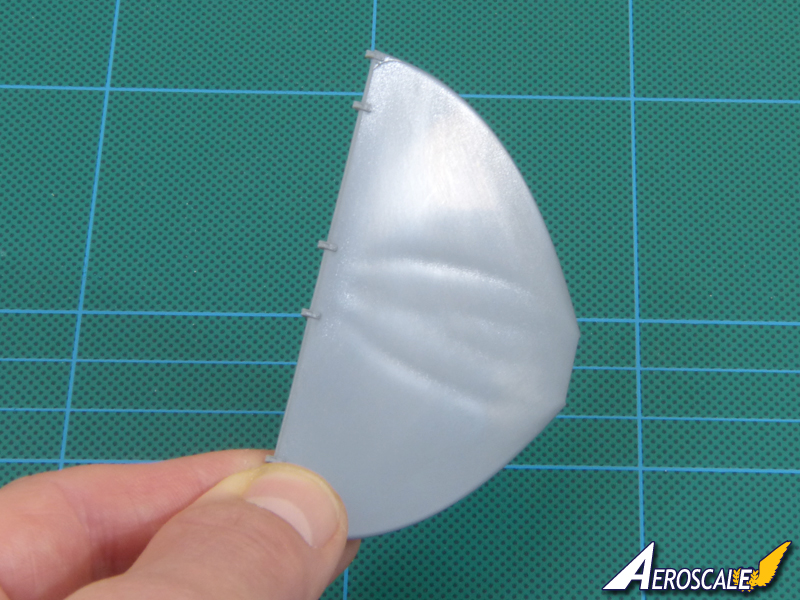
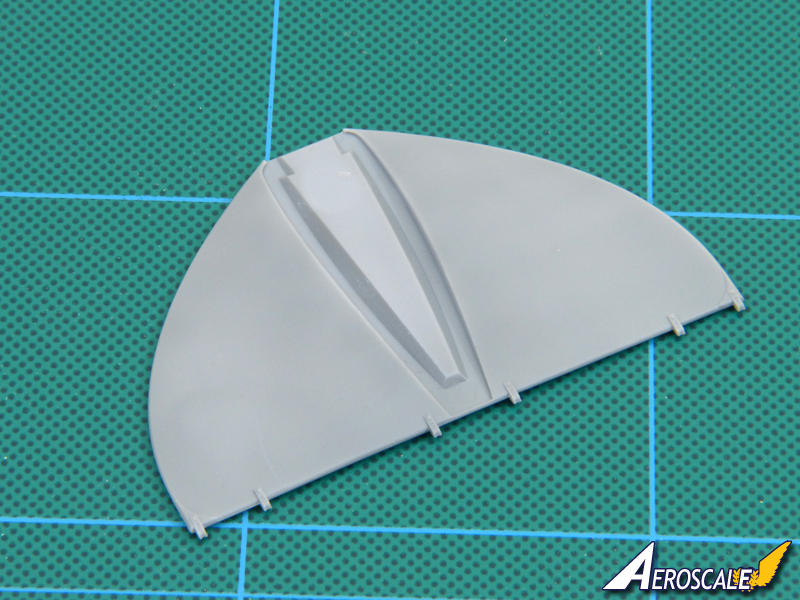
If this was a standard, painted finish, I'd definitely fill and level the marks, but the lozenge decals may disguise them - we'll see in due course...
Hopefully, I'll get a good bit done this weekend; the interior's blocked out in the basic colours, so I'll try to post more updates before long.
All the best
Rowan

BEWARE OF THE FEW...
As I grow older, I regret to say that a detestable habit of thinking seems to be getting a hold of me. - H. Rider Haggard
Merlin
 Senior Editor
#017
United Kingdom
Joined: June 11, 2003
KitMaker: 17,582 posts
AeroScale: 12,795 posts
Posted: Saturday, October 10, 2015 - 12:30 PM UTC
Hi again
Well, I'm glad I tested the lozenge decals on the tailplane, because I tried Humbrol's DecalFix (new style) for the first time - and it had, basically, no effect whatsoever on the Cartograf decal. I left it all day and overnight and, as far as I could see, it didn't tighten the decal around the raised detail at all. I've applied some Mr. Mark Softener this morning and can see it's working already, so that's a lesson learnt.
All the best
Rowan

BEWARE OF THE FEW...
As I grow older, I regret to say that a detestable habit of thinking seems to be getting a hold of me. - H. Rider Haggard


 ) - But I've been a good boy (so far...) and stuck to projects I've already started. I'm not sure I'm safe, though:


)



 After a few days out of action through work, I'm looking forward to cracking on a bit.


