Tim,
I'm impressed with your detailing of that Aces II seat. Should really look quite convincing in the cockpit.
While this is a modeling site, the events that transpired in Paris a few days ago affects all of us. Being a New Yorker, I lived through the horrors of 9-11, and our country is that much stronger for it. We have a much needed stronger sense of pride and purpose. We stand with our French Brothern as our oldest of all allies.
Joel
Modern (1975-today)
Discuss the modern aircraft age from 1975 thru today.
Discuss the modern aircraft age from 1975 thru today.
Hosted by Jim Starkweather
F-16XL Build Blog
Joel_W

Joined: December 04, 2010
KitMaker: 11,666 posts
AeroScale: 7,410 posts

Posted: Monday, November 16, 2015 - 09:28 PM UTC
litespeed


Joined: October 15, 2009
KitMaker: 1,976 posts
AeroScale: 1,789 posts

Posted: Tuesday, November 17, 2015 - 02:31 AM UTC
Quoted Text
While this is a modeling site, the events that transpired in Paris a few days ago affects all of us. Being a New Yorker, I lived through the horrors of 9-11, and our country is that much stronger for it. We have a much needed stronger sense of pride and purpose. We stand with our French Brothern as our oldest of all allies.
Joel
Thanks for the sentiments Joel, they are much appreciated. The events on Friday night were a real shock for us all. I moved here from the UK about eight years ago and have got to know a fair few of my neighbours and they have been hit hard by Friday nights events. But there is a strength and determination to carry on and this was manifest in our local bar watching the football friendly between England v France. The French were very appreciative of the English having a go at singing la Marseillaise. The French certainly also appreciate the thoughts and support from around the world.
tim
Posted: Tuesday, November 17, 2015 - 03:03 AM UTC
Tim,
The Crank-Arrow is looking good.
The Crank-Arrow is looking good.
litespeed


Joined: October 15, 2009
KitMaker: 1,976 posts
AeroScale: 1,789 posts

Posted: Tuesday, November 17, 2015 - 03:15 AM UTC
Quoted Text
Tim,
The Crank-Arrow is looking good.
Thanks Fred, it is looking good. Kinetic have done a good job of reproducing the Crank-Arrow in 1/48 scale. I'm really enjoying building it.
tim

litespeed


Joined: October 15, 2009
KitMaker: 1,976 posts
AeroScale: 1,789 posts

Posted: Monday, November 23, 2015 - 02:32 AM UTC
Hi all
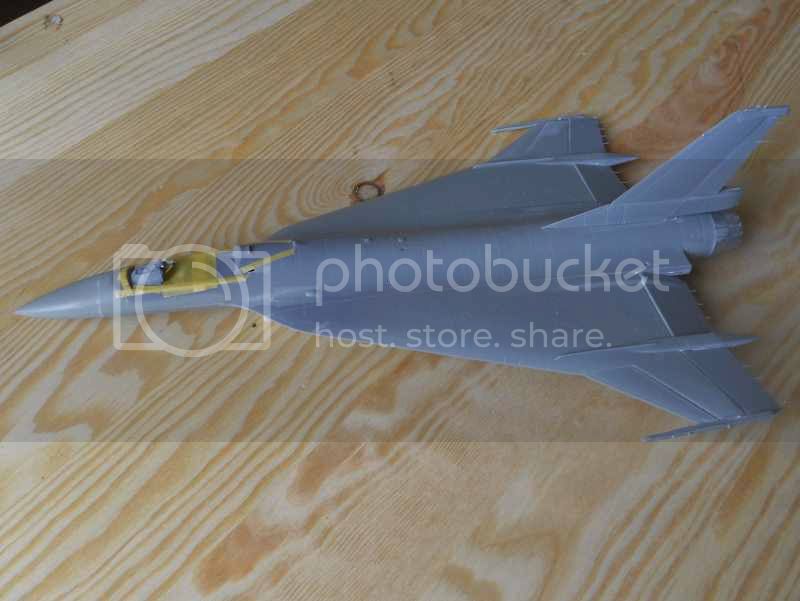
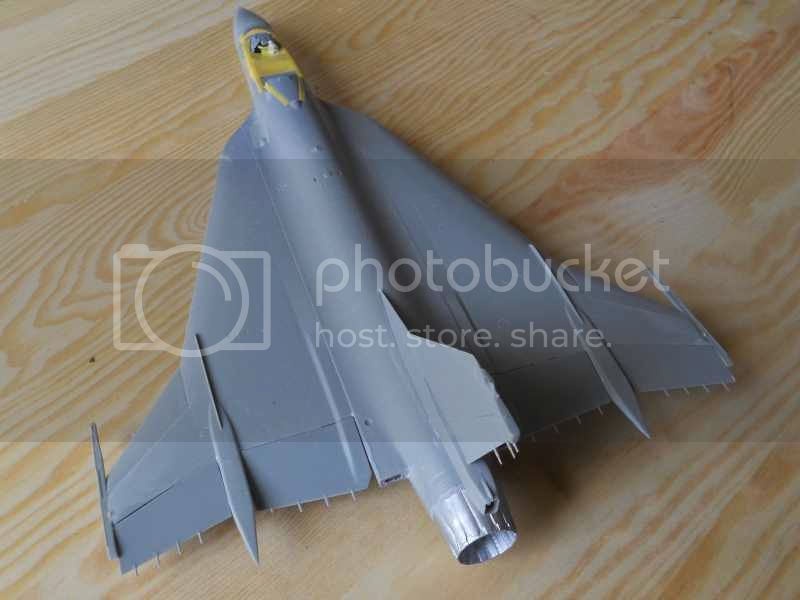
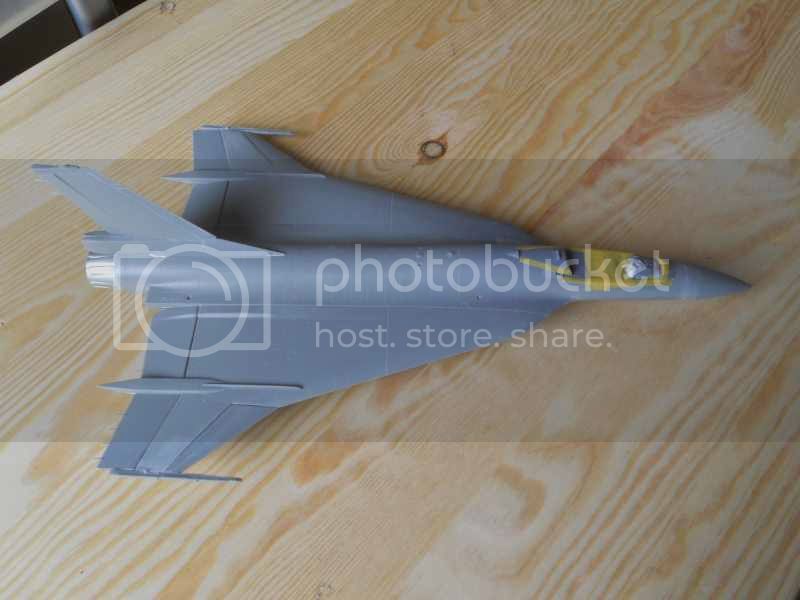
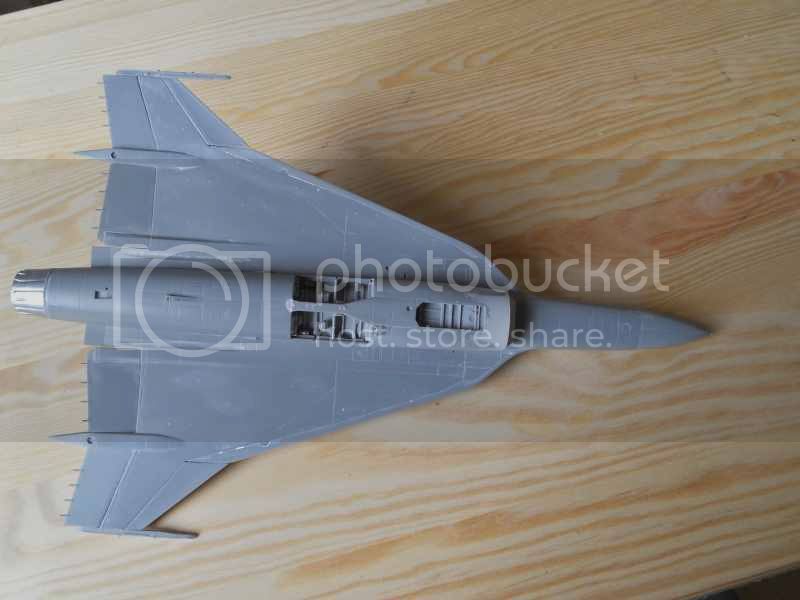
I have added all the control surfaces to the airframe. No real difficulties, the only minor problems were that some of the holes for the attachment tabs were sealed up with glue when joining the airframe halves. You do have to be careful with the attached static wicks as they are very easy to break.
I also took the opportunity to attach the wing tip missile rails. Even though I plan to finish this build as a NASA test aircraft: the F-16XL retained the missile rails.I fixed the rails with a slight incline as you will see on the real thing. This does involve trimming off the forward locating pin on the wing tip. Also some blending in of the wing tip to the new position of the rail. The kit has the rails being parallel to the ground, which I think is incorrect.
I have sealed off the cockpit so I can apply some colours before attaching the canopy. The tape is also protecting the contact area between the fuselage and canopy so the glue will have a better chance of working. I generally find that glue is less effective on painted surfaces.
To be continued
I have added all the control surfaces to the airframe. No real difficulties, the only minor problems were that some of the holes for the attachment tabs were sealed up with glue when joining the airframe halves. You do have to be careful with the attached static wicks as they are very easy to break.
I also took the opportunity to attach the wing tip missile rails. Even though I plan to finish this build as a NASA test aircraft: the F-16XL retained the missile rails.I fixed the rails with a slight incline as you will see on the real thing. This does involve trimming off the forward locating pin on the wing tip. Also some blending in of the wing tip to the new position of the rail. The kit has the rails being parallel to the ground, which I think is incorrect.
I have sealed off the cockpit so I can apply some colours before attaching the canopy. The tape is also protecting the contact area between the fuselage and canopy so the glue will have a better chance of working. I generally find that glue is less effective on painted surfaces.


To be continued

Joel_W

Joined: December 04, 2010
KitMaker: 11,666 posts
AeroScale: 7,410 posts

Posted: Monday, November 23, 2015 - 04:29 AM UTC
Tim,
Can't wait to see some paint on it. As for gluing not biting through paint, I've been using Tamiya Extra Thin applied very, very carefully to attach my canopies, and it eats through paint like it's not even there.
Joel
Can't wait to see some paint on it. As for gluing not biting through paint, I've been using Tamiya Extra Thin applied very, very carefully to attach my canopies, and it eats through paint like it's not even there.
Joel
litespeed


Joined: October 15, 2009
KitMaker: 1,976 posts
AeroScale: 1,789 posts

Posted: Monday, November 23, 2015 - 09:55 PM UTC
Joel
Yes I am starting to get that excited tingly feeling as this build approaches the painting stage. Still not 100% decided which scheme to go for: NASA or prototype. I really like both, but I do like the red, white and blue tail of the prototype.
Thanks for your insight with the glue, I have been using Tamiya Extra Thin on this build so I might give your suggestion a try.
tim

litespeed


Joined: October 15, 2009
KitMaker: 1,976 posts
AeroScale: 1,789 posts

Posted: Wednesday, November 25, 2015 - 04:14 AM UTC
Hi all
I have been doing a little experimenting to try to reproduce the tinted colour often seen on the canopies of the F-16. I read an article by Steve Bamford over on Arcair and he describes using Tamiya acrylic colour paints to achieve the effect. So below are three spare canopies that I have applied a tint. I used Tamiya clear yellow [X-24] mixed with a little Smoke [X-19] with a small amount of Klear. The Smoke kills the intensity of the yellow. The paint was applied using a flat brush. On the image with three canopies, the canopy on the left has no paint applied; the canopy in the middle has one coat of colour applied. The right hand canopy has two coats applied. The second image is both the canopies I tinted.
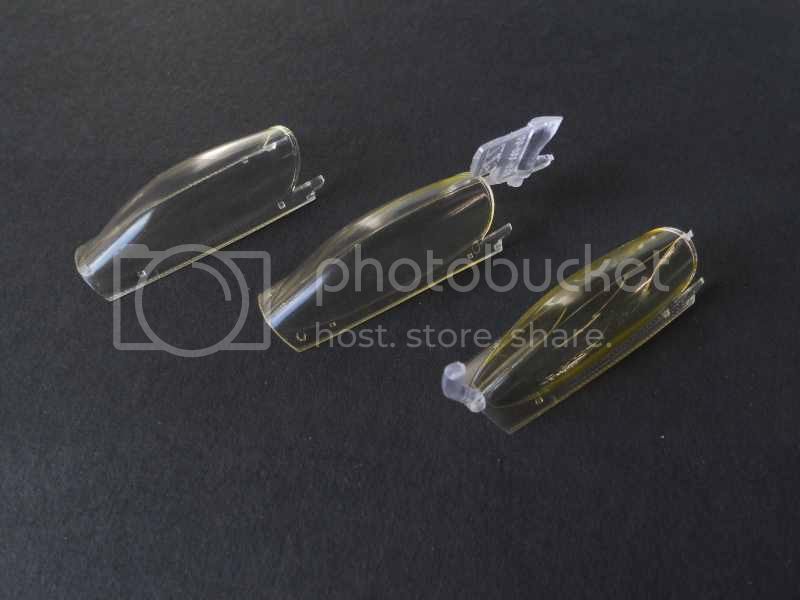
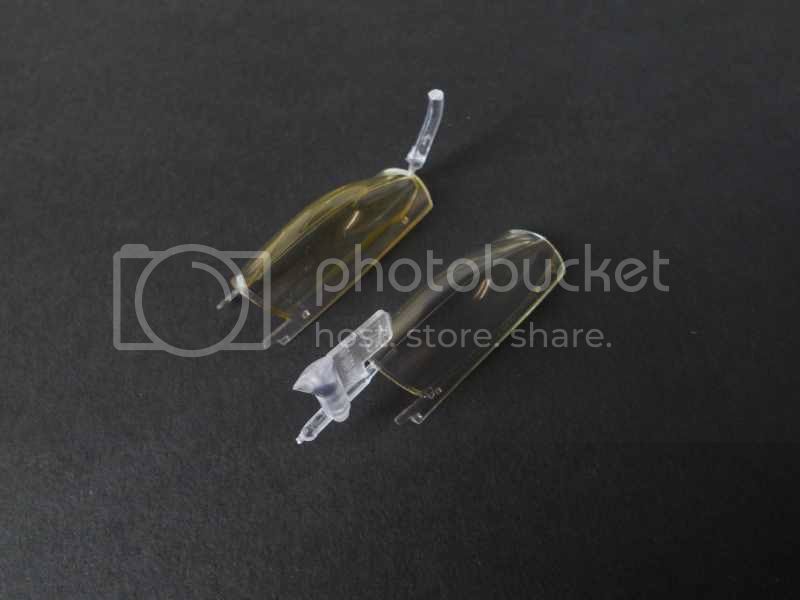
To be continued
I have been doing a little experimenting to try to reproduce the tinted colour often seen on the canopies of the F-16. I read an article by Steve Bamford over on Arcair and he describes using Tamiya acrylic colour paints to achieve the effect. So below are three spare canopies that I have applied a tint. I used Tamiya clear yellow [X-24] mixed with a little Smoke [X-19] with a small amount of Klear. The Smoke kills the intensity of the yellow. The paint was applied using a flat brush. On the image with three canopies, the canopy on the left has no paint applied; the canopy in the middle has one coat of colour applied. The right hand canopy has two coats applied. The second image is both the canopies I tinted.


To be continued

Joel_W

Joined: December 04, 2010
KitMaker: 11,666 posts
AeroScale: 7,410 posts

Posted: Wednesday, November 25, 2015 - 09:39 PM UTC
Tim,
So far they're both looking good. Try dipping them in Future now. You'll be amazed at the difference.
Joel
So far they're both looking good. Try dipping them in Future now. You'll be amazed at the difference.
Joel
litespeed


Joined: October 15, 2009
KitMaker: 1,976 posts
AeroScale: 1,789 posts

Posted: Friday, November 27, 2015 - 01:33 AM UTC
Quoted Text
Tim,
So far they're both looking good. Try dipping them in Future now. You'll be amazed at the difference.
Joel
You have read my mind Joel.
tim

litespeed


Joined: October 15, 2009
KitMaker: 1,976 posts
AeroScale: 1,789 posts

Posted: Thursday, December 03, 2015 - 01:35 AM UTC
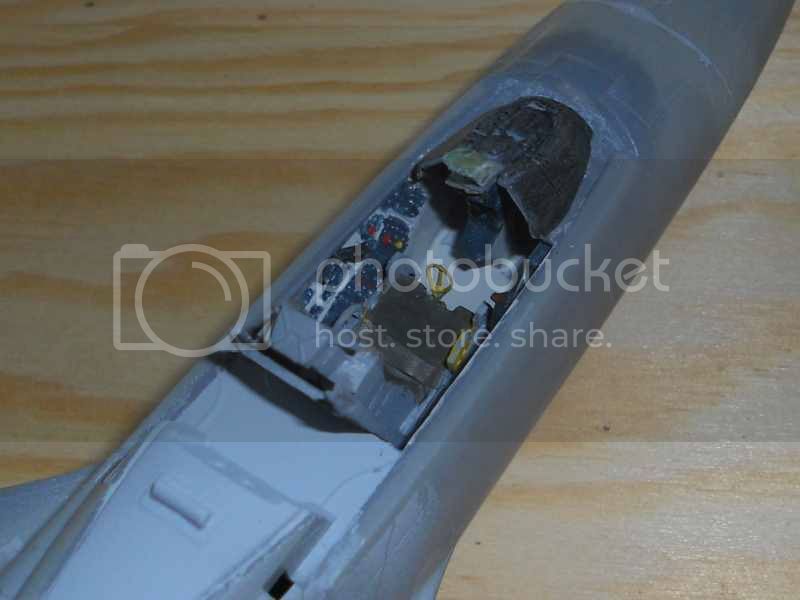
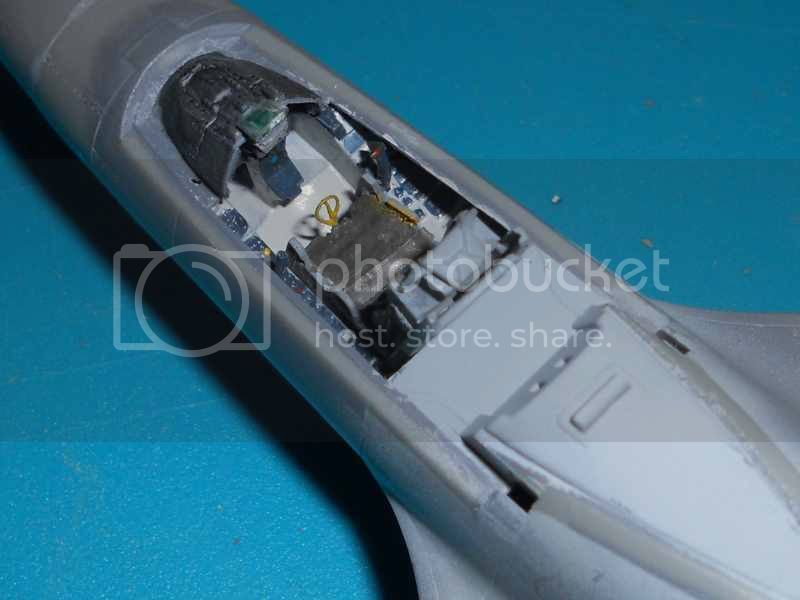
Sorry I have been away for a few days. The really fine weather we are experiencing in SW France gave us the opportunity to do some work on the house that was scheduled for next year. The result of which we have a brand new concrete floor in the living room replacing the old tiled floor that was an excellent dust trap. Hopefully we will be able to lay some new tiles in the new year.
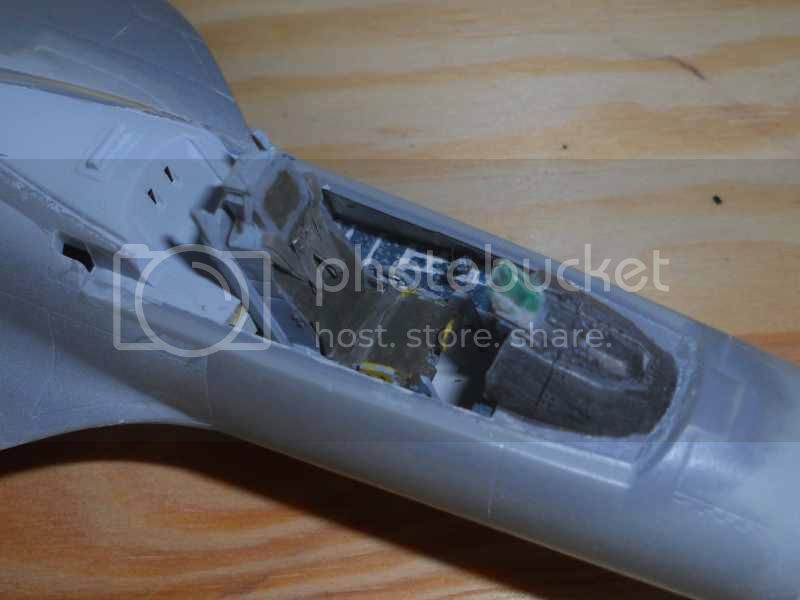
Right back to the modelling. I am in the process of finishing off the cockpit. The seat has been added and some paint touch ups are required, but it’s almost time to fit the canopy.
To be continued
Right back to the modelling. I am in the process of finishing off the cockpit. The seat has been added and some paint touch ups are required, but it’s almost time to fit the canopy.


To be continued

Joel_W

Joined: December 04, 2010
KitMaker: 11,666 posts
AeroScale: 7,410 posts

Posted: Thursday, December 03, 2015 - 01:52 AM UTC
Tim,
The cockpit is really looking quite good. The shoulder harness on the seat really stands out. The color of the paint just gives it that fabric look. Well done.
Joel
The cockpit is really looking quite good. The shoulder harness on the seat really stands out. The color of the paint just gives it that fabric look. Well done.
Joel
litespeed


Joined: October 15, 2009
KitMaker: 1,976 posts
AeroScale: 1,789 posts

Posted: Friday, December 04, 2015 - 01:42 AM UTC
Quoted Text
Tim,
The cockpit is really looking quite good. The shoulder harness on the seat really stands out. The color of the paint just gives it that fabric look. Well done.
Joel
Thanks very much for your positive comments Joel. Your company on this build is most appreciated

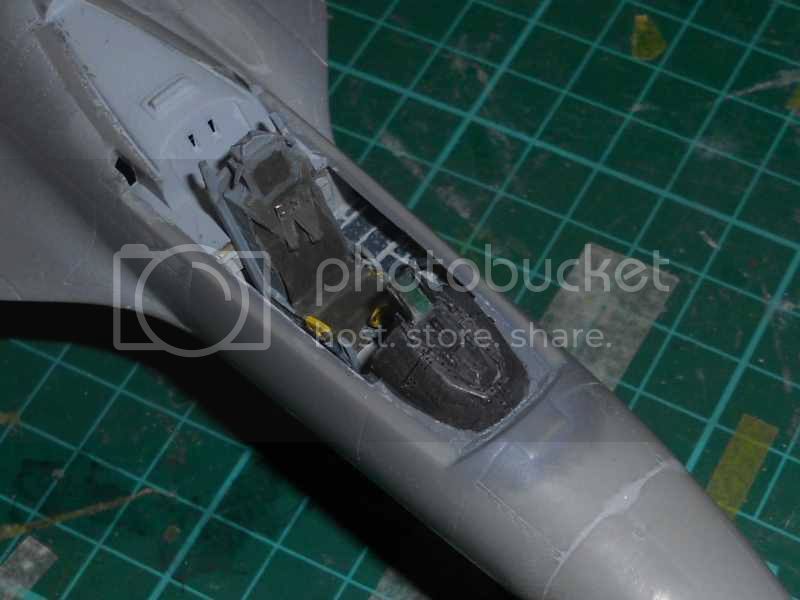
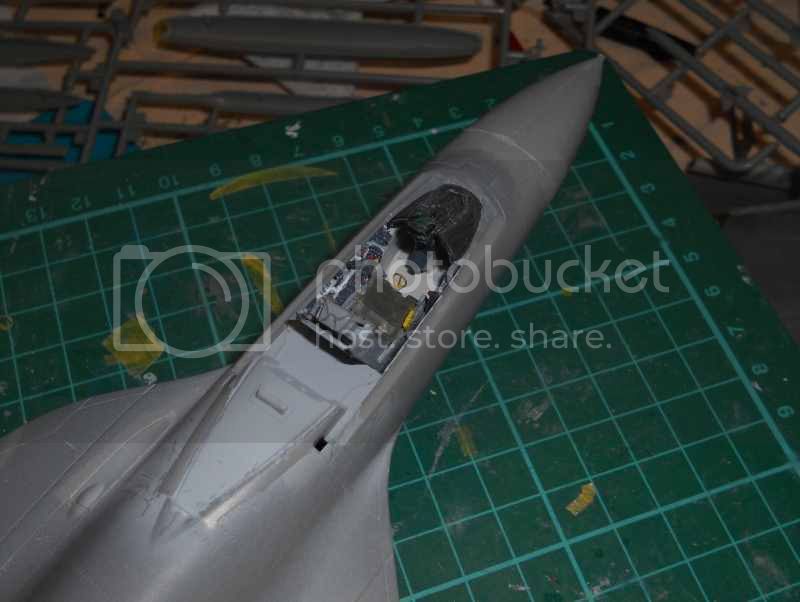
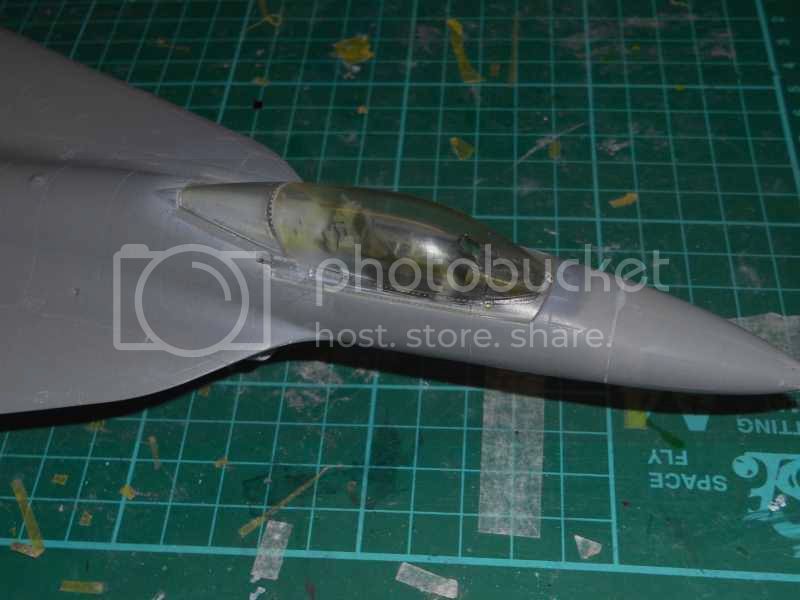
I have finished the cockpit and have attached the canopy. As discussed early I tinted the canopy and soaked the whole thing in Klear for a few minutes and then let the canopy dry for twenty four hours. Unfortunately I cannot take a decent image of the canopy. The colour looks a bit patchy on the images, but in reality the colour is much more even.
The fit of the canopy is not great, so it would be much easier to display the canopy open. I will fill any gap with Milliput as I do not want to use any solvent filler as it may fog the inside of the canopy.
To be continued

Joel_W

Joined: December 04, 2010
KitMaker: 11,666 posts
AeroScale: 7,410 posts

Posted: Saturday, December 05, 2015 - 04:23 AM UTC
Tim,
About the only way I can suggest to have the Yellow pop on the canopy is by shooting in RAW rather then JPEG, and then using a decent photo editor increase the yellow intensity.
I can still see that the canopy has been tinted, and that's the main thing to be concerned with.
Joel
About the only way I can suggest to have the Yellow pop on the canopy is by shooting in RAW rather then JPEG, and then using a decent photo editor increase the yellow intensity.
I can still see that the canopy has been tinted, and that's the main thing to be concerned with.
Joel
Posted: Saturday, December 12, 2015 - 06:00 AM UTC
Tim,
I am looking forward to the paint job you give it. I like a nice "what if" job. But I do not do many of those so I am not the one to listen to.
I am looking forward to the paint job you give it. I like a nice "what if" job. But I do not do many of those so I am not the one to listen to.

litespeed


Joined: October 15, 2009
KitMaker: 1,976 posts
AeroScale: 1,789 posts

Posted: Sunday, December 13, 2015 - 12:49 AM UTC
Quoted Text
Tim,
About the only way I can suggest to have the Yellow pop on the canopy is by shooting in RAW rather then JPEG, and then using a decent photo editor increase the yellow intensity.
I can still see that the canopy has been tinted, and that's the main thing to be concerned with.
Joel
Joel I shall try shooting in RAW next time. Will it affect the image load time Joel?
Quoted Text
Tim,
I am looking forward to the paint job you give it. I like a nice "what if" job. But I do not do many of those so I am not the one to listen to.
No whatifs with this build Fred
 I am going for the NASA option, with the black paint job. The finish reminds me of a black backed gull.
tim
litespeed


Joined: October 15, 2009
KitMaker: 1,976 posts
AeroScale: 1,789 posts

Posted: Monday, December 14, 2015 - 02:22 AM UTC
Hi all
I discovered that I had made a bit of a cock up. My planned next stage was to install the under carriage. I ignored Kinetics instructions to install the under carriage at a very early stage in the construction process. I thought the chance of damaging the spindly under carriage legs was far too great. Anyway I have discovered that the cover over the central beam over the main under carriage bay is in the way. The cover is a separate part so should be left of until the under carriage legs have been installed. So I had three options:
[a] run away screaming into the night.
[b] Cut up the main under carriage legs and install the parts separately or
[c] Cut of the cover over the central beam.
So quickly discounting the first two options and I cut off the cover. In the end it was no big deal refitting it. I would not normally attach the under carriage at this stage of the build. As the under carriage and under carriage bay are mostly white, I thought I could kill two birds with one stone.
The misnumbering of some of the parts is classic Kinetic Models. So you need your wits about you searching the sprues for the correct parts. The parts went together pretty well although there is a little head scratching involved trying to decide where the contact points are on some of the components. The drawings are a little busy and it is difficult to tell from the instructions what goes where.
Anyway the main and nose under carriage legs are now installed and my F-16XL sits happily on it’s under carriage.
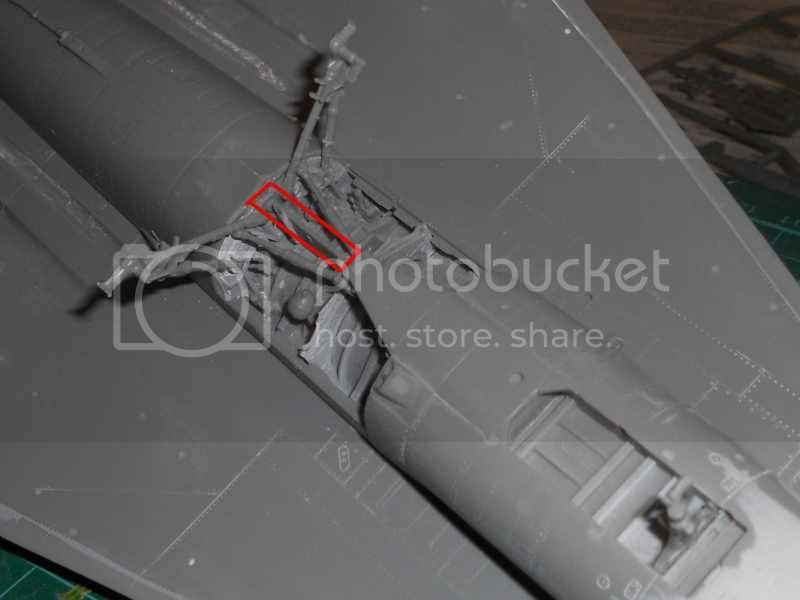
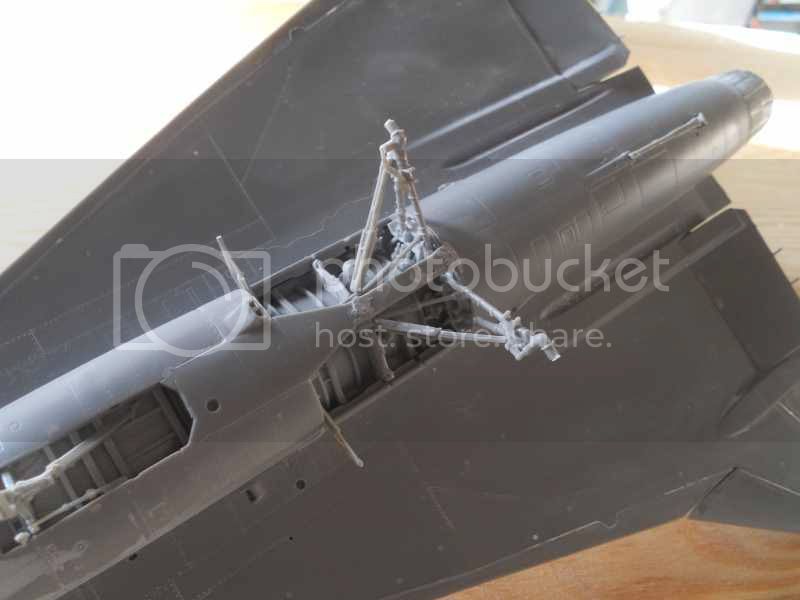
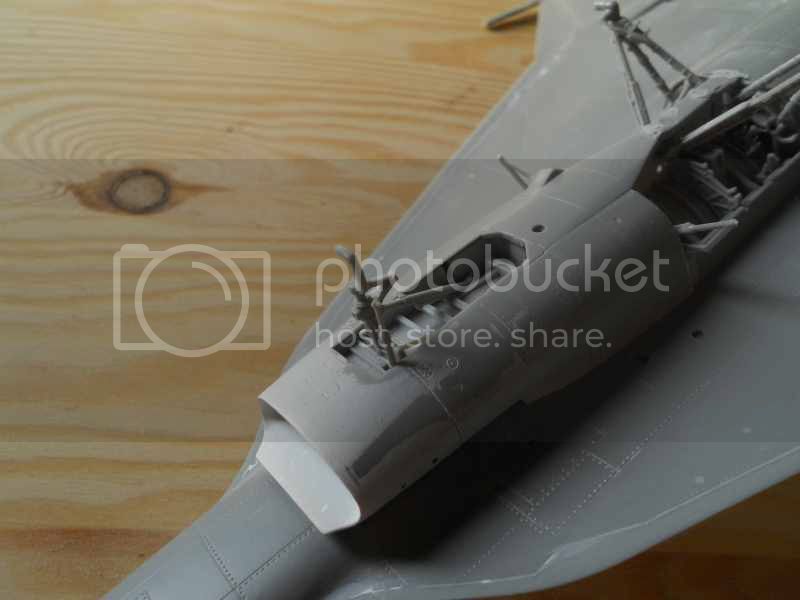
To be continued
I discovered that I had made a bit of a cock up. My planned next stage was to install the under carriage. I ignored Kinetics instructions to install the under carriage at a very early stage in the construction process. I thought the chance of damaging the spindly under carriage legs was far too great. Anyway I have discovered that the cover over the central beam over the main under carriage bay is in the way. The cover is a separate part so should be left of until the under carriage legs have been installed. So I had three options:
[a] run away screaming into the night.
[b] Cut up the main under carriage legs and install the parts separately or
[c] Cut of the cover over the central beam.
So quickly discounting the first two options and I cut off the cover. In the end it was no big deal refitting it. I would not normally attach the under carriage at this stage of the build. As the under carriage and under carriage bay are mostly white, I thought I could kill two birds with one stone.
The misnumbering of some of the parts is classic Kinetic Models. So you need your wits about you searching the sprues for the correct parts. The parts went together pretty well although there is a little head scratching involved trying to decide where the contact points are on some of the components. The drawings are a little busy and it is difficult to tell from the instructions what goes where.
Anyway the main and nose under carriage legs are now installed and my F-16XL sits happily on it’s under carriage.


To be continued
Joel_W

Joined: December 04, 2010
KitMaker: 11,666 posts
AeroScale: 7,410 posts

Posted: Monday, December 14, 2015 - 09:23 PM UTC
Tim,
that's one hell of save. Should work out well in the end. I did the same with my Academy F-4B, and had all sorts of issues trying to get the main gear installed. Ended up having to modify the strut assembly.
Joel
that's one hell of save. Should work out well in the end. I did the same with my Academy F-4B, and had all sorts of issues trying to get the main gear installed. Ended up having to modify the strut assembly.
Joel
litespeed


Joined: October 15, 2009
KitMaker: 1,976 posts
AeroScale: 1,789 posts

Posted: Tuesday, December 15, 2015 - 02:03 AM UTC
Quoted Text
Tim,
that's one hell of save. Should work out well in the end.
Joel
Cheers Joel. I am just in the process of cleaning up the join now.
tim


jgrease

Joined: November 14, 2007
KitMaker: 21 posts
AeroScale: 15 posts

Posted: Tuesday, December 15, 2015 - 02:34 AM UTC
Tim -
Great build so far - sorry I missed it from the start, but I'm now looking forward to your progress!
John
Great build so far - sorry I missed it from the start, but I'm now looking forward to your progress!
John
litespeed


Joined: October 15, 2009
KitMaker: 1,976 posts
AeroScale: 1,789 posts

Posted: Wednesday, December 16, 2015 - 01:35 AM UTC
Quoted Text
Tim -
Great build so far - sorry I missed it from the start, but I'm now looking forward to your progress!
John
Hi John, great to have you along on this build. I'm not too far from my favourite part of any build; the painting.
tim

litespeed


Joined: October 15, 2009
KitMaker: 1,976 posts
AeroScale: 1,789 posts

Posted: Thursday, December 17, 2015 - 03:28 AM UTC
Hi all
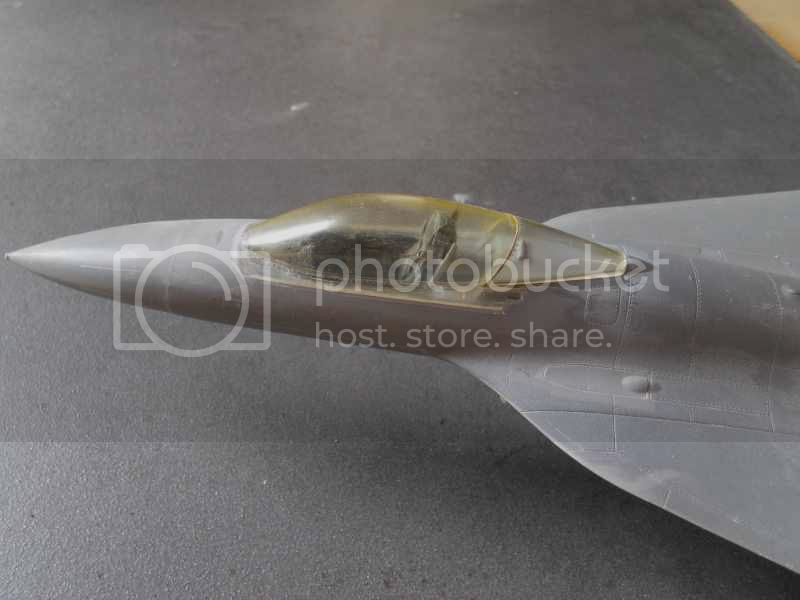
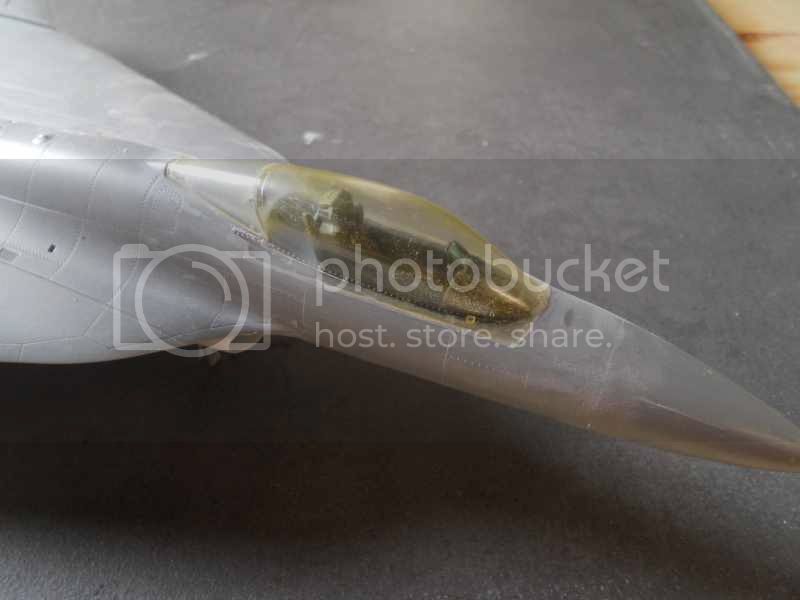
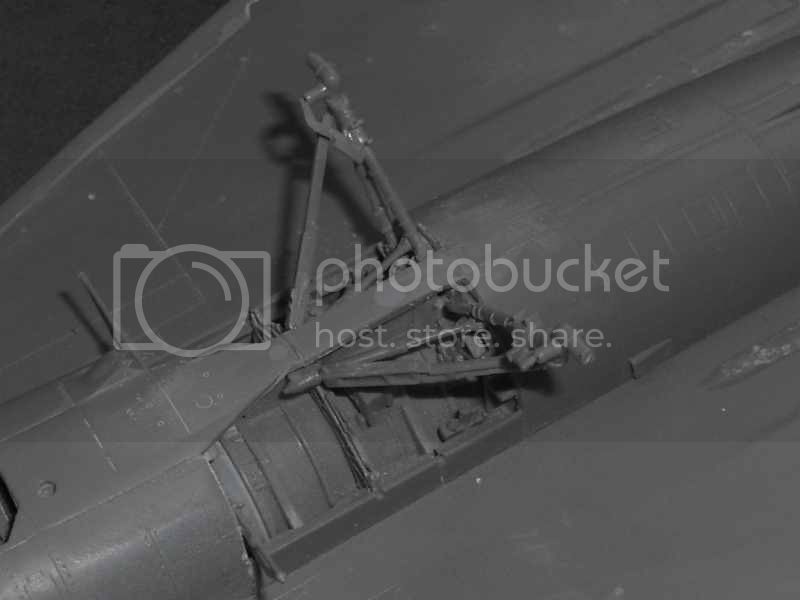
I have filled in the gap between the canopy and the fuselage. The filler was sanded back to produce a seamless join. Obviously this can be avoided if you display the canopy open. While I had the sanding sticks in my hand I also blended in the refitted cover that I removed whilst fitting the main undercarriage.
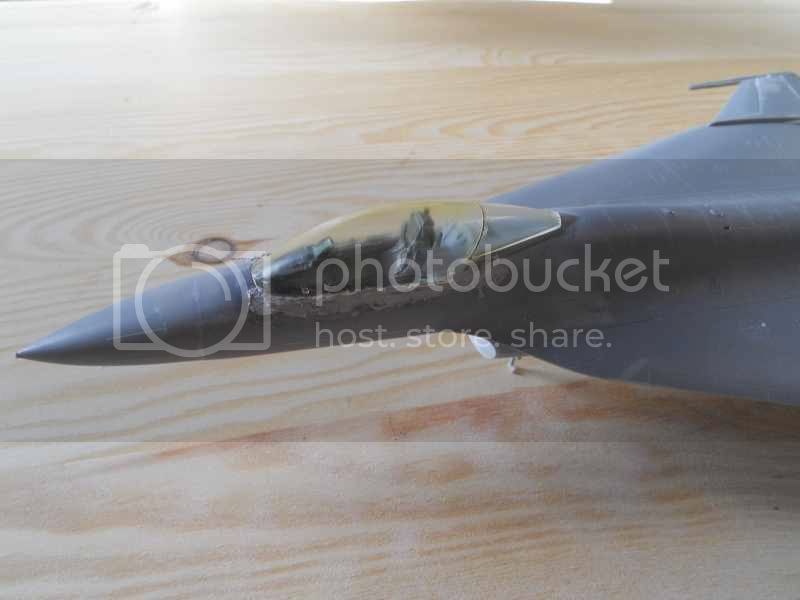
To be continued
I have filled in the gap between the canopy and the fuselage. The filler was sanded back to produce a seamless join. Obviously this can be avoided if you display the canopy open. While I had the sanding sticks in my hand I also blended in the refitted cover that I removed whilst fitting the main undercarriage.


To be continued

litespeed


Joined: October 15, 2009
KitMaker: 1,976 posts
AeroScale: 1,789 posts

Posted: Tuesday, December 22, 2015 - 04:29 AM UTC
Hi all
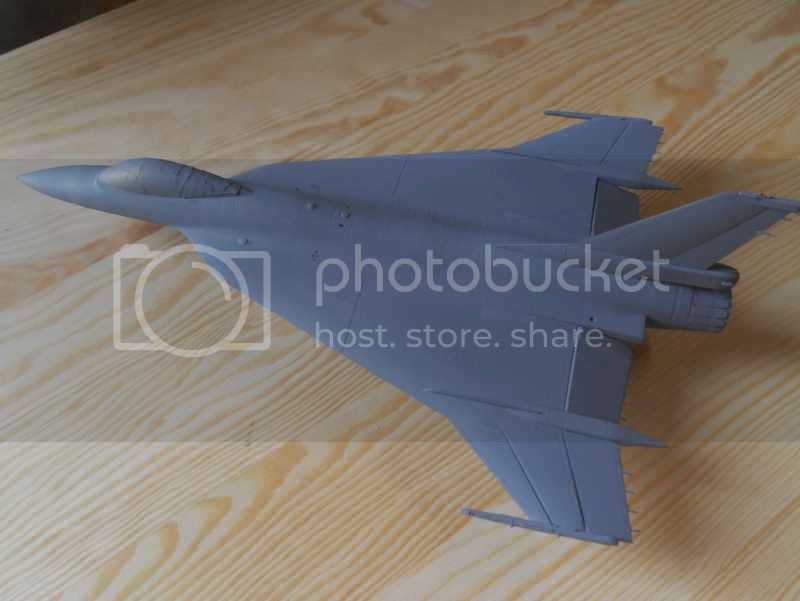
I masked off the canopy with Tamiya tape and sprayed the airframe with Halfords grey primer. Much to my surprise the filling and blending I have done seems fine. There is a slight gap between the fuselage and the rear most part of the canopy and that’s about it. I am a bit disappointed with the look of the jet nozzle. There is a distinct mould mark around the central part of the nozzle. I had already painted this part aluminium, but I really was not satisfied with the look. So I will repaint the nozzle using Alclad II paint.
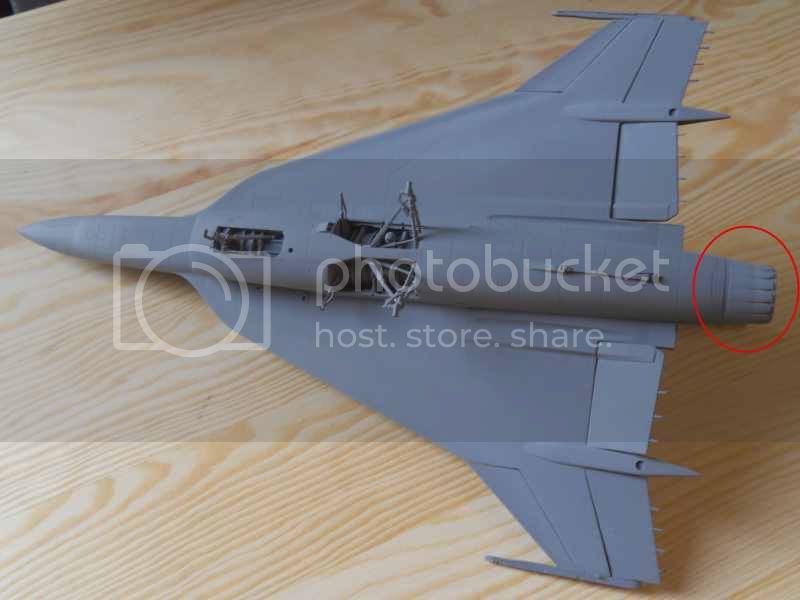
To be continued
I masked off the canopy with Tamiya tape and sprayed the airframe with Halfords grey primer. Much to my surprise the filling and blending I have done seems fine. There is a slight gap between the fuselage and the rear most part of the canopy and that’s about it. I am a bit disappointed with the look of the jet nozzle. There is a distinct mould mark around the central part of the nozzle. I had already painted this part aluminium, but I really was not satisfied with the look. So I will repaint the nozzle using Alclad II paint.


To be continued

Joel_W

Joined: December 04, 2010
KitMaker: 11,666 posts
AeroScale: 7,410 posts

Posted: Thursday, December 24, 2015 - 12:36 AM UTC
Tim,
Really a nice job of blending in the canopy frame to the fuselage. For seam issues like that, I like to use Vallejo acrylic putty so I can just wipe off the excess. Let dry and repeat as necessary. It does take longer, but there is no sanding, and thus no chance of damaging the clear glass, which I always manage to do.
Joel
litespeed


Joined: October 15, 2009
KitMaker: 1,976 posts
AeroScale: 1,789 posts

Posted: Thursday, December 24, 2015 - 03:34 AM UTC
Hi Joel and welcome back. I read you had some computer issues recently. Your the second person to recommend Vallejo acrylic putty to me this week, I must try some. I was a bit mortified sanding around the canopy, but I did mask the canopy with some decorators masking tape just in case my sanding stick slipped.
tim
tim

 |


