World War II
Discuss WWII and the era directly before and after the war from 1935-1949.
Hosted by Rowan Baylis
1/32 Trumpeter P-40B
SGTJKJ
#041
_VISITCOMMUNITY
Kobenhavn, Denmark
Joined: July 20, 2006
KitMaker: 10,069 posts
AeroScale: 3,788 posts
Posted: Friday, February 05, 2016 - 04:00 PM UTC
This looks fantastic! Awesome details and outstanding scratch building skills!

Looking forward to see more
fightnjoe
_VISITCOMMUNITY
Washington, United States
Joined: August 16, 2004
KitMaker: 603 posts
AeroScale: 565 posts
Posted: Saturday, February 06, 2016 - 02:40 AM UTC
Many thanks.

Now.....

Bonus material time....

As I started out today I thought why not show what I was doing. Just a small assembly but it is worth the time.

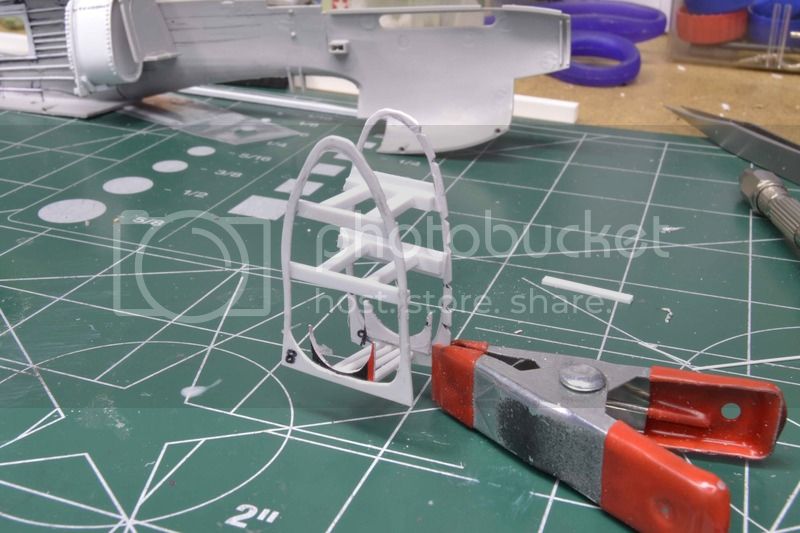
Today I began by cleaning up the bulkheads. Remember those....
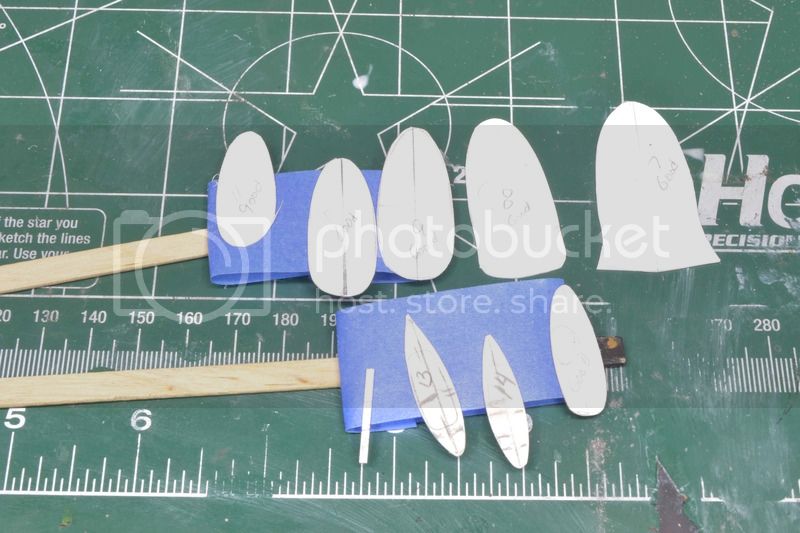


Well I began with punching out a hole, the largest my punch set has, and then using the dremel I worked the bulkheads out to where they looked more like they do in my drawings. I then went in with 320 sandpaper and cleaned them up.
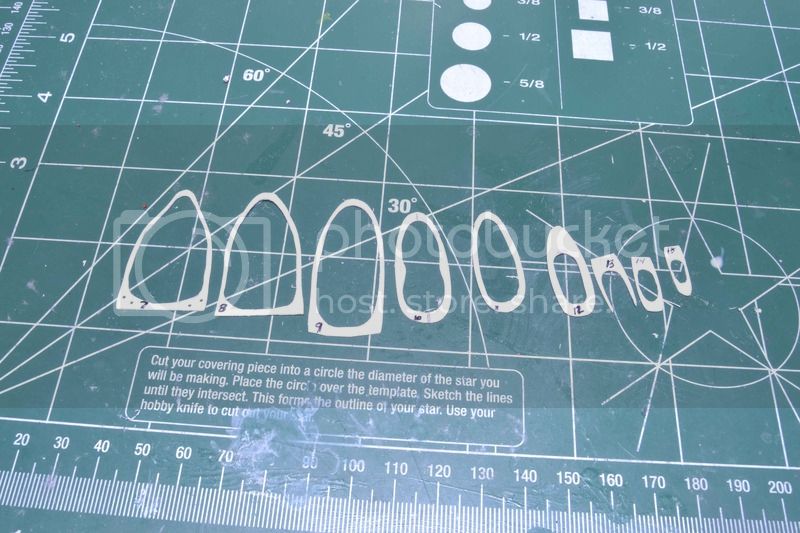


Once that was done I was able to start on the fuel cell. Using bulkhead #7 as a reference I sketched out the form, that was cut out, cleaned up, and then used as a master to form 3 pieces of sheet styrene. I then cut two pieces of tube styrene, size isnt important as long as it fits. I glued the tube to the sheet and then put them all together.
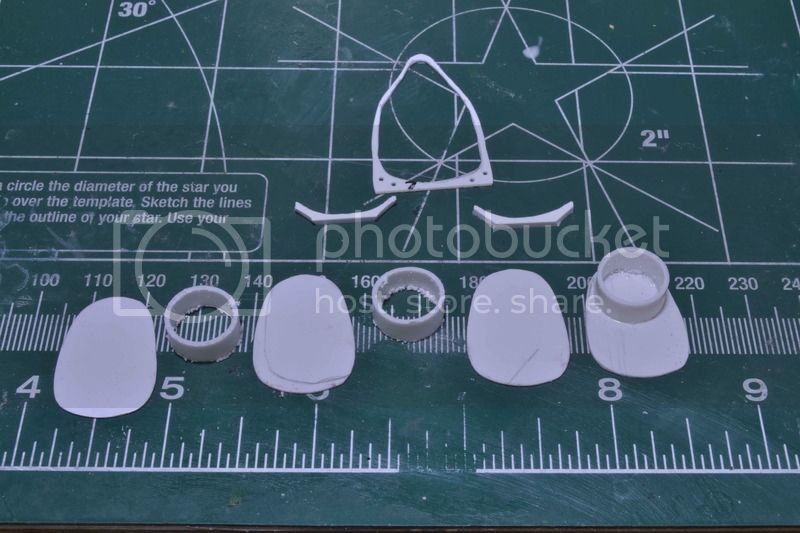


I then used .010 sheet styrene and skinned the framework. Also using the same bulkhead I fashioned a stand to keep the fuel cell in place.
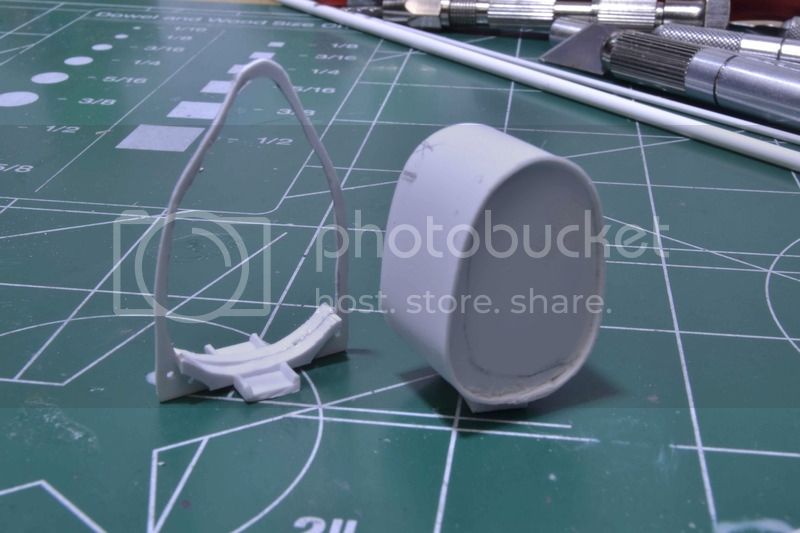


Just that simple.

Ok next will be to continue to work the interior, most likely starting with the tail and moving forward. I do need to add detail to most of the bulkheads as well as the fuel cell.

I hope you enjoyed the bonus.

All comments, critiques, and criticism are encouraged.


Joe
fightnjoe
_VISITCOMMUNITY
Washington, United States
Joined: August 16, 2004
KitMaker: 603 posts
AeroScale: 565 posts
Posted: Tuesday, February 09, 2016 - 10:43 AM UTC
Wow. It really is amazing what can happen when we move past a stumbling block.

Just a bit of an update:

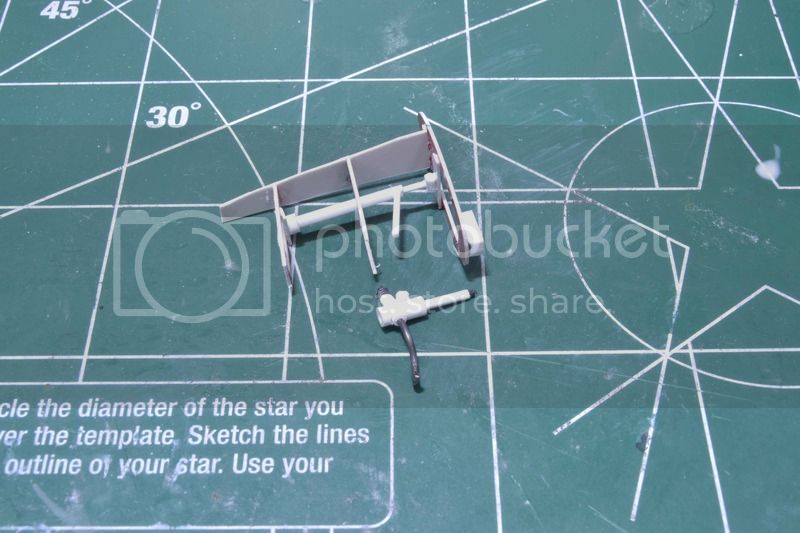
Work has commenced on the interior begining with the tail wheel assembly. This does not represent 100% accuracy as I needed to make sure there was stability and strength as well.


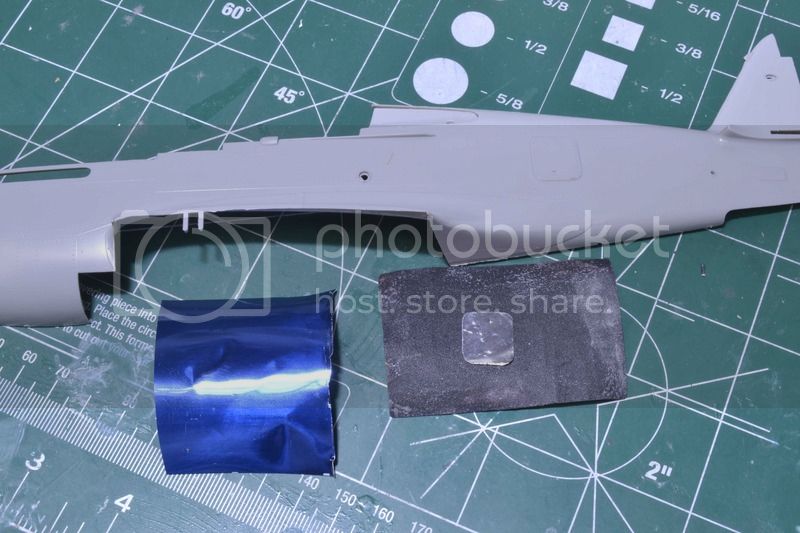
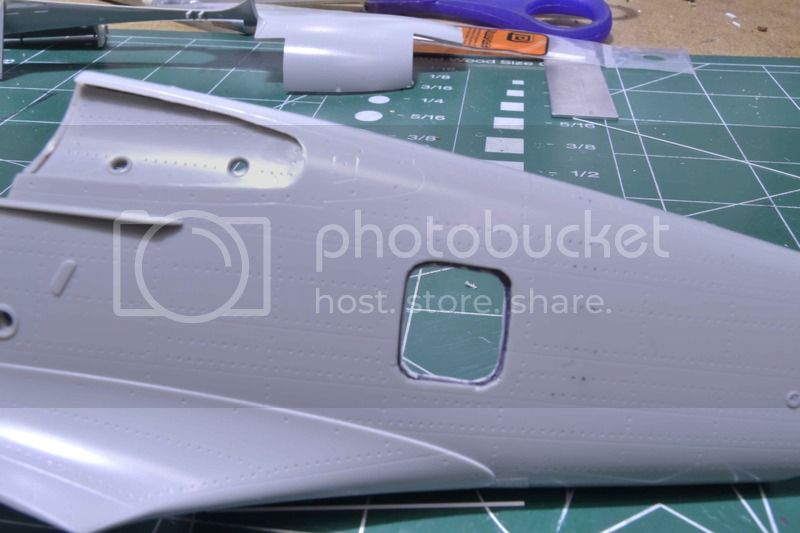
Before I go too far I really need to open up the access door on the fuselage. For that first a template is made out of aluminium foil which is taped to an aluminium can, cut out, and cleaned up a bit.


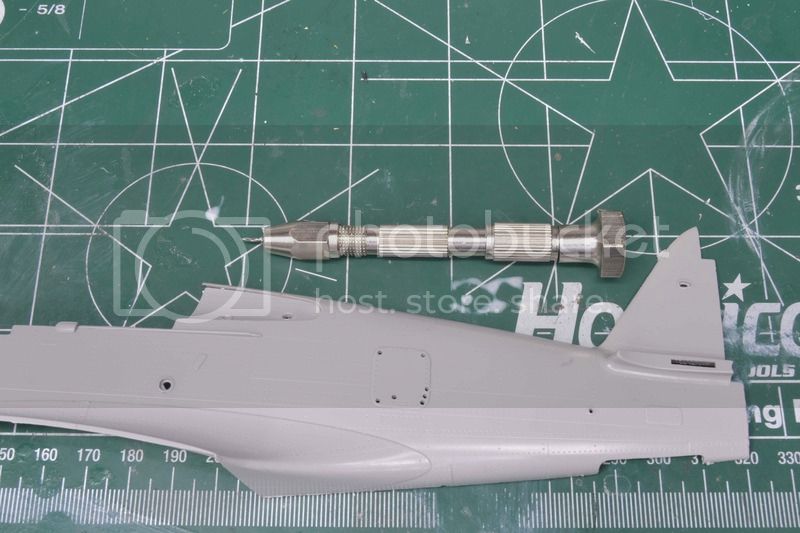
Next is to drill out the door. Let the drilling begin.


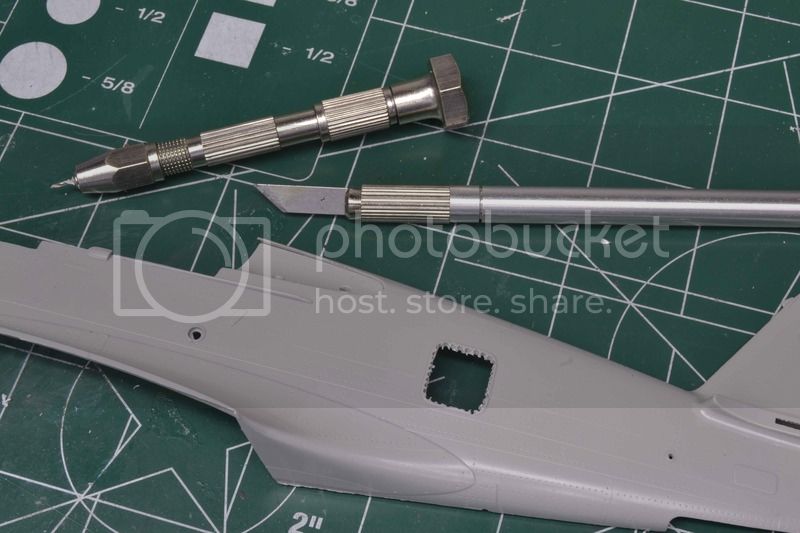
And drilled out.


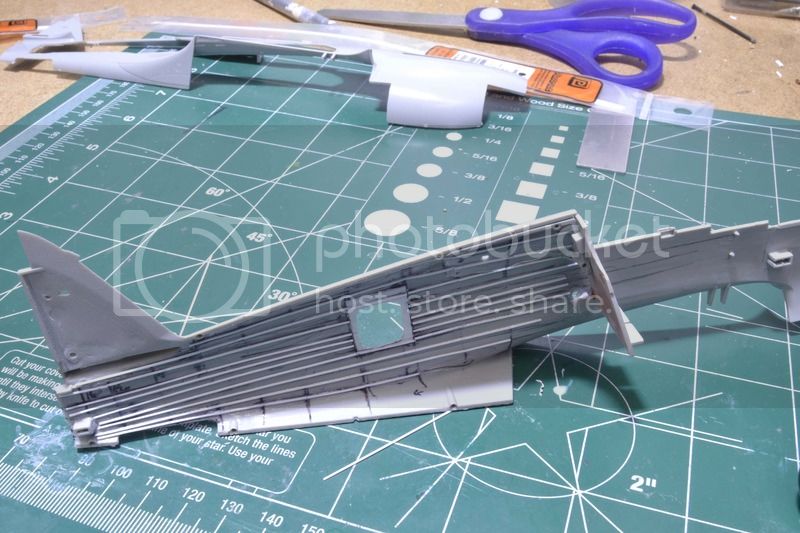
Next will be to clean up the cut and then I can put in stringers and back plates.


All comments, critiques, and criticism are encouraged.


Joe
greif8
_VISITCOMMUNITY
Bayern, Germany
Joined: January 17, 2006
KitMaker: 673 posts
AeroScale: 492 posts
Posted: Tuesday, February 09, 2016 - 10:50 PM UTC
Awe inspiring work all around Joe, but the frames are especially so.

Ernest
fightnjoe
_VISITCOMMUNITY
Washington, United States
Joined: August 16, 2004
KitMaker: 603 posts
AeroScale: 565 posts
Posted: Thursday, February 11, 2016 - 03:41 AM UTC
Many many thanks. I really like the way they have turned out.


Joe
PrickleHead
_VISITCOMMUNITY
Western Australia, Australia
Joined: December 31, 2013
KitMaker: 338 posts
AeroScale: 190 posts
Posted: Thursday, February 11, 2016 - 04:33 AM UTC
So impressive already. Great admirer of you guys that do this kind of work.
fightnjoe
_VISITCOMMUNITY
Washington, United States
Joined: August 16, 2004
KitMaker: 603 posts
AeroScale: 565 posts
Posted: Thursday, February 11, 2016 - 07:45 AM UTC
Glad you are enjoying. Many thanks.


Joe
fightnjoe
_VISITCOMMUNITY
Washington, United States
Joined: August 16, 2004
KitMaker: 603 posts
AeroScale: 565 posts
Posted: Monday, February 15, 2016 - 10:00 AM UTC
Moving right along with the interior work.

First up was to clean up the access door and then attach a backing plate.


Once that was completed I moved on to putting the stringers in place. These are .020 hex rod.


With that done the part of the builds that I truly enjoy could begin. The interior work.

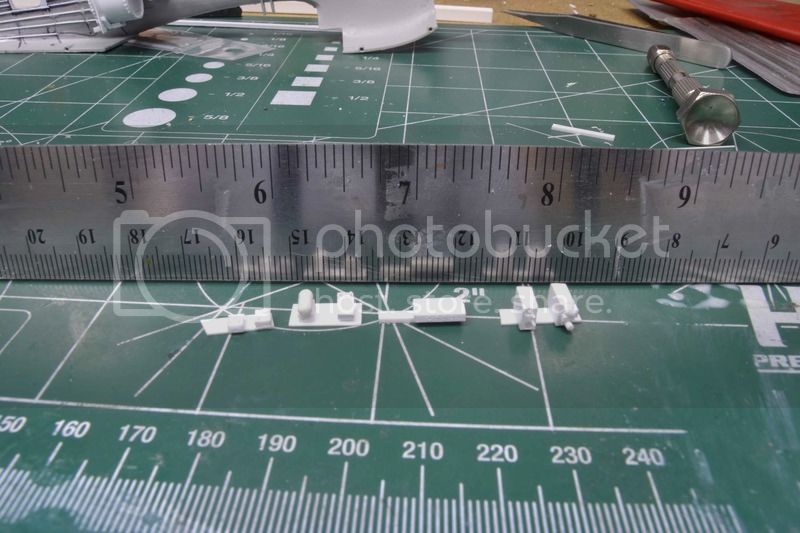
First up was to prep bulkheads 8 and 9 for radio equipment. I took some time and set up the racks to mimic what I have seen in pictures.


The next step of course was to actually build up the radio equipment. Now indulge me on this.

From left to right. Radio boxes both recieving and transmitting, dynamotor and antenna switch box, junction box, and the reciever and transmitter.


Now with that ready, before I can add the wiring, I am going to need to do some painting I think. I may just move on and continue the construction of interior assemblies. Thinking on this.

All comments, critiques, and criticism are encouraged.


Joe
GazzaS
#424
_VISITCOMMUNITY
Queensland, Australia
Joined: April 23, 2015
KitMaker: 4,648 posts
AeroScale: 1,938 posts
Posted: Monday, February 15, 2016 - 02:11 PM UTC
I'm amazed. I like that you are able to create all of this interior detail from just plastic stock.

Gary
fightnjoe
_VISITCOMMUNITY
Washington, United States
Joined: August 16, 2004
KitMaker: 603 posts
AeroScale: 565 posts
Posted: Tuesday, February 16, 2016 - 05:13 AM UTC
Very kind. Many thanks.


Joe
greif8
_VISITCOMMUNITY
Bayern, Germany
Joined: January 17, 2006
KitMaker: 673 posts
AeroScale: 492 posts
Posted: Tuesday, February 16, 2016 - 02:56 PM UTC
Progress looking awesome as always Joe.
fightnjoe
_VISITCOMMUNITY
Washington, United States
Joined: August 16, 2004
KitMaker: 603 posts
AeroScale: 565 posts
Posted: Tuesday, February 16, 2016 - 07:49 PM UTC
You are very kind, thankyou.


Joe
fightnjoe
_VISITCOMMUNITY
Washington, United States
Joined: August 16, 2004
KitMaker: 603 posts
AeroScale: 565 posts
Posted: Thursday, February 18, 2016 - 09:35 AM UTC
Just a quick update.

Spent some time getting some of the internal details constructed. Again they are not 100% but they will work for what I need.

The hydraulic pump.


And the landing gear/flap unit


I have also begun to frame in the cockpit.


I will be doing some crossmembers for the stringers. These will only be there to make sure the detail has a place to anchor.


All comments, critiques, and criticism are encouraged.


Joe
fightnjoe
_VISITCOMMUNITY
Washington, United States
Joined: August 16, 2004
KitMaker: 603 posts
AeroScale: 565 posts
Posted: Sunday, February 21, 2016 - 05:08 AM UTC
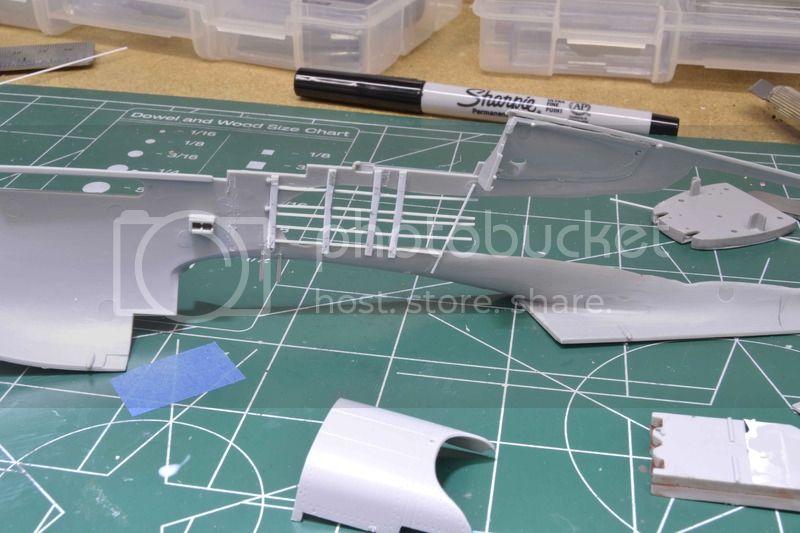
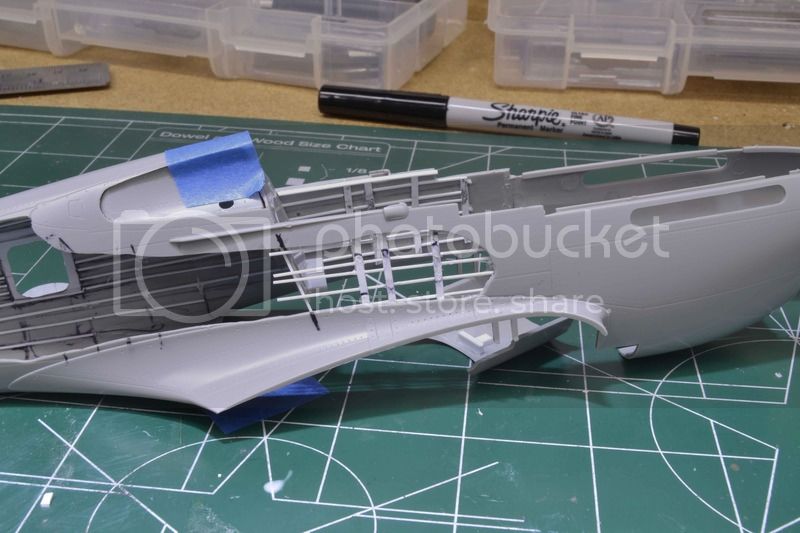
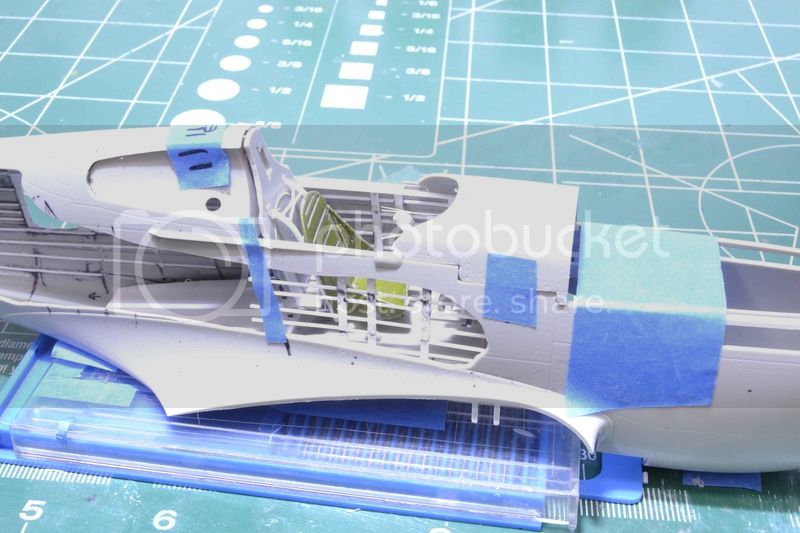
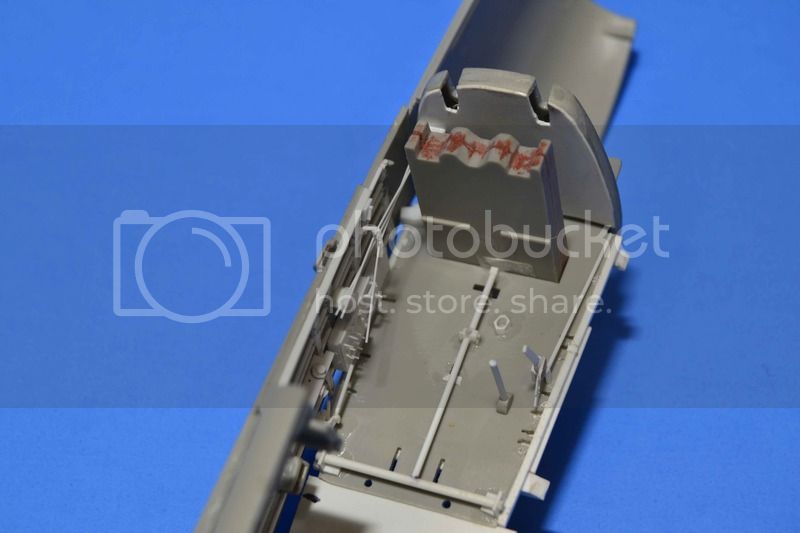
The next major construction stage is to work on the cockpit.

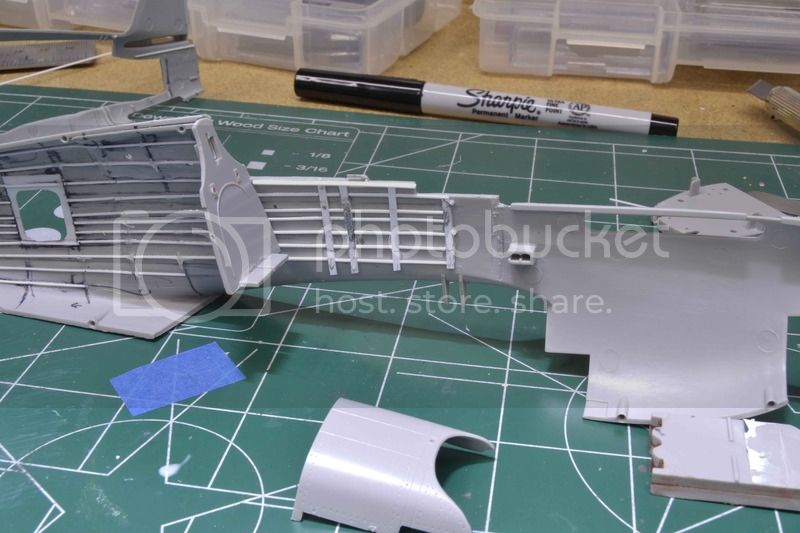
This begins with framing in the pit. Bulheads and frames. After putting in the bulkheads each stringer was cut to fit. I used .020 by .040 strip for the bulkhead. I used .020 square strip for the stringers.


And how it looks all together. Taped of course.


Now there are a couple of major flaws in the pictures. One I have fixed the other I will live with.

Moving right along and actually kind of quick with this part so far.


All comments, critiques, and criticism are encouraged.


Joe
greif8
_VISITCOMMUNITY
Bayern, Germany
Joined: January 17, 2006
KitMaker: 673 posts
AeroScale: 492 posts
Posted: Tuesday, February 23, 2016 - 12:41 PM UTC
NO critiques here Joe. The hydraulic pump is especially exquisite, craftsmanship at its finest. I would have had to take several breaks while doing the ribs to keep my eyes from crossing!
fightnjoe
_VISITCOMMUNITY
Washington, United States
Joined: August 16, 2004
KitMaker: 603 posts
AeroScale: 565 posts
Posted: Thursday, February 25, 2016 - 03:42 AM UTC
Very kind, thank you. I did take multiple breaks as well as redoing them.


Joe
fightnjoe
_VISITCOMMUNITY
Washington, United States
Joined: August 16, 2004
KitMaker: 603 posts
AeroScale: 565 posts
Posted: Saturday, March 26, 2016 - 08:22 AM UTC
Back to the bench.


Joe
fightnjoe
_VISITCOMMUNITY
Washington, United States
Joined: August 16, 2004
KitMaker: 603 posts
AeroScale: 565 posts
Posted: Tuesday, March 29, 2016 - 07:52 AM UTC
How about a long overdue, a month since the last one, update????

When last we saw our hero the framing for the cockpit had been readied and installed. We had prepared to begin to start detailing.

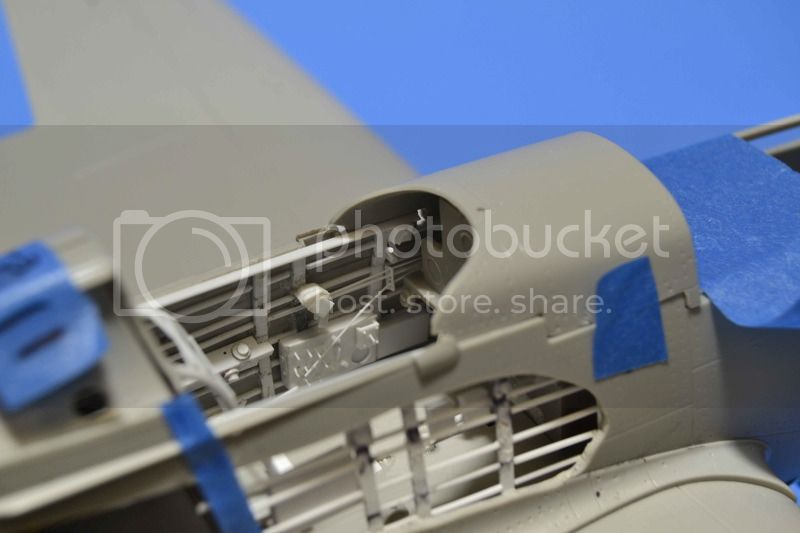
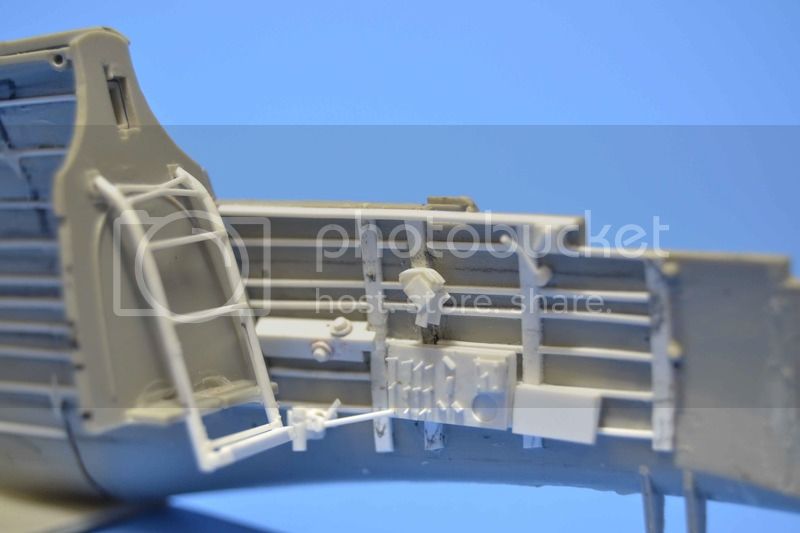
This update is all about the seat frame and the port side.

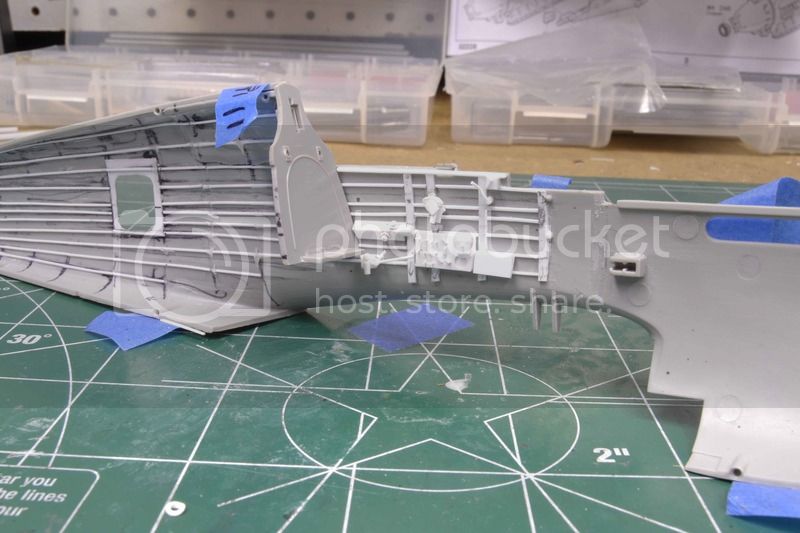
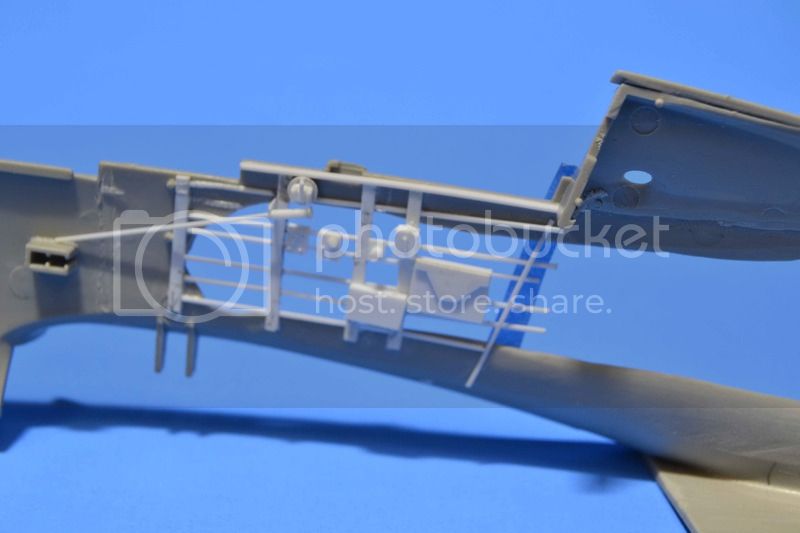
Working off of several pictures work began with the electrical panels and the throttle control. Using strip, rod, tube, and scrap plastic the panels were fashioned. After they were ready some little odds and ends on the port side were fashioned to match the pictures.

The port side.


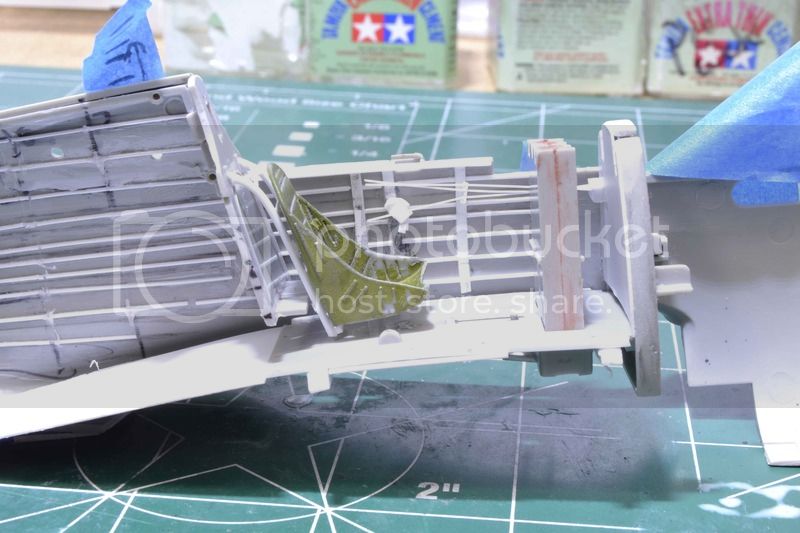
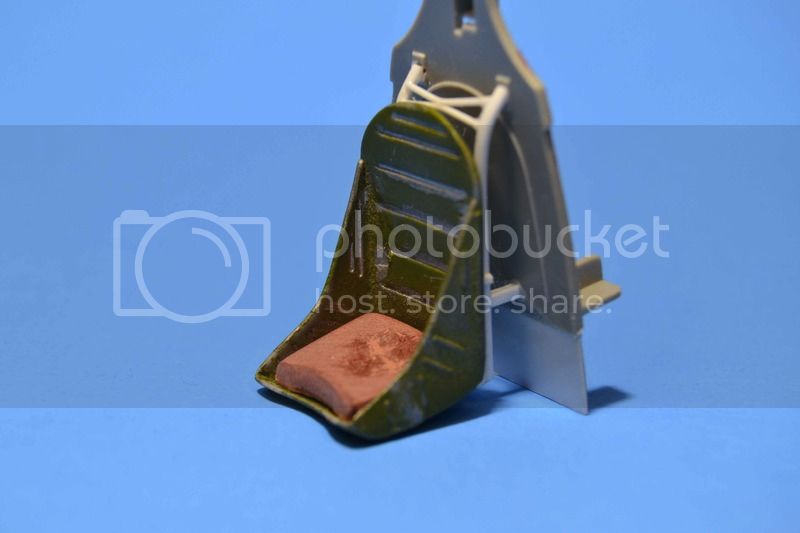
I also worked on the seat framing. This is not 100% accurate but needed to have a bit more strength than what I could see for a plastic frame. I canibalized a seat from the parts box and have it in place temp.


And finally just a glimpse of what this looks like, minus the port detail, with the fuselage together.


That is about all the detail seen in my pictures for the Port side. Next up will be to work on the Starboard side.


All comments, critiques, and criticism are encouraged.


Joe
fightnjoe
_VISITCOMMUNITY
Washington, United States
Joined: August 16, 2004
KitMaker: 603 posts
AeroScale: 565 posts
Posted: Friday, April 01, 2016 - 08:49 AM UTC
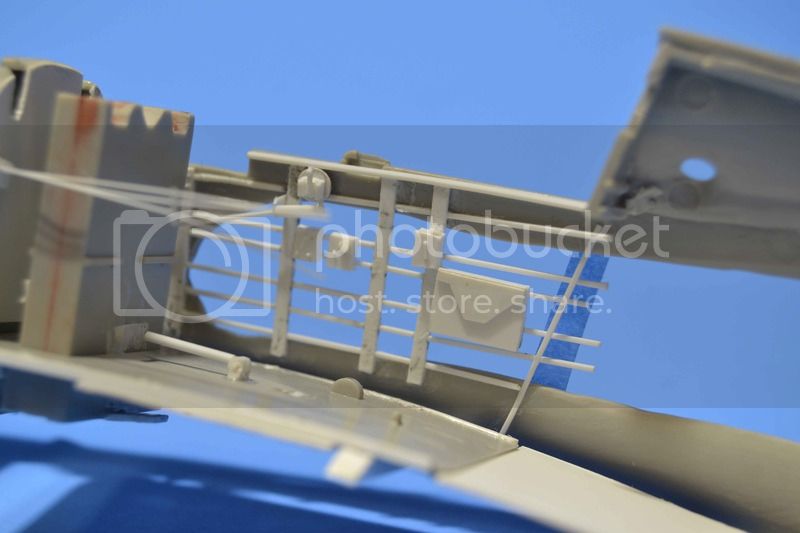
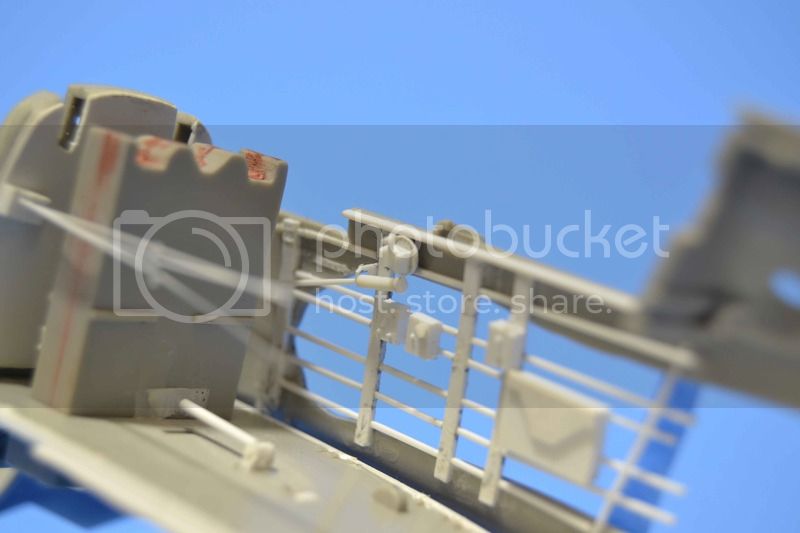
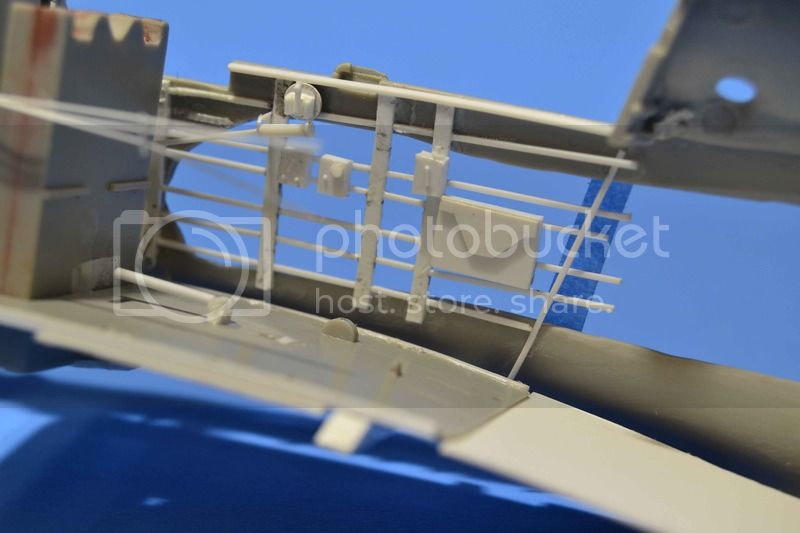
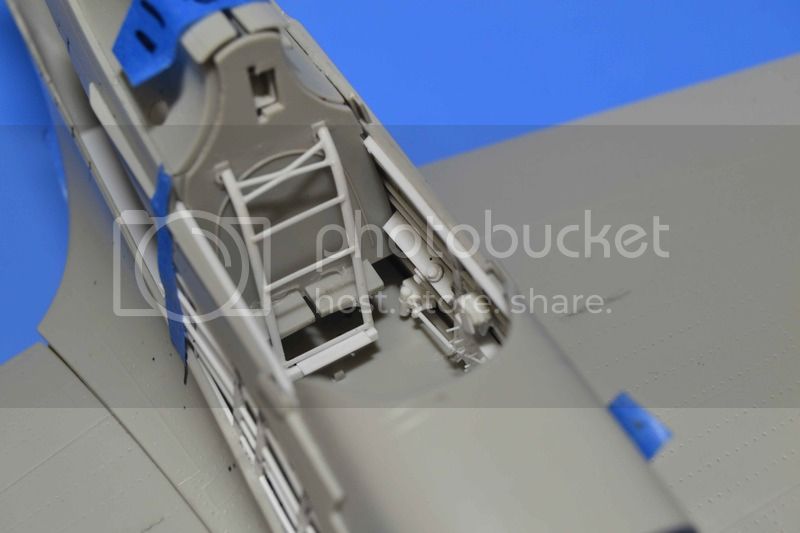
On to the Starboard side of the cockpit. A little of detail but to be honest I missed a couple of things that I will have in the next update.

Radio boxes, a light, and the canopy handle dominate this side.


Now let me back up a bit, playing with different camera settings. Here are a couple of shots of the Port side using a different background and different settings.


Next up will be the top of the wing/floor of the cockpit.


All comments, critiques, and criticism are encouraged.


Joe
fightnjoe
_VISITCOMMUNITY
Washington, United States
Joined: August 16, 2004
KitMaker: 603 posts
AeroScale: 565 posts
Posted: Saturday, April 02, 2016 - 03:18 AM UTC
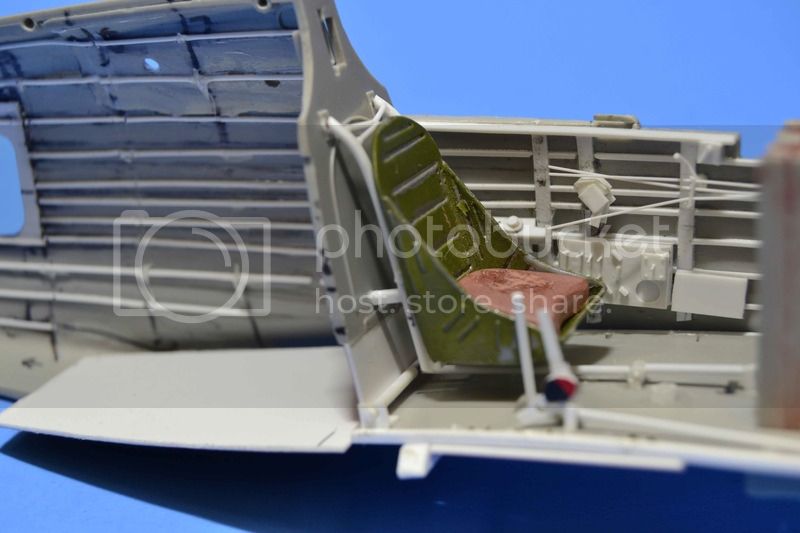
My friends most of the cockpit is now ready for paint.

There are a few things that I have not worked yet but they can be done at paint.

I added a box on the starboard side, reworked the frame a bit, reworked the instrument panel to add some detail that was lacking, and added just a couple of things to the floor/top of the wing.


This section is now far enough that I can move on.

Next up will be the firewall and the engine compartment moving into the engine.

Many thanks all for sticking around this long.


All comments, critiques, and criticism are encouraged.


Joe
fightnjoe
_VISITCOMMUNITY
Washington, United States
Joined: August 16, 2004
KitMaker: 603 posts
AeroScale: 565 posts
Posted: Friday, April 08, 2016 - 06:21 AM UTC
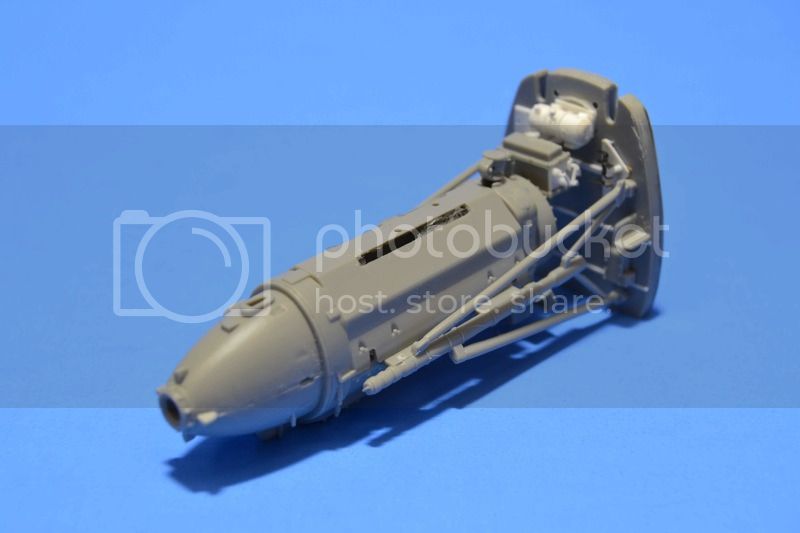
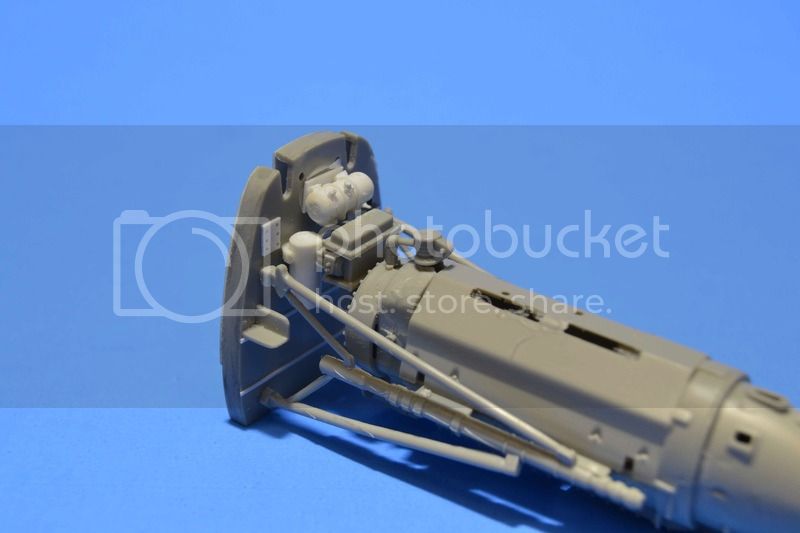
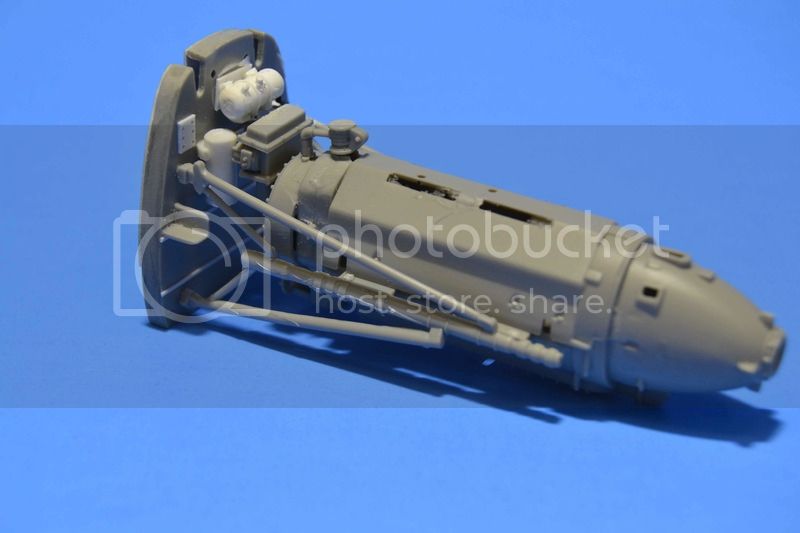
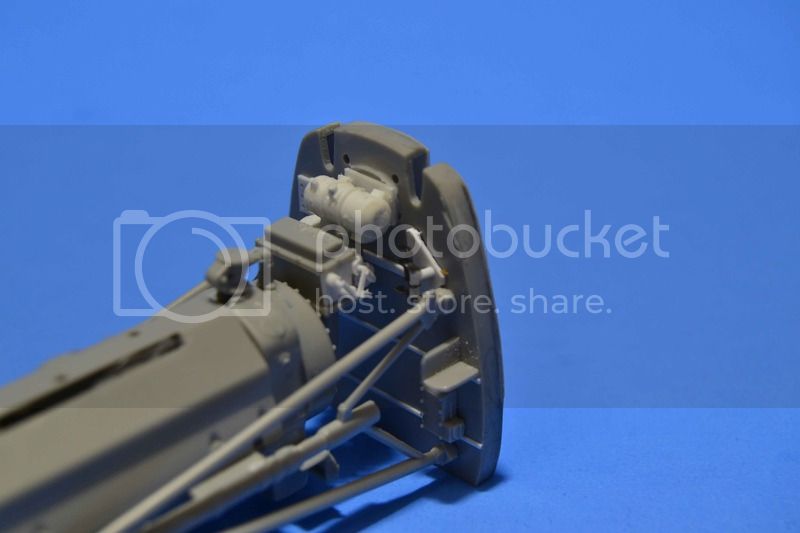
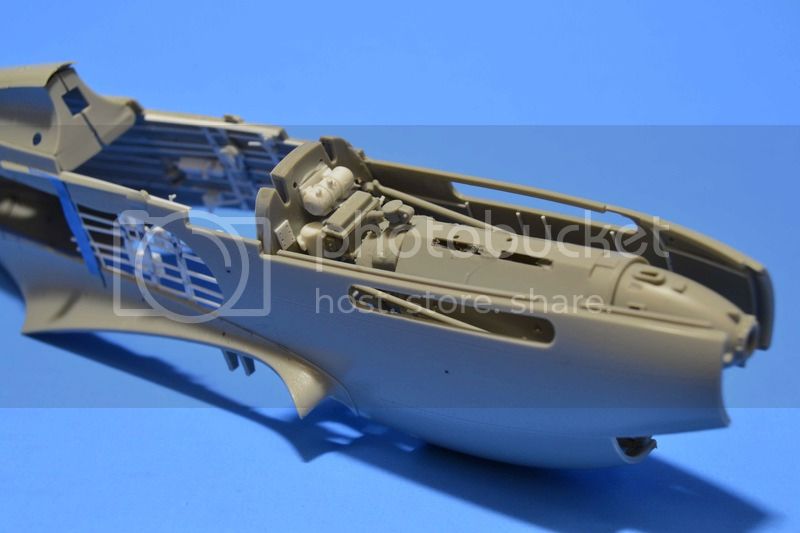
The final phase of construction is to work on the firewall and the engine area. The engine will be an entirely separate thing and will be covered while I install it permanently.

The firewall included a couple of tanks as well as a base for some plumbing and the throttle linkages.


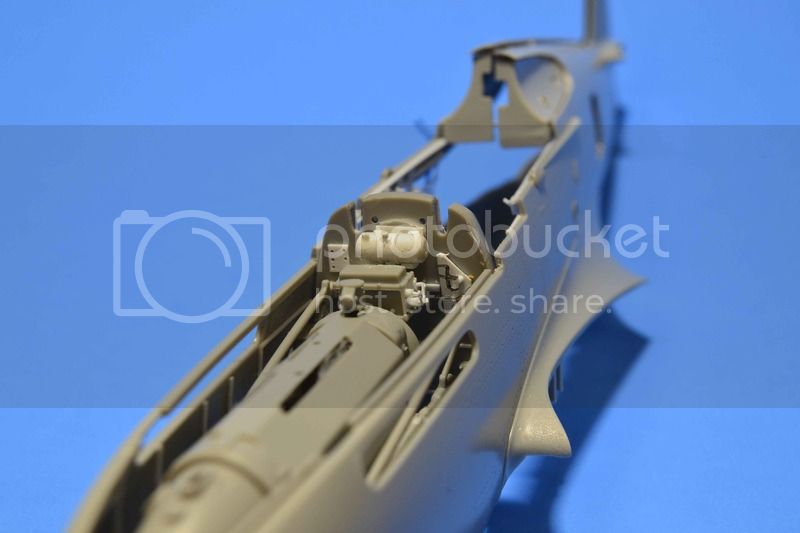
And with it inplace in the fuselage.


Now I have also added just a few stringers for detail on the interior of the fuselage. Next for me will be to begin to paint.


All comments, critiques, and criticism are encouraged.


Joe
Scrodes
_VISITCOMMUNITY
Ontario, Canada
Joined: July 22, 2012
KitMaker: 771 posts
AeroScale: 763 posts
Posted: Friday, April 08, 2016 - 08:55 AM UTC
Inspiring work, especially the carburetor linkages.
fightnjoe
_VISITCOMMUNITY
Washington, United States
Joined: August 16, 2004
KitMaker: 603 posts
AeroScale: 565 posts
Posted: Saturday, April 09, 2016 - 05:41 PM UTC
Many many thanks. To be honest they are a bit thick but they will be partially hidden.


Joe
KelticKnot
_VISITCOMMUNITY
Scotland, United Kingdom
Joined: May 11, 2015
KitMaker: 768 posts
AeroScale: 656 posts
Posted: Saturday, April 09, 2016 - 06:40 PM UTC
Great work Joe, this kind of work is absolutely fascinating.
If i may ask a question, did you trace the bulkhead shapes from a scale plan or do you have a secret trick? I'm facing similar tasks and cant get my head around how to replicate the interior shape of a fuselage without first taking a very rough guess then endlessly sanding to fit.
greif8
_VISITCOMMUNITY
Bayern, Germany
Joined: January 17, 2006
KitMaker: 673 posts
AeroScale: 492 posts
Posted: Sunday, April 10, 2016 - 02:22 PM UTC
Simply awesome work Joe, much better than anything I could achieve. It is a real pleasure to view this build as it comes together.