Many many thanks.
No secret at all. I use a contour gauge to get the general shape, trace that onto paper, then use the paper to fine tune as much as I can. I then trace it onto the plastic.
Joe
World War II
Discuss WWII and the era directly before and after the war from 1935-1949.
Discuss WWII and the era directly before and after the war from 1935-1949.
Hosted by Rowan Baylis
1/32 Trumpeter P-40B

fightnjoe

Joined: August 16, 2004
KitMaker: 603 posts
AeroScale: 565 posts

Posted: Sunday, April 10, 2016 - 07:24 PM UTC
Removed by original poster on 04/11/16 - 14:29:00 (GMT).

fightnjoe

Joined: August 16, 2004
KitMaker: 603 posts
AeroScale: 565 posts

Posted: Friday, April 15, 2016 - 09:49 PM UTC
Ok folks I have reached a point where it would be advisable to start the paint work.
All the prep work is done, I think. Bulkheads are installed, with the exception of the forward most as they need to be removable yet. The little bits and pieces are prepped for paint. The tail wheel assembly is in place.
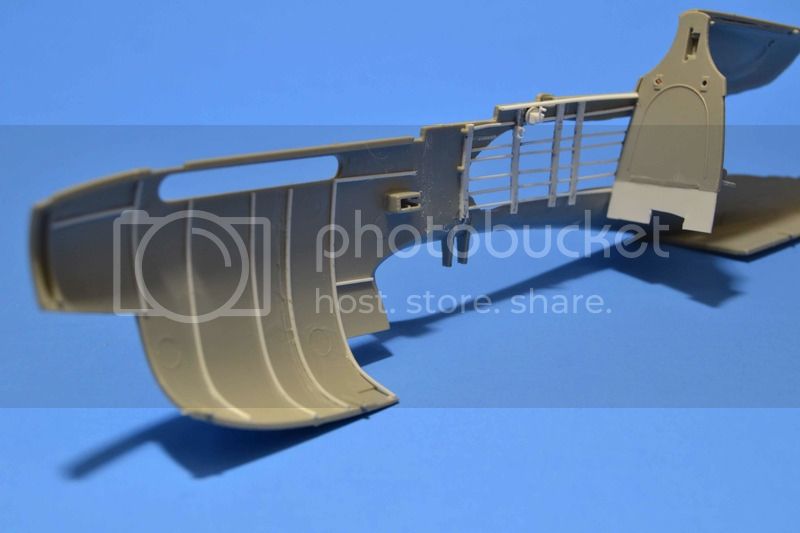
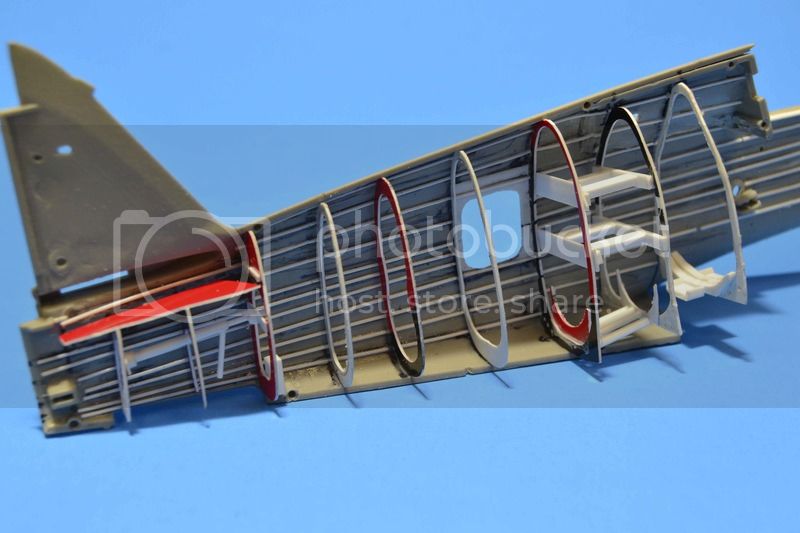
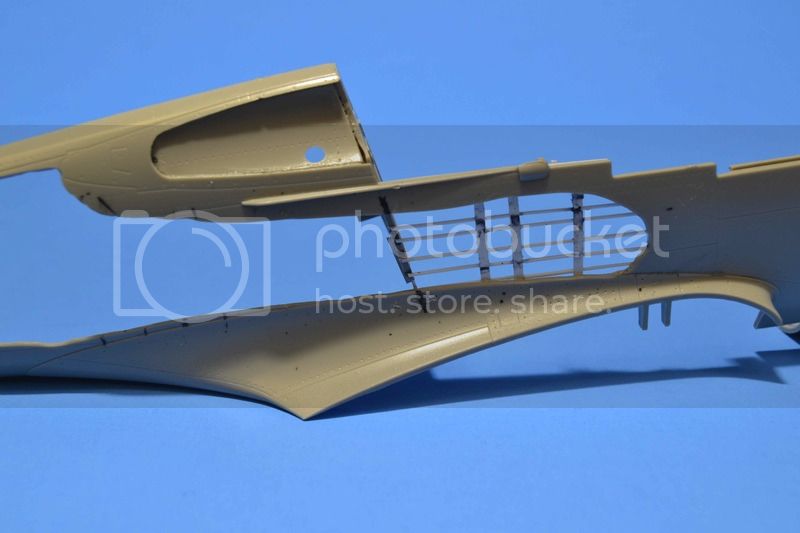
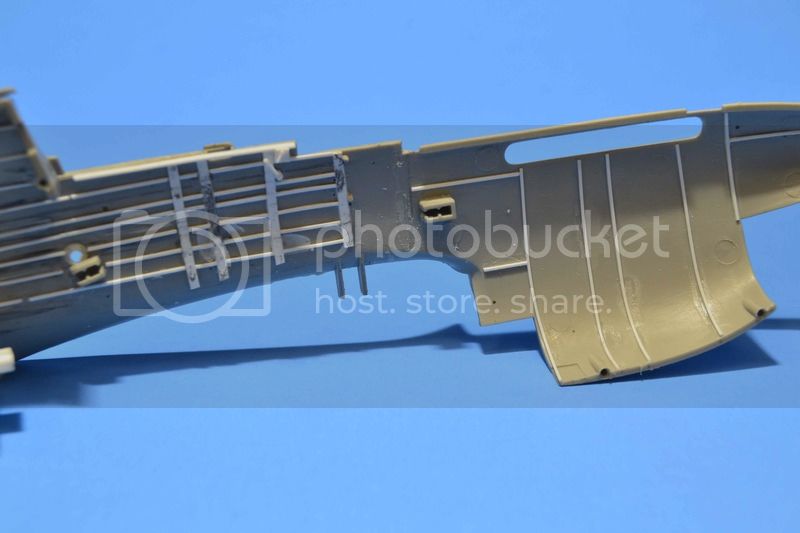
Paint was sprayed starting with a flat black base. I wanted to try something a bit different and changed midstream to putting a coat of Model Master Aluminium Plate on then I sprayed the interior colors. I did however forget to take pictures of that. I wanted to see if the Aluminium changed the Interior Green and the Yellow Zinc Chromate. It did but not so much as you would really see it.
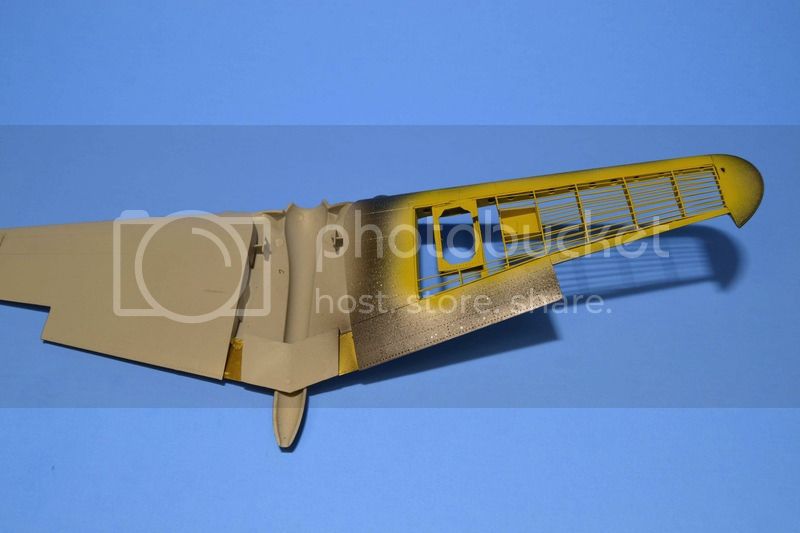
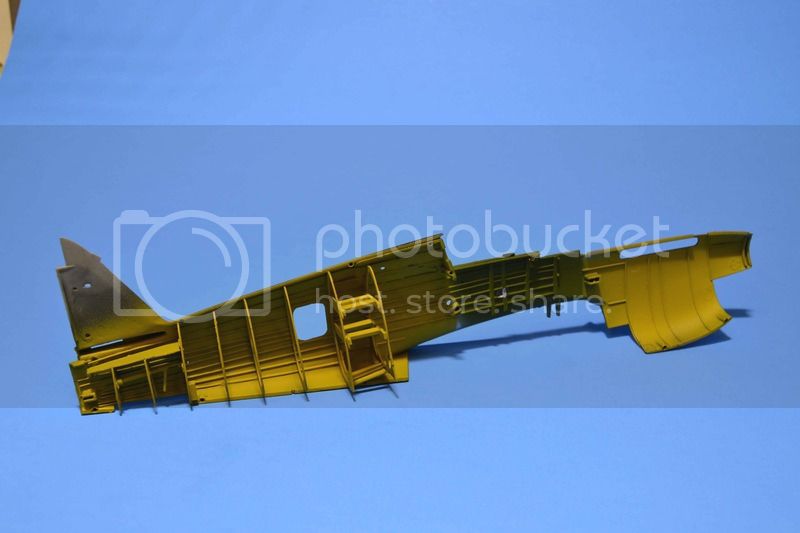
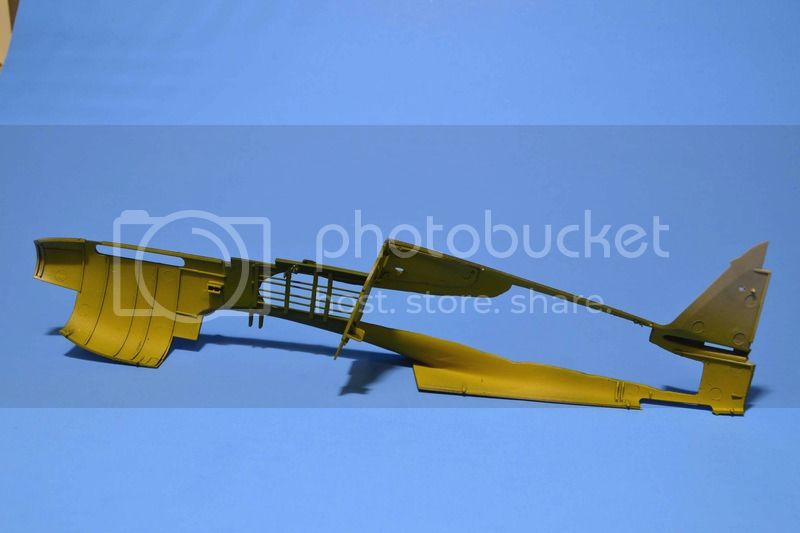
I also began to paint and detail paint the interior pieces.
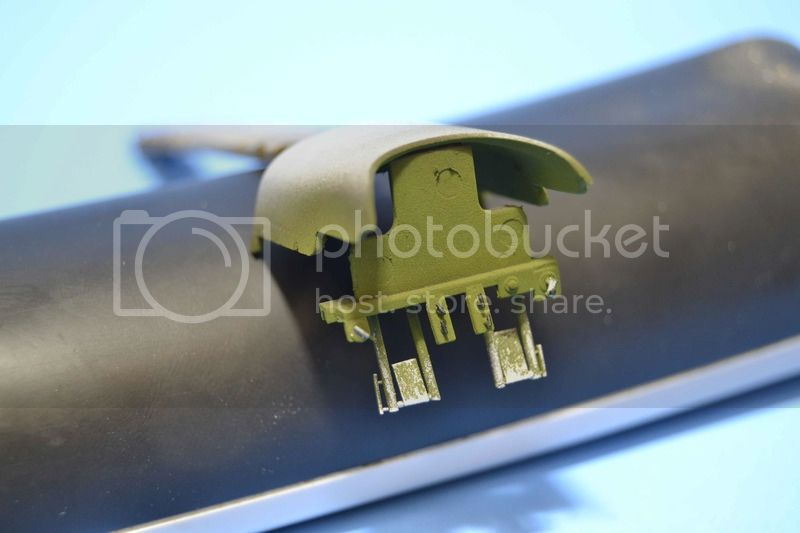
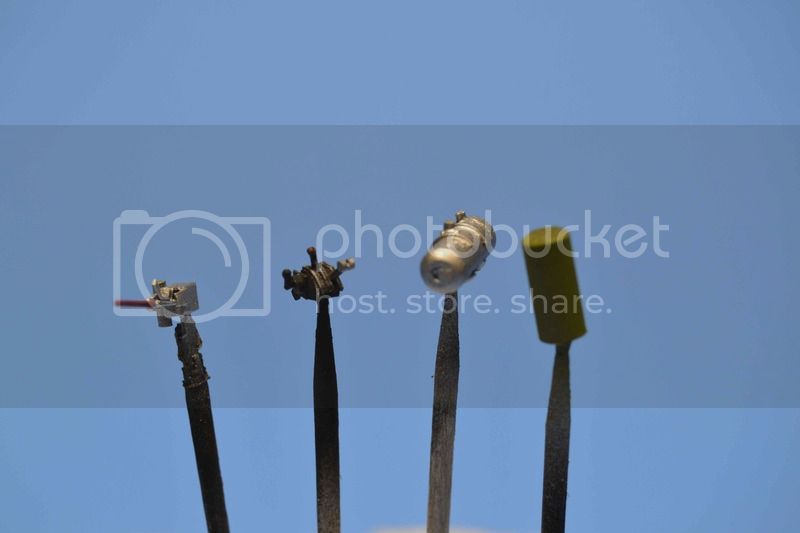
That is where it stands at the moment. Now the challenge will be to work on the firewall more and on to the engine work. I am choosing to not install the bits and pieces as of yet as they could break free during the process and I do not want to lose them.
All comments, critiques, and criticism are encouraged.
Joe
All the prep work is done, I think. Bulkheads are installed, with the exception of the forward most as they need to be removable yet. The little bits and pieces are prepped for paint. The tail wheel assembly is in place.


Paint was sprayed starting with a flat black base. I wanted to try something a bit different and changed midstream to putting a coat of Model Master Aluminium Plate on then I sprayed the interior colors. I did however forget to take pictures of that. I wanted to see if the Aluminium changed the Interior Green and the Yellow Zinc Chromate. It did but not so much as you would really see it.


I also began to paint and detail paint the interior pieces.


That is where it stands at the moment. Now the challenge will be to work on the firewall more and on to the engine work. I am choosing to not install the bits and pieces as of yet as they could break free during the process and I do not want to lose them.
All comments, critiques, and criticism are encouraged.
Joe

fightnjoe

Joined: August 16, 2004
KitMaker: 603 posts
AeroScale: 565 posts

Posted: Saturday, April 23, 2016 - 06:11 AM UTC
Update time:
Engine compartment and Engine work.
The engine is the kit parts, added are hoses and such.
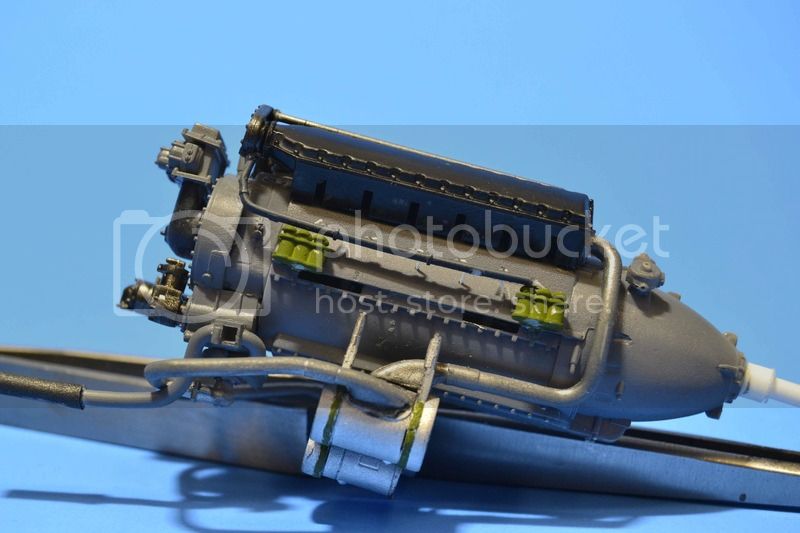
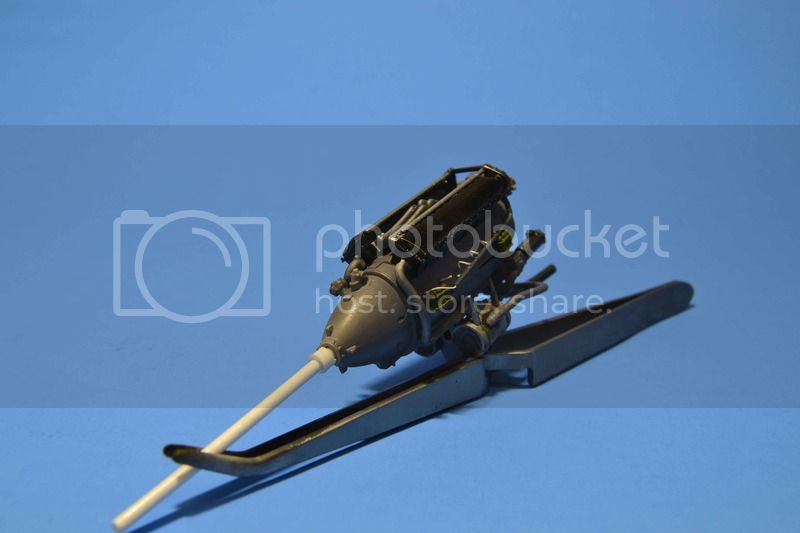
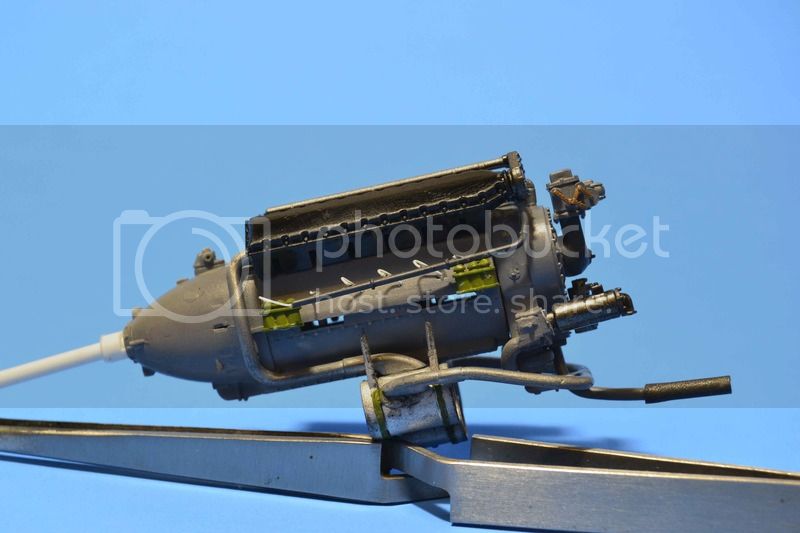
The firewall.
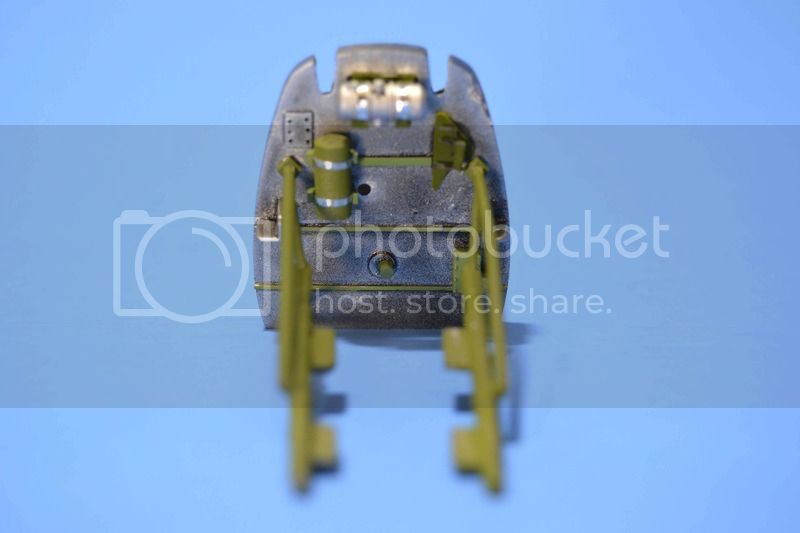
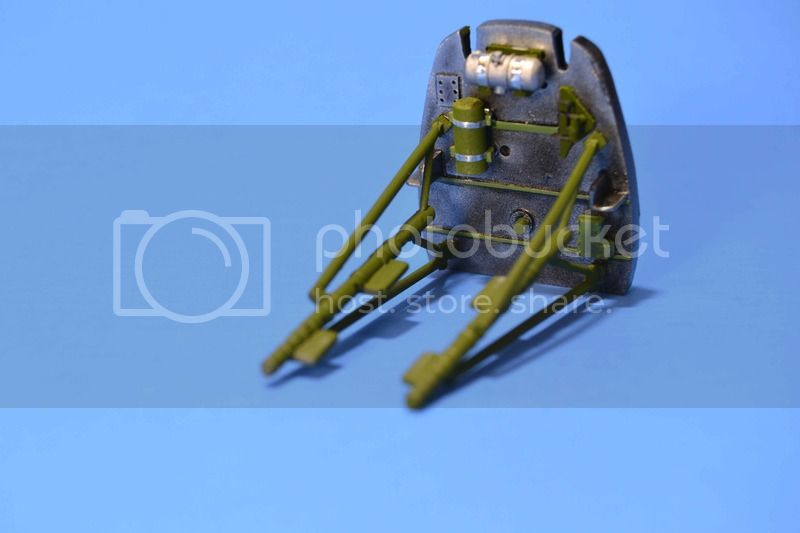
With some additions.
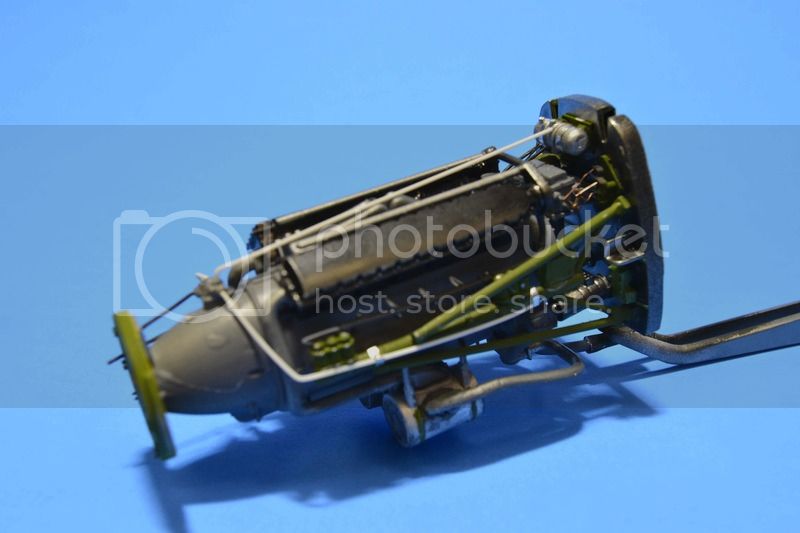
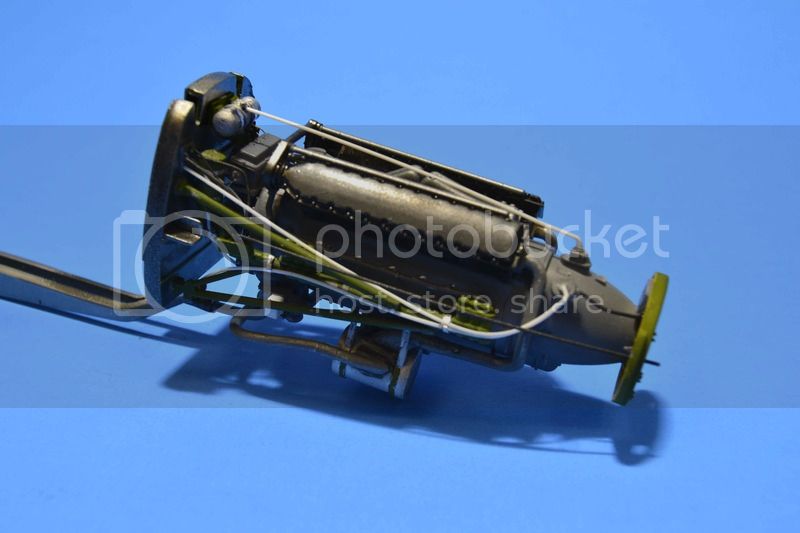
And just how much will you actually see when done???
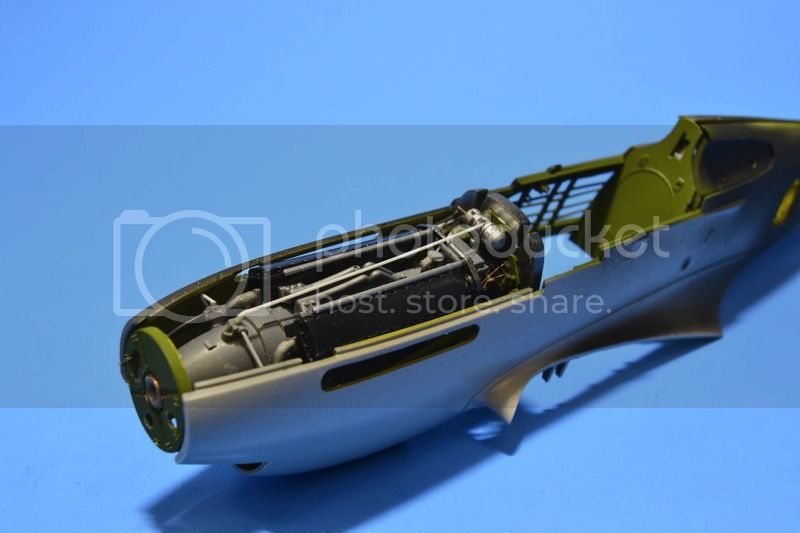
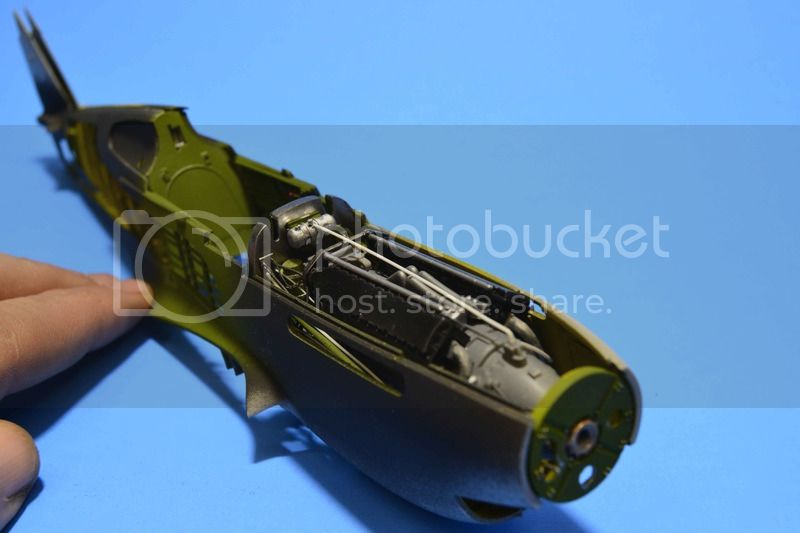
Well not much really. Again this is not 100% accurate. Some issues occurred during the process and some things did not get installed. Maybe the next time.
This took a while so my goal was not reached. I had hoped to get this weathered but that did not happen. Also I have not finished the exhausts yet. That will have to wait till the next update.
All comments, critiques, and criticism are encouraged.
Joe
Engine compartment and Engine work.
The engine is the kit parts, added are hoses and such.


The firewall.


With some additions.


And just how much will you actually see when done???


Well not much really. Again this is not 100% accurate. Some issues occurred during the process and some things did not get installed. Maybe the next time.
This took a while so my goal was not reached. I had hoped to get this weathered but that did not happen. Also I have not finished the exhausts yet. That will have to wait till the next update.
All comments, critiques, and criticism are encouraged.
Joe

fightnjoe

Joined: August 16, 2004
KitMaker: 603 posts
AeroScale: 565 posts

Posted: Friday, April 29, 2016 - 09:02 AM UTC
An update, a rather quick moving one.
First up is finishing up the engine. Exhausts are now added.
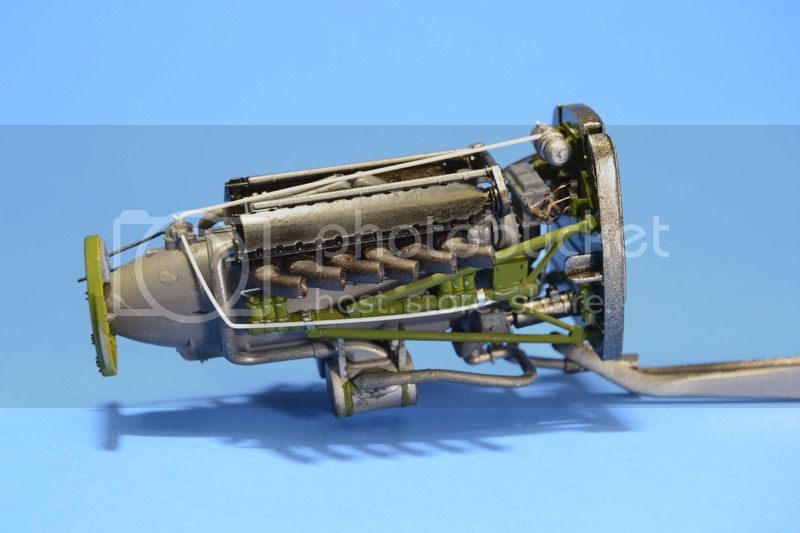
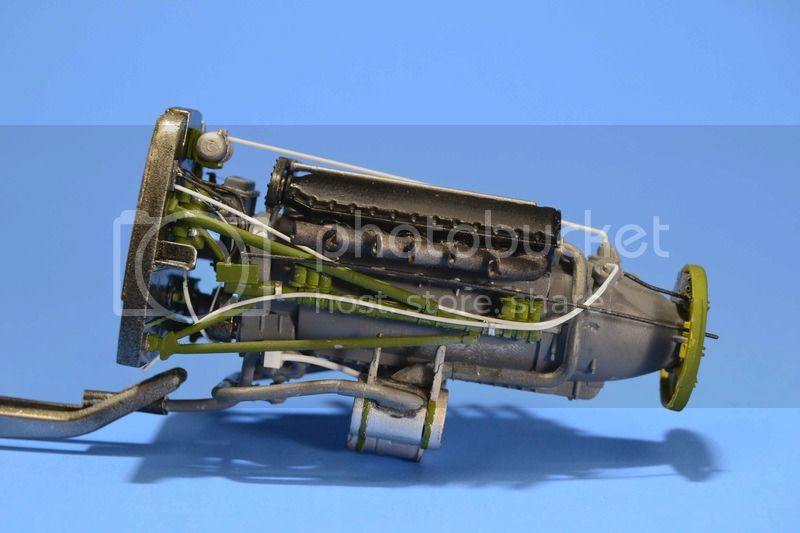
Next up is to actually begin the painting process. Some may ask why, why do that prior to gluing all of the bits and pieces? Well simple really. I am a bit scared when it comes to painting around that cut away bit. For that reason I choose to paint it now and then when I get it all together I can go back over the bits and touch up.
First up is my usual, a coat of Flat Black.
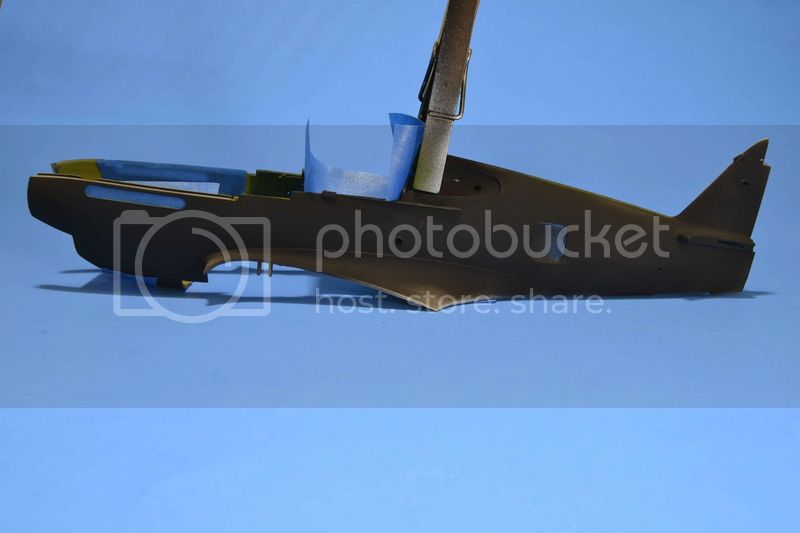
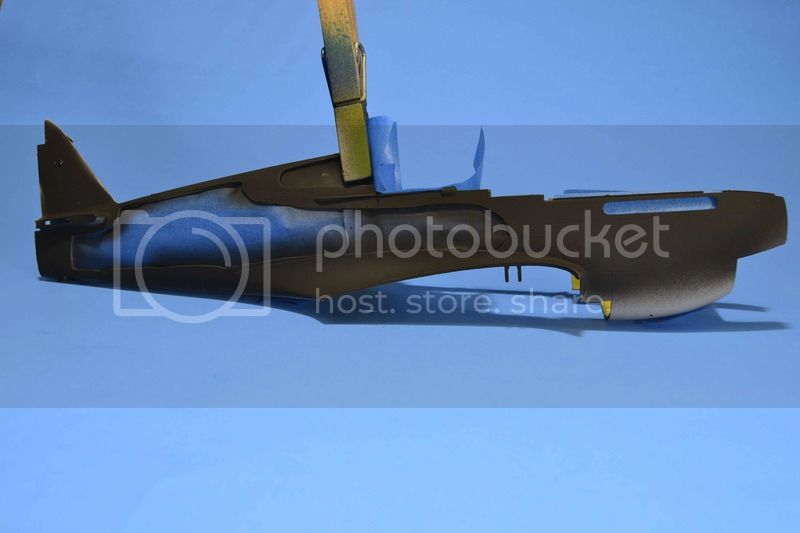
Next up is to break this up just a bit. I choose to use Model Master Aluminium Plate. This is sprayed on randomly. This is to break the monotone of the top colors.
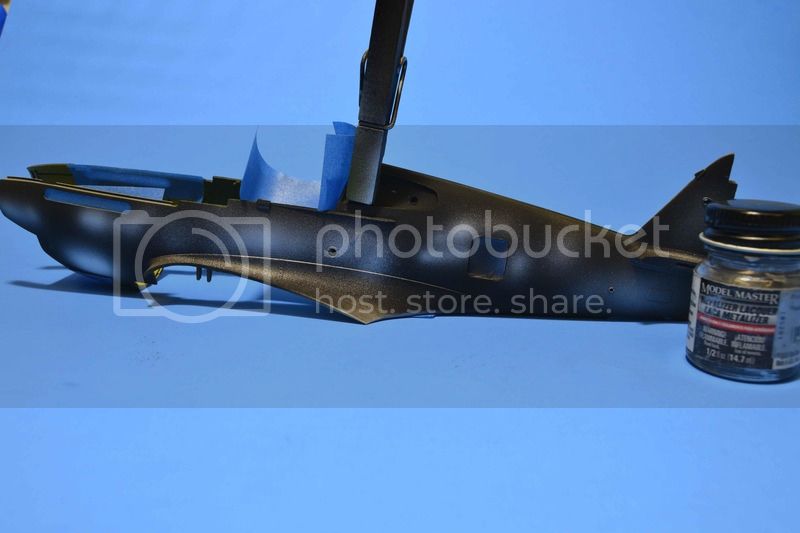
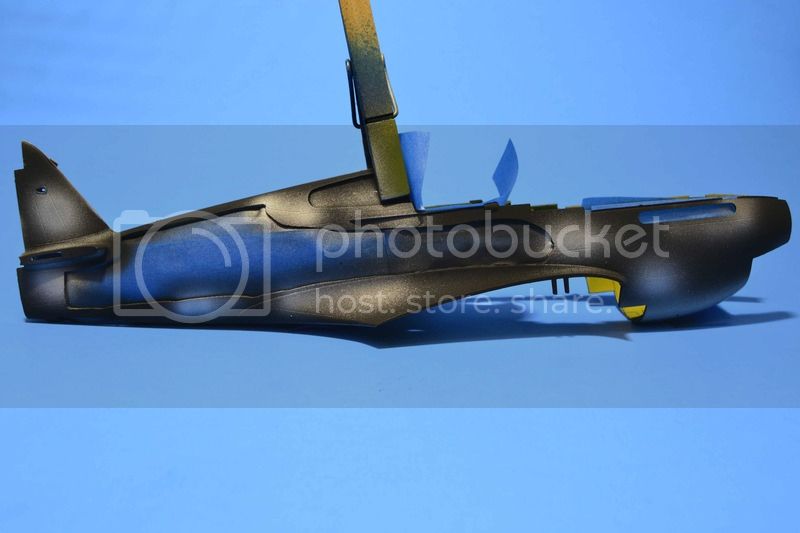
I then sprayed Pollyscale colors, Dark Earth, and Dark Green. I used homemade paper masks. To be honest they worked ok but they could have been so much better. The paints on the other hand again do not impress me. They are some of the most difficult I have used.
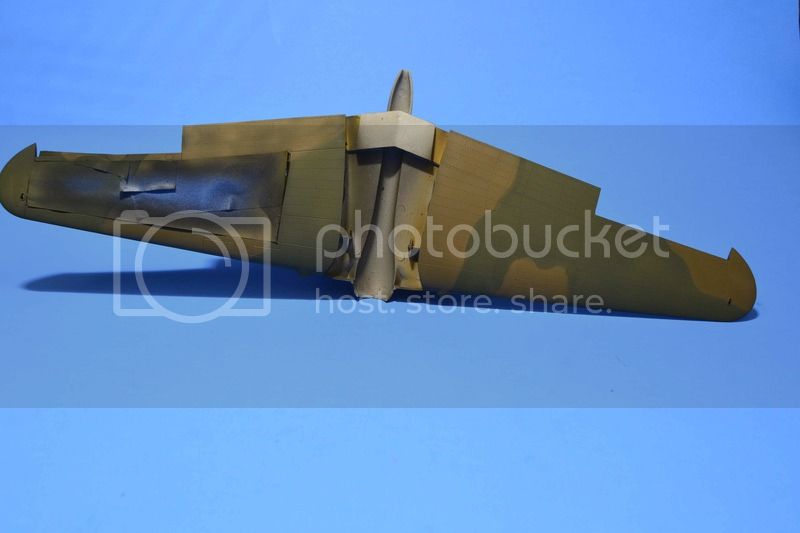
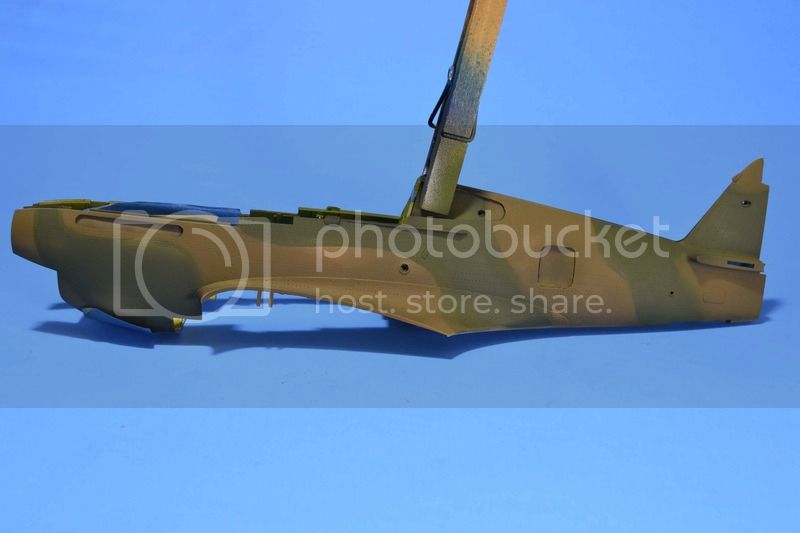
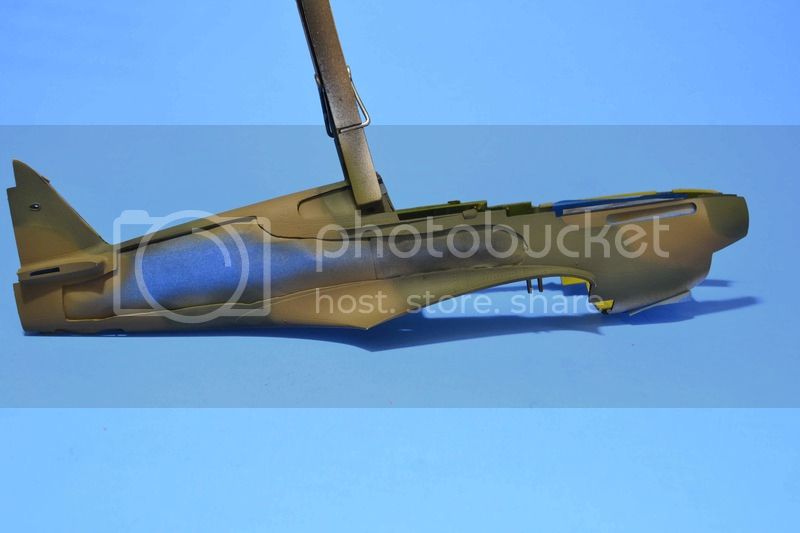
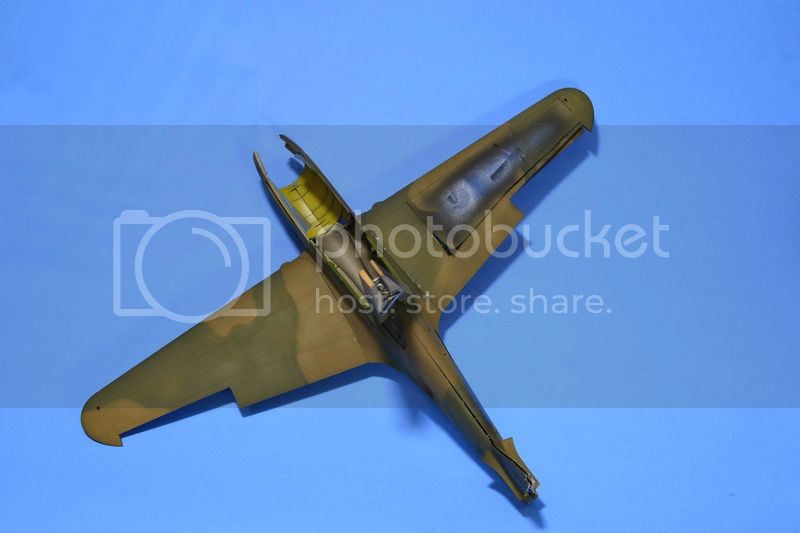
Being up front about it, any tone modulation in the paint are strictly because I either sprayed too heavy, not heavy enough, or otherwise screwed up. It might just work for what I intend though.
Next up will be to begin the reconstruction of the interior and the permanent installation of the assorted pieces.
All comments, critiques, and criticism are encouraged.
Joe
First up is finishing up the engine. Exhausts are now added.


Next up is to actually begin the painting process. Some may ask why, why do that prior to gluing all of the bits and pieces? Well simple really. I am a bit scared when it comes to painting around that cut away bit. For that reason I choose to paint it now and then when I get it all together I can go back over the bits and touch up.
First up is my usual, a coat of Flat Black.


Next up is to break this up just a bit. I choose to use Model Master Aluminium Plate. This is sprayed on randomly. This is to break the monotone of the top colors.


I then sprayed Pollyscale colors, Dark Earth, and Dark Green. I used homemade paper masks. To be honest they worked ok but they could have been so much better. The paints on the other hand again do not impress me. They are some of the most difficult I have used.


Being up front about it, any tone modulation in the paint are strictly because I either sprayed too heavy, not heavy enough, or otherwise screwed up. It might just work for what I intend though.
Next up will be to begin the reconstruction of the interior and the permanent installation of the assorted pieces.
All comments, critiques, and criticism are encouraged.
Joe

fightnjoe

Joined: August 16, 2004
KitMaker: 603 posts
AeroScale: 565 posts

Posted: Tuesday, May 03, 2016 - 08:35 AM UTC
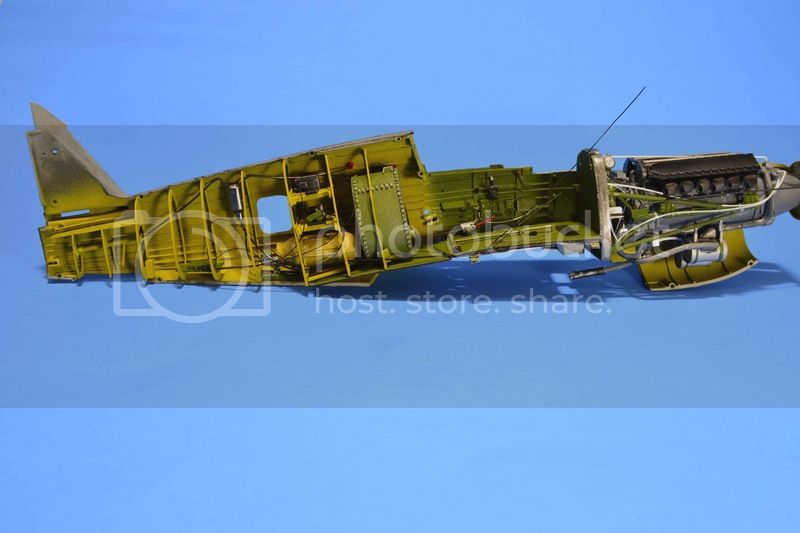
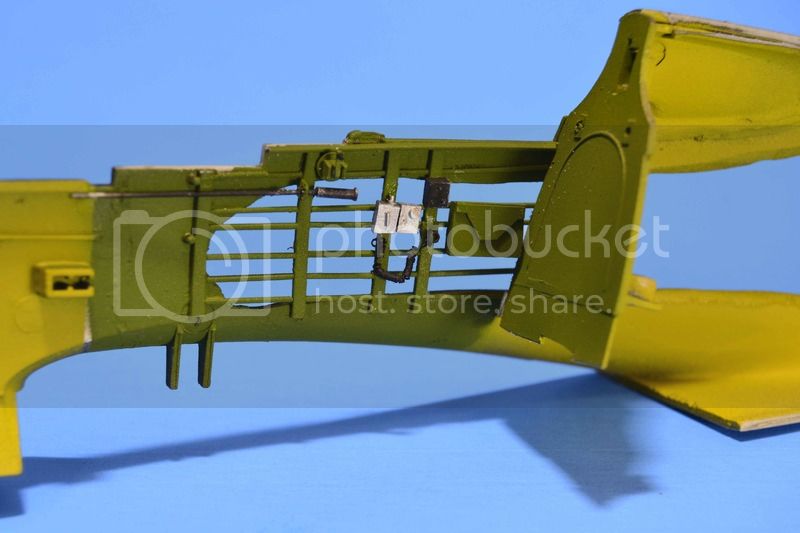
Finishing up the interior work. Everything I will show in this post is now installed.
The port side
And the little bit on the starboard side.
What is left on the interior is the seat, the lower section of the tail wheel assembly, and finishing off the plumbing of the starboard side of the cockpit. Oh so close to closing up the fuselage. Oh so close.
All comments, critiques, and criticism are encouraged.
Joe
The port side

And the little bit on the starboard side.

What is left on the interior is the seat, the lower section of the tail wheel assembly, and finishing off the plumbing of the starboard side of the cockpit. Oh so close to closing up the fuselage. Oh so close.
All comments, critiques, and criticism are encouraged.
Joe

Scrodes

Joined: July 22, 2012
KitMaker: 771 posts
AeroScale: 763 posts

Posted: Saturday, May 14, 2016 - 07:34 PM UTC
I'm curious to see how you deal with the seam on the spine of the fuselage.
Great looking build though - and the tone modulation looks good, even if not done on purpose.
Great looking build though - and the tone modulation looks good, even if not done on purpose.

fightnjoe

Joined: August 16, 2004
KitMaker: 603 posts
AeroScale: 565 posts

Posted: Tuesday, May 17, 2016 - 08:35 AM UTC
Many thanks. The spine was not too bad this time around.
And yet another update. This one is just a bit of the small stuff and then a big step forward.
First the small stuff.
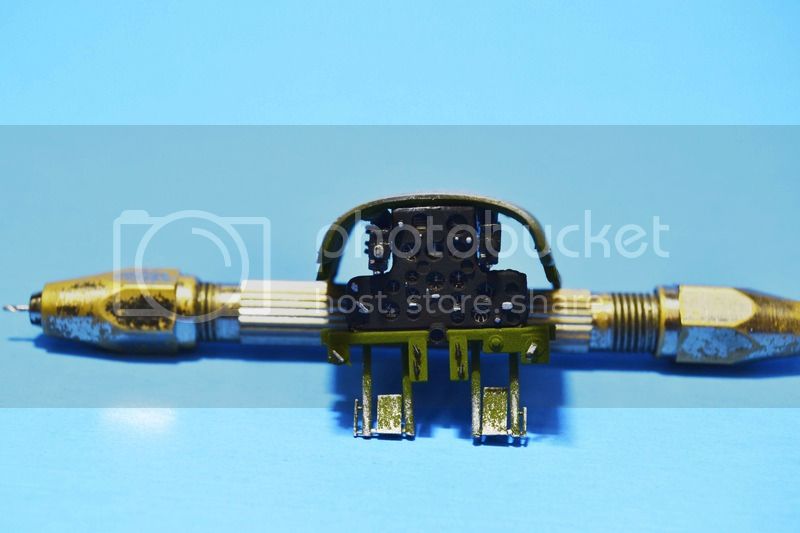
The IP.
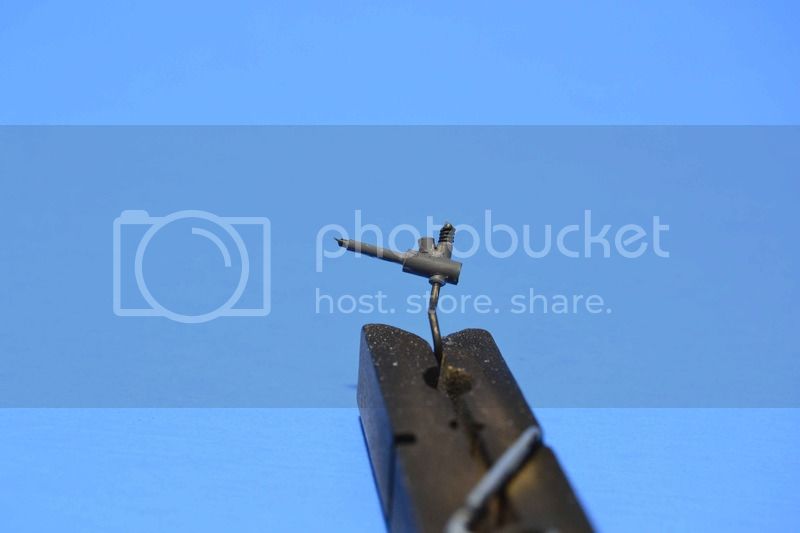
The tail wheel assembly.
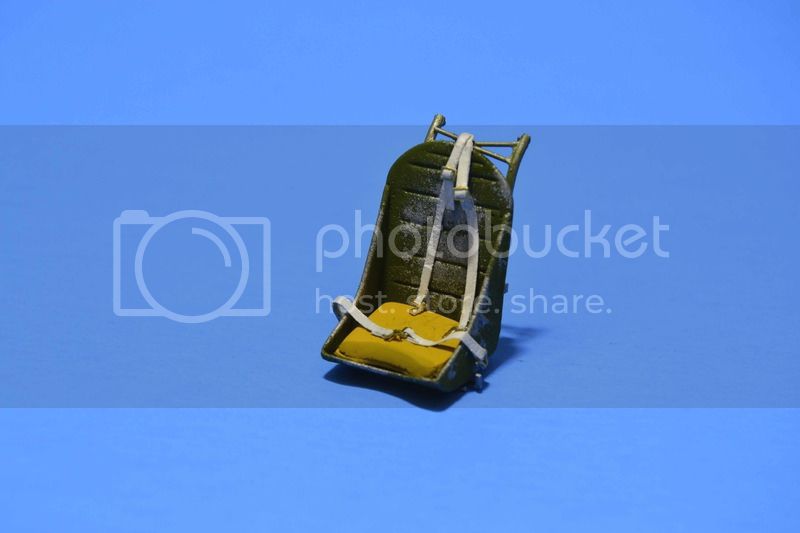
And the seat.
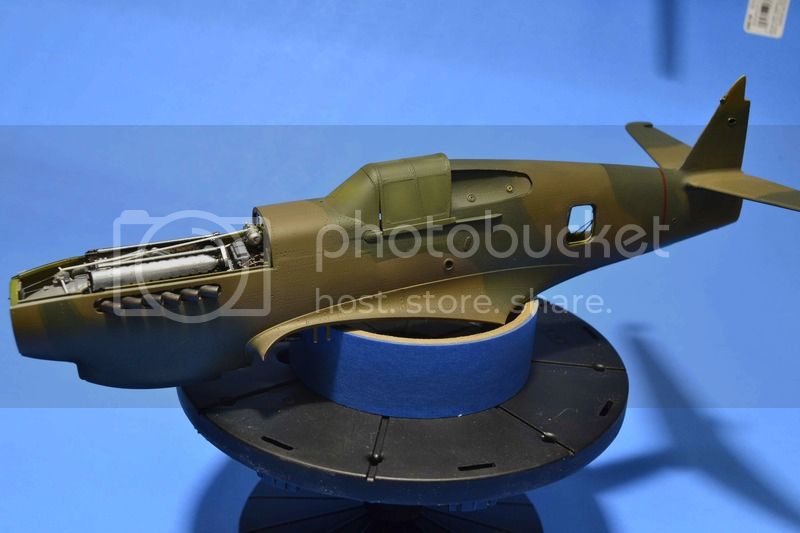
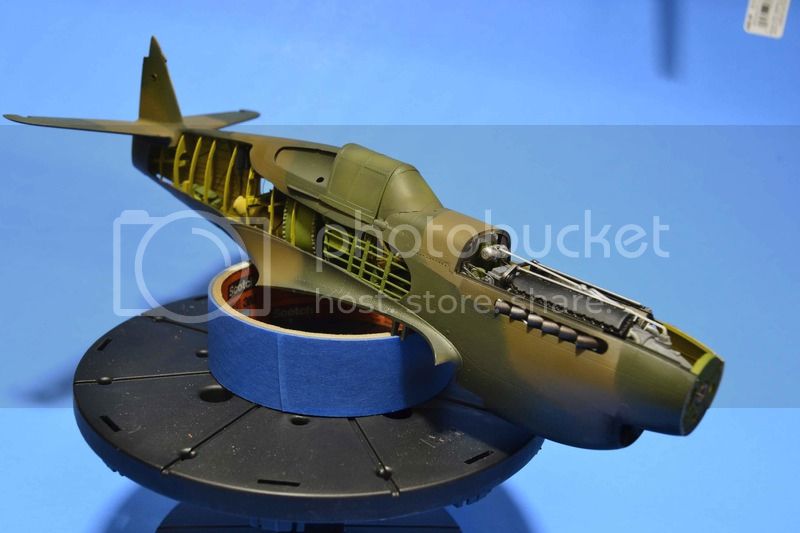
Well then came a big step. Closure of the fuselage.
Next up is to go back and work on the wing some. I have some fixes to make and some little things to install.
Moving along but oh so slowly.
All comments, critiques, and criticism are encouraged.
Joe
And yet another update. This one is just a bit of the small stuff and then a big step forward.
First the small stuff.
The IP.

The tail wheel assembly.

And the seat.

Well then came a big step. Closure of the fuselage.


Next up is to go back and work on the wing some. I have some fixes to make and some little things to install.
Moving along but oh so slowly.
All comments, critiques, and criticism are encouraged.
Joe

fightnjoe

Joined: August 16, 2004
KitMaker: 603 posts
AeroScale: 565 posts

Posted: Sunday, May 29, 2016 - 06:35 AM UTC
Well folks back again. Just a brief one this time.
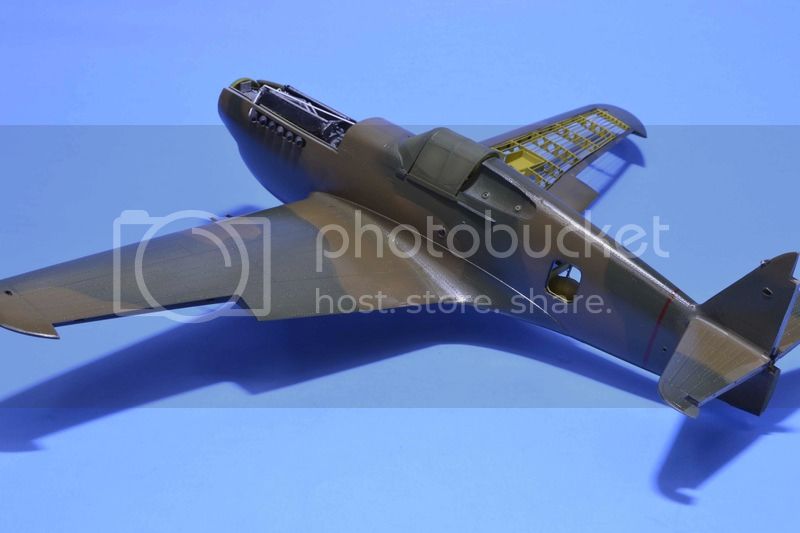
The wings are on and the fuselage is now completely painted.
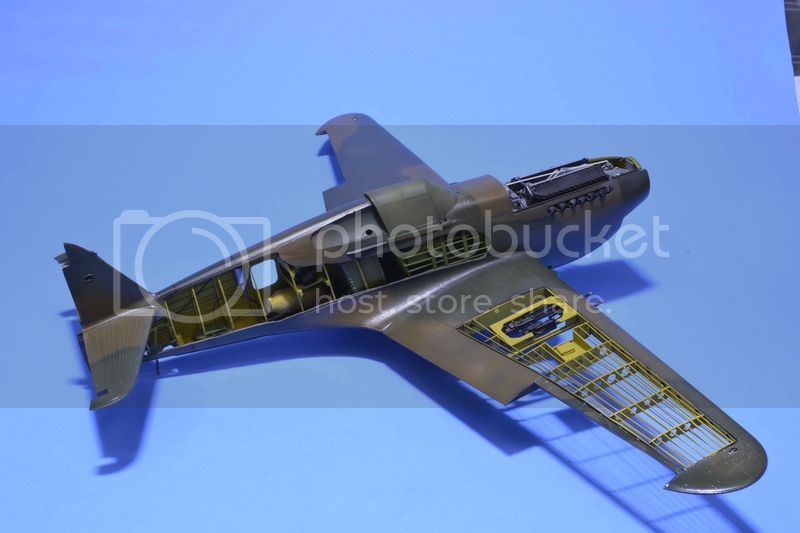
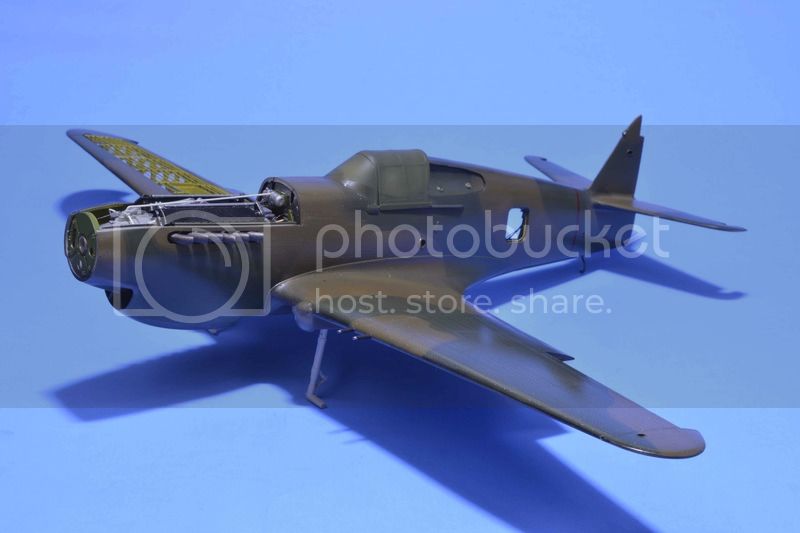
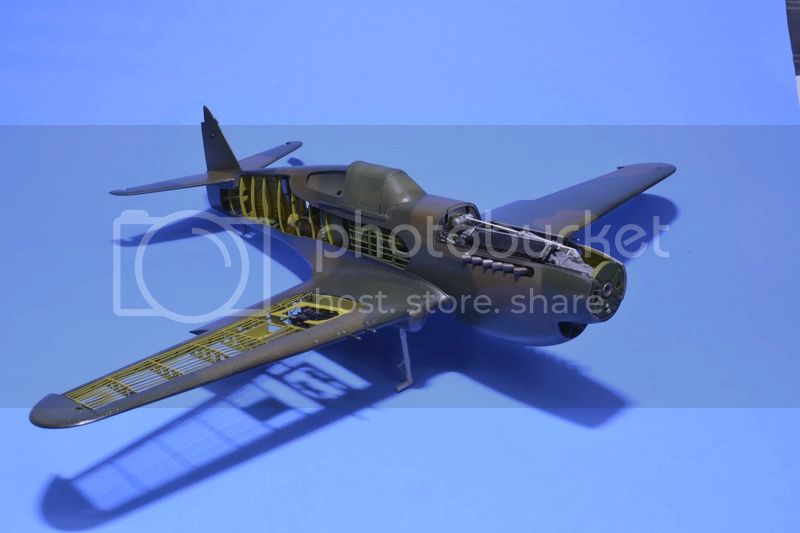
Decals are on and setting at the moment. There will be pictures soon.
All comments, critiques, and criticism are encouraged.
Joe
The wings are on and the fuselage is now completely painted.


Decals are on and setting at the moment. There will be pictures soon.
All comments, critiques, and criticism are encouraged.
Joe

fightnjoe

Joined: August 16, 2004
KitMaker: 603 posts
AeroScale: 565 posts

Posted: Tuesday, May 31, 2016 - 09:18 AM UTC
Well folks work continues on the P-40B.
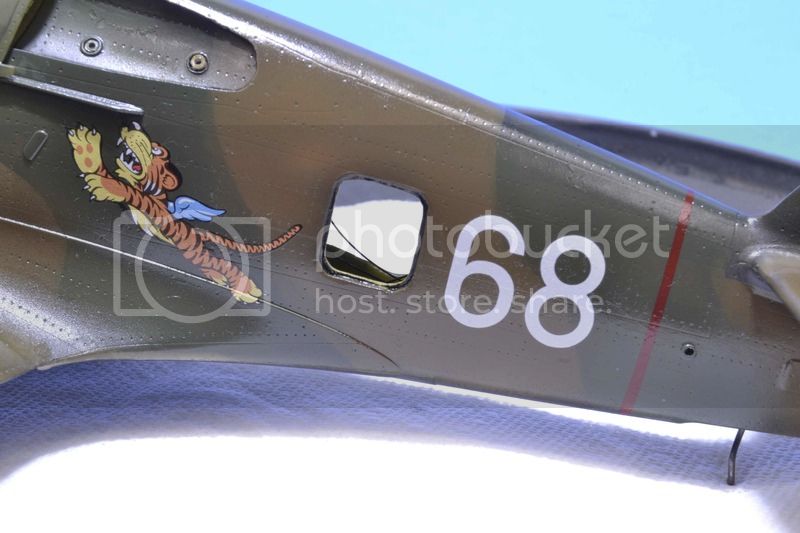
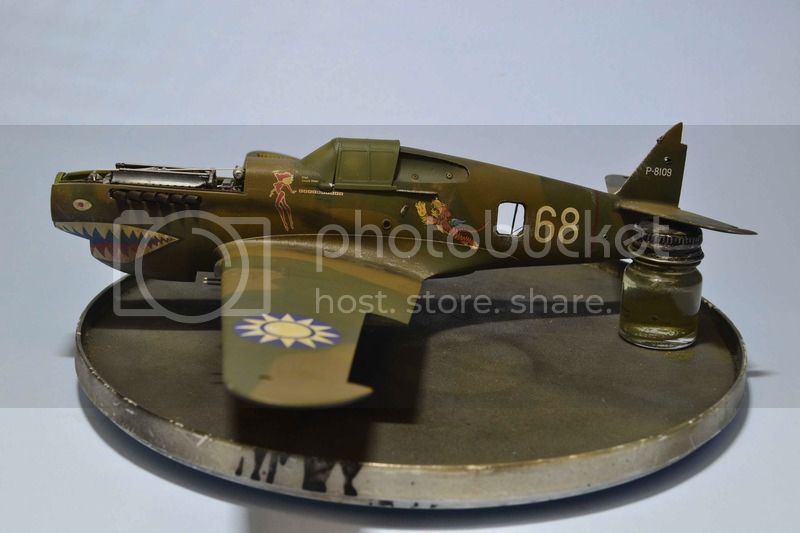
The decals are in place. I have glossed them over to prepare for the weathering stage. They went down a dream this time. The subject is "White 68".
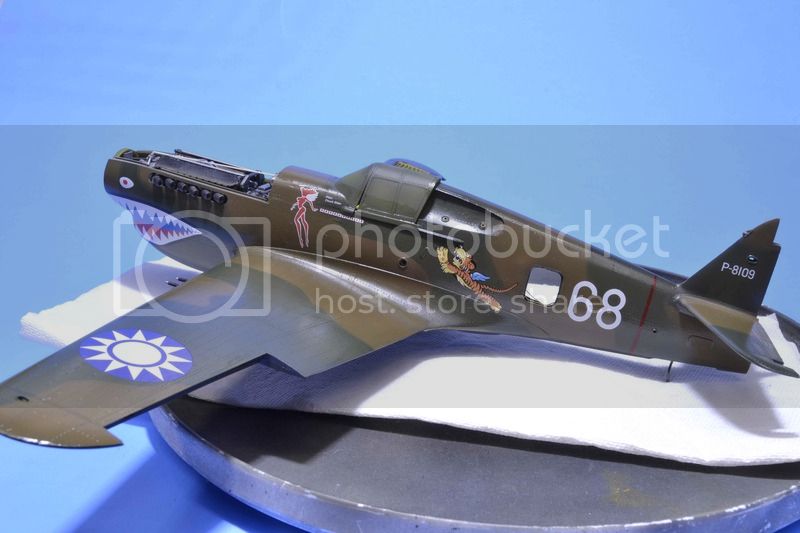
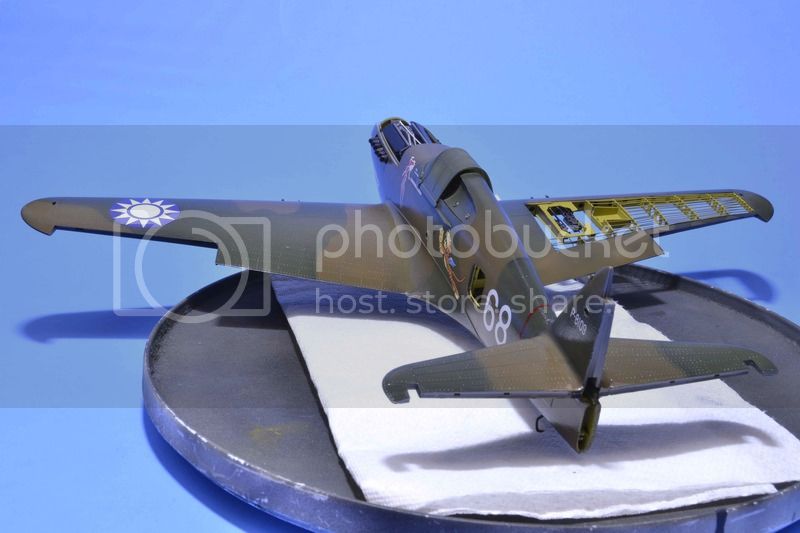
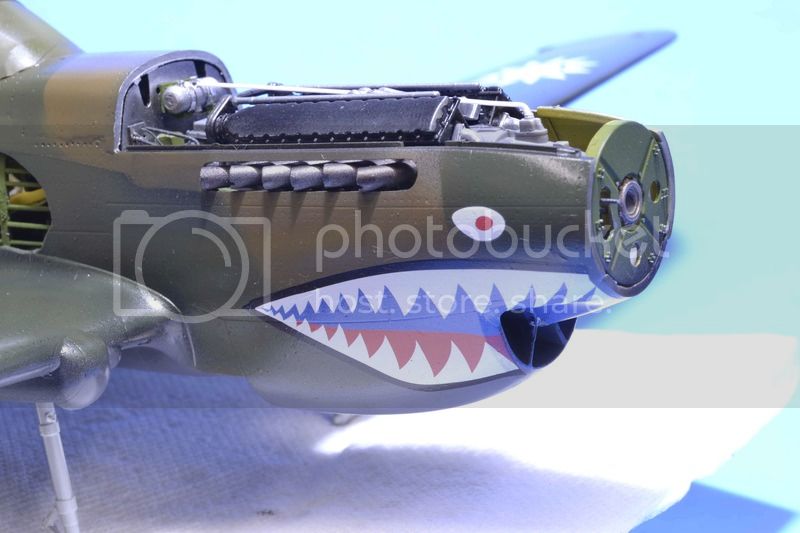
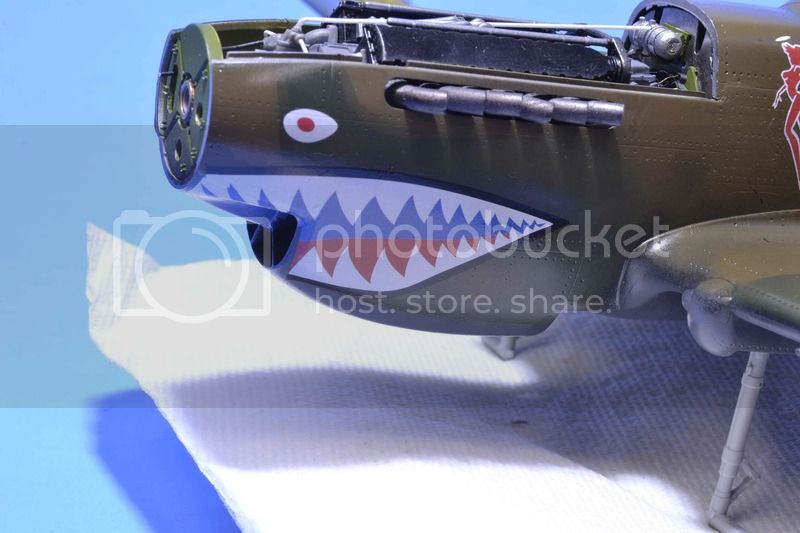
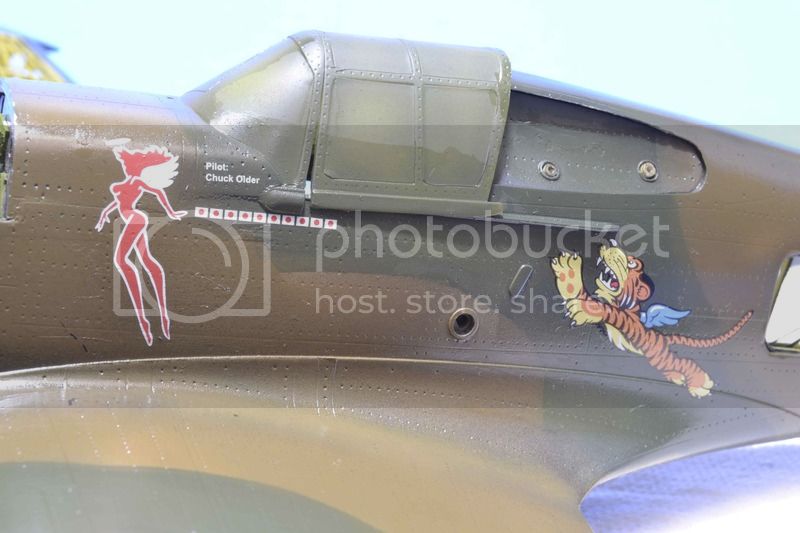
Next will be to start the weathering.
All comments, critiques, and criticism are encouraged.
Joe
The decals are in place. I have glossed them over to prepare for the weathering stage. They went down a dream this time. The subject is "White 68".


Next will be to start the weathering.
All comments, critiques, and criticism are encouraged.
Joe

fightnjoe

Joined: August 16, 2004
KitMaker: 603 posts
AeroScale: 565 posts

Posted: Sunday, June 05, 2016 - 09:04 AM UTC
The fun begins.
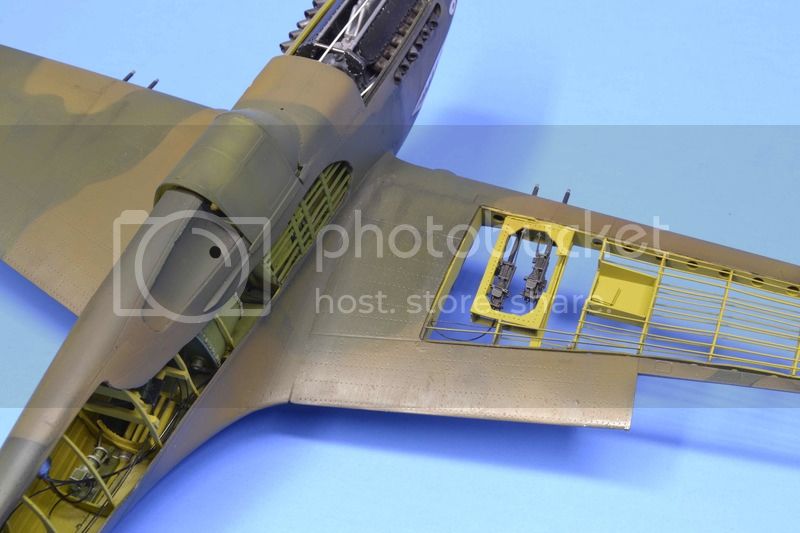
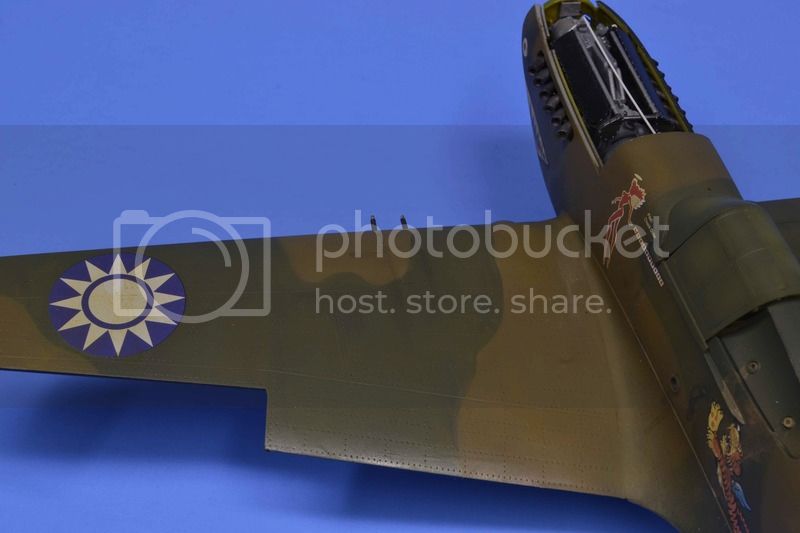
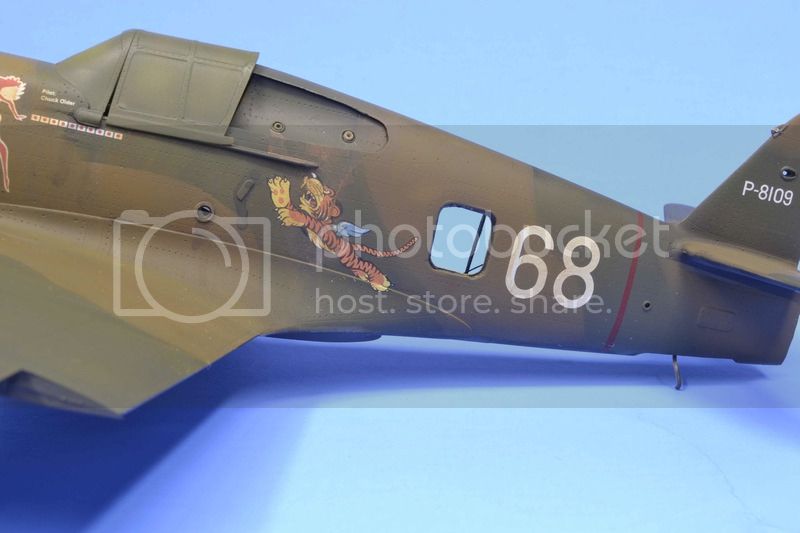
The process to bring the showroom aircraft to a well used aircraft has started. Using artist oils the process begins with a simple dot filter. Once the filter was blended I used mineral spirits to show some staining. This was in a very random pattern. I added some additional oils in places where I felt and had seen photos of the staining being heavier.
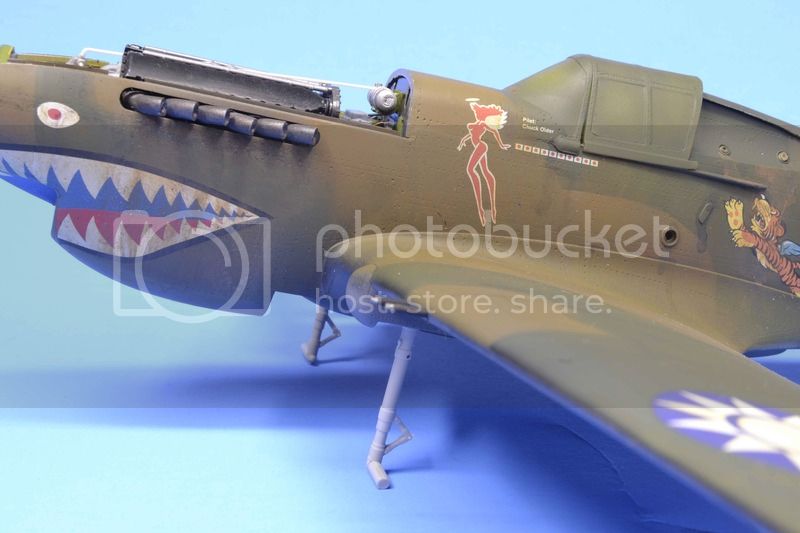
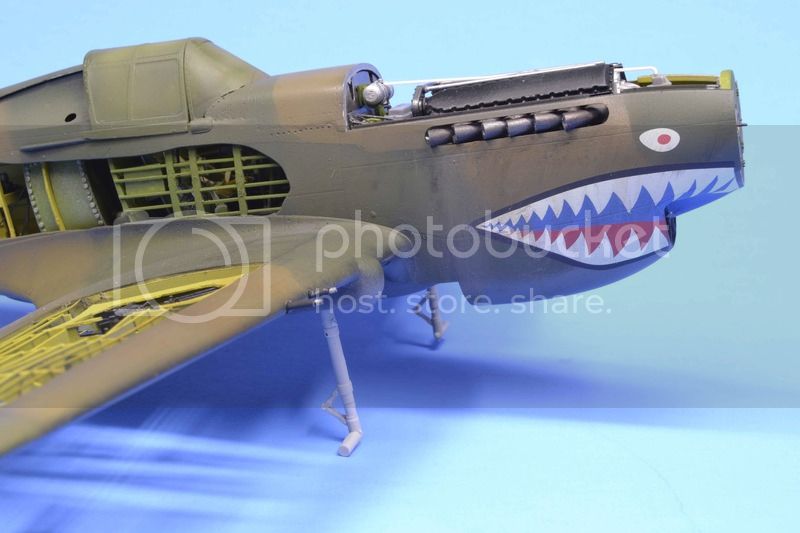
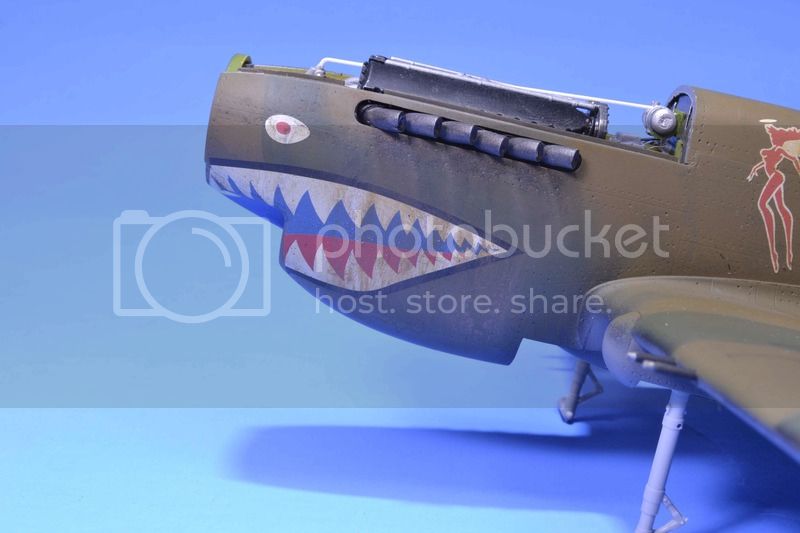
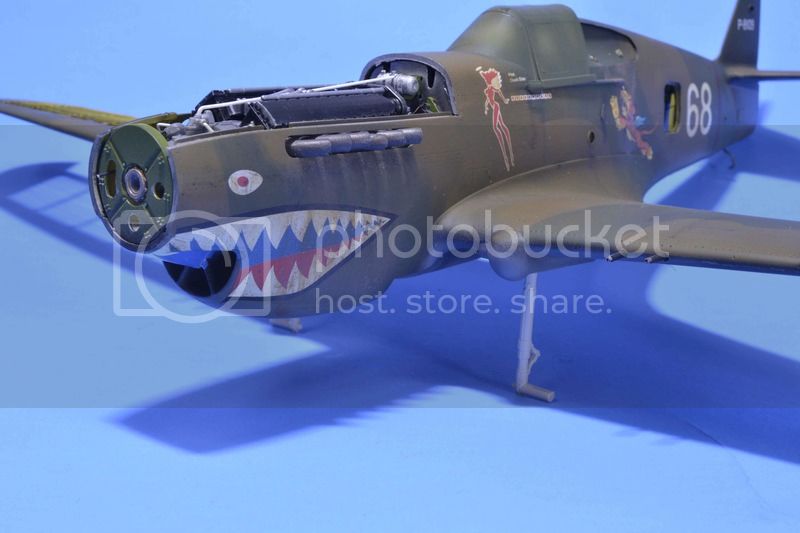
Phase one finished. Next will be phase two, chipping and additional weathering and staining.
All comments, critiques, and criticism are encouraged.
Joe
The process to bring the showroom aircraft to a well used aircraft has started. Using artist oils the process begins with a simple dot filter. Once the filter was blended I used mineral spirits to show some staining. This was in a very random pattern. I added some additional oils in places where I felt and had seen photos of the staining being heavier.


Phase one finished. Next will be phase two, chipping and additional weathering and staining.
All comments, critiques, and criticism are encouraged.
Joe

fightnjoe

Joined: August 16, 2004
KitMaker: 603 posts
AeroScale: 565 posts

Posted: Sunday, June 05, 2016 - 07:17 PM UTC
Phase two.
For this part of the process I went back through with some oils and also with an Acrylic pin wash to pic out specific spots. I did this after shooting a Flat Clear over the aircraft. I also dry brushed Flat Aluminium in areas that I had seen in photos were subject to wear and tear. I used several brushes from a fine point to a rather large soft brush.
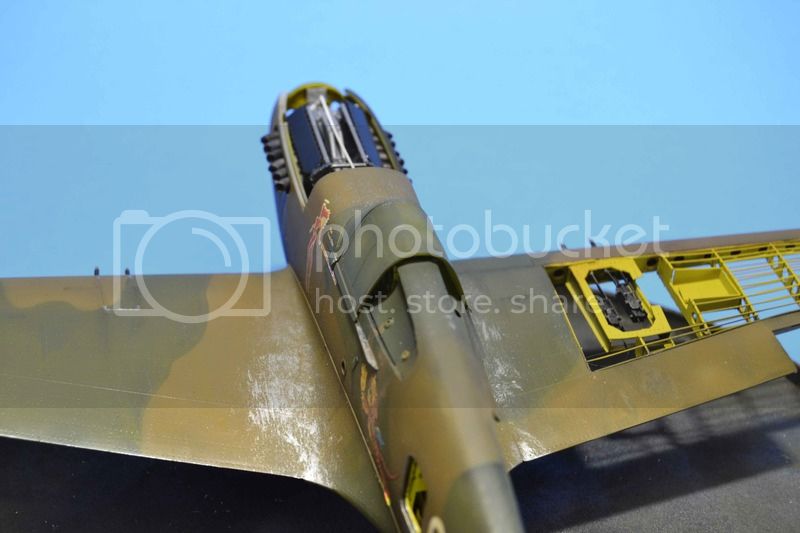
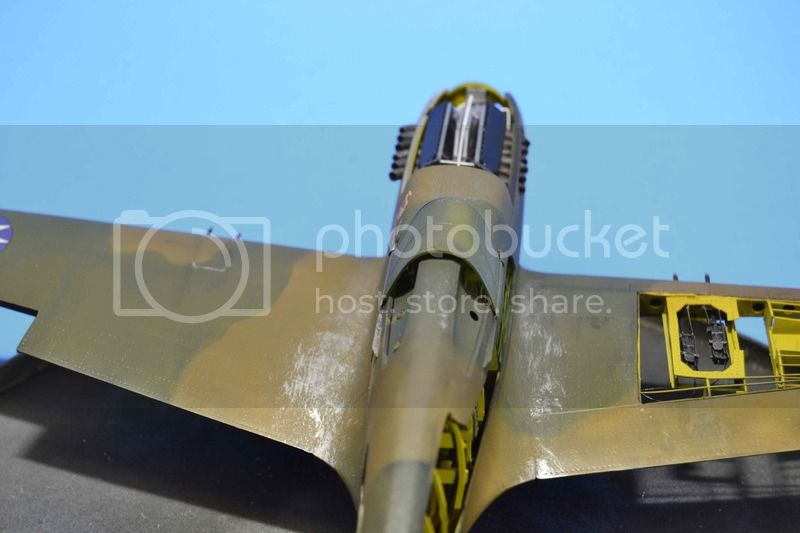
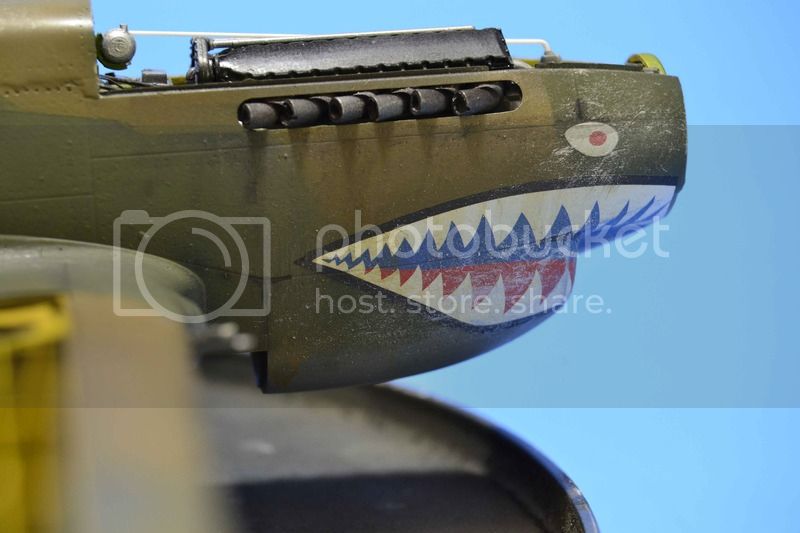
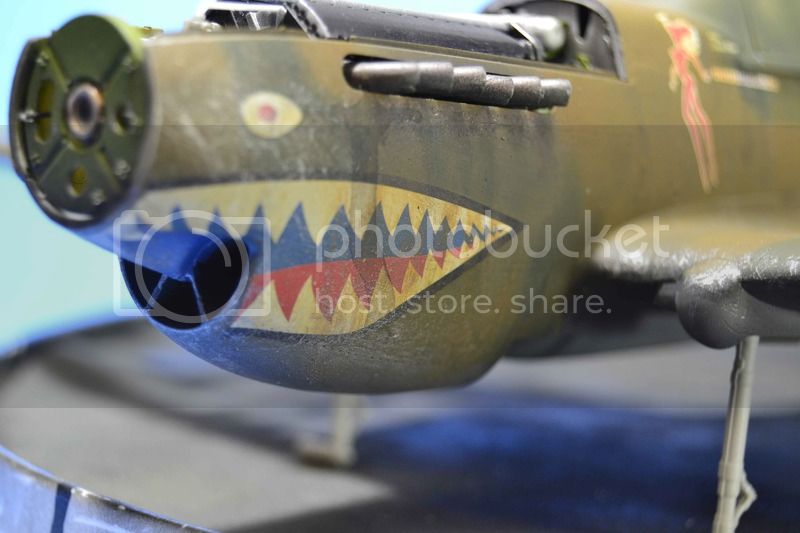
The next stage will be the small detail work in the landing gear and such.
All comments,critiques, and criticism are encouraged.
Joe
For this part of the process I went back through with some oils and also with an Acrylic pin wash to pic out specific spots. I did this after shooting a Flat Clear over the aircraft. I also dry brushed Flat Aluminium in areas that I had seen in photos were subject to wear and tear. I used several brushes from a fine point to a rather large soft brush.


The next stage will be the small detail work in the landing gear and such.
All comments,critiques, and criticism are encouraged.
Joe
Posted: Sunday, June 05, 2016 - 07:46 PM UTC
Joe,
Excellent interior you created. Glad you camouflaged the rear canopy cutout interiors - it seems many modelers still think they were painted an interior color.
Recently, I reviewed Dana Bell's Long-nosed P-40 book; if I'd remembered your project, I could have sent it to you.
Excellent interior you created. Glad you camouflaged the rear canopy cutout interiors - it seems many modelers still think they were painted an interior color.
Recently, I reviewed Dana Bell's Long-nosed P-40 book; if I'd remembered your project, I could have sent it to you.


fightnjoe

Joined: August 16, 2004
KitMaker: 603 posts
AeroScale: 565 posts

Posted: Wednesday, June 08, 2016 - 08:03 PM UTC
Quoted Text
Joe,
Excellent interior you created. Glad you camouflaged the rear canopy cutout interiors - it seems many modelers still think they were painted an interior color.
Recently, I reviewed Dana Bell's Long-nosed P-40 book; if I'd remembered your project, I could have sent it to you.
Many thanks. I have been thinking strongly about throwing my hat into the ring for the reviews here.
Joe

fightnjoe

Joined: August 16, 2004
KitMaker: 603 posts
AeroScale: 565 posts

Posted: Friday, June 10, 2016 - 09:13 AM UTC
Well folks the time has come to make the decision.
I am going to submit this to a magazine. With that in mind this will be the last update until I am told no or it is in print.
Now the update...
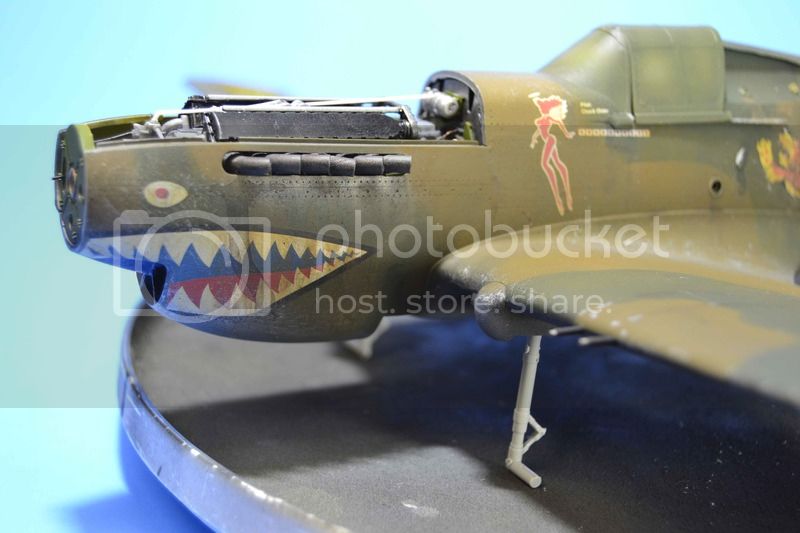
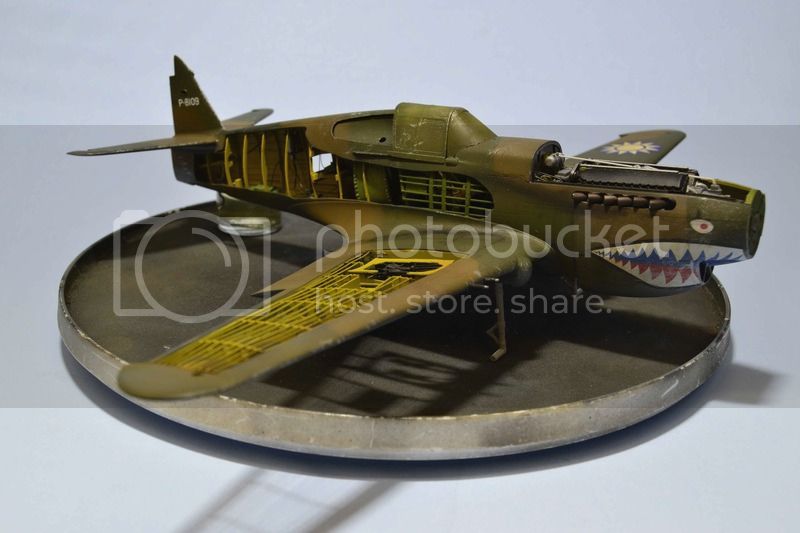
Continuing with the weathering pastels were added to show exhaust staining. I also added some on the exhaust pipes. I added some black pastels to the wing roots to try to tone down the look.
Pictures..........
Thank you all for following along.
All comments, critiques, and criticism are encouraged.
Joe
I am going to submit this to a magazine. With that in mind this will be the last update until I am told no or it is in print.
Now the update...
Continuing with the weathering pastels were added to show exhaust staining. I also added some on the exhaust pipes. I added some black pastels to the wing roots to try to tone down the look.
Pictures..........


Thank you all for following along.
All comments, critiques, and criticism are encouraged.
Joe
Posted: Friday, June 10, 2016 - 11:31 AM UTC
Hi Joe,
I love the stained and dirty look you've given the plane! Curious about the exhausts, though. Are the supposed to be some of them at different angles to the others?
I'm no P-40 expert and of course large pictures exaggerate details.
Gaz
I love the stained and dirty look you've given the plane! Curious about the exhausts, though. Are the supposed to be some of them at different angles to the others?
I'm no P-40 expert and of course large pictures exaggerate details.
Gaz

fightnjoe

Joined: August 16, 2004
KitMaker: 603 posts
AeroScale: 565 posts

Posted: Saturday, June 11, 2016 - 08:33 AM UTC
To be honest I screwed up. When I got the fuse together I noticed they were off and when I tried to get them straight again I made it slightly worse. I did however find some photos that had exhausts a bit out of whack. Mine is not too far off of the pic.
Joe
Joe
 |


