Revell 1/32nd scale Phantom
Texas, United States
Joined: May 27, 2009
KitMaker: 1,293 posts
AeroScale: 1,072 posts
Posted: Tuesday, January 26, 2016 - 11:54 PM UTC
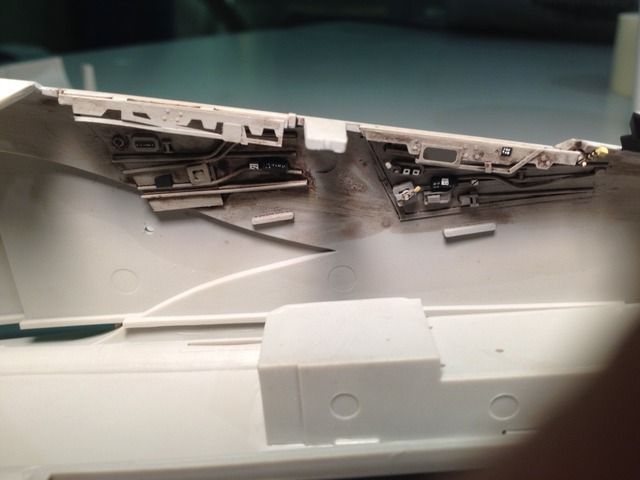
starting a 1/32nd scale Revell Phantom, this is it so far.

British Columbia, Canada
Joined: September 03, 2009
KitMaker: 6,965 posts
AeroScale: 6,247 posts
Posted: Wednesday, January 27, 2016 - 12:44 AM UTC
It's nice, but the wings don't whirl around. How are you going to deal with that?
When once you have tasted flight you will walk the Earth with your eyes turned skyward.
For there you have been, and there you will always long to return.
-Leonardo Da Vinci
Texas, United States
Joined: May 27, 2009
KitMaker: 1,293 posts
AeroScale: 1,072 posts
Posted: Wednesday, January 27, 2016 - 08:02 AM UTC
HA HA Jess I will be ok on the dark side for a build or two.
AussieReg
 Associate Editor
#007
Victoria, Australia
Joined: June 09, 2009
KitMaker: 8,156 posts
AeroScale: 3,756 posts
Posted: Wednesday, January 27, 2016 - 08:31 AM UTC
That office looks great Doug, very nice detail work!
Cheers, D
ON the bench
Revell 1/24 '53 Corvette (building as '54)
Revell 1/24 BMW 507 Coupe and Cabrio
Italeri 1/48 Me262 B-1a/U1 Nightfighter
Monogram 1/24 '57 Chevy Nomad
Dragon 1/350 USS Frank Knox DD-742
JPTRR
 Managing Editor
#051
Tennessee, United States
Joined: December 21, 2002
KitMaker: 7,772 posts
AeroScale: 3,175 posts
Posted: Wednesday, January 27, 2016 - 08:46 AM UTC
Hi Doug,
Looking good! Which 1/32 Revell "Double Ugly" is this?
Do I detect some Shep Paine scratch-'gizmology' on the cockpit sides?
That cockpit is beautiful! Painted or decals? And who needs to cage their AI, the pilot of GIB?

If they demand your loyalty, give them integrity; if they demand integrity, give them your loyalty.--Col John Boyd, USAF
“Any plan where you lose your hat is a bad plan.”
Texas, United States
Joined: May 27, 2009
KitMaker: 1,293 posts
AeroScale: 1,072 posts
Posted: Wednesday, January 27, 2016 - 10:15 PM UTC
Quoted Text
Hi Doug,
Looking good! Which 1/32 Revell "Double Ugly" is this?
Do I detect some Shep Paine scratch-'gizmology' on the cockpit sides?
That cockpit is beautiful! Painted or decals? And who needs to cage their AI, the pilot of GIB? 
Thanks, this is the F-4F a pretty new kit and really very good detail is included, I did do some extra bits here and there, the IP,s are stock with just paint, and for some reason the AI's are not the same from front to back so I am guessing the pilot needs to cage it as it is still wondering with the power up.

#424
Queensland, Australia
Joined: April 23, 2015
KitMaker: 4,648 posts
AeroScale: 1,938 posts
Posted: Wednesday, January 27, 2016 - 11:07 PM UTC
Very nice cockpit detailing. Will have to watch this one.
Gary
"Artillery adds dignity, to what would otherwise be an ugly brawl."
Frederick The Great
Joel_W
 Associate Editor
New York, United States
Joined: December 04, 2010
KitMaker: 11,666 posts
AeroScale: 7,410 posts
Posted: Thursday, January 28, 2016 - 02:13 AM UTC
Doug,
I'll be following along for sure. Your cockpit really looks quite good.
Joel
On my Workbench:
Monogram 1/24 scale 427 Shelby Cobra
Just Completed:
Beemax 1/24 scale BMW M3 E30 1992 Evolution II
Texas, United States
Joined: May 27, 2009
KitMaker: 1,293 posts
AeroScale: 1,072 posts
Posted: Tuesday, February 02, 2016 - 04:18 AM UTC
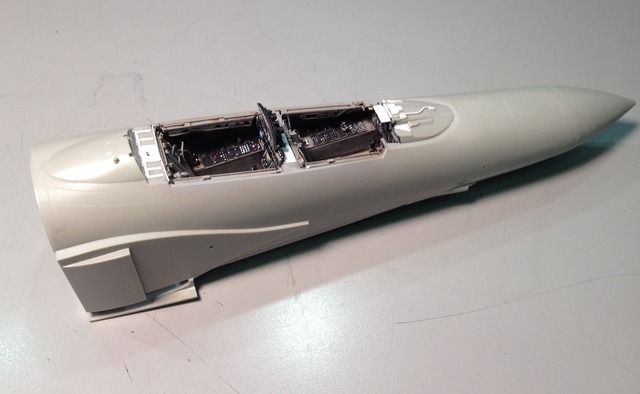
this kit goes together so well I am making a lot of progress

Texas, United States
Joined: May 27, 2009
KitMaker: 1,293 posts
AeroScale: 1,072 posts
Posted: Tuesday, February 02, 2016 - 04:20 AM UTC
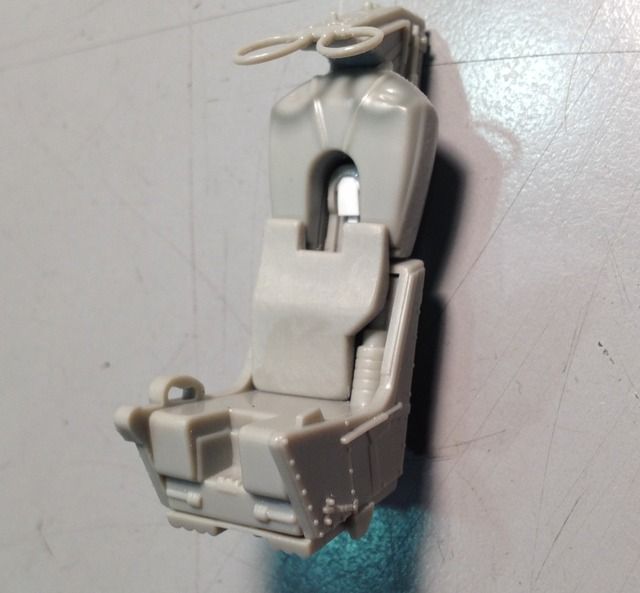
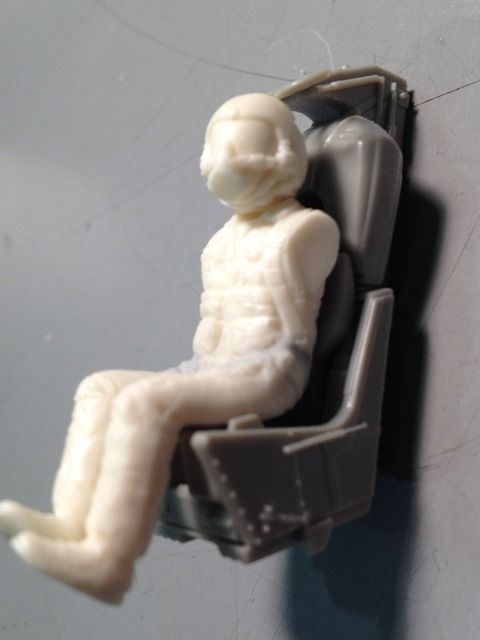
I wanted to do pilots in the cockpit so I cast up some copies of the Tamiya Phantom crew, they are being modified to fit the Revell kit.
Texas, United States
Joined: May 27, 2009
KitMaker: 1,293 posts
AeroScale: 1,072 posts
Posted: Thursday, February 04, 2016 - 04:36 AM UTC
tubes and wires for aft IP

JPTRR
 Managing Editor
#051
Tennessee, United States
Joined: December 21, 2002
KitMaker: 7,772 posts
AeroScale: 3,175 posts
Posted: Thursday, February 04, 2016 - 04:48 AM UTC
Okay Doug, now I am hankering for this model!

So big and so modern for my tastes, but you are making it look soooo good.

If they demand your loyalty, give them integrity; if they demand integrity, give them your loyalty.--Col John Boyd, USAF
“Any plan where you lose your hat is a bad plan.”

#424
Queensland, Australia
Joined: April 23, 2015
KitMaker: 4,648 posts
AeroScale: 1,938 posts
Posted: Thursday, February 04, 2016 - 11:27 AM UTC
Everything looks great so far! Love the guide rails for the ejection seats. It's such a huge bird in real life, I can't imagine ever finding space for it in this scale.
Gary
"Artillery adds dignity, to what would otherwise be an ugly brawl."
Frederick The Great
Joel_W
 Associate Editor
New York, United States
Joined: December 04, 2010
KitMaker: 11,666 posts
AeroScale: 7,410 posts
Posted: Saturday, February 06, 2016 - 11:05 PM UTC
Doug,
Your aft cockpit detailing looks fantastic. I've seen this kit in person, and I can attest to it being huge.
I've already sold off all my 1/48 scale 2nd generation jets as I plan on stepping down to 1/72 scale for those. They just take up way to much of what room I have left without adding more display space.
Joel
On my Workbench:
Monogram 1/24 scale 427 Shelby Cobra
Just Completed:
Beemax 1/24 scale BMW M3 E30 1992 Evolution II
Texas, United States
Joined: May 27, 2009
KitMaker: 1,293 posts
AeroScale: 1,072 posts
Posted: Sunday, February 07, 2016 - 05:42 AM UTC
Quoted Text
Everything looks great so far! Love the guide rails for the ejection seats. It's such a huge bird in real life, I can't imagine ever finding space for it in this scale.
Gary
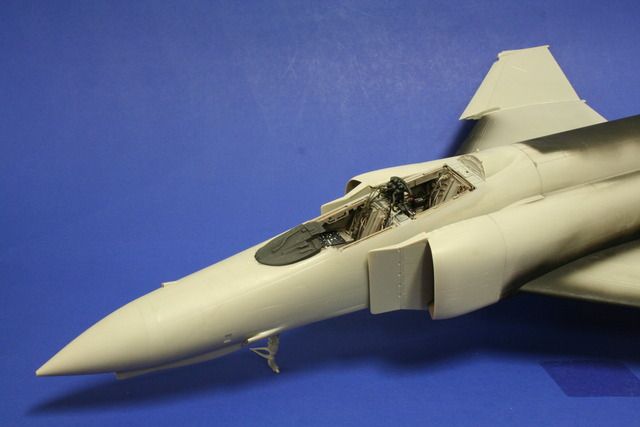
getting closer and I did test fit it in my largest case and it barely fits to your point Gary but it is so cool in this scale.
Texas, United States
Joined: May 27, 2009
KitMaker: 1,293 posts
AeroScale: 1,072 posts
Posted: Monday, February 08, 2016 - 07:58 AM UTC
for some reason the seats sit way too low in the cockpit so I added some short stilts to get the height correct.

British Columbia, Canada
Joined: September 03, 2009
KitMaker: 6,965 posts
AeroScale: 6,247 posts
Posted: Monday, February 08, 2016 - 11:17 PM UTC
Quoted Text
for some reason the seats sit way too low in the cockpit so I added some short stilts to get the height correct.

The "some reason" is that Revell unaccountably made the cockpit far too deep. Your solution is the simplest. The more accurate, and much more labour intensive solution is to saw about 2mm out of the sidewalls all around and then make it all fit seamlessly again. given that the error is almost invisible once the fuselage is buttoned up, hardly anyone bothers with that.
When once you have tasted flight you will walk the Earth with your eyes turned skyward.
For there you have been, and there you will always long to return.
-Leonardo Da Vinci
Texas, United States
Joined: May 27, 2009
KitMaker: 1,293 posts
AeroScale: 1,072 posts
Posted: Tuesday, February 09, 2016 - 01:51 AM UTC
Quoted Text
Quoted Text
for some reason the seats sit way too low in the cockpit so I added some short stilts to get the height correct.

The "some reason" is that Revell unaccountably made the cockpit far too deep. Your solution is the simplest. The more accurate, and much more labour intensive solution is to saw about 2mm out of the sidewalls all around and then make it all fit seamlessly again. given that the error is almost invisible once the fuselage is buttoned up, hardly anyone bothers with that.
Oh well that splains it and I agree that it will be easier to do it this way. more progress soon.
Texas, United States
Joined: May 27, 2009
KitMaker: 1,293 posts
AeroScale: 1,072 posts
Posted: Tuesday, February 09, 2016 - 06:58 AM UTC
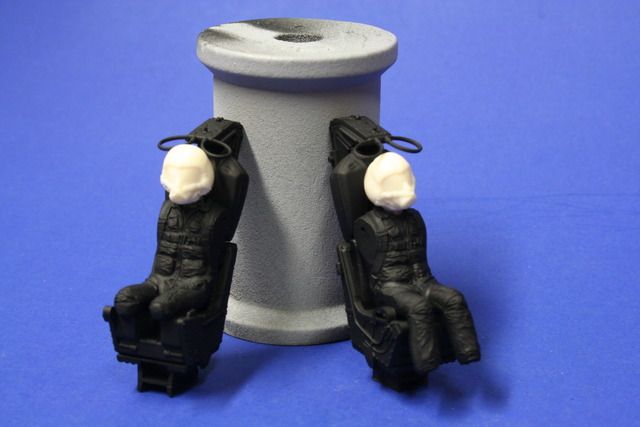
pilots and seats paint started, figured it would be easiest to just airbrush black for a good base coat.
Texas, United States
Joined: May 27, 2009
KitMaker: 1,293 posts
AeroScale: 1,072 posts
Posted: Wednesday, February 10, 2016 - 07:21 AM UTC
Joel_W
 Associate Editor
New York, United States
Joined: December 04, 2010
KitMaker: 11,666 posts
AeroScale: 7,410 posts
Posted: Thursday, February 11, 2016 - 12:22 AM UTC
Doug,
I'm really impressed on how you're modifying those figures.
Joel
On my Workbench:
Monogram 1/24 scale 427 Shelby Cobra
Just Completed:
Beemax 1/24 scale BMW M3 E30 1992 Evolution II

#424
Queensland, Australia
Joined: April 23, 2015
KitMaker: 4,648 posts
AeroScale: 1,938 posts
Posted: Thursday, February 11, 2016 - 02:24 AM UTC
Wow, that is an awesome way to modify figures! What did you use for the 'flesh'?
Gary
"Artillery adds dignity, to what would otherwise be an ugly brawl."
Frederick The Great
Texas, United States
Joined: May 27, 2009
KitMaker: 1,293 posts
AeroScale: 1,072 posts
Posted: Wednesday, February 24, 2016 - 04:38 AM UTC
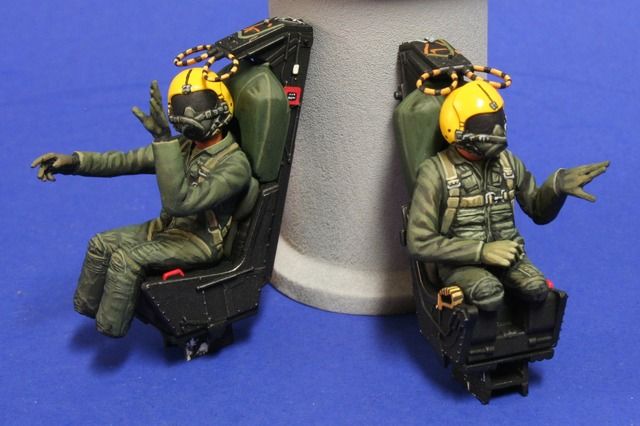
more work done on the pilots
Joel_W
 Associate Editor
New York, United States
Joined: December 04, 2010
KitMaker: 11,666 posts
AeroScale: 7,410 posts
Posted: Wednesday, February 24, 2016 - 10:07 PM UTC
Doug,
Outstanding, simply outstanding conversion work on those two figures.
Joel
On my Workbench:
Monogram 1/24 scale 427 Shelby Cobra
Just Completed:
Beemax 1/24 scale BMW M3 E30 1992 Evolution II
Texas, United States
Joined: May 27, 2009
KitMaker: 1,293 posts
AeroScale: 1,072 posts
Posted: Saturday, February 27, 2016 - 07:26 AM UTC
pilots done and ready to go into the cockpit, the O2 mask hoses are from guitar strings, perfect ribbing
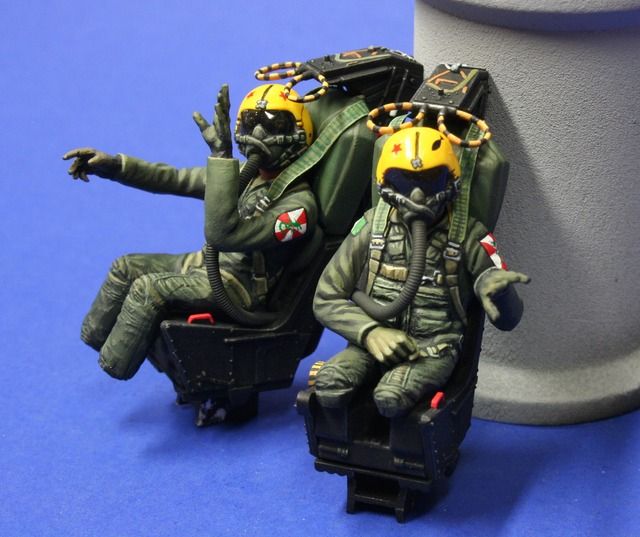
I put some clear epoxy on the visors to make them real glossy.
someone asked about my paint mix for the skin color on the necks , I use Reaper paint and for the flesh I used clotted red, white , and orange brown.


 So big and so modern for my tastes, but you are making it look soooo good.


