Welcome to the Dive Bomber Campaign!
The campaign will run from March 1, 2016 through August 31, 2016.
If you haven't signed up yet, or want to see the rules, go here.
Please post your initial and in-progress photos as well as campaign discussion in this thread. Please post your finished build photos in the campaign gallery.
Looking forward to some "straight down and bombs away" builds!
Michael
Air Campaigns
Want to start or join a group build? This is where to start.
Hosted by Frederick Boucher, Michael Satin
OFFICIAL: Dive Bomber Campaign
MichaelSatin
Campaigns Administrator
Colorado, United States
Joined: January 19, 2008
KitMaker: 3,909 posts
AeroScale: 2,904 posts
Joined: January 19, 2008
KitMaker: 3,909 posts
AeroScale: 2,904 posts
Posted: Monday, February 29, 2016 - 05:21 AM UTC
Posted: Tuesday, March 01, 2016 - 12:38 AM UTC
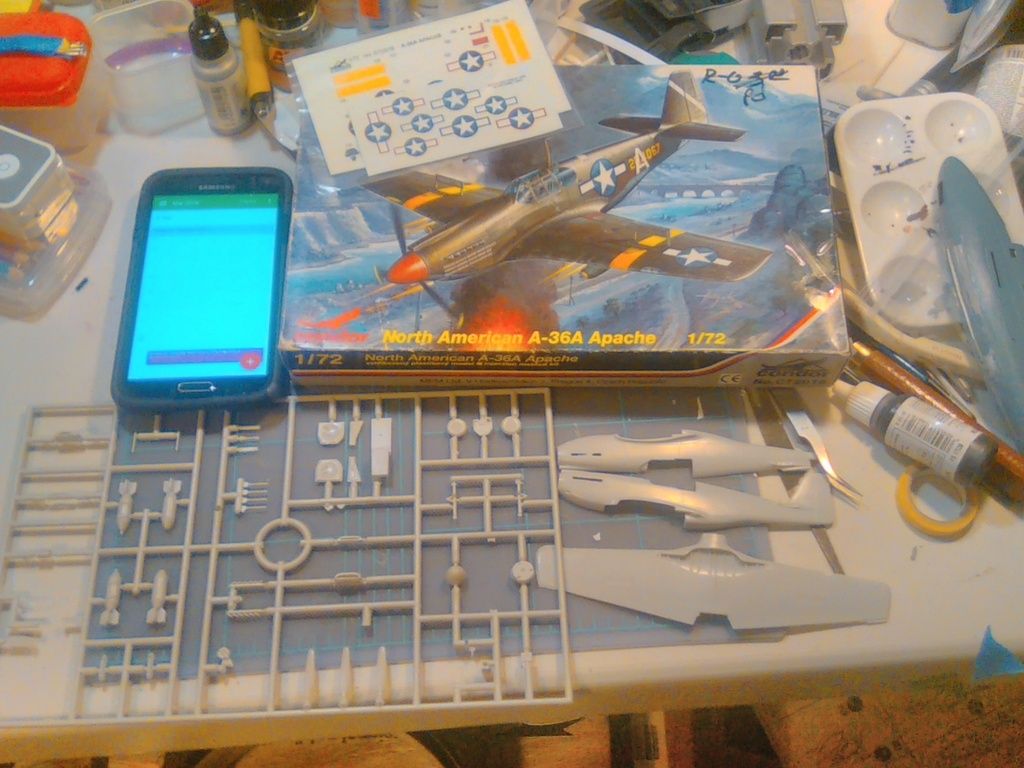
Well, it was a bit shy of March when I got the notice, but the kit was near the table. I took it out took a look and decided to stay with it. Just din't have the camera to take a start shot.
Posted: Tuesday, March 01, 2016 - 11:56 AM UTC
Posted: Saturday, March 05, 2016 - 03:16 PM UTC
Okay after being unable to make a choice regarding just what I wanted to build, I suddenly felt inspired to build the ProModeller SB2C-4 HellDiver. It has rudimentary etch for the wiring harness on the motor, dive brakes and a few other items. It has some interesting marking options and I have a complete set of stencils for it by the folks at AeroMaster. Here are a couple of the obligatory pics of the kit.
Posted: Wednesday, March 09, 2016 - 11:55 AM UTC
Well I've read a few online build logs that warn about the Accurate Miniatures version of this kit and how the instructions are ambiguous, ill written and missing out steps etc. But I've also found similar instances in the Revell instructions being ambiguous as well. The rear gunner's assembly clearly has an arrow that would appear to want you to mount it on the bomb bay roof it actually sits behind it.
This is an awkward assembly to build I found it best to assemble the components outside of the right fuselage half then insert it in and close up the fuselage halves to trap it in place while drying. I was warned to do this by one of the build logs to ensure a good fit of the various units in the fuselage when you close everything up. So I assembled the bomb bay, pilots bulkhead and the rear gunner's position before installing them into the right fuselage half gluing them in place and then trapping everything between the two halves. Letting it all dry overnight before painting and highlighting etc.
Looking into the rear gunner's position you realise it's obvious that the ammo cases for the 30 cal machine guns aren't complete so I added a couple of pieces of plasticard (the white pieces in the pic below) to give the impression of depth and being whole.
It works rather well and didn't require much work to get it to fit. With a coat of paint to blend it all in it should look fairly good. I've drilled out all the lightening holes in the gunners chair but I may still use the photo etch provided.
I've also read warnings about the undercarriage being flimsy when mounted and located, so I'll keep you up to date on my progress in that regard and what fixes I apply if any. If anyone else has some warnings about the assembly of the kit I'd like to hear about it forewarned is forearmed!
That's about as far as I've gotten so far but there'll be a little more work done tonight. Here are some pics to help describe what I mean. (Hopefully!)
Posted: Friday, March 11, 2016 - 02:48 PM UTC
Okay so things progress a little further with the Helldiver I've started painting the interior using Humbrol's (Hu 226) interior green. Not to sure if I like the colour but the paint sprayed beautifully and dried to a hard finish after 24 hours drying time. I toyed with the idea of using a black primer and spraying in the direction of falling light but I think with the way I've constructed the kit so far that that approach wouldn't work in this case.
So I decided to lighten some of the paint and dry brush those surfaces that get direct light to give the impression of shadowing. Darker paint in the interior lighter paint on those surfaces in direct light. A little hard to perceive under flash lighting but it looks okay. I then detail painted the interior and dry brushed the instrument panel, radio gear and radar display in the gunners position. I'm still building the gunners flexible gun mount and that's been given a similar treatment as the cockpit and wheel wells.
I've still got to apply a wash to add grime and more shadowing but it should blend everything into a homogenous whole. This is the first time I've applied this technique to an interior but I think I can refine it quite well with a little more practice. I think I'll save the black undercoat for models of 1/32 scale and larger.
While I was building the life raft housing I was pondering on ways of producing the obviously missing life raft. Some had used aluminium furnace tape to produce a realistic rolled bundle but it required painting and washes etc. Thinking a little out of the box I decided to buy some coloured polymer clay that had, to my eye the colour I was looking for, roll some out and create my life raft. Then oven bake it till it goes hard and et viola instant raft that just needs a wash and has a rubbery look to it.
I'll let you know how I get on as I've still got to refine just how I'm going to produce it but rolling it out with a rolling pin and then folding and rolling it up is where I'm going to start.
Posted: Saturday, March 12, 2016 - 02:44 PM UTC
Okay so a little further on, I've got the fuselage buttoned up and now I'm working on getting the wings attached. I did find that the bombay doors needed a little help with gluing in and being wide enough for the bomb displacement gear. The cockpit because of the way I assembled it, in the right hand fuselage half, is a little to the right of centre. I therefore needed to notch a couple of the brackets, nothing major just a small recess to allow them to sit properly. I'll leave it braced till the following day to ensure the glue has completely dried.
With the wings it pays to glue and tape the leading edge first as the trailing edge around the dive brakes need to be aligned properly. I used quite a bit of Tamiya masking tape to ensure the edges lined up properly. As can be seen in the accompanying pics.
The tail planes by comparison went together easily but a word of caution from the instructions, the trim tab is only on the left hand side of the tail. And there is only one of between the two of them.
Posted: Thursday, March 17, 2016 - 04:30 PM UTC
Another update for you lot.
The tail planes are on it looks more like an aeroplane now. It also gives a better perspective of just how "tubby" the SB2C actually is. It's almost a perfect square in basic outline. It appears to me to need to be stretched, the fuselage looks just way too short for the wings. It was terribly underpowered in its first edition. The replacement R2600 engine was much more reliable and powerful. They increased the tail area TWICE to correct for directional instability. We all know that eventually the defects were corrected and it served with distinction in the last two years of the war but it never managed to escape the initial bad feelings it engendered amongst its crews. Here's a brief synopsis I stole verbatim from wikipedia (because if it's on Wiki it must be true!).
"The model XSB2C-1 prototype initially suffered teething problems connected to its R-2600 engine and three-bladed propeller; further concerns included structural weaknesses, poor handling, directional instability and bad stall characteristics. In 1939, a student brought a model of the new Curtiss XSB2C-1 to the MIT wind tunnel. Professor Emeritus of Aeronautical Engineering Otto C. Koppen was quoted as saying, "if they build more than one of these, they are crazy". He was referring to controllability issues with the small vertical tail.
The first prototype made its maiden flight on 18 December 1940. It crashed on 8 February 1941 when its engine failed on approach, but Curtiss was asked to rebuild it. The fuselage was lengthened and a larger tail was fitted, while an autopilot was fitted as a result of the aircraft's poor stability. The revised prototype flew again on 20 October 1941, but was destroyed when its wing failed during diving tests on 21 December 1941.
Large-scale production had already been ordered on 29 November 1940, but a large number of modifications were specified for the production model. The size of the fin and rudder was enlarged, fuel capacity was increased, self-sealing fuel tanks were added and the fixed armament was doubled to four 0.50 in (12.7 mm) machine guns in the wings, compared with the prototype's two cowling guns. The SB2C-2 was built with larger fuel tanks, improving its range considerably.
The program suffered so many delays that the Grumman TBF Avenger entered service before the Helldiver, even though the Avenger had begun its development two years later. Nevertheless, production tempo accelerated with production at Columbus, Ohio and two Canadian factories: Fairchild Aircraft Ltd. (Canada), which produced 300 (under the designations XSBF-l, SBF-l, SBF-3 and SBF-4E), and Canadian Car and Foundry, which built 894 (designated SBW-l, SBW-3, SBW-4, SBW-4E and SBW-5), these models being respectively equivalent to their Curtiss-built counterparts. A total of 7,140 SB2Cs were produced in World War II."
I've got the engine in place and the ignition harness attached. I've put a burnt umber wash over it which of course removed the gunmetal enamel paint I'd painted the harness with. Note to self protect the harness with Klear or use acrylic as a wash over enamels. Actually I prefer to use artist's oils as a wash so I usually use acrylics for the base colour. The engine was painted flat aluminium, however I used enamel to paint the harness as I tend to use enamels for detail painting. No biggie really just need to repaint the harness.
While I was fighting the etch for the gunners flexible mount I broke off the long thin plastic support at the front so I took the opportunity to replace it with some of the thin brass rod I got the other day. It will be a lot stronger than the brittle plastic and perhaps a better scale representation of the actual rod? Anyways here are the usual progress pics.
Posted: Thursday, March 17, 2016 - 11:56 PM UTC
Looking really nice Chris!
Posted: Friday, March 18, 2016 - 01:11 AM UTC
Well I was trying new stuff and making progress.
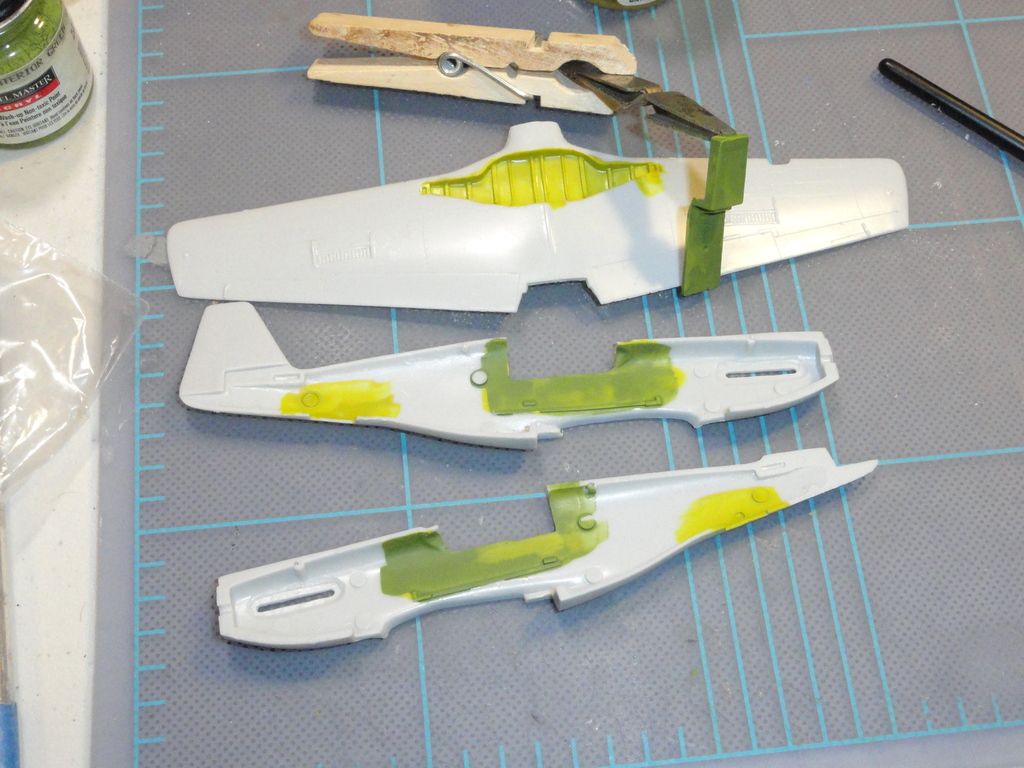
First time with Mr. Color Leveling Thinner. Poured out a little Mr. Color Interior Green, added a drop or tow of leveling thinner and tried to brush it on the insides of my A-36. Too yellow for the cockpit but it worked out well. Let it dry and tried to cover the cockpit with MM interior green, didn't work so well. So Then I decided I'd work on the seat. No seat. Don't think I did that, so it must have been a previous owner.... So now I've got to rustle one up...
Posted: Saturday, March 19, 2016 - 06:44 AM UTC
Cheers Jeff still working on the interior, update to follow.
My pictures should improve immensely as I'm about to invest an obscene amount of money in a DSLR (does video as well as stills so my wife can make video of her making soap), macro lens, ring flash etc etc. Managed to combine her wants and mine in one camera! (LOL lucky me!)
So we can now expect video as well as razor sharp stills ..... once I've learned how to drive it of course! Been wanting to expand my still and video making capabilities so I can post more comprehensive pics, video than I have in the past.
Wish me luck gentlemen as this is another learning curve for me!
Posted: Saturday, March 19, 2016 - 09:44 AM UTC
Some more progress with the interior I've got the pilot's seat installed and the rear flexible mount guns attached. I've still got to touch up the gun assembly and cover it in a wash to highlight the cooling holes cocking handles etc. I've also yet to paint the wooden handles and the optical sight. I may possibly add some wires if I think I can do it without popping the guns off their mount. The flash has also highlighted the fact I've missed some wash on the cockpit floor which I have since remedied. I'll also look at finding some .30 cal ammo belts as it looks really wrong without them.
Here are some pics to accompany the text and hopefully show you what I'm blathering on about.
Posted: Sunday, March 20, 2016 - 01:25 PM UTC
But wait there's more! Okay so I'm getting down to brass tacks .... well almost. I've got the final painting on the engine bay done and the cowl on. I've painted the bombs and swing gear and assembled them. They're just sitting in place in the pic, I've got a little weathering to do first. Now it's starting to come down to which one do I choose to represent? Overall glossy sea blue or do I go for one of the tri color schemes? Glossy sea blue is obviously easier to paint, but the tri colour schemes may be more interesting. I'll put the versions up and we'll see what public opinion is if any.
Posted: Sunday, March 20, 2016 - 01:51 PM UTC
Tricolour, very interesting scheme. This build is coming along very nicely.
Cheers, D
Cheers, D
Posted: Sunday, March 20, 2016 - 02:01 PM UTC
Hi D thanks .... yes I thought you might think that. Going back through the instructions I found three more schemes two more tri colour and another all glossy sea blue. I guess I'll see which one speaks to me as it were. Whilst waiting to see if we have more opinions lol.
Kilo_Uniform
Gauteng, South Africa
Joined: July 03, 2015
KitMaker: 280 posts
AeroScale: 141 posts
Joined: July 03, 2015
KitMaker: 280 posts
AeroScale: 141 posts
Posted: Sunday, March 20, 2016 - 02:58 PM UTC
Hi Chris,
Awesome work on the HellDiver! Looking forward to the next installment.
Regards,
Kobus
Awesome work on the HellDiver! Looking forward to the next installment.
Regards,
Kobus
Posted: Monday, March 21, 2016 - 03:58 AM UTC
Thanks Kobus! Probably another one tonight as I'm filling seams and getting her ready for her paint acheme .... yet to be decided. But I am leaning towards one scheme.
SHAKY962
Buenos Aires, Argentina
Joined: May 21, 2012
KitMaker: 765 posts
AeroScale: 316 posts
Joined: May 21, 2012
KitMaker: 765 posts
AeroScale: 316 posts
Posted: Tuesday, March 22, 2016 - 05:10 PM UTC
I don´t see in the list the Il-2. Let me know its included in this GB
klimmer
Ontario, Canada
Joined: May 16, 2003
KitMaker: 250 posts
AeroScale: 207 posts
Joined: May 16, 2003
KitMaker: 250 posts
AeroScale: 207 posts
Posted: Wednesday, March 23, 2016 - 03:05 AM UTC
Hi Everyone,
Some very nice looking builds happening here.
I would like to join the fun with the following build.
Accurate Miniatures TBF-1C Avenger in 1/48th scale
Some very nice looking builds happening here.
I would like to join the fun with the following build.
Accurate Miniatures TBF-1C Avenger in 1/48th scale
Posted: Thursday, March 24, 2016 - 01:03 PM UTC
Well I've been having a filling good time! Working on the seams, sanding and replacing lost detail.
Got her more or less ready for undercoating and highlighting of the panel lines.
Posted: Thursday, March 24, 2016 - 04:06 PM UTC
I've got the polymer clay all sorted for the life raft, it's been cured in the oven and can now be cut or sawn as necessary. I've cut it to size and filed it down to make a flush fit. Here are a couple of pics to illustrate what I mean.
Removed by original poster on 04/04/16 - 00:30:37 (GMT).
Removed by original poster on 04/05/16 - 17:52:20 (GMT).
modelguy2
Ohio, United States
Joined: March 09, 2002
KitMaker: 818 posts
AeroScale: 137 posts
Joined: March 09, 2002
KitMaker: 818 posts
AeroScale: 137 posts
Posted: Thursday, April 07, 2016 - 11:12 PM UTC
I'm in!
Posted: Friday, April 08, 2016 - 12:04 AM UTC
Oh, now I've got to get back to work. I got a new seat in for John over at Roll Models, so no excuses..