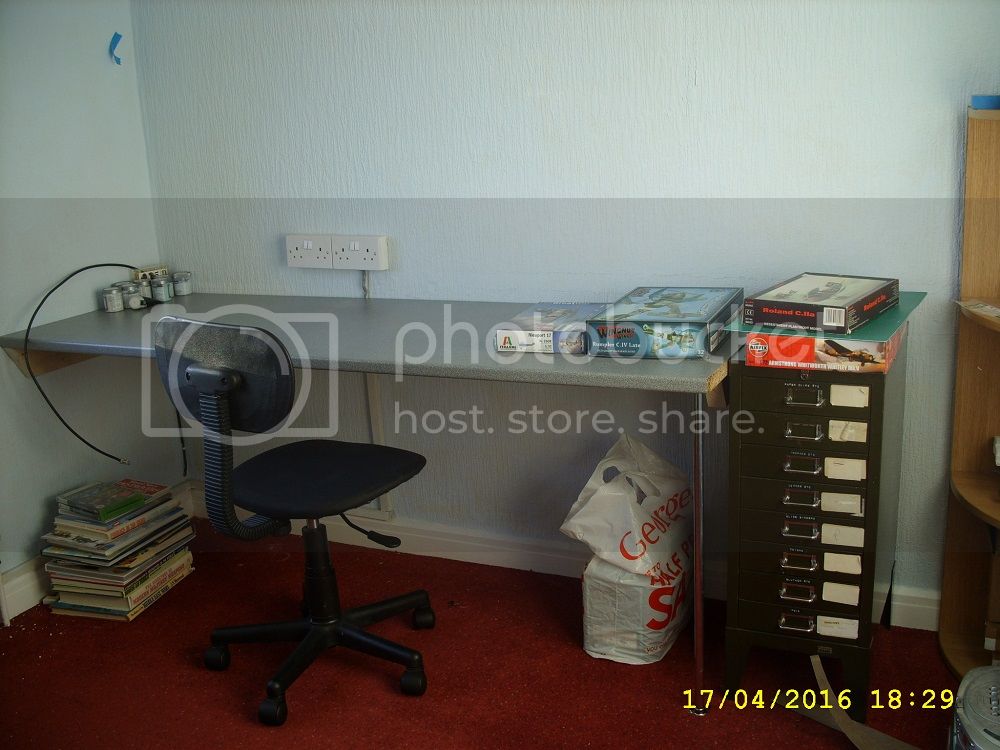
Well after a few months of not being able to do much work on any models, I finally have my new Mancave to a point where I can actually start building something. Still needs some finishing, but I have a sturdy desk and that;s the important thing. A few prints (aircraft and of course SF movie poster) will really make it feel like home.
As you can see I have a few things already waiting on the bench.
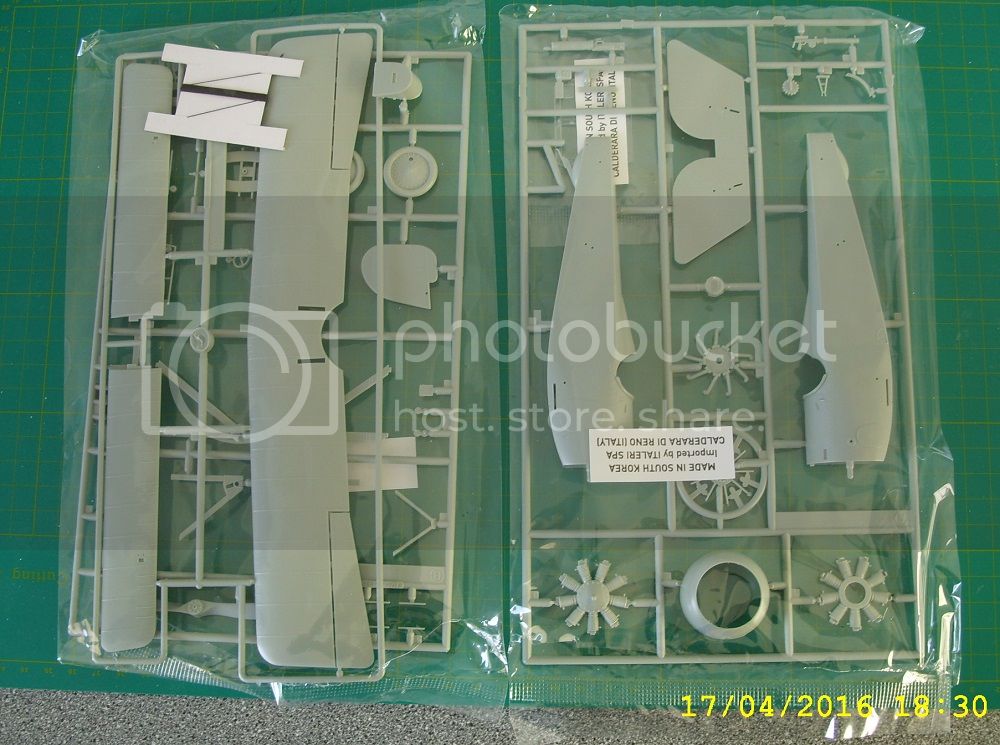
Along with continuing work on the Whitley I'm also going to start on Italeri's 1/32 Nieuport 17. It's a rebox of the Academy/Hobbycraft kit but with MUCH better decals. This is mostly going to be a trial run before I move onto the WNW Rumpler. I want to try out some advanced finishing techniques and a rig and a cheap simple kit like this is perfect for that.
The kit provides some sort of cotton like material for a rig, but I'm going to ditch that in favor of elastic thread. I'll find a use for it on armour builds.
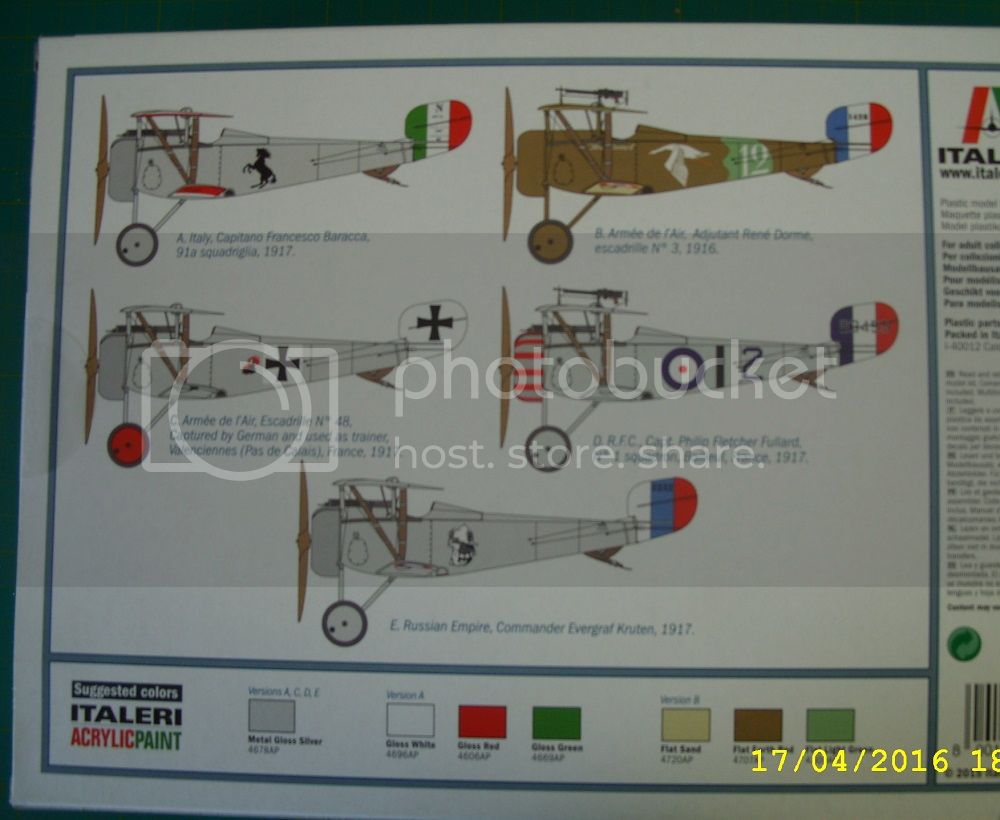
What really sets this kit apart from the Academy boxing are the decals. Beautifully printed and 5 choices:
-Capitano Francesco Baracca, 91a Squadraglia 1917.
-Adjutant Rene Dorme, Escradrille No.3 1916.
-A captured N.17 used a trainer by Jagdstaffelschule 1 at Valenciennes 1917.
-Captain Philip Fletcher Fullard, No. Squadron RFC 1917.
-Commander Evergraf Kruten, Russian Empire 1917.
Given the quality and attractive schemes It's hard to pick one, but I am thinking of finishing it as Barraca's aircraft. The Italian tricolor painted on the bottoms of the wings certainly makes for a very colourful model. Given how cheap the Academy kit can be found for, I might even pick a couple up to build as Fullard and Dorme's machines at some point.
I don't want to spend too much time fussing over details. It has weak points but I'm interested in getting it finished. One thing I have done however is to build up the missing internal structure with plastic strip and rod. A quick job that took a few minutes.
Just need to paint this up now. Not sure however what colour the interior would be. With the outer fuselage being aluminium doped, would the aluminium show through the fabric or would it be the traditional pale beige of bleached linen? And was the upper fuselage around the cockpit unpainted ply or aluminium?
Any help would be appreciated.
Stephen
Early Aviation
Discuss World War I and the early years of aviation thru 1934.
Hosted by Jim Starkweather
1/32 Nieuport 17
Posted: Sunday, April 17, 2016 - 09:17 PM UTC
Jessie_C
British Columbia, Canada
Joined: September 03, 2009
KitMaker: 6,965 posts
AeroScale: 6,247 posts
Joined: September 03, 2009
KitMaker: 6,965 posts
AeroScale: 6,247 posts
Posted: Monday, April 18, 2016 - 01:19 AM UTC
According to this truly phenomenal 3D rendering the inside bits of a Nieuport 17 are wooden slats steamed and bent to shape.
There's a resin set available (A look into the parts thereof.)
Posted: Monday, April 18, 2016 - 01:47 AM UTC
Quoted Text
According to this truly phenomenal 3D rendering the inside bits of a Nieuport 17 are wooden slats steamed and bent to shape.
There's a resin set available (A look into the parts thereof.)
Thanks Jessie, those links will be a big help. As long as I can fill the cockpit with what look like should be there I'll be happy.
A new tooling is long overdue, maybe WNW will treat us eventually. Have to confess to being a fan of the Nieuport, it's an elegant and almost fragile looking design. Like the Spitfire it doesn't look like a machine built for war, but for flying around for fun.
OEFFAG_153
Västra Götaland, Sweden
Joined: February 19, 2010
KitMaker: 1,473 posts
AeroScale: 1,450 posts
Joined: February 19, 2010
KitMaker: 1,473 posts
AeroScale: 1,450 posts
Posted: Monday, April 18, 2016 - 12:28 PM UTC
Hi Stephen,
Those decals look really nice. Considering the price, I might consider getting this boxing for the decals alone (I have two Nie17 as hangar queens at the moment).
If you like the Nie series, you might want to have a look at Special Hobbys Nie 11 and 16 in 1:32. Both are very nice kits!
Cheers
/Mikael
Posted: Monday, April 18, 2016 - 08:53 PM UTC
Thanks Mikael, I had completely forgotten that Special Hobby did 1/32. Just had a quick look and they have some interesting kits. The Morane and Bristol M1 monoplanes are very tempting!
Posted: Tuesday, April 19, 2016 - 01:36 AM UTC
Quoted Text
Thanks Mikael, I had completely forgotten that Special Hobby did 1/32. Just had a quick look and they have some interesting kits. The Morane and Bristol M1 monoplanes are very tempting!
Hi Stephen
Nice start. (And I wish I could boast such an uncluttered workshop - mine's like a bomb-site! )
Special Hobby's Bristol M.1C is a real gem! I bought one a while back, but amid the deluge of samples at the time, I never got a chance to review it. It keeps nagging at the back of my mind "Build me! Build me!"
All the best
Rowan
Posted: Tuesday, April 19, 2016 - 01:59 AM UTC
Hi Rowan,
My desk remained uncluttered for about a night! Currentylly covered in the Nieuports sprues, parts, packets of plastic strop, glue and some reference books. The other corner of the room is crammed with packing boxes and a new door we still need to hang!
I'll keep my eyes open for the Bristol. I can see myself really getting into these large scale WW1 kits.
Posted: Wednesday, April 20, 2016 - 01:21 AM UTC
A little more work done tonight.
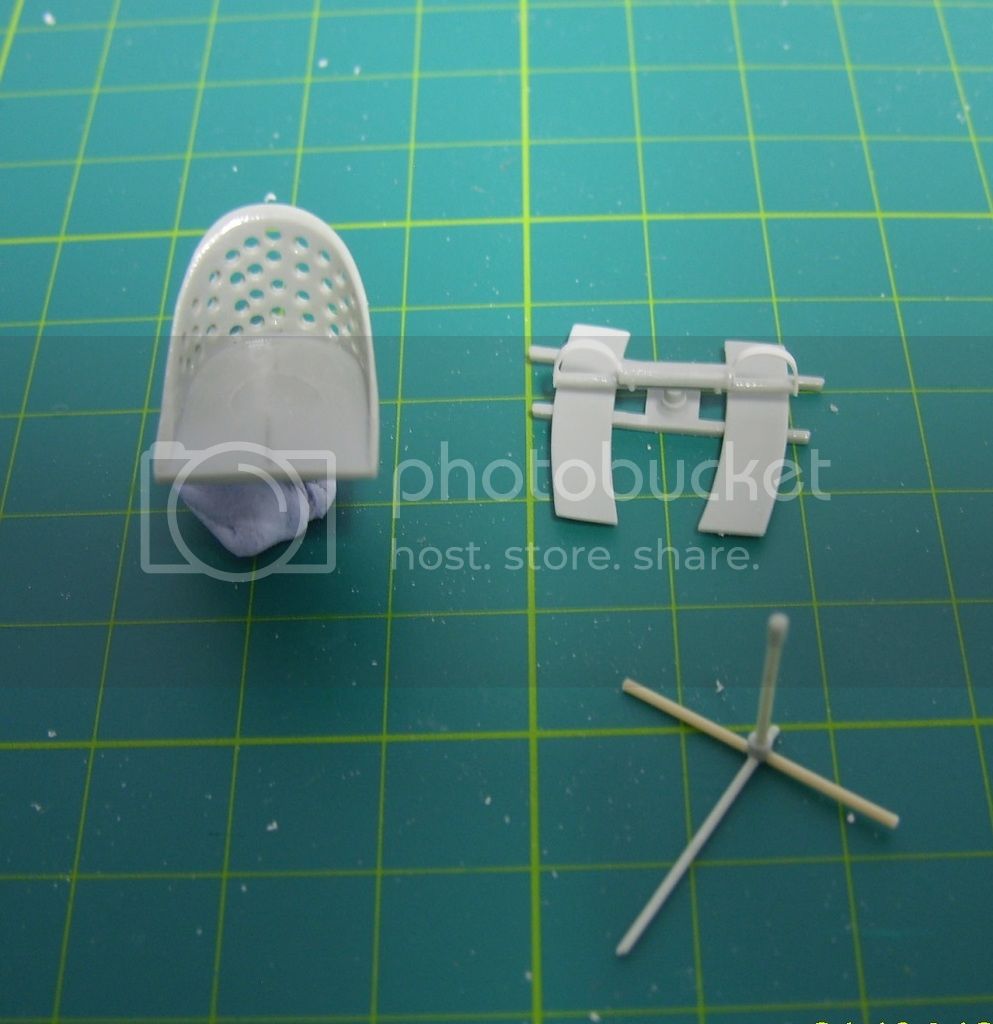
Added a couple more strips inside the fuselage, made up the foot straps on the rudder bar and drilled out holes in the back of the seat. I've also ordered a set of Airscale WW1 instrument dials to help add a little more detail. No doubt I will find use for them on other projects in the near future.
Going to start painting up the interior tomorrow.
Also on tomorrows 'to-do' list is to hunt through boxes to find the milliput and pasticard sheets.
Posted: Friday, April 22, 2016 - 09:50 PM UTC
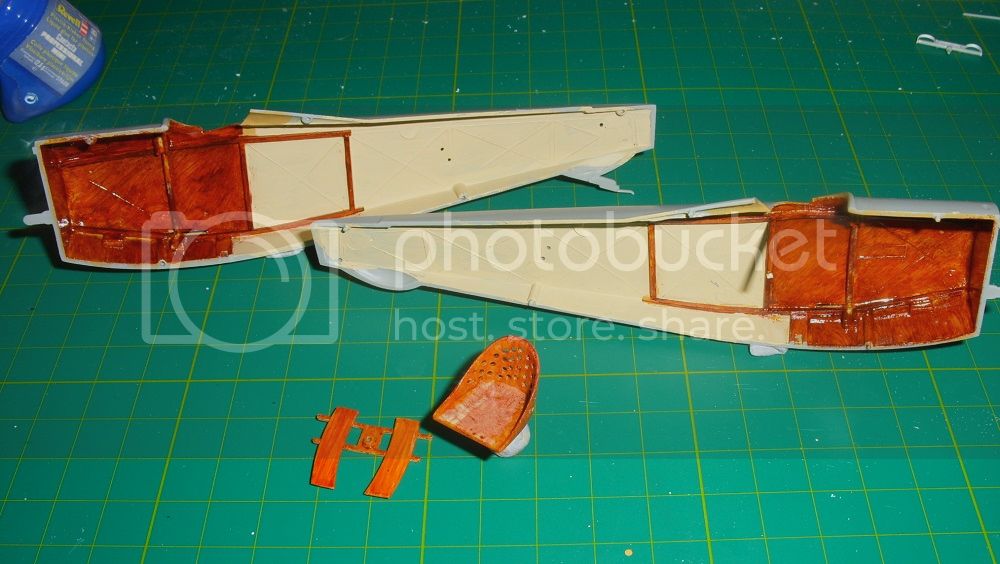
Painted up the cockpit interior yesterday. I used Vallejo Buff for the linen and Yellow Ochre darkened with a spot of Model-Air Golden Brown for the wood parts. To get the wood grain effect I used Vallejo's Dark Woodgrain, applied with an old splayed brush in a similar manner to oil wood grain effect. This was a lot darker than I expected, having a mahogany colour. I might try thinning it next time to see if I get a lighter tone. This model is all about trying some new techniques, so I'm not too worried. After leaving it all for a couple of hours to dry I overpainted with Tamiya Gloss Clear Orange, again something I had seen a lot of modellers here use but never tried myself. I am quite impressed with how well it turned out. Maybe a bit dark, but only took a fraction of the time that it would have taken me with oils.
I think Vallejo do a lighter woodgrain paint that I might try out.
Bink123
Quebec, Canada
Joined: June 23, 2008
KitMaker: 414 posts
AeroScale: 364 posts
Joined: June 23, 2008
KitMaker: 414 posts
AeroScale: 364 posts
Posted: Saturday, April 23, 2016 - 01:02 AM UTC
Looks good. It will look great once finished.
The kit is missing afew things, among them a windscreen situated between the rear cabane struts, an Aldus sight, and a headrest. I built this kit a few yesrs ago, the otiginal Hobbycraft version in Billy Bishop markings.
Maybe Italeri added these missing bits - I don't know.
One thing about the Nieuports is that aileron control was by a sytem of rods and levers, not the usual wires and pulleys as per most fighters of the era.
The Nieports are my favourite WW1 aircraft..
Posted: Saturday, April 23, 2016 - 11:34 PM UTC
Hi Richard,
Thanks for the extra bit of information.
Besides from the decals I don't think Italeri have added much, all the bags are marked with a sticker stating that they have been imported from South Korea. The kit still lacks the sight and headrest. Good news is that Academy have provided a windscreen. I plan on making up the headrest from milliput stuck to a shaped piece of plastic.
I think at least one of the marking options needs an Aldis sight, but I don't think it would be a huge job to scratch from tube.
I'm always surprised that Eduard don't do a PE set to improve this kit. Given that it's still the only game in town at this scale, it would be a must have accessory. They might even be able to scale up the PE from their own 1/48 N.17. Wishful thinking though.
Wasn't able to do much more today, ended up finishing off a bit of decorating.
Kevlar06
Washington, United States
Joined: March 15, 2009
KitMaker: 3,670 posts
AeroScale: 833 posts
Joined: March 15, 2009
KitMaker: 3,670 posts
AeroScale: 833 posts
Posted: Monday, April 25, 2016 - 12:10 AM UTC
Stephen,
I suspect Eduard does not do a PE set for this kit because Toms Model Works does two sets-- one is a Generic French WWI aircraft set, the other is specifically for French Nieuports.
I've built three of these kits-- their plastic heritage is interesting-- Hobbycraft was sued by Academy who made the molds, then sold kits to Hobbycraft for packaging with different markings. the molds then were packaged by Academy exclusively for a while, now they have been sold to Italeri. It's a good little kit, but I encourage you to go on line for details to build specific aircraft-- as they all varied a bit, and there were differences between the Italian Macchi built versions, the UK versions, and the Russian versions. I believe Barraca flew a French built version. Barraca was originally a cavalry officer and expert horseman. An interesting story regarding his "raging stallion" symbol-- After his death in WWI, Enzo Ferrari asked his family if he could use the raging black stallion symbol on his race cars-- and that's where the Ferrari symbol came from. I see it looks like Italeri has accurately depicted the over-painted French roundels on Barraca's aircraft-- that's a nice touch.
VR, Russ
Posted: Monday, April 25, 2016 - 01:45 AM UTC
Hi Russ,
Thanks. I read that about Barraca and Ferrari in a book of WW1 aeroplanes I was given by my dad. I used to like to throw it in when my car mad friends would debate which was faster between a Jaguar and a Ferrari.
I have seen the Toms Modelwork sets and although useful they still lack the headrest and a few other missing details. I have their PE sets for the 1/28 Fokker Dr.1 and I find them a little crude compared to other etch sets.
If I do another I will probably invest in the Mastercasters resin cockpit. Or cover it with a tarp and display it in a maintenance scene.
Did a little more tonight. Made up the Vickers gun magazine and a few other greeblies to go in the cockpit. Thanks to ripping out a ton of telephone wiring in the house, I now have enough copper wire to last me several lifetimes and I'm certainly using some here!
I'll get a few pics tomorrow maybe if I have good light.
One thing that is confusing me is cockpit instrumentation. It appears that there should be an altimeter to the right hand side, but anything else? Airspeed indicator, air pressure, engine revs? Or is it dependent on aircraft?
Also having some trouble with the engine and how it fits to the fuselage and cowl. It's a bit on the wobbly side! Need to think of a way to fix it more positively than the short stump they provide.
Kevlar06
Washington, United States
Joined: March 15, 2009
KitMaker: 3,670 posts
AeroScale: 833 posts
Joined: March 15, 2009
KitMaker: 3,670 posts
AeroScale: 833 posts
Posted: Monday, April 25, 2016 - 04:38 AM UTC
Stephen,
The Nieuport series were very sparse on instruments compared to other aircraft of the times (although by later standards they were all sparse). I have a modest library of about 30 books on WWI aircraft, and several on the Nieuport series, including Aircraft In Profile, and the Squadron book on Nieuport scouts. None had a good explanation of Nieuport instruments-- I got most of my info on line from several sources,the best was the Vintage Aviator, and the Omaka Aviation Heritage Museum (NZ) one of these had a pretty good photo of the interior of a '17-- Omaka I believe. From my research, I figured there were only three or four instruments on French built '17s-- oil pressure gauge, altimeter and clock were likely basic requirements, Most aircraft at the time the '17 was developed used a sight glass for fuel level. The answer though is the instruments probably depended on the pilot and what he desired. Check out some of the on-line photos of Nieuport 17 Cockpit Interiors-- you'll see a wide selection, but not more than 2-5 instruments-- here's what I went with after research: 1) Fuel sight glass mounted on the left side steel tube upright just in front of the throttle: 2) Oil pressure gauge lower down on the same upright, almost at seat level. 3) Airspeed Indicator on the far left side of the curved tube across the front of the cockpit, near the throttle; 4) Clock mounted directly in the center and just below the cockpit coaming in front of the pilot. The charging handle for the Vickers would be just to the right of the clock; 5) Altimeter mounted on the far right on the curved support. There would also be a manual fuel pump on the pilots right. The seat is actually mounted on a cast support that crosses the cockpit from one steel tube to another, and the joystick linkage goes through a hole in this support-- I think the kit has a simple plastic slab representing this mounting-- which is fine because it can't be seen anyway. The plastic windscreen in the kit represents a wood framed shape that goes between the wing supports. look closely and you'll see the molding has two small hinges on the back. The upper half held the windscreen, and folded down for cleaning. the lower half was natural wood. The kit has a couple of flaws in the cockpit area-- the cockpit is not quite deep enough in the upper fuselage towards the tail, and there is no wood insert to support the headrest. There is also no ammo box, which effectively screens the forward part of the cockpit.
Also, the Nieuport engine cowling was interesting. On the left side, just behind the cowling near the support strut was the fuel filler cap (not present on the kit). just in front of that in a hole through the cowling was the oil filler cap, and the oil tank was positioned just behind the engine on the firewall. It's really not too visible when the engine is in place. On French aircraft, the upper center section (below the Vickers muzzle) was removable. There were two flanges on either side that bolted this panel to the rest of the cowling. and to do work on the engine, the lower part of the cowling rotated down, the removable center section allowing clearance for the prop. The cowling itself had a lip on the inside of the opening, which was riveted in place-- if you study closeups of the cowling, you will find the front edge opening is completely circled by rivets, the kit has the lip, but not the rivets. British Nieuports used a different cowling configuration to access the engine.
Just a few other notes on the details-- the wheel covers in the kit are really not accurate for French aircraft which frequently had the inspection holes on the inside
and those heavy little circles and lines on the wheels representing cover "tiedowns" are not visible on any photo I've ever seen. If you position the ailerons up or down, don't forget to pose the counterbalances in the upper wing appropriately to match-- as someone pointed out, the control system used a crank type through the wing. The skinny little tail skid in the kit really needs to be replaced too. The wing rib tapes could be widened too.
I agree with you about the Tom's model works detail set, it could be better but it does have a few items that come in handy--a perforated seat, access panel covers, and most importantly in my book-- the prominent stitching over the wood and canvass panels on the forward fuselage. covered with tape, these really do add some charm to the model.
Don't get me wrong-- I think this is a great little kit, especially for the price, and can be made into a real gem. as I said, I've built three-- one in Russian service with Le Priuer rockets (and the skull and crossbones tail), one in Italian service (Baracca's), and Guynemer's black heart. Since reading McKay's "Courage of the Early Morning"
(Bishop's biography) I've wanted to build the RFC version, but haven't had time yet. With the decals Italeri is including now, it's a great value, and no collection of WWI aircraft should be without a Nieuport (or two, or three maybe!).
VR, Russ
Kevlar06
Washington, United States
Joined: March 15, 2009
KitMaker: 3,670 posts
AeroScale: 833 posts
Joined: March 15, 2009
KitMaker: 3,670 posts
AeroScale: 833 posts
Posted: Monday, April 25, 2016 - 05:22 AM UTC
Stephen,
P.S. to my last long post-- Get rid of the spindly plastic engine mounting nub. I used two telescoping brass tubes, super-glued through the firewall to mount the engine, with a slightly larger brass retaining ring on the inside of the fuselage. I went completely through the engine to the prop, which was fixed anyway. On this side of the pond, we have K & S Brass products which are good, although rather plain (we colonials are still rather backward, but get the job done!) On the other hand, you who speak the Queen's English have Albion brass tube-- which is fantastic!-- I save my Albion for really precision work!
VR, Russ
JackFlash
Colorado, United States
Joined: January 25, 2004
KitMaker: 11,669 posts
AeroScale: 11,011 posts
Joined: January 25, 2004
KitMaker: 11,669 posts
AeroScale: 11,011 posts
Posted: Wednesday, April 27, 2016 - 01:46 AM UTC
Quoted Text
here's what I went with after research:
1) Fuel sight glass mounted on the left side steel tube upright just in front of the throttle:
2) Oil pressure gauge lower down on the same upright, almost at seat level.
3) Airspeed Indicator on the far left side of the curved tube across the front of the cockpit, near the throttle;
4) Clock mounted directly in the center and just below the cockpit coaming in front of the pilot.
The charging handle for the Vickers would be just to the right of the clock;
5) Altimeter mounted on the far right on the curved support. There would also be a manual fuel pump on the pilots right.
The seat is actually mounted on a cast support that crosses the cockpit from one steel tube to another, and the joystick linkage goes through a hole in this support. . .
Please forgive the following. Not meaning to step on anyone's toes here. In my humble opinion.
#1 - #2 In the Nieuport fighters most had the pulseometers for the (tall)fuel and the (short)oil. As long as the liquids were pulsing through the glass housings the pilot knew he was getting fuel. The two liquids mixed (as rotaries do) and flowed through centrifical force to the chambers for combustion.
#3 This was most probably a tachometer or in the common venacular a "rev coutner". This allowed the pilot to make decisions about fuel mixture and throttle advance. Airspeed indicators were not normal on French aircraft and were evidenced by the presence of a air feed tube attached to an interplane strut. These were used on aircraft for evaluations.
#4 Clocks were expensive items and the French did not mount them though the British did mount them and these machines usually went to assignments for Flight Commanders. Otherwise pilots were obligated to purchase pocket watches or (later in the war) wristwatches. The charging handle would be to the right of the Vickers gun breech.
#5 Altimeters were also a bit scarce and not seen on many singleseat fighters. Late in the war these were seen as oversized wristwatches on pilots on both sides.
Here is what I did to erase the heavy "tiedowns on the wheel covers.
JackFlash
Colorado, United States
Joined: January 25, 2004
KitMaker: 11,669 posts
AeroScale: 11,011 posts
Joined: January 25, 2004
KitMaker: 11,669 posts
AeroScale: 11,011 posts
Posted: Wednesday, April 27, 2016 - 01:55 AM UTC
For the RFC and Trainer versions,
Posted: Wednesday, April 27, 2016 - 01:55 AM UTC
Russ,
Thanks for all the extra information. I think I should be able to do a fairly reasonable representation of the cockpit with that. Really looking at a quickish build rather than total accuracy. It's something of a guinea pig before I tackle something more complex and expensive! The WNW Rumpler is sitting right next to the Nieuport screaming BUILD ME!
I've also got three of Eduards superb Nieuports in the stash to show off detail. Two in a 1/72 Dual-Combo and their 1/48. Amazing kits. In fact I should dig out the 1/48 to use as reference. Why I never thought of that before I don't know!
It is a better kit than the Camel. I had a look at that one at the same time I got the Nieuport and I was less than impressed with the plastic. Great decals though, but would have been more work than it was worth. I might invest in WNW when their's is released.
Luckily my lhs sells a huge range of Albion Alloys stuff so I should be able to get some tubing from them. They're an RC aircraft specialist and stock all sorts of useful materials like that.
JackFlash
Colorado, United States
Joined: January 25, 2004
KitMaker: 11,669 posts
AeroScale: 11,011 posts
Joined: January 25, 2004
KitMaker: 11,669 posts
AeroScale: 11,011 posts
Posted: Wednesday, April 27, 2016 - 02:03 AM UTC
Good luck with that! As a heads up the Eduard Nieuport types 17 - 21- 23 kit has a small accuracy issue in the cockpit area and the top wing locator holes need some opening up. The online images of the Nieuport 23 restoration should help clear up any issues.
JackFlash
Colorado, United States
Joined: January 25, 2004
KitMaker: 11,669 posts
AeroScale: 11,011 posts
Joined: January 25, 2004
KitMaker: 11,669 posts
AeroScale: 11,011 posts
Posted: Wednesday, April 27, 2016 - 03:18 AM UTC
Kevlar06
Washington, United States
Joined: March 15, 2009
KitMaker: 3,670 posts
AeroScale: 833 posts
Joined: March 15, 2009
KitMaker: 3,670 posts
AeroScale: 833 posts
Posted: Wednesday, April 27, 2016 - 06:33 AM UTC
Stephen & Stephen--
I'd g0 with Mr. Lawson's advice on the instruments-- he's the expert in this and certainly not stepping on my toes-- my instrument suggestions were best-guess based on generic research I've done for the three kits I built. As far as the clock goes-- I was addressing mostly foreign (Italy and Russian) Nieuports, and again, it was just a generic addition for the models I built. As a side note, there is a funny story about the clock that came in the the Sopwith Camel William Barker flew for a year (B6313) in France and Italy. B6313 went through 4 different paint schemes, and although Barker was the leader of an F2B squadron in Italy, he continued to fly B6313 because he was so fond of it. When he left Italy to return to France in 1918, he took the clock with him, only to be sent a bill later by the RAF for cost of the clock. You'd think a VC winner would catch a break, but that supports Mr. Lawson's statement about the scarcity of clocks. That clock and his "Little Red Devil" hood ornament were presumably on the Snipe he flew during his VC engagement. As to Sopwith's, I've built two of the later Hobbycraft Sopwith kits (they were boxed as "Clerget Aces or LeRhone" Aces) of Barker's Sopwith as well. These were different kits from the poor Academy Sopwith kits which have now also been re-boxed by Italeri. The "Aces" issues were not to bad, had different wings, cowlings and details but not to WnW standard of course.
VR, Russ
I'd g0 with Mr. Lawson's advice on the instruments-- he's the expert in this and certainly not stepping on my toes-- my instrument suggestions were best-guess based on generic research I've done for the three kits I built. As far as the clock goes-- I was addressing mostly foreign (Italy and Russian) Nieuports, and again, it was just a generic addition for the models I built. As a side note, there is a funny story about the clock that came in the the Sopwith Camel William Barker flew for a year (B6313) in France and Italy. B6313 went through 4 different paint schemes, and although Barker was the leader of an F2B squadron in Italy, he continued to fly B6313 because he was so fond of it. When he left Italy to return to France in 1918, he took the clock with him, only to be sent a bill later by the RAF for cost of the clock. You'd think a VC winner would catch a break, but that supports Mr. Lawson's statement about the scarcity of clocks. That clock and his "Little Red Devil" hood ornament were presumably on the Snipe he flew during his VC engagement. As to Sopwith's, I've built two of the later Hobbycraft Sopwith kits (they were boxed as "Clerget Aces or LeRhone" Aces) of Barker's Sopwith as well. These were different kits from the poor Academy Sopwith kits which have now also been re-boxed by Italeri. The "Aces" issues were not to bad, had different wings, cowlings and details but not to WnW standard of course.
VR, Russ
Posted: Thursday, April 28, 2016 - 01:37 AM UTC
Hi all,
Thanks for all the help and advice. I'm going to have a proper read of it all over the weekend and see where I go from there. It will certainly be useful for my other builds.
Interested to know what the large wheel next to the pilots seat is?
Thanks for all the help and advice. I'm going to have a proper read of it all over the weekend and see where I go from there. It will certainly be useful for my other builds.
Interested to know what the large wheel next to the pilots seat is?
Jessie_C
British Columbia, Canada
Joined: September 03, 2009
KitMaker: 6,965 posts
AeroScale: 6,247 posts
Joined: September 03, 2009
KitMaker: 6,965 posts
AeroScale: 6,247 posts
Posted: Thursday, April 28, 2016 - 03:28 AM UTC
That's the take-up real for the spent ammunition belt, IIRC.
Kevlar06
Washington, United States
Joined: March 15, 2009
KitMaker: 3,670 posts
AeroScale: 833 posts
Joined: March 15, 2009
KitMaker: 3,670 posts
AeroScale: 833 posts
Posted: Thursday, April 28, 2016 - 05:14 AM UTC
I'm not sure all Nieuports had a take up reel that large, also, the reel might have been mounted in a different location on other Nieuports. Certainly Lewis armed Nieuports wouldn't have one. Some photos I've seen on line show the ammo box with a right hand feed coming up through the top panel in front of the cockpit. The kit comes with an empty cartridge belt chute on the left of the gun as a separate part, which could be going to a take up reel, or into the other side of the ammo box. I think the manufacturer (Academy) mistook this for the ammo feed chute.
VR, Russ
VR, Russ
Posted: Friday, April 29, 2016 - 08:13 PM UTC
Oh I get it now, the spent belt would wind on to it. But would it be hand operated by the pilot or mechanically driven somehow?
At the moment I'm struggling with the internal bracing wires. Been at it for two hours with only marginal success. The thread I'm using either refuses to stick with superglue or sticks where I don't want it too. I really hate rigging!