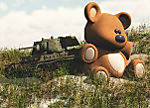
Thanks Bob -- glad to be in this fun campaign! It sure is a breather from doing serious builds. That's a cool project you have there. I think your proportions as drawn are ok, and I'd go with the oversized wheels. Now comes the question on the size of the spare -- should it be the same as the others? I don't think so, thus I'd leave it as you depicted.
Had a bit of bench time tonight so I continued on. Having this snap-on, no-glue feature gets the work done quickly. The fit is nice though in some cases very tight that you get the plastic strained as you put components together.
A couple of components may need to have glue on it, like the turret base.
The gun is movable up or down though I noticed there is not much play to do it. I guess a correction may be made by shaving off a bit of the top part of the shield so there's greater movement in the elevation. Anyways, it's a non-issue for me as I'm not a fan of moving parts on my builds
Till next update.
Cheers,
Tat
Air Campaigns
Want to start or join a group build? This is where to start.
Hosted by Frederick Boucher, Michael Satin
OFFICIAL: Egg Squared (Caricature) Campaign
Posted: Tuesday, May 17, 2016 - 07:11 PM UTC
TacFireGuru
Colorado, United States
Joined: December 25, 2004
KitMaker: 3,770 posts
AeroScale: 201 posts
Joined: December 25, 2004
KitMaker: 3,770 posts
AeroScale: 201 posts
Posted: Tuesday, May 17, 2016 - 07:31 PM UTC
Lookin' good Tat. I haven't picked up any of the tanks yet...operative word is "yet."
That one would look good in some weather-worn DAK.
Mike
That one would look good in some weather-worn DAK.
Mike
bwiber
Washington, United States
Joined: August 03, 2008
KitMaker: 436 posts
AeroScale: 69 posts
Joined: August 03, 2008
KitMaker: 436 posts
AeroScale: 69 posts
Posted: Tuesday, May 17, 2016 - 09:47 PM UTC
Tat...... Looking better all the time. I know from the little snap kit I built that I would not want to have to try and take parts of it apart again. Couple times I thought I was going to crush something when it finally snapped into place.
I like the idea of the spare tire being smaller than the others, thanks. It is something that never occurred to me, one reason I posted the images.
Bob
I like the idea of the spare tire being smaller than the others, thanks. It is something that never occurred to me, one reason I posted the images.
Bob
TacFireGuru
Colorado, United States
Joined: December 25, 2004
KitMaker: 3,770 posts
AeroScale: 201 posts
Joined: December 25, 2004
KitMaker: 3,770 posts
AeroScale: 201 posts
Posted: Tuesday, May 17, 2016 - 10:39 PM UTC
Ah yes...Paint.
The scheme I chose shows more dark gray than dark green, so the gray is what I laid down first (a couple days ago). Then it was time to pull out the generic "Silly Putty."
I applied the putty to the Tu-2 trying to adhere to the color template I have (hard considering the plane itself is "squished").
I used a USPS packing envelope as the base. This allows the model and putty to be moved; the putty will stick to a bench and try to pull off when lifting the model. Yes, first hand experience.
Then came the dark green.
And here it is with the two-tone camo. Very little touch up will be needed at the underside of the tail.
Mike
bwiber
Washington, United States
Joined: August 03, 2008
KitMaker: 436 posts
AeroScale: 69 posts
Joined: August 03, 2008
KitMaker: 436 posts
AeroScale: 69 posts
Posted: Wednesday, May 18, 2016 - 09:41 PM UTC
Mike.....
Really coming along nicely. I think that the camouflage came out fine, and I doubt if they could have done any better with the lines on a warped aircraft than you did. I really do have to pick up some Silly Putty one of these days.
Looking forward to the next step...
Bob
Really coming along nicely. I think that the camouflage came out fine, and I doubt if they could have done any better with the lines on a warped aircraft than you did. I really do have to pick up some Silly Putty one of these days.
Looking forward to the next step...
Bob
Posted: Thursday, May 19, 2016 - 07:02 AM UTC
Thanks for the kind words Bob, Mike! Happy to see the builds coming along quite well.
I've put on a piece of sprue for the exhaust pipe:
There's the option to put in a friction drive, but I am not going for it. That said I'd say the build phase is done:
Just placed the turret on top for this photo op. Dry-fitting snap-on components can be a pain, as there would be instances where one can not simply take them apart without diffculty or damage to the plastic at worst.
Well, this is first time I encountered a build step called Fun
Have yet to decide on the paint scheme -- the kit offers decal options for either DAK or French Campaign. Apologies as I'll have to set the paint phase aside for the meantime. Need to finish another campaign build due by end of the month. Will be back.
Cheers,
Tat
bwiber
Washington, United States
Joined: August 03, 2008
KitMaker: 436 posts
AeroScale: 69 posts
Joined: August 03, 2008
KitMaker: 436 posts
AeroScale: 69 posts
Posted: Thursday, May 19, 2016 - 09:39 PM UTC
Tat....
The addition of the exhaust pipe is excellent.... like how you made it over sized. Really goes with the overall look of the little beast.
Looks really good, but I am looking forward to seeing what you do with it as far as markings and paint.
Bob
The addition of the exhaust pipe is excellent.... like how you made it over sized. Really goes with the overall look of the little beast.
Looks really good, but I am looking forward to seeing what you do with it as far as markings and paint.
Bob
TacFireGuru
Colorado, United States
Joined: December 25, 2004
KitMaker: 3,770 posts
AeroScale: 201 posts
Joined: December 25, 2004
KitMaker: 3,770 posts
AeroScale: 201 posts
Posted: Sunday, May 22, 2016 - 08:13 PM UTC
So, I got all the paint on and was quite happy with it with one exception...that Games Workshop primer I used is, I think, old....gave a rough texture. So, I'll chuck that can and continue to use the Lowe's bought Rustoleum Self-Etching Primer...very smooth paint.
With all that said, the fit tolerances on these kits is pretty extreme; the primer and paint on the inside affected the fit of the two halves. I had to pull out some filler (Used the Vallejo filler for the first time and I'm hooked on it!!) as you can see.
All of which means some fine line hand brushing to repaint the sanded area.
Bombs and landing gear are primed too.
Mike
Posted: Tuesday, May 24, 2016 - 04:35 AM UTC
Here is the latest update.
Model has been painted, gloss coated and decaled.
The Pilot is complete, I used a 1/48 Body trimmed down and adjusted arms to fit in cockpit. The head is not as BIG HEAD as I wanted because it would not fit in the cockpit with the canopy closed. I have his mask down because I did not want to have to mold a face. But it fits fine so I am staying with this one.
I also started to paint the stand.
Next up another gloss coat followed by semi-gloss and then add the gear and canopy on. Finish the stand and paint the little Russian guy.
bwiber
Washington, United States
Joined: August 03, 2008
KitMaker: 436 posts
AeroScale: 69 posts
Joined: August 03, 2008
KitMaker: 436 posts
AeroScale: 69 posts
Posted: Saturday, May 28, 2016 - 04:54 AM UTC
Mike..... Looking good. From seeing how nice your model is I think I am going to have to pick up the Greif one of these days. Oh, and am I the only one that thinks the front of the fuselage on your plane looks like a lizard?
Have a question.... the primer, are you shooting that straight from the can? It actually sounds like something I might give a shot, although the Vallejo Surface Primer I used on the P-40 worked nicely also, and I didn't have to paint over it. Will also give the putty a try one of these days....
Jeff-D.... Looking good, I like the finish on the Black Bird. Really coming together nicely, and it is really nice that it has a pilot as I don't see to many of those in these builds. The little Ivan will just be another plus.
Must be something of a pain to paint the globe on the inside of the circle. However, it is looking good....
Almost makes me want to dig up the 109 and build it. However, I kind of promised that when I got around to working on it that I would try to do a cut-away. Of course, I could just paint the interior white and put a yellow blob in the middle of it.... after all, it is an EGG plane... Yes, I will leave now.....
Bob....
TacFireGuru
Colorado, United States
Joined: December 25, 2004
KitMaker: 3,770 posts
AeroScale: 201 posts
Joined: December 25, 2004
KitMaker: 3,770 posts
AeroScale: 201 posts
Posted: Saturday, May 28, 2016 - 11:48 PM UTC
Ha, Ha! It does kinda look like a lizard...
The Rustoleum primer is shot directly from the can. I don't transfer it to an air brush...no need.
The putty is now my "go-to" for fine filling. Squadron Green is still my main putty.
I rather like that idea.....
Mike
The Rustoleum primer is shot directly from the can. I don't transfer it to an air brush...no need.
The putty is now my "go-to" for fine filling. Squadron Green is still my main putty.
Quoted Text
I could just paint the interior white and put a yellow blob in the middle of it.... after all, it is an EGG plane...
I rather like that idea.....
Mike
TacFireGuru
Colorado, United States
Joined: December 25, 2004
KitMaker: 3,770 posts
AeroScale: 201 posts
Joined: December 25, 2004
KitMaker: 3,770 posts
AeroScale: 201 posts
Posted: Sunday, May 29, 2016 - 01:08 AM UTC
bwiber
Washington, United States
Joined: August 03, 2008
KitMaker: 436 posts
AeroScale: 69 posts
Joined: August 03, 2008
KitMaker: 436 posts
AeroScale: 69 posts
Posted: Sunday, May 29, 2016 - 08:41 AM UTC
Mike,
Sweet looking little plane.... Now for the accessories and she will be ready for her debut!
Bob
Sweet looking little plane.... Now for the accessories and she will be ready for her debut!
Bob
MichaelSatin
Campaigns Administrator
Colorado, United States
Joined: January 19, 2008
KitMaker: 3,909 posts
AeroScale: 2,904 posts
Joined: January 19, 2008
KitMaker: 3,909 posts
AeroScale: 2,904 posts
Posted: Monday, May 30, 2016 - 02:22 AM UTC
Posted: Tuesday, June 07, 2016 - 10:29 AM UTC
I finished the SR-71 a while ago but thought I would have the base done to put it on.
But no go.....I did not like how it came out so I completed striped it down and I am starting over on it.
Here are images of the Blackbird
But no go.....I did not like how it came out so I completed striped it down and I am starting over on it.
Here are images of the Blackbird
Posted: Thursday, June 09, 2016 - 01:20 AM UTC
Posted: Thursday, June 09, 2016 - 08:32 PM UTC
Jesper,
Thank you.
I have not seen those Vigorous Dragon kits. Looking forward to seeing them built.
BTW.....
Love the old school Matchbox Helldiver for Dive bomber campaign you are going to do.
Thank you.
I have not seen those Vigorous Dragon kits. Looking forward to seeing them built.
BTW.....
Love the old school Matchbox Helldiver for Dive bomber campaign you are going to do.
Posted: Friday, June 10, 2016 - 01:11 PM UTC
Thanks, Jeff. After closer inspection of the matchbox kit was the trainer version of the hell diver without bomb or bomb release mechanism. So I had to go for the Skyraider instead.
Back to this campaign. I bought two J-10Q kits to build with the kids. When opened it turned out one kit was a J-10Q the other a SU-27!! I guess packing of kits are not always an exact science in China
Anyway, I had a great time with the kids building them. Construction is now done. Later today we will paint the planes. Later stickers will be added.
The kits contain both water slide decals and normal stickers. A very nice and kid friendly move. In addition the water slide decals will be a nice addition to the water slides transfer box
More to follow
Posted: Friday, June 10, 2016 - 06:57 PM UTC
For painting and stickers we moved outside in the beautiful summer sun.
After some painting with serious thick layers and alternative colors, the stickers were applied.
The kids are very satisfied with their creations and we had great fun. They are 4 and 6 years old. There be another modeler or two in the future
Great fun to participate in this campaign for all three of us
Posted: Friday, June 10, 2016 - 07:58 PM UTC
Hello,
It sure looks like you had a great time with the kids Jesper. Oh and indeed a welcome bonus of having a different kit that got packed wrong. Congrats on the finish!
From my last update I had it lined up for the paint shop. But I thought it was too plain so why not add weld beads. Well, one thing led to another and I guess I got carried away:
The spare road wheels and jack are loaners from a 1/48 Bandai Nashorn -- will get it back, that is if ever I get to build that kit in the ever too distant future. The other bits are from a 1/35 Academy Pz IV, modified to authentic egg-scale dimensions. I sure had fun doing this without much concern whether this part is dimensionally correct, etc.
I had it primed grey, followed by a flat black coat for the shadows. I have base coated with a rattlecan Tamiya Gunship Gray. I think this shade is nearer to their bottled German Gray.
Till next update.
Cheers,
Tat
Posted: Saturday, June 11, 2016 - 12:28 AM UTC
Tat, thanks for the comments. It was fun for sure!
Your panzer IV looks good. Very nice extra details for an egg tank. Looking forward to see more.
Posted: Saturday, June 11, 2016 - 11:22 AM UTC
Jesper,
A hardy "Well done Dad!"
I remember doing some of the old Weirdo Kits with my kids.
Great Fun.
BZ
Jeff D
A hardy "Well done Dad!"
I remember doing some of the old Weirdo Kits with my kids.
Great Fun.
BZ
Jeff D
Posted: Saturday, June 11, 2016 - 11:49 AM UTC
Thanks for the comment, Jeff. It is great to share the hobby with the kids
TacFireGuru
Colorado, United States
Joined: December 25, 2004
KitMaker: 3,770 posts
AeroScale: 201 posts
Joined: December 25, 2004
KitMaker: 3,770 posts
AeroScale: 201 posts
Posted: Sunday, June 12, 2016 - 02:35 AM UTC
Jesper, the kids did a great job. Well done.
That Pz. IV is really looking good Tat. The "extras" really make a difference. Welds and bolt heads; I like!
Jeff-D, very nice looking SR-71. Your little pilot looks the part under glass.
Mike
That Pz. IV is really looking good Tat. The "extras" really make a difference. Welds and bolt heads; I like!
Jeff-D, very nice looking SR-71. Your little pilot looks the part under glass.
Mike
TacFireGuru
Colorado, United States
Joined: December 25, 2004
KitMaker: 3,770 posts
AeroScale: 201 posts
Joined: December 25, 2004
KitMaker: 3,770 posts
AeroScale: 201 posts
Posted: Sunday, June 12, 2016 - 02:39 AM UTC