Albatros D.II "Boelcke" - 1/32 by Encore Mode
Baden-Württemberg, Germany
Joined: December 26, 2009
KitMaker: 813 posts
AeroScale: 98 posts
Posted: Saturday, May 21, 2016 - 10:07 PM UTC
regards,
Michael
http://www.world-in-scale.de
Merlin
 Senior Editor
#017
United Kingdom
Joined: June 11, 2003
KitMaker: 17,582 posts
AeroScale: 12,795 posts
Posted: Saturday, May 21, 2016 - 10:25 PM UTC
Nice one Michael
Great start! It's going to look a beauty.

All the best
Rowan
BEWARE OF THE FEW...
As I grow older, I regret to say that a detestable habit of thinking seems to be getting a hold of me. - H. Rider Haggard
#372
United Kingdom
Joined: March 10, 2010
KitMaker: 2,568 posts
AeroScale: 1,619 posts
Posted: Saturday, May 21, 2016 - 11:39 PM UTC
Looks good. I like the wood effect.
I'm thinking of giving one Roden's big Albatros's a go in the near future, so I'll be watching your build and seeing how it goes together.
On the bench: 1/72 Mosquito, Lightning F.6, DH.2,
AMT Vulcan Shuttle Surak.
Cyber-Hobby 1:35 Sherman Firefly IC - still stalled.
England - East Midlands, United Kingdom
Joined: November 06, 2005
KitMaker: 753 posts
AeroScale: 311 posts
Posted: Sunday, May 22, 2016 - 03:29 AM UTC
Excellent start and incredibly realistic wood effects.
Gary
#424
Queensland, Australia
Joined: April 23, 2015
KitMaker: 4,648 posts
AeroScale: 1,938 posts
Posted: Sunday, May 22, 2016 - 04:17 AM UTC
Michael,
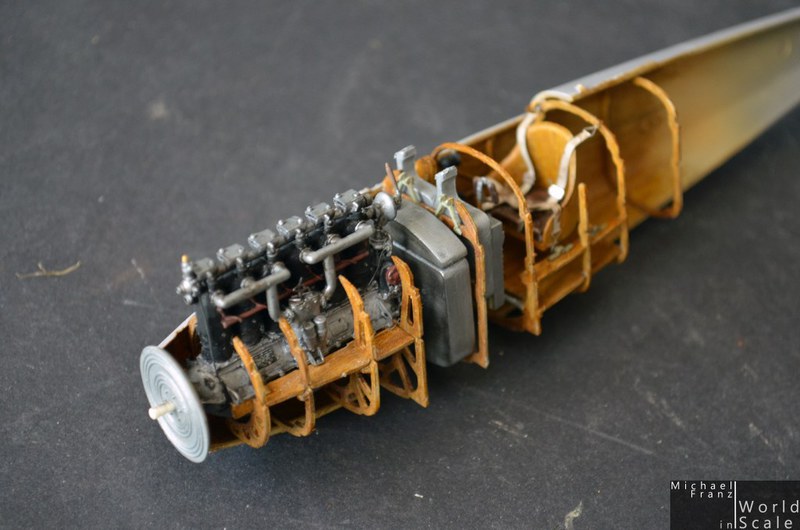
Great start! The engine looks fantastic, and your wood grain is very impressive.
Now, I have a question for you:
Were the Albatross fighters lacquered on the inside like they were on the outside?
Gaz
"Artillery adds dignity, to what would otherwise be an ugly brawl."
Frederick The Great
Overijssel, Netherlands
Joined: September 13, 2003
KitMaker: 339 posts
AeroScale: 244 posts
Posted: Monday, May 23, 2016 - 11:19 PM UTC
Nice work and good looking engine!
gr TC
Colorado, United States
Joined: January 25, 2004
KitMaker: 11,669 posts
AeroScale: 11,011 posts
Posted: Tuesday, May 24, 2016 - 02:10 AM UTC
". . .The most important thing is to know why you build and then get the most that you can out of building." via D.D.
Baden-Württemberg, Germany
Joined: December 26, 2009
KitMaker: 813 posts
AeroScale: 98 posts
Posted: Saturday, May 28, 2016 - 11:20 PM UTC
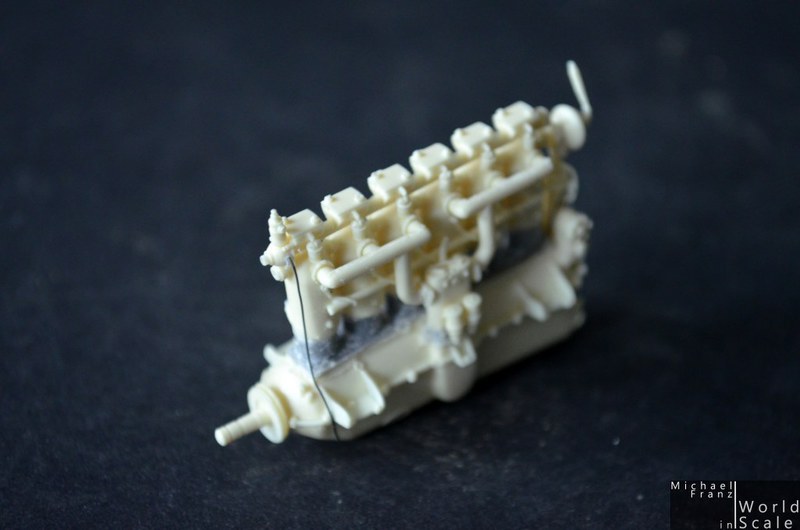
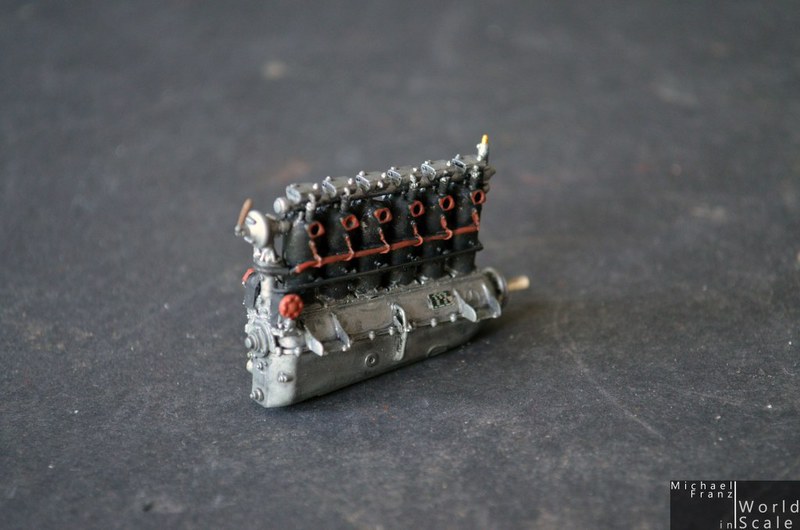
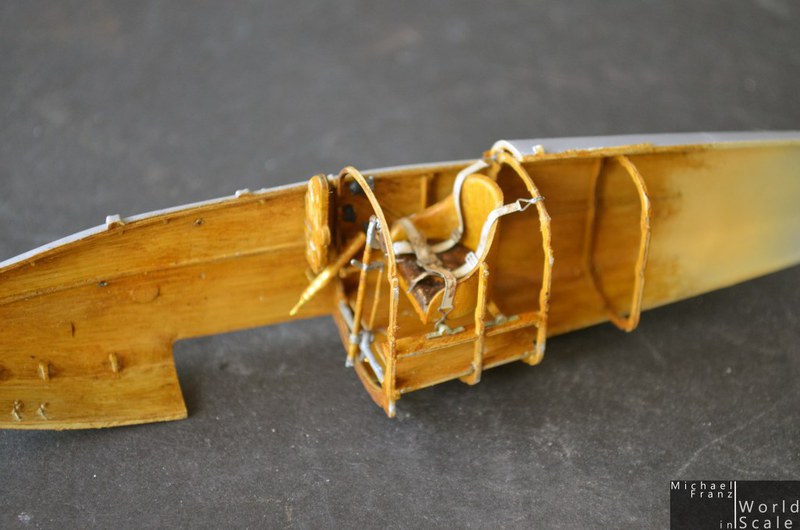
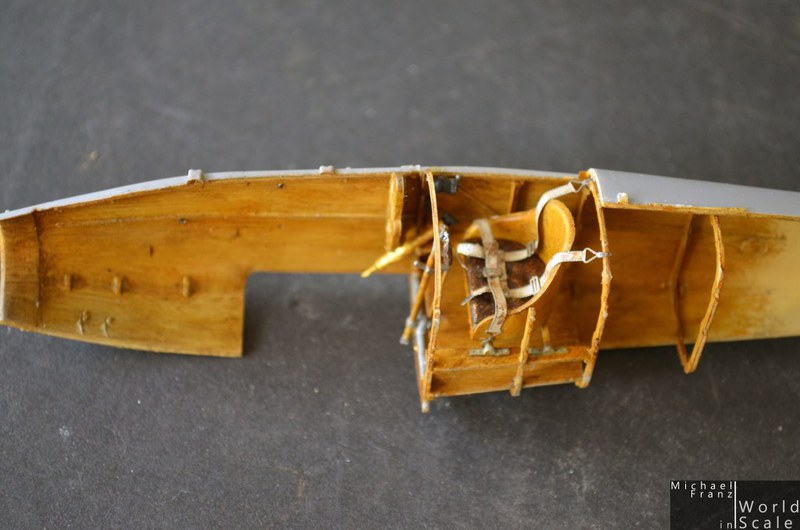
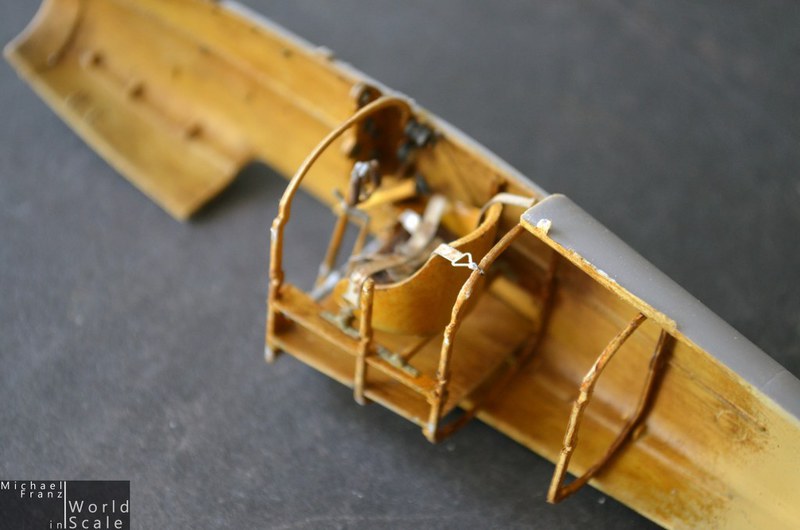
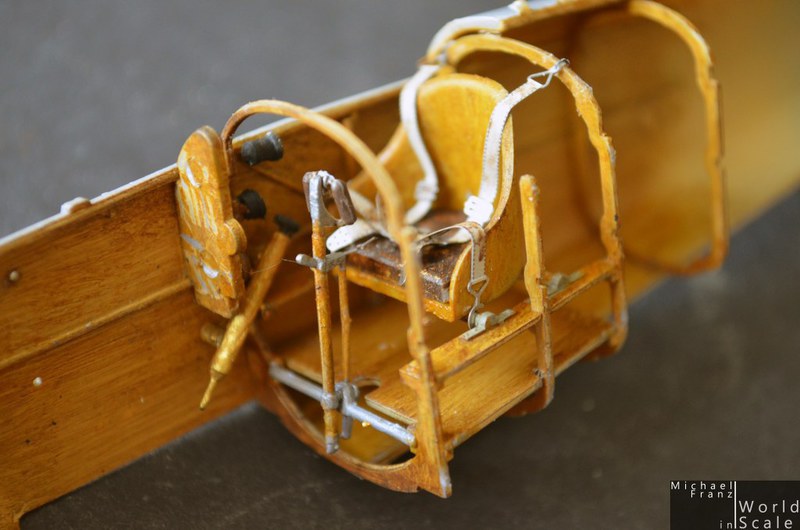
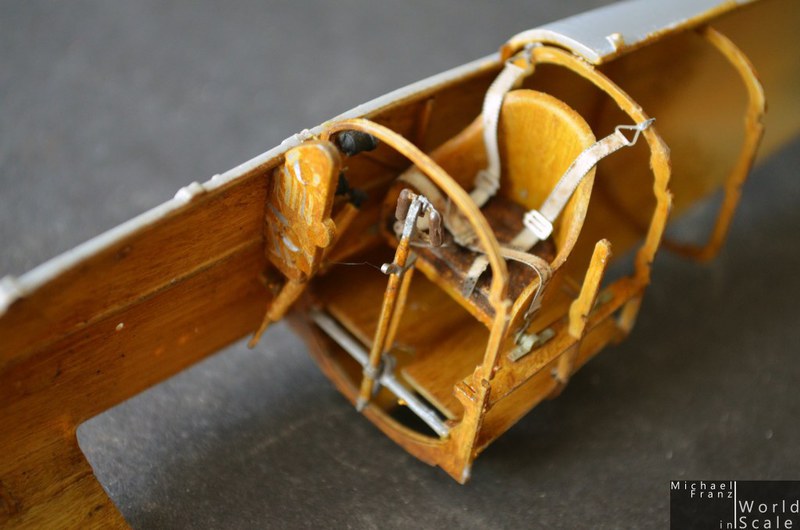
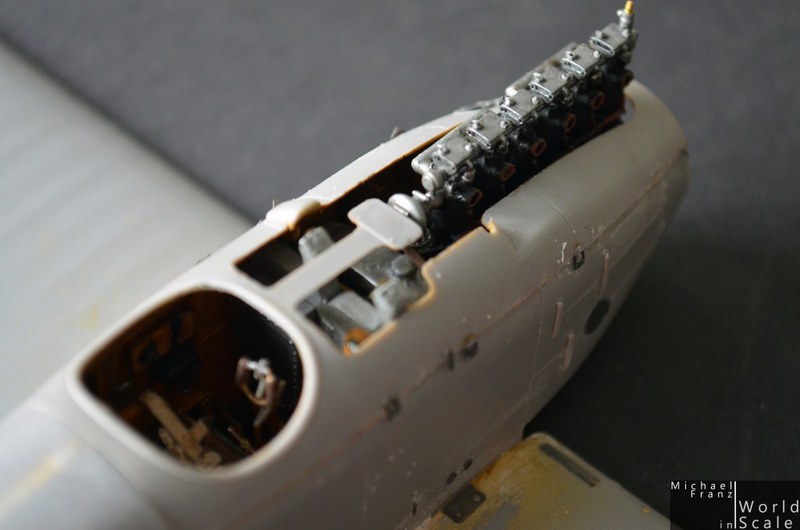
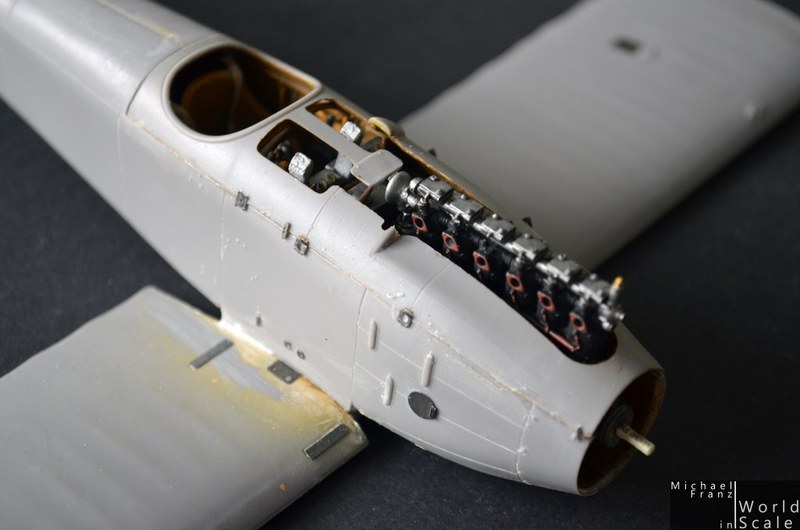
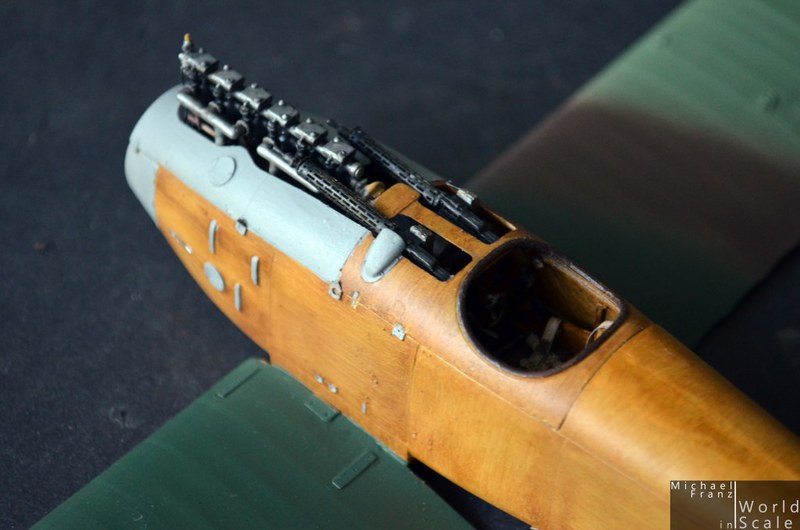
*** UPDATE ***
The parts of the interior are finished and glued on the right half of the hull... some colors are added and further parts mounted.

Once the two halfs of the hull are glued together, the seam is filled with putty and sanded, then further etched parts added on the outside.

Everything is masked then and ready for the painting of the exterieur. I began with an airbrush paint in a light beige as base for the oil colors.
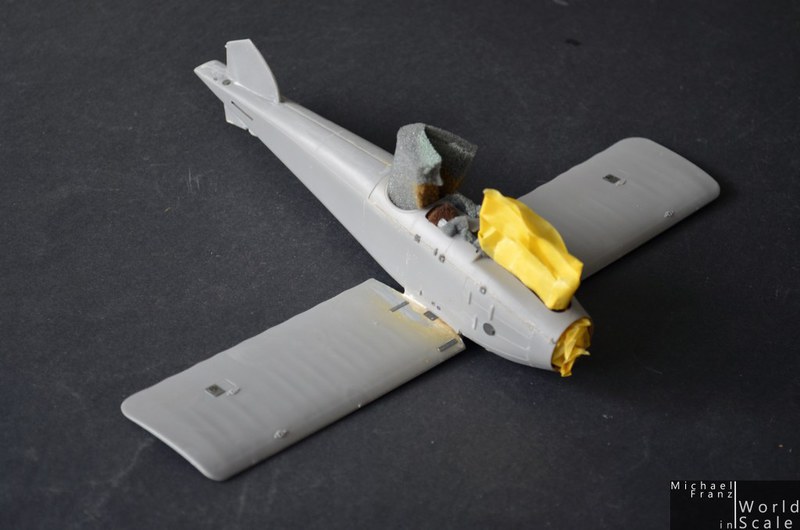
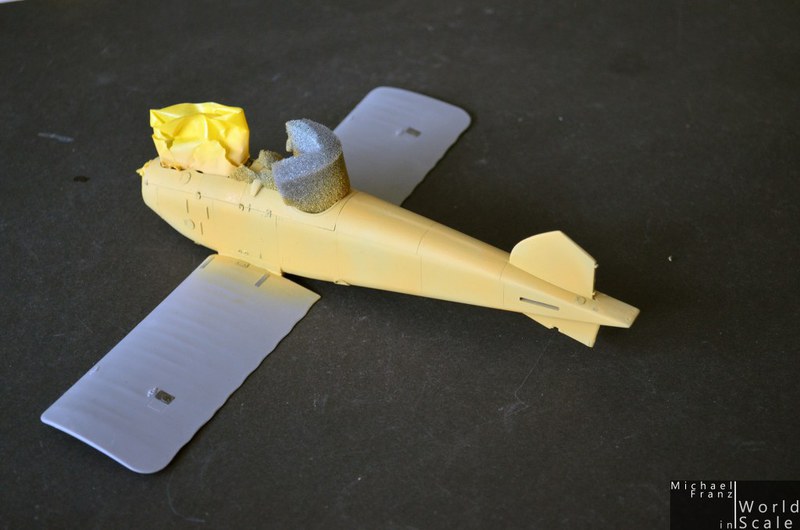
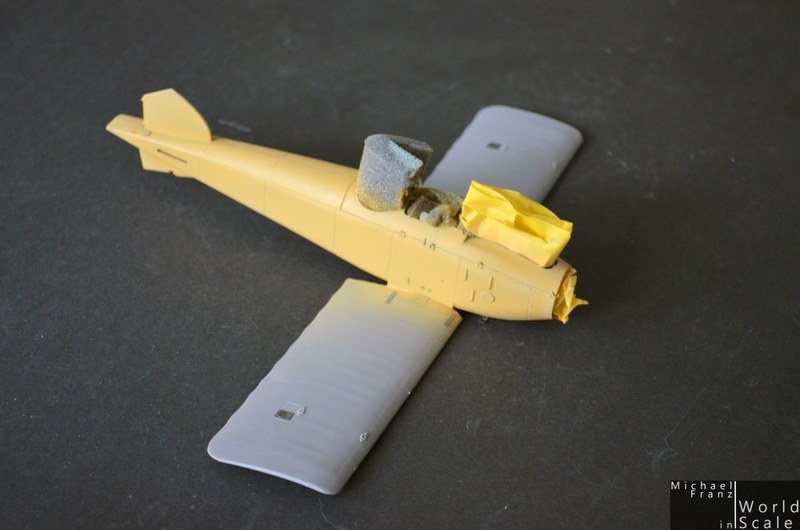
Next steps are painting the wood grain with oil colors ....
Cheers
Micha
regards,
Michael
http://www.world-in-scale.de
Connecticut, United States
Joined: October 26, 2009
KitMaker: 424 posts
AeroScale: 389 posts
Posted: Tuesday, May 31, 2016 - 01:40 AM UTC
By the way, looking at your cockpit. Boelcke Never wore his seat belt. It was too restricting.
His death was in a survivable crash landing had he worn his seat belt.
Captn Tommy
Gdańsk, Poland
Joined: February 18, 2016
KitMaker: 92 posts
AeroScale: 90 posts
Posted: Friday, June 03, 2016 - 02:41 PM UTC
Excellent start Michael! Love the engine

cheers
Bart
Florida, United States
Joined: May 14, 2012
KitMaker: 730 posts
AeroScale: 15 posts
Posted: Saturday, June 04, 2016 - 04:49 AM UTC
This is coming along nicely, great job!
Cheers
Dave

"No beast so fierce but knows some touch of pity.
But I know none, and therefore am no beast."
Baden-Württemberg, Germany
Joined: December 26, 2009
KitMaker: 813 posts
AeroScale: 98 posts
Posted: Sunday, June 05, 2016 - 02:14 PM UTC
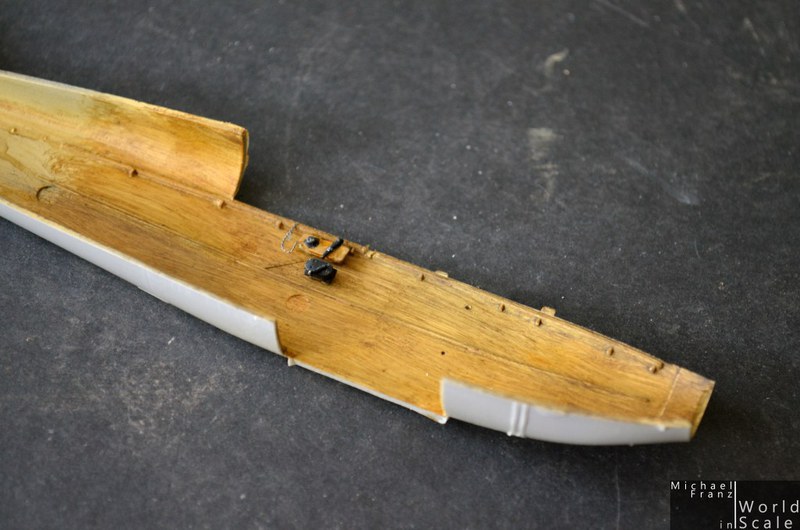
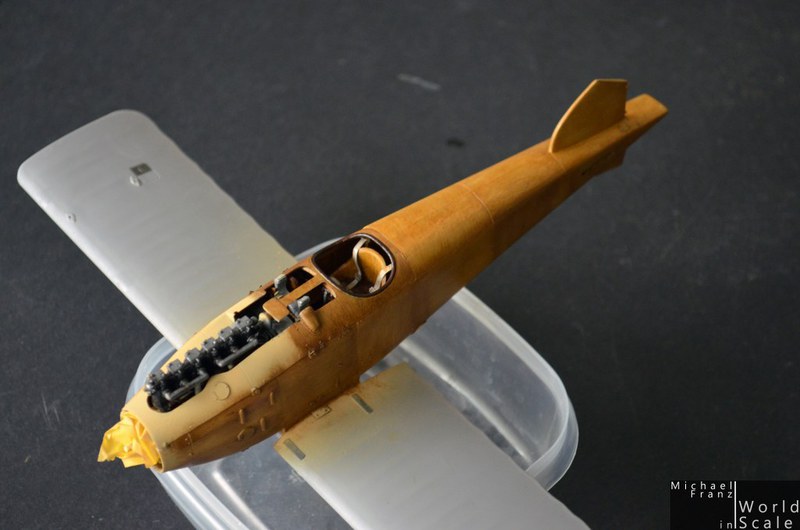
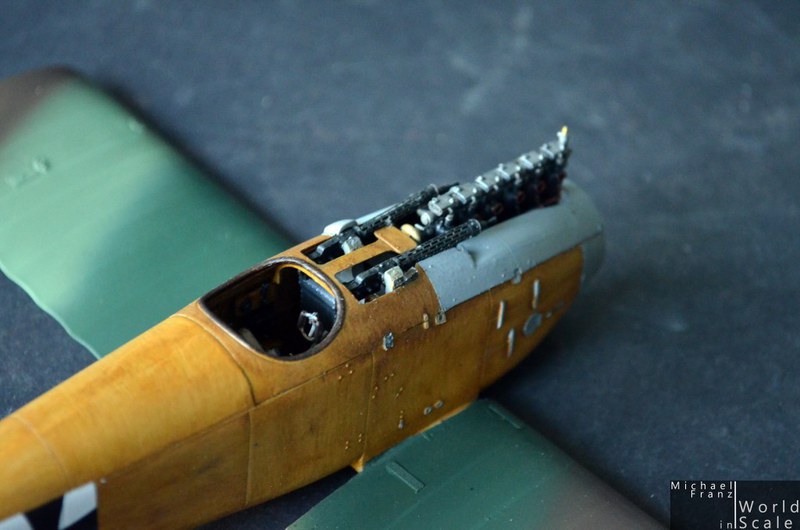
*** UPDATE ***
The wooden optic was made with oil colors which were painted over a beige airbrushed base-color. I have used a light brown/yellow color, darkend with a darker brown and lightend with a lighter yellow. Painted each panel by panel in different directions, lither in the center of each panel.
Now the oil color needs some drying time, then clear coat will follow, then the light grey area at the front and the metal details.


Cheers
Micha
regards,
Michael
http://www.world-in-scale.de
#372
United Kingdom
Joined: March 10, 2010
KitMaker: 2,568 posts
AeroScale: 1,619 posts
Posted: Sunday, June 05, 2016 - 08:55 PM UTC
That's just fantastic. The wood grain is very nicely done.
Your build has convinced me to order the D.III kit. I just hope I can get a finish as good as you have.
On the bench: 1/72 Mosquito, Lightning F.6, DH.2,
AMT Vulcan Shuttle Surak.
Cyber-Hobby 1:35 Sherman Firefly IC - still stalled.
Baden-Württemberg, Germany
Joined: December 26, 2009
KitMaker: 813 posts
AeroScale: 98 posts
Posted: Monday, June 13, 2016 - 01:31 PM UTC
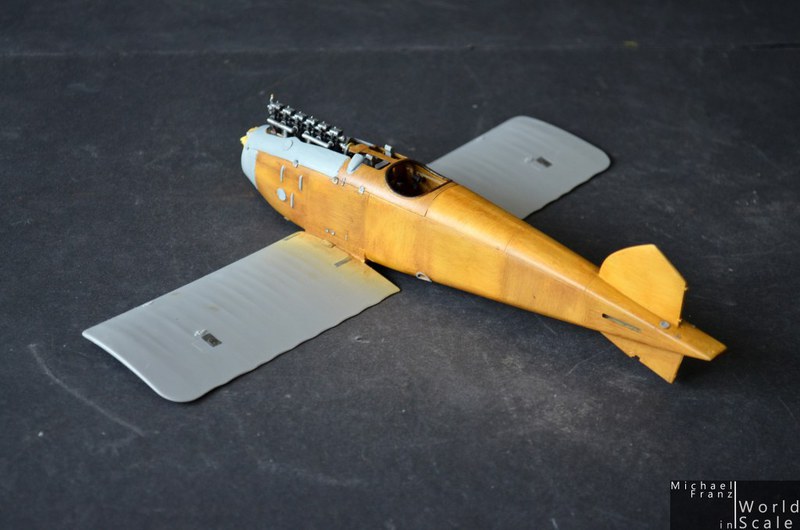
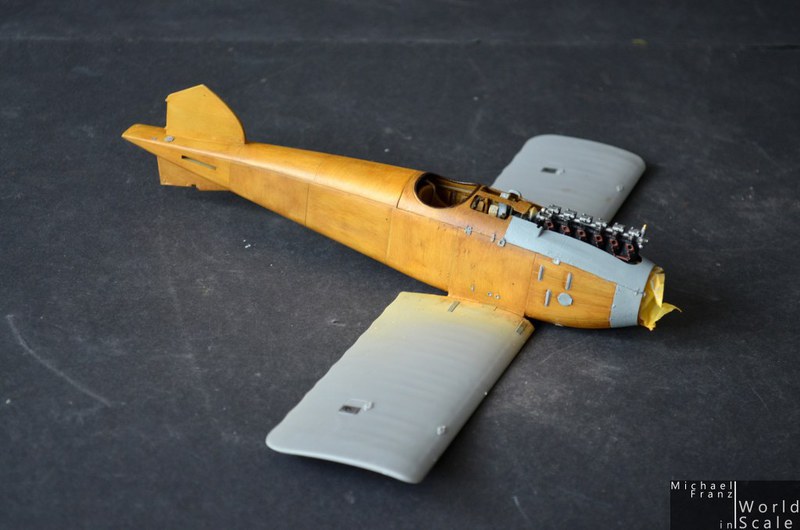
*** UPDATE ***
The oil colors of the wooden optic needed some drying time, then a layer of matt clear coat fixed the colors for the next steps.
The light grey areas were brush painted with colors from Lifecolor with a little black washing on it.

Cheers
Micha
regards,
Michael
http://www.world-in-scale.de
Berlin, Germany
Joined: June 14, 2016
KitMaker: 25 posts
AeroScale: 25 posts
Posted: Thursday, June 16, 2016 - 03:12 PM UTC
Thanks, Micha, a lot,
for the motivation to go foreward toward my shelfware: a Roden 1/32 kit of the Albatros D.III - one OAW and one Johannisthal. My question is about a short sentence you wrote:
Quoted Text
The wooden optic was made with oil colors which were painted over a beige airbrushed base-color. I have used a light brown/yellow color, darkend with a darker brown and lightend with a lighter yellow. Painted each panel by panel in different directions, lither in the center of each panel.
The birch structure of the plywood - could you kindly tell a bit more detailed how you've managed to get it this good? What paint is used? What brush made your day?
I've to admit my test with a brush was completly a fiasco and I binned the complete D.III kit - it was never shown to public not to be banned due to bedazzlement-hazard.

Christian
"Anything that can go right, will go right."
Yhprum's law
In the building yard:
1/32 Acadamy Sopwith Camel F.1
Baden-Württemberg, Germany
Joined: December 26, 2009
KitMaker: 813 posts
AeroScale: 98 posts
Posted: Sunday, June 26, 2016 - 01:19 PM UTC
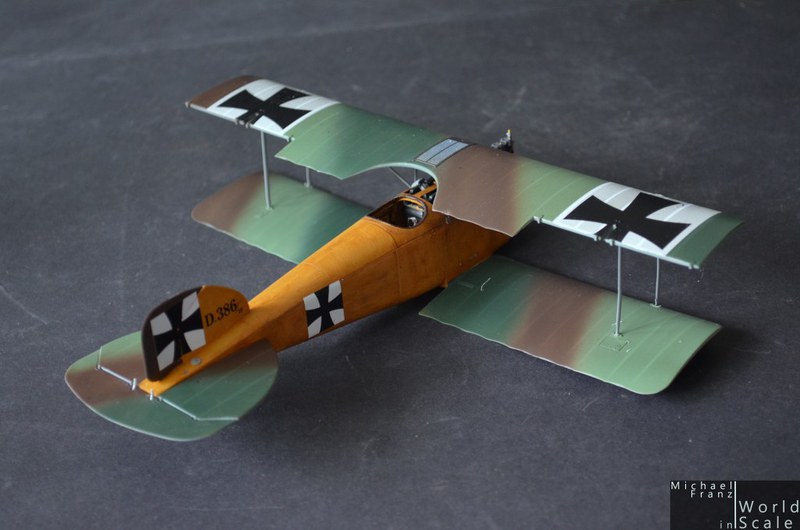
*** UPDATE ***
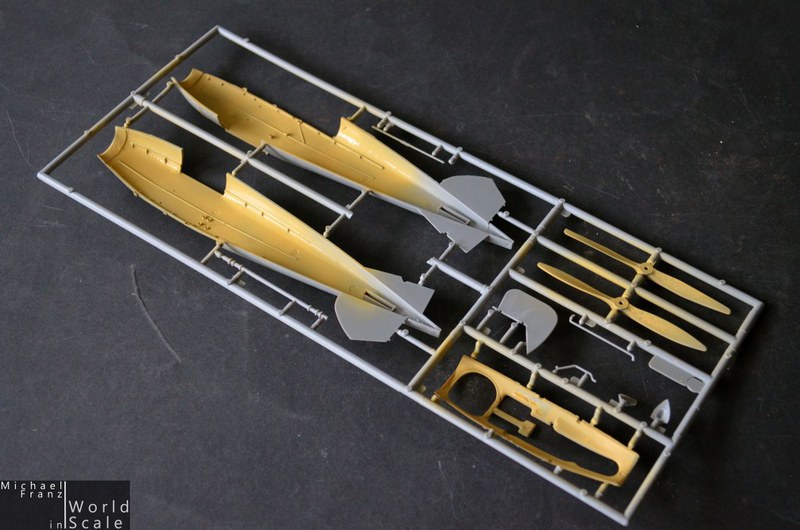
The wings were painted ...
First the underside in a light sky blue, then the light green on the upper side, followed by the dark green and dark red/brown.
The scheme was painted free-hand without masking the colors.


Now clear coat, decals, clear coat and the painting of the ribs of the wings.
Cheers
Micha
regards,
Michael
http://www.world-in-scale.de
#424
Queensland, Australia
Joined: April 23, 2015
KitMaker: 4,648 posts
AeroScale: 1,938 posts
Posted: Sunday, June 26, 2016 - 02:48 PM UTC
Beautiful Michael! Your painting skills are impressive!
Gaz
"Artillery adds dignity, to what would otherwise be an ugly brawl."
Frederick The Great
England - East Midlands, United Kingdom
Joined: November 06, 2005
KitMaker: 753 posts
AeroScale: 311 posts
Posted: Sunday, June 26, 2016 - 06:39 PM UTC
Excellent progress and having tackled a Roden 1/32 WW1 kit before, I know the difference between these and WNW and how much work you are putting into this to get it to this standard.
It looks tremendous so far.
Gary
United States
Joined: January 18, 2009
KitMaker: 12 posts
AeroScale: 10 posts
Posted: Monday, June 27, 2016 - 03:27 AM UTC
I love the way this one is turning out. I especially like the look of the oil painted wood grain. Nice work!
Ontario, Canada
Joined: July 22, 2012
KitMaker: 771 posts
AeroScale: 763 posts
Posted: Wednesday, June 29, 2016 - 06:51 AM UTC
I want more close ups and walk through on the wood grain! How are we supposed to learn?!

Matt Odom
I've been known to build a few things
Baden-Württemberg, Germany
Joined: December 26, 2009
KitMaker: 813 posts
AeroScale: 98 posts
Posted: Wednesday, June 29, 2016 - 01:18 PM UTC
Thanks a lot!
Yes, the Roden kit is far away from the Wingnut Kits. But in this combination from Encore models it is quiet good. The resin and etched parts are a real good upgrade to the Roden kit. But after building this kit, you know what you get with the Wingnut ones
@Matt: I will make some close ups of the wooden texture at the weekend!
Cheers
Michael
regards,
Michael
http://www.world-in-scale.de
#372
United Kingdom
Joined: March 10, 2010
KitMaker: 2,568 posts
AeroScale: 1,619 posts
Posted: Thursday, June 30, 2016 - 03:22 AM UTC
Looking fantastic Michael.
The woodgrain finish on the fuselage and wing camouflage are just beautiful.
I'm planning on getting started on a couple of big scale WW1 planes in the next few days.
On the bench: 1/72 Mosquito, Lightning F.6, DH.2,
AMT Vulcan Shuttle Surak.
Cyber-Hobby 1:35 Sherman Firefly IC - still stalled.
Baden-Württemberg, Germany
Joined: December 26, 2009
KitMaker: 813 posts
AeroScale: 98 posts
Posted: Wednesday, July 20, 2016 - 08:56 PM UTC
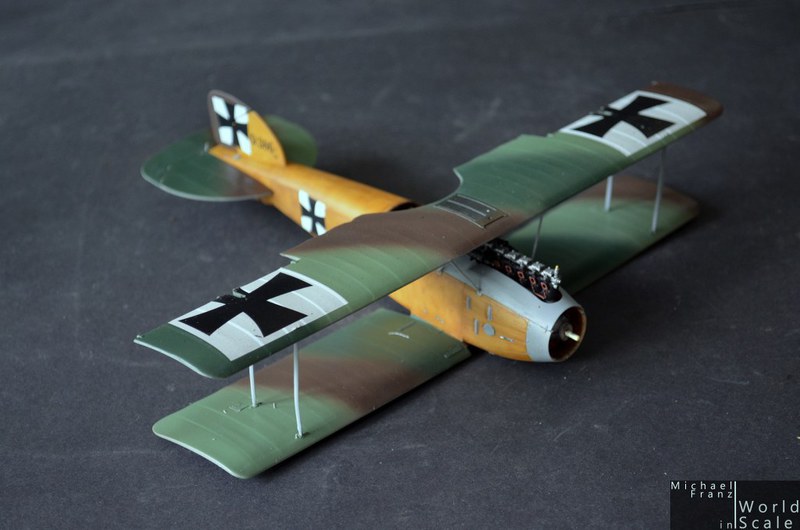
Hello,
the Albatros received his wings... but first the two Spandau machine guns from Master Models from Poland were glued together, painted and mounted.
The wings were painted, received the decals and the rips were painted with Tamiya Smoke, finished with clear coat matt, then mounted on the metal struts. Now drying time ....

Cheers
Micha
regards,
Michael
http://www.world-in-scale.de
Connecticut, United States
Joined: October 26, 2009
KitMaker: 424 posts
AeroScale: 389 posts
Posted: Thursday, July 21, 2016 - 07:31 PM UTC
beautiful, beautiful! Especially the interior! the plywood looks like Plywood
Captn Tommy
#424
Queensland, Australia
Joined: April 23, 2015
KitMaker: 4,648 posts
AeroScale: 1,938 posts
Posted: Friday, July 22, 2016 - 12:58 AM UTC
"Artillery adds dignity, to what would otherwise be an ugly brawl."
Frederick The Great