Air Recce Campaign - 1/32 Roland Cl.IIa "7"
California, United States
Joined: April 26, 2010
KitMaker: 346 posts
AeroScale: 292 posts
Posted: Tuesday, May 24, 2016 - 02:40 AM UTC
Like, follow, find out what I've had for breakfast - your large scale frenemy starter kit.
California, United States
Joined: April 26, 2010
KitMaker: 346 posts
AeroScale: 292 posts
Posted: Tuesday, May 24, 2016 - 06:21 AM UTC
Like, follow, find out what I've had for breakfast - your large scale frenemy starter kit.
JPTRR
 Managing Editor
#051
Tennessee, United States
Joined: December 21, 2002
KitMaker: 7,772 posts
AeroScale: 3,175 posts
Posted: Tuesday, May 24, 2016 - 07:49 AM UTC
If they demand your loyalty, give them integrity; if they demand integrity, give them your loyalty.--Col John Boyd, USAF
Any plan where you lose your hat is a bad plan.
AussieReg
Associate Editor #007
Victoria, Australia
Joined: June 09, 2009
KitMaker: 8,156 posts
AeroScale: 3,756 posts
Posted: Tuesday, May 24, 2016 - 08:06 AM UTC
Looks great so far Ivan, lovely neat work.
Cheers, D
ON the bench
Revell 1/24 '53 Corvette (building as '54)
Revell 1/24 BMW 507 Coupe and Cabrio
Italeri 1/48 Me262 B-1a/U1 Nightfighter
Monogram 1/24 '57 Chevy Nomad
Dragon 1/350 USS Frank Knox DD-742
#424
Queensland, Australia
Joined: April 23, 2015
KitMaker: 4,648 posts
AeroScale: 1,938 posts
Posted: Tuesday, May 24, 2016 - 02:04 PM UTC
Ivan,
Looks really good. Gonna follow this one!
Gaz
"Artillery adds dignity, to what would otherwise be an ugly brawl."
Frederick The Great
California, United States
Joined: April 26, 2010
KitMaker: 346 posts
AeroScale: 292 posts
Posted: Wednesday, June 08, 2016 - 06:17 AM UTC
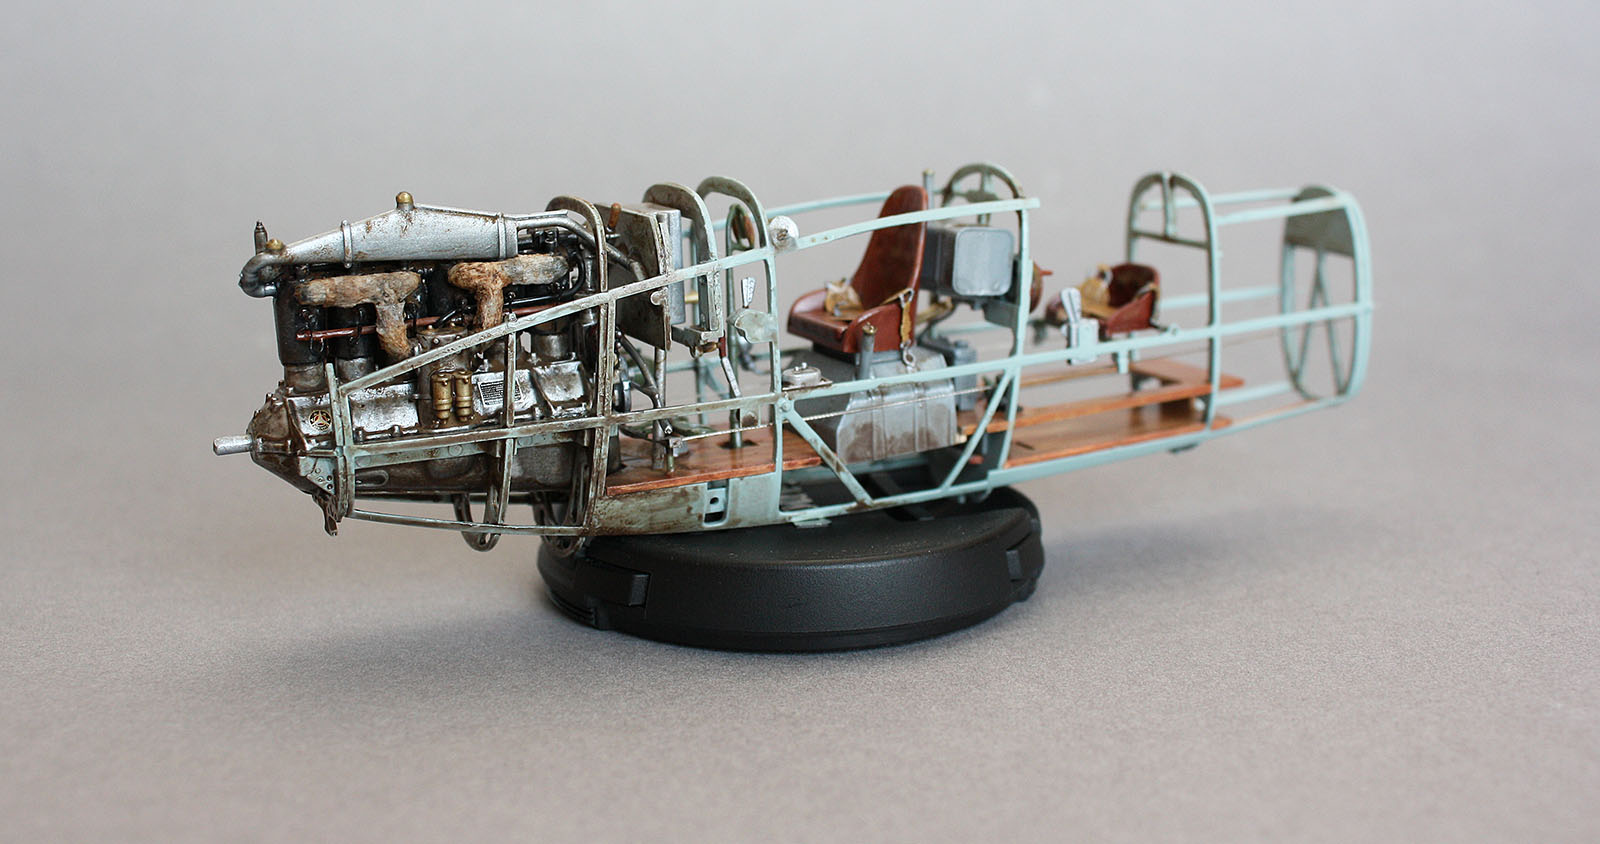
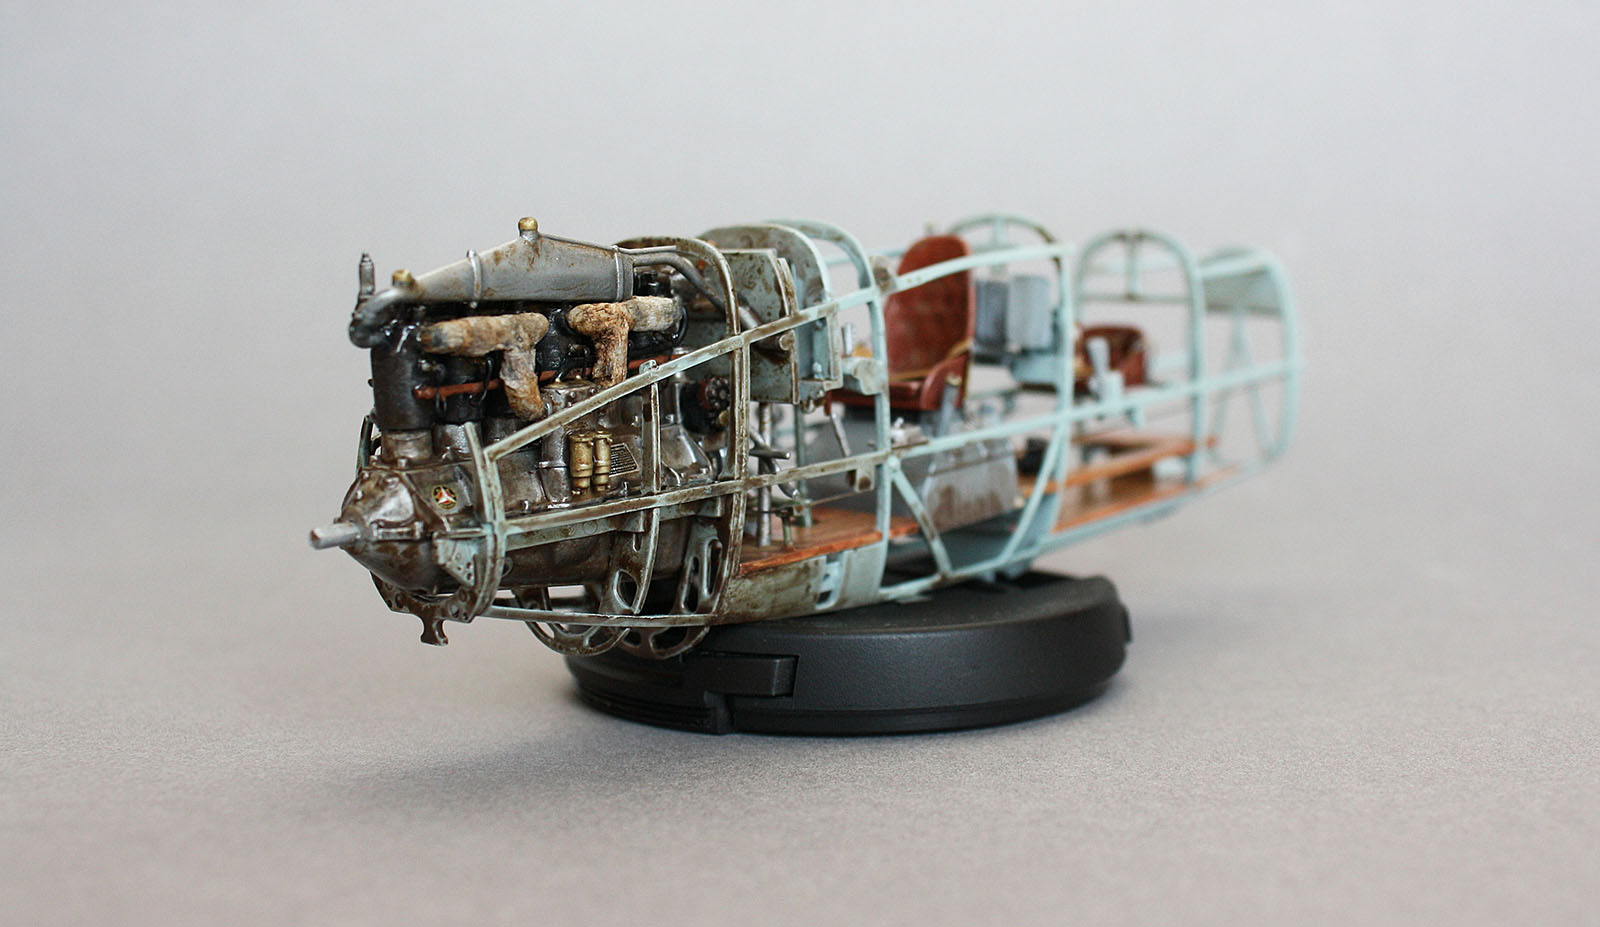
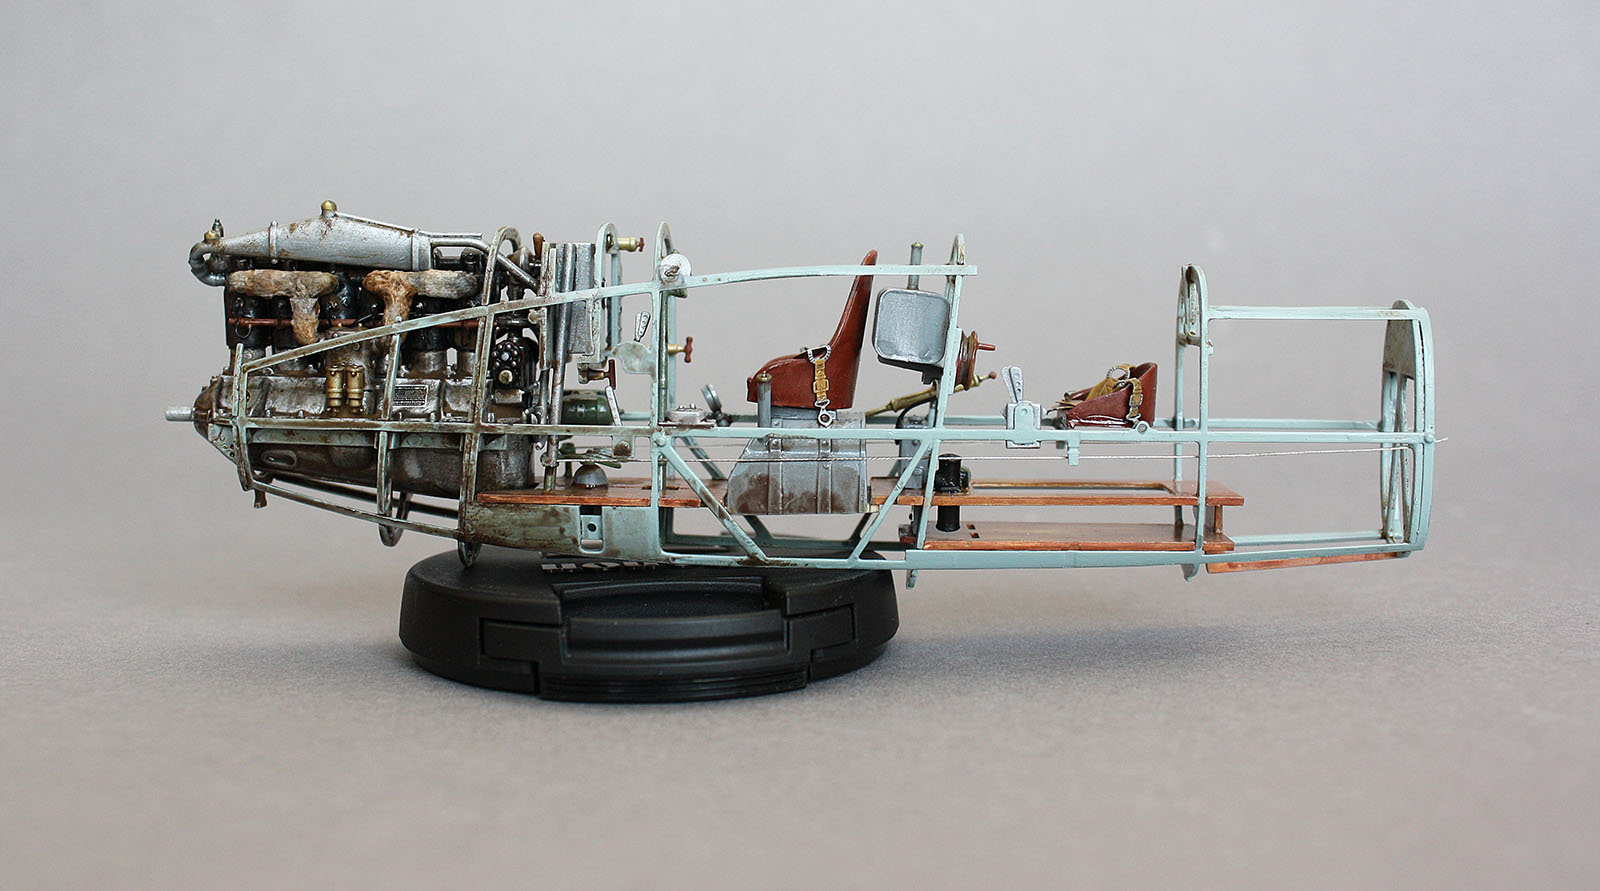
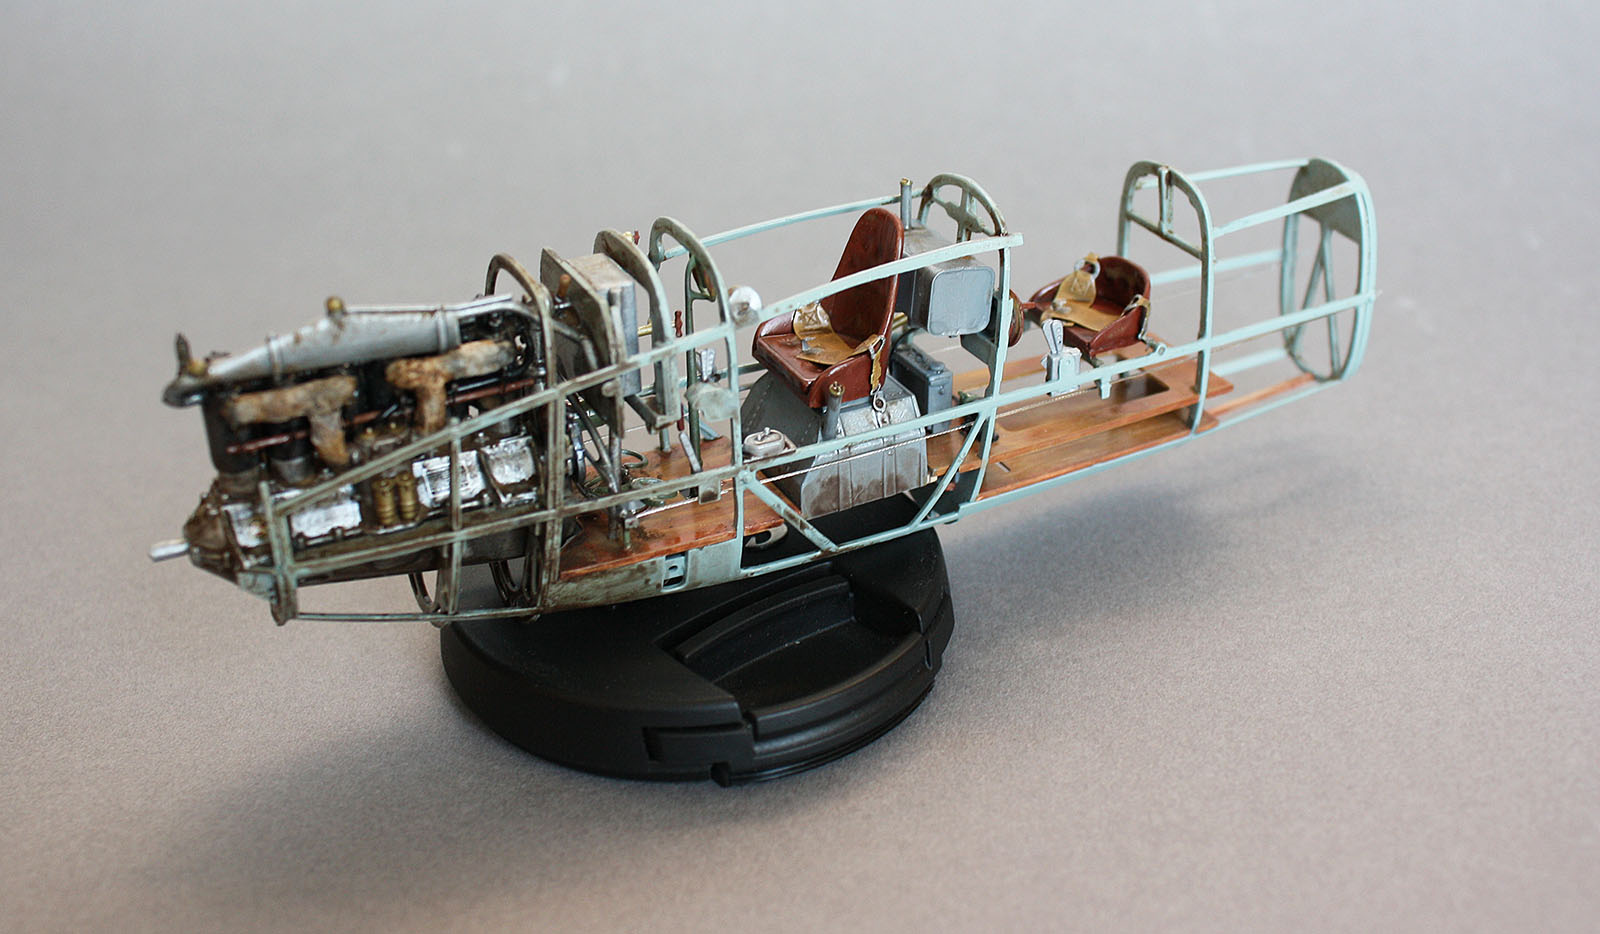
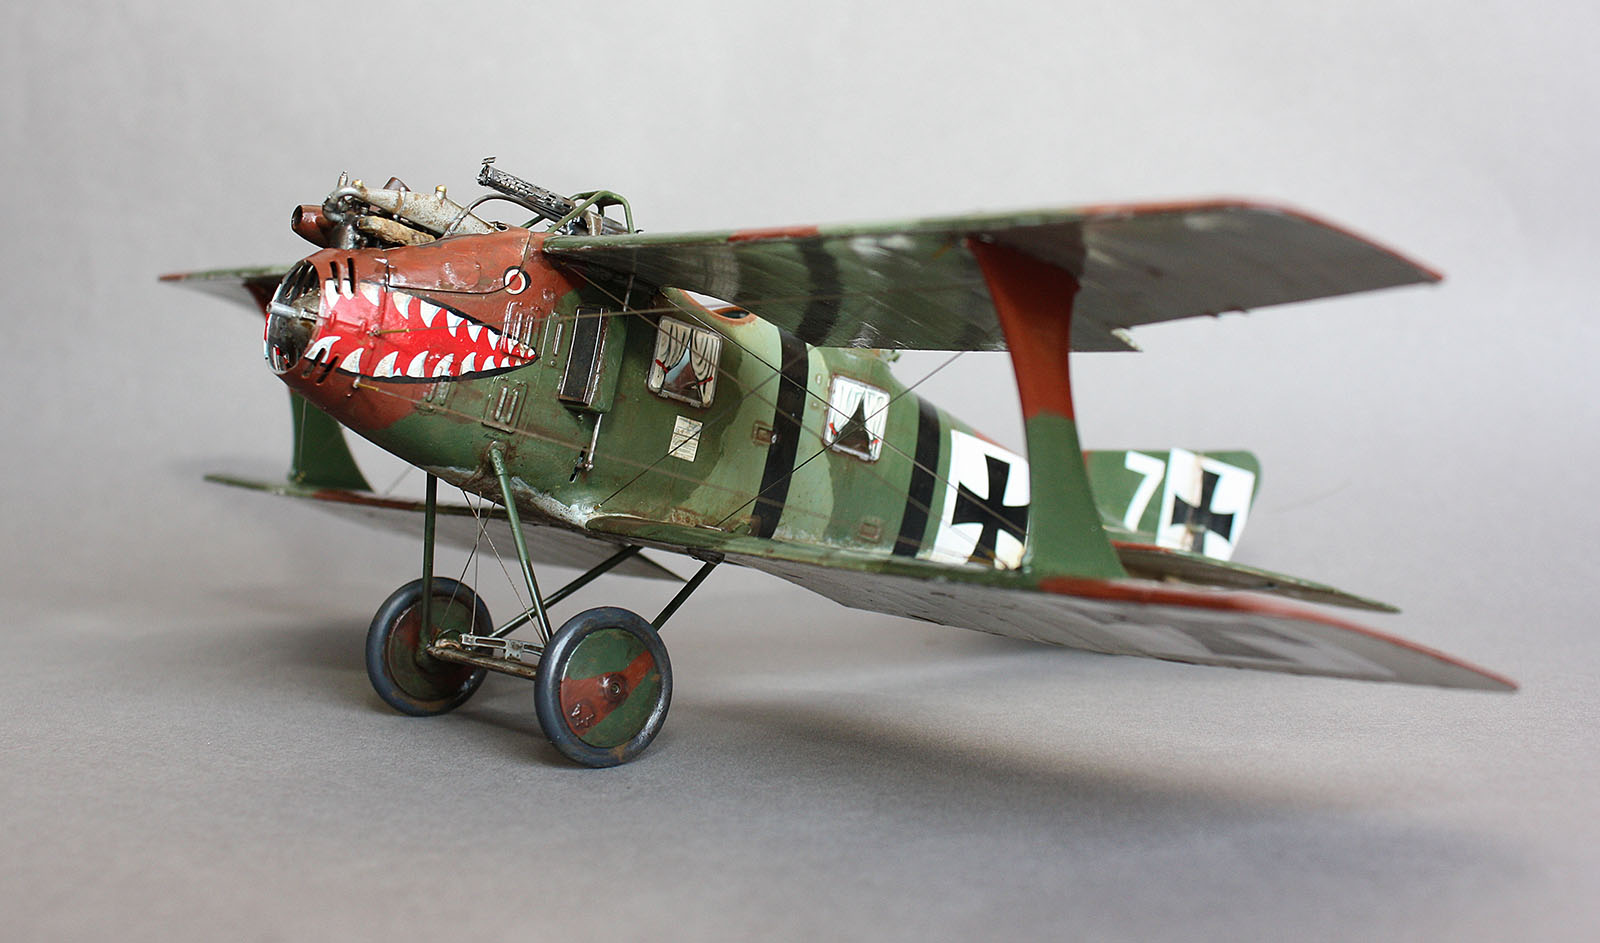
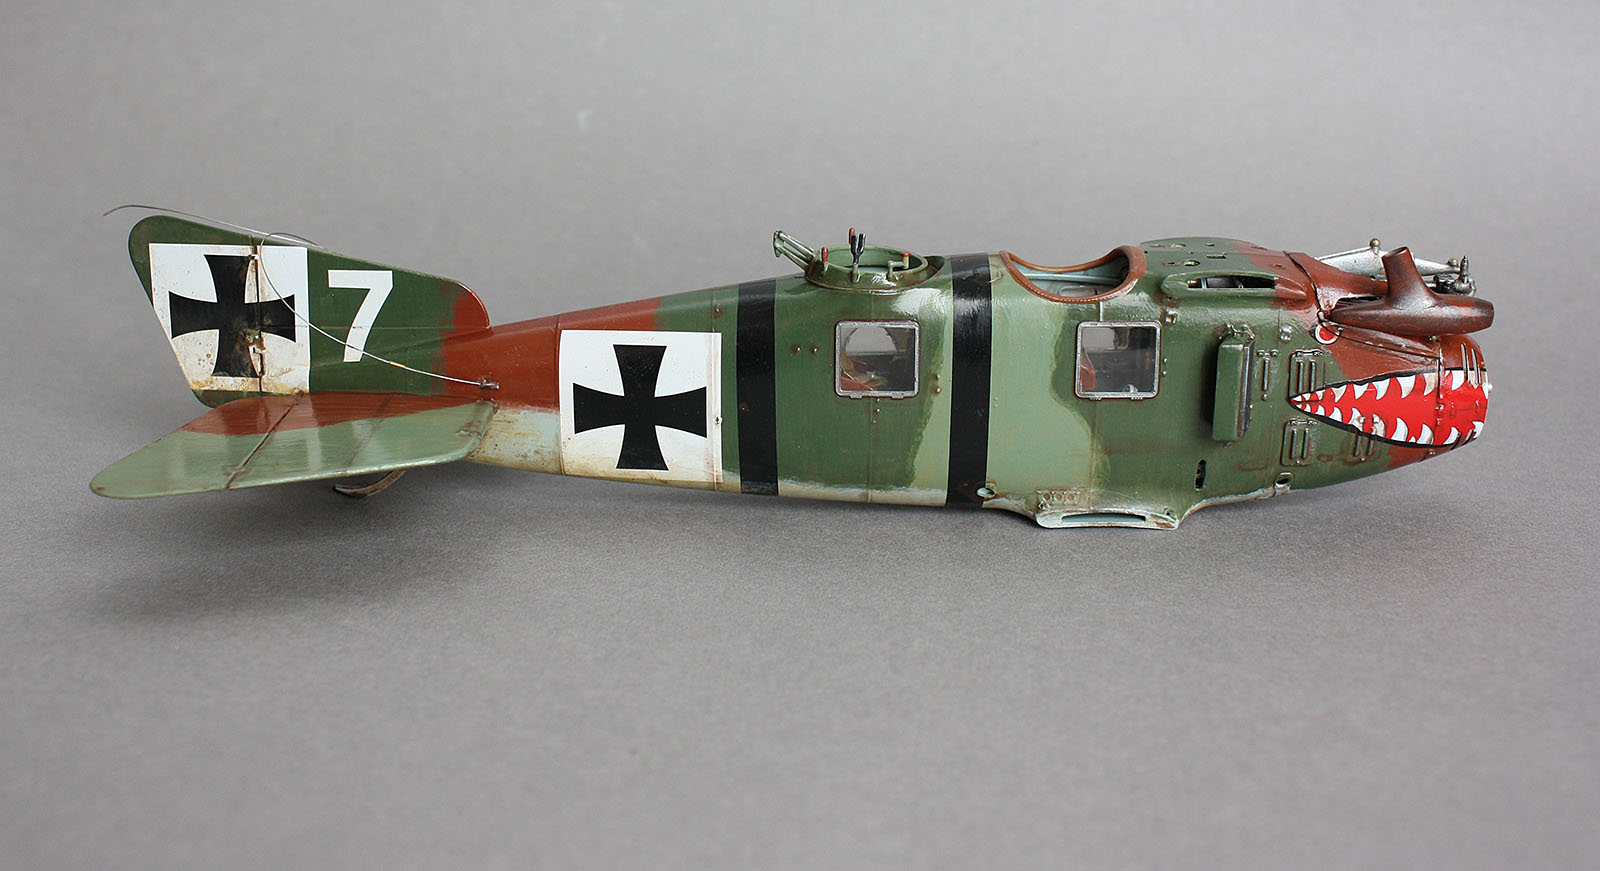
Thanks all! Here's last week's update:
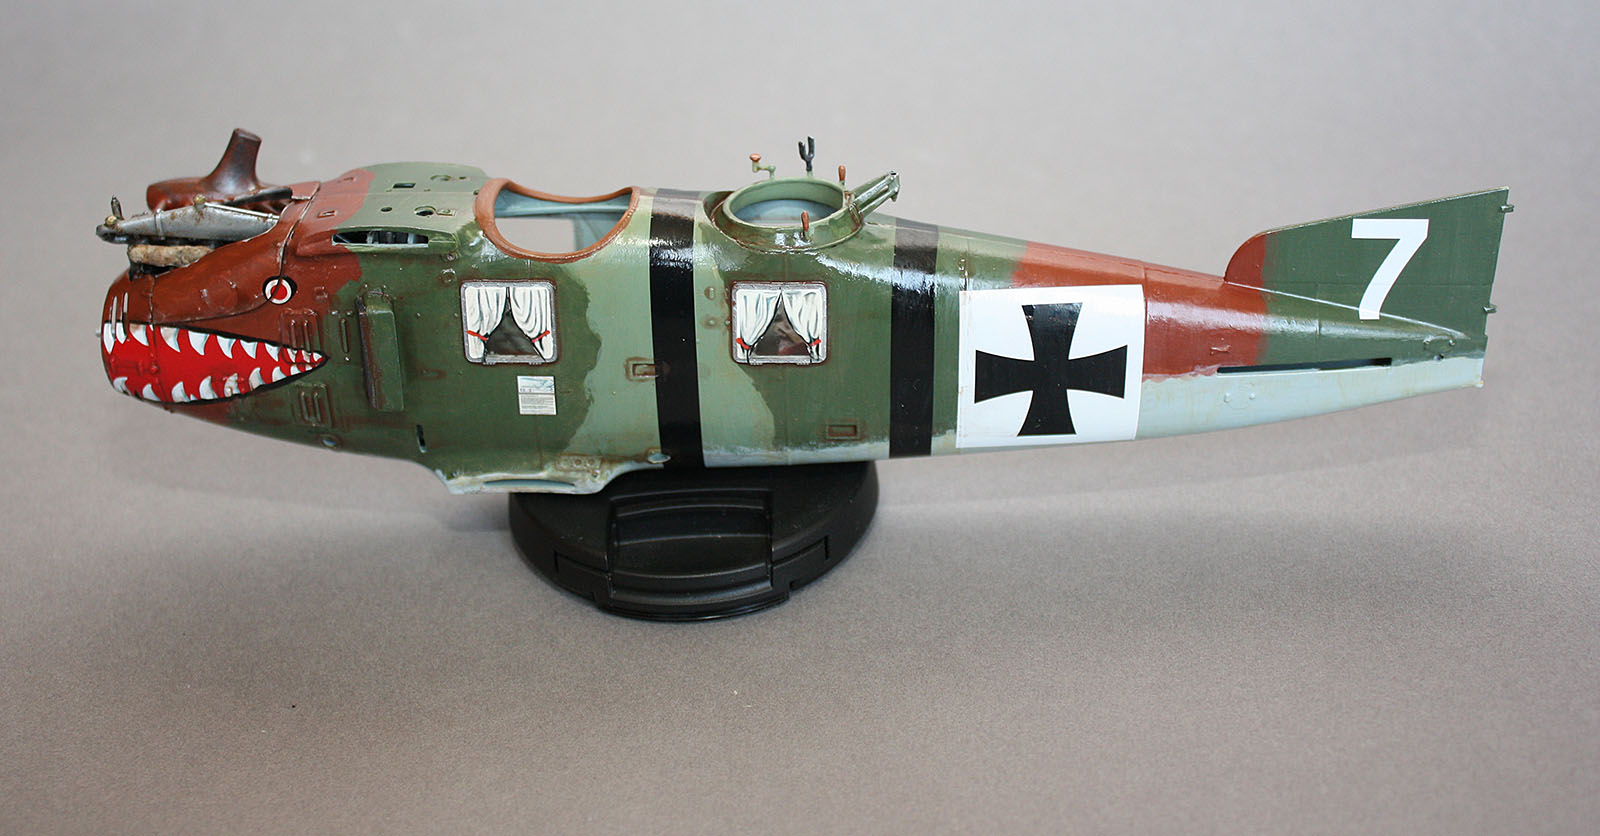


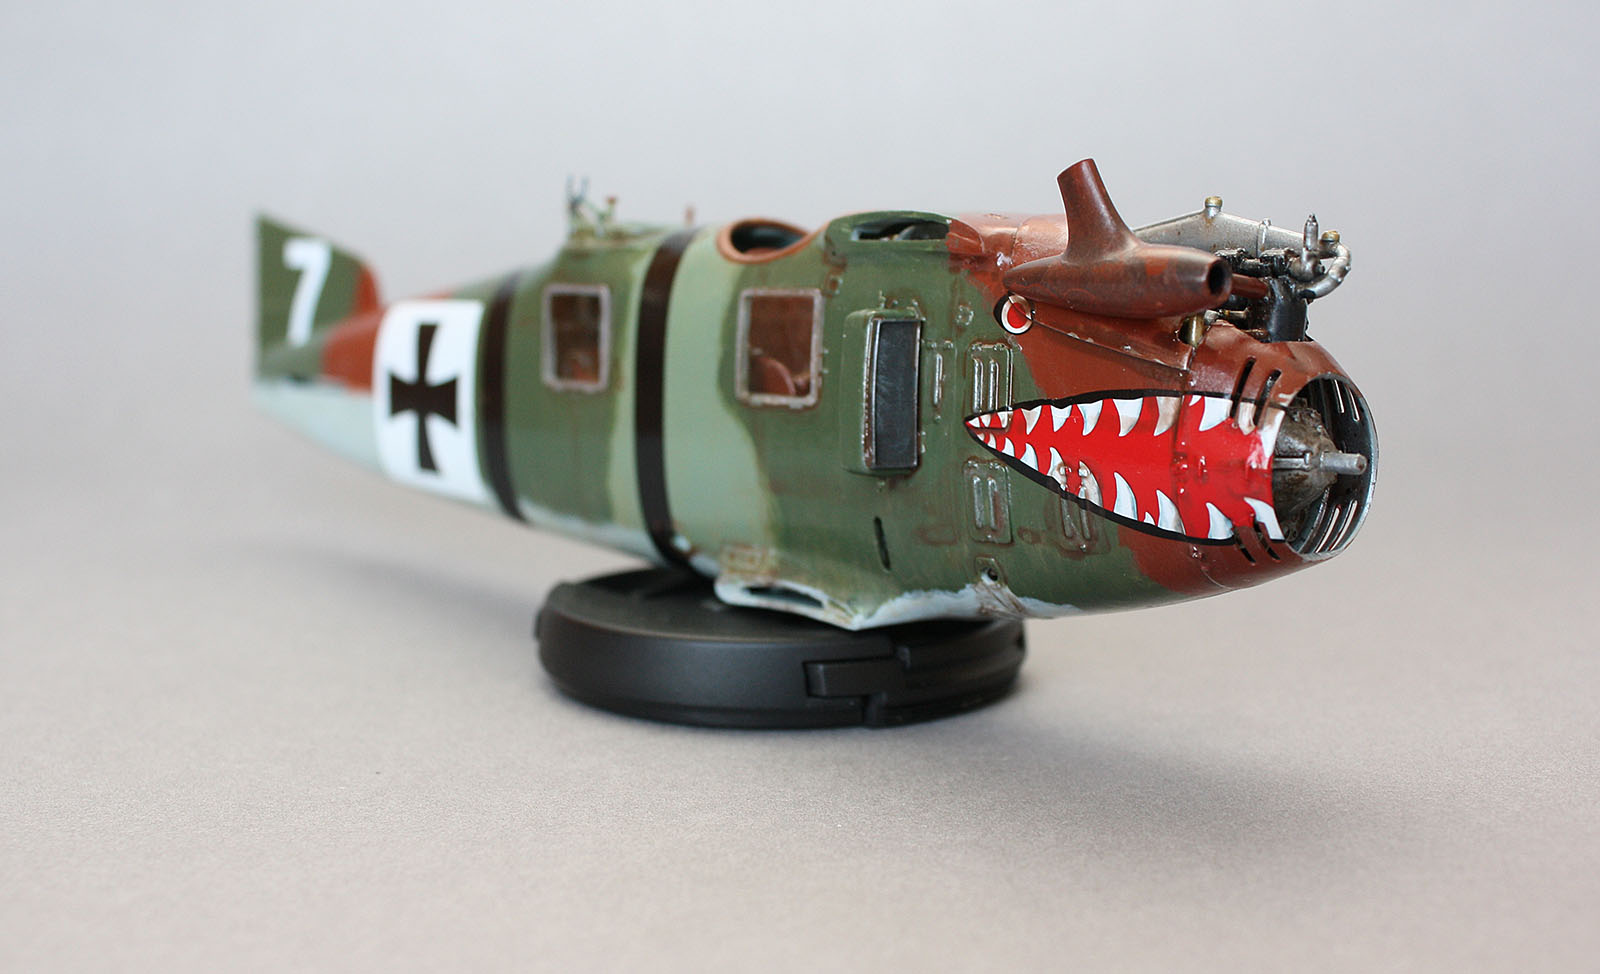
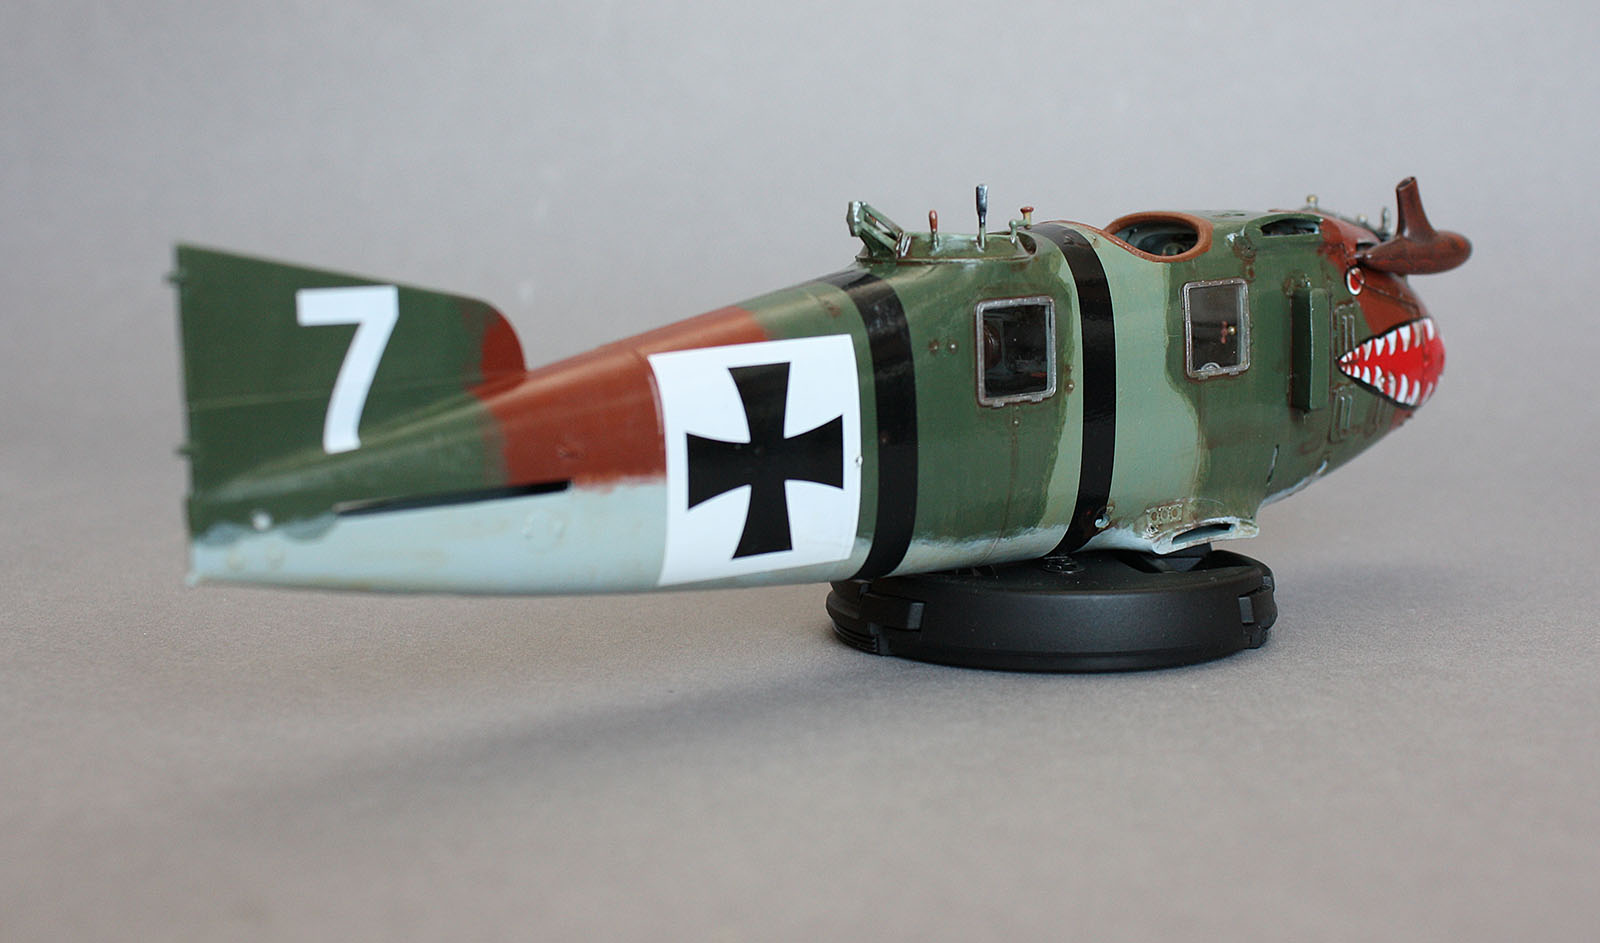
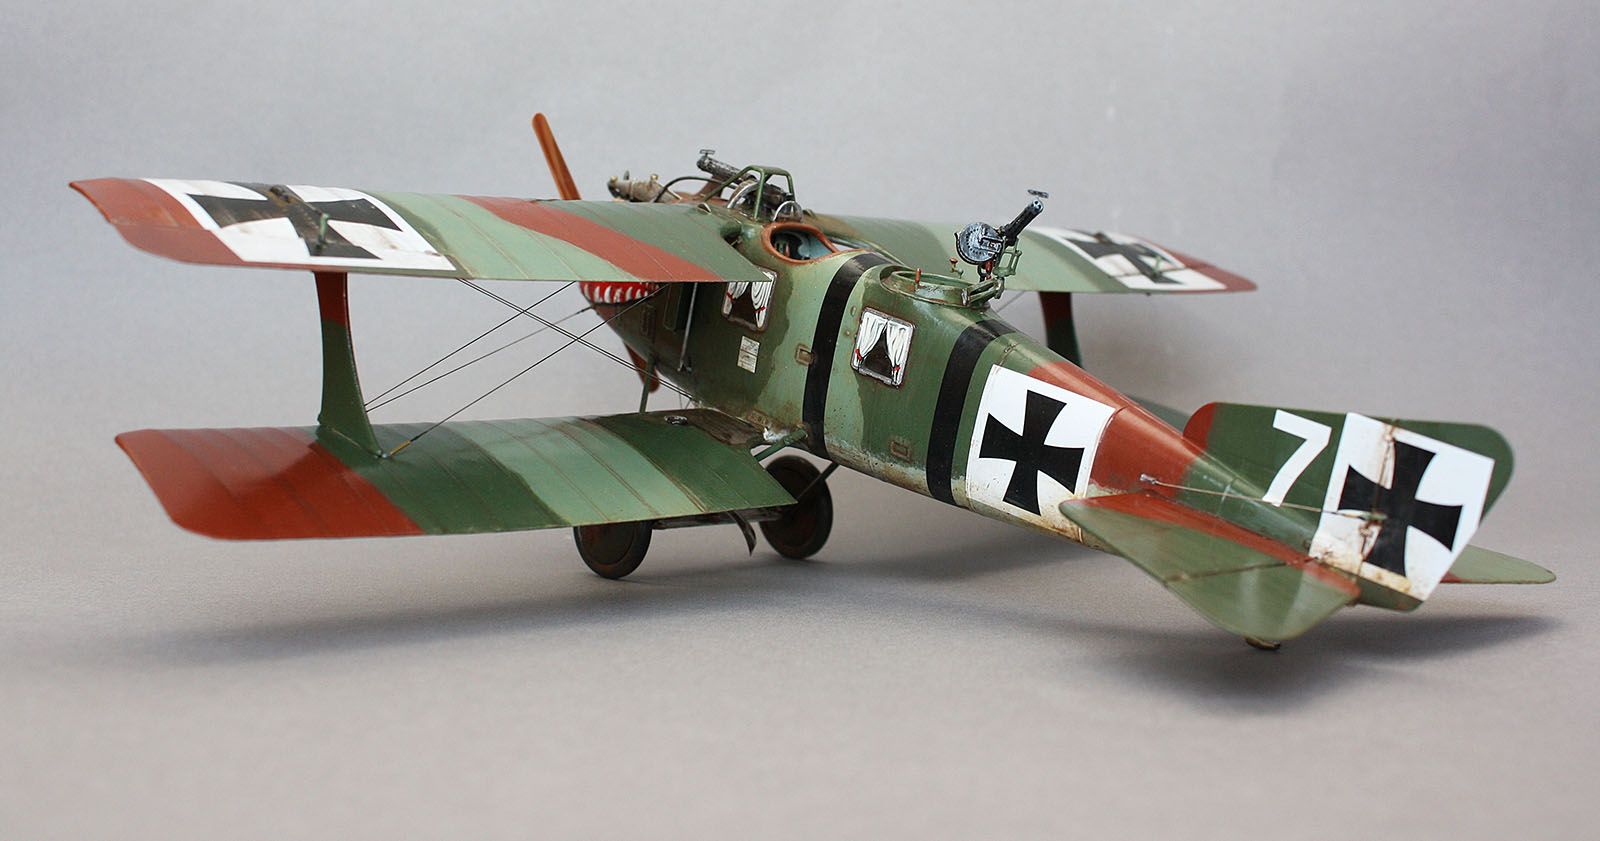
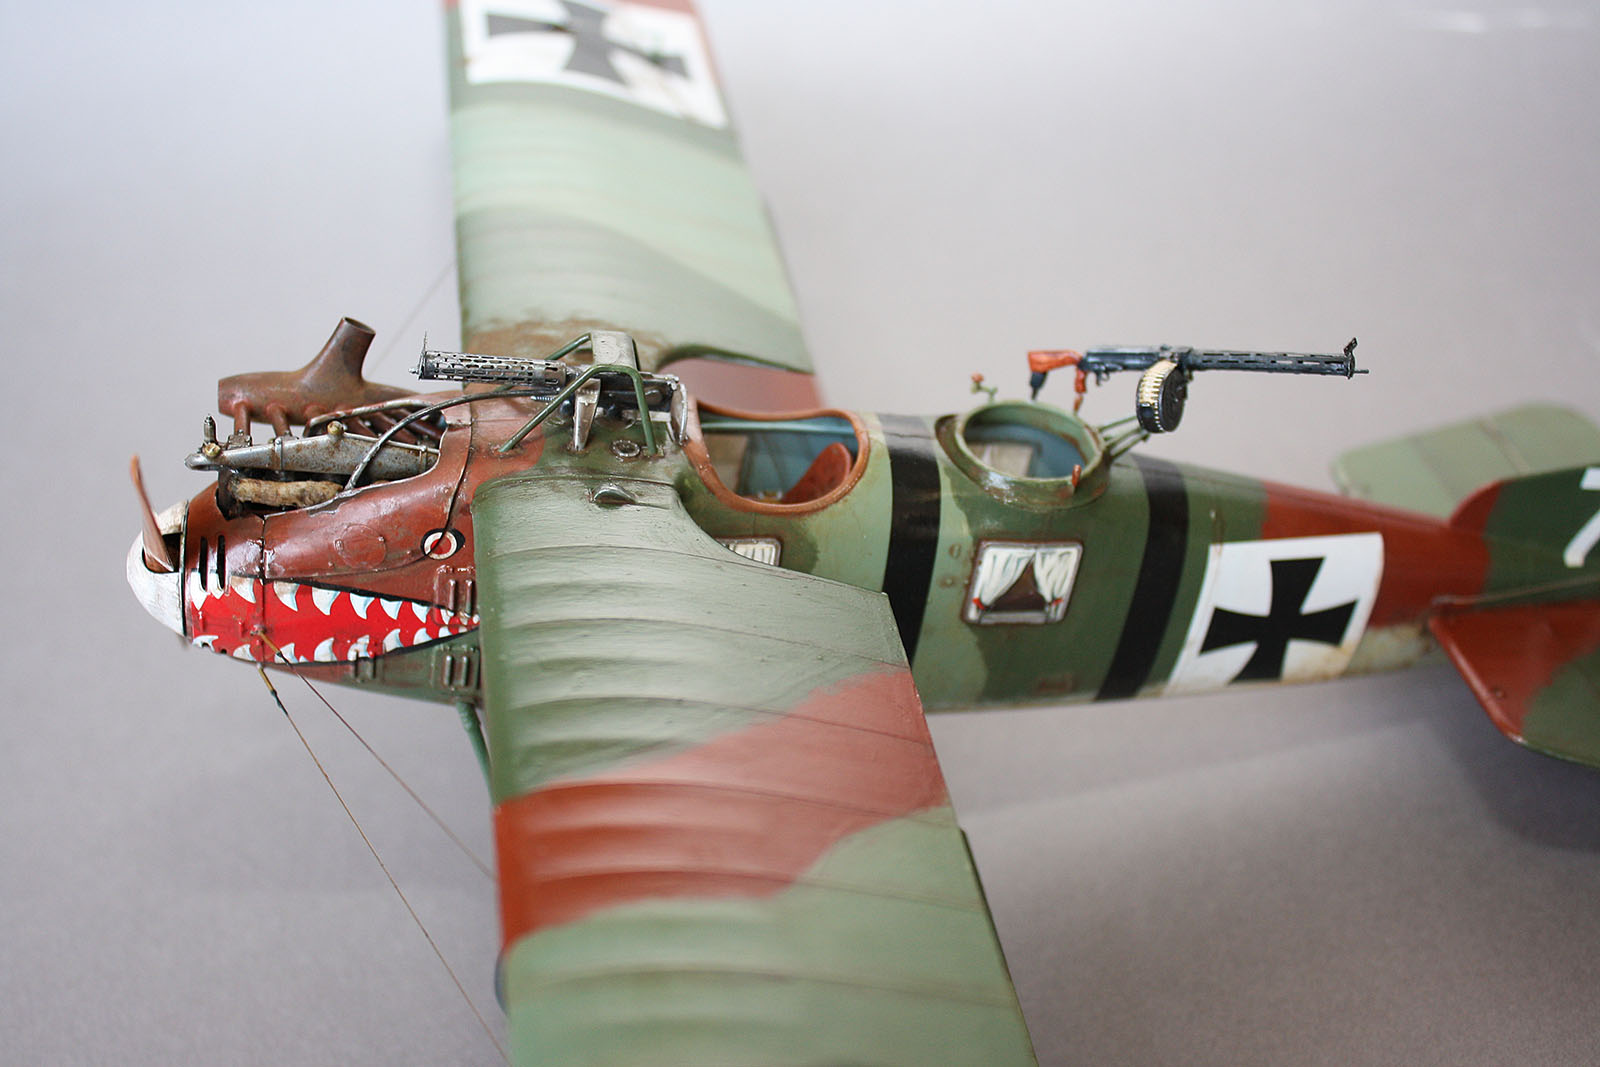
Fuselage is mostly done - now I remember why I've chosen the "shark head" motif. Window curtains are done on one side - almost got caught unawares that the decal for them are clear and require white paint layer as base.
Camo is hand painted, with hand feathered edge and some sloppy filters.
I usually recommend WnW Roland Cl.II for Early Aviation beginners and starting to remember why.
Like, follow, find out what I've had for breakfast - your large scale frenemy starter kit.
Gdańsk, Poland
Joined: February 18, 2016
KitMaker: 92 posts
AeroScale: 90 posts
Posted: Wednesday, June 08, 2016 - 01:09 PM UTC
Hello Ivan,
wow! simply beautiful work.
one question - the curtains are separate or as one part with windows?
Bart
Indre-et-Loire, France
Joined: May 23, 2011
KitMaker: 651 posts
AeroScale: 181 posts
Posted: Wednesday, June 08, 2016 - 01:45 PM UTC
Hi,
Ivan: what a beautifull work !!!!! I'm eager to see the followings
cheers
nico
Indre-et-Loire, France
Joined: May 23, 2011
KitMaker: 651 posts
AeroScale: 181 posts
Posted: Wednesday, June 08, 2016 - 01:53 PM UTC
Hi all,
here is the beginings of my model for this campaign, it'll be a "simple" making with no scratch nor PE, just a from the box, so i hope it'll be done in the timelines.
So here is the box and contains, not seems so bad for Heller standards :


Firstable a little bath and drying under the sunlights :


That's all but pics will follow soon ...
cheers
nico
#424
Queensland, Australia
Joined: April 23, 2015
KitMaker: 4,648 posts
AeroScale: 1,938 posts
Posted: Wednesday, June 08, 2016 - 01:55 PM UTC
"Artillery adds dignity, to what would otherwise be an ugly brawl."
Frederick The Great
Berlin, Germany
Joined: October 12, 2008
KitMaker: 709 posts
AeroScale: 651 posts
Posted: Wednesday, June 08, 2016 - 02:27 PM UTC
Quoted Text
Hi all,
here is the beginings of my model for this campaign,...
That's all but pics will follow soon ...
cheers
nico
Très jolie!
But I think you chose the wrong thread and have to go there with your entrance:
https://aeroscale.kitmaker.net/forums/244035&page=3#2099454P.S. Bonne chance ! pour le championnats d'Europe et paix
Thomas

Sometimes you need to distance yourself to see things clearly - Lao Tzu -
... in scale and in real life -T.
Berlin, Germany
Joined: October 12, 2008
KitMaker: 709 posts
AeroScale: 651 posts
Posted: Wednesday, June 08, 2016 - 02:29 PM UTC
Great work, Ivan - nice to watch and follow.
Thomas
Sometimes you need to distance yourself to see things clearly - Lao Tzu -
... in scale and in real life -T.
#259
Massachusetts, United States
Joined: October 23, 2011
KitMaker: 2,265 posts
AeroScale: 1,715 posts
Posted: Wednesday, June 08, 2016 - 04:31 PM UTC
That shark mouth is wonderful!

Indre-et-Loire, France
Joined: May 23, 2011
KitMaker: 651 posts
AeroScale: 181 posts
Posted: Wednesday, June 08, 2016 - 04:59 PM UTC
Quoted Text
Quoted Text
Hi all,
here is the beginings of my model for this campaign,...
That's all but pics will follow soon ...
cheers
nico
Nicolas: Très jolie!
But I think you chose the wrong thread and have to go there with your entrance:
https://aeroscale.kitmaker.net/forums/244035&page=3#2099454
P.S. Bonne chance ! pour le championnats d'Europe et paix
Thomas
OOOUPS You're completly right !!! I did not see it was an individual post ....So sorry Yvan to have polluted your thread ............. shame on me !
...I'm going to remove my post.....
et merci pour l'Euro

cheers
nico
California, United States
Joined: April 26, 2010
KitMaker: 346 posts
AeroScale: 292 posts
Posted: Wednesday, June 08, 2016 - 10:54 PM UTC
Quoted Text
Hello Ivan,
wow! simply beautiful work.
one question - the curtains are separate or as one part with windows?
Bart
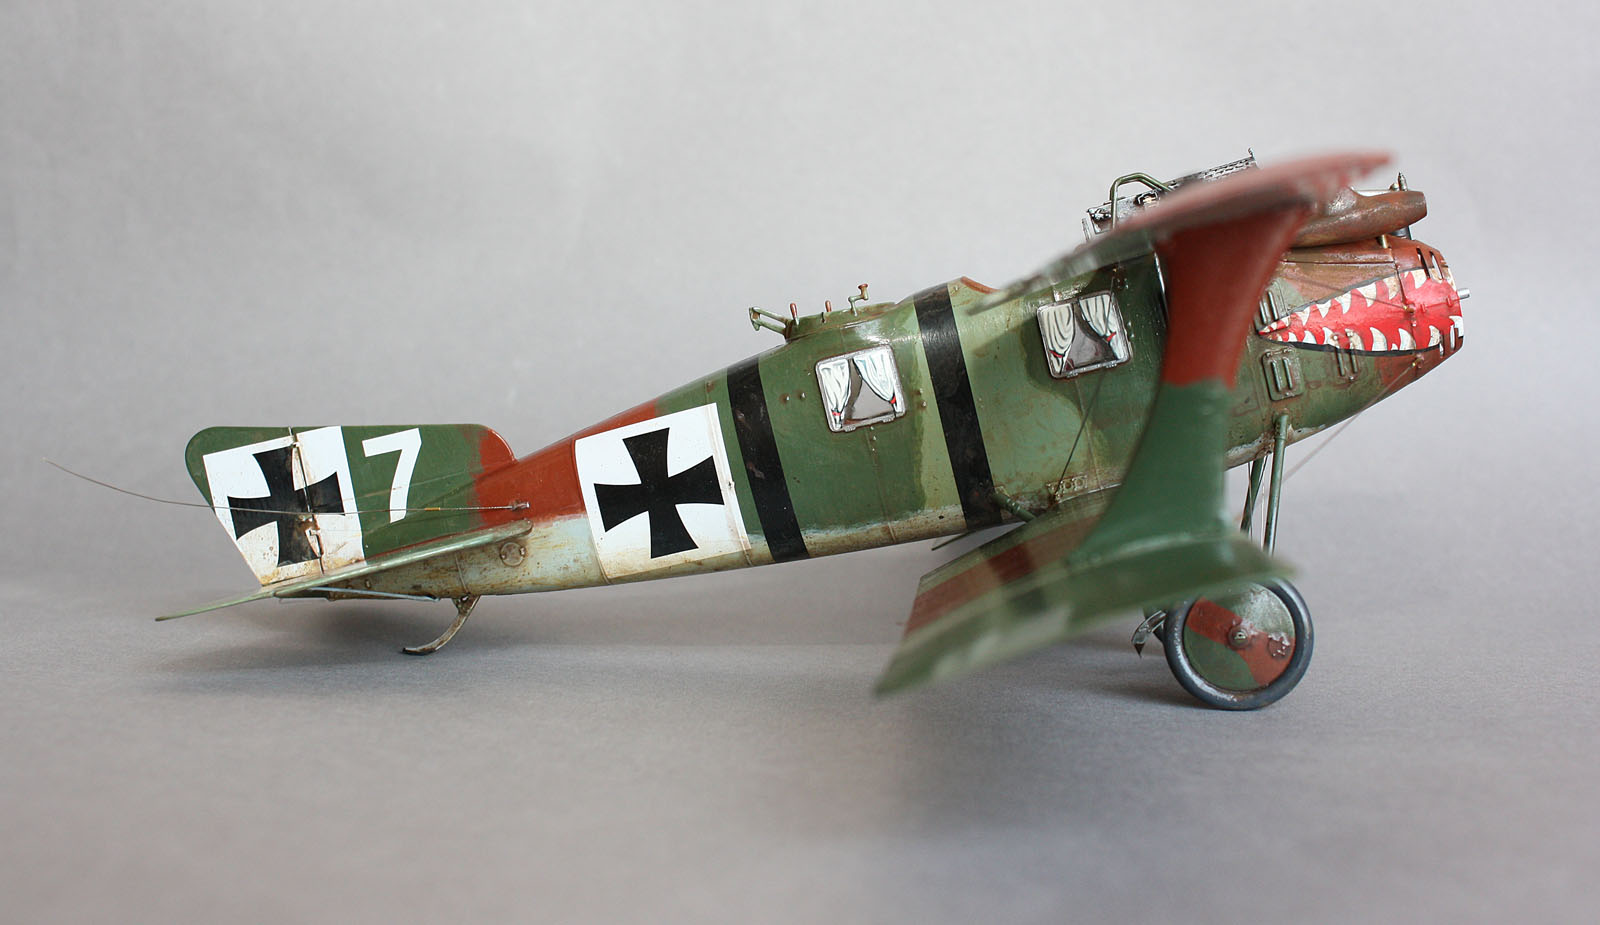
The curtains are clear decals provided with the kit - you paint the white over clear styrene window in approximate shape of the curtain (I used cut out decal to trace the shape), then apply decal to provide outline, shading and red sash of the curtain...
I'm not sure why the decals are clear and not printed on white, but that's how they come - extra step, but results are good. Just be careful not to paint too much white.
Like, follow, find out what I've had for breakfast - your large scale frenemy starter kit.
California, United States
Joined: April 26, 2010
KitMaker: 346 posts
AeroScale: 292 posts
Posted: Wednesday, June 08, 2016 - 10:55 PM UTC
Quoted Text
OOOUPS You're completly right !!! I did not see it was an individual post ....So sorry Yvan to have polluted your thread ............. shame on me !
...I'm going to remove my post.....
et merci pour l'Euro
cheers
nico
No problemo,

Like, follow, find out what I've had for breakfast - your large scale frenemy starter kit.
Berlin, Germany
Joined: June 14, 2016
KitMaker: 25 posts
AeroScale: 25 posts
Posted: Monday, June 13, 2016 - 06:04 PM UTC
Great job -wished I could do it in this way!
"Anything that can go right, will go right."
Yhprum's law
In the building yard:
1/32 Acadamy Sopwith Camel F.1
California, United States
Joined: April 26, 2010
KitMaker: 346 posts
AeroScale: 292 posts
Posted: Tuesday, June 14, 2016 - 04:37 AM UTC
Thanks!
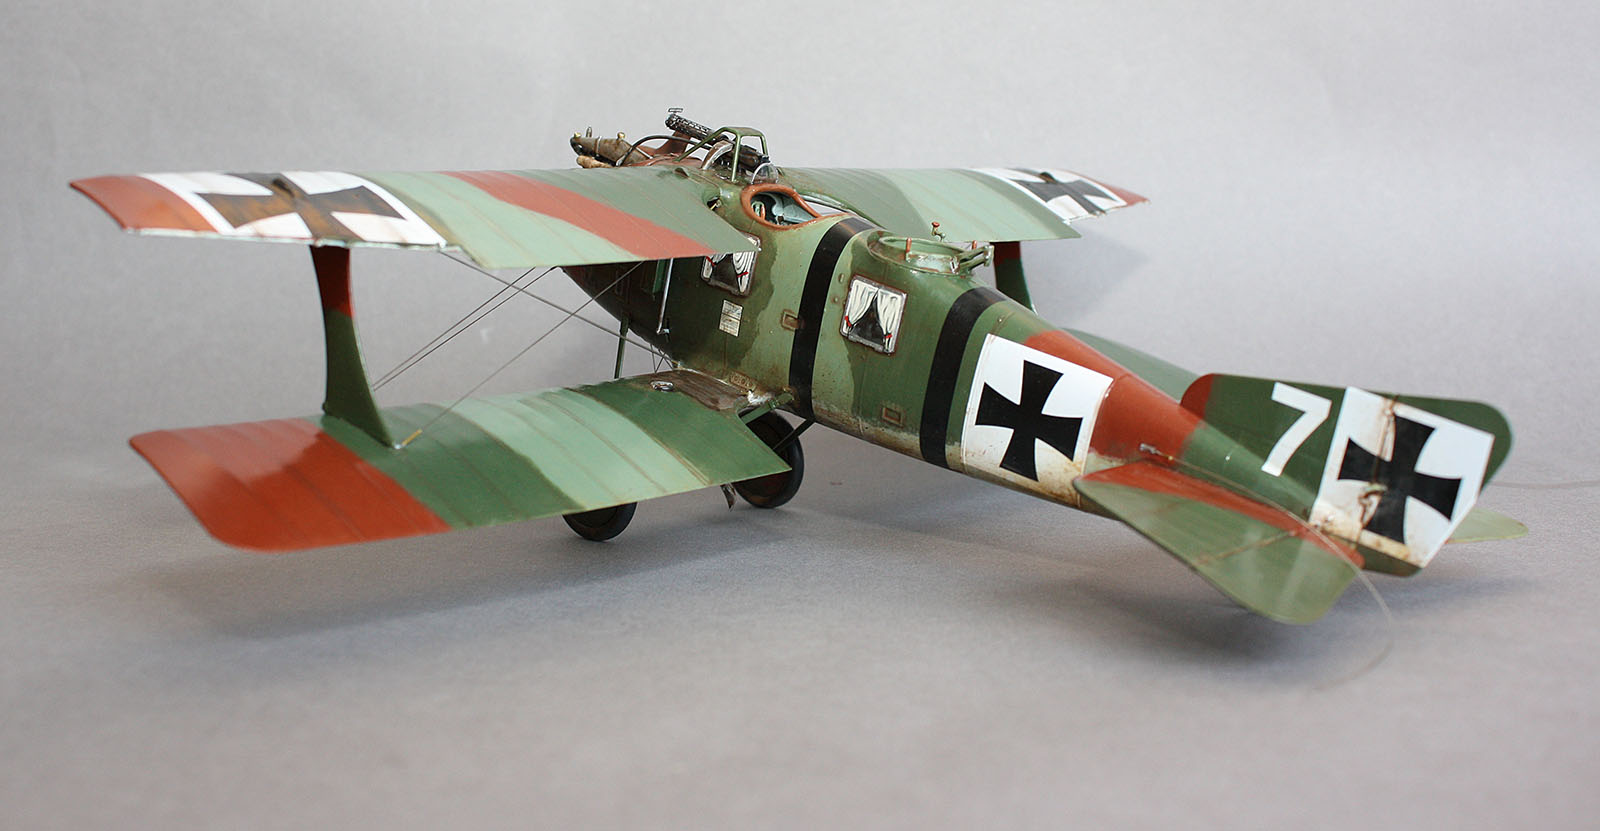
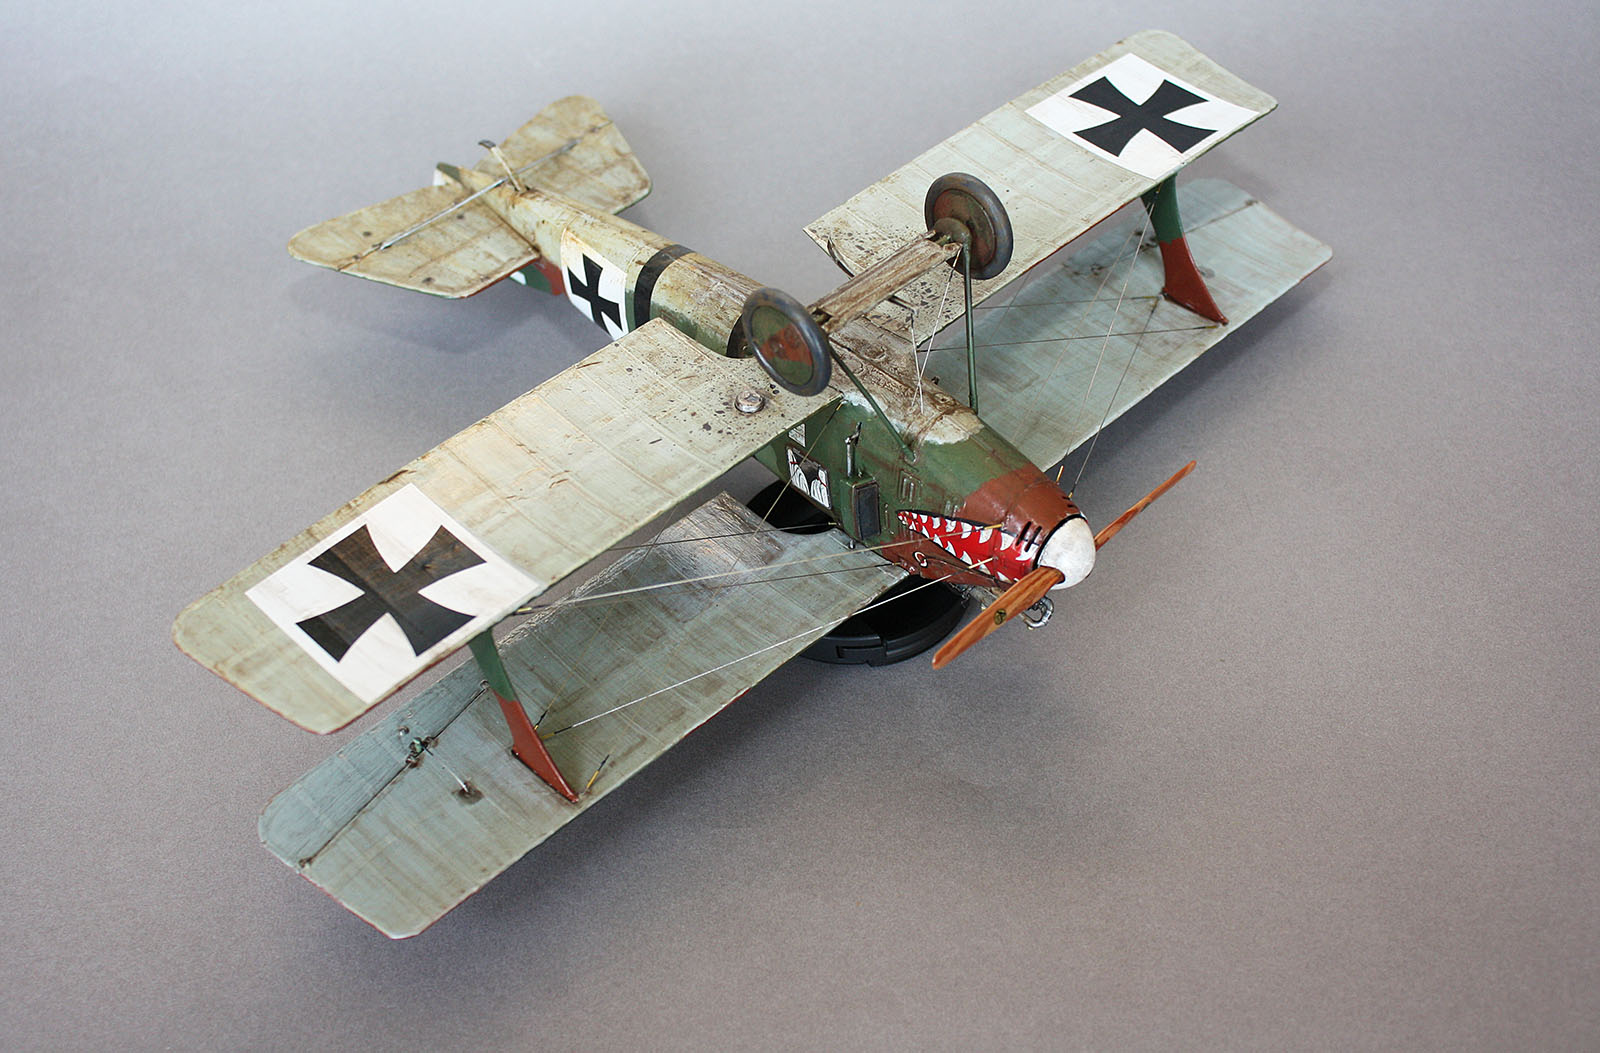
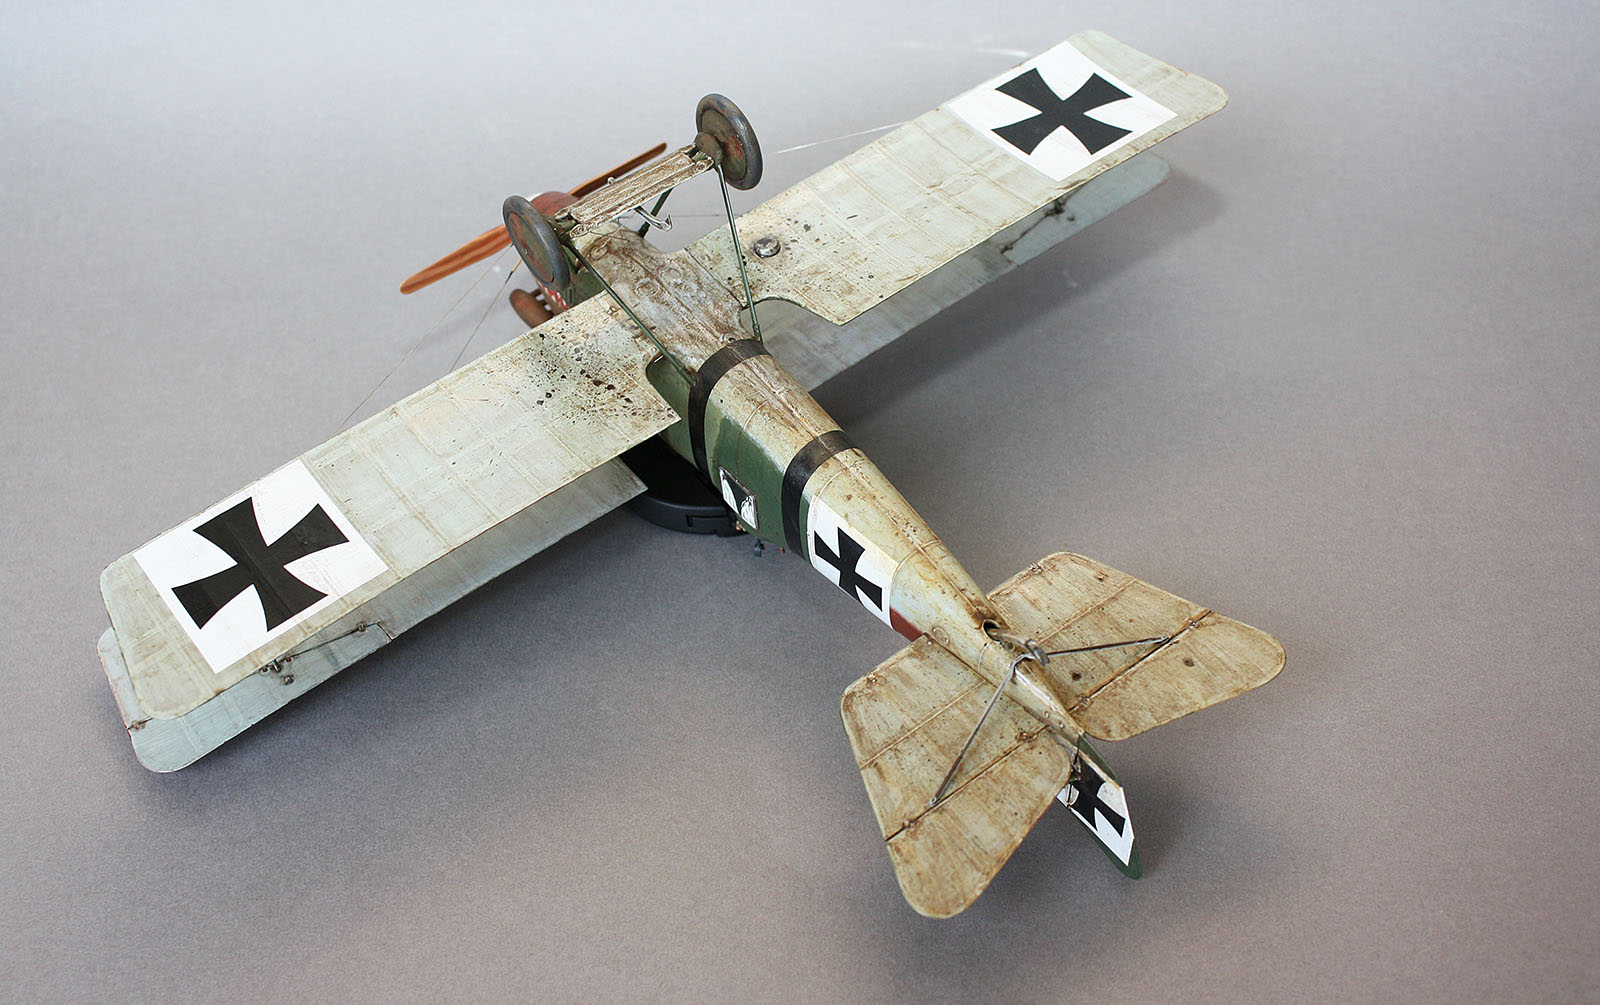
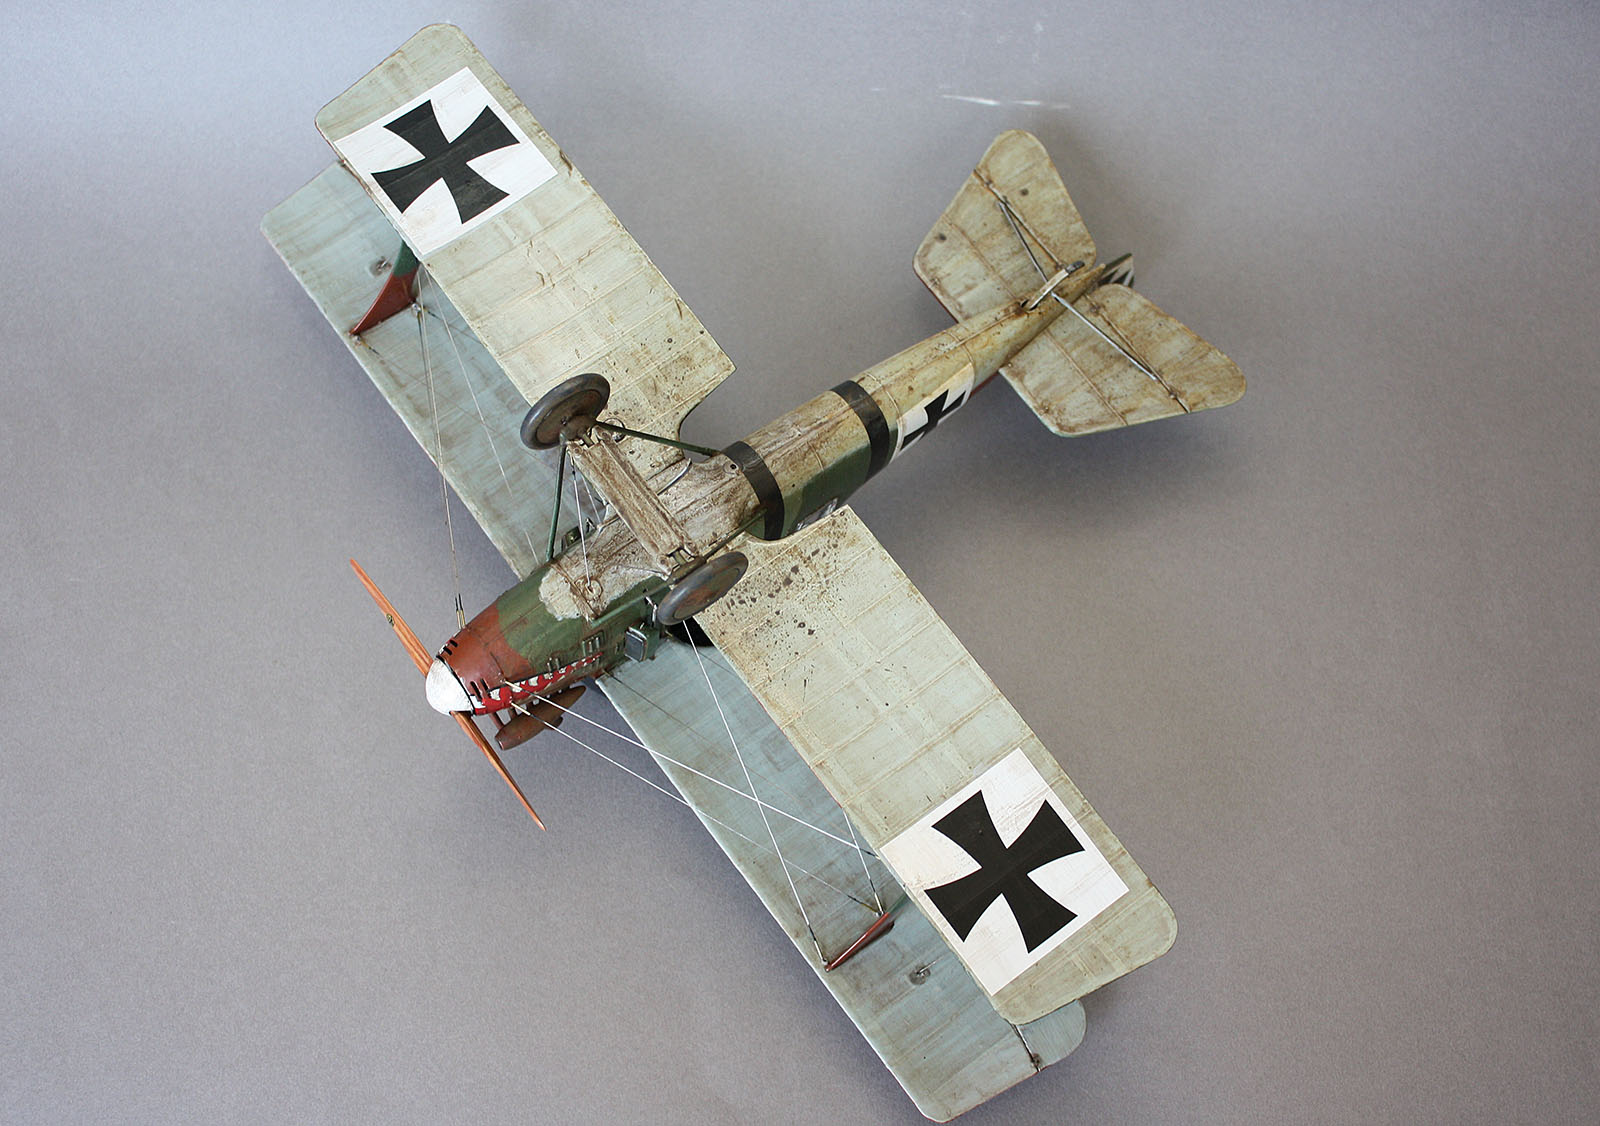
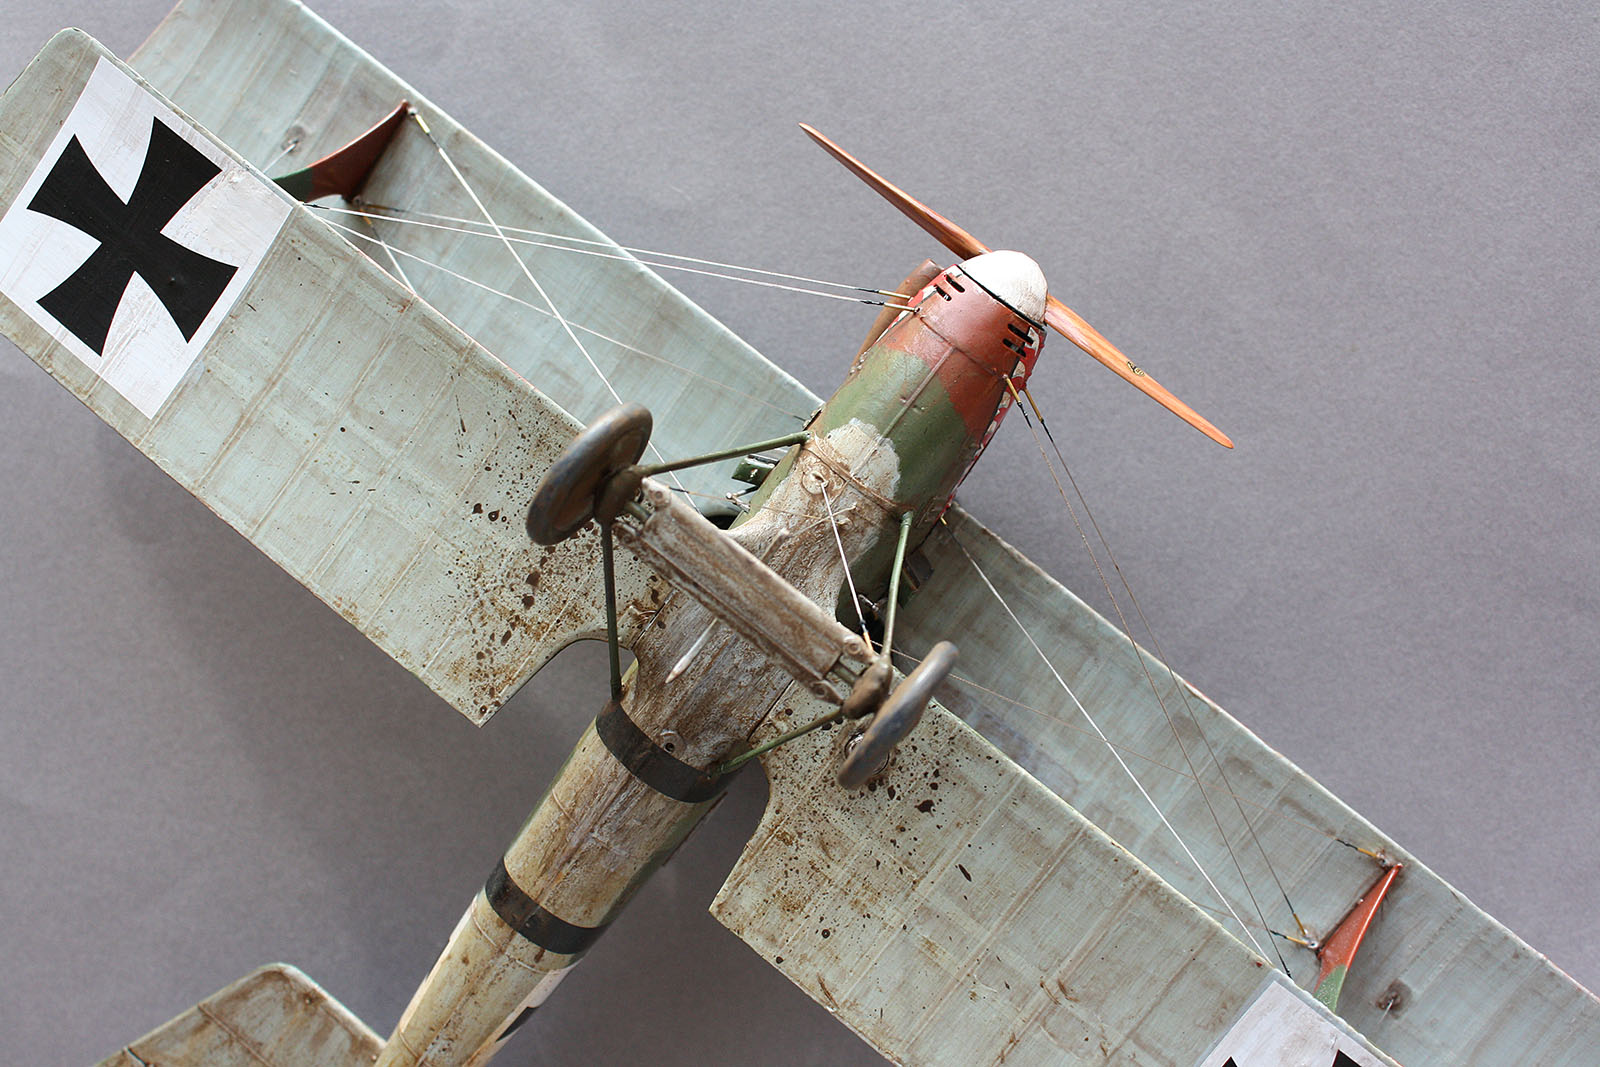
Tail is mostly done - missing bottom bracing struts indicative of mid-production Cl.IIa and steel cables need to be attached to the rudder.
Lower wings are pretty much ready for the install - the rigging will be installed "through the wing" method, so Eisenkreuz decals on white fields will cover up the damage just so. I suspect I will install all four wings at once, as just lower wings seem flimsy for handling purposes - with outer strut and rigging, it will give no concerns.


This aircraft is going in heavily weathered direction - historically operating in the autumn - winter - early spring months. Aviattic linen effects decals on the lower surfaces of the wings and tail plane - pre and post shading methods, weathering heaviest at the tail, lesser on the bottom wings and the upper wings will be most pristine.
Test fitting wings is very promising for the overall look.
Like, follow, find out what I've had for breakfast - your large scale frenemy starter kit.
California, United States
Joined: April 26, 2010
KitMaker: 346 posts
AeroScale: 292 posts
Posted: Friday, July 08, 2016 - 02:26 AM UTC
Like, follow, find out what I've had for breakfast - your large scale frenemy starter kit.
Colorado, United States
Joined: January 25, 2004
KitMaker: 11,669 posts
AeroScale: 11,011 posts
Posted: Friday, July 08, 2016 - 03:31 AM UTC
". . .The most important thing is to know why you build and then get the most that you can out of building." via D.D.
New Jersey, United States
Joined: June 02, 2006
KitMaker: 1,212 posts
AeroScale: 468 posts
Posted: Friday, July 08, 2016 - 08:00 PM UTC
Pretty sharp looking Ivan.
#259
Massachusetts, United States
Joined: October 23, 2011
KitMaker: 2,265 posts
AeroScale: 1,715 posts
Posted: Friday, July 08, 2016 - 11:35 PM UTC
That is some cool business right there.

Connecticut, United States
Joined: October 26, 2009
KitMaker: 424 posts
AeroScale: 389 posts
Posted: Sunday, July 10, 2016 - 09:24 PM UTC
StukaJr
Outstanding Job.... wonderful!!!
Only one problem I see, or can not see, is that equally beautiful interior and frame. I literally thought that interior was the model.
The outer paintjob Looks absolutely like you hired some really short people to paint it.
Yours is a Wonderful model.
Captn Tommy
#424
Queensland, Australia
Joined: April 23, 2015
KitMaker: 4,648 posts
AeroScale: 1,938 posts
Posted: Monday, July 11, 2016 - 11:04 AM UTC
Ivan,
Beautiful! I really love the rich tones in your paint. My little 1/48 Roland will have a struggle to imminptate yours.
Bravo!
Gaz
"Artillery adds dignity, to what would otherwise be an ugly brawl."
Frederick The Great
California, United States
Joined: April 26, 2010
KitMaker: 346 posts
AeroScale: 292 posts
Posted: Wednesday, July 13, 2016 - 12:01 AM UTC
Like, follow, find out what I've had for breakfast - your large scale frenemy starter kit.