Eduard 1/48 Bf 110C risen from the ashes
New South Wales, Australia
Joined: April 06, 2008
KitMaker: 151 posts
AeroScale: 141 posts
Posted: Tuesday, July 12, 2016 - 06:12 AM UTC
New South Wales, Australia
Joined: April 06, 2008
KitMaker: 151 posts
AeroScale: 141 posts
Posted: Tuesday, July 12, 2016 - 06:16 AM UTC
New South Wales, Australia
Joined: April 06, 2008
KitMaker: 151 posts
AeroScale: 141 posts
Posted: Tuesday, July 12, 2016 - 06:19 AM UTC

#424
Queensland, Australia
Joined: April 23, 2015
KitMaker: 4,648 posts
AeroScale: 1,938 posts
Posted: Tuesday, July 12, 2016 - 12:58 PM UTC
Kent,
Your details look great! I recently had my first use of Techmod decals but was fortunate enough to have read about floating them on a large bead of water before final placement. But man, they really sunk into the panel lines well.
Gaz
"Artillery adds dignity, to what would otherwise be an ugly brawl."
Frederick The Great
New South Wales, Australia
Joined: April 06, 2008
KitMaker: 151 posts
AeroScale: 141 posts
Posted: Thursday, July 14, 2016 - 12:38 PM UTC
#424
Queensland, Australia
Joined: April 23, 2015
KitMaker: 4,648 posts
AeroScale: 1,938 posts
Posted: Thursday, July 14, 2016 - 01:30 PM UTC
Kent,
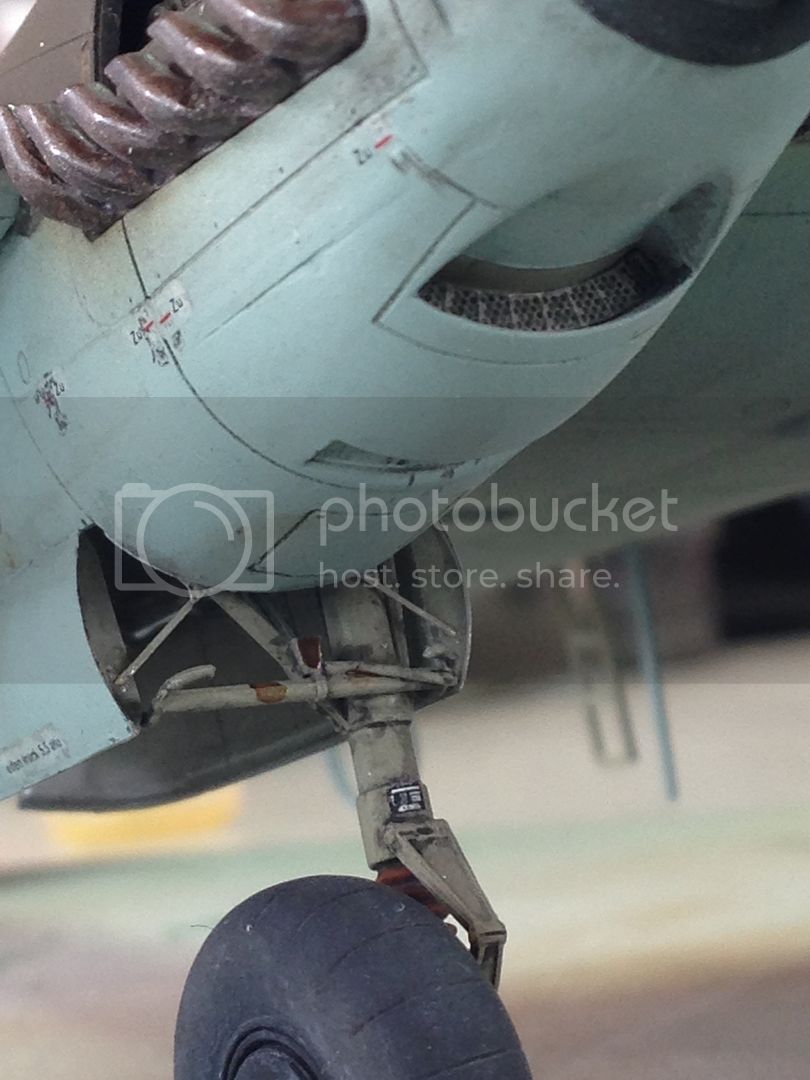
Those are some great looking landing gear legs and bays. Do you know what materialthe accordion boots over the telescoping parts were made of?
Gaz
"Artillery adds dignity, to what would otherwise be an ugly brawl."
Frederick The Great
New South Wales, Australia
Joined: April 06, 2008
KitMaker: 151 posts
AeroScale: 141 posts
Posted: Friday, July 15, 2016 - 03:19 AM UTC
Thanks Gaz,
To be honest I don't, I just assumed they were a leather type material as all the colour shots (not many) show them a leather brown.
Regards,
New South Wales, Australia
Joined: April 06, 2008
KitMaker: 151 posts
AeroScale: 141 posts
Posted: Saturday, July 16, 2016 - 09:26 AM UTC
Hi Gaz,
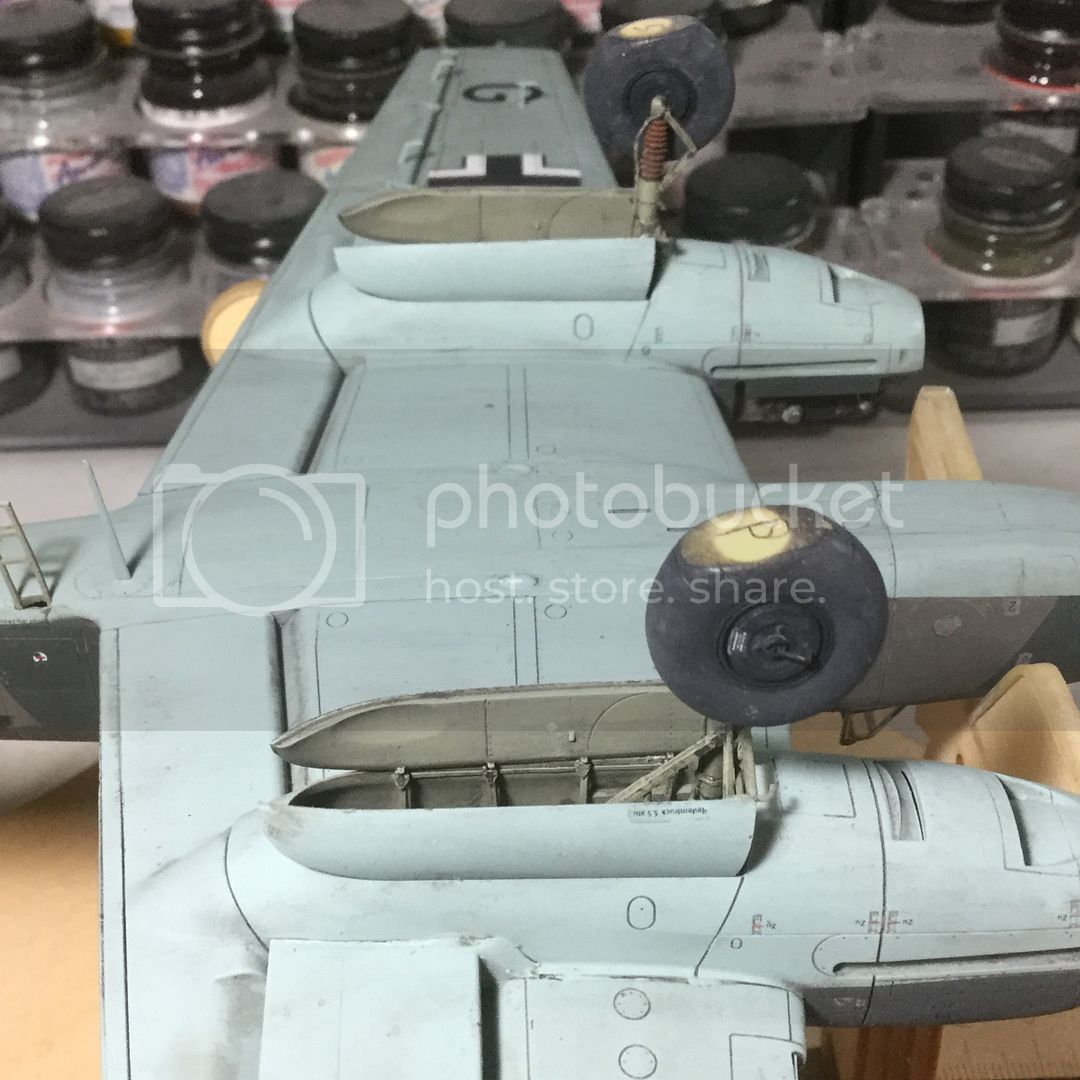
I went back and revisited the oleo cover....apparently it pays to actually read the caption of your photographic references. From Bf110C,D and E by Vasco and Estanislau on page 73:
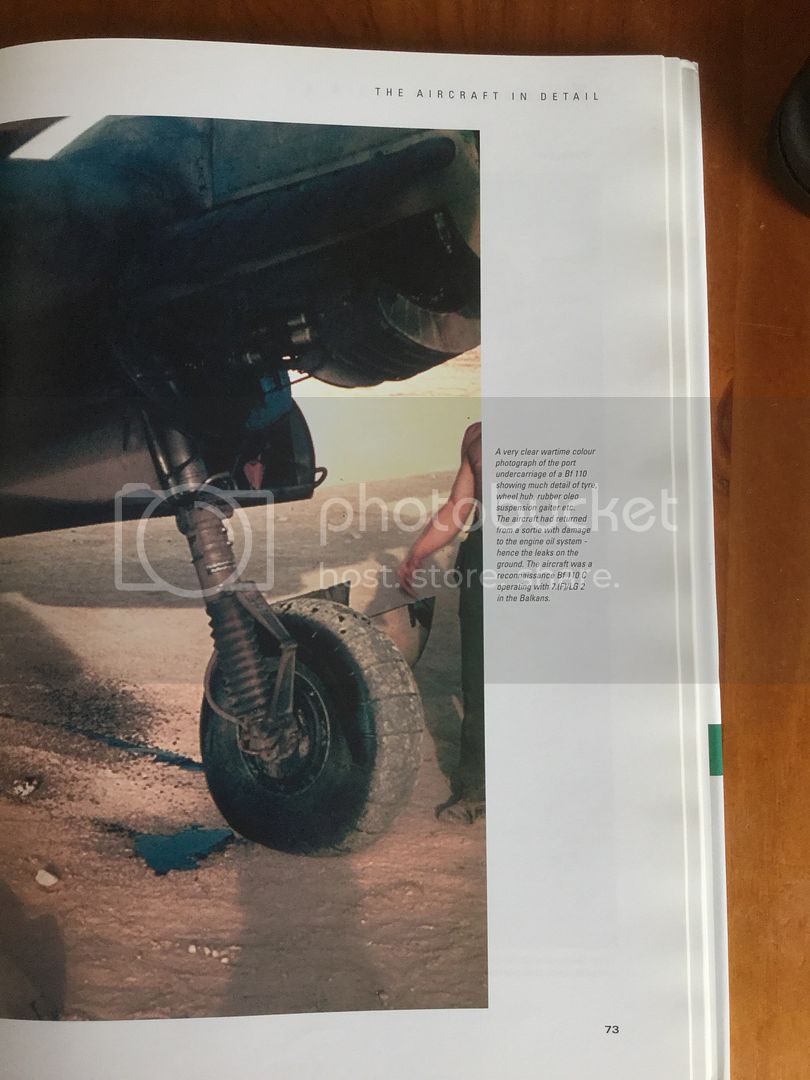
They look a dark brown leather colour to me but obviously rubberised black colour. Oh well, next time.
Regards,
New South Wales, Australia
Joined: April 06, 2008
KitMaker: 151 posts
AeroScale: 141 posts
Posted: Saturday, July 16, 2016 - 02:44 PM UTC
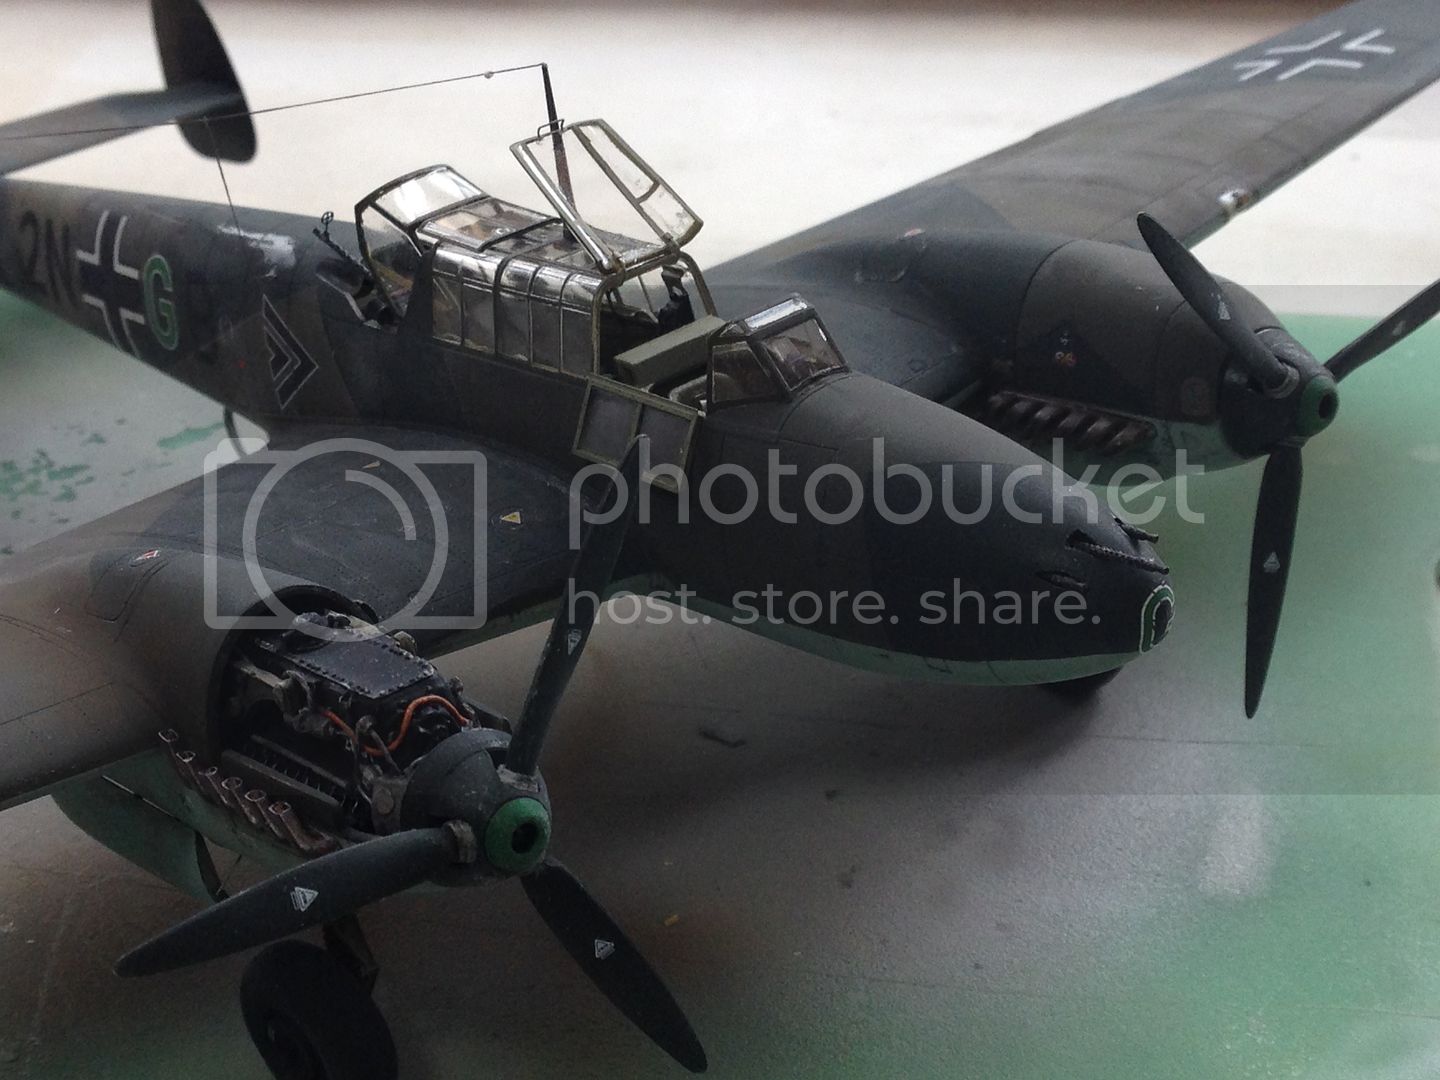
Just a quick update. The Flory wash has been applied. I then set about adding the DF and "clothes line" antennas:
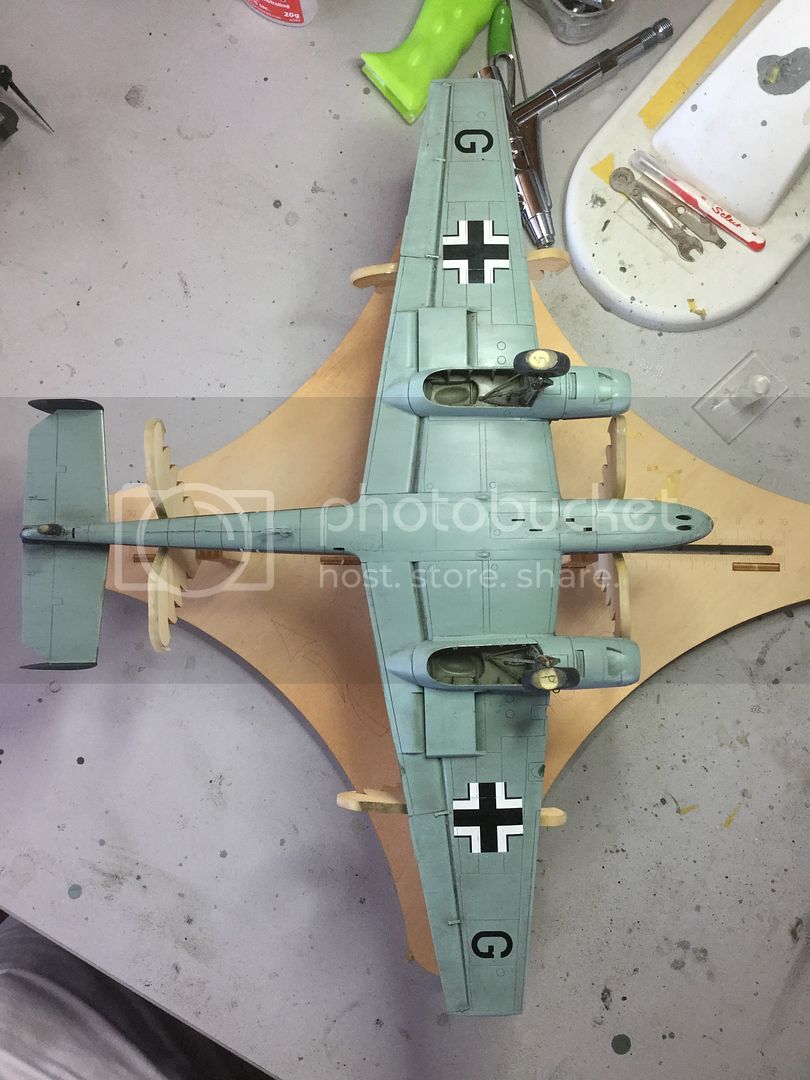
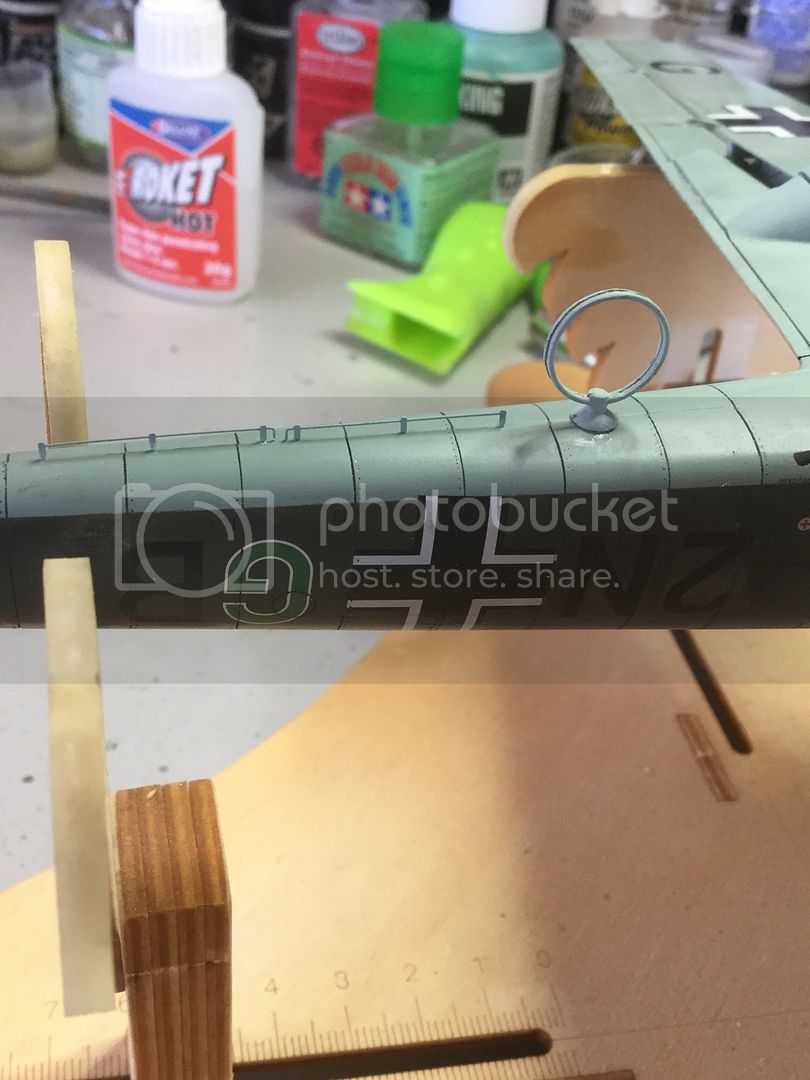
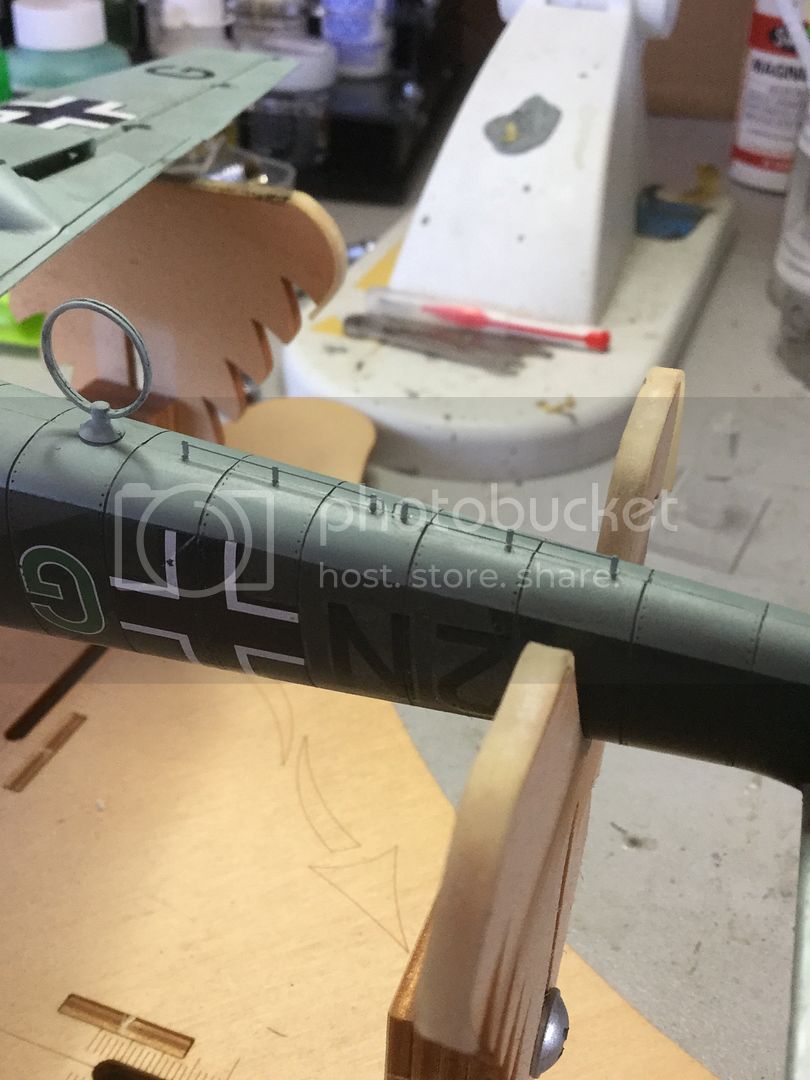
Regards,
Germany
Joined: September 07, 2005
KitMaker: 5,609 posts
AeroScale: 5,231 posts
Posted: Saturday, July 16, 2016 - 03:14 PM UTC
Looking really good Kent!
Do not worry, the brown is dark enought to simulate rubber with some grime and dirt on it.
all the best
Steffen
DULCE ET DECORUM EST PRO HOBBY MORI
New South Wales, Australia
Joined: April 06, 2008
KitMaker: 151 posts
AeroScale: 141 posts
Posted: Saturday, July 16, 2016 - 04:30 PM UTC
Thanks Steffen,
I appreciate the comment. It doesn't look too bad and I am happy with what I have done. Just next time.
Regards,
New South Wales, Australia
Joined: April 06, 2008
KitMaker: 151 posts
AeroScale: 141 posts
Posted: Wednesday, July 20, 2016 - 02:42 PM UTC
New South Wales, Australia
Joined: April 06, 2008
KitMaker: 151 posts
AeroScale: 141 posts
Posted: Monday, July 25, 2016 - 01:25 PM UTC
Lisboa, Portugal
Joined: August 27, 2010
KitMaker: 679 posts
AeroScale: 669 posts
Posted: Monday, July 25, 2016 - 03:43 PM UTC
Ken,
Just my 2 cents, I don't think the AC finish was that matte, too dull IMO.
I usually blend 50-50 gloss and matte on most Luftwaffe, but there were exceptions with some Fighters having a very polished finish to achieve less drag.
That said, it is odd that you find silvering only on decals applied over the 71... Perhaps a steady hand and a very fine brush you can "cure" it??
Keep it up, overall a very fine job :-)
Cheers
Pedro
New South Wales, Australia
Joined: April 06, 2008
KitMaker: 151 posts
AeroScale: 141 posts
Posted: Thursday, July 28, 2016 - 03:42 PM UTC
I added some bits and bobs. The MLG doors and the PE retraction cables:


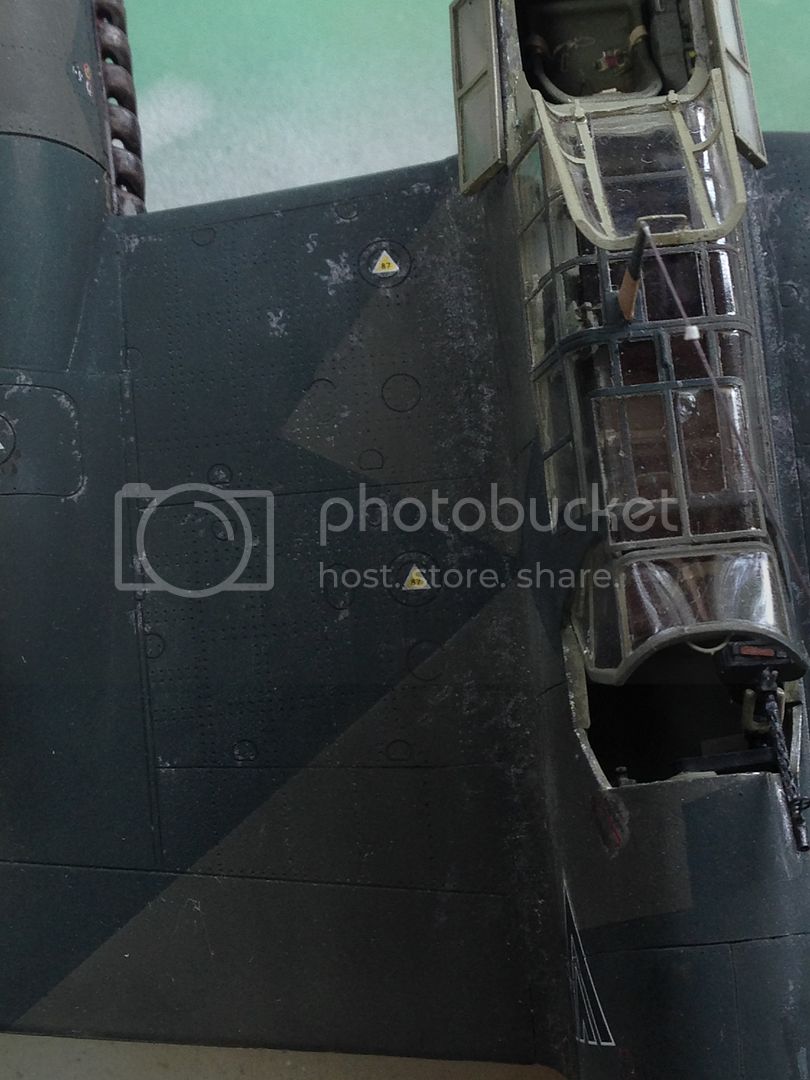
The remedial work on the silvered decals has both good and bad. The balkenkreutz is finished and awaits a final matte coat:
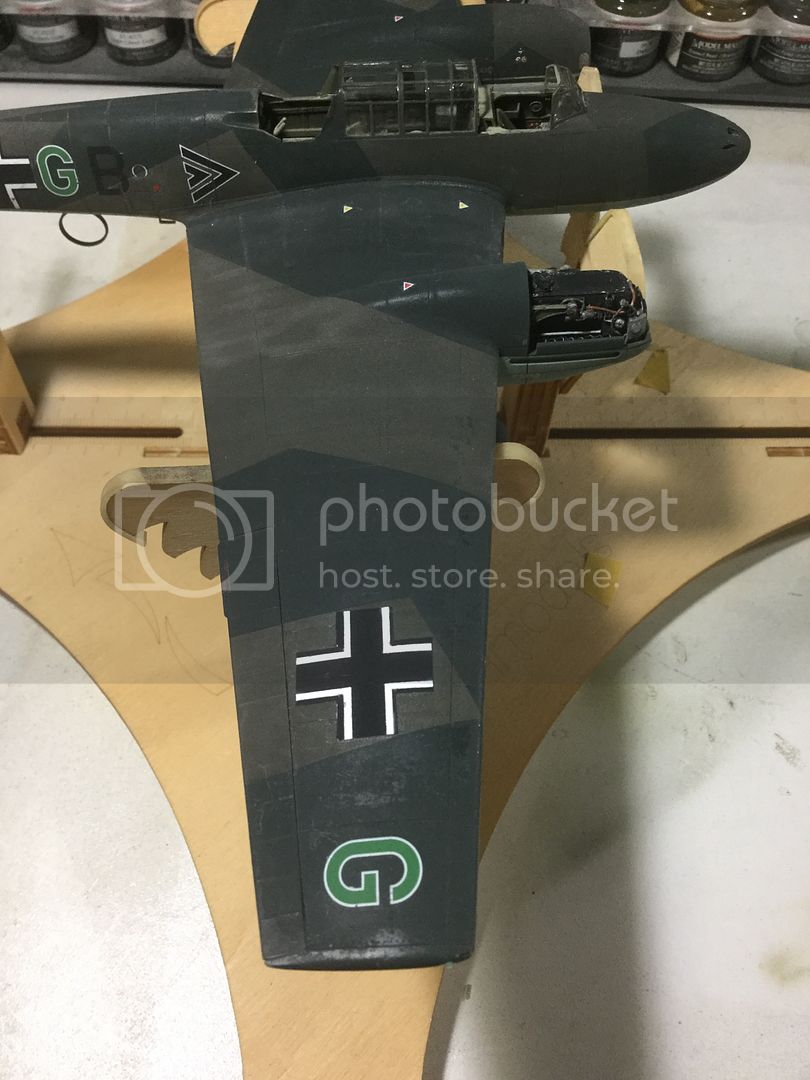
Port serial came out well with some minor lifting. I think the final matte coat will sort that out. Starboard side will need another go:
Regards,
New South Wales, Australia
Joined: April 06, 2008
KitMaker: 151 posts
AeroScale: 141 posts
Posted: Monday, August 01, 2016 - 09:47 AM UTC
#424
Queensland, Australia
Joined: April 23, 2015
KitMaker: 4,648 posts
AeroScale: 1,938 posts
Posted: Monday, August 01, 2016 - 11:11 AM UTC
Kent,
Impressive stenciling and painting! I've yet to master stencils.
Gaz
"Artillery adds dignity, to what would otherwise be an ugly brawl."
Frederick The Great
New South Wales, Australia
Joined: April 06, 2008
KitMaker: 151 posts
AeroScale: 141 posts
Posted: Monday, August 01, 2016 - 12:50 PM UTC
Quoted Text
Kent,
Impressive stenciling and painting! I've yet to master stencils.
Gaz
You are too kind. I really should have gone this way in the first place. All a learning curve.
Regards
New South Wales, Australia
Joined: April 06, 2008
KitMaker: 151 posts
AeroScale: 141 posts
Posted: Wednesday, August 03, 2016 - 09:11 AM UTC
#424
Queensland, Australia
Joined: April 23, 2015
KitMaker: 4,648 posts
AeroScale: 1,938 posts
Posted: Wednesday, August 03, 2016 - 09:54 AM UTC
Kent,
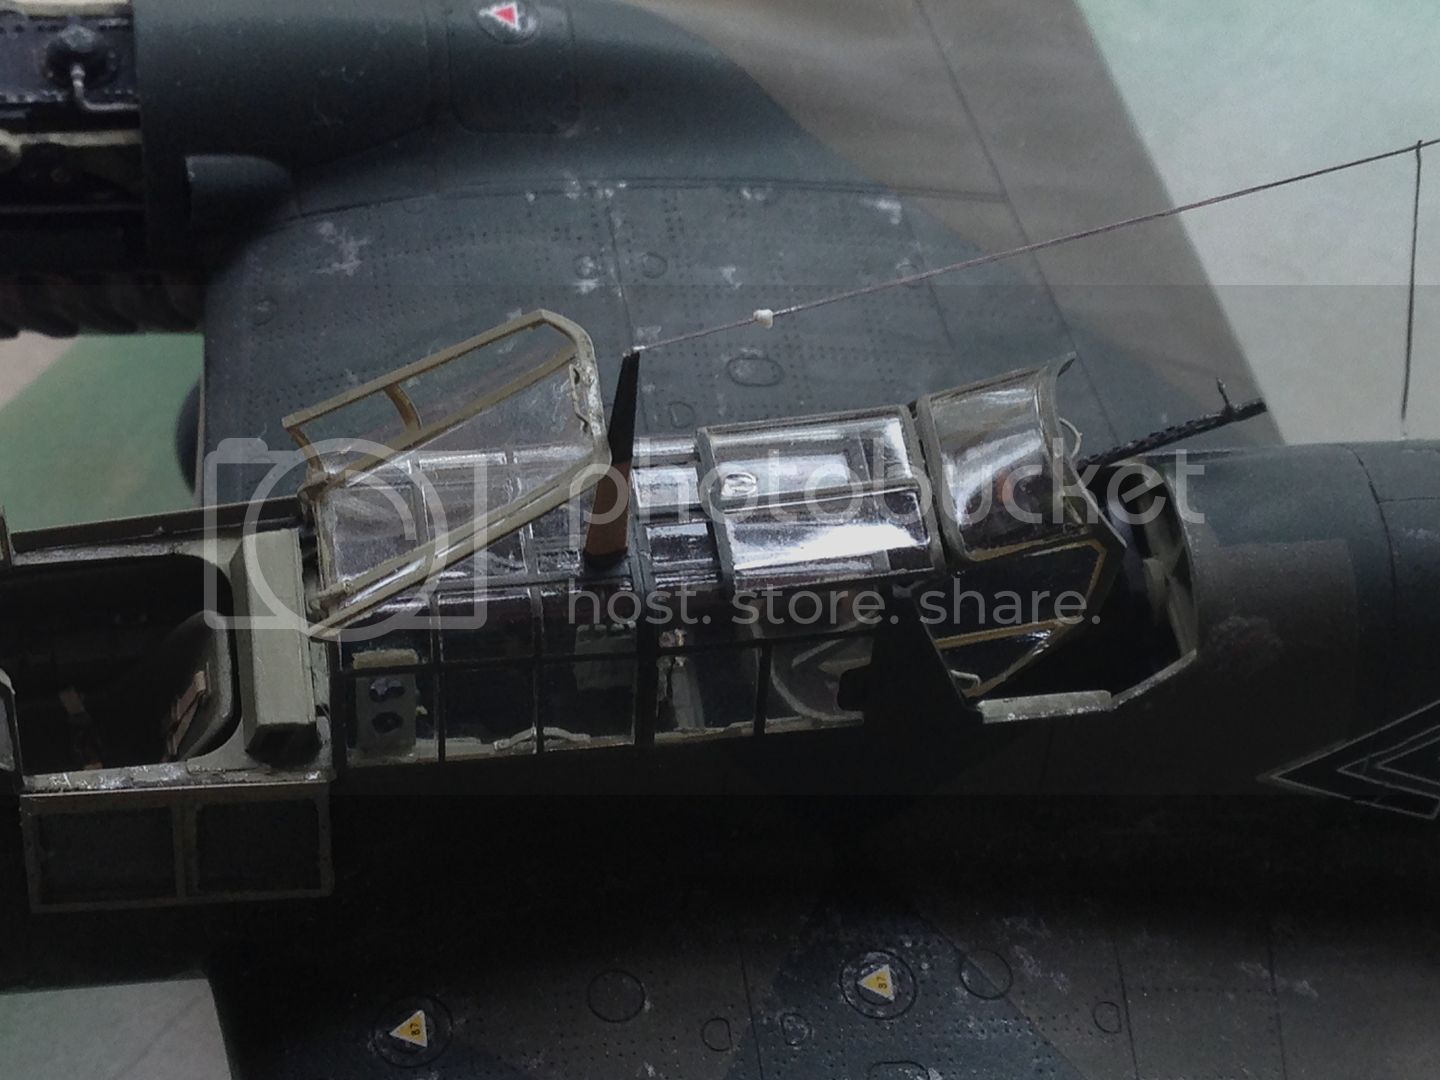
A nice build in my eyes. Really like the greenhouse and MG15 detail.
Gaz
"Artillery adds dignity, to what would otherwise be an ugly brawl."
Frederick The Great
New South Wales, Australia
Joined: April 06, 2008
KitMaker: 151 posts
AeroScale: 141 posts
Posted: Thursday, August 04, 2016 - 08:21 AM UTC
Quoted Text
Kent,
A nice build in my eyes. Really like the greenhouse and MG15 detail.
Gaz
I am really happy with how these turned out as well. The greenhouse is one of the defining characteristics of the Bf 110 and I am pleased it works.
Regards,
New South Wales, Australia
Joined: April 06, 2008
KitMaker: 151 posts
AeroScale: 141 posts
Posted: Saturday, August 06, 2016 - 01:05 PM UTC
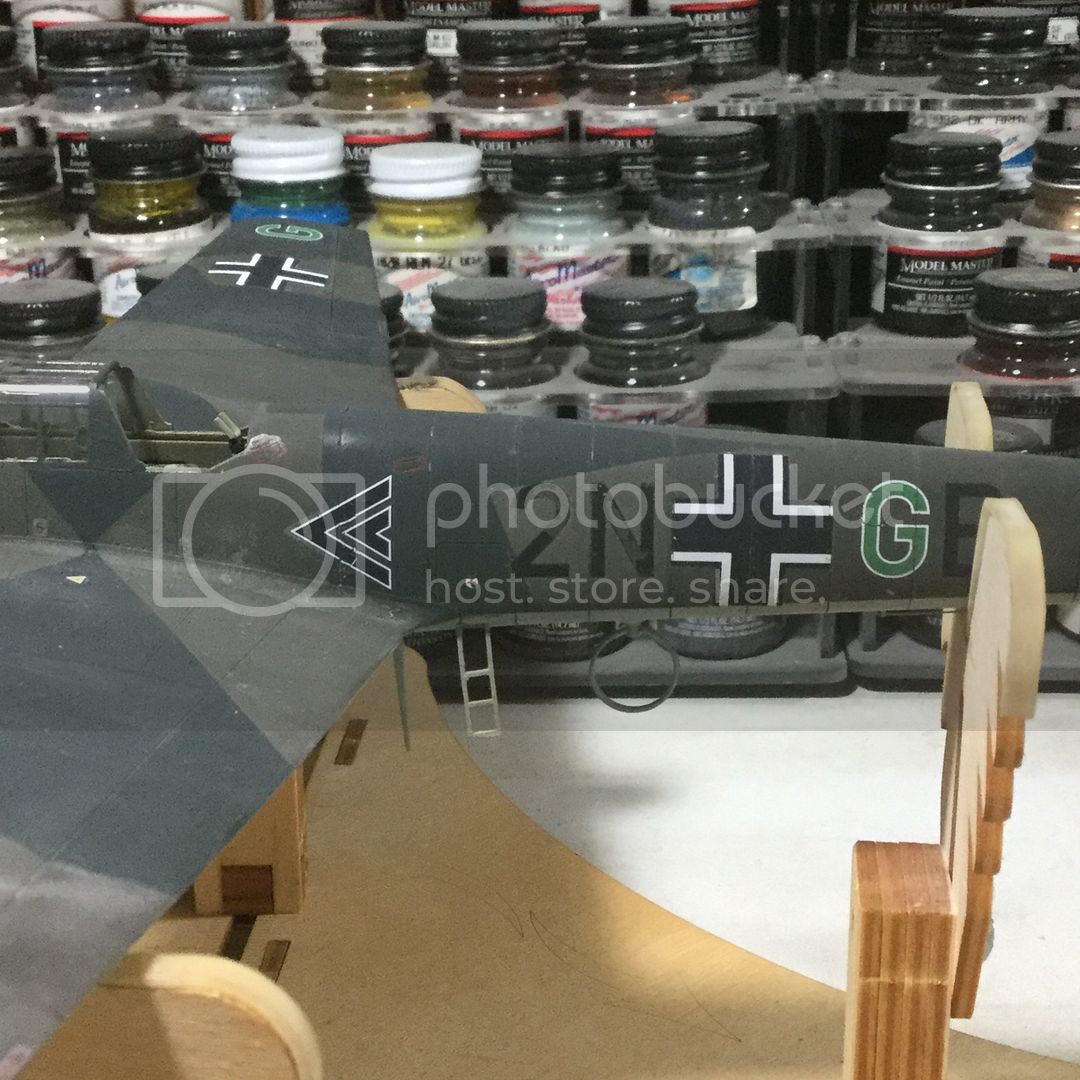
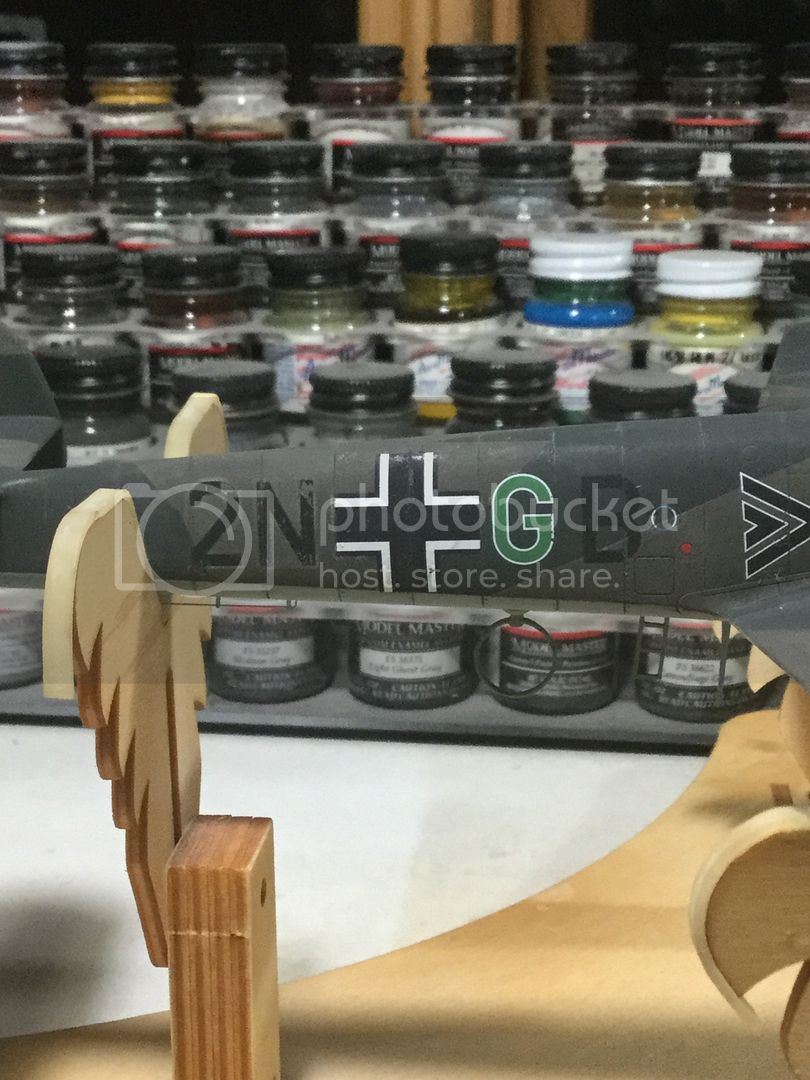
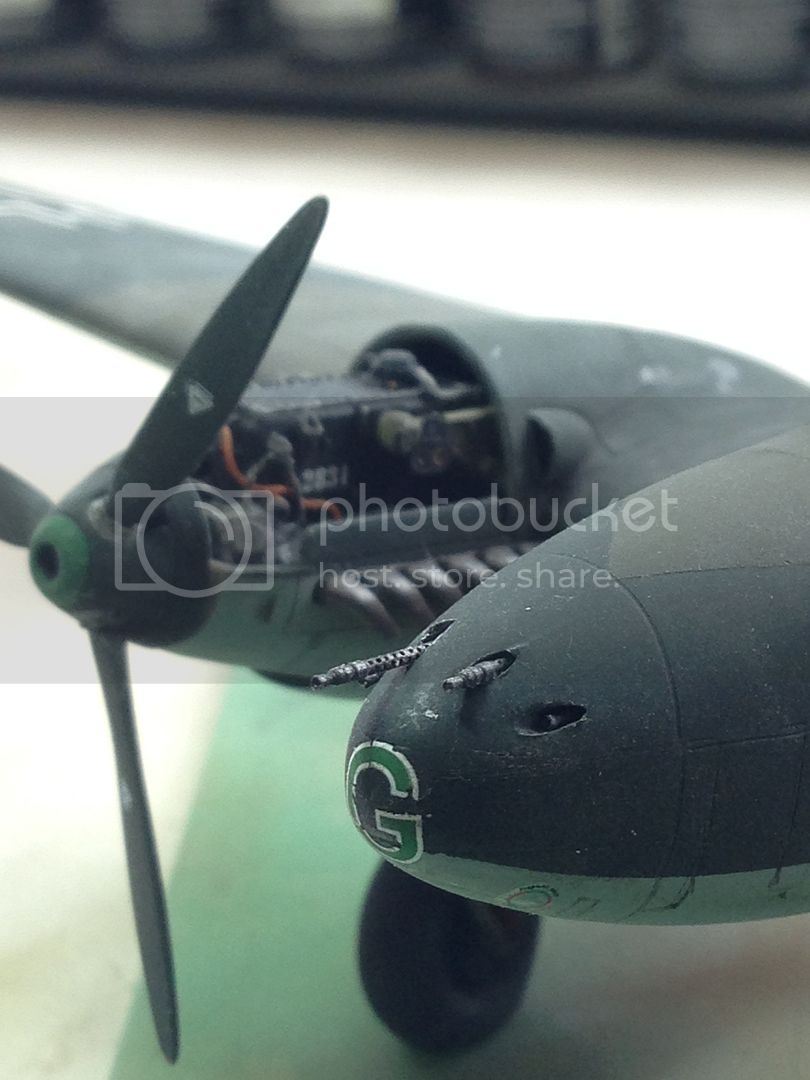
And down to the wire...literally. Ezi line antenna, heat stretched and pierced deflectors, PE and touch ups:
Pencil chipping with water colours and some AK Kerosene and AK Engine oil enamel washes:
QB MG 17's installed in the business end:

Into the cabinet in front of the 1/4 scale Bf 110 panel from the Royal Class boxing:

Thanks to all that followed and commented.
AussieReg
 Associate Editor
#007
Victoria, Australia
Joined: June 09, 2009
KitMaker: 8,156 posts
AeroScale: 3,756 posts
Posted: Saturday, August 06, 2016 - 01:15 PM UTC
Beautiful build Kent, it looks great in the display with the big IP. Great thread, I will be referring back to this one when I get cracking on my Royal Class builds.
Cheers , D
ON the bench
Revell 1/24 '53 Corvette (building as '54)
Revell 1/24 BMW 507 Coupe and Cabrio
Italeri 1/48 Me262 B-1a/U1 Nightfighter
Monogram 1/24 '57 Chevy Nomad
Dragon 1/350 USS Frank Knox DD-742
New South Wales, Australia
Joined: April 06, 2008
KitMaker: 151 posts
AeroScale: 141 posts
Posted: Sunday, August 07, 2016 - 05:29 AM UTC
Quoted Text
Beautiful build Kent, it looks great in the display with the big IP. Great thread, I will be referring back to this one when I get cracking on my Royal Class builds.
Cheers , D
Many thanks Damien.
You are too kind. There are a lot of flaws in my build that I have let go just to get it "off the bench". One thing I would do over is the engine instruments on the nacelles. They are marked with a circle and I have just put a decal over the top. It doesn't look right as it just sits on top when it should obviously be recessed. I would probably drill out the holes and mount the gauges on some card on the inside. Then mask them for painting and a drop of clear at the end to simulate the glass faces.
Having said all that I am pleased with the build overall and it is good to get it into the display shelf.
Regards,


