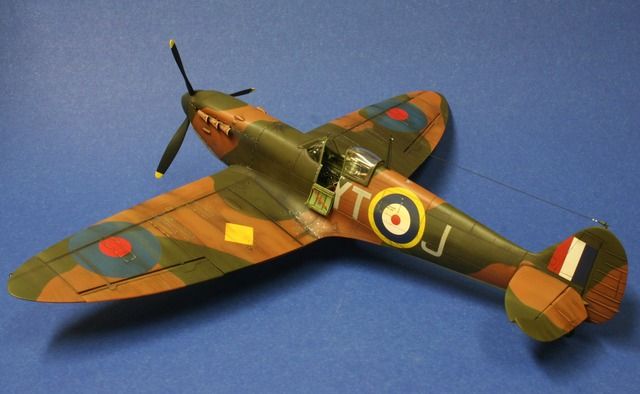
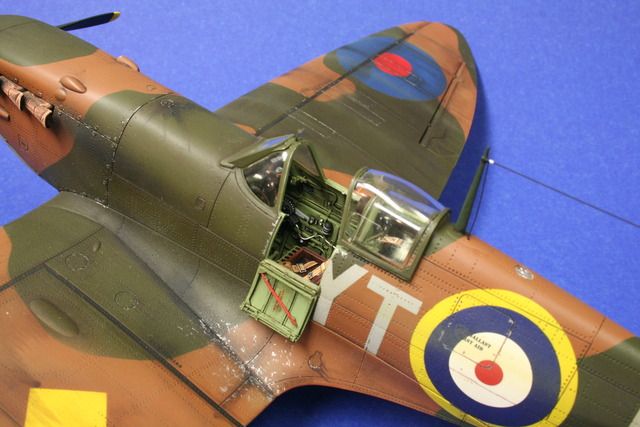
Doug,
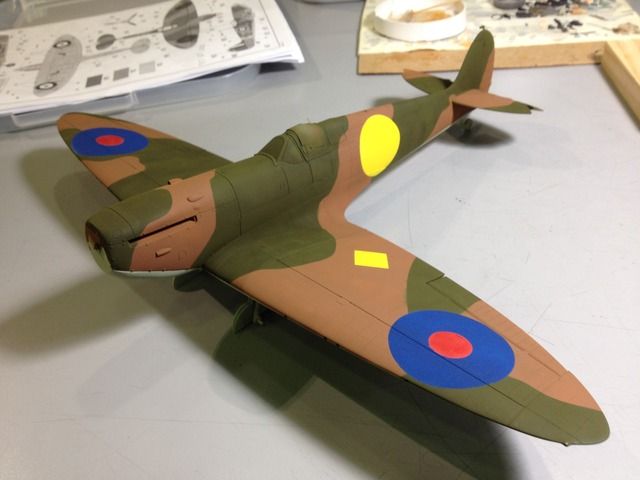
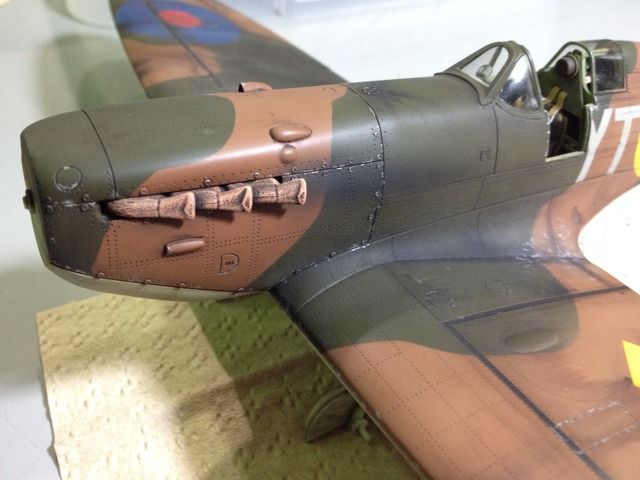
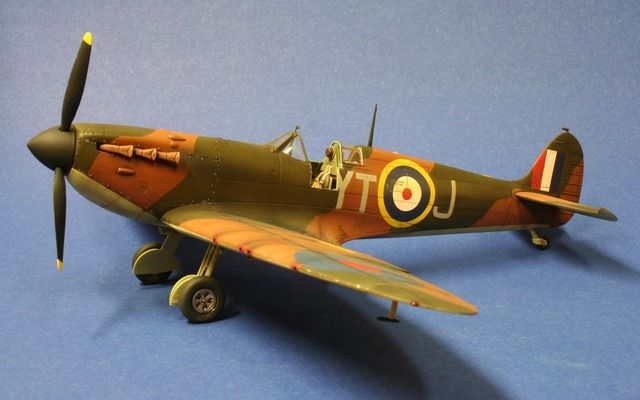
Really a clean looking camo pattern, and those masked roundels look quite good.
Joel
World War II
Discuss WWII and the era directly before and after the war from 1935-1949.
Discuss WWII and the era directly before and after the war from 1935-1949.
Hosted by Rowan Baylis
Revell 1/32nd scale Spitfire
Joel_W

Joined: December 04, 2010
KitMaker: 11,666 posts
AeroScale: 7,410 posts

Posted: Tuesday, August 16, 2016 - 01:02 AM UTC
DougCohen

Joined: May 27, 2009
KitMaker: 1,293 posts
AeroScale: 1,072 posts

Posted: Tuesday, August 16, 2016 - 02:22 AM UTC
DougCohen

Joined: May 27, 2009
KitMaker: 1,293 posts
AeroScale: 1,072 posts

Posted: Tuesday, August 16, 2016 - 02:23 AM UTC
DougCohen

Joined: May 27, 2009
KitMaker: 1,293 posts
AeroScale: 1,072 posts

Posted: Thursday, August 18, 2016 - 02:57 AM UTC
Steven000

Joined: August 07, 2016
KitMaker: 191 posts
AeroScale: 24 posts

Posted: Thursday, August 18, 2016 - 04:45 PM UTC
Quoted Text
...oil wash on panel lines and dull coat applied...
Nice work so far Doug,
I just have a small question about paint; I've never justed oil paints before, and I was wondering if it is possible to paint 'over' oil painted surfaces afterwards with acrilyc/enamel paints (like your dull coat)? I would think the oil paints are a bit greasy and might take a very long time to completey dry, but I don't have any experience with them...
Thanks and kind regards
Steven

DougCohen

Joined: May 27, 2009
KitMaker: 1,293 posts
AeroScale: 1,072 posts

Posted: Thursday, August 18, 2016 - 05:50 PM UTC
Quoted Text
Quoted Text...oil wash on panel lines and dull coat applied...
Nice work so far Doug,
I just have a small question about paint; I've never justed oil paints before, and I was wondering if it is possible to paint 'over' oil painted surfaces afterwards with acrilyc/enamel paints (like your dull coat)? I would think the oil paints are a bit greasy and might take a very long time to completey dry, but I don't have any experience with them...
Thanks and kind regards
Steven
Steven
I put water based paint on oils after they dry all the time, one thing that may make a difference is that I use Terpinoid instead of Terpintine, and it does not hurt the paint under it and it seems to evaporate away with little residue if any after it dries. I do use Testors lacquer for dull coat after decals and washes, but lots of other water based paint goes on before and after that.
hope that is not too confusing
Doug

Steven000

Joined: August 07, 2016
KitMaker: 191 posts
AeroScale: 24 posts

Posted: Thursday, August 18, 2016 - 06:04 PM UTC
Ok thanks for pointing that out Doug, I will try it out sometime on a next project.
Thanks & happy weathering
Steven
Thanks & happy weathering

Steven
Joel_W

Joined: December 04, 2010
KitMaker: 11,666 posts
AeroScale: 7,410 posts

Posted: Friday, August 19, 2016 - 07:32 PM UTC
Doug,
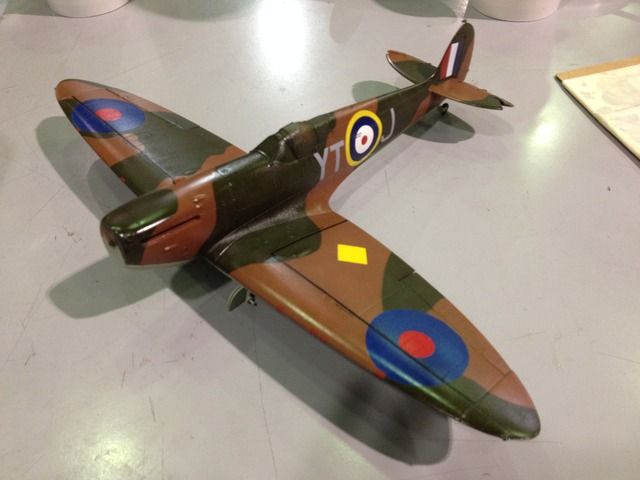
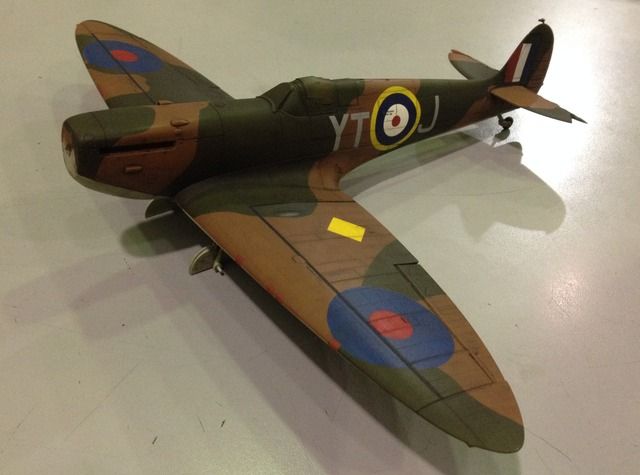
The matt coated paint camo scheme and markings really looks quite good.
I'll 2nd what you said about different base paints. I've never had any issues mixing different base paints as long as they were completely dry. Air brushing just doesn't lay down enough paint to make it an issue. Washes and Filters that are brushed on will eat right through a clear base of the same type.
Joel
DougCohen

Joined: May 27, 2009
KitMaker: 1,293 posts
AeroScale: 1,072 posts

Posted: Saturday, August 20, 2016 - 07:53 AM UTC
DougCohen

Joined: May 27, 2009
KitMaker: 1,293 posts
AeroScale: 1,072 posts

Posted: Saturday, August 20, 2016 - 11:33 PM UTC
DougCohen

Joined: May 27, 2009
KitMaker: 1,293 posts
AeroScale: 1,072 posts

Posted: Saturday, August 20, 2016 - 11:34 PM UTC

Steven000

Joined: August 07, 2016
KitMaker: 191 posts
AeroScale: 24 posts

Posted: Sunday, August 21, 2016 - 03:40 AM UTC
Very impressive Doug!
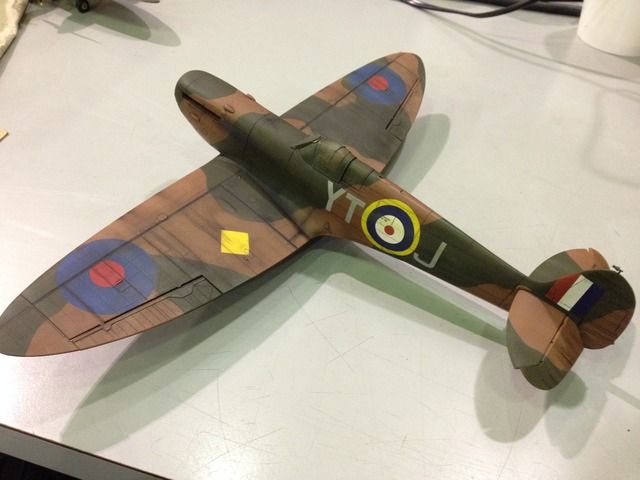
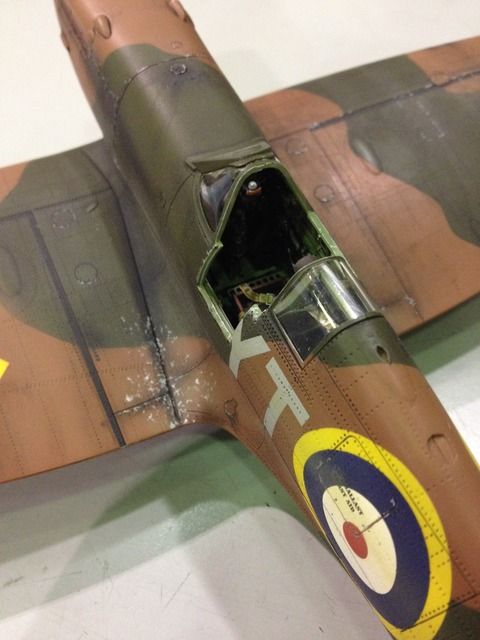
If I'm not mistaken the yellow circle is painted and the blue/white/red is a decal; I was wondering how you got the panel-lines and rivits still appearing through the decal, did you cut the decal after aplying or what kind of technique did you use?
Thanks for sharing this build,
Kind regards
Steven
If I'm not mistaken the yellow circle is painted and the blue/white/red is a decal; I was wondering how you got the panel-lines and rivits still appearing through the decal, did you cut the decal after aplying or what kind of technique did you use?
Thanks for sharing this build,
Kind regards
Steven
DougCohen

Joined: May 27, 2009
KitMaker: 1,293 posts
AeroScale: 1,072 posts

Posted: Sunday, August 21, 2016 - 04:14 AM UTC
Quoted Text
Very impressive Doug!
If I'm not mistaken the yellow circle is painted and the blue/white/red is a decal; I was wondering how you got the panel-lines and rivits still appearing through the decal, did you cut the decal after aplying or what kind of technique did you use?
Thanks for sharing this build,
Kind regards
Steven
you are correct the yellow is paint and the rest of the fuselage roundel is decal, I used the kit decals and they are very thin to begin with, then I use MicroSet under the decal to help set it, then it is patted gently with a cotton cloth to remove all moisture and get the air bubbles out and lastly I apply a light coat of Solvaset decal solution and the decals just melt down into the panel lines for the most part. One thing that helps a lot is that I always orient the model so that the decals being applied are laying flat so to do the fuselage decals I prop the plane up so gravity helps lay the decals down. After the Solvaset has been given about five hours to work I use a sharp knife to stick any spots down that did not go into the lines or rivets, and then a final touch of Solvaset to hug them down also. Paint is always best but today there are so many good decals out there and the kits have such good decals that it is worth working with them.
hope this helps
Doug
Joel_W

Joined: December 04, 2010
KitMaker: 11,666 posts
AeroScale: 7,410 posts

Posted: Sunday, August 21, 2016 - 08:47 PM UTC
Dough,
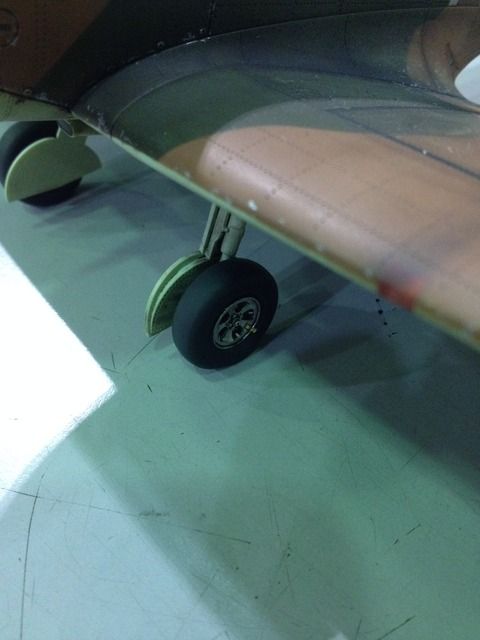
impressive to say the least. The overall weathering as I've said before is just right for a well maintained operational aircraft. Excellent job with the decals, as they do indeed look like they were painted on.
Joel
impressive to say the least. The overall weathering as I've said before is just right for a well maintained operational aircraft. Excellent job with the decals, as they do indeed look like they were painted on.
Joel
DougCohen

Joined: May 27, 2009
KitMaker: 1,293 posts
AeroScale: 1,072 posts

Posted: Monday, August 22, 2016 - 04:58 AM UTC
Quoted Text
Dough,
impressive to say the least. The overall weathering as I've said before is just right for a well maintained operational aircraft. Excellent job with the decals, as they do indeed look like they were painted on.
Joel
Thanks Joel
But who is this Dough you speak of?
Doug
Joel_W

Joined: December 04, 2010
KitMaker: 11,666 posts
AeroScale: 7,410 posts

Posted: Tuesday, August 23, 2016 - 01:22 AM UTC
Quoted Text
Quoted TextDough,
impressive to say the least. The overall weathering as I've said before is just right for a well maintained operational aircraft. Excellent job with the decals, as they do indeed look like they were painted on.
Joel
Thanks Joel
But who is this Dough you speak of?
Doug,
Sorry for the typo.
Joel
Doug
AB1Vasek

Joined: August 23, 2016
KitMaker: 6 posts
AeroScale: 5 posts

Posted: Tuesday, August 23, 2016 - 02:27 AM UTC
Beautiful job Doug. I have a Spitfire 1/32 still in a box, waiting for the right time.
The details are perfect, as well as the weathering. And I also thought the roundels were painted. Great job!
I wish my Spitfire looked like yours :-)
The details are perfect, as well as the weathering. And I also thought the roundels were painted. Great job!
I wish my Spitfire looked like yours :-)
DougCohen

Joined: May 27, 2009
KitMaker: 1,293 posts
AeroScale: 1,072 posts

Posted: Monday, August 29, 2016 - 02:28 AM UTC
DougCohen

Joined: May 27, 2009
KitMaker: 1,293 posts
AeroScale: 1,072 posts

Posted: Monday, August 29, 2016 - 02:29 AM UTC

Steven000

Joined: August 07, 2016
KitMaker: 191 posts
AeroScale: 24 posts

Posted: Monday, August 29, 2016 - 03:48 AM UTC
Wow you really nailed it Doug, she is looking fantastic!
Also thanks for sharing your Solvaset-workflow etc, this will be a great help.
Kind regards
Steven
Also thanks for sharing your Solvaset-workflow etc, this will be a great help.
Kind regards
Steven
DougCohen

Joined: May 27, 2009
KitMaker: 1,293 posts
AeroScale: 1,072 posts

Posted: Tuesday, August 30, 2016 - 06:35 AM UTC
DougCohen

Joined: May 27, 2009
KitMaker: 1,293 posts
AeroScale: 1,072 posts

Posted: Tuesday, August 30, 2016 - 06:38 AM UTC
DougCohen

Joined: May 27, 2009
KitMaker: 1,293 posts
AeroScale: 1,072 posts

Posted: Saturday, September 03, 2016 - 01:48 AM UTC
DougCohen

Joined: May 27, 2009
KitMaker: 1,293 posts
AeroScale: 1,072 posts

Posted: Saturday, September 03, 2016 - 01:50 AM UTC
Posted: Saturday, September 03, 2016 - 03:47 AM UTC
Hi Group,
Late to the party again, as usual. I just found this post.
I was reading about the contradicting statements about the Spitfire cockpit crowbar color. Instead of reading on to see if it was ever definitively answered, I went to the Roger Freeman Collection. For what it's worth, here's a color pix of a Spit with it's door down and crowbar shown.
http://www.americanairmuseum.com/media/4528
I will not speculate on B/W photos because of the known peculiarities of judging color from them, yet there are several excellent images of the door and prybar in the collection. All I will saw is that the bars I've seen are not darker than the color of the door interior.
http://www.americanairmuseum.com/media/17296
Color photos and video of a pilot climbing into a Spit:
http://www.gettyimages.com/detail/video/news-footage/mr_00083767
Just barely see it:
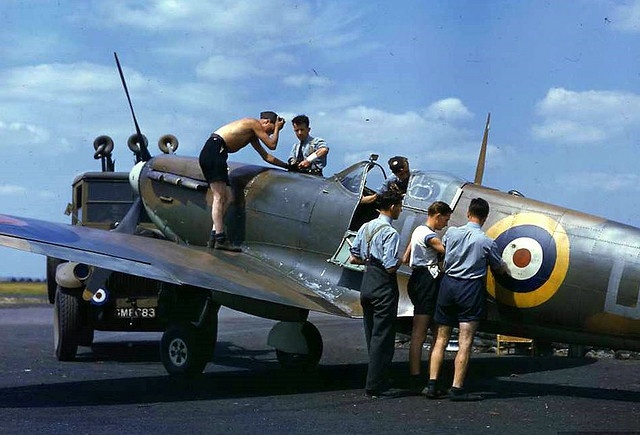
From Spitfire and Hurricane Museum:
http://www.aeroflight.co.uk/museums/main/spitfire-hurricane-memorial-museum.htm
What is exasperating are the number of quality color shots of open Spitfire doors with NO prybar:
http://www.3djuegos.com/comunidad-foros/tema/4916505/0/imagenes-en-color/
This one doesn't show the crowbar, yet isn't this just an incredibly splendid scene? I just hope an IPMS judge doesn't spot the uneven line of the fuselage band.
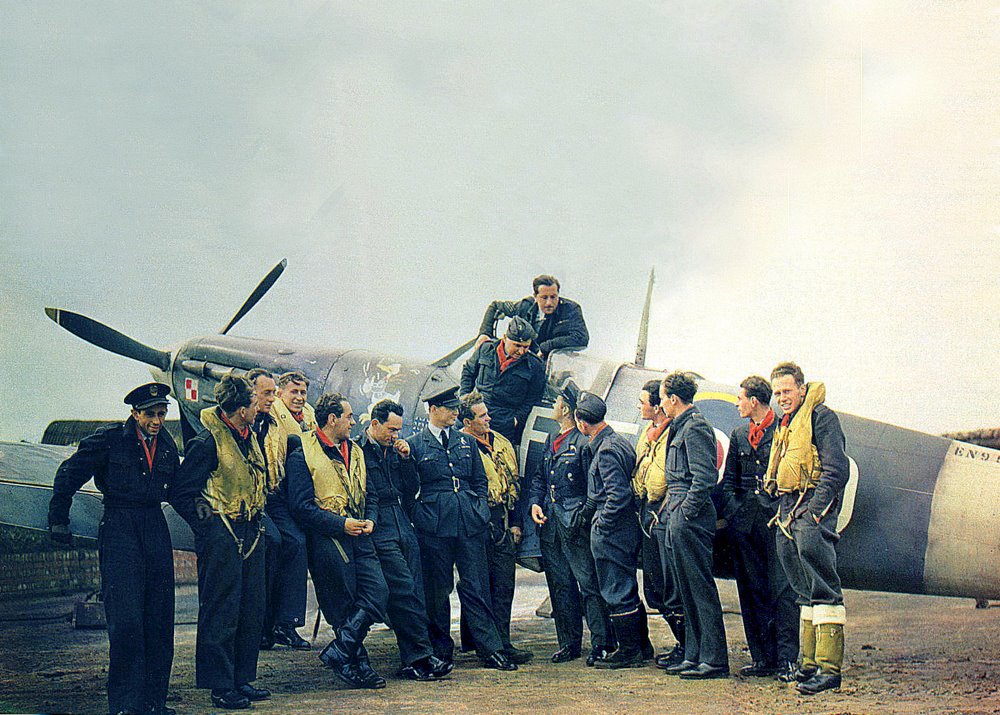
Late to the party again, as usual. I just found this post.
I was reading about the contradicting statements about the Spitfire cockpit crowbar color. Instead of reading on to see if it was ever definitively answered, I went to the Roger Freeman Collection. For what it's worth, here's a color pix of a Spit with it's door down and crowbar shown.
http://www.americanairmuseum.com/media/4528
I will not speculate on B/W photos because of the known peculiarities of judging color from them, yet there are several excellent images of the door and prybar in the collection. All I will saw is that the bars I've seen are not darker than the color of the door interior.
http://www.americanairmuseum.com/media/17296
Color photos and video of a pilot climbing into a Spit:
http://www.gettyimages.com/detail/video/news-footage/mr_00083767
Just barely see it:

From Spitfire and Hurricane Museum:
http://www.aeroflight.co.uk/museums/main/spitfire-hurricane-memorial-museum.htm
What is exasperating are the number of quality color shots of open Spitfire doors with NO prybar:
http://www.3djuegos.com/comunidad-foros/tema/4916505/0/imagenes-en-color/
This one doesn't show the crowbar, yet isn't this just an incredibly splendid scene? I just hope an IPMS judge doesn't spot the uneven line of the fuselage band.


 |


