

Hey folks, I thought this would be the best section for this question as it may help other modellers too.
I am having problems with clear coats in a big way. Most every kit I build falls at the clearcoat/decals/weathering stage due to an apparently bad clearcoat system.
The first method I tried gave me the best finish but was unpredictable when it came to weathering. I used testors lacquer satin, decals,satin, matt. Then weathering. Sometimes, the lacquer would allow an oil wash but other times it ended up melting into a mess.
Second method was with the humbrol enamel based modelcote gloss and matt, the matt was brilliant, but the gloss remained soft and susceptible to finger print impressions, and it also reacted with the oil wash occasionally.
The third method I am currently trying is all acylic. Humbrol clear decals humbrol clear (a future like product I believe) and micro flat acrylic matte varnish. I haven't even got as far as oil washes with this one. And its giving me the most trouble. I am hitting the model with a mist coat of clear, then a thicker one. And am getting a dust like finish in the varnish, the models are clear from dust, I also go over them just before spraying with a high pressure, just air burst to blow anything away. Then there is the reaction to solvaset, sometimes it marks and another coat of clear doesn't remove the mark be it water or decal solution.
The last attempt after a matt varnish ended up with a strange crazed effect that I have put down to not enough curing time.
Any tips? I'm at my wits end at the moment. I am using an iwata hp-b+ and sprint jet, with Tamiya and lifecolour acrylics. I have tried varying pressures and proximities of spraying. I also have a sparmax max 3 if the larger needle might help.
any tips that could help would be lifesaving !
best
. James
Start Here (for Beginners)
This forum is for younger modelers or people just starting out in the hobby.
This forum is for younger modelers or people just starting out in the hobby.
Hosted by Jim Starkweather
clear coat woes

lespauljames

Joined: January 06, 2007
KitMaker: 3,661 posts
AeroScale: 369 posts

Posted: Saturday, October 01, 2016 - 05:51 PM UTC


OEFFAG_153

Joined: February 19, 2010
KitMaker: 1,473 posts
AeroScale: 1,450 posts

Posted: Saturday, October 01, 2016 - 08:14 PM UTC
Hi James,
Clear coating can be a bit of a bother especially the "solvent based" variants when it comes to weathering. However there are ways to get round this.
First though a question for you do you weather before or after you spray the dull finish? If you do it after, then stop. As a rule of thumb, the matt/satin depending on the finish you want, should be sprayed at the end of the process to seal everything in, weathering decals etc. It's basically the last thing you do.
I've started using clears from Alclad2 lately, and they've really made me stop using future and other brands.
First step after rubbing down the paintjob with very fine micro mesh (grit 6000 or even better 8000) I gently clean the whole surface with a dampened cloth (lint free).
Then I use Alclad2 Aqua gloss all over the surface. This is water based and handles very well. Make sure you've got the preasure of the airbrush not too high, but not too low either.
Once this has settledfor a couple of days lay down the decals. If you Use Micro set/sol etc, make sure there are no wast puddles they could eat into the clear and make marks. I generally wipe on and around the decal during this process so that there is no residue.
Once the decals set wipe everything down again to remove any fingerprints then seal everything with Aqua gloss again.
Now you're ready for weathering. The Aqua gloss woun't react to any oil based washes or solvents. As a rule of thumb Waterbased clear coat OK to weather with oil based products. Solvent based clear use waterbased/acrylic weathering products. That way you should be safe.
Once the weathering is done make sure the model is absolutely dust free then airbrush with your desired matte/satin coat. I generally use Alclad2 Flat they have four finishes from dead flat to slight shine.
be warned though this is nasty stuff that you should not breathe, so use in a very well ventilated place and wear a mask.
Hope this helps somewhat, and Good Luck!
/Mikael

Tojo72

Joined: June 06, 2006
KitMaker: 4,691 posts
AeroScale: 238 posts
Posted: Saturday, October 01, 2016 - 09:12 PM UTC
I found that the Alclad clears are just about fool proof,I love them.
Joel_W
Joined: December 04, 2010
KitMaker: 11,666 posts
AeroScale: 7,410 posts
Posted: Saturday, October 01, 2016 - 09:55 PM UTC
I'm really old school, and after testing so many clearcoats, I have a just about one or two from every base type. I've gone back to the Grand Daddy of them all: Testors Model Master Glosscoat and Dullcoat for use over all paints. they're lacquer based, and once dry nothing enamel or Acrylic base will eat through them.
I do 90% of my weathering on glossy surfaces as the weathering media flows just that much better. the final sealing coat of clear is Dullcoat.
When I'm using Alcads and need to seal them I use Testors' Metalizer Sealer as it barely changes the look of the Metalizer, but when decaling is needed, I use their Gloss as a base coat, decal, then the Testors Metalizer. Just how I do things.
Biggest thing to watch out for is that the weathering base won't eat through the clear base.
Joel


TimReynaga
Joined: May 03, 2006
KitMaker: 2,500 posts
AeroScale: 318 posts
Posted: Saturday, October 01, 2016 - 11:14 PM UTC
Hi James,
I'm no aircraft expert (I mostly do ships), but I have had good luck with "flat Future" semi-gloss overcoats on my airplanes (usually 5 parts Future to 2 parts Tamiya acrylic Flat Base).
This type of overcoating offers a number of advantages: low toxicity, the reflectance level can be easily adjusted, and if you screw it up you can just spray Windex on it, strip it off, and start again!

I'm no aircraft expert (I mostly do ships), but I have had good luck with "flat Future" semi-gloss overcoats on my airplanes (usually 5 parts Future to 2 parts Tamiya acrylic Flat Base).

This type of overcoating offers a number of advantages: low toxicity, the reflectance level can be easily adjusted, and if you screw it up you can just spray Windex on it, strip it off, and start again!


Merlin

#017


Joined: June 11, 2003
KitMaker: 17,582 posts
AeroScale: 12,795 posts

Posted: Wednesday, October 05, 2016 - 01:28 AM UTC
Hi James
Your mention of a dust like finish reminds me of something I experienced with a black enamel gloss coat I applied a week ago. I've never had it happen before (even using the same paint a week earlier), so it may have been be down to moisture in the air as summer turns to autumn, but I noticed a white "dusty" effect as the paint dried. It wiped off and left me none the wiser.
All the best
Rowan

OEFFAG_153
Joined: February 19, 2010
KitMaker: 1,473 posts
AeroScale: 1,450 posts
Posted: Wednesday, October 05, 2016 - 01:28 PM UTC
Quoted Text
Hi James
Your mention of a dust like finish reminds me of something I experienced with a black enamel gloss coat I applied a week ago. I've never had it happen before (even using the same paint a week earlier), so it may have been be down to moisture in the air as summer turns to autumn, but I noticed a white "dusty" effect as the paint dried. It wiped off and left me none the wiser.
All the best
Rowan
Hi Rowan and James,
I've had similar experiences with matt coats in the past, and like you say Rowan, they were probably due to moisture and temperature.
But I've also heard that it may depend on the age of the clear varnish. I.e. there is some sort of Best before date and perhaps depending on storage they could go off? Not sure how to check this "fact", but I've been given the advice in the past to make sure I use a "fresh" bottle...
All the best
/Mikael

Emeritus

Joined: March 30, 2004
KitMaker: 2,845 posts
AeroScale: 1,564 posts

Posted: Wednesday, October 05, 2016 - 06:59 PM UTC
Quoted Text
Hi James,
I'm no aircraft expert (I mostly do ships), but I have had good luck with "flat Future" semi-gloss overcoats on my airplanes (usually 5 parts Future to 2 parts Tamiya acrylic Flat Base).
This type of overcoating offers a number of advantages: low toxicity, the reflectance level can be easily adjusted, and if you screw it up you can just spray Windex on it, strip it off, and start again!
That's a 5:2 mix of Future to Flat Base? Interesting, I wonder if the stuff I've been using is sligthly different, but I've gotten a similar (or just a bit flatter) sheen with 10 parts Future and 2 parts Flat Base, and even with that ratio there's the chance of getting a slightly tinted finish if you're not extra careful keeping your coats really light. 10:1 mixture I've found to my liking with aircraft: hardly any risk of that cloudy finish (though sometimes it can beneficial by giving some scale effect and tone down stark contrasts) and dries down to a tad shinier, semi-satin finish.

dammodeus
Joined: February 01, 2009
KitMaker: 19 posts
AeroScale: 18 posts
Posted: Thursday, October 06, 2016 - 07:10 AM UTC
I concur, Dullcote and Glosscote have never let me down. And, they are impervious to mineral spirits based weathering. I have had Glosscote get a little soft from strong decal softeners (used multiple times without soaking up excess), the fix for that was to allow some time between decal softener applications and wick up any excess. Dullcote is bulletproof!
lespauljames
Joined: January 06, 2007
KitMaker: 3,661 posts
AeroScale: 369 posts
Posted: Wednesday, October 19, 2016 - 03:42 AM UTC
Thankyou all for your replies. Some very concise descriptions that will hopefully help others as it has me.
The testors I have in lacquer pots and I just ended up with a melty mess when I oil washed over them. And after having tried an enamel base (too stinky ) with humbrol clear I went back to acrylic, humbrol clear and weathering. The thing it turns out that I was missing, was patience. I was attempting to lay down too thick a coat each time, from too far away with too much pressure. So effectively the stuff was half drying hence the annoying texture. Also I found out that using a hair dryer to speed things up made the clear leave little dry pools. Oops.
Hopefully having got clearcoating down, and using alclad down more builds will pop up when I have the time to post them
best.
James

Littorio

Joined: September 15, 2004
KitMaker: 4,728 posts
AeroScale: 1,351 posts

Posted: Wednesday, October 19, 2016 - 05:02 AM UTC
James, don't know if this helps in any way but my method is along these lines:
Halfords (auto parts store) grey plastic primer (enamel) - aerosol (Red primer for ship hulls)
Black base for metallic finishes only over the grey - aerosol or airbrush depending on the coverage needed (tends to be more airbrush now with Model Air)
Acrylic base coat and any other coats - airbrush (Vallejo, Ammo and Lifecolor)
Future - Airbrush or spot coat with hairy stick if only a few decals
Decal
Future - airbrush the whole model
Oil wash and weather
Testors dull coat - aerosol or Vallejo (gloss, satin or matt) - airbrush
The Testors dull coat gives me the best matt coat I find but the Vallejo is more forgiving.
This has not failed me yet on armour or ships. Pressure is a big thing when working with acrylics, it needs to be higher than you use with enamels but not to high, also depending on brand you may benefit from flow improver or a retarder.
The dust effect mentioned will be down to the relative humidity or rH, which this time of year is very high in the UK during the evening/night (81% as I type this, I have to measure this during the night at work, Shh I'm at work ).
).
Halfords (auto parts store) grey plastic primer (enamel) - aerosol (Red primer for ship hulls)
Black base for metallic finishes only over the grey - aerosol or airbrush depending on the coverage needed (tends to be more airbrush now with Model Air)
Acrylic base coat and any other coats - airbrush (Vallejo, Ammo and Lifecolor)
Future - Airbrush or spot coat with hairy stick if only a few decals
Decal
Future - airbrush the whole model
Oil wash and weather
Testors dull coat - aerosol or Vallejo (gloss, satin or matt) - airbrush
The Testors dull coat gives me the best matt coat I find but the Vallejo is more forgiving.
This has not failed me yet on armour or ships. Pressure is a big thing when working with acrylics, it needs to be higher than you use with enamels but not to high, also depending on brand you may benefit from flow improver or a retarder.
The dust effect mentioned will be down to the relative humidity or rH, which this time of year is very high in the UK during the evening/night (81% as I type this, I have to measure this during the night at work, Shh I'm at work
).
Joel_W
Joined: December 04, 2010
KitMaker: 11,666 posts
AeroScale: 7,410 posts
Posted: Wednesday, October 19, 2016 - 05:18 AM UTC
James,
Testors Glosscoat is indeed lacquer based, and once dry Mineral Spirits, or Turps shouldn't eat through it unless you keep on laying on heavy coat after heavy coat and rubbing it through the protective layer.
No matter what base Clear I use, I air brush it exactly like I do thinned out paint @ 18 psi. I start with a few light tack coats, then a heavier coat or two, and then a wet coat. you need to let each coat completely dry. With Glosscoat that takes less then 5-10 min. Lacquer dries the quickest, and Mineral Spirits can take days to cure.
Joel
Kevlar06
Joined: March 15, 2009
KitMaker: 3,670 posts
AeroScale: 833 posts
Posted: Wednesday, October 19, 2016 - 05:33 AM UTC
I use three types of clearcoat, some have already been mentioned, but one that is never mentioned, the one of which I prefer over all painted aircraft surfaces:
1) Alclad clear gloss, semi-gloss and flat
2) Testors DullCoat and Glosscoat from the bottle, not the can
3) Testors Metalizer Sealer-- this is one not mentioned very often, but it gives a very thin slightly gloss sheen, almost perfect for scale effect on any scale aircraft, and works well for factory paint on armored vehicles.
VR, Russ
lespauljames
Joined: January 06, 2007
KitMaker: 3,661 posts
AeroScale: 369 posts
Posted: Friday, October 21, 2016 - 03:53 AM UTC
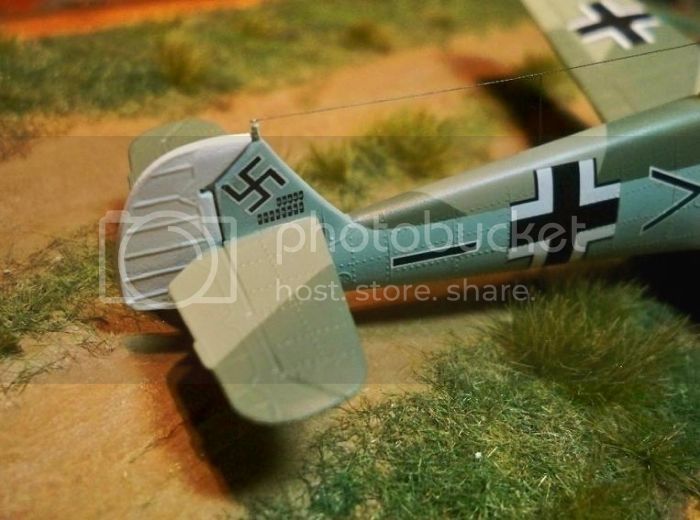
Hey all I'm still having problems. Maybe its just me.
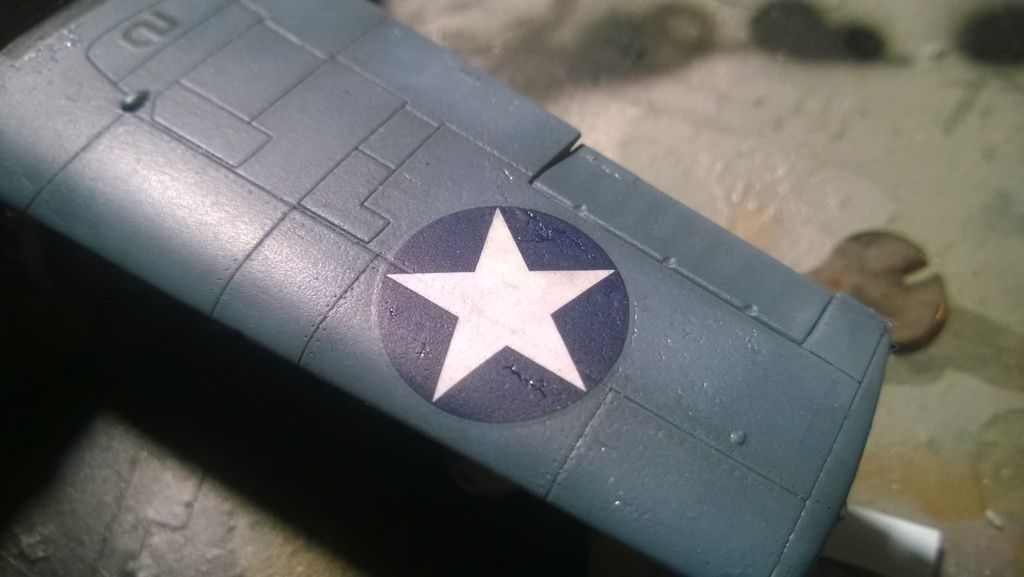
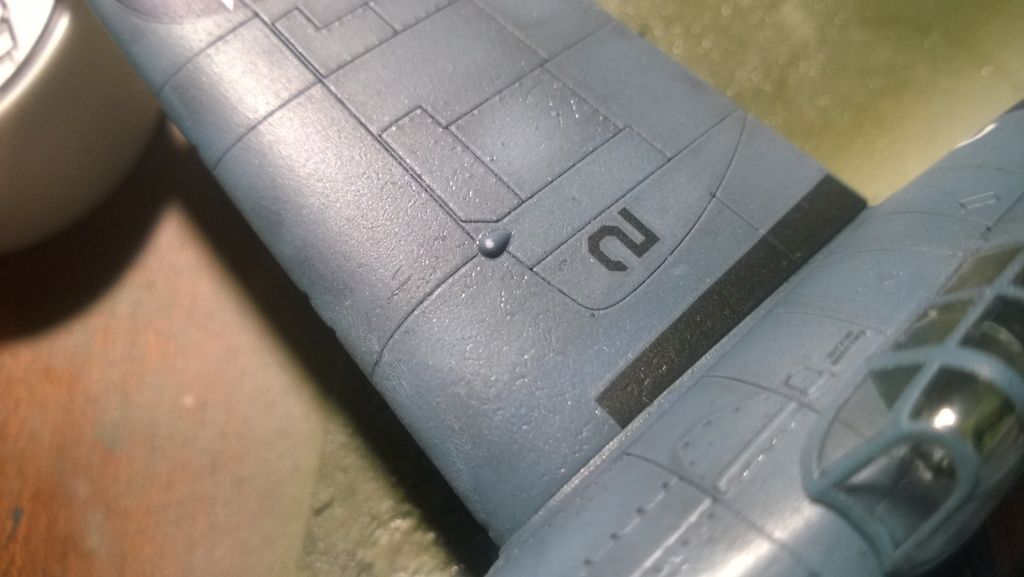
This is whit humbrol clear and micro scale flat. Getting to the end of my tether !


This is whit humbrol clear and micro scale flat. Getting to the end of my tether !
Kevlar06
Joined: March 15, 2009
KitMaker: 3,670 posts
AeroScale: 833 posts
Posted: Friday, October 21, 2016 - 05:31 AM UTC
James,
I'm not quite sure what I see there in the photos-- they lack a little in definition, but it looks like one of the topcoats is being repelled by the other and "crinkling" up, or one is attacking the other and forming cracks in the surface. Here's what I'd do-- get some oooo or finer steel wool, and see if you can polish the clearcoats down, at least to the decal level (assuming the clear coats are over your decals-- I can't tell). This is a messy process, and when done, you'll need to clean the aircraft under running water and air dry for several days to ensure the steel wool fibers are all gone. Once done, re coat the surface with another clear coat-- as was mentioned by several of us-- Alclad seems to be the best. I've found in the past few years that Humbrol seems to have changed its formulation for its paints and clear coats-- they don't seem to dry properly and remain tacky for a long while. Not saying this is your issue, but it might be.
VR, Russ

champy
Joined: January 20, 2005
KitMaker: 103 posts
AeroScale: 8 posts

Posted: Friday, October 21, 2016 - 01:34 PM UTC
Hi James
Again not an expert but I have recently switched from afv to planes (more embraced planes than left afvs!) but this has made me have to think more about clear cotes and decals as there are a lot more and things show up in 1/72. I was using humbrol clear and it was great but when I got a new bottle it was drying cloudy in places and never actually setting hard, it seems humbrol have good and bad batches so it's hard to trust it, I have recent,y switched to pledge floor wax after doing a few tests and this is working well I also find that tamiya x22 is the safest although you can get through it quickly. I always Matt down with tamiya flat clear.
The main point to make though is after every stage (even before the first clear cote) I find it essential to buff the surface, I've only ever done this for the planes recently but I think I will do it all the time now. If you use a micro fibre cloth you can get a gloss shine just by buffing the fresh (dried) Matt paint, a clear cote then goes down lovely onto this, I then buff that, decal, clear, buff, weather etc until the Matt cote which is then left un buffed.
Also just to note if you are using the buffing method leave everything you can off the plane and paint and weather separately until you are ready to Matt as you WILL break it off!
Hope that's not too long winded and helps.
Jason
Joel_W
Joined: December 04, 2010
KitMaker: 11,666 posts
AeroScale: 7,410 posts
Posted: Friday, October 21, 2016 - 11:15 PM UTC
James,
the pitting could be caused by a few issues. My guess is that you applied the clear coat way to heavy, waited a while, and applied another coat without letting the 1st coat completely dry.
Can you post a picture of the wing area with paint but before clear coating so that we can see what the painted surface looked like.
Joel
dammodeus
Joined: February 01, 2009
KitMaker: 19 posts
AeroScale: 18 posts
Posted: Saturday, October 22, 2016 - 10:44 AM UTC
Old time Testors Dullcote and Glosscote (in the square bottles) never fail. I mix them 50:50 with generic lacquer thinner. I plan to try the Alclad 2 clear coats-due to the praise they've received.
Joel_W
Joined: December 04, 2010
KitMaker: 11,666 posts
AeroScale: 7,410 posts
Posted: Saturday, October 22, 2016 - 11:05 PM UTC
Quoted Text
Old time Testors Dullcote and Glosscote (in the square bottles) never fail. I mix them 50:50 with generic lacquer thinner. I plan to try the Alclad 2 clear coats-due to the praise they've received.
I've used both of them, and will finish both bottles eventually for certain jobs. the problem with them is that they're Mineral Spirit based, and do take a much longer time to dry and cure then Testors gloss/dullcoat which are lacquer based. I also prefer Testors metalizer sealer for the same reason.
As I said before, one other issue is that they come pre-thinned, which to me means 4 oz bottles are only 2 oz worth of agent, a very expensive alternative.
Joel
airdefensegal
Joined: March 14, 2016
KitMaker: 15 posts
AeroScale: 1 posts
Posted: Saturday, October 22, 2016 - 11:50 PM UTC
I've used Tamiya acrylic clear gloss to good effect. I thin it about 4:1 or 5:1 with their airbrush thinner, and mist on a few of coats (wet on wet), then hit it with more of a soaking spray. Let it dry a day before declaring, wait another day and repeat the mist-soak treatment to seal it. Let dry 2 days. If I'm after a gloss coat (e.g. for aerobatic birds), I'll usually buff that with plastic polish. If not, start weathering, dull coat, etc..
What other modelers in my club have done is simply spray on Future floor wax (it has since been remarketed with a longer name), which is self leveling. After that's dried, apply the decals, decal solvents, etc. with suitable waiting times, then hit it with a sealant coat of Future. Let that dry a couple of days and start weathering., dull coat, etc. Some have used Future as their setting solution - spray on the Future, soak the decals to free them, then dip the decals in future and apply directly on the model, and overcoat with a Future spray. Their results look good - I've tried it once and was reasonably satisfied with my first attempt.
YMMV, of course.
lespauljames
Joined: January 06, 2007
KitMaker: 3,661 posts
AeroScale: 369 posts
Posted: Sunday, October 23, 2016 - 04:58 PM UTC
Thanks guys, I'm waiting till payday to get the alclad aquagloss. I have heard only good things about it. The pitting was resolved with some locational sanding and re varnishing. I think I just need to wait longer between coats ! I'll write back when i have used the aquagloss

Planenuts
Joined: December 16, 2005
KitMaker: 45 posts
AeroScale: 45 posts
Posted: Sunday, October 23, 2016 - 05:50 PM UTC
Patience is probably the issue, you are not giving the coatings time to thoroughly cure before adding more. I always give Future at least 24 hours to cure, I realize when you put it on the floor you can walk on it on short order but on the floor you are not putting other coatings on top of it. I too have switched to the Alclad aqua and it just works better for me and it seems to cure faster than Future but don't rush it. With any coatings in my opinion it's better to wait 24 hours between them than to need to strip and start over. With paint, if you can still smell a strong odder of solvent, then it has not fully cured and adding other coatings over it can cause issues! You most likely didn't finish building the kit in a day so don't try to do all of the finish in one day.
 |

WEB HOSTING BY


Copyright ©2021 AeroScale and Kitmaker Network, a subsidiary of Silver Star Enterprises
All Rights Reserved. Please read our Conditions of Use and Privacy Policy.
All Rights Reserved. Please read our Conditions of Use and Privacy Policy.