World War II
Discuss WWII and the era directly before and after the war from 1935-1949.
Hosted by Rowan Baylis
Airfix 1/72 He111 h-6
lespauljames
England - South West, United Kingdom
Joined: January 06, 2007
KitMaker: 3,661 posts
AeroScale: 369 posts
Joined: January 06, 2007
KitMaker: 3,661 posts
AeroScale: 369 posts
Posted: Thursday, February 02, 2017 - 05:23 AM UTC
Next up..
Got this kit for Christmas and have always wanted to build a he111 (cheers mum) I'm unsure as to what finish I will go for. The box art is very attractive and the black underside will be new to me, but the north African finish in sandgelb looks nice too and isn't seen too often. The build will be mostly oob and I will try to show my process more. I will add the sunshade above the pilot and will probably use rice paper to try and get a suitable thickness.
thegirl
Alberta, Canada
Joined: January 19, 2008
KitMaker: 6,743 posts
AeroScale: 6,151 posts
Joined: January 19, 2008
KitMaker: 6,743 posts
AeroScale: 6,151 posts
Posted: Thursday, February 02, 2017 - 05:41 AM UTC
Looking forward to your build James
Terri
Terri
berndm
Niedersachsen, Germany
Joined: March 26, 2014
KitMaker: 844 posts
AeroScale: 630 posts
Joined: March 26, 2014
KitMaker: 844 posts
AeroScale: 630 posts
Posted: Thursday, February 02, 2017 - 01:03 PM UTC
Good choice with a striking boxart.
If you go with the torpedo bomber from KG 26, check it out if these aircrafts had the bomb sight still installed.
Antilles
Nordrhein-Westfalen, Germany
Joined: March 22, 2015
KitMaker: 671 posts
AeroScale: 614 posts
Joined: March 22, 2015
KitMaker: 671 posts
AeroScale: 614 posts
Posted: Friday, February 03, 2017 - 04:24 AM UTC
James,
Your Messerschmitt turned out great, so, I will gladly follow Your build in my favourite scale!
Oliver
Your Messerschmitt turned out great, so, I will gladly follow Your build in my favourite scale!
Oliver
lespauljames
England - South West, United Kingdom
Joined: January 06, 2007
KitMaker: 3,661 posts
AeroScale: 369 posts
Joined: January 06, 2007
KitMaker: 3,661 posts
AeroScale: 369 posts
Posted: Sunday, February 05, 2017 - 12:55 AM UTC
Oliver, Bernd, thankyou for popping along for this one..
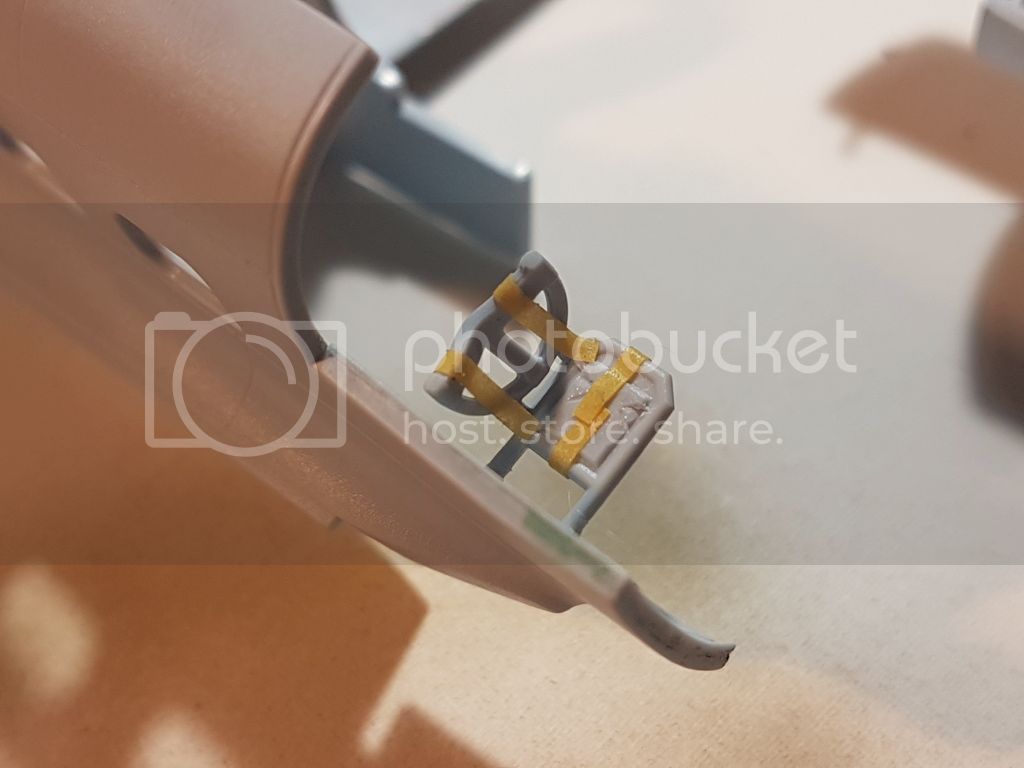
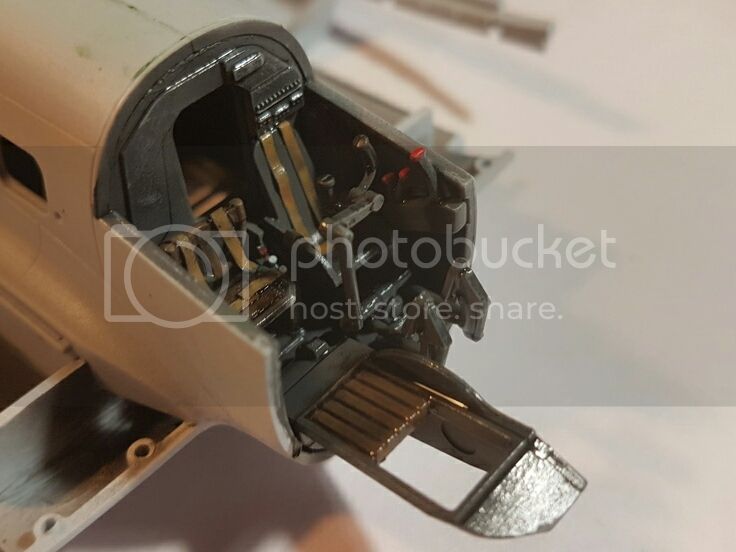
First up. The seat had belts added to it from 1mm tape
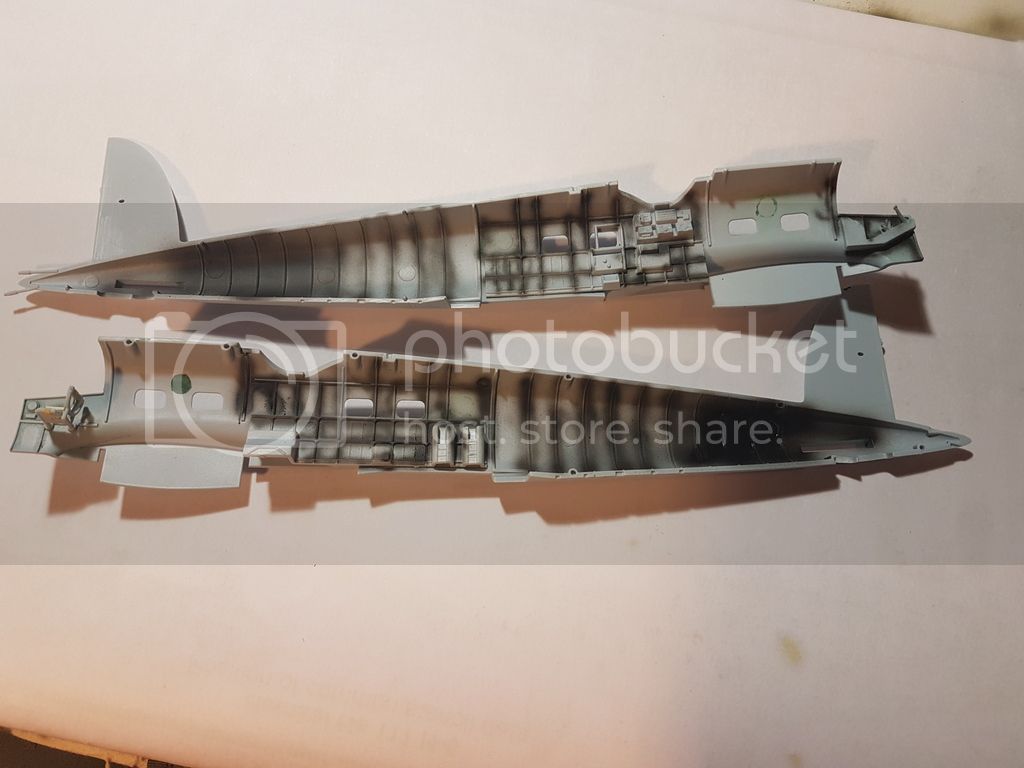
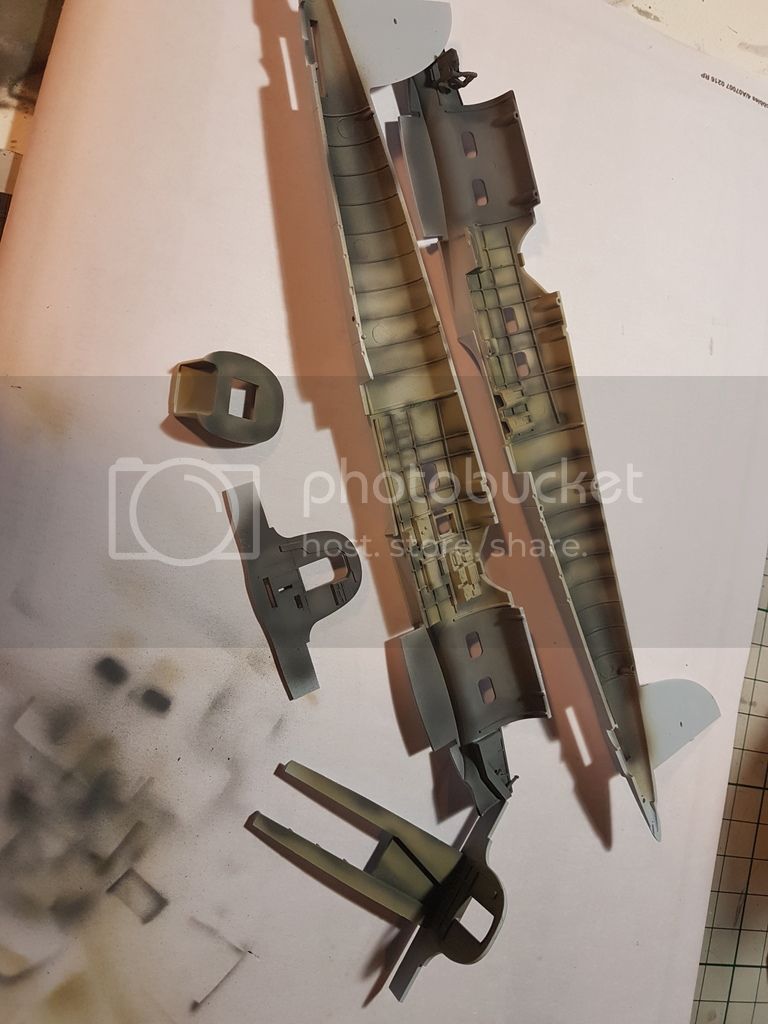
Ejector pin marks were filled with games workshops "green stuff" in a paint pot. I think this is really just thick acrylic paint. I need a new filler as it doesn't really work well. I then preshading the interior with tamiya black mixed with screen wash and sprayed the cockpit tamiya German grey, lightened a bit. And the rear compartment life colour rlm02.
Then second photo was not the final coat.
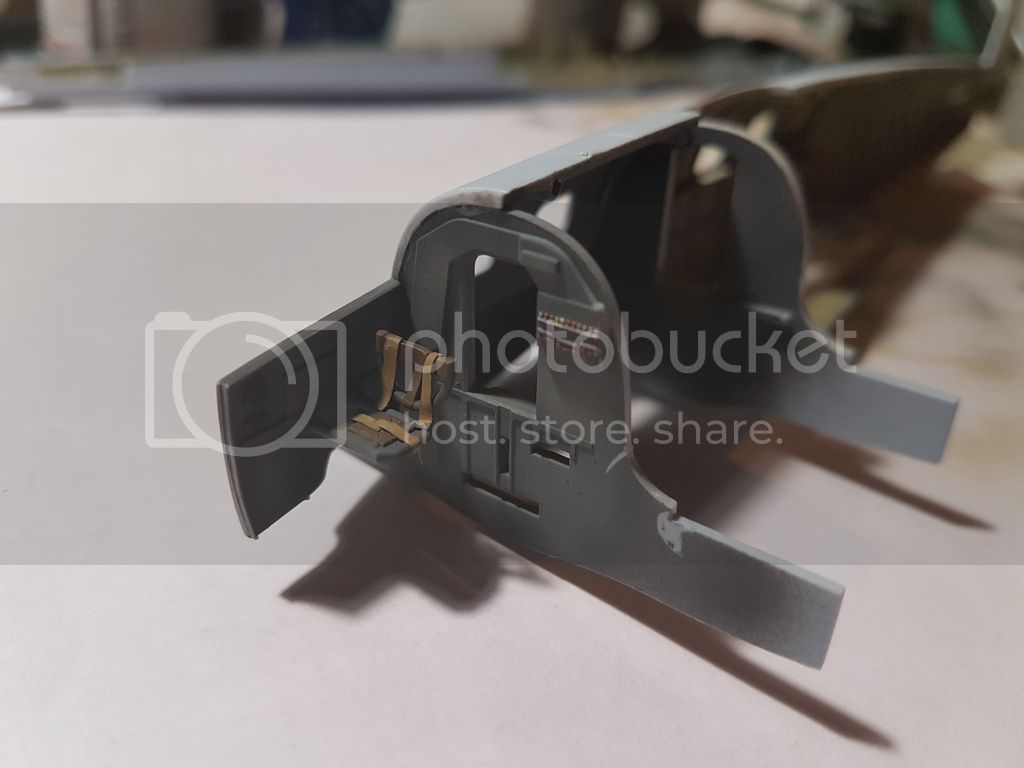
I painted the straps sandgelb and the seat valley of leather brown. I picked out the switches white then painted over red and yellow.
This will go together a lot quicker than the me410.
Thanks all
J
Posted: Sunday, February 05, 2017 - 05:09 AM UTC
I just have to say the shading work is just outstanding James. And that I just love the new Airfix kits they are just fantastic. The internal detail is just stunning for a 1/72nd scale kit, I'm loving the build so far. As for putty the results Terri has achieved with Vallejo acrylic putty have been quite encouraging.
lespauljames
England - South West, United Kingdom
Joined: January 06, 2007
KitMaker: 3,661 posts
AeroScale: 369 posts
Joined: January 06, 2007
KitMaker: 3,661 posts
AeroScale: 369 posts
Posted: Sunday, February 05, 2017 - 05:26 AM UTC
Chris thankyou. And I will get some valley of putty asap !
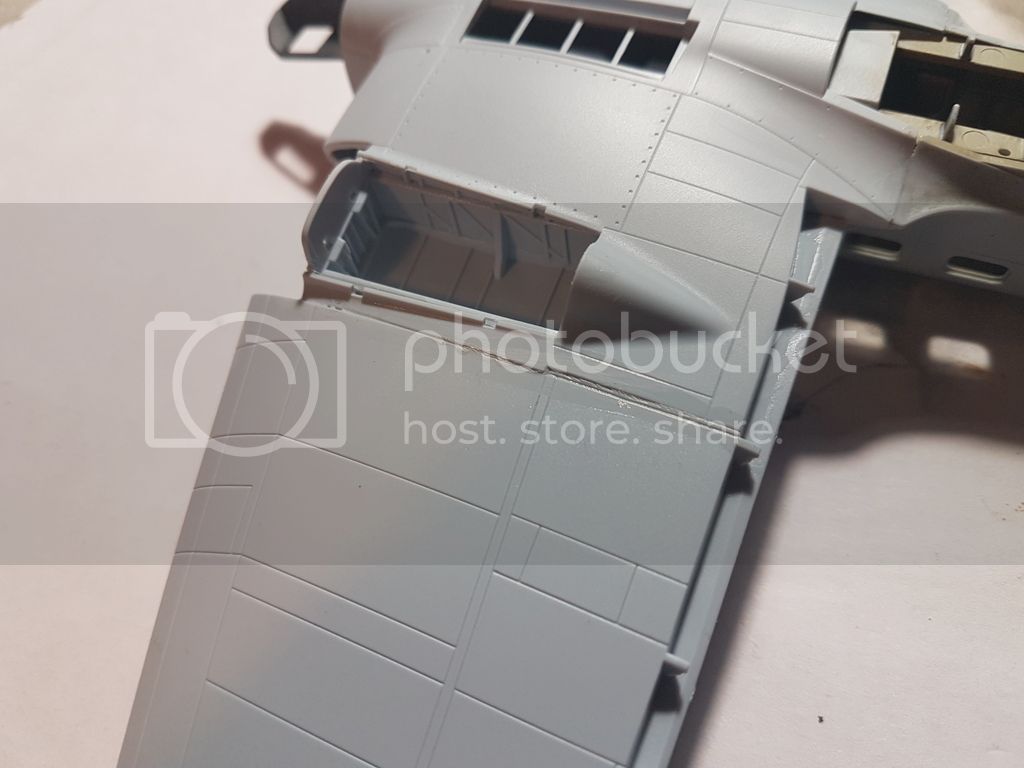
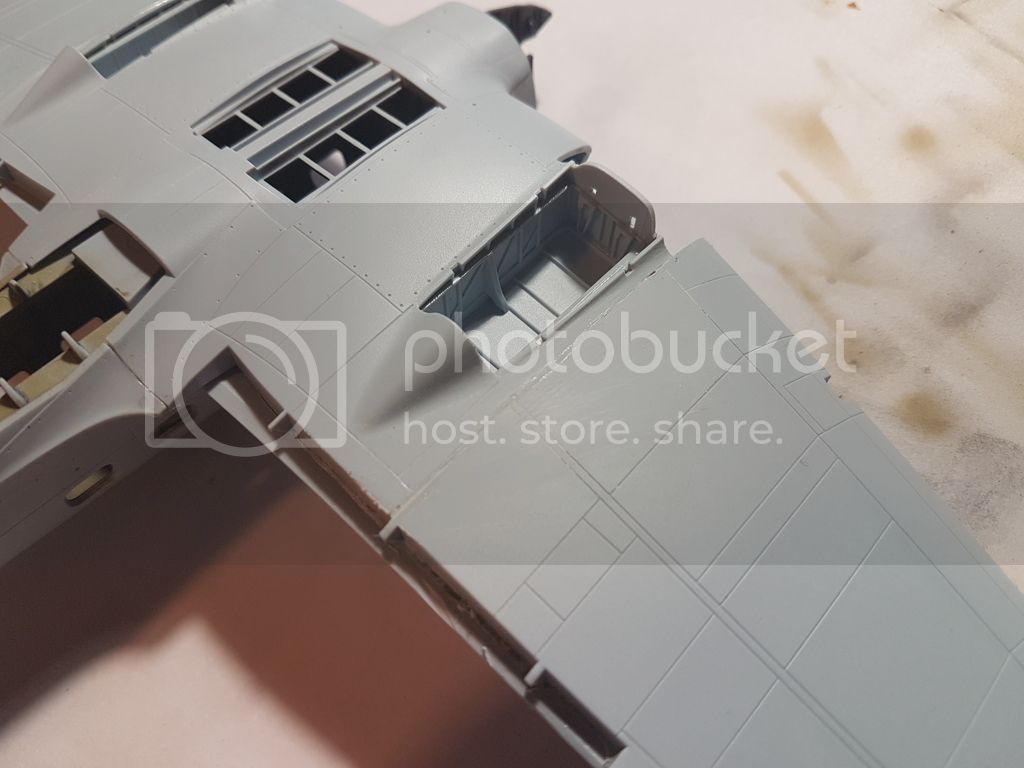
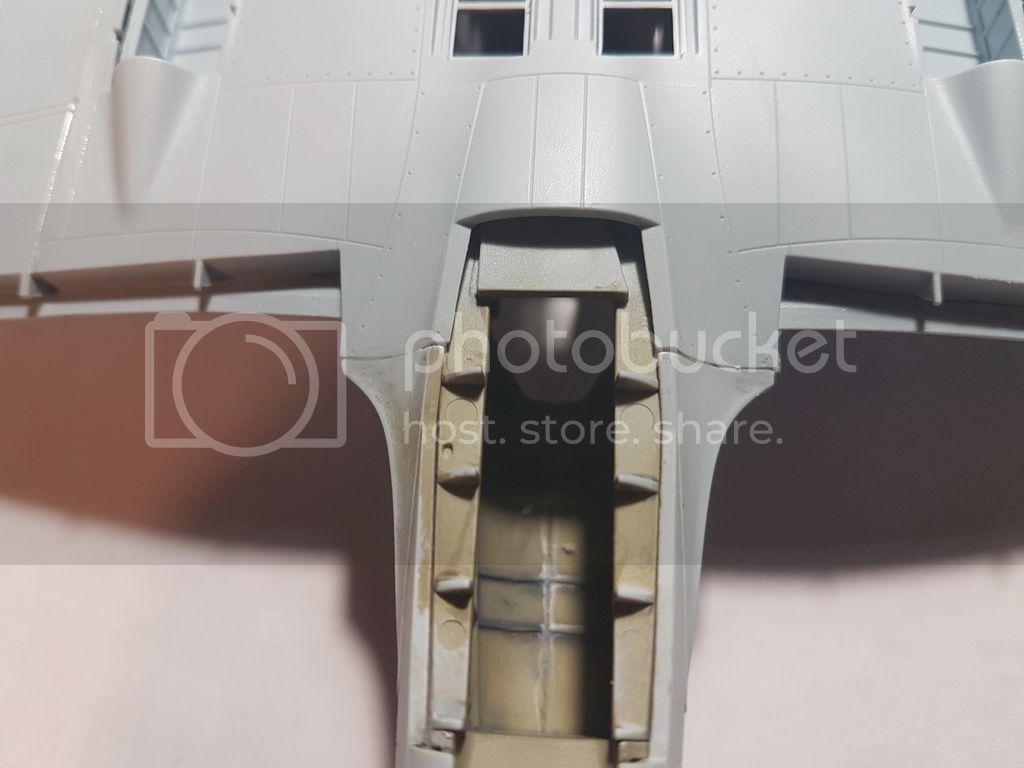
The shading on the interior was a little slapdash if I'm honest but you will barely see it inside. This kit falls together so far and I'm my own worst enemy, I started this kit today and the wings are already on. Overproductive builder I must be. The wings although I have no pics as yet went together well although there was a small issue with the gap where the wing joins the centre section on the underside. I have to get some new putty . Looks like I'll be trying valley putty.
Here is a pic of the cockpit. Shiny from a wash..
Posted: Sunday, February 05, 2017 - 03:57 PM UTC
Hi James
great progress. Have been quietly following along. I have this kit in the stash am interested to see how it builds up!
lespauljames
England - South West, United Kingdom
Joined: January 06, 2007
KitMaker: 3,661 posts
AeroScale: 369 posts
Joined: January 06, 2007
KitMaker: 3,661 posts
AeroScale: 369 posts
Posted: Sunday, February 05, 2017 - 05:47 PM UTC
Russell it's falling together. Easiest build so far that I have done in a while !
lespauljames
England - South West, United Kingdom
Joined: January 06, 2007
KitMaker: 3,661 posts
AeroScale: 369 posts
Joined: January 06, 2007
KitMaker: 3,661 posts
AeroScale: 369 posts
Posted: Sunday, February 05, 2017 - 11:17 PM UTC
berndm
Niedersachsen, Germany
Joined: March 26, 2014
KitMaker: 844 posts
AeroScale: 630 posts
Joined: March 26, 2014
KitMaker: 844 posts
AeroScale: 630 posts
Posted: Tuesday, February 07, 2017 - 12:45 PM UTC
Looking good so far, James.
Looks like a straight forward build and there is nothing that some putty and some sanding can t cure.
Masking all the clear parts will be a challenge.
Looks like a straight forward build and there is nothing that some putty and some sanding can t cure.
Masking all the clear parts will be a challenge.
lespauljames
England - South West, United Kingdom
Joined: January 06, 2007
KitMaker: 3,661 posts
AeroScale: 369 posts
Joined: January 06, 2007
KitMaker: 3,661 posts
AeroScale: 369 posts
Posted: Tuesday, February 07, 2017 - 02:49 PM UTC
Thanks Bernd that's where I am now, masking off. It shouldn't take too long
thegirl
Alberta, Canada
Joined: January 19, 2008
KitMaker: 6,743 posts
AeroScale: 6,151 posts
Joined: January 19, 2008
KitMaker: 6,743 posts
AeroScale: 6,151 posts
Posted: Wednesday, February 08, 2017 - 05:09 AM UTC
Your off to a good start on this one ! Looking good so far and the added seatbelts really dress up the pit .
Terri
Terri
lespauljames
England - South West, United Kingdom
Joined: January 06, 2007
KitMaker: 3,661 posts
AeroScale: 369 posts
Joined: January 06, 2007
KitMaker: 3,661 posts
AeroScale: 369 posts
Posted: Thursday, February 09, 2017 - 03:11 AM UTC
Thanks Terri , hopefully youll be able to see them through my bad masking..
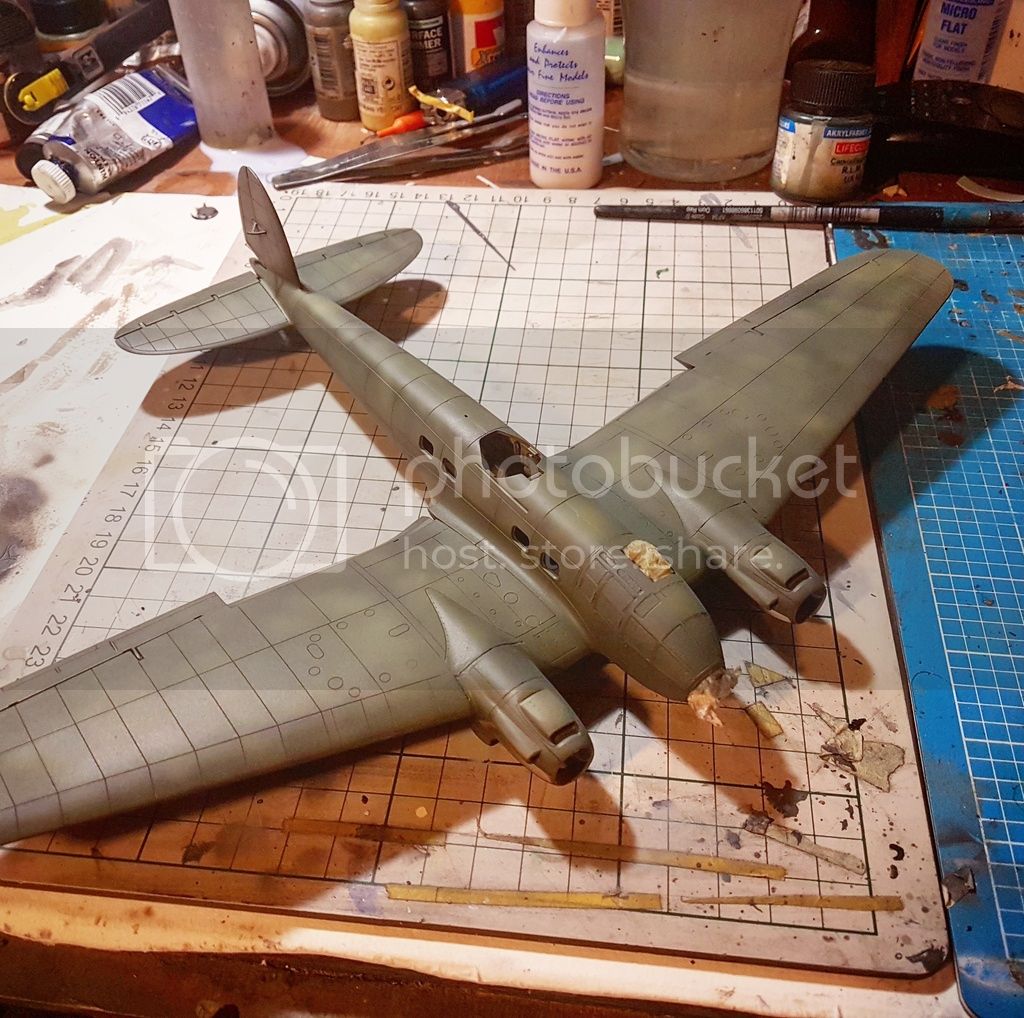
Update progress hooray.
Base coat. Lifecolour rlm 71 over black preshading with rlm 71 and Russian 7k green yellow 60:40 mottled over the top
Secondary camouflage colour. Rlm 70 schwarzgrun over black preshading mottled with rlm 70 and rlm 04 60:40
I'm painting this in a modular way so I can keep on top of masking and not confuse myself.
J
Posted: Thursday, February 09, 2017 - 04:14 AM UTC
nice, fast, progress James
lespauljames
England - South West, United Kingdom
Joined: January 06, 2007
KitMaker: 3,661 posts
AeroScale: 369 posts
Joined: January 06, 2007
KitMaker: 3,661 posts
AeroScale: 369 posts
Posted: Thursday, February 09, 2017 - 04:40 PM UTC
Thanks Russell... day off today so I will probably get a lot more done after run a few errands.
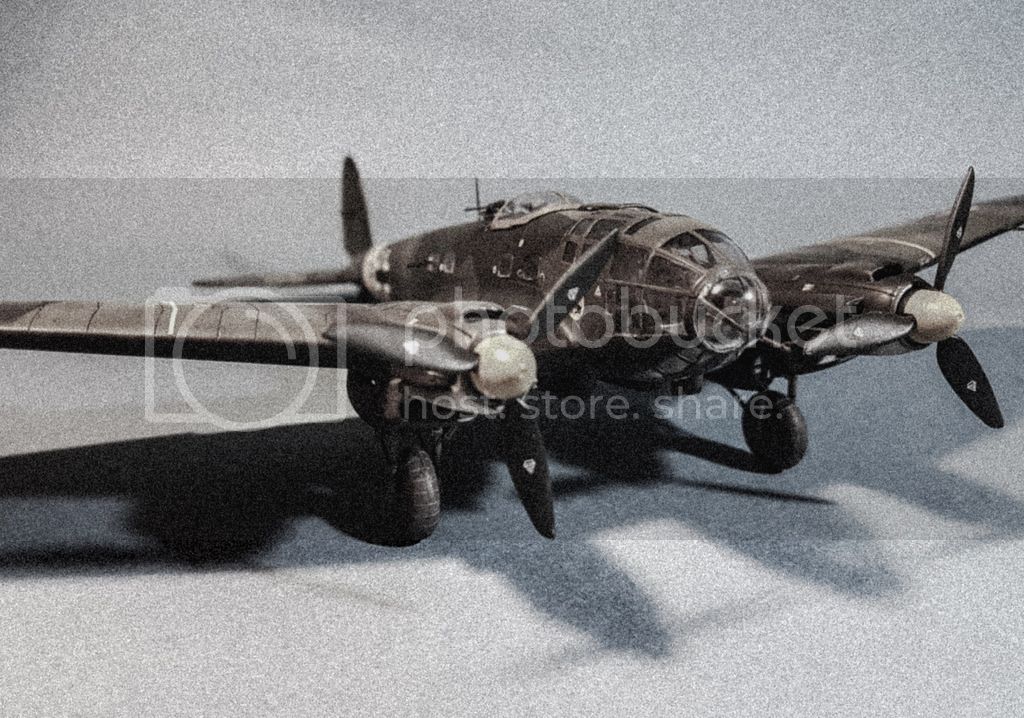
Here she is as of 9am.
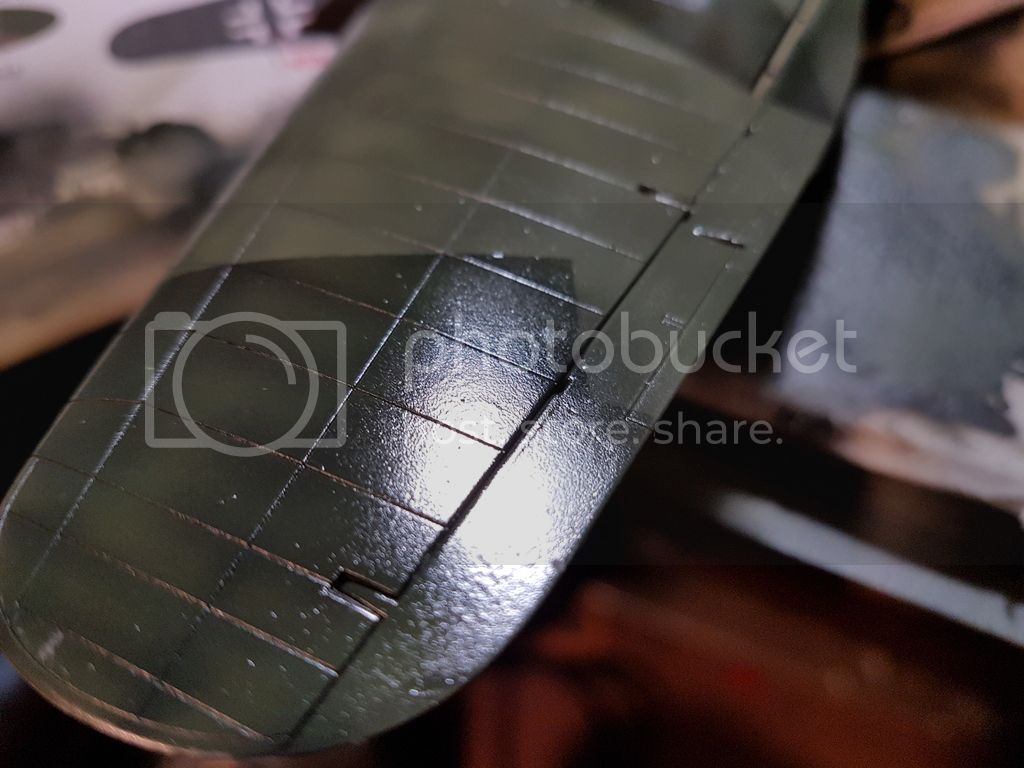
I'm using humbrol clear still at the moment and am getting a micro sandpaper texture in some areas. I did hit it with a flat clear before to protect the delicate lifecolour could that have been it ?
Here she is as of 9am.
I'm using humbrol clear still at the moment and am getting a micro sandpaper texture in some areas. I did hit it with a flat clear before to protect the delicate lifecolour could that have been it ?
magnusf
Stockholm, Sweden
Joined: May 02, 2006
KitMaker: 1,953 posts
AeroScale: 1,902 posts
Joined: May 02, 2006
KitMaker: 1,953 posts
AeroScale: 1,902 posts
Posted: Thursday, February 09, 2017 - 05:00 PM UTC
James! I'm following your build with a smile on my face! Great progress and it looks really good!
I've done two 111:s in the 1980's, one was a Matchbox (I went for the Romanian option), the other one was Italeri's kit that I did as a torpedo bomber in North Africa camo. Could really be time to do another one now ...
Regarding that sandpaper effect, I tend to get a bit of it randomly here and there no matter how I try to avoid it, maybe that matt coat is the culprit, maybe not. I would get some MicroMesh sanding pads (or a nail polishing stick!) and carefully get rid of the worst of it, then maybe touch up the affected areas with another shot of gloss if I thought it was necessary. The final satin- or matte coat is also a bit forgiving when it comes to hiding this kind of imperfections!
Regarding that flat clear protection coat, I'm not sure that would be necessary since it won't help LifeColor adherence (my main gripe with LC paints) and you are anyway shooting a layer of gloss clear!
No matter what, I think you're doing a great job on this one and I love the look of that camo, breaking it up look with preshading and mottling.
Finally: have you used ready made masks for the canopy or did you cut them by hand?
Magnus
lespauljames
England - South West, United Kingdom
Joined: January 06, 2007
KitMaker: 3,661 posts
AeroScale: 369 posts
Joined: January 06, 2007
KitMaker: 3,661 posts
AeroScale: 369 posts
Posted: Thursday, February 09, 2017 - 05:35 PM UTC
Magnus thankyou I have always wanted to build a 111. It's a funny looking aircraft yet so sleek at the same time. I think under the flat coat you won't see the texture it's just me being picky. I need to get some micromesh polishing cloths but at the moment I'm all out of budget! I don't have a lot of trouble with lifecolour coming off . I preshade with tamiya and maybe it grips to that. When it does come up its usually very tiny spots. Probably where I have been handling the model before paint.
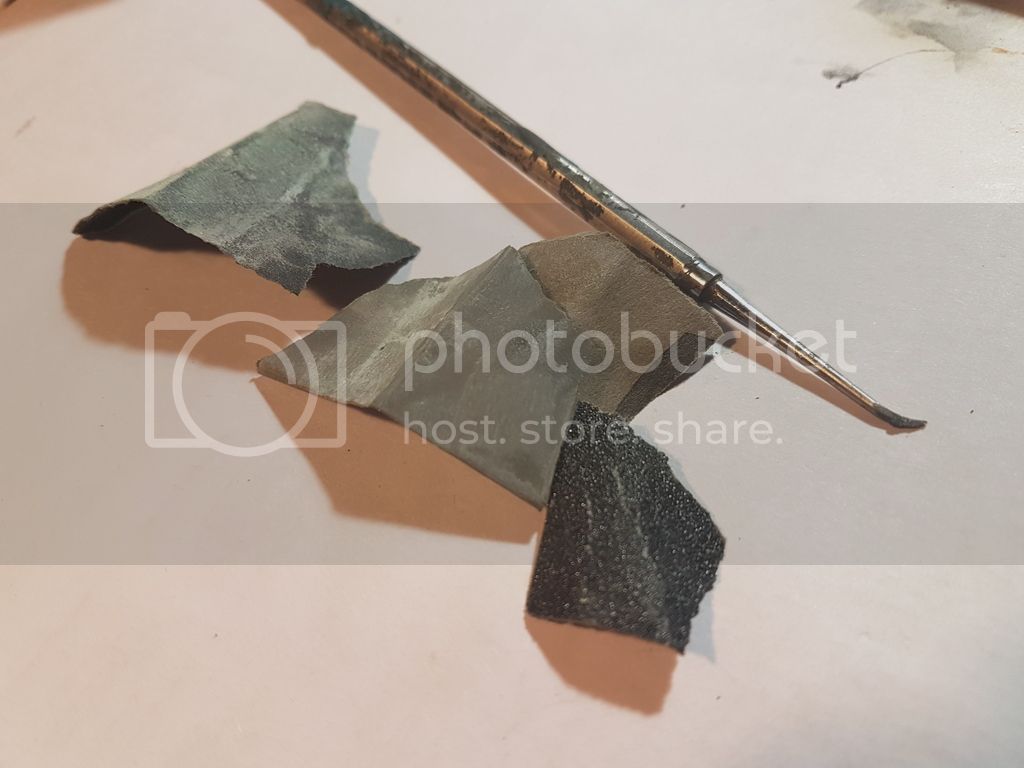
Canopy masking. I hate it with a passion. I used the technique used in the video ( with a more slapdash approach) on this page of the forum. Masking tape. Burnish and trim. Arduous.
lespauljames
England - South West, United Kingdom
Joined: January 06, 2007
KitMaker: 3,661 posts
AeroScale: 369 posts
Joined: January 06, 2007
KitMaker: 3,661 posts
AeroScale: 369 posts
Posted: Thursday, February 09, 2017 - 11:30 PM UTC
berndm
Niedersachsen, Germany
Joined: March 26, 2014
KitMaker: 844 posts
AeroScale: 630 posts
Joined: March 26, 2014
KitMaker: 844 posts
AeroScale: 630 posts
Posted: Friday, February 10, 2017 - 12:48 PM UTC
Your Heinkel looks really nice James.
My builds get a slight polish / wet sanding before i apply the decals. Gives a very smotth surface and the next layer of varnish will do the job.
Here is a question regarding Lifecolor, i had some problems with spraying these acrylics. What are you using as thinner ?
Have a great weekend
Bernd
My builds get a slight polish / wet sanding before i apply the decals. Gives a very smotth surface and the next layer of varnish will do the job.
Here is a question regarding Lifecolor, i had some problems with spraying these acrylics. What are you using as thinner ?
Have a great weekend
Bernd
badwolf
England - East Anglia, United Kingdom
Joined: November 16, 2009
KitMaker: 79 posts
AeroScale: 75 posts
Joined: November 16, 2009
KitMaker: 79 posts
AeroScale: 75 posts
Posted: Friday, February 10, 2017 - 03:08 PM UTC
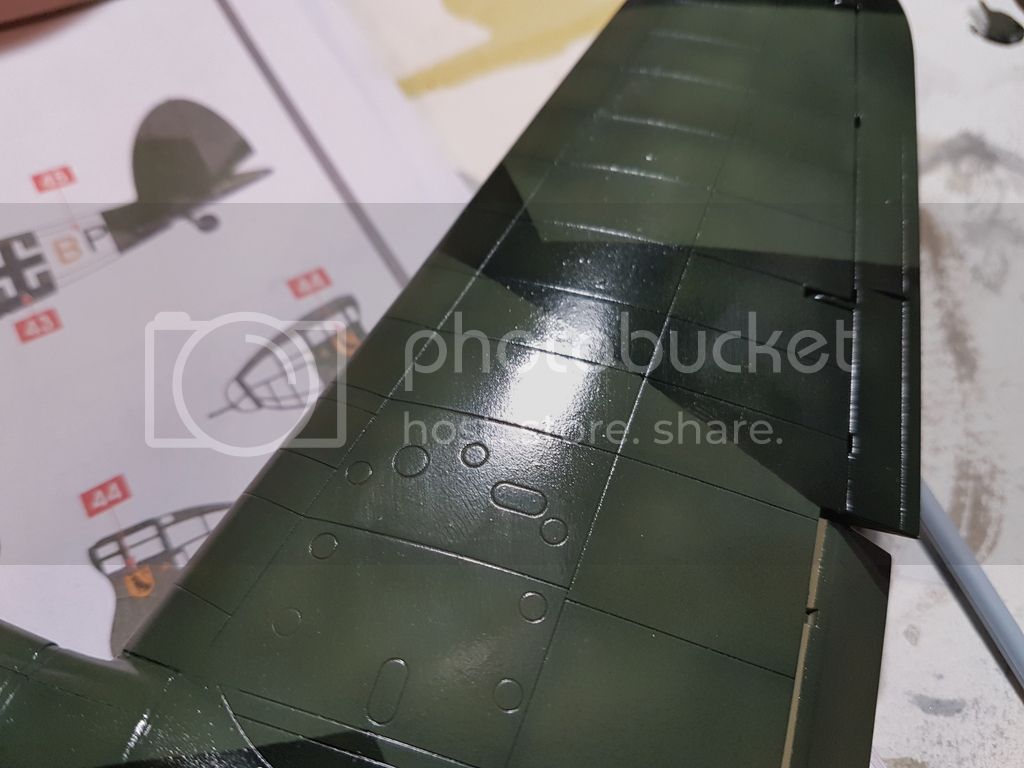
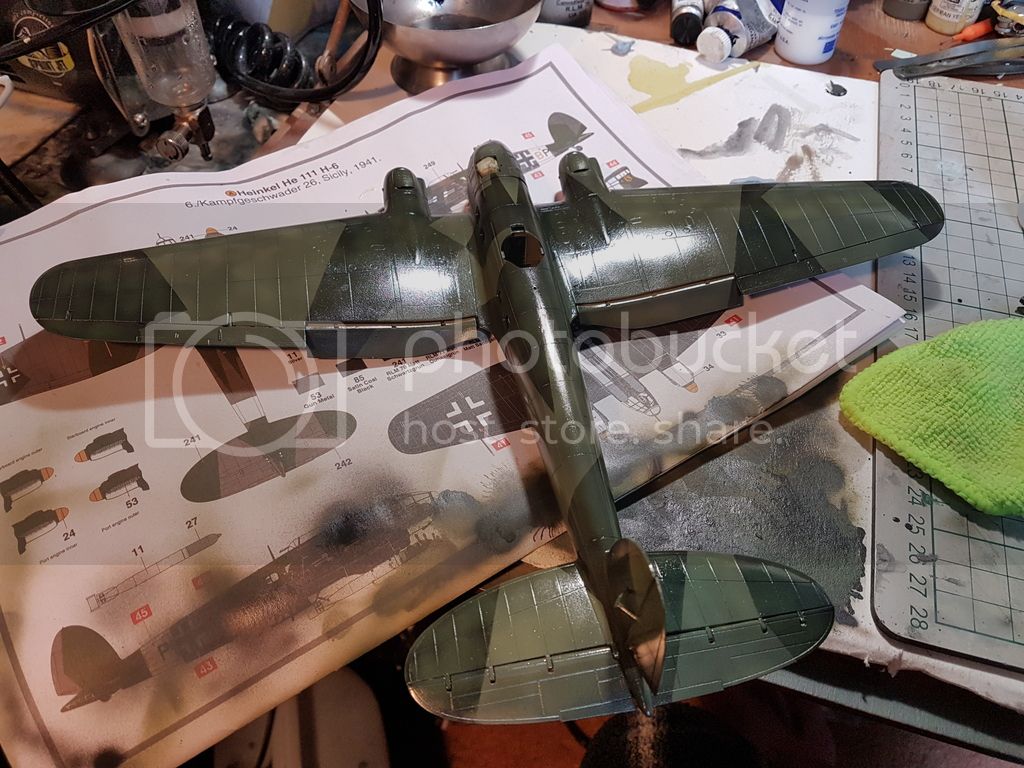
Airfix seem to have come along way since most of us started out in the hobby, some nice kits getting updates, and your HE 111 looks brill, my only moan is not your build but Airfix, looking at the photos i would say the panel lines are way too deep in 1/72nd, you could plant potatoes in them.
rdt1953
New Jersey, United States
Joined: February 06, 2015
KitMaker: 1,098 posts
AeroScale: 900 posts
Joined: February 06, 2015
KitMaker: 1,098 posts
AeroScale: 900 posts
Posted: Friday, February 10, 2017 - 05:42 PM UTC
James -
Wow ! You don't waste any time do you ! Do you do all these builds AND find time to strum a Gibson ?
Cheers- Richard
Wow ! You don't waste any time do you ! Do you do all these builds AND find time to strum a Gibson ?
Cheers- Richard
lespauljames
England - South West, United Kingdom
Joined: January 06, 2007
KitMaker: 3,661 posts
AeroScale: 369 posts
Joined: January 06, 2007
KitMaker: 3,661 posts
AeroScale: 369 posts
Posted: Friday, February 10, 2017 - 05:58 PM UTC
Decals and clear coat down
Bernd thankyou I will start sanding on the next one see hot that fares what problems do you have with lifecolour ?
Keith, thankyou I know what you mean some of the new airfix have very refined lines but some like this one are trenches. If you hit them with Mr surfacer that usually solves it. But I'm usually happy with how they turn out order paint etc.
Richard thankyou. I am too speedy and miss things or glaze over details I should really pay attention to..
Unfortunately no les Paul's in the house anymore. I run a prs se cu24 with bareknuckle pickups a hags trombone viking and a fender strat through my orange rocker 50 nowadays. Very happy with my set up but I'm doing way more acoustic at the moment.
Ciao
lespauljames
England - South West, United Kingdom
Joined: January 06, 2007
KitMaker: 3,661 posts
AeroScale: 369 posts
Joined: January 06, 2007
KitMaker: 3,661 posts
AeroScale: 369 posts
Posted: Saturday, February 11, 2017 - 06:03 PM UTC
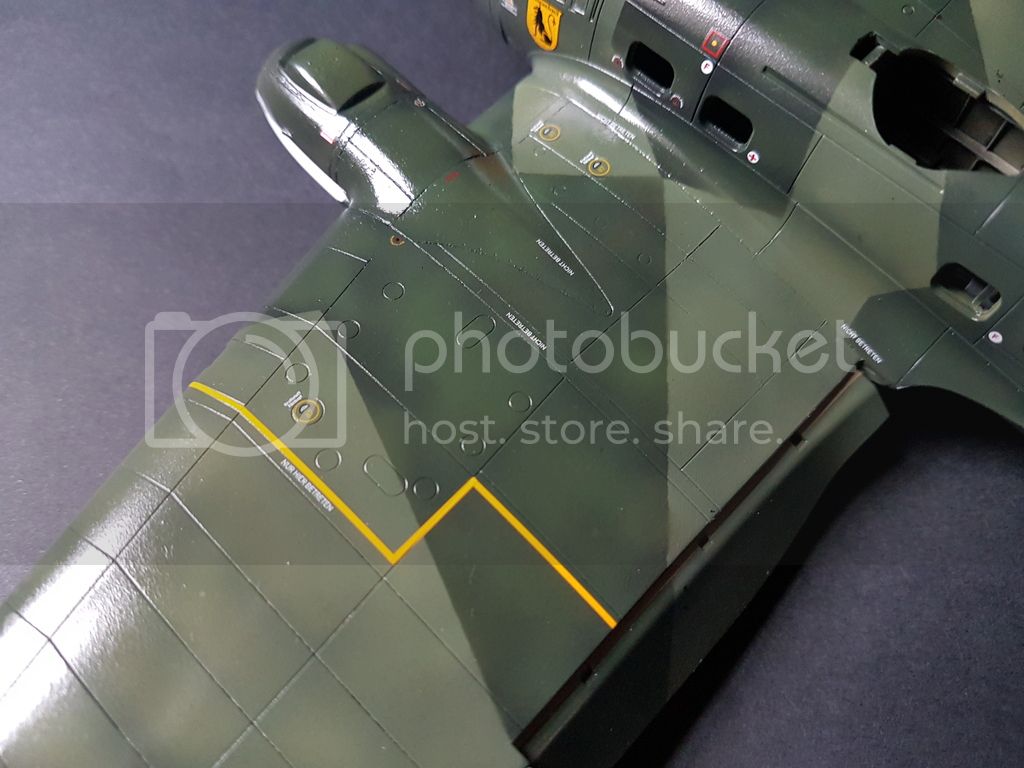
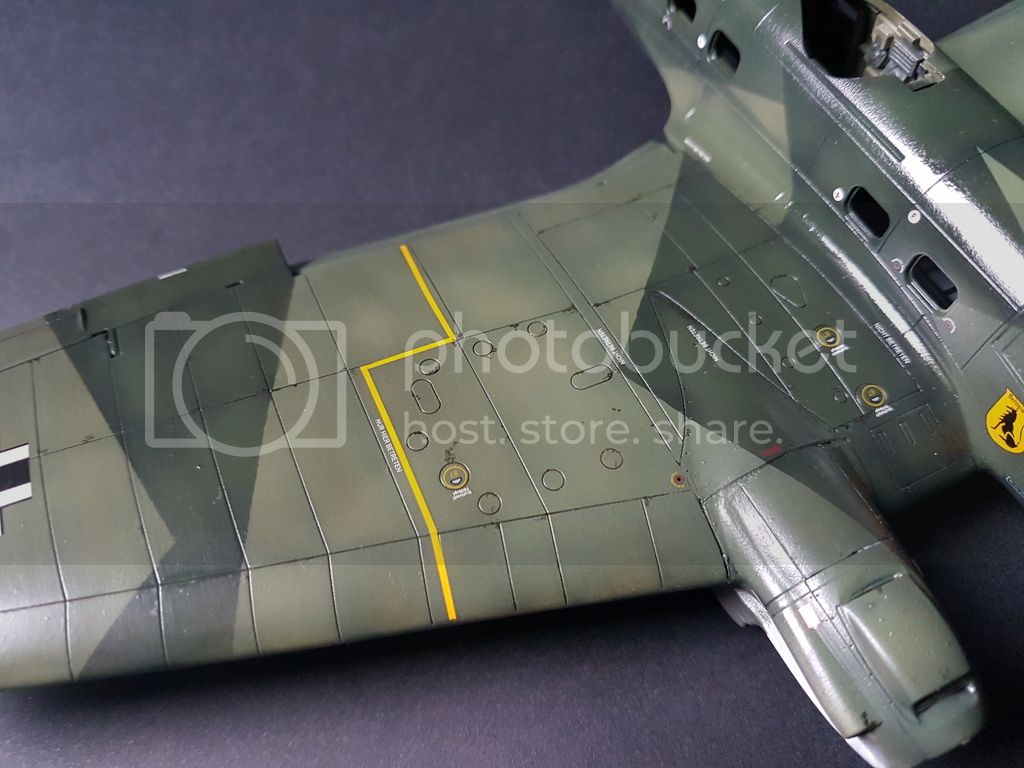
Hey folks I started weathering the main airframe. I want to keep it as in scale as possible and I'm doing it in sections so as not to burn out and start bobbing the chips on.
Left wing as of now just a clear coat
Here I laid down small chips of hellgrun on the lighter green and green grey on the darker green then filled in the bigger ones with 50:50 black and brown and I will add metallic to the larger ones around access panels. I also used a burnt umber/ ultramarine for the wash on the wing.
I'd like to say the finish line is in sight but I have a lot more to do . J
lespauljames
England - South West, United Kingdom
Joined: January 06, 2007
KitMaker: 3,661 posts
AeroScale: 369 posts
Joined: January 06, 2007
KitMaker: 3,661 posts
AeroScale: 369 posts
Posted: Saturday, February 11, 2017 - 10:54 PM UTC