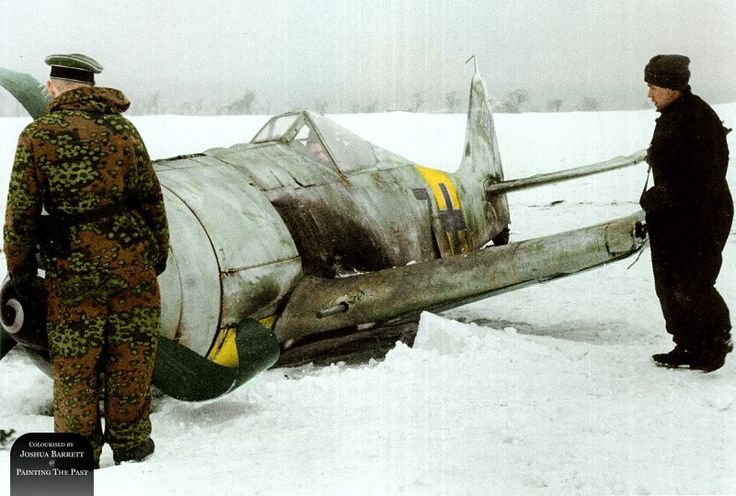
Eduard Fw190A-6, Hans Dortemann
Wellington, New Zealand
Joined: June 01, 2014
KitMaker: 189 posts
AeroScale: 179 posts
Posted: Friday, April 07, 2017 - 04:32 AM UTC
Hello,
Now the bench is clear, I'm going to have a crack at this puppy, and try and document it as well.

I'm keen to do a white wash scheme, and I'm going to use this product.

Here it is applied to my long suffering test subject.

The kit has a bit of an unforgiving reputation and this is my first time building it, so I'm going OOTB and buttoned up.

#305
Christchurch, New Zealand
Joined: February 01, 2006
KitMaker: 1,673 posts
AeroScale: 1,517 posts
Posted: Saturday, April 08, 2017 - 08:32 AM UTC
Interesting use of medium Spud I'll follow along to get an idea of the Eduard kit and to see how the white distemper paint works as I wonder how easy it is to remove.
Wellington, New Zealand
Joined: June 01, 2014
KitMaker: 189 posts
AeroScale: 179 posts
Posted: Saturday, April 08, 2017 - 12:21 PM UTC
Cheers Chris, on the test wing it wasn't to bad just a case of scrubbing with water until you get the look you're after.
Some updates:
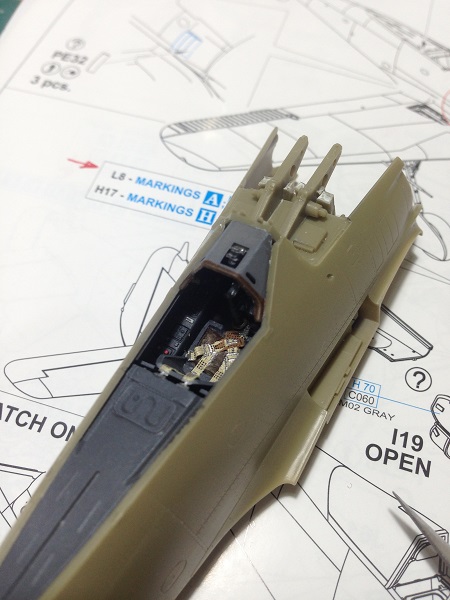
the tub, forward bulkhead and engine assembled. The engine and gun bays are going to be buttoned up, so no dramas there.
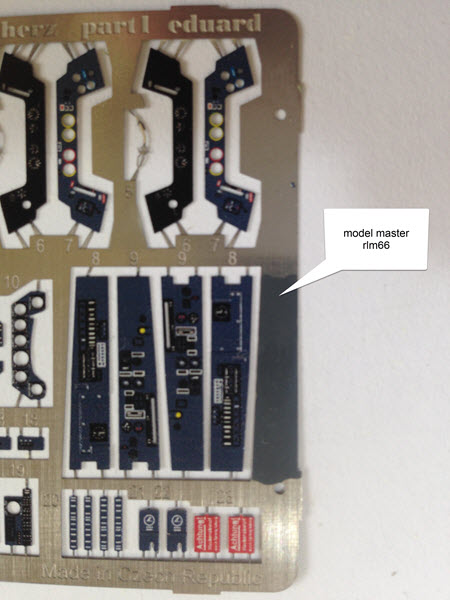
I've decided to not use the pre-painted side walls because I'm not really sure about the colour compared to the Modelmaster RLM 66 I'm going to be using. Plus it give me chance to practice some brush work.
Starting to assemble the gear bay, these two parts are critical for getting the upper wings to sit properly. It's pretty tricky trying to get this positioned and clamped down, so fingers crossed.

#424
Queensland, Australia
Joined: April 23, 2015
KitMaker: 4,648 posts
AeroScale: 1,938 posts
Posted: Saturday, April 08, 2017 - 02:13 PM UTC
I have the A8 in my stash. Seems these Eduard FW's are tricky.
Gaz
"Artillery adds dignity, to what would otherwise be an ugly brawl."
Frederick The Great
Alberta, Canada
Joined: January 19, 2008
KitMaker: 6,743 posts
AeroScale: 6,151 posts
Posted: Sunday, April 09, 2017 - 03:02 AM UTC
looking forward on seeing how this turns out

Terri
Wellington, New Zealand
Joined: June 01, 2014
KitMaker: 189 posts
AeroScale: 179 posts
Posted: Sunday, April 09, 2017 - 05:32 AM UTC
Crud. Seems I wasn't as precise as the kit required. I'm not panicking yet, a test fit of the cockpit to the fuselage showed the difference between perfect and rubbish was very fine. It may not take much to convince the wing to behave.
The tub has been primed and I'm playing with a little bit of B&W modulation.
cheers, PS I just realise I misspelled Dortenmann. How embarrassment.
Lisboa, Portugal
Joined: August 27, 2010
KitMaker: 679 posts
AeroScale: 669 posts
Posted: Sunday, April 09, 2017 - 04:11 PM UTC
Spud,
First time I see this picture, seems an otiginal colour photo, not colourised as many.
You probably noticed also that the spinner is not red as Eduard calls, but rather black or rlm 70 with a spiral. Wonder if that plane had 2 different spinners in its lifetime??
Good choice indeed

and good luck with the washable white, sure it will turn out great
Cheers
Pedro
Wellington, New Zealand
Joined: June 01, 2014
KitMaker: 189 posts
AeroScale: 179 posts
Posted: Monday, April 10, 2017 - 01:00 AM UTC
Hi Pedro,
the image has been coloured, there's a box in the bottom left corner that say 'Coloured by...'. As for the spinner, yes I did note that that was black, but could just be an interpretation (the same could be said of Eduards scheme).
If anyone who is reading has more info, then I'd be grateful for it.
Otherwise I may just flip a coin.
cheers.
New South Wales, Australia
Joined: April 06, 2008
KitMaker: 151 posts
AeroScale: 141 posts
Posted: Monday, April 10, 2017 - 02:44 AM UTC
Nice to see you tackling this one Spud.
Eduard's Fw190's are definitely engineered with very tight tolerances but with due care, build up nicely. Here is a link to my last one over at BM.
http://www.britmodeller.com/forums/index.php?/topic/235005921-148-eduard-fw-190a-5-hptm-egon-mayer-france-1943/Not self promotion or ego but hopefully, the way I tackled some of the problems may help you avoid the worst of them.
Regards,
Wellington, New Zealand
Joined: June 01, 2014
KitMaker: 189 posts
AeroScale: 179 posts
Posted: Monday, April 10, 2017 - 02:55 AM UTC
Thanks Kent, I'll review this before I go any further, I did manage to get the upper wings to settle down somewhat with some careful sanding of the internal bulkhead.
regards.
New South Wales, Australia
Joined: April 06, 2008
KitMaker: 151 posts
AeroScale: 141 posts
Posted: Monday, April 10, 2017 - 04:25 AM UTC
Quoted Text
Thanks Kent, I'll review this before I go any further, I did manage to get the upper wings to settle down somewhat with some careful sanding of the internal bulkhead.
regards.
Glad to hear, that is pretty much how I tackled it.
Good luck!
Regards,
Kent
Oregon, United States
Joined: March 09, 2017
KitMaker: 525 posts
AeroScale: 52 posts
Posted: Monday, April 10, 2017 - 04:30 AM UTC
Be cautious with the washable white. I tried that brand and left it on my model for about a week, then went back to try to wash it off and it had set hard. I was able to get it to fade a little, but I couldn't expose any of the base paint. I had applied a gloss coat beforehand to seal the base between the whitewash. Hope yours goes differently.

These are great days we're living, bros. We are jolly green giants, walking the Earth with guns.
-C. Earl
Berlin, Germany
Joined: October 12, 2008
KitMaker: 709 posts
AeroScale: 651 posts
Posted: Monday, April 10, 2017 - 10:21 AM UTC
Hi Spud!
Nice start.
Following your build as I assemble a Fw190 for ETO-cpgn.(Revell, similar fiddling) my own at the moment and did some research about possible units.
A b/w photo of the crashed "Black-7-Hans-Dortenmann" shows a darker coloured spinner with an even more darker spiral. So I think red with black is more likely.

Thomas
Sometimes you need to distance yourself to see things clearly - Lao Tzu -
... in scale and in real life -T.
Lisboa, Portugal
Joined: August 27, 2010
KitMaker: 679 posts
AeroScale: 669 posts
Posted: Monday, April 10, 2017 - 12:30 PM UTC
Ups, I didn't noticed that box on the lower corner

my bad!
On the other hand, the colorisation of this photo is very well done as it misleads the eye easily in my opinion, but in view of the BW image that Thomas posted above, they definitly got the spinner wrong for it can't be black or black or black green.
Keep it up
Cheers
Pedro
Wellington, New Zealand
Joined: June 01, 2014
KitMaker: 189 posts
AeroScale: 179 posts
Posted: Thursday, April 13, 2017 - 11:09 AM UTC
Christian, thanks. Ive done a test, it does take a bit of scrubbing and I probably wont leave it a week. I wont be going nuts on it, the paint job seems uniform, so I just want to show a bit of wear and tear.
Thomas, thanks for that. Red and black it is.
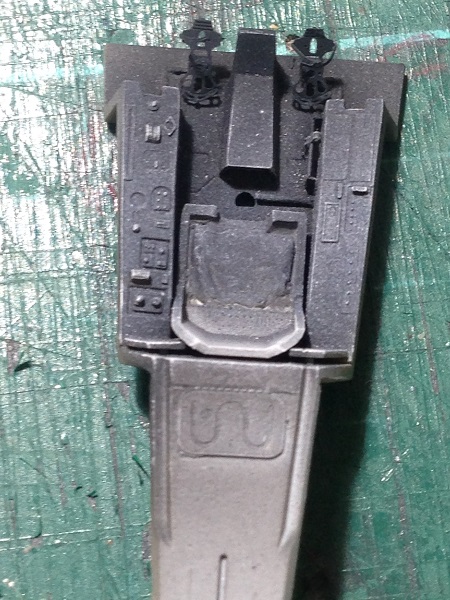
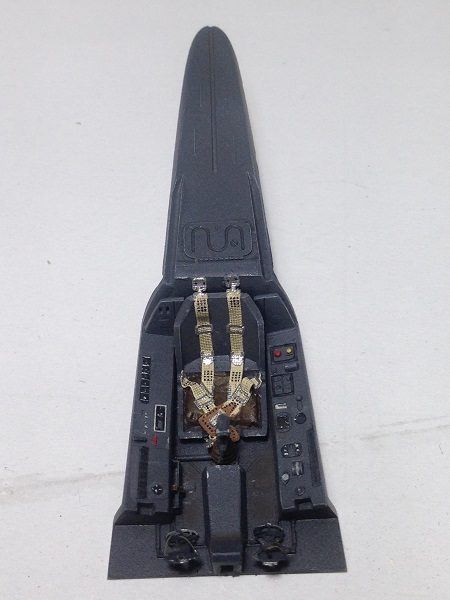
So, Im finished with the tub now, except for some delicate PE like the throttle control. Ill install those just before I close it up.
Ive got nothing against the painted PE instrument panels and use them often, but it was a satisfying exercise to paint the side panels by hand especially given the colour difference.
The seat belts are Eduards Fabric set. Theyre not as detailed as the PE, but a heck of a lot easier to install.
Thanks for lookin.
Wellington, New Zealand
Joined: June 01, 2014
KitMaker: 189 posts
AeroScale: 179 posts
Posted: Sunday, April 16, 2017 - 08:05 AM UTC
I love PE, I hate PE, I love PE, I hate PE, I love PE, I hate PE...
I'm sure whoever invented this stuff did so to torment the obsessive compulsive.
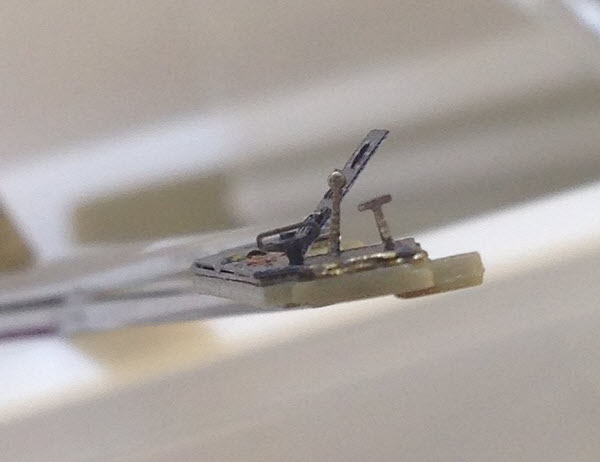
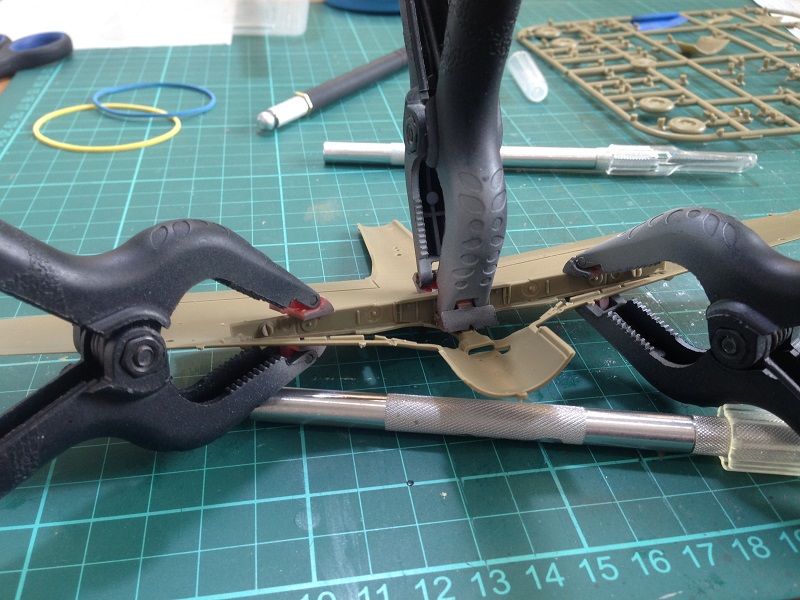
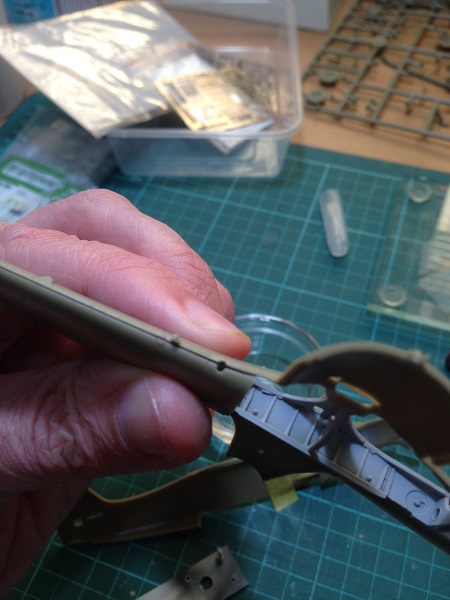
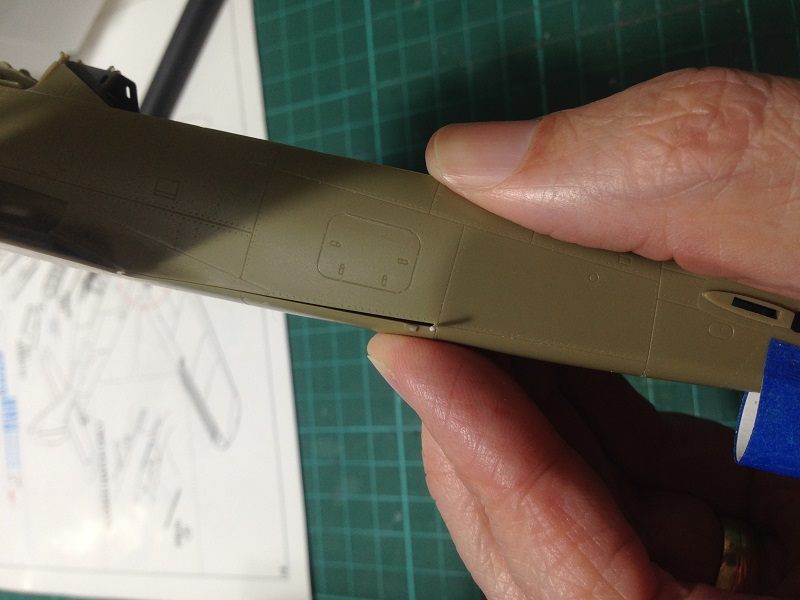
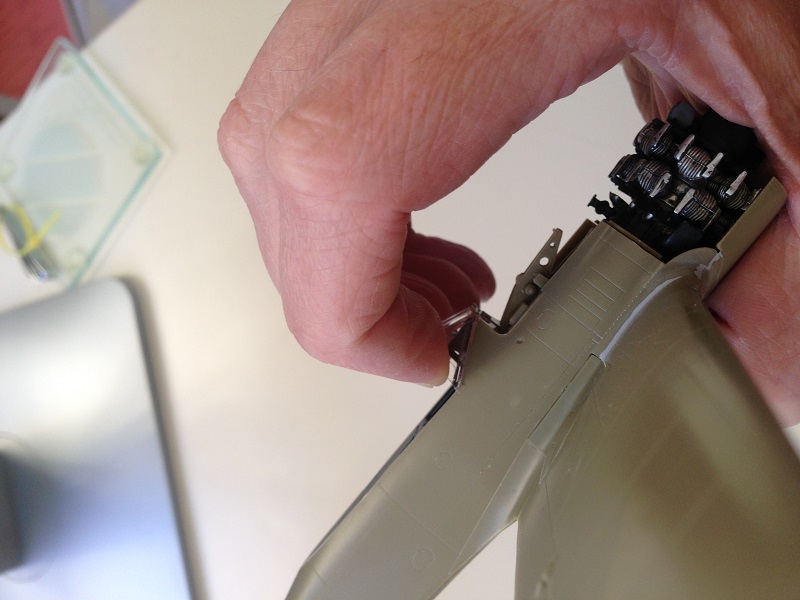
The Cockpit and front gun bay are closed up with the fuselage.
the image below shows how fine the tolerances are.
I'm not sure if this is definitive, but what I found was you need to tape only the top of the fuselage to kinda roll it into itself. If you try and clamp it all around, say with rubber bands or tape, it tends to roll out and open up the gap at the gun bay.
Anyway, that bit's taken care of now, so far so good.
cheers.
Wellington, New Zealand
Joined: June 01, 2014
KitMaker: 189 posts
AeroScale: 179 posts
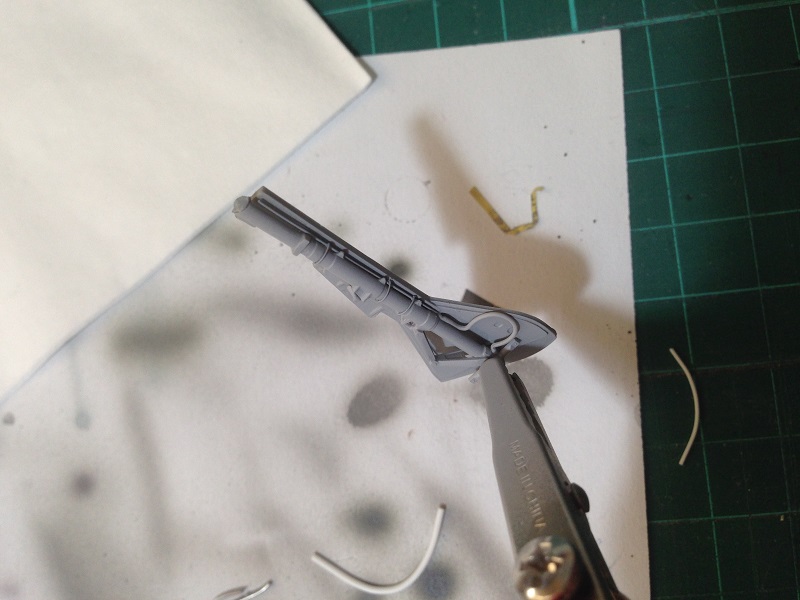
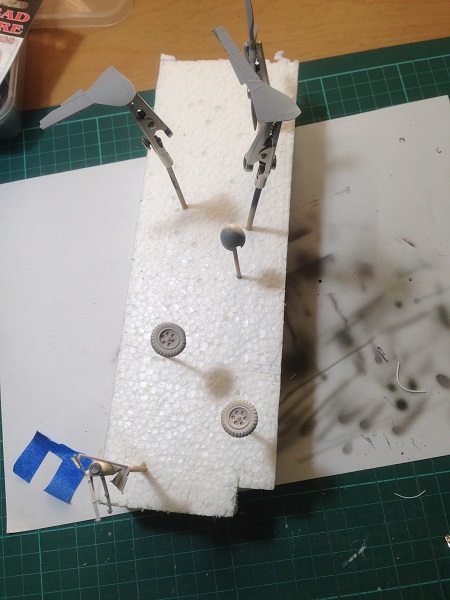
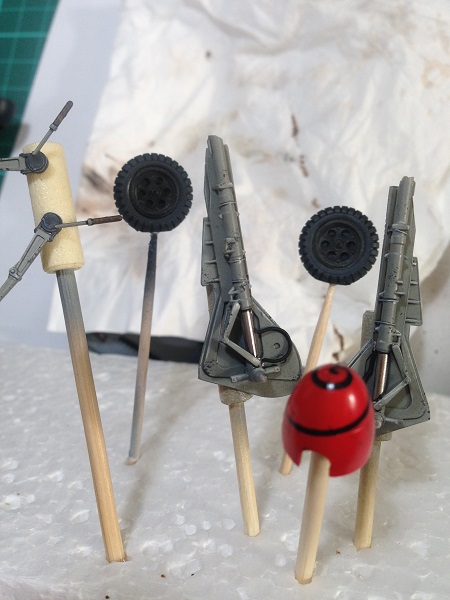
Posted: Thursday, April 20, 2017 - 05:53 AM UTC
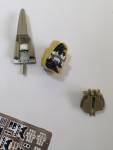
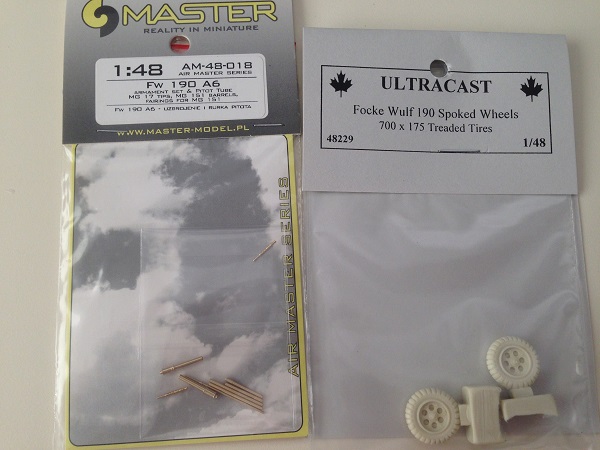
Well shame on me, but these are too good to resist.
New South Wales, Australia
Joined: April 06, 2008
KitMaker: 151 posts
AeroScale: 141 posts
Posted: Friday, April 21, 2017 - 03:27 PM UTC
Nothing wrong with a little controlled after market...

Wellington, New Zealand
Joined: June 01, 2014
KitMaker: 189 posts
AeroScale: 179 posts
Posted: Monday, April 24, 2017 - 01:40 AM UTC
Cheers Kent,
I was doing another google reference search and came across your earlier build of Dortenmann's A8. There was a good tip about building the cowl, which I'm working on now, other than that the build has slowed a bit with work and whatnot.
[url=http://www.britmodeller.com/forums/index.php?/topic/234912857-eduard-148-fw190a-8/[/url]
regards.
Wellington, New Zealand
Joined: June 01, 2014
KitMaker: 189 posts
AeroScale: 179 posts
Posted: Monday, April 24, 2017 - 12:15 PM UTC
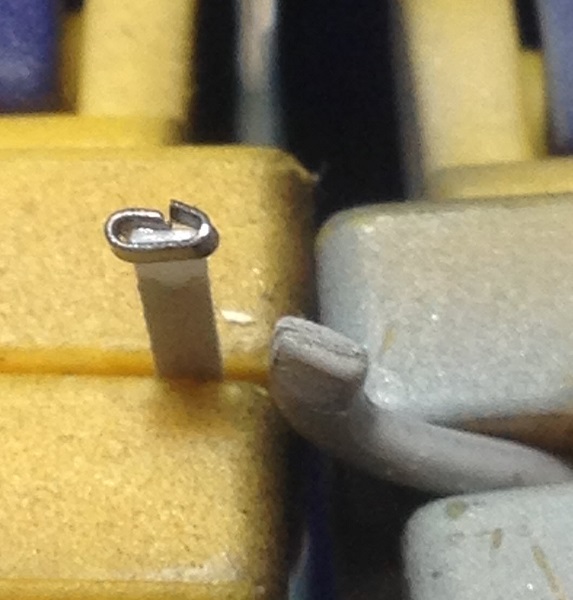
I'm in dry-fit purgatory at the moment, so I thought I'd distract myself with doing something different with the exhausts. I'm going to try and fit the exhaust stubs to the cowl wall (thanks Kent) instead of fiddling around with the jig and I'm playing with the idea of bending a bit of flattened lead wire around some styrene to give a bit of depth.
Regards, and I hope all my Kiwi and Aussie compatriots had a reflective day, I know I did.
Wellington, New Zealand
Joined: June 01, 2014
KitMaker: 189 posts
AeroScale: 179 posts
Posted: Friday, June 02, 2017 - 01:56 AM UTC
It's been a struggle to get to the bench, but some sporadic progress has been made over time.
The cockpit cowl is on and as mentioned by others, it can be a real snot to position and fix. I ended up gluing a couple of styrene tabs to help but even this can be awkward.
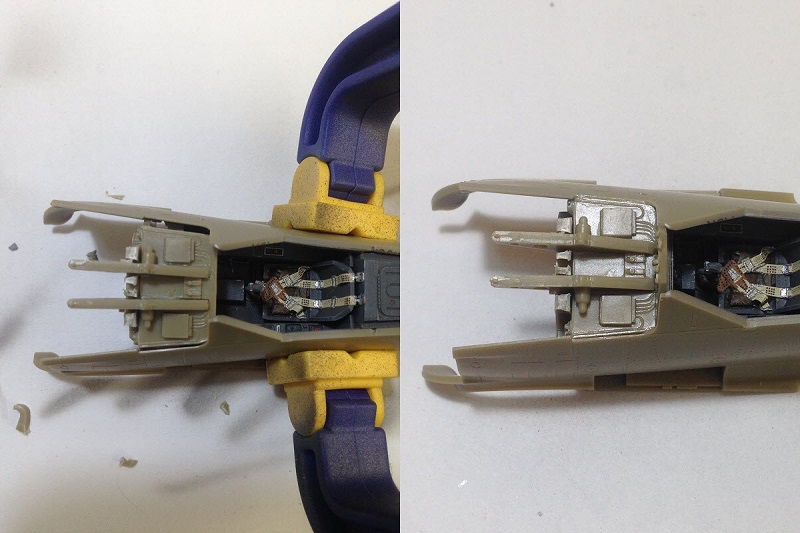
Dry fitting the lower wing showed a noticeable step where it meets the rear fuselage, so I've opted to pack it out and fill a gap rather than trying to build up a step.
gap side.
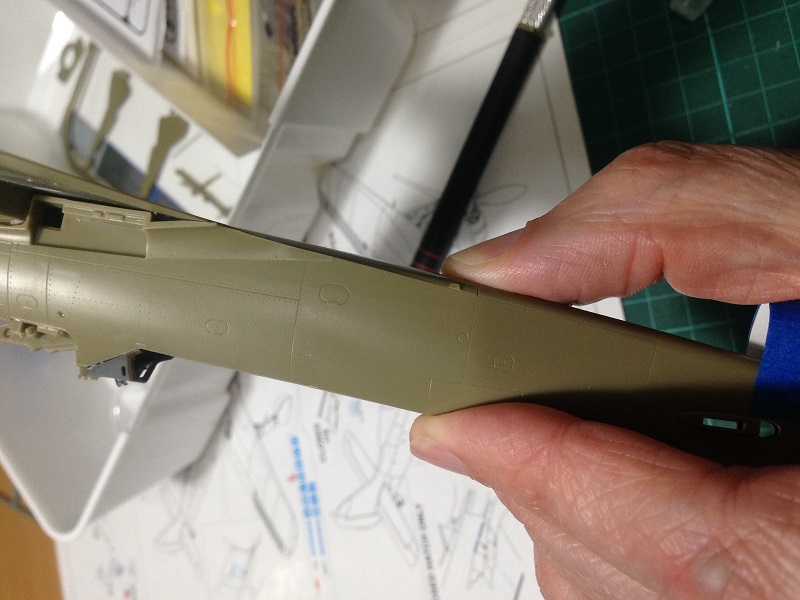
no gap side.
Then we've got some bits and bobs primed ready for painting.
cheers.
Wellington, New Zealand
Joined: June 01, 2014
KitMaker: 189 posts
AeroScale: 179 posts
Posted: Friday, June 02, 2017 - 12:47 PM UTC
An assortment of painted bits and bobs.
Wellington, New Zealand
Joined: June 01, 2014
KitMaker: 189 posts
AeroScale: 179 posts
Posted: Friday, July 14, 2017 - 09:49 AM UTC
I finally feel like Ive made progress, after a long stretch of fitting and filling and sanding and filling and primer and sanding
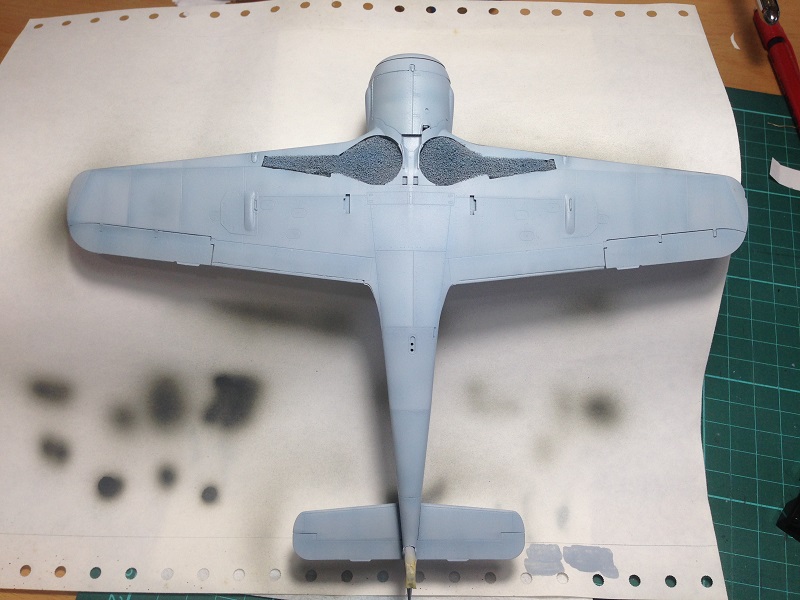
etc etc Im at the painting stage. Under side first with a different take on the pre shade, different for me at least.
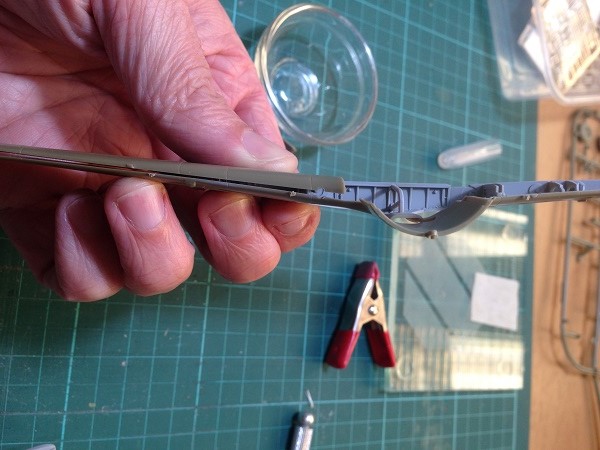
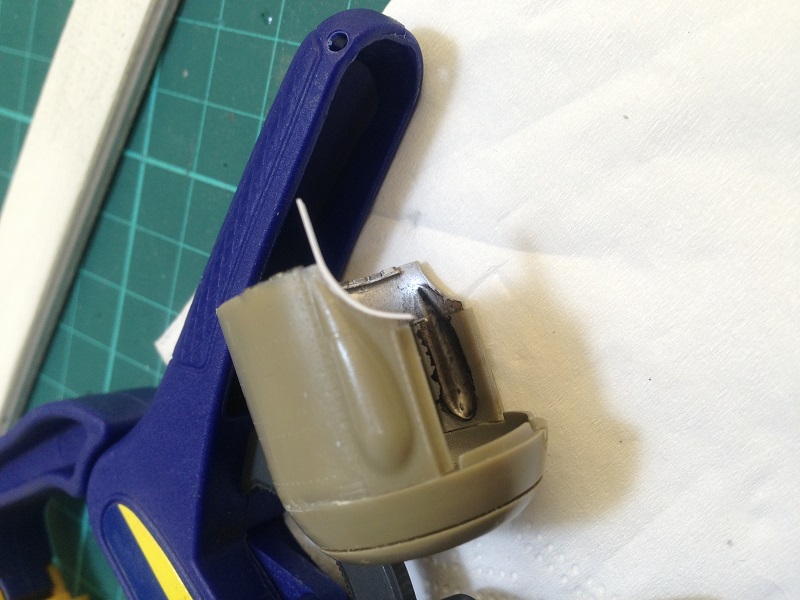
Utilizing a Hand Clamp to hold the front canopy down.
Some material build up required to close a stubborn gap.
Pre-shade
There wasnt a large amount of filling to be done, but I wanted to take my time and do it right. As has been noted widely, the kit has a reputation and its not completely undeserved, it just requires patience with a lot of test fitting and it goes together well. Having said that, Im looking forward to seeing what Eduard does with their new A4 kit.
Cheers.
Berlin, Germany
Joined: October 12, 2008
KitMaker: 709 posts
AeroScale: 651 posts
Posted: Friday, July 14, 2017 - 02:56 PM UTC
Spud, you are doing a really nice job on the Fw and a nice preshade! looks like most of the Fw190 kits suffer from a tricky and weak connection of cowling/fuselage/wings.
Thomas
Sometimes you need to distance yourself to see things clearly - Lao Tzu -
... in scale and in real life -T.
Wellington, New Zealand
Joined: June 01, 2014
KitMaker: 189 posts
AeroScale: 179 posts
Posted: Monday, July 24, 2017 - 09:26 AM UTC
Thomas Thanks.
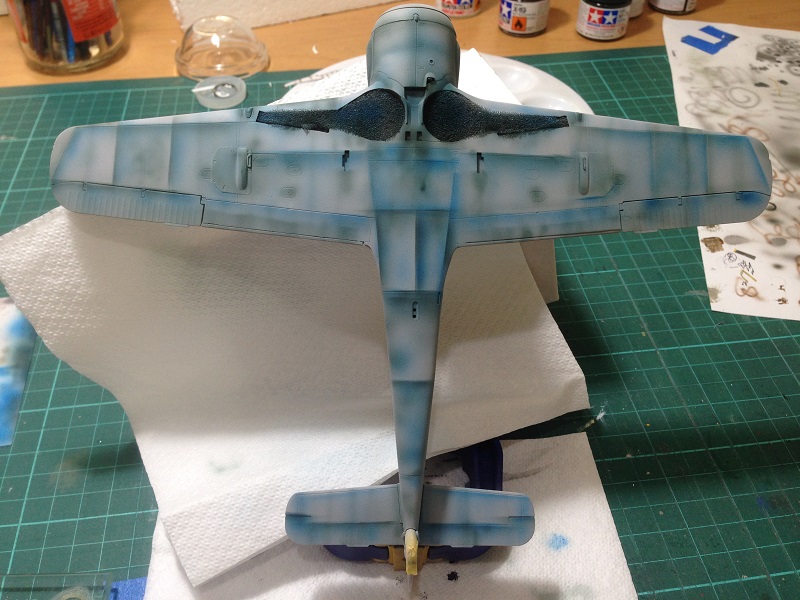
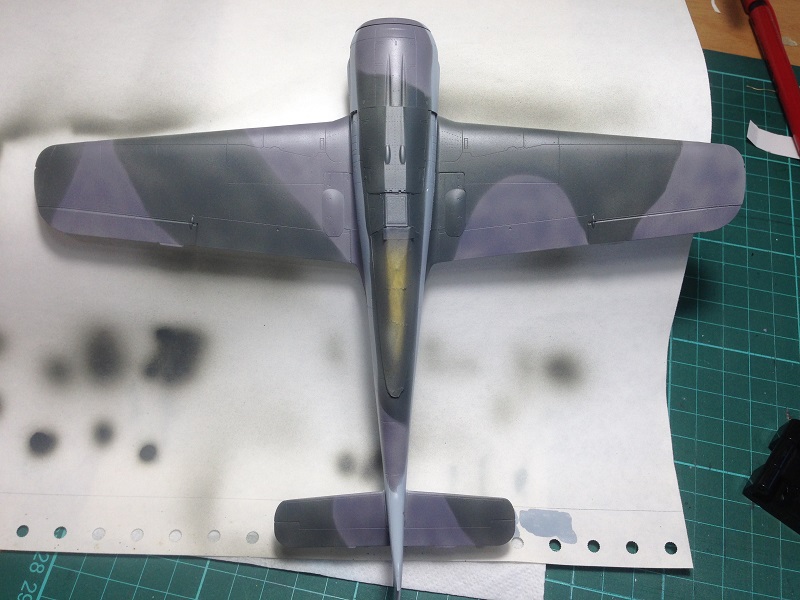
The 190 topside has been given a standard camo pattern to give something to show under its upcoming winter coat, as well as the bottom base color being applied.
As is usually the case, it seems Ive gone to heavy on the underside base coat and wiped away most of the pre-shade, Im trying to be a bit bolder on contrast, but Im struggling with it to be honest, my eyes have trouble accepting it.
However, it occurs to me that if Im going to be overcoating with winter white then Ive got an opportunity to practice some post shade over the standard camo scheme and not worry too much about stuffing it up too much. So, Ill probably spend some time playing around with that while I mentally work through the decal/winter scheme/weathering sequence.
cheers.


