OK, going Spitfire big time this year! I really felt I ought to do something else after the Mk XVI but another Spitfire can't be wrong either...
So, filling another hole in my Spit collection, here comes the Mk VIII!
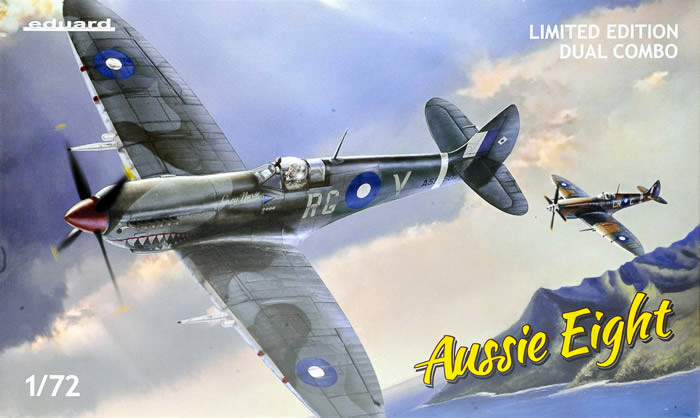
I did (of course) pick up the rather expensive "Aussie Eight"-boxing, complete with two Spit kits, 32 decal options and a book covering everything you ever wanted to know about Australian Spit VIIIs. Highly recommended but pretty pointless in my case since I don't intend to do an Australian one, at least not right now...
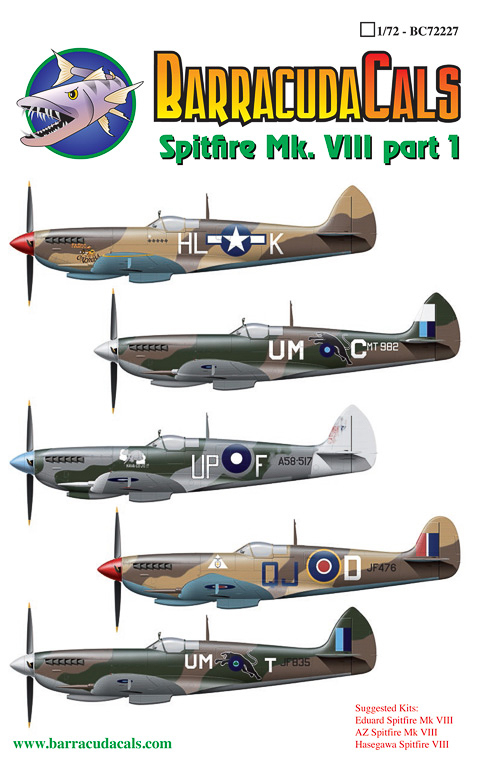
Marking-wise I'm going Sicilian with a USAAC-Spit in desert colours, the well-known "Fargo Express". Decals from BarracudaCals!
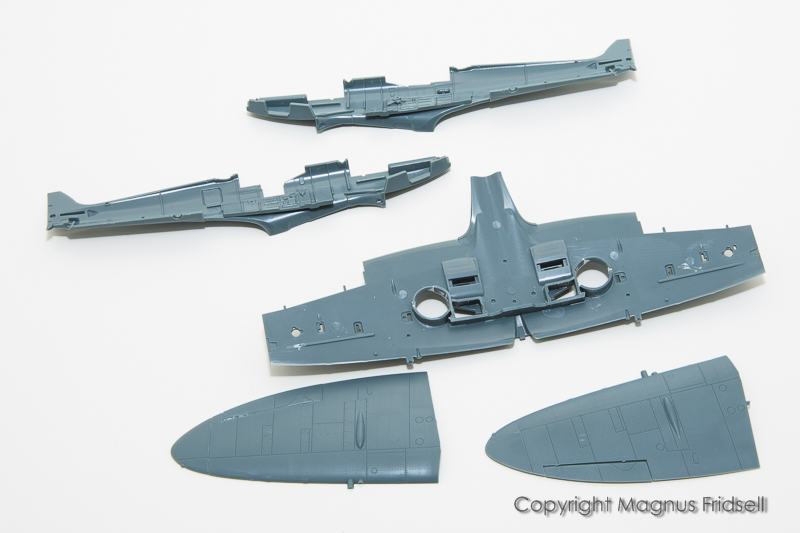
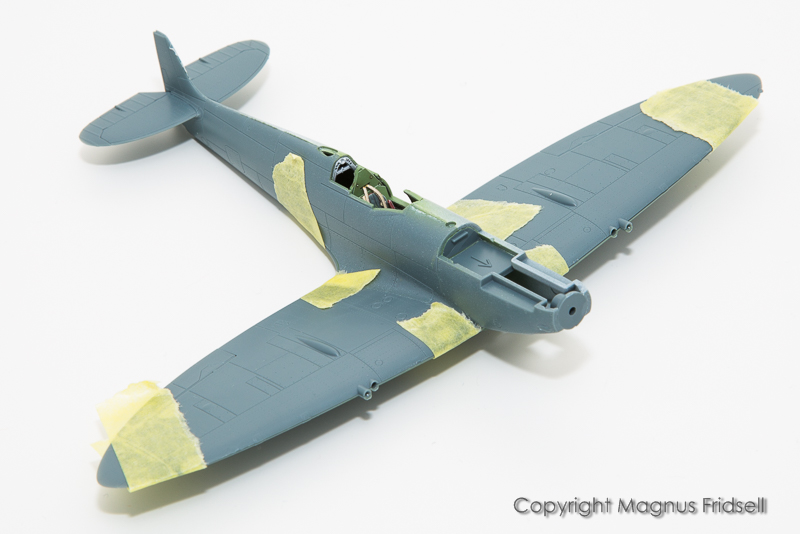
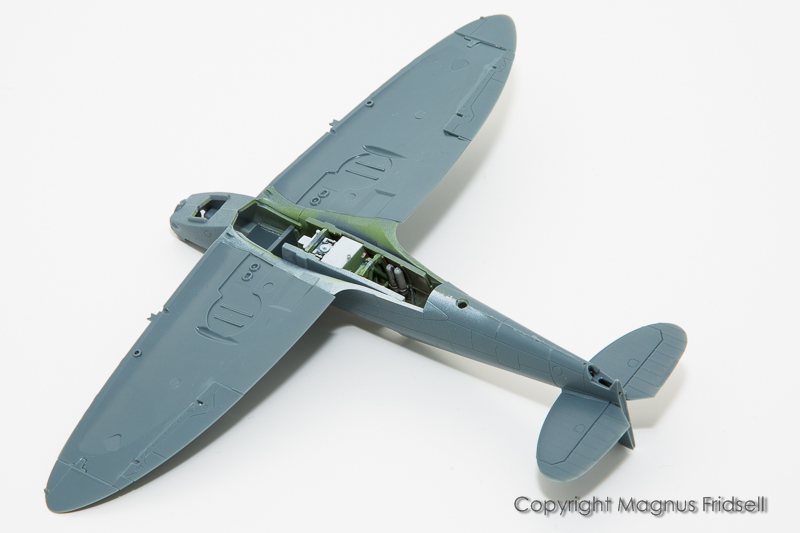
Our usual start-of-the-project-photo, this is the stuff that makes up an Eduard Spit!
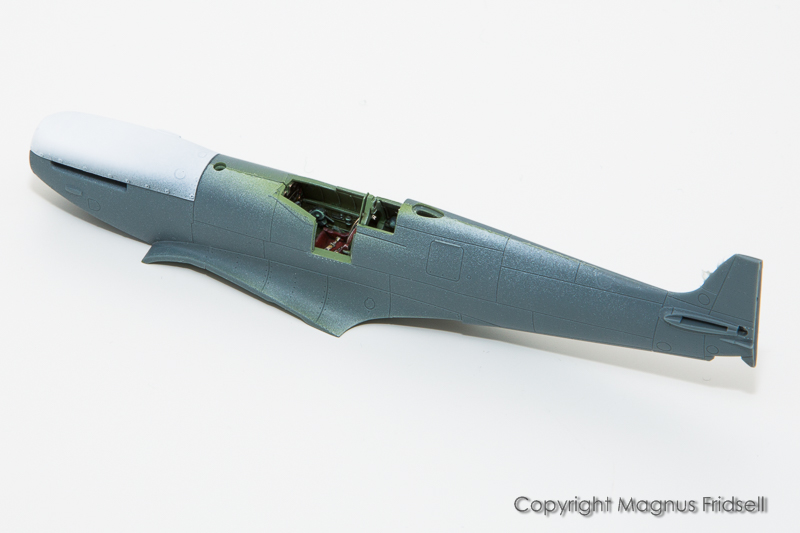
And as usual, I've already started to tinker...
...with the plastic! Parts on sticks already my friends!
Magnus
Hosted by Rowan Baylis
Eduard Spit VIII in 1/72
magnusf
Stockholm, Sweden
Joined: May 02, 2006
KitMaker: 1,953 posts
AeroScale: 1,902 posts
Joined: May 02, 2006
KitMaker: 1,953 posts
AeroScale: 1,902 posts
Posted: Friday, September 08, 2017 - 11:04 PM UTC
magnusf
Stockholm, Sweden
Joined: May 02, 2006
KitMaker: 1,953 posts
AeroScale: 1,902 posts
Joined: May 02, 2006
KitMaker: 1,953 posts
AeroScale: 1,902 posts
Posted: Wednesday, September 20, 2017 - 01:26 AM UTC
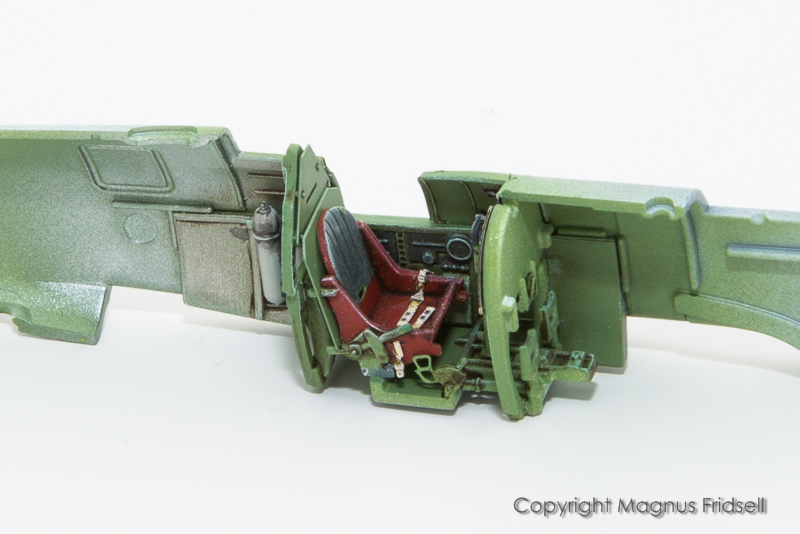
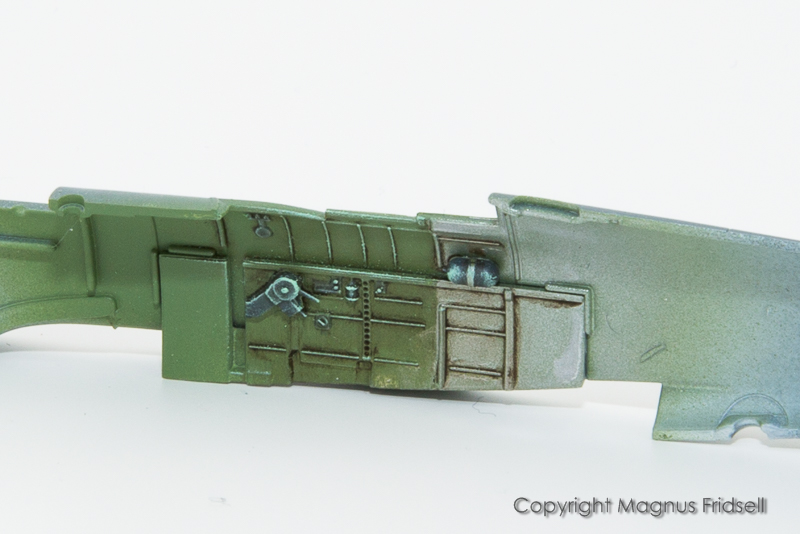
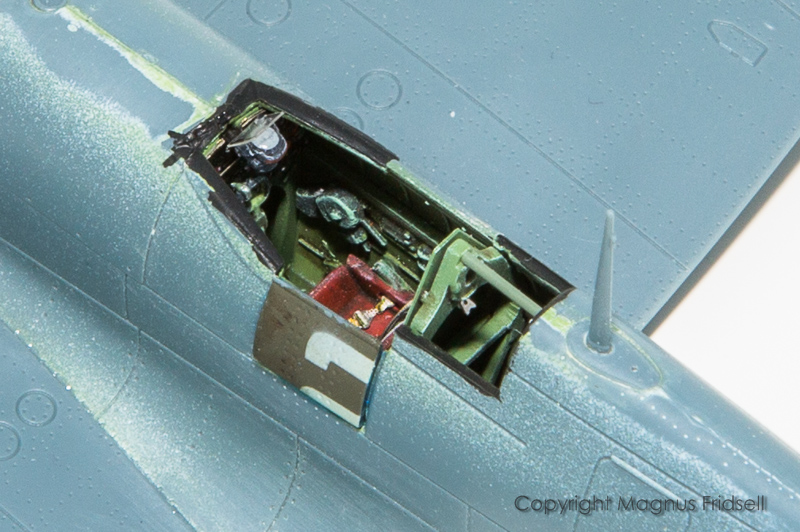
Cockpit-work. You never get away from it !
No resin, just the stock kit cockpit with the photo etch included with this boxing added.
Magnus
No resin, just the stock kit cockpit with the photo etch included with this boxing added.
Magnus
BlackWidow
European Union
Joined: August 09, 2009
KitMaker: 1,732 posts
AeroScale: 1,336 posts
Joined: August 09, 2009
KitMaker: 1,732 posts
AeroScale: 1,336 posts
Posted: Thursday, September 21, 2017 - 11:39 PM UTC
Nice progress on another Spit, Magnus! I guess this kit doesn't need anything else than what is in the box with your skills. Will follow this build also - more or less silently.
Some time ago I've built a Spit Mk. IX in US markings out of the Eduard Weekend kit in 1/48 for the Edgar Brooks Campaign and was also enthusiastic about the fitting of the kit. I believe it's the same in "your" scale.
Happy modelling!
Torsten
Some time ago I've built a Spit Mk. IX in US markings out of the Eduard Weekend kit in 1/48 for the Edgar Brooks Campaign and was also enthusiastic about the fitting of the kit. I believe it's the same in "your" scale.
Happy modelling!
Torsten
magnusf
Stockholm, Sweden
Joined: May 02, 2006
KitMaker: 1,953 posts
AeroScale: 1,902 posts
Joined: May 02, 2006
KitMaker: 1,953 posts
AeroScale: 1,902 posts
Posted: Friday, September 22, 2017 - 01:13 AM UTC
Torsten! Thanks for visiting ! I remember your Spit, mine won't look too different even if it is 2/3 the size !
A neat trick that I've started using recently even if my friend Mark showed it to me 20 years ago...
...gluing the top wings to the fuselage first, carefully holding them to the fuselage and adding tiny amounts of glue from below. If the kit has the same kind of first-class fit as the Eduard Spits you will get a very neat joint without the need for sanding. The lower wing was only taped in place as a jig.
And finally some more bits and pieces added, it will be set aside for the joints to harden thoroughly for a day or to before sanding commences!
Magnus
magnusf
Stockholm, Sweden
Joined: May 02, 2006
KitMaker: 1,953 posts
AeroScale: 1,902 posts
Joined: May 02, 2006
KitMaker: 1,953 posts
AeroScale: 1,902 posts
Posted: Wednesday, October 18, 2017 - 11:34 AM UTC
Not much to show for the last month's modelling time...
I take that most VIIIs had the reflector sight to the right and not the gyro sight to the left. Oh well, then I have one ready-made for my next Spit build!
Sights are from Quickboost, a very inexpensive way to dressing up a prominently seen part of a cockpit!
Magnus
I take that most VIIIs had the reflector sight to the right and not the gyro sight to the left. Oh well, then I have one ready-made for my next Spit build!
Sights are from Quickboost, a very inexpensive way to dressing up a prominently seen part of a cockpit!
Magnus
BlackWidow
European Union
Joined: August 09, 2009
KitMaker: 1,732 posts
AeroScale: 1,336 posts
Joined: August 09, 2009
KitMaker: 1,732 posts
AeroScale: 1,336 posts
Posted: Thursday, October 19, 2017 - 12:25 PM UTC
magnusf
Stockholm, Sweden
Joined: May 02, 2006
KitMaker: 1,953 posts
AeroScale: 1,902 posts
Joined: May 02, 2006
KitMaker: 1,953 posts
AeroScale: 1,902 posts
Posted: Saturday, November 04, 2017 - 12:37 PM UTC
Torsten! The result on the sight is mostly due to some really great master work from Quickboost. Those sights are among the cheapest and absolutely simplest upgrades possible, I can thoroughly recommend them!
I have been lazy posting during the last few weeks, concentrating on the modelling instead...
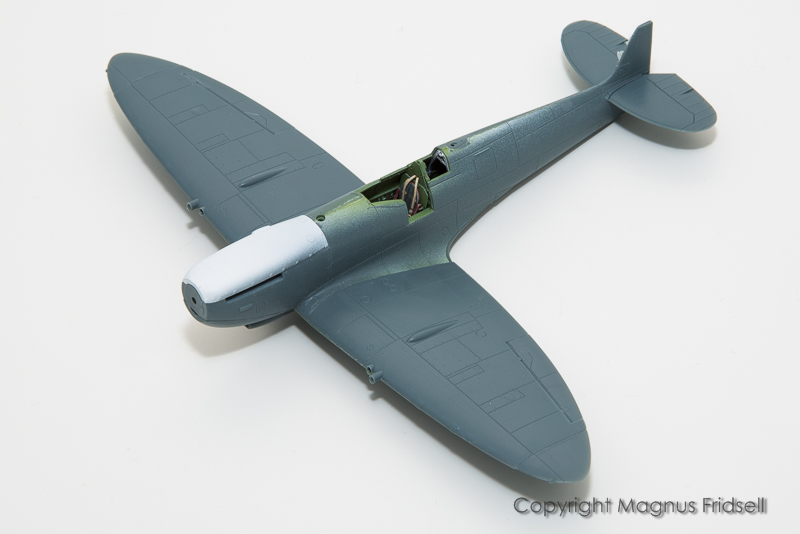
One almost complete Spitfire!
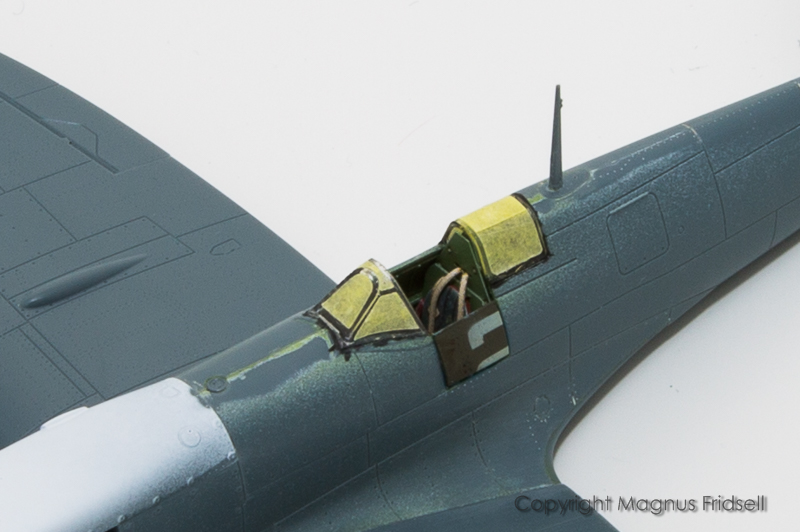
A cockpit close-up (note recycled door for masking purposes from an earlier project!).
Masking is on, masks are Eduard's own diecut ones included with the kit.
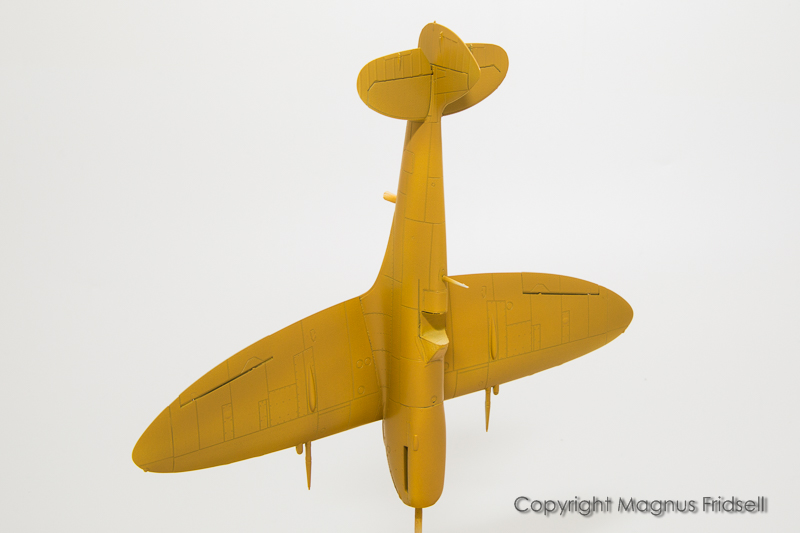
A layer of MRP Mid Stone...
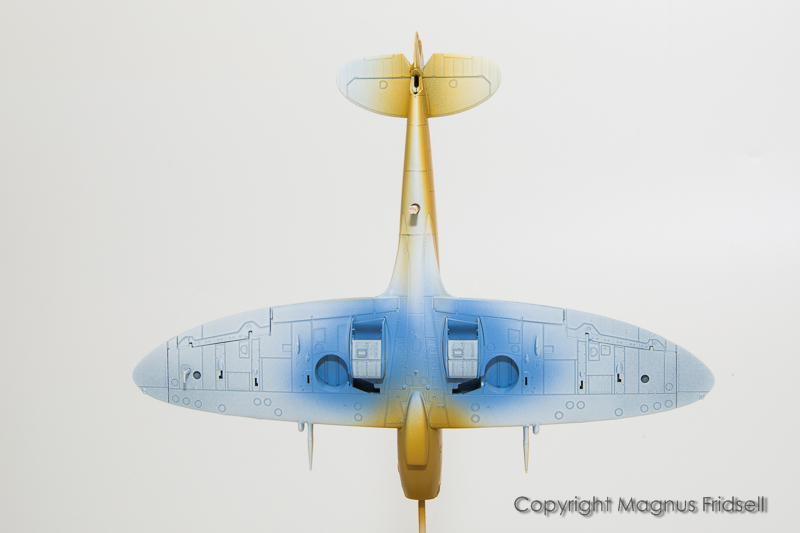
...and some Azure for the radiators before closing them.
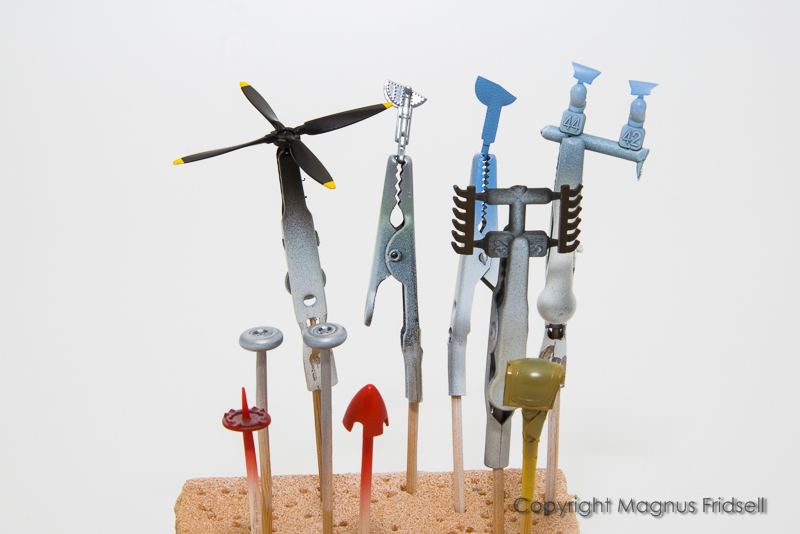
And finally some parts on sticks !
Magnus
Szmann
Netherlands Antilles
Joined: September 02, 2014
KitMaker: 1,977 posts
AeroScale: 295 posts
Joined: September 02, 2014
KitMaker: 1,977 posts
AeroScale: 295 posts
Posted: Sunday, November 05, 2017 - 09:24 PM UTC
Magnus, great work on the Spit. Thanks for sharing - definitely I'm going to approach one in the same scale soon...
Gabriel
Gabriel
goodn8
Berlin, Germany
Joined: October 12, 2008
KitMaker: 709 posts
AeroScale: 651 posts
Joined: October 12, 2008
KitMaker: 709 posts
AeroScale: 651 posts
Posted: Sunday, November 05, 2017 - 10:43 PM UTC
Very nice work as always, Magnus!
Just ordered that kit (Weekend Ed.) together with the Spitfire Mk.IXc late version and awaiting it's delivery.
Looks like a precious. Following up...
Thomas
Just ordered that kit (Weekend Ed.) together with the Spitfire Mk.IXc late version and awaiting it's delivery.
Looks like a precious. Following up...
Thomas
Joel_W
Associate Editor
New York, United States
Joined: December 04, 2010
KitMaker: 11,666 posts
AeroScale: 7,410 posts
Joined: December 04, 2010
KitMaker: 11,666 posts
AeroScale: 7,410 posts
Posted: Sunday, November 05, 2017 - 11:06 PM UTC
Magnus,
Just catching up on the many builds still running that I've missed. As usual, your level of work is that of a true 1/72 scale master. You certainly did that incredible Eduard Cockpit justice, as it looks just as good as most 1/38 scale spit cockpits I've seen or built myself.
As for the "trick" of taping the upper wings to the fuselage 1st, I've got to try that out. I can see it really working wonders on a kit with proper fit. But what if there is a gap due to poor fit, so now the gap is gone but the angle is too great? Will the bottom wing if one full wing span be strong enough to pull it into place? I would think so.
Joel
magnusf
Stockholm, Sweden
Joined: May 02, 2006
KitMaker: 1,953 posts
AeroScale: 1,902 posts
Joined: May 02, 2006
KitMaker: 1,953 posts
AeroScale: 1,902 posts
Posted: Saturday, November 11, 2017 - 12:49 PM UTC
Gabriel and Thomas! I'm happy to be of inspiration, you won't be disappointed with these kits !
Joel! I'm so glad you're back! As for the wing trick: yes, it works best on a well-fitting kit like this and it probably wouldn't be necessary in this case if I could learn to be less sloppy when gluing !
On the other hand, on an ill-fitting kit, if you can get a perfect fit between upper wing and fuselage there are many ways you can fix it out-of-sight on the lower surfaces. I remember discussing this with the guy who suggested the method many years ago and he said that in some extreme cases he had gotten the lower half of the wing-tips going a few mm beyond the upper ones and also badly mismatching ailerons between upper and lower wing halves. This was easily fixed by sanding the wingtips to contour and filling and rescribing the ailerons, probably a lot easier than fixing the wing-to-fuselage-joint and restoring lost detail in that area! Nowadays though, building modern kits, most fit very well so this is probably less of a problem!
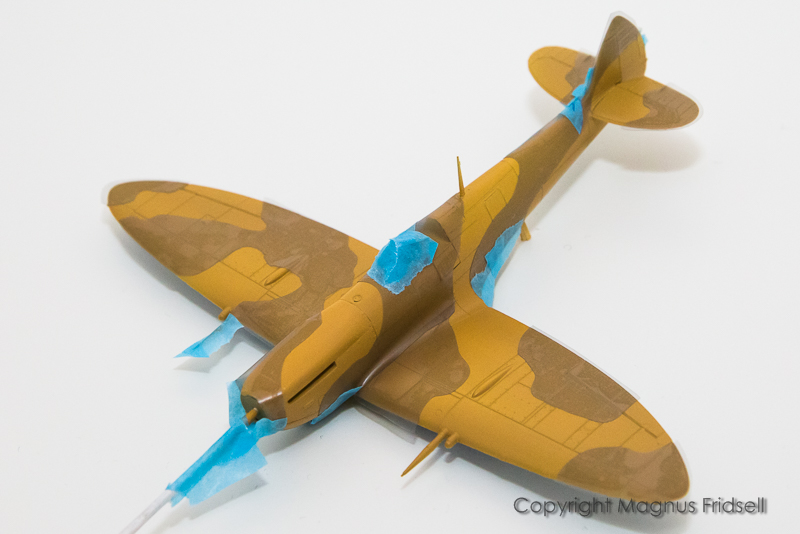
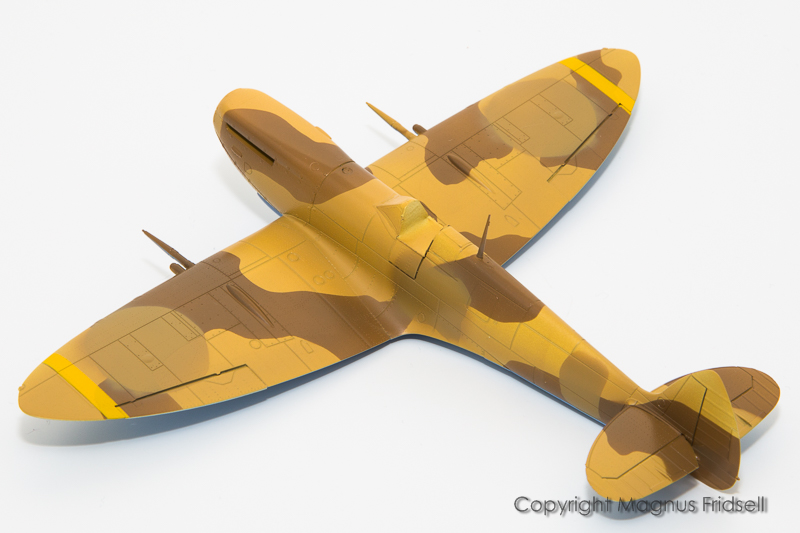
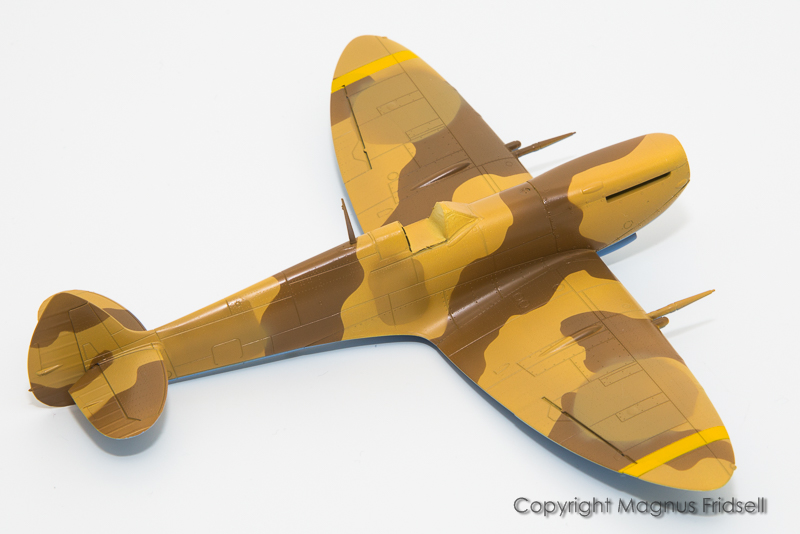
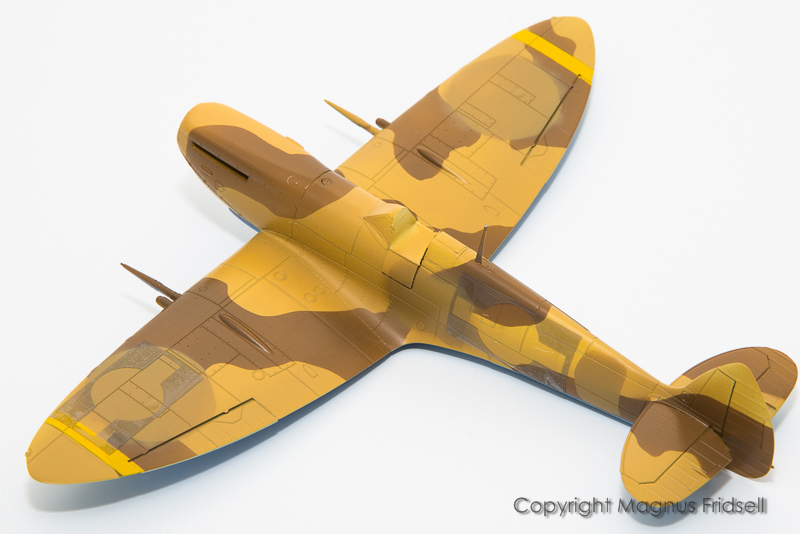
A bit of masking before painting the Dark Earth parts of the camouflage...
...using home-drawn masks cut with the Cameo plotter. That fit so-so, If I were more ambitious I would peal these off carefully after painting and put them in the scanner complete with the tape adjustments to update the masks...
Not bad...
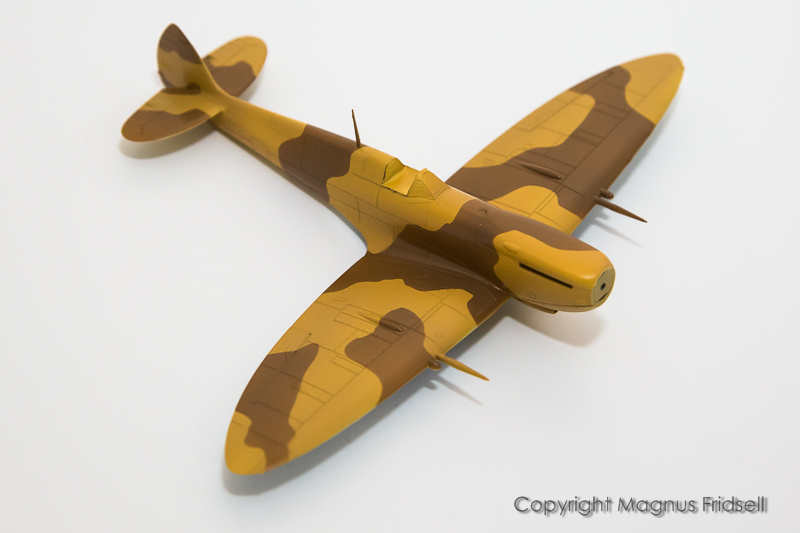
...I do get a bit of a salamander-feeling from this camo-scheme!
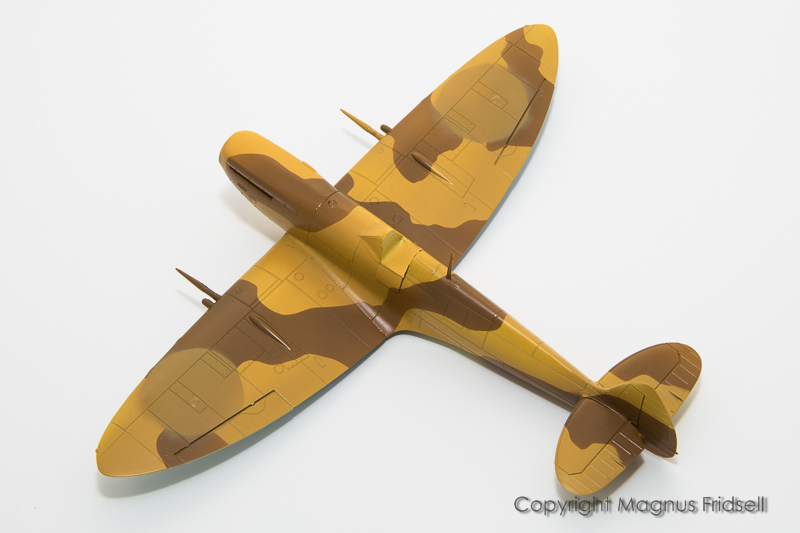
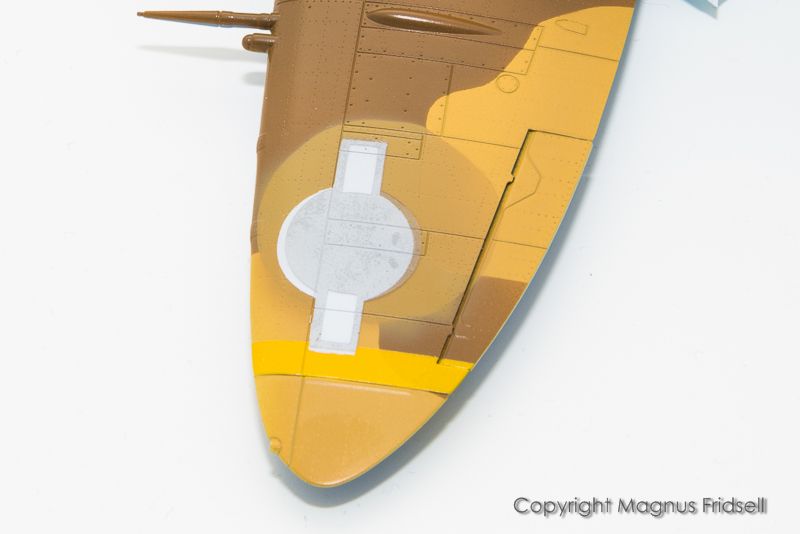
And finally, to add some interest. This one is going to be a USAAF machine, they were received second-hand from the RAF. The over-painted roundels can be seen in photos and this is my take on that. I'll probably do the same on the fuselage where the code letters had been.
Magnus
BlackWidow
European Union
Joined: August 09, 2009
KitMaker: 1,732 posts
AeroScale: 1,336 posts
Joined: August 09, 2009
KitMaker: 1,732 posts
AeroScale: 1,336 posts
Posted: Saturday, November 11, 2017 - 03:58 PM UTC
Good painting result, Magnus! You've got the correct sharp edges between MS and DE. I'm always too lazy to do that, so I airbrush the camo free hand and get soft edges, just like on my Ventura II right now ....
If I may hijack your thread for 2 photos of my US Spit for a moment. This is how I painted out the RAF roundels. I've cut a circle out of the masking tape and used a hairy stick for painting them out. Same on the fuselage with the codes and other insignias but here without masks ....
Torsten
If I may hijack your thread for 2 photos of my US Spit for a moment. This is how I painted out the RAF roundels. I've cut a circle out of the masking tape and used a hairy stick for painting them out. Same on the fuselage with the codes and other insignias but here without masks ....
Torsten
Joel_W
Associate Editor
New York, United States
Joined: December 04, 2010
KitMaker: 11,666 posts
AeroScale: 7,410 posts
Joined: December 04, 2010
KitMaker: 11,666 posts
AeroScale: 7,410 posts
Posted: Sunday, November 12, 2017 - 03:25 AM UTC
Magnus,
Thanks so much for the warm welcome back, it's greatly appreciated.
Nicely done camo paint scheme. The painted over British Roundels stand out just enough to leave the viewer no doubt as to the originals of that Spit.
Joel
Thanks so much for the warm welcome back, it's greatly appreciated.
Nicely done camo paint scheme. The painted over British Roundels stand out just enough to leave the viewer no doubt as to the originals of that Spit.
Joel
Posted: Sunday, November 12, 2017 - 03:10 PM UTC
coming in late to the party on this one Magnus, but all caught up and following along with interest
goodn8
Berlin, Germany
Joined: October 12, 2008
KitMaker: 709 posts
AeroScale: 651 posts
Joined: October 12, 2008
KitMaker: 709 posts
AeroScale: 651 posts
Posted: Sunday, November 12, 2017 - 08:49 PM UTC
Very nice and neat paint job, Magnus!
Again your Cameo is doing a good cut-out aside some afterwork and the sharp edges are great and matching.
Airbrushing the overpainted roundels is the way to go, at least to me. Using a paintbrush let it look too heavy and like putty or filler and out of scale.
Following up your progress, Thomas
Again your Cameo is doing a good cut-out aside some afterwork and the sharp edges are great and matching.
Airbrushing the overpainted roundels is the way to go, at least to me. Using a paintbrush let it look too heavy and like putty or filler and out of scale.
Following up your progress, Thomas
magnusf
Stockholm, Sweden
Joined: May 02, 2006
KitMaker: 1,953 posts
AeroScale: 1,902 posts
Joined: May 02, 2006
KitMaker: 1,953 posts
AeroScale: 1,902 posts
Posted: Friday, November 17, 2017 - 02:54 PM UTC
Torsten! So THAT'S the use of the hairy sticks, I've got a whole old jam-jar full of them and had almost forgotten what they're for ! Over-painting the old markings is just the kind of thing that adds a bit of extra interest to a build! Regarding hard-edge vs soft-edge, I like the look of your's a lot. It is really tight even if it's free-hand!
Joel and Russell! Thanks!
Thomas! I have done camo both freehand and masked earlier and I can't really decide which one I like the best... Even if the overspray in real life really should disappear in 1/72 there is still a slightly fuzzy feeling when looking at period photos that gets lost with the knife-sharp demarcations from masks. On the other hand, the weathering tends to even-out the impression a bit!
Hopefully another update soon, been too busy for modelling last week!
Magnus
magnusf
Stockholm, Sweden
Joined: May 02, 2006
KitMaker: 1,953 posts
AeroScale: 1,902 posts
Joined: May 02, 2006
KitMaker: 1,953 posts
AeroScale: 1,902 posts
Posted: Saturday, November 18, 2017 - 03:10 PM UTC
Moving forward with the markings!
Wing stripes in place...
...and RAF codes overpainted on both sides. I don't think the fuselage roundel was overpainted with camo paint on this one since the USAAC insignia covers the roundel.
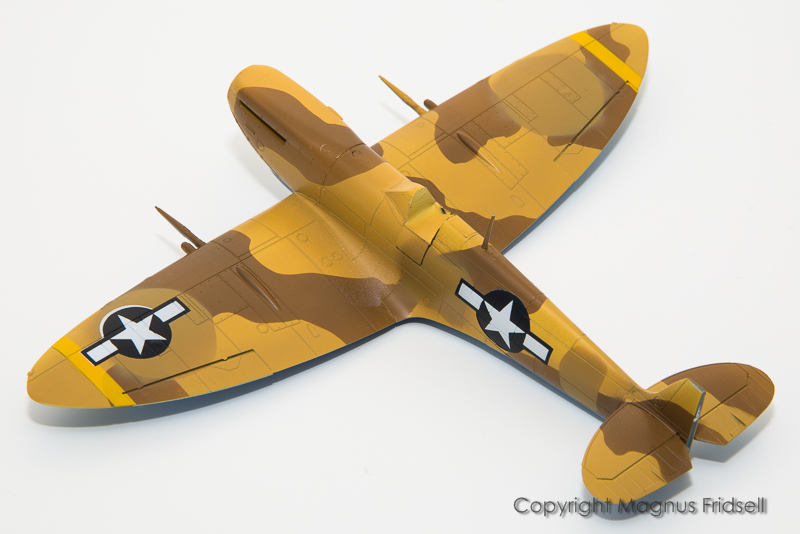
Masks are on for the US markings...
...and a coat of white! Will add the stars and the bars and paint the dark blue later today.
Magnus
Szmann
Netherlands Antilles
Joined: September 02, 2014
KitMaker: 1,977 posts
AeroScale: 295 posts
Joined: September 02, 2014
KitMaker: 1,977 posts
AeroScale: 295 posts
Posted: Saturday, November 18, 2017 - 07:52 PM UTC
Good work on masking and painting, Magnus! Waiting the decal application with interest.
Gabriel
Gabriel
Joel_W
Associate Editor
New York, United States
Joined: December 04, 2010
KitMaker: 11,666 posts
AeroScale: 7,410 posts
Joined: December 04, 2010
KitMaker: 11,666 posts
AeroScale: 7,410 posts
Posted: Saturday, November 18, 2017 - 08:52 PM UTC
Magnus,
I'm impressed to say the least. Your masking looks great. Well done my friend.
I'm getting real close to biting the bullet and getting a craft cutter.
Joel
I'm impressed to say the least. Your masking looks great. Well done my friend.
I'm getting real close to biting the bullet and getting a craft cutter.
Joel
Antilles
Nordrhein-Westfalen, Germany
Joined: March 22, 2015
KitMaker: 671 posts
AeroScale: 614 posts
Joined: March 22, 2015
KitMaker: 671 posts
AeroScale: 614 posts
Posted: Saturday, November 18, 2017 - 09:37 PM UTC
Magnus,
I agree with Gabriel and Joel. You have done a flawless paint job on Your Spitfire. Can hardly wait for the next update!
Oliver
I agree with Gabriel and Joel. You have done a flawless paint job on Your Spitfire. Can hardly wait for the next update!
Oliver
magnusf
Stockholm, Sweden
Joined: May 02, 2006
KitMaker: 1,953 posts
AeroScale: 1,902 posts
Joined: May 02, 2006
KitMaker: 1,953 posts
AeroScale: 1,902 posts
Posted: Saturday, November 18, 2017 - 09:40 PM UTC
Gabriel! Even if I mask most of the markings there will still be at least a few decals so stay tuned!
Joel! It's a useful extra and I suppose so even more in bigger scales. However, one should be aware that it takes a bit of time both to learn (especially if you haven't done any CAD or drawing in computers) and it will then also take time away from the "real modelling". I find it worth it since I dislike decals intensely and do CAD for a living !
Oliver! Thanks!
What's the most common mistake when applying US markings? Probably turning them upside down so they stand on the tip of the star. I have a friend who has done it ! Making masks with the star separated from the rest of the design of course solves this problem - NOT! The "ears" aren't centered on the circle and even if I drew these myself (copying the scanned decals) I didn't notice. By a strike of sheer luck, only one of the markings was applied upside down...
Instead of repainting the whole marking I simply turned the mask 180 degrees, leaving an edge of white forward of the design. The corresponding mismatch to the rear was part of the dark blue part of the design so that was covered when painting. When everything is thoroughly set I'll reapply the mask to the marking and touch up the white edge. A bit of really unnecessary work but it could have been worse...
Magnus
Joel_W
Associate Editor
New York, United States
Joined: December 04, 2010
KitMaker: 11,666 posts
AeroScale: 7,410 posts
Joined: December 04, 2010
KitMaker: 11,666 posts
AeroScale: 7,410 posts
Posted: Saturday, November 18, 2017 - 10:41 PM UTC
Magnus
I've never done CAD nor any drawing in a computer, so I would be starting from scratch. I've heard that the learning curve could be rather long for someone as unskilled nor gifted when it comes to design work. Maybe I should just stick with good old decals or by masks as needed for difficult applications where compound curves become a real issue.
As for applying the Stars & Bars upside down. I still remember my 1st model back in the 70s when I re-entered the hobby. Had half of them upside down. Took a really major ribbing from my brother. Think I left them that way as I hadn't discovered AM decals as yet.
BTW, great save on that wing Star & Bar.
Joel
magnusf
Stockholm, Sweden
Joined: May 02, 2006
KitMaker: 1,953 posts
AeroScale: 1,902 posts
Joined: May 02, 2006
KitMaker: 1,953 posts
AeroScale: 1,902 posts
Posted: Sunday, November 19, 2017 - 01:02 AM UTC
Joel! Sorry, I didn't mean to scare you away from it! Santa came with mine a year ago and it's soon Christmas again ! As for artistic talent, I get quite far using a scanner and somebody elses artwork from decal sheets, not much talent required really! Regarding your stars-and-bars: you didn't have to admit it was you but I'm impressed by your honesty!
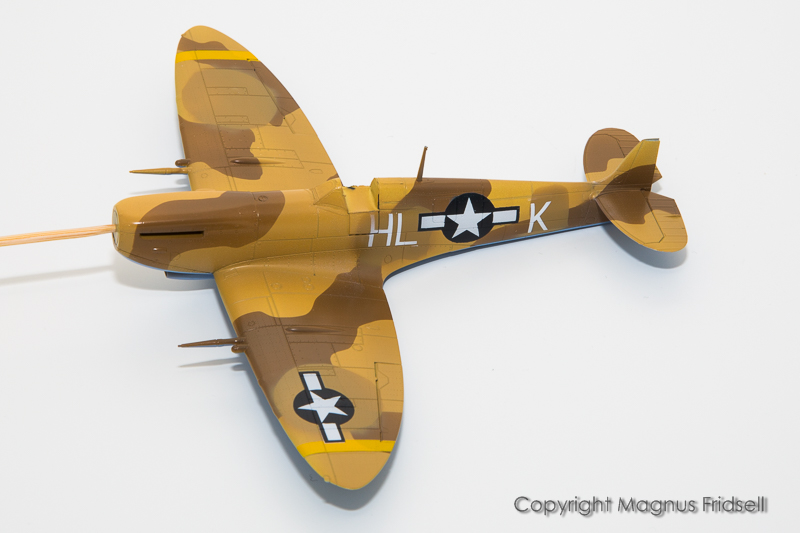
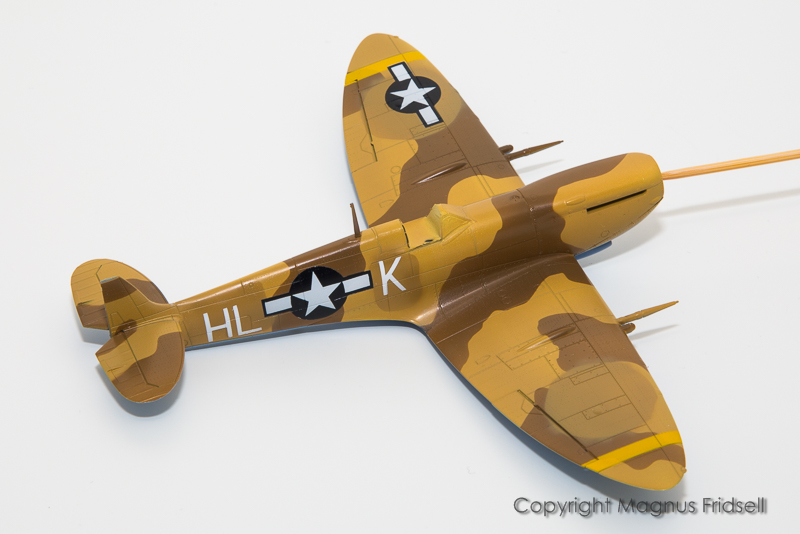
Most productive weekend in a long time, I managed to both touch up my insignia mistake and add the code letters as well!
Magnus
Most productive weekend in a long time, I managed to both touch up my insignia mistake and add the code letters as well!
Magnus
Joel_W
Associate Editor
New York, United States
Joined: December 04, 2010
KitMaker: 11,666 posts
AeroScale: 7,410 posts
Joined: December 04, 2010
KitMaker: 11,666 posts
AeroScale: 7,410 posts
Posted: Sunday, November 19, 2017 - 01:22 AM UTC
Magnus,
My intention was to scan in the decal sheets, then create the national insignia masks. I figure what I want to do is more technical then artistic, but I still have to learn how to create those masks, so there's a learning curve for sure.
As far as your wing insignia goes, you sir did an outstanding correction. It looks absolutely perfect.
Joel
Posted: Sunday, November 19, 2017 - 03:33 PM UTC
Inspiring as always Magnus