_GOTOBOTTOM
World War II: Germany
Aircraft of Germany in WWII.
Hosted by Rowan Baylis
Eduard's New-Tool Fw 190A-4
Merlin
Staff MemberSenior Editor
AEROSCALE
#017
_VISITCOMMUNITY
United Kingdom
Joined: June 11, 2003
KitMaker: 17,582 posts
AeroScale: 12,795 posts
Posted: Tuesday, October 31, 2017 - 02:11 AM UTC


Hi everyone

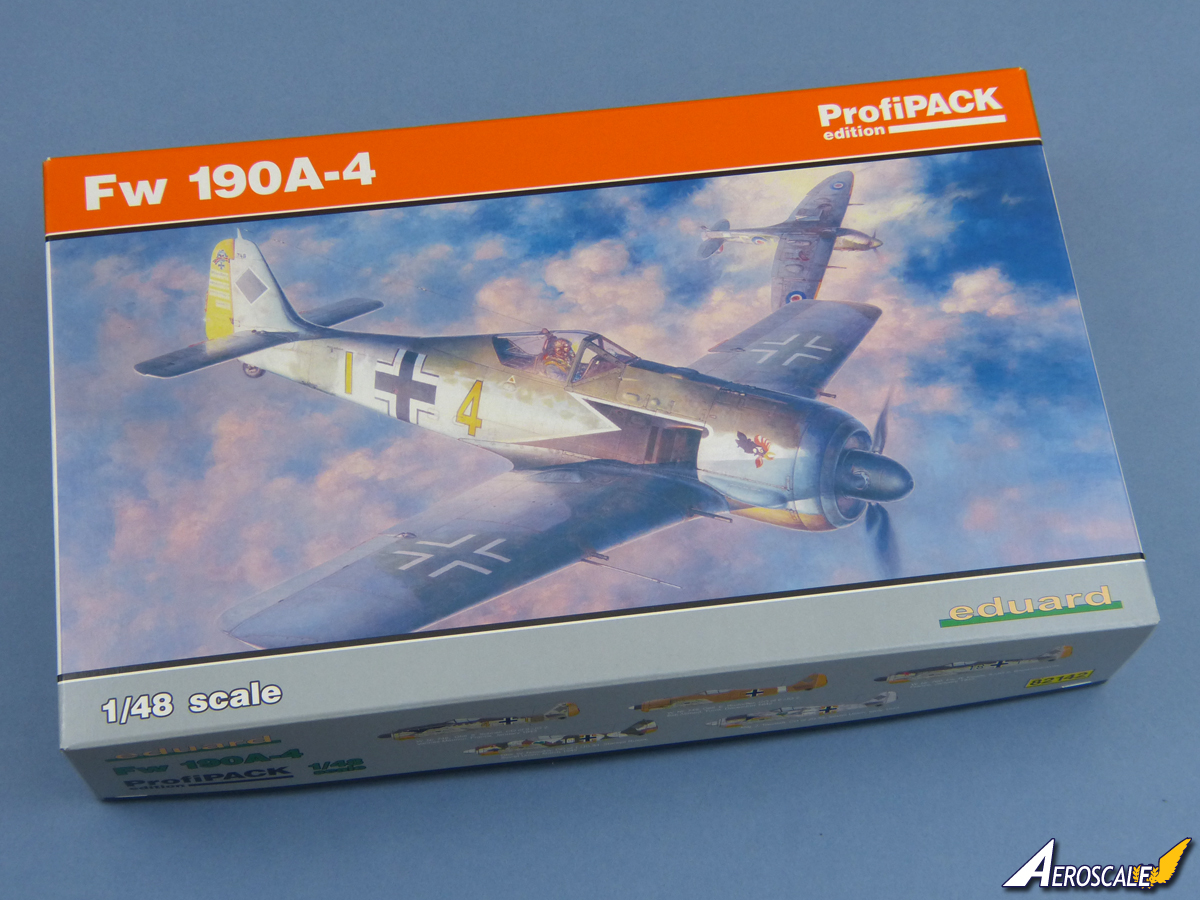
Eduard have very kindly sent us their new-tool Fw 190A-4 for review. Rather than do my usual In-Box followed by a build, I'm going to turn things on their head for a change and dive straight in with a Blog - so, you'll see it here in the Forum first.

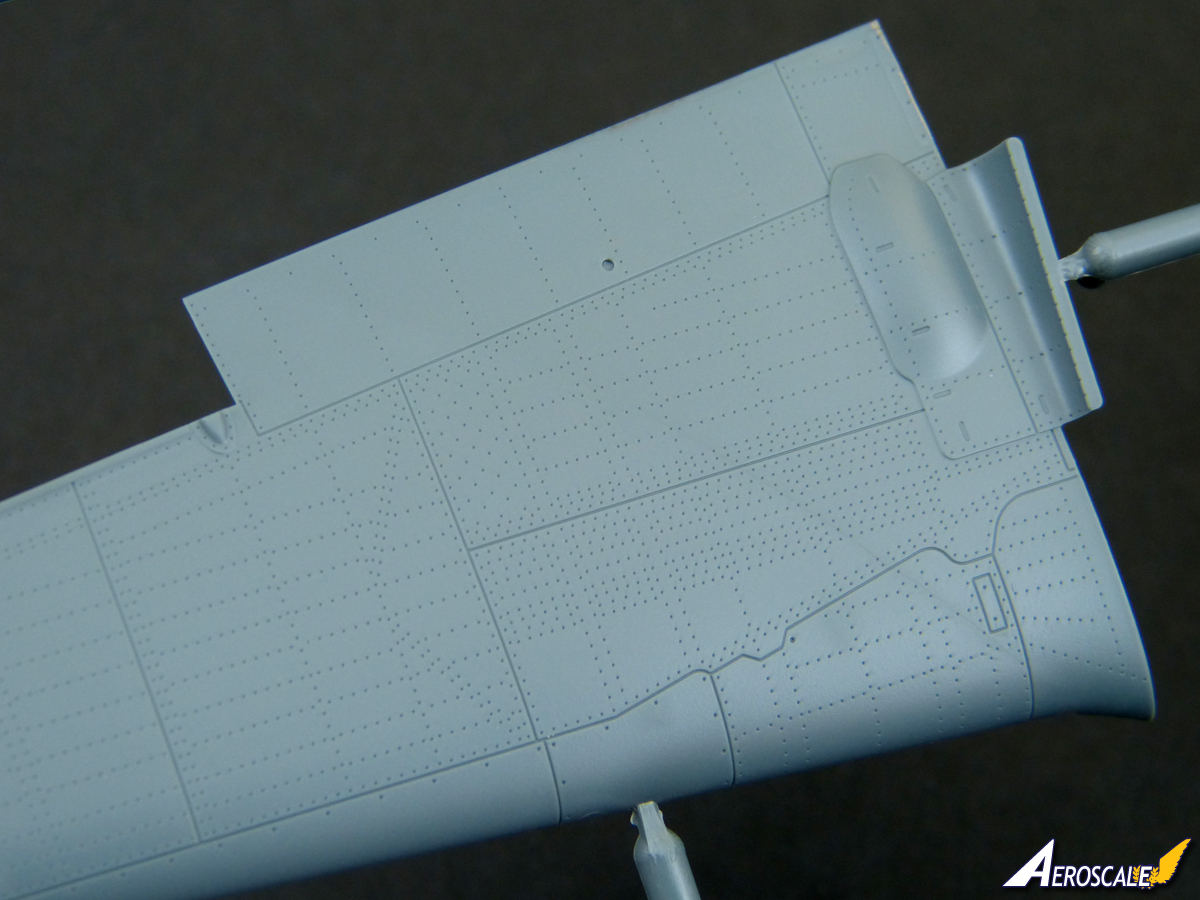
Anyway... first impressions? Straight out of the box, the first thing you notice is the superb surface finish with finely engraved panel lines and really delicate embossed rivets. It's going to look fantastic under a coat of paint.

I'm starting things off with a test-fit because, inevitably, the new kit is going to be compared with Eduard's previous 1:48 Wurger kits. A lot of people were put off Eduard's first attempt at the Fw 190 by the scare stories that dogged it. I always felt they were a bit overdone, but it arguably tried to pack in too much detail for its own good and ended up being over-complicated. Whatever, it certainly wasn't a "shake 'n bake" kit.

Learning from that, Eduard have taken a completely different path this time and aimed to make the standard kit straightforward to build for the average modeller. For superdetailers, Eduard have an extensive range of Brassin upgrades to add. More on them in due course, because the first priority is to tackle the standard kit and not get distracted.

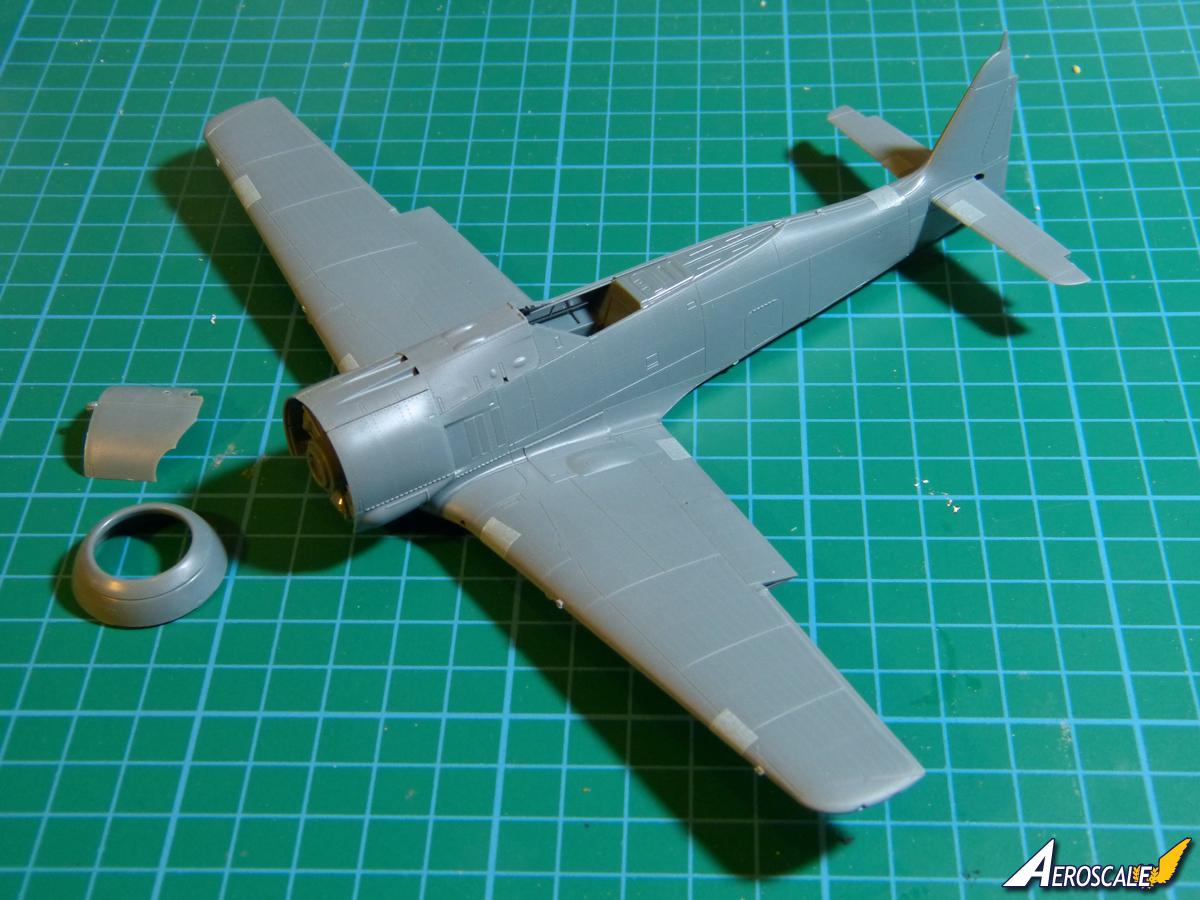

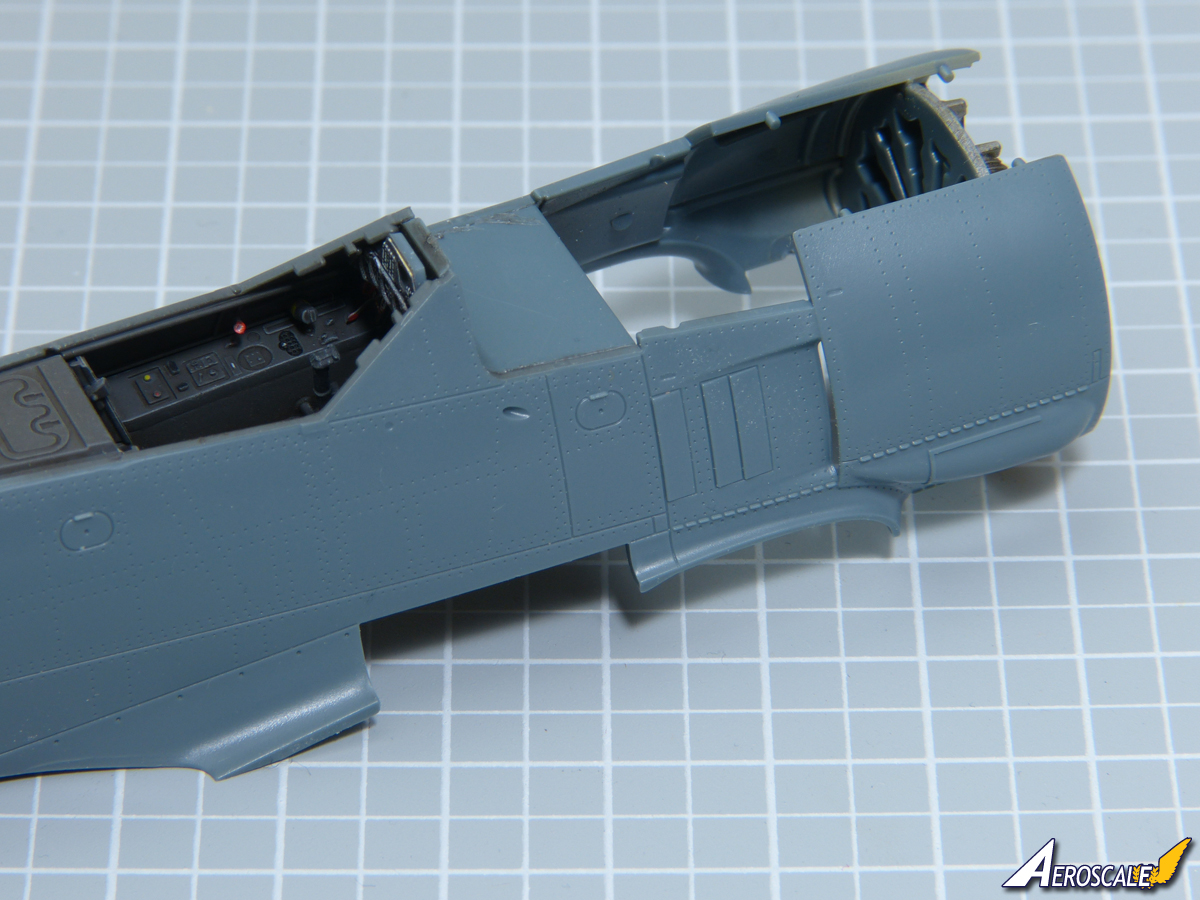
As you can see, the test-fit is really encouraging with the main parts just taped together. I've noticed a slight gap on the leading edge of the wings (that should be easy to sort out) and the horizontal tail is loose (although the actual fit is perfect). Other than that, everything has gone together like a dream - the wing-roots are really tight and the nose cowls are a doddle to fit.

And the other big change - the "fat fin" of the old kit is gone. The new version looks instantly much better.

I've got a bit of a heavy week ahead at work, but I hope to get the build underway shortly - and on the basis of this first look, it should be a blast! I need something to get my mojo back (as Mal would say) - and Eduard's new Fw 190 looks to have all the right ingredients.

More as soon as I can manage.

All the best

Rowan
Joel_W
Staff MemberAssociate Editor
AUTOMODELER
_VISITCOMMUNITY
New York, United States
Joined: December 04, 2010
KitMaker: 11,666 posts
AeroScale: 7,410 posts
Posted: Tuesday, October 31, 2017 - 02:38 AM UTC
Rowan,
I'm really looking forward to following your build. For sure this will get your mojo flowing. And it just might get me to buy and build a few Eduard Axis aircraft. So now the pressure's on

Joel
Merlin
Staff MemberSenior Editor
AEROSCALE
#017
_VISITCOMMUNITY
United Kingdom
Joined: June 11, 2003
KitMaker: 17,582 posts
AeroScale: 12,795 posts
Posted: Tuesday, October 31, 2017 - 02:51 AM UTC
Cheers Joel

It's great to have you back on board! We've missed you on Aeroscale.

I don't want to tempt Fate - but I think I'm going to have fun with this build.

It'll be a real Focke-Wulf autumn for me, because I'll be building a vacuform Weihe for the "Lost Art" campaign. There could hardly be a greater contrast, but I'm also really looking forward to getting back to the sort of stuff I built routinely before finding Aeroscale (or the aircraft section of Armorama, as it was back then).

All the best

Rowan
Willard79
_VISITCOMMUNITY
Wellington, New Zealand
Joined: June 01, 2014
KitMaker: 189 posts
AeroScale: 179 posts
Posted: Tuesday, October 31, 2017 - 03:11 AM UTC
Hi Rowan,
I'm very close to finishing up the previous version of Eduards 190, and despite the 'scare stories', I won't have any apprehension doing the other one that came with the dual kit.
Having said that, I'm mad keen to build this version also. I can already see there are a lot more rivets, but I'm also keen to see how the control surface detail compares with previous.
Looking forward to following along.

Regards.
Merlin
Staff MemberSenior Editor
AEROSCALE
#017
_VISITCOMMUNITY
United Kingdom
Joined: June 11, 2003
KitMaker: 17,582 posts
AeroScale: 12,795 posts
Posted: Tuesday, October 31, 2017 - 03:26 AM UTC
Hi Spud

Nice one! As I say, I always thought scare stories were a bit overdone, because I enjoyed the original kit.

As regards the surface finish of the new-tool Fw 190, here's a taste of what you can look forward to:


I'll leave the control surfaces until next time.

All the best

Rowan
Joel_W
Staff MemberAssociate Editor
AUTOMODELER
_VISITCOMMUNITY
New York, United States
Joined: December 04, 2010
KitMaker: 11,666 posts
AeroScale: 7,410 posts
Posted: Tuesday, October 31, 2017 - 05:07 AM UTC

Quoted Text

Cheers Joel

It's great to have you back on board! We've missed you on Aeroscale.

I don't want to tempt Fate - but I think I'm going to have fun with this build.

It'll be a real Focke-Wulf autumn for me, because I'll be building a vacuform Weihe for the "Lost Art" campaign. There could hardly be a greater contrast, but I'm also really looking forward to getting back to the sort of stuff I built routinely before finding Aeroscale (or the aircraft section of Armorama, as it was back then).

All the best

Rowan


Rowan,
Thanks so much for the warm welcome back, it's much appreciated my friend.

The detail on the wing is magnificent. Boy has Eduard kicked it up more then a few notches.

Joel
rdt1953
_VISITCOMMUNITY
New Jersey, United States
Joined: February 06, 2015
KitMaker: 1,098 posts
AeroScale: 900 posts
Posted: Tuesday, October 31, 2017 - 05:22 AM UTC
Rowan - this kit may just tempt me away from Hinomarus- yikes !
Please say something bad about it so I am not led astray !

Cheers - Richard
Merlin
Staff MemberSenior Editor
AEROSCALE
#017
_VISITCOMMUNITY
United Kingdom
Joined: June 11, 2003
KitMaker: 17,582 posts
AeroScale: 12,795 posts
Posted: Thursday, November 02, 2017 - 03:14 AM UTC

Quoted Text

Rowan - this kit may just tempt me away from Hinomarus- yikes !
Please say something bad about it so I am not led astray !

Cheers - Richard


Hi Richard

I found a couple of tiny sink marks on parts that probably won't be seen on the finished model as I was getting everything ready for a proper start this afternoon. Is that serious enough to save you?...

The way things have panned out at Oxfam, it's looking like Sunday to get properly underway - but I hope to grab an extra day (at least) at the workbench after that.

All the best

Rowan
thegirl
_VISITCOMMUNITY
Alberta, Canada
Joined: January 19, 2008
KitMaker: 6,743 posts
AeroScale: 6,151 posts
Posted: Thursday, November 02, 2017 - 04:27 AM UTC
You have my full attention on the is Rowan , I have a few of the Hasegawa kits in the stash of the A-4 , but I sure don't have an Eduard one though . I agree with the others . Eduard really has turned it up a notch in their detail and less complicated construction .


Terri
Merlin
Staff MemberSenior Editor
AEROSCALE
#017
_VISITCOMMUNITY
United Kingdom
Joined: June 11, 2003
KitMaker: 17,582 posts
AeroScale: 12,795 posts
Posted: Sunday, November 05, 2017 - 04:09 PM UTC
Hi again all

Just a quick update to show I wasn't idle yesterday.

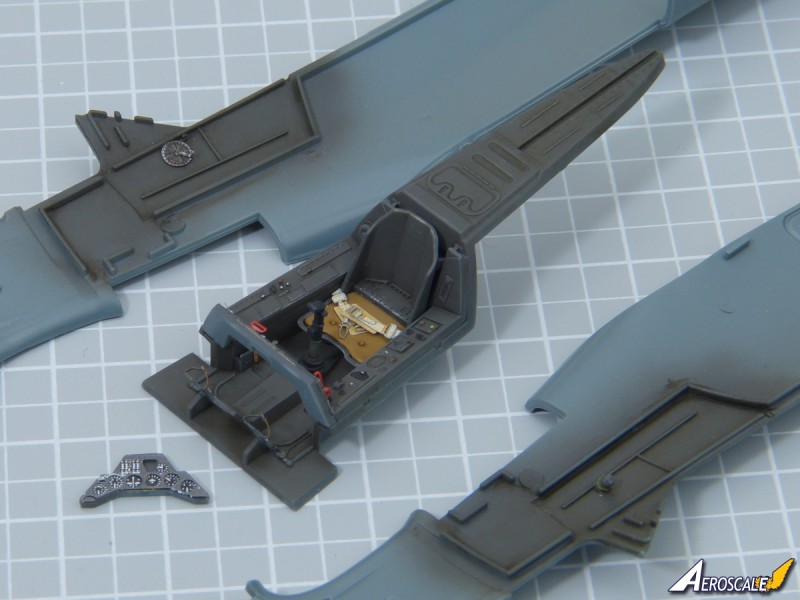
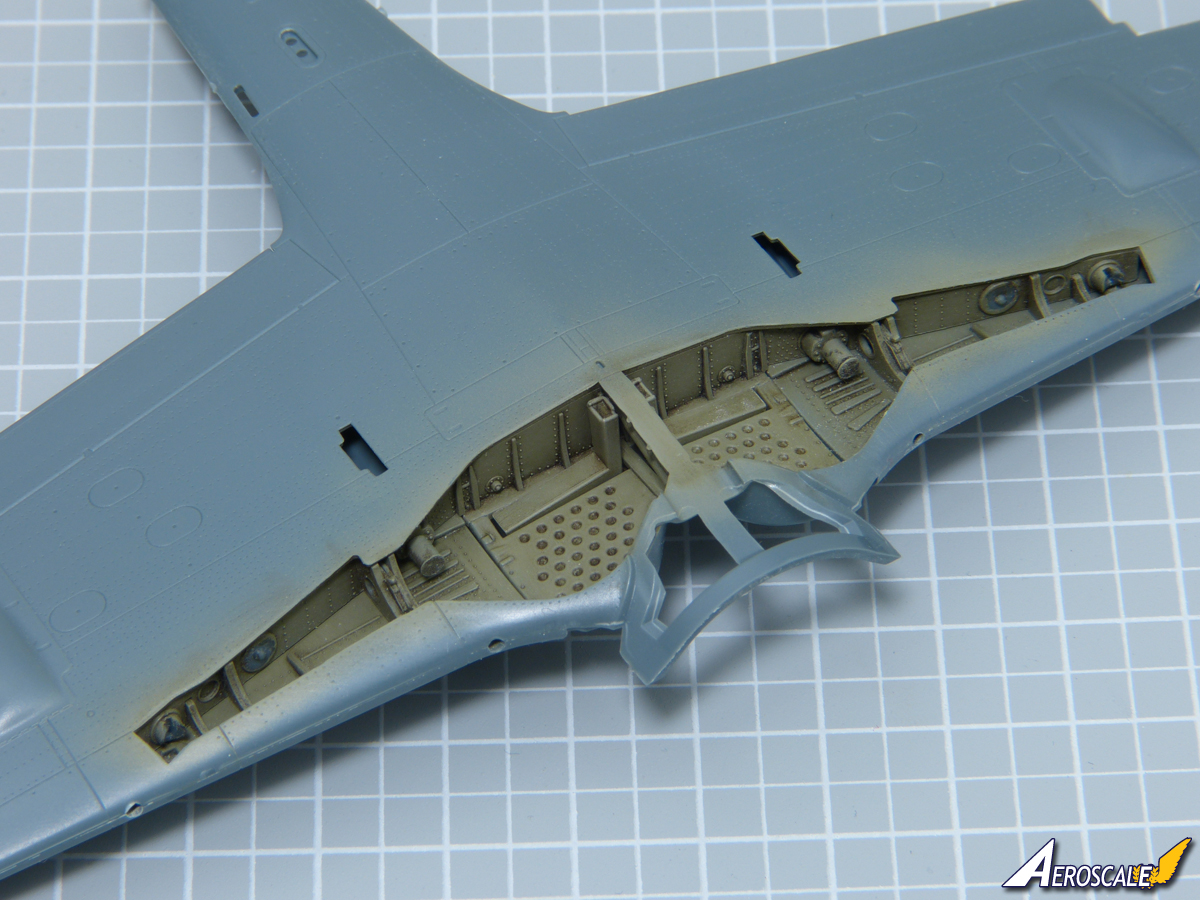
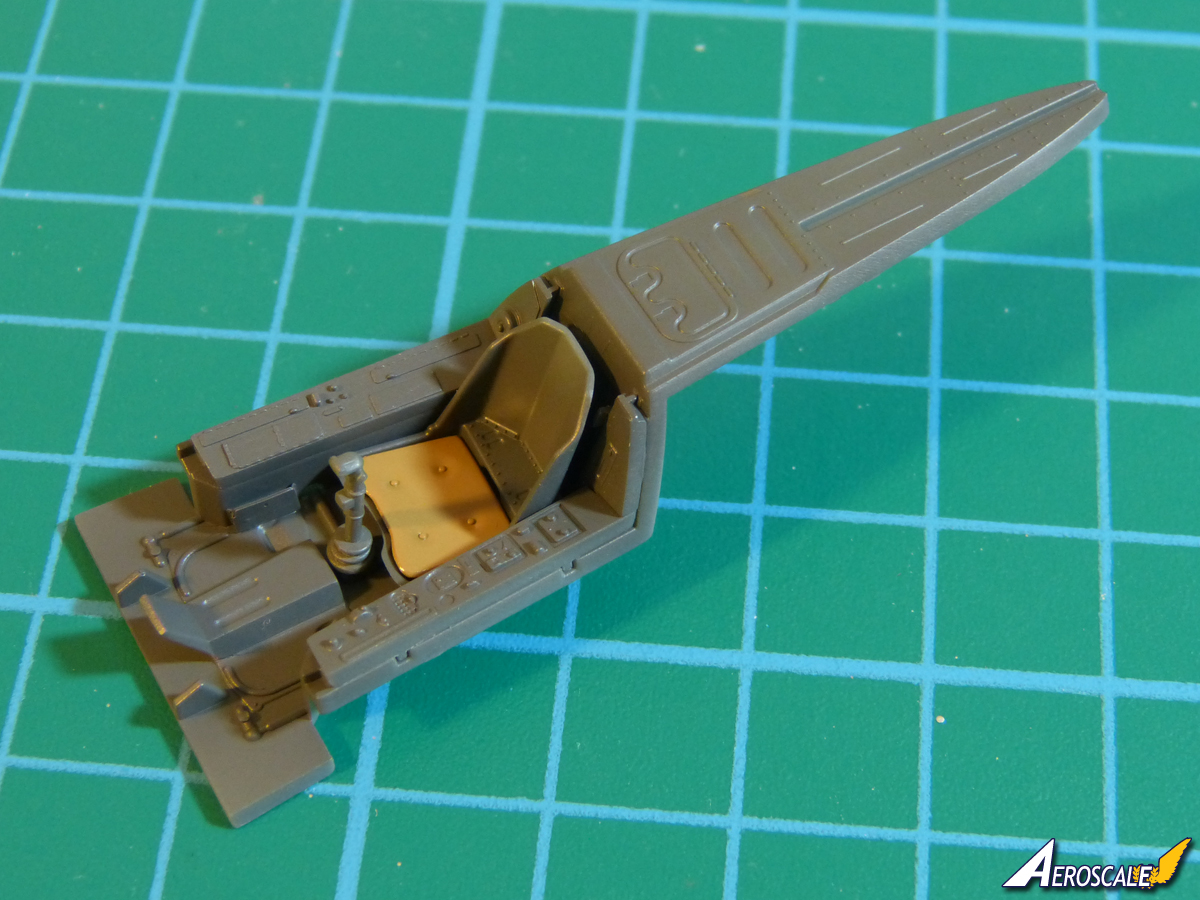
I've done some basic assembly on the cockpit and wheel well and it's been very straightforward and everything's fitted together very neatly:


Today's task is to start some light weathering and shading to bring it all to life a bit. All being well, more later.

All the best

Rowan
Merlin
Staff MemberSenior Editor
AEROSCALE
#017
_VISITCOMMUNITY
United Kingdom
Joined: June 11, 2003
KitMaker: 17,582 posts
AeroScale: 12,795 posts
Posted: Sunday, November 05, 2017 - 09:28 PM UTC
Hi again

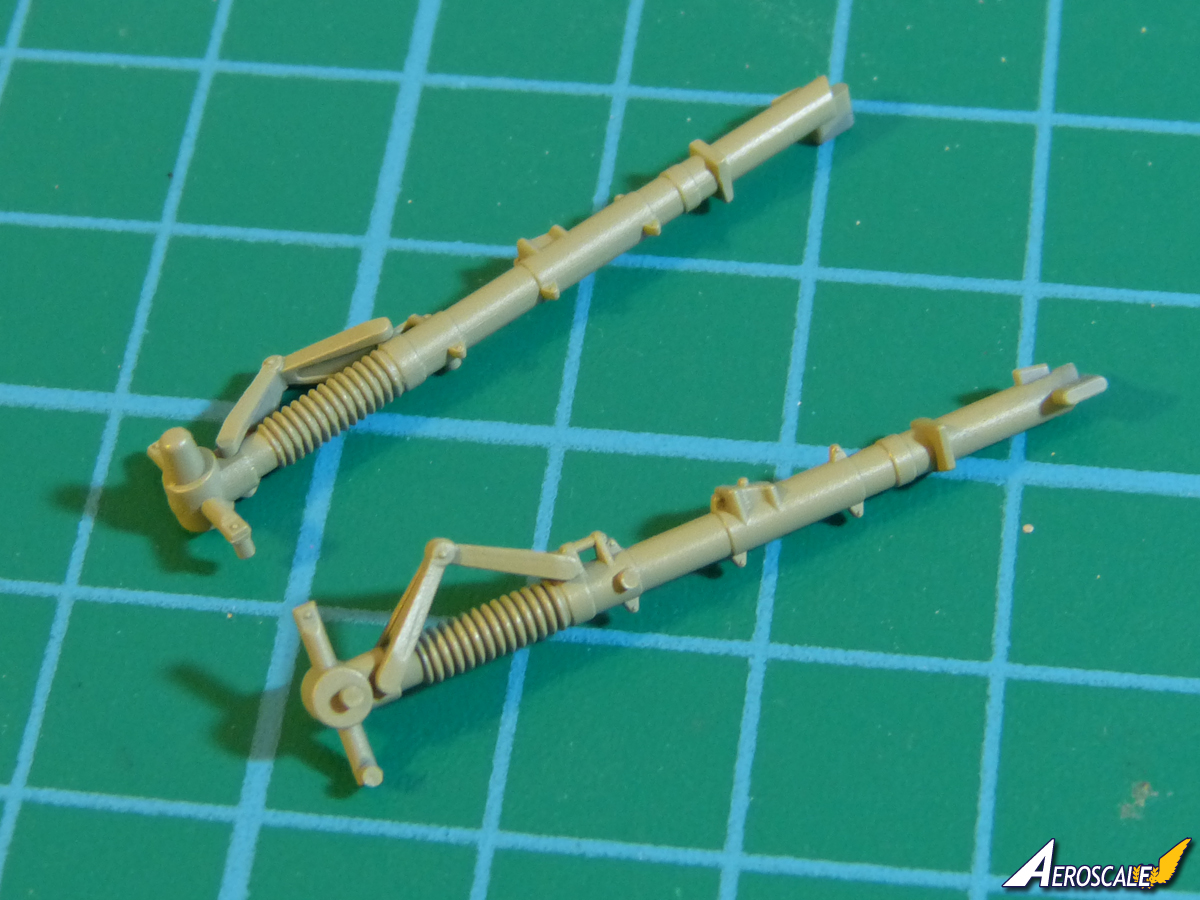
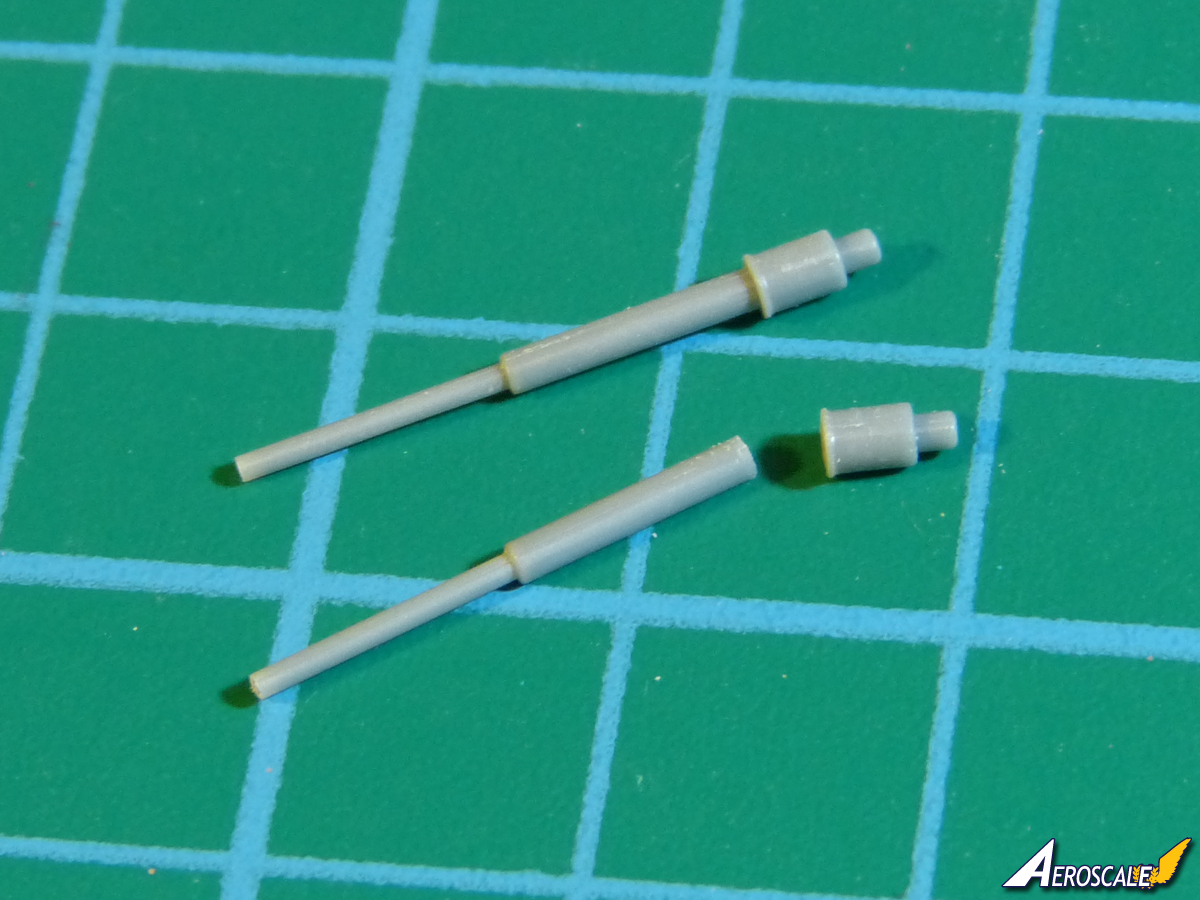
I'll be building the first kit pretty much out of the box (a second will serve as a test-bed for the numerous Brassin upgrade sets), but one small change I'm making is how the wing-root cannons install.

I always like to add the guns after I've done any clean-up needed on the wing joints (and usually after I've done the main exterior painting), so a simple change is to cut the barrels off with a razor saw so they can be fitted later:


I'll also fix that moulding seam that I missed with the naked eye and which the photo has highlighted.

All the best

Rowan
goodn8
_VISITCOMMUNITY
Berlin, Germany
Joined: October 12, 2008
KitMaker: 709 posts
AeroScale: 651 posts
Posted: Sunday, November 05, 2017 - 10:37 PM UTC
Rowan, good to see you putting some styrene together with a new kit on your bench. That one is really nice and your progress is fast and beautifully done so far.
After I finished my first 190 this summer I'm quite addicted to this bird. And after your introducion I was happy that Eduard done their job. Recently ordered (aside other stuff and kits) this one as overtrees from Eduard's shop.

Following your build with interest.
Thomas
greif8
_VISITCOMMUNITY
Bayern, Germany
Joined: January 17, 2006
KitMaker: 673 posts
AeroScale: 492 posts
Posted: Monday, November 06, 2017 - 07:54 PM UTC
Hi Rowan, I will also be following your build closely, as I am interested in getting his kit. I have mostly been building 1/32 scale for the past few years - and I do have a couple of Hasegawa's 1/32 Butcher Birds coming in the mail, but this looks like a nice enough kit to make me step back to 1/48 for a build.

Ernest
Merlin
Staff MemberSenior Editor
AEROSCALE
#017
_VISITCOMMUNITY
United Kingdom
Joined: June 11, 2003
KitMaker: 17,582 posts
AeroScale: 12,795 posts
Posted: Sunday, November 12, 2017 - 09:24 PM UTC
Hi again

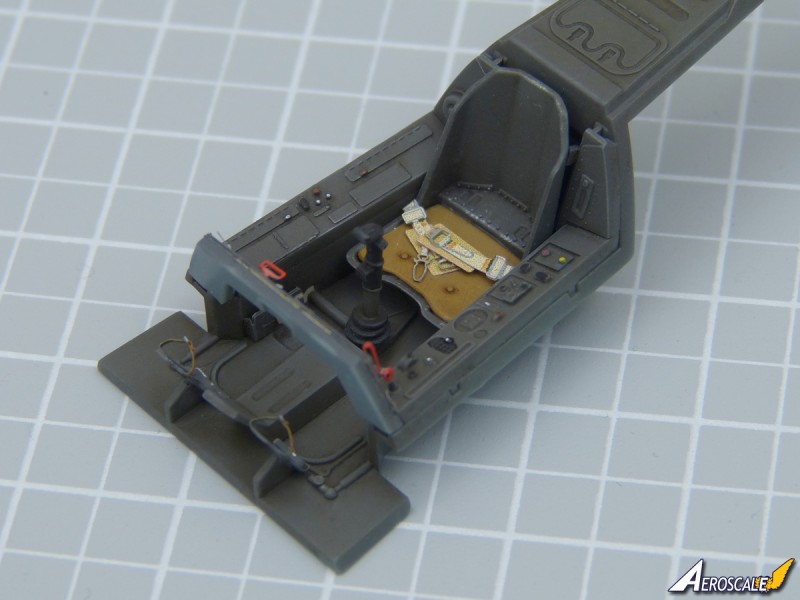
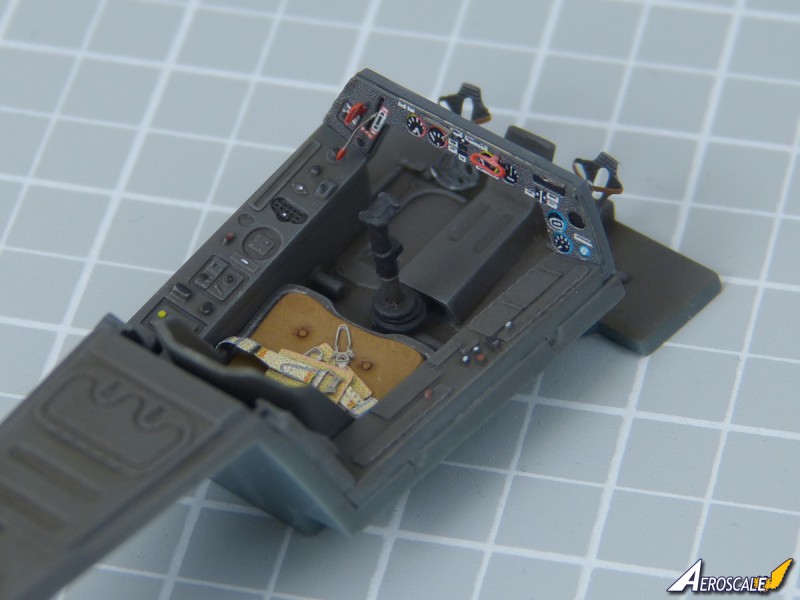
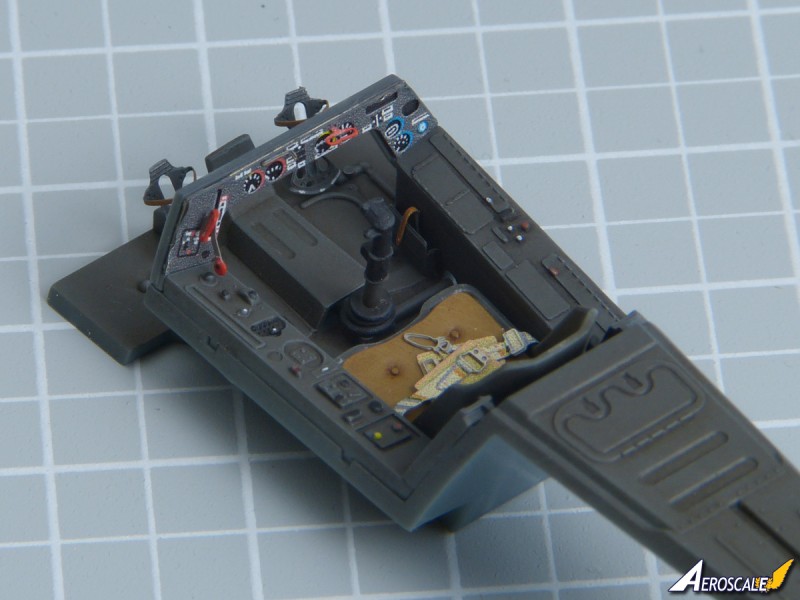
Time for a quick update . I had the day off work today and managed to crack on a bit. The cockpit is basically done:


The extreme magnification picks up the speckled "dithering" on Eduard's pre-coloured photo-etched parts, but it's not really noticeable to the naked eye from normal viewing range.

Eduard definitely seem to have changed the colour they are using to represent RLM 66, and it's now a closer match for the surrounding parted parts (previously I always found it rather too blue).

I've still got a bit of work to do - and I think I'll add a bit more highlighting because it's flattened out a bit in the photos. I won't attach the shoulder harnesses until later in the build.

All the best

Rowan
Merlin
Staff MemberSenior Editor
AEROSCALE
#017
_VISITCOMMUNITY
United Kingdom
Joined: June 11, 2003
KitMaker: 17,582 posts
AeroScale: 12,795 posts
Posted: Monday, November 13, 2017 - 01:05 AM UTC
Hi again

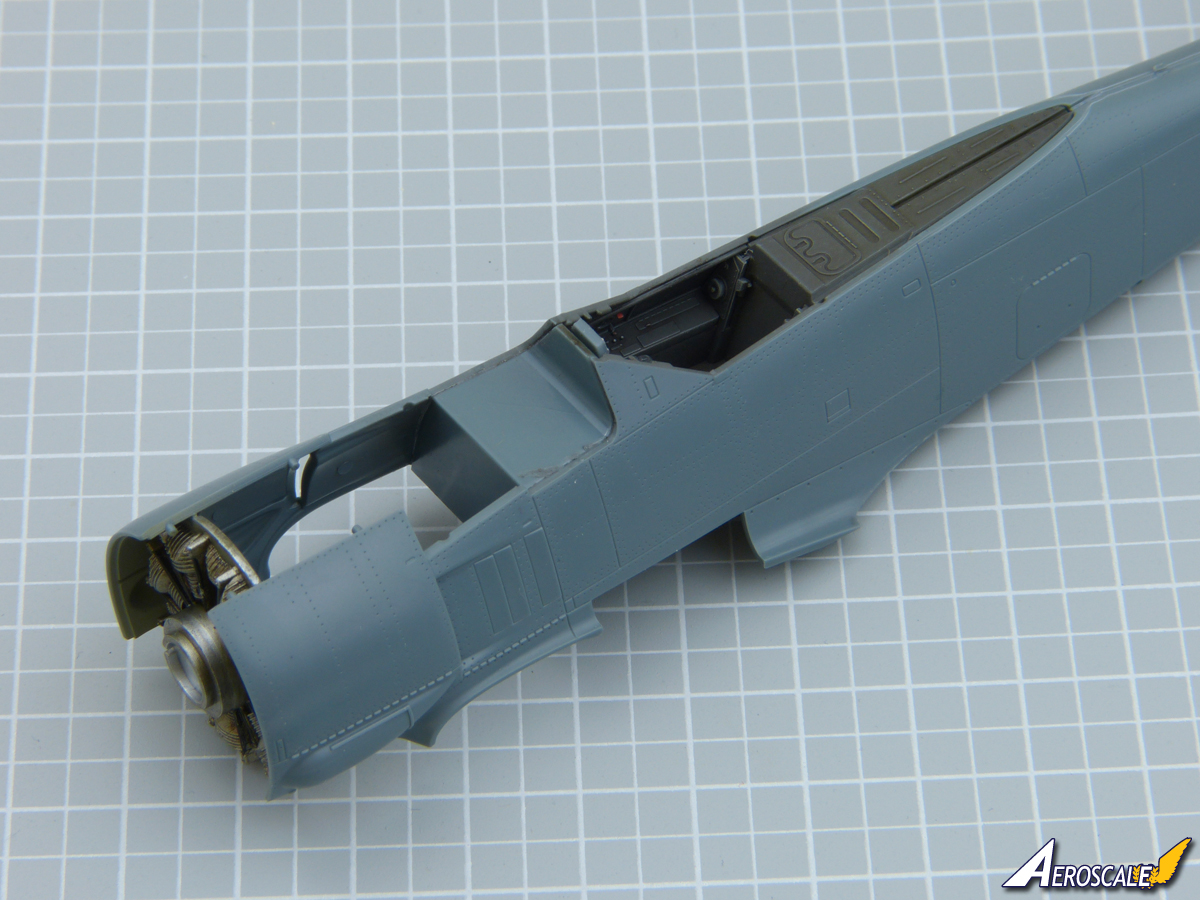
A couple more shots to round off today's work. The fuselage went together like a doddle as expected:


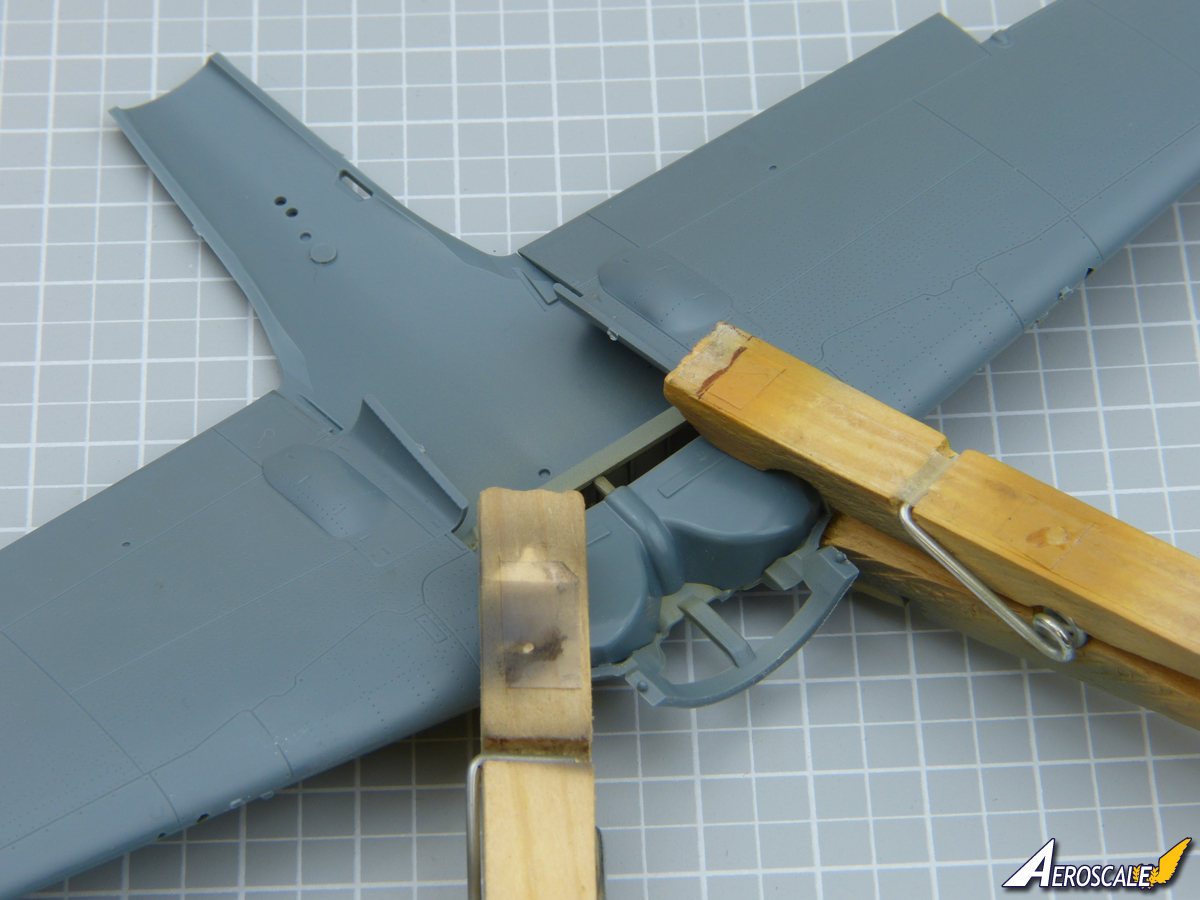
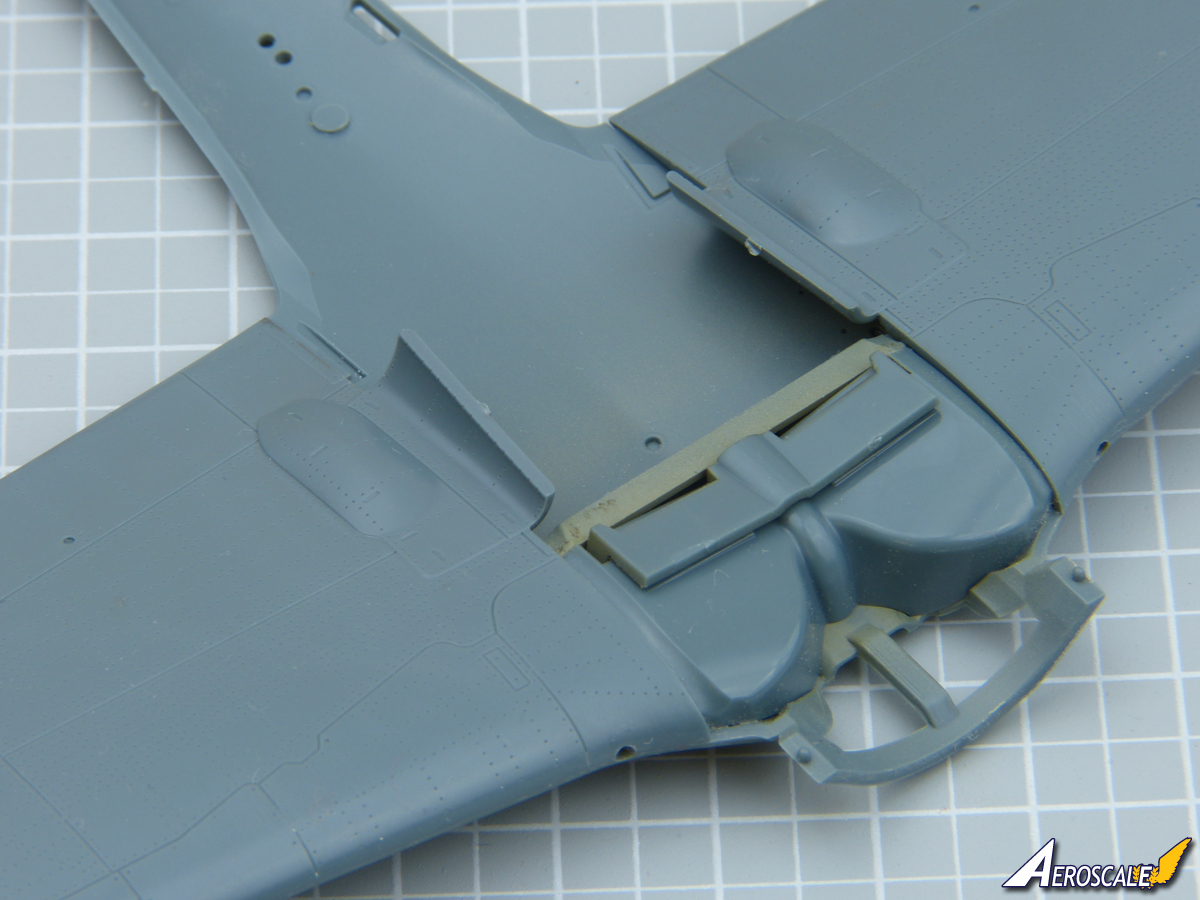
The wings slightly less so:


Nothing major, but there's a slight step, which is a bit of a surprise considering how well everything else has fitted. It doesn't seem to be anything to do with the wheel-well - the fit is the same with or without the internal parts. Anyway, I'm glad I made the modification to how the wing-root cannons install, because the leading edge will definitely need a little TLC.

All the best

Rowan
rdt1953
_VISITCOMMUNITY
New Jersey, United States
Joined: February 06, 2015
KitMaker: 1,098 posts
AeroScale: 900 posts
Posted: Monday, November 13, 2017 - 04:29 AM UTC
Attaboy Rowan - find some more things wrong so I don't weaken - I actually looked for it today on my favorite retailers site - if I buy / build it I may have to put red circles on it to aswage my conscience .

Cheers - Richard
Merlin
Staff MemberSenior Editor
AEROSCALE
#017
_VISITCOMMUNITY
United Kingdom
Joined: June 11, 2003
KitMaker: 17,582 posts
AeroScale: 12,795 posts
Posted: Monday, November 13, 2017 - 10:35 PM UTC

Quoted Text

Attaboy Rowan - find some more things wrong so I don't weaken - I actually looked for it today on my favorite retailers site - if I buy / build it I may have to put red circles on it to aswage my conscience .

Cheers - Richard


Hi Richard

I hate to disappoint you, but the leading edge cleaned up much better than I'd expected, so you're not safe yet.

Just a quick update to try to keep a bit of momentum going while I'm managing to grab a little time at the workbench.

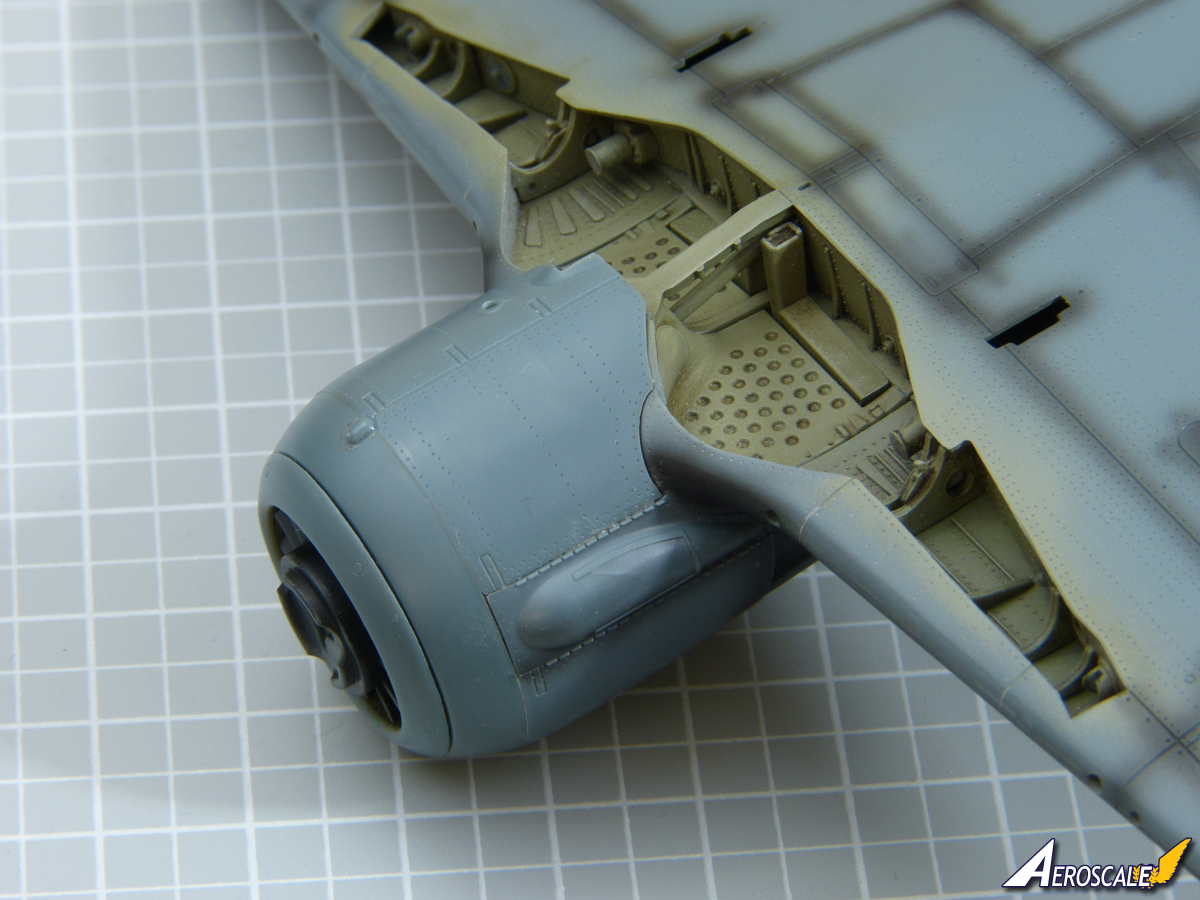
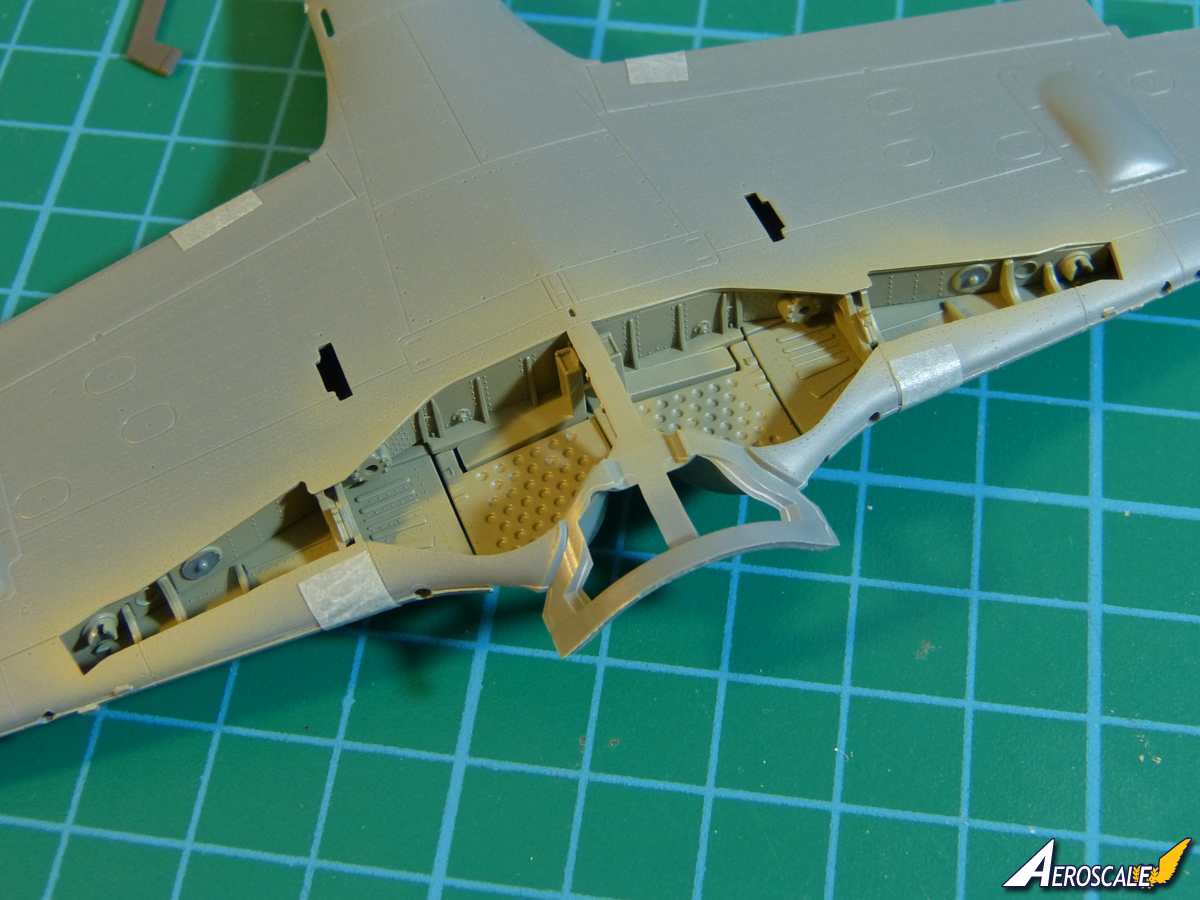
The wheel well all fitted together nice and neatly, and the cannon barrels will slot in from the front:


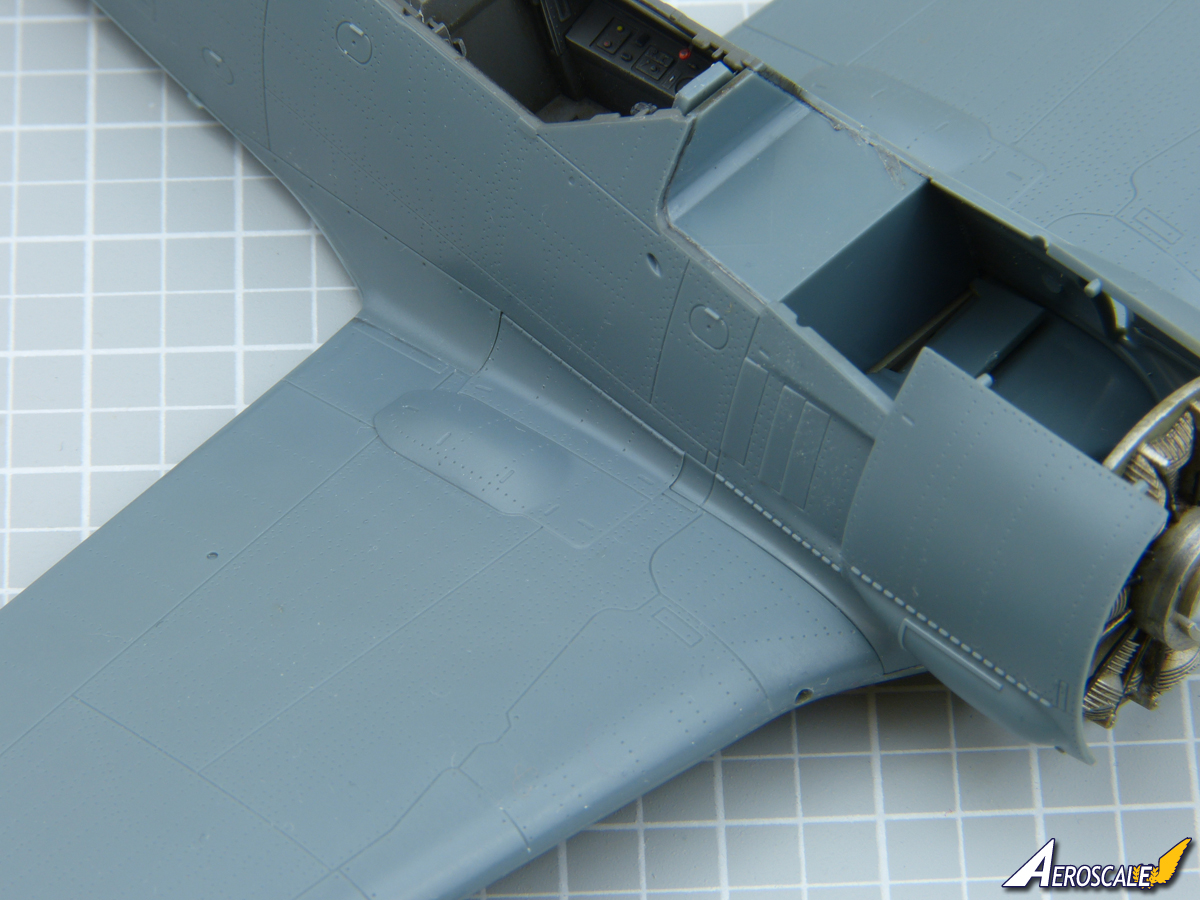
The way Eduard have handled the wing roots is completely different to their previous Fw 190 and it works a treat. The cannon covers are moulded integrally with the wings, leaving a big cutout each side of the fuselage:


And the result is a perfect fit - this is only clipped in place:


I'm tempted to break away from the assembly sequence shown in the instructions and join the fuselage and wings before adding the exhausts, because I think it should be possible to fit them through the gap for the cowling top. I'll obviously check that before going ahead, but it'll make painting simpler if it works.

More soon.

All the best

Rowan
c4willy
#305
_VISITCOMMUNITY
Christchurch, New Zealand
Joined: February 01, 2006
KitMaker: 1,673 posts
AeroScale: 1,517 posts
Posted: Tuesday, November 14, 2017 - 01:02 AM UTC
Hi Richard remember the Japanese test flew the Fw190 (although I can't remeber which of the A series it was) and a Bf109-E (I think) so the idea of an Fw-190 in meatballs isn't to far fetched! Does that help any?
Joel_W
Staff MemberAssociate Editor
AUTOMODELER
_VISITCOMMUNITY
New York, United States
Joined: December 04, 2010
KitMaker: 11,666 posts
AeroScale: 7,410 posts
Posted: Tuesday, November 14, 2017 - 01:17 AM UTC
Rowan,
Impressive work for sure. The cockpit really looks quite good as one can plainly see that you haven't lost your touch. BTW, nice job on those seatbelts.

Eduard really has produced an extraordinary Fw 190 kit. I'm weakening with everyone of your posts to order one. How the upper wings attach to the fuselage is just outstanding engineering to say the least.

Joel
Merlin
Staff MemberSenior Editor
AEROSCALE
#017
_VISITCOMMUNITY
United Kingdom
Joined: June 11, 2003
KitMaker: 17,582 posts
AeroScale: 12,795 posts
Posted: Tuesday, November 14, 2017 - 03:00 AM UTC
Cheers Joel

Going back a couple of steps, I probably should add that Eduard provide both decals and pre-coloured etched options for the side consoles, but I went with the styrene parts because I prefer the 3-D quality of the moulded items. I couldn't resist the etched instrument panels though.

All the best

Rowan
rdt1953
_VISITCOMMUNITY
New Jersey, United States
Joined: February 06, 2015
KitMaker: 1,098 posts
AeroScale: 900 posts
Posted: Tuesday, November 14, 2017 - 03:33 AM UTC

Quoted Text

Hi Richard remember the Japanese test flew the Fw190 (although I can't remeber which of the A series it was) and a Bf109-E (I think) so the idea of an Fw-190 in meatballs isn't to far fetched! Does that help any?


Ha - Thanks Chris - that's the excuse I needed !
Now , where is my credit card ?

Cheers - Richard
thegirl
_VISITCOMMUNITY
Alberta, Canada
Joined: January 19, 2008
KitMaker: 6,743 posts
AeroScale: 6,151 posts
Posted: Tuesday, November 14, 2017 - 06:09 AM UTC
You are making excellent headway Rowan . Nice job in the pit as well .
I do like how the wing root area mates with the fuselage . Cowl assembly is much easier . How do the rest of those cowl pieces fit ?


Terri
Merlin
Staff MemberSenior Editor
AEROSCALE
#017
_VISITCOMMUNITY
United Kingdom
Joined: June 11, 2003
KitMaker: 17,582 posts
AeroScale: 12,795 posts
Posted: Wednesday, November 15, 2017 - 01:44 AM UTC
Cheers Terri

All the cowl parts fit really easily. The only reason I left the cowl-ring and lower panel off in the test-fit photo is because they'd have fallen off without tape to hold them in place.

By way of an update, I've got the wings on and it's all starting to look aeroplane shaped. I will be away for the next few days, but I might take a few sub-assemblies with me to play with. I'll post a proper progress report as soon as I can.

All the best

Rowan
Merlin
Staff MemberSenior Editor
AEROSCALE
#017
_VISITCOMMUNITY
United Kingdom
Joined: June 11, 2003
KitMaker: 17,582 posts
AeroScale: 12,795 posts
Posted: Monday, November 20, 2017 - 04:46 AM UTC
Hi again

Time for a quick update.

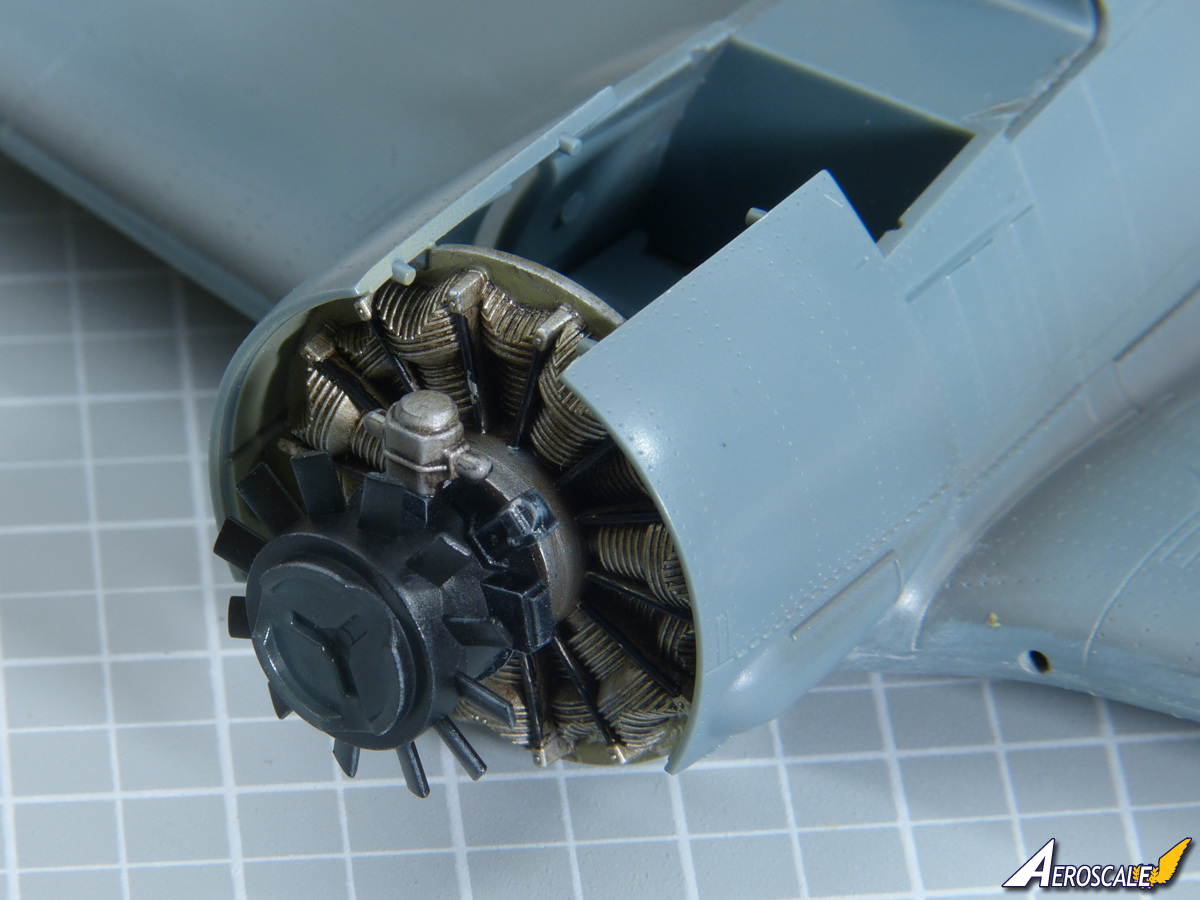
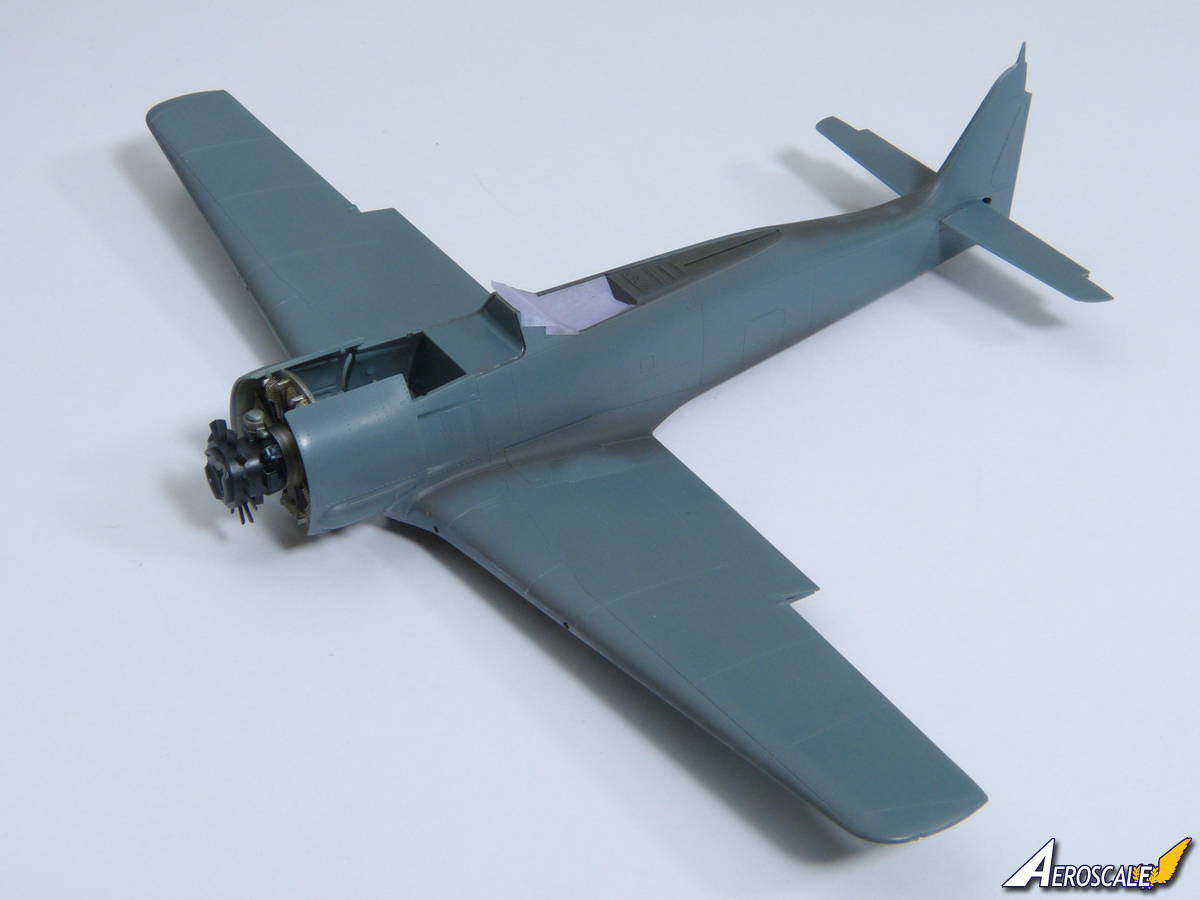
Eduard provide quite a basic engine in the standard kit - just two parts, plus the fan on the front - but that's totally adequate, because the fan effectively hides everything. You can tell that something's behind it, but that's all. You could obviously add pipework and cabling, but I wouldn't bother:


In contrast to their first try at the '190, Eduard have kept the engine section really simple, leaving it for Brassin upgrades to superdetail it. They've kindly supplied samples of no less than three different sets - each taking a different approach - so I'll cover those in detail on the second build.

Back to "basics", with the engine parts tacked in place, the airframe is coming together:


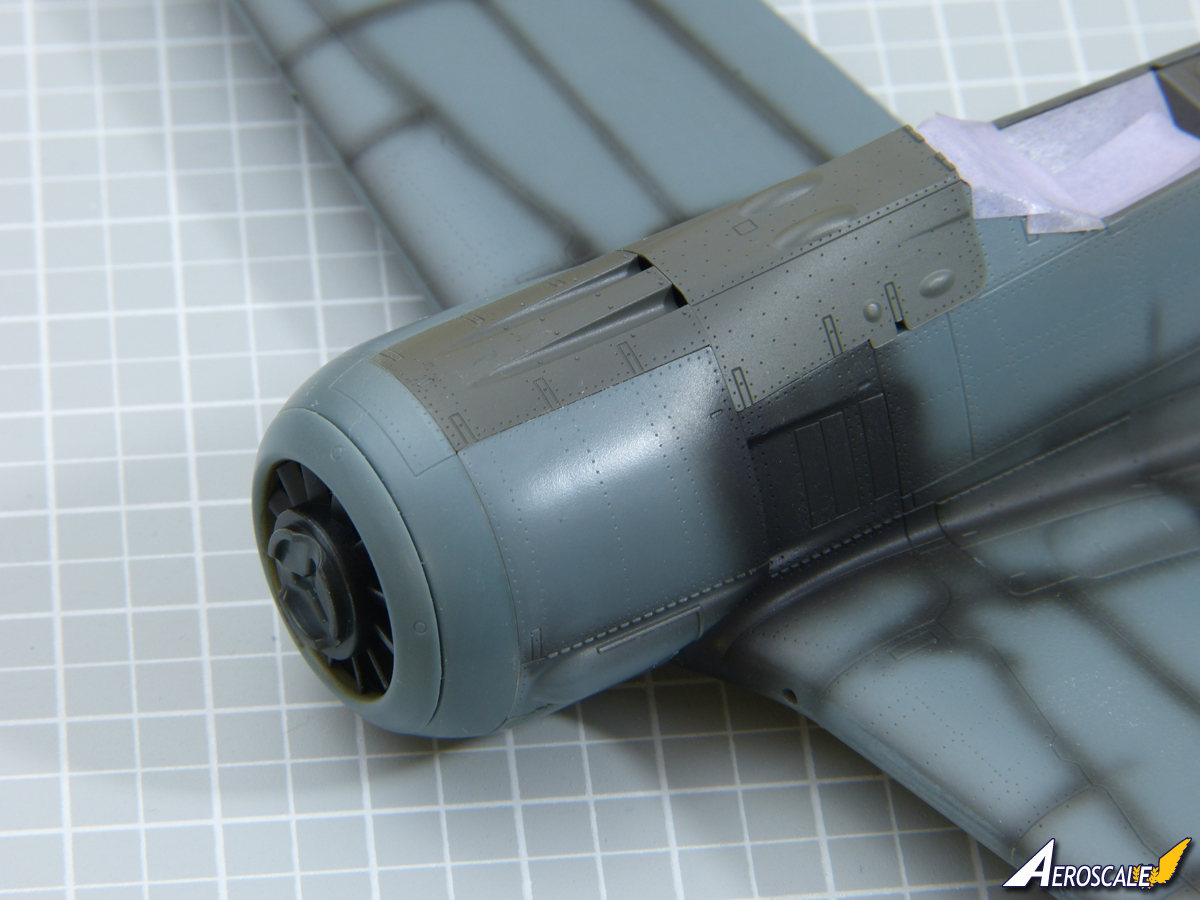
Gong back to Terri's question about the fit of the cowls - it's a total doddle. The gun cover is just clipped in place at this stage (hence no guns):


As you can probably guess from the black paint around the exhausts, I'm going to go for a classic eagle's head scheme. Rather than waste the leftover paint, I used it for some pre-shading.

I've got the morning off work tomorrow, so I'll hope to make a bit more progress - and, touch wood, with the airframe pretty much complete, things should speed up from this point on...

All the best

Rowan
Merlin
Staff MemberSenior Editor
AEROSCALE
#017
_VISITCOMMUNITY
United Kingdom
Joined: June 11, 2003
KitMaker: 17,582 posts
AeroScale: 12,795 posts
Posted: Friday, November 24, 2017 - 01:27 AM UTC
Hi again

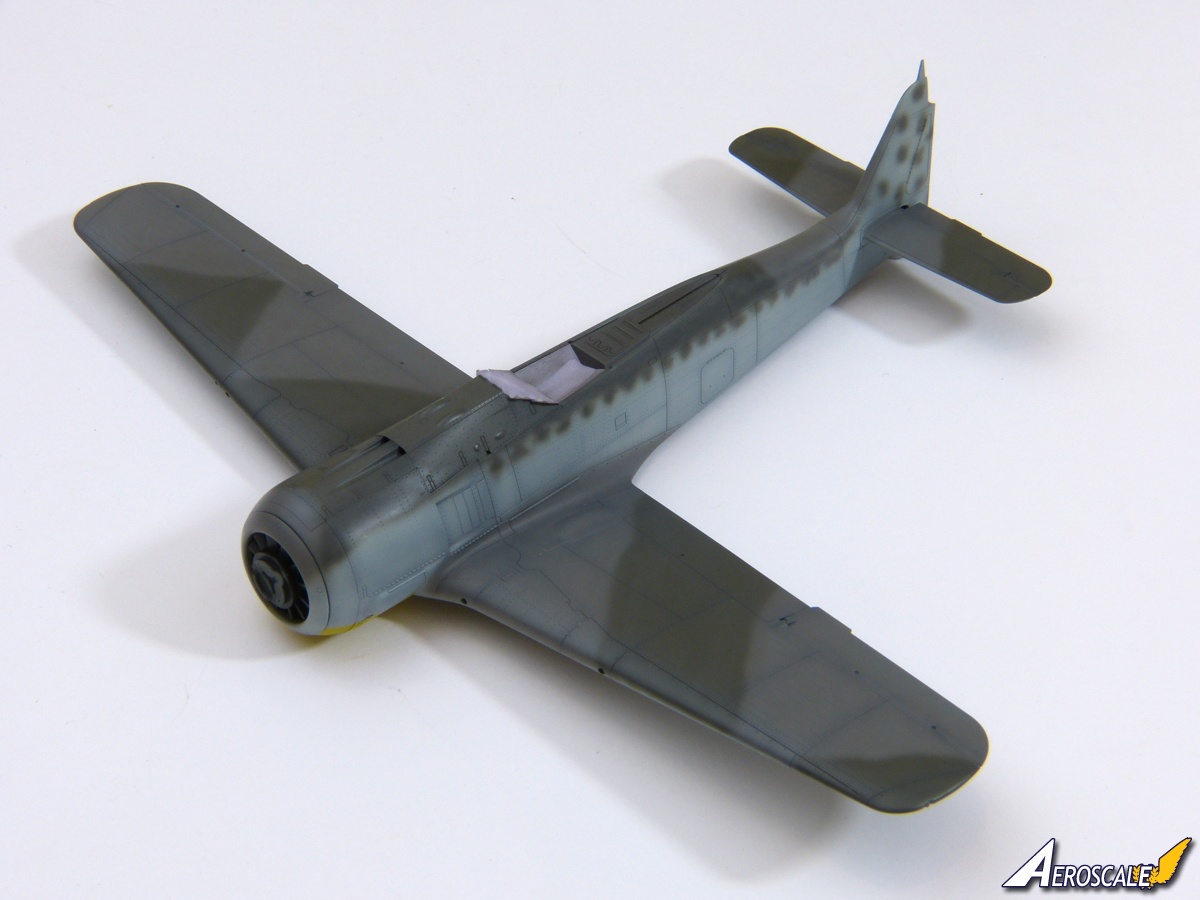
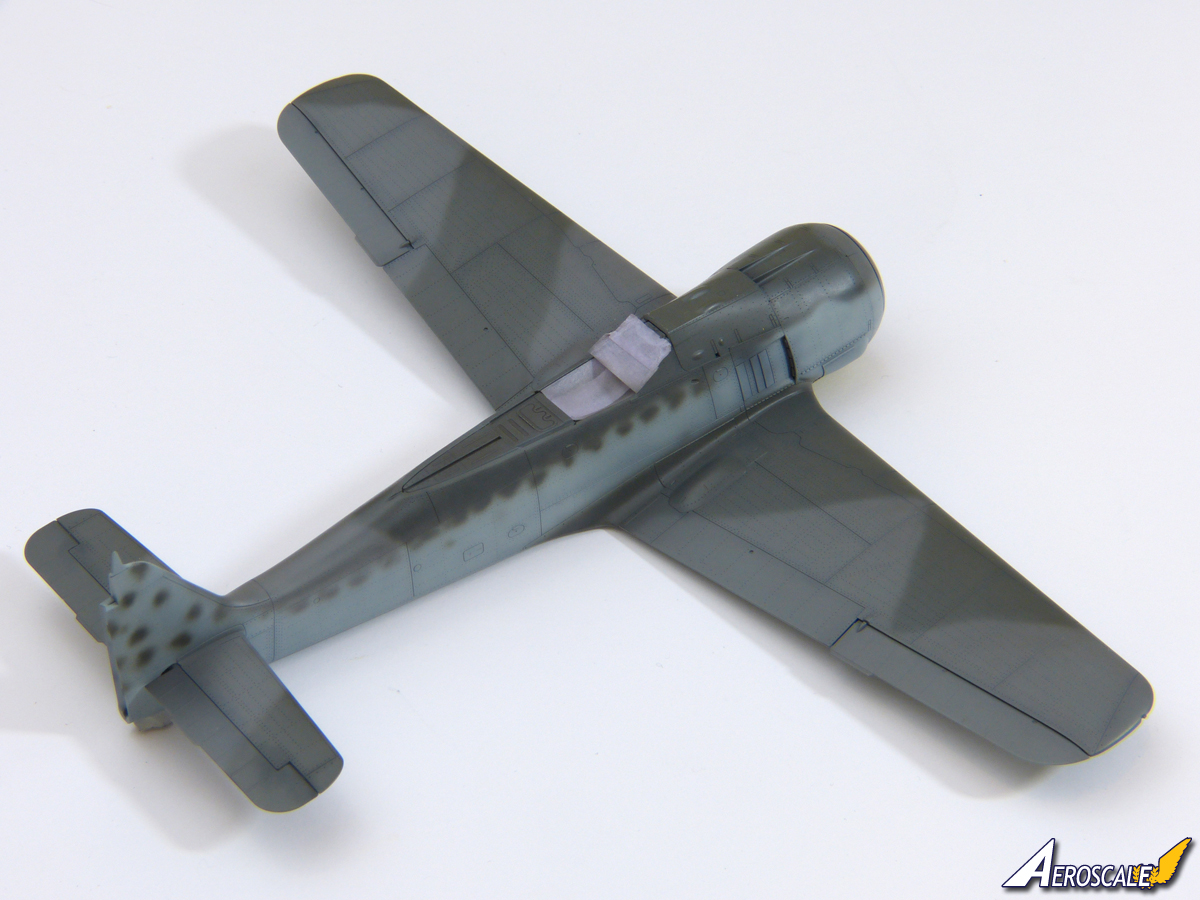
A quick update - the basic camouflage is on:


As you can see, I've lost the black around the exhausts in the process, so I'll replace that. I might modify the decals for that area, because they'll need to go over the open louvres. that might work fine with setting solution, but it could be easier to go straight for Plan B and trim the decal along panel lines to leave the louvres clear.

More soon.

All the best

Rowan
 _GOTOTOP