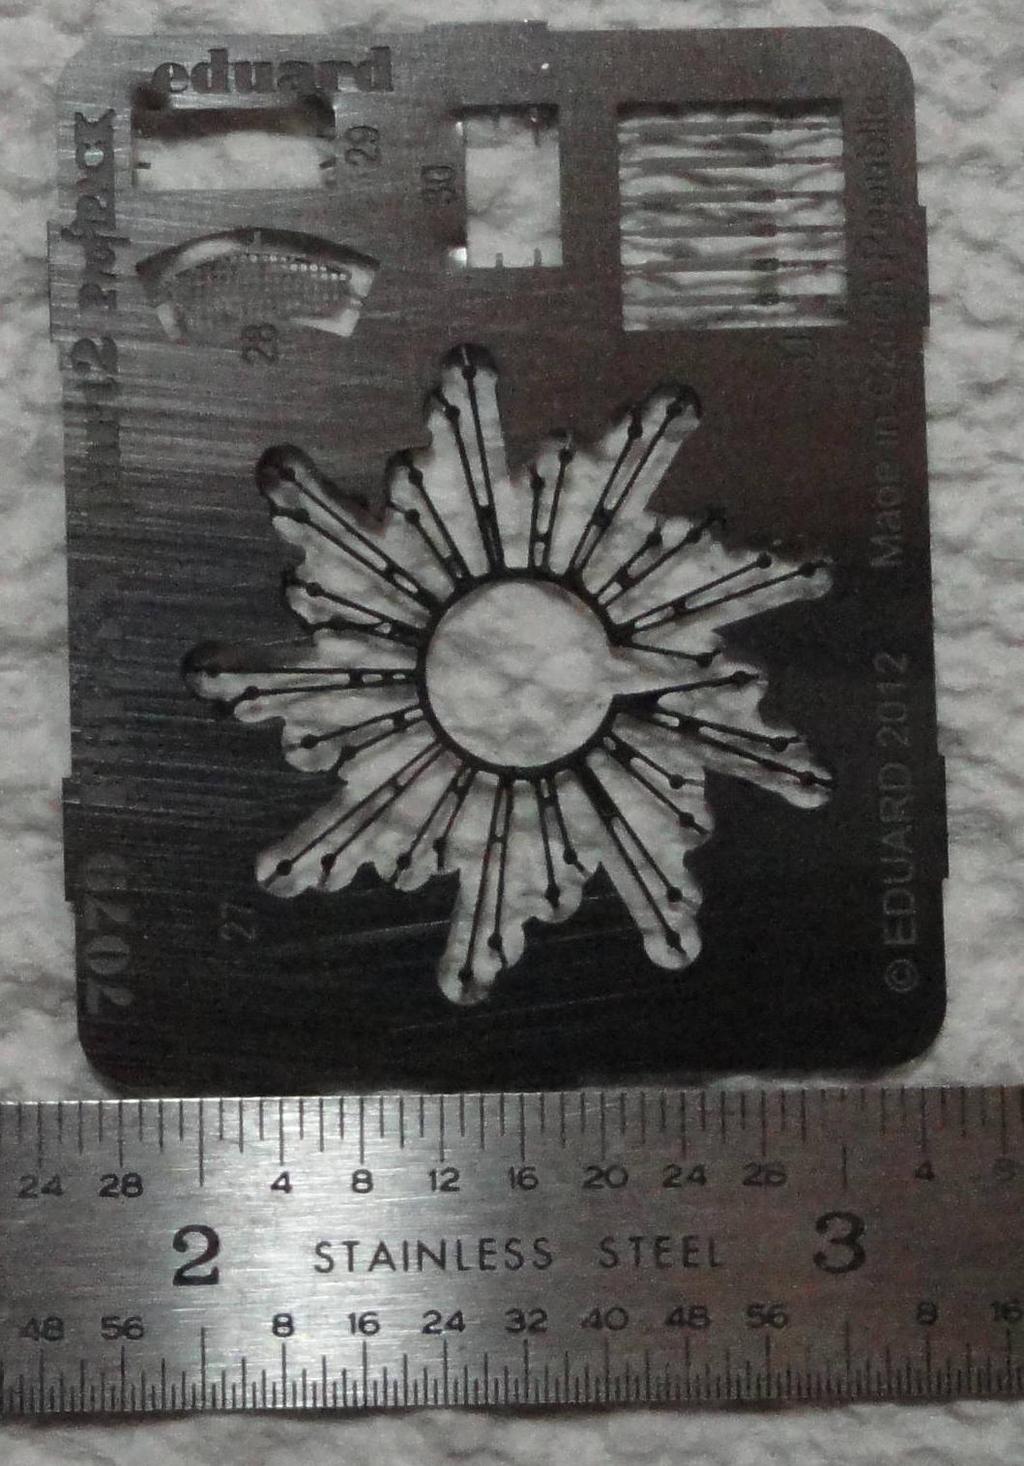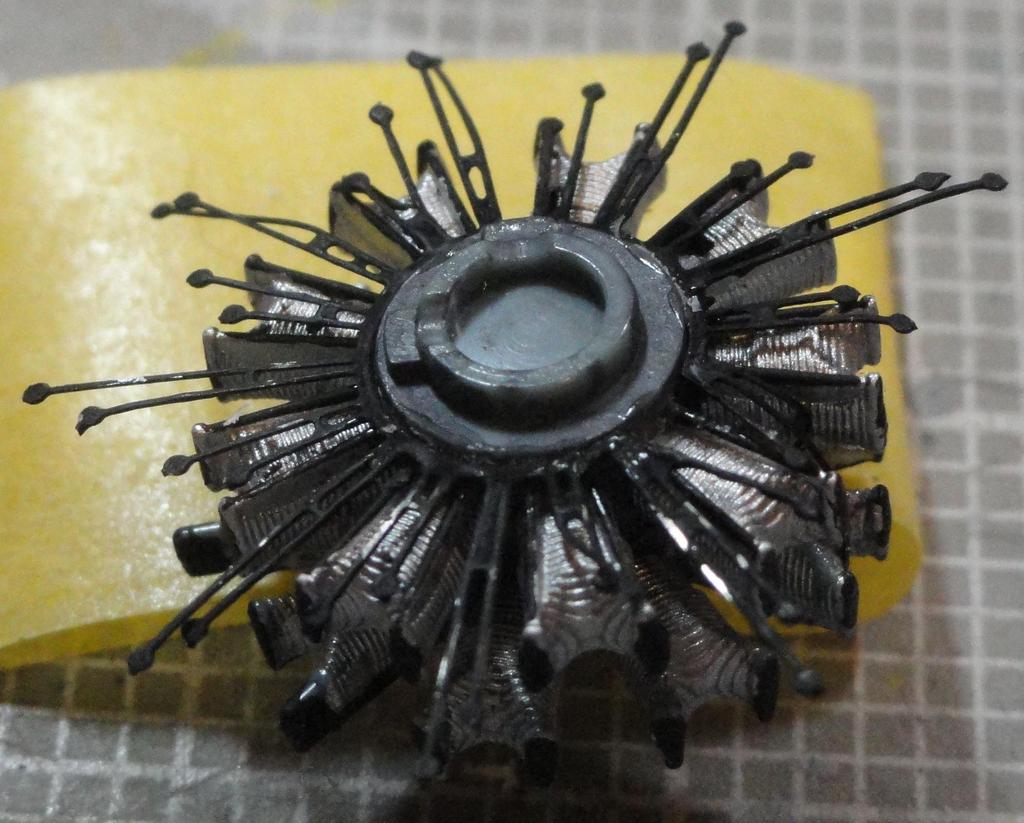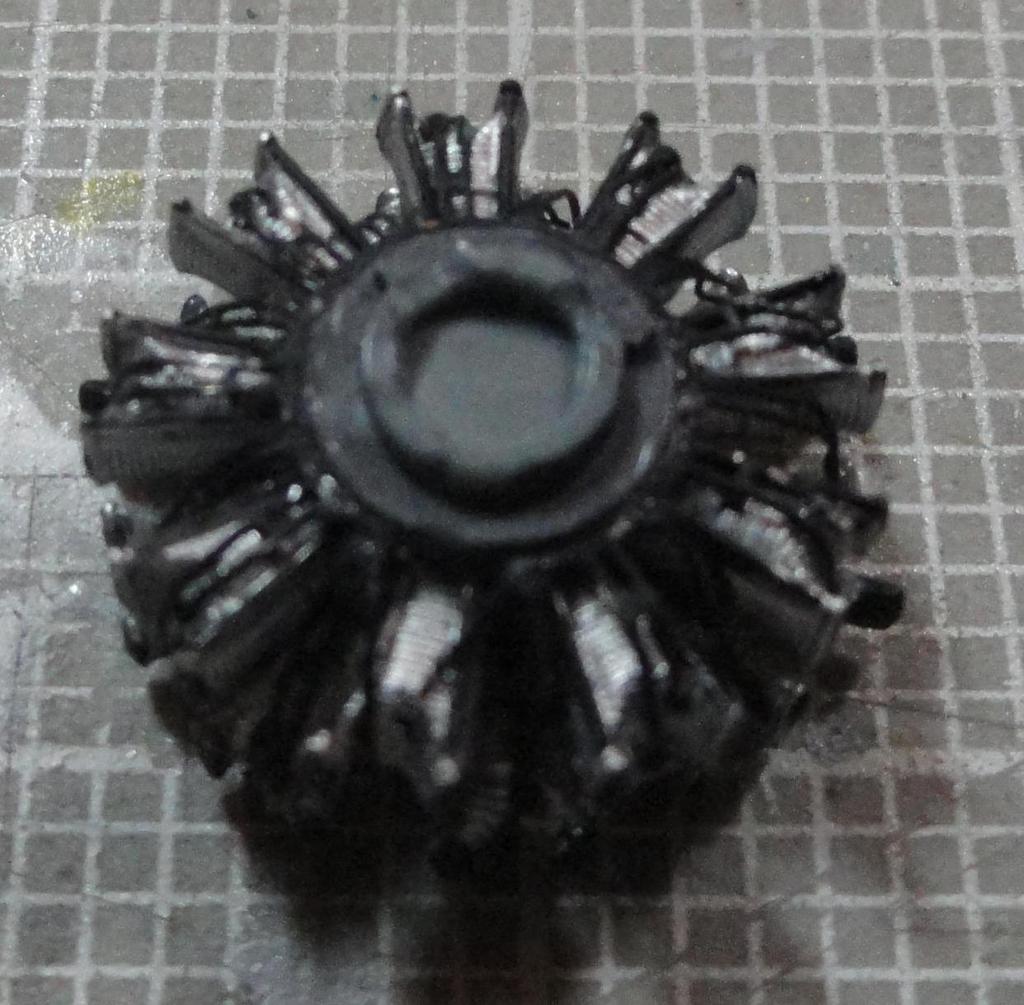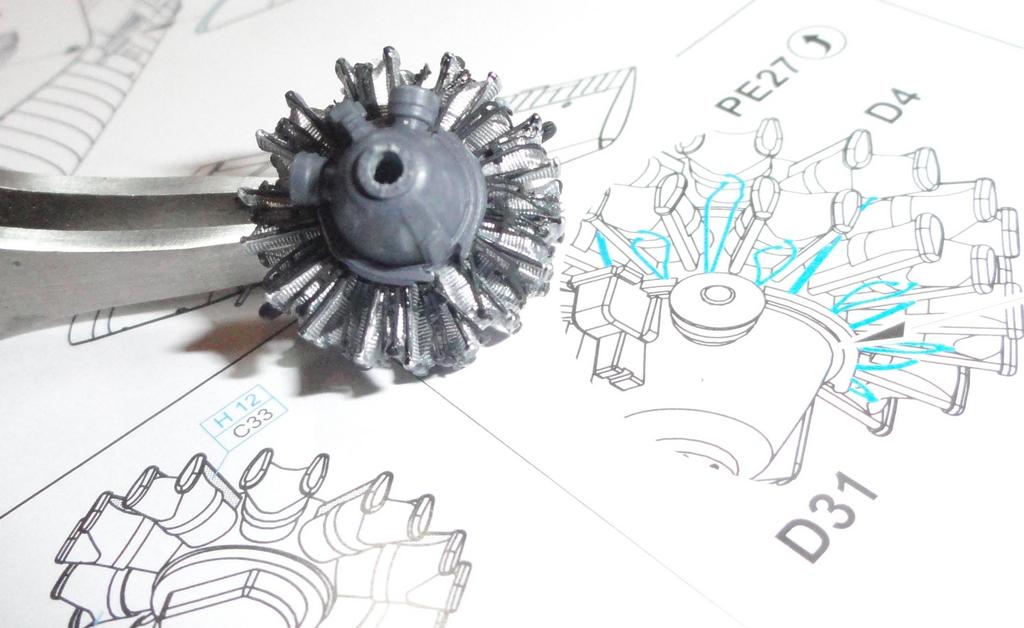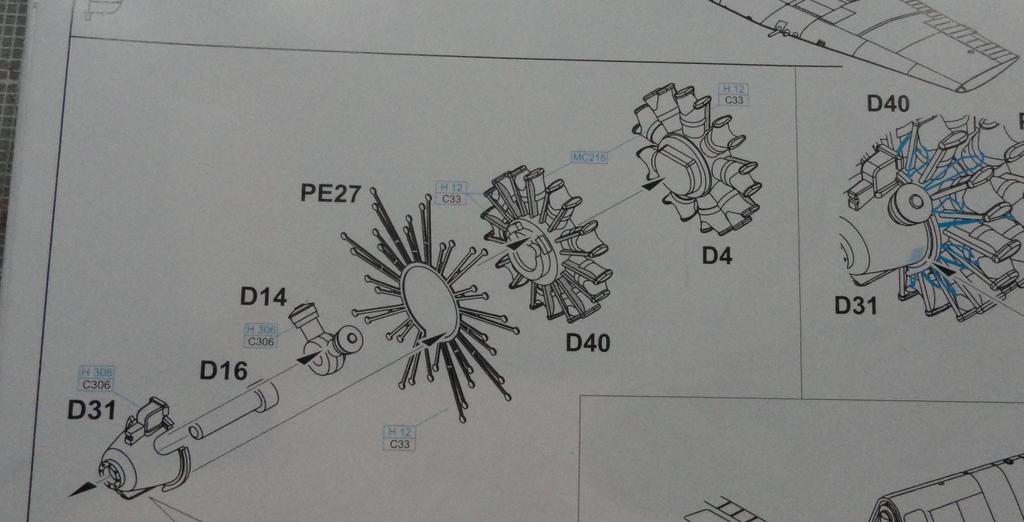
Help! I've never tackled an engine this detailed on a 1/72nd kit.
A 5 part engine? 36 spark plug wires? I'm sure I need epoxy or superglue, but how? No way I can get that many wires routed and placed during the epoxy's 5 minute pot life. Mix a batch fix a few, mix a new batch and fix a few more, lather, rinse and repeat? What about superglue, set out a small puddle, transfer a dot to the 'spark plug', apply a dot of accelerator to the wire and press to the spark plug, over and over for 36 spark plugs?
World War II
Discuss WWII and the era directly before and after the war from 1935-1949.
Hosted by Rowan Baylis
Wiring a Radial Engine
Posted: Friday, January 12, 2018 - 11:40 AM UTC
greif8
Bayern, Germany
Joined: January 17, 2006
KitMaker: 673 posts
AeroScale: 492 posts
Joined: January 17, 2006
KitMaker: 673 posts
AeroScale: 492 posts
Posted: Friday, January 12, 2018 - 01:47 PM UTC
Hi Md, I would use super glue. The PE simulating the wiring harness will not be load bearing or handled once in position, so you should not need the extra strength of epoxy.
An alternate method might be to use fine copper wire to simulate the wiring harness. It would be a challenge to drill out the harness ring, which looks like it is simulated on Part 31. Drilling spark plug hole in the cylinder heads would not be a tough. I build mostly 1/32, with an occasional foray into 1/48, and that is how I always make the wiring harness. Again, 1/72 might be too small to pull that off, but if it is not, the time spent making the wiring harness using the technique above is time well spent in my opinion.
Ernest
Quoted Text
Help! I've never tackled an engine this detailed on a 1/72nd kit.
A 5 part engine? 36 spark plug wires? I'm sure I need epoxy or superglue, but how? No way I can get that many wires routed and placed during the epoxy's 5 minute pot life. Mix a batch fix a few, mix a new batch and fix a few more, lather, rinse and repeat? What about superglue, set out a small puddle, transfer a dot to the 'spark plug', apply a dot of accelerator to the wire and press to the spark plug, over and over for 36 spark plugs?
mrockhill
Pennsylvania, United States
Joined: June 17, 2009
KitMaker: 566 posts
AeroScale: 507 posts
Joined: June 17, 2009
KitMaker: 566 posts
AeroScale: 507 posts
Posted: Friday, January 12, 2018 - 09:48 PM UTC
Sometime soon Ill be facing the same lil engine you are. Im thinking im going to use fine copper wire for my harness as I have the weekend edition w/o PE. I should only need 18 holes for the 36 wires in the ignition ring as I plan to fold the wire in half and push the folded end into the hole leaving 2 loose ends. Ill drill another set of holes all the way through the cylinder heads to feed the wire through so even if the glue lets go it wont hang loose.
The 2nd wire on each cylinder I think goes up and over the top so shouldnt be visible where it terminates. At least that's my plan right now while im still horsing around in the cockpit. You can anneal the PE harness over a match or a lighter which should help the PE be less springy if that's of any help.
Posted: Friday, January 12, 2018 - 10:00 PM UTC
Thanks guys! I'm leaning towards the superglue solution. This could work out yet..
Posted: Saturday, January 13, 2018 - 02:53 AM UTC
Hi Mark
You definitely don't need to go for epoxy on something like this - the slow drying time would far outweigh any strength advantages.
My first thought would be CA, but to be honest, I'd wait until you've dry-fitted the ignition harness and curled the wires to their approximate final position before making a decision. You may well be able to use something like Gator's glue to hold them in place. Unless something's under serious tension, it can be a great solution and a lot friendlier to use with its water clean-up.
All the best
Rowan
Joel_W
Associate Editor
New York, United States
Joined: December 04, 2010
KitMaker: 11,666 posts
AeroScale: 7,410 posts
Joined: December 04, 2010
KitMaker: 11,666 posts
AeroScale: 7,410 posts
Posted: Saturday, January 13, 2018 - 03:37 AM UTC
Mark,
I haven't wired a 1/72 scale engine since the 70s. These days 1/48 scale is a real challenge.
Each cylinder has two spark plug wires, one dead center in the front of the cylinder, and the 2nd one dead center on the top. The PE wiring harness must really be small with very thin flat wires. From the instructions they have rounded ends to make gluing them easier. I'd use them that way for the top of the cylinders with CCA glue. For the front of the cylinders I'd prefer to cut them off and drill a hole to insert the wire gluing it in place with CCA glue, but they don't look long enough so you'll have to CCA glue them with the tabs, but bend the tab so that it's below the wire rather then on top. The visual effect will be that the wire is attached to the plug, the other way just won't have the same effect.
Just take your time, wear your Optivisor, and you'll get through this just fine.
maybe someone can post a picture or two of how a 1/72 scale radial engine looks wired up.
Joel
Posted: Saturday, January 13, 2018 - 04:17 AM UTC
Thanks, the pre-fitting sounds like a good idea. Yes, I's not very big. Less than 1" tip to tip.
Posted: Saturday, January 20, 2018 - 10:31 AM UTC
Thanks Guys! I went with Super glue and accelerator.
Super glued the wires to the engine block. (Note to the foolish: get the supply ring where you want it before applying the super glue) And let it cure.
Then I set out a puddle of super glue, a puddle of accelerator and bent each pair into position. Then I transferred the SG on a pencil lead to the cylinder head, then dipped another pencil lead into the accelerator and pressed the spark plug cap into position.
All told, I got them all in place in less than 1/2 hour.
Joel_W
Associate Editor
New York, United States
Joined: December 04, 2010
KitMaker: 11,666 posts
AeroScale: 7,410 posts
Joined: December 04, 2010
KitMaker: 11,666 posts
AeroScale: 7,410 posts
Posted: Sunday, January 21, 2018 - 11:39 PM UTC
Mark,
Nicely done, and in record breaking time. It takes me nearly a week's worth of building sessions to do a 1/48 twin bank radial engine.
Any chance of a sharper picture of the wired engine? it would be most appreciated.
Joel
Nicely done, and in record breaking time. It takes me nearly a week's worth of building sessions to do a 1/48 twin bank radial engine.
Any chance of a sharper picture of the wired engine? it would be most appreciated.
Joel
Posted: Monday, January 22, 2018 - 12:02 PM UTC
Well this is a little better.
Might need to upgrade my camera or my skills...
Joel_W
Associate Editor
New York, United States
Joined: December 04, 2010
KitMaker: 11,666 posts
AeroScale: 7,410 posts
Joined: December 04, 2010
KitMaker: 11,666 posts
AeroScale: 7,410 posts
Posted: Monday, January 22, 2018 - 10:28 PM UTC
Mark,
Outstanding my friend.
Joel
Outstanding my friend.
Joel
Posted: Monday, January 22, 2018 - 10:55 PM UTC
Thanks Joel and to everyone else who provided suggestions and encouragement. It went much better than I expected, and was a LOT less trouble than I was preparing for.
Not sure I ready to try drilling out spark plug hole and gluing in fuse wire, but it's now an option.
Thanks guyz
Not sure I ready to try drilling out spark plug hole and gluing in fuse wire, but it's now an option.
Thanks guyz
krow113
British Columbia, Canada
Joined: March 16, 2010
KitMaker: 473 posts
AeroScale: 101 posts
Joined: March 16, 2010
KitMaker: 473 posts
AeroScale: 101 posts
Posted: Tuesday, January 23, 2018 - 01:18 AM UTC
Before drilling use a sharp pointed item to lay in a divot so the drill wont wander. CenterPoint or divot , drilling 101.
Posted: Tuesday, January 23, 2018 - 01:25 AM UTC
Thanks, but I'm not sure I want to dig my automatic center punch out of a resin engine.....
Do have a couple of dental picks that might work though.
krow113
British Columbia, Canada
Joined: March 16, 2010
KitMaker: 473 posts
AeroScale: 101 posts
Joined: March 16, 2010
KitMaker: 473 posts
AeroScale: 101 posts
Posted: Saturday, January 27, 2018 - 03:20 AM UTC
I use the compass tip out of a Steadtler drafting set clamped in a pin vice for a precise placement of the centerPoint.